Dao Lord Location and How to Beat
NEW: Hexi Map | Chapter 3 | Flute Mystic Skill
★ Unfettered and Everspring Build
☆ Liangzhou | Cat Fever | Prismatic Essence
✪ Updated: Best Weapon | Best Builds
☆ WWM Game8 Twitter: New tips daily!
Recruit using our Guild Recruitment Board!
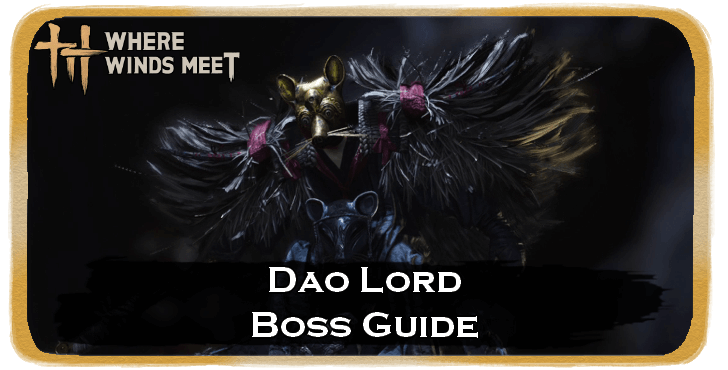
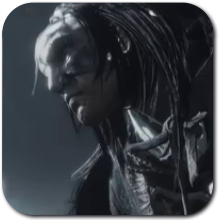
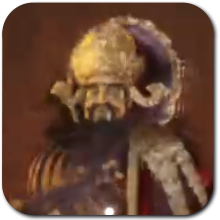
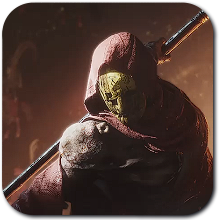
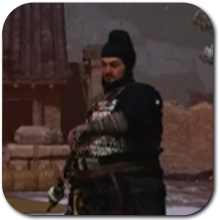
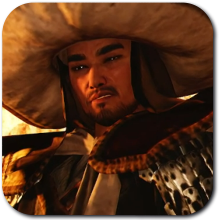
Dao Lord is a Campaign Boss that you can find at Kaifeng City in Where Winds Meet. Check out how to beat Dao Lord, their movesets and weaknesses, and the rewards and achievements you can claim here!
List of Contents
Dao Lord Boss Weakness
Basic Information
 |
||
| Difficulty | Weakness | |
|---|---|---|
| ★★★★★ | Stonesplit | |
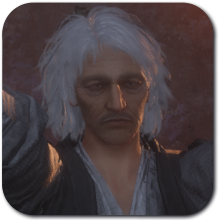
Dao Lord Best Companion
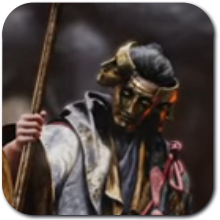
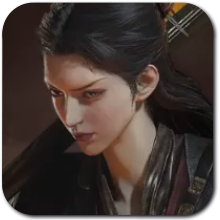
The best companion to bring with against Dao Lord would be Yuan Jin'gang due to his ability to stagger and deal huge Qi damage from a far with his Bow. He can cancel most of Dao Lord's various combos and can dish out damage from anywhere around the battlefield.
Take note to keep Dao Lord's aggro on yourself so you can prevent him from attacking Yuan Jin'gang and help him survive the boss fight. This is especially useful for the second phase since he can instantly exhaust each of the mini bosses for Execute attacks.
Dao Lord Location
Found During Chapter 2 Main Quest at Kaifeng City
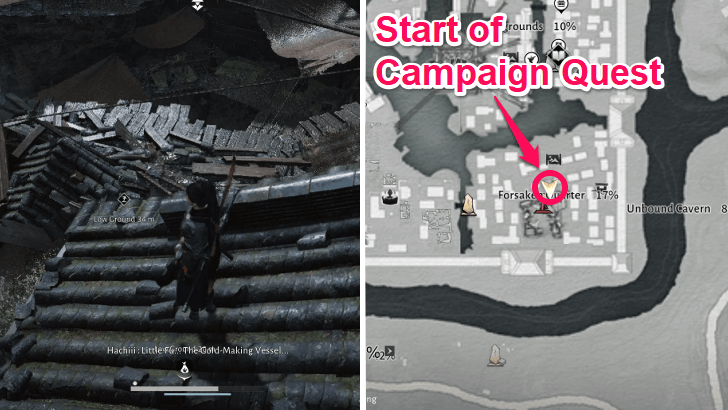
In order to unlock Dao Lord, you will need to progress the Main Quest until you reach Chapter 2 Accident, where you will have to complete the Unbound Cavern campaign quest in order to progress further.
Once you have finished the quest, you can find Dao Lord's Campaign version at the Kaifeng City area in the Kaifeng region.
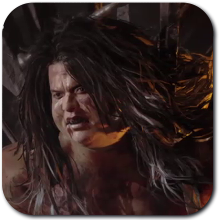
How to Beat Dao Lord (Campaign)
|
|
Keep Your Distance and Use Ranged Attacks
We highly recommend using Ranged weapons against Dao Lord such as the Vernal Umbrella and Panacea Fan since they can safely deal damage without having to worry about getting blinded by his attacks.
Additionally, the Vernal Umbrella can also deal damage while floating in the air with its Charged Light Attack so you can avoid most of Dao Lord's melee attacks with ease.
Focus on Parrying and Use the Bow During 2nd Phase
During Dao Lord's second phase, he will split into 3 enemies with their own health bar that can all attack you simultaneously. Since you cannot damage them continuously due to their vanishing mechanic, make sure to parry the Hammer and Dagger red attacks to execute counterattacks and defeat them one by one.
Eventually, all 3 of them will submerge to the ground and pop out to attack you briefly in the air. We suggest using the Bow and shoot them with arrows as they pop out to help counter this move and shave off a small chunk of their health.
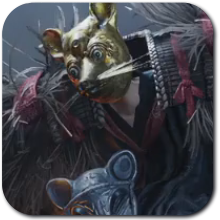
How to Beat Dao Lord (Yama's Seal)
|
|
Separate the Three Sisters and Assign Aggro
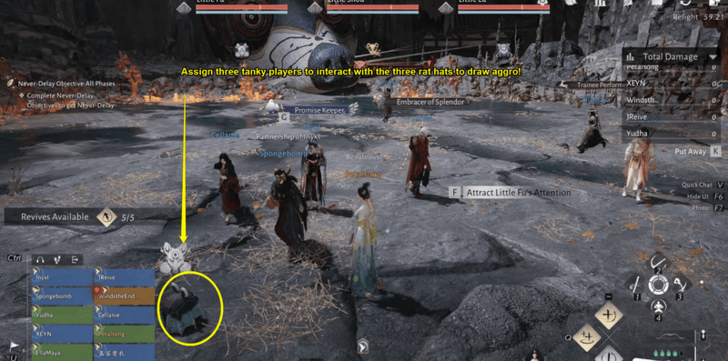
Three Rat Hats appear at the start of the encounter. Three players should pick them up to draw aggro from each of the bosses. Ideally, these players should have higher HP or survivability, since they will take most of the incoming damage.
Once the hats are assigned, keep the bosses far apart from each other. The safest positioning is a triangle formation, which helps prevent their bond mechanic from activating and makes it easier for healers to focus on their assigned tank.
Prevent the Bond Gauge From Filling
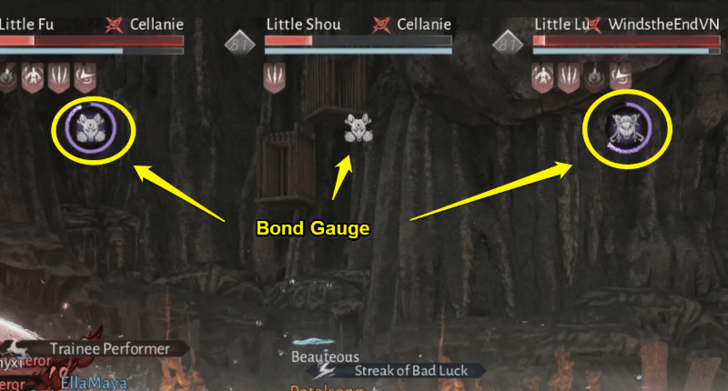
When two bosses move too close together, a yellow link appears between them, which causes their mouse gauge (bond gauge) to fill faster. If the gauge reaches its threshold, that boss will transform into a giant form, gaining significantly higher damage and durability.
If this happens, small rats will spawn around the arena. Use Tai Chi to grab the rats and throw them at the giant boss to reduce its gauge. Each rat reduces the gauge by about 25%, so continue throwing rats until the boss returns to normal.
Tai Chi Mystic Skill Effect and How to Unlock
Force Burrowed Bosses Out of the Ground
At certain points in the fight, the bosses will burrow underground and move around the arena.
When this happens, watch their location indicators carefully. Jump above their position and press Jump + Q to perform Mighty Drop, which will force them back out of the ground and allow your party to resume attacking them.
Mighty Drop Mystic Skill Effect and How to Unlock
Free Trapped Players With Tai Chi
During the Dao Lord phase, some players may become stunned or trapped by smoke mechanics. When this happens, other players must use Tai Chi to throw rats at the trapped player or smoke area to free them.
Players targeted by this mechanic should also move away from the center of the arena so they do not trap other teammates.
Reduce the Dao Lord Gauge to Delay AoE
The Dao Lord will gradually build up a mouse gauge, and when it becomes full he will unleash a large area attack that deals heavy damage to the party.
To delay this attack, continue collecting rats and throwing them at the boss to reduce the gauge. While the gauge is filling, it is safest for everyone except the tanks to keep their distance.
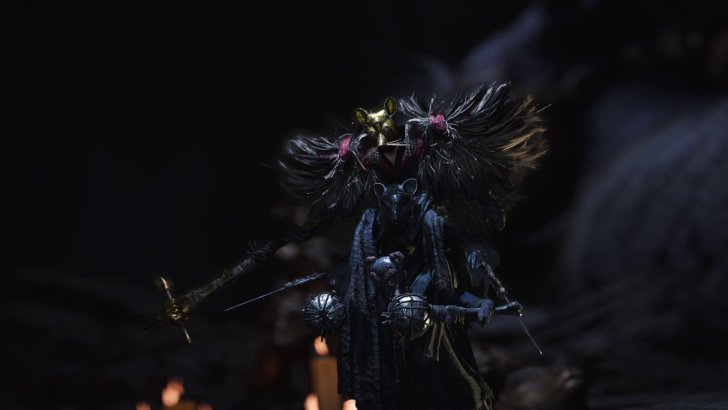
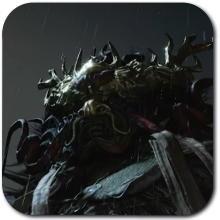
Dao Lord Moveset
| All Dao Lord Phases | ||
|---|---|---|
| Phase 1 | Phase 2 | Hero's Realm |
Phase 1 Dao Lord Moves
| Moves | Details |
|---|---|
| Spinning Slam | Dao Lord grabs onto the ground to spin around four times and end with a wide ranged slam that can blind you. This move can be parried and dodged when timed correctly. |
| Claw Flurry | Dao Lord winds up briefly to attack you with his claws five times with a slightly delayed attack at the end that can blind you. This move can be parried and dodged when timed correctly. |
| Blinding Sweep | Dao Lord winds up and starts performing four sweep attacks that can easily blind you on hit. This move can be parried and dodged when timed correctly. |
| Triple Knife Throw | Dao Lord starts throwing three projectiles in a cone in front of him up to three times. This move can be parried and dodged when timed correctly. |
| Dark Slam | Dao Lord immediately rushes towards you and slams with ground with a huge AoE that can blind you. This move can be parried and dodged when timed correctly. |
| Right-Left Claw | Dao Lord lunges towards you with his right claw and follows up with a left claw attack that can blind you. This move can be parried and dodged when timed correctly. |
| Dark Cross | Dao Lord briefly winds up and lunges forward to execute a two-handed claw attack that can blind you. This move can be parried and dodged when timed correctly. |
| Threefold Claw Combo | Dao Lord slam the ground with his claws in front of him and follows up with a delayed uppercut that can easily knock you down. This move can be parried and dodged when timed correctly. |
| Shallow Grab | Dao Lord charges his right claw with a gold glow to quickly grab you and slam you into the ground. This move cannot be parried and can only be dodged when timed correctly. |
Phase 2 Dao Lord Moves
| Moves | Details |
|---|---|
| Hammer Slam | Dao Lord - Hammer starts charging up his twin hammers with a red glow and jumps towards you to hit you with a ground slam. This move can be perfect parried to trigger a counterattack and dodged when timed correctly |
| Dagger Thrust | Dao Lord - Dagger charges up his staff with a red glow and rushes towards you with a thrusting attack. This move can be perfect parried to trigger a counterattack and dodged when timed correctly. |
| Hookblade Combo | Dao Lord - Hook lunges forward to execute a spinning slash and follows up with a double uppercut slash. This move can be parried and dodged when timed correctly. |
| Digging Maneuver | Each Dao Lord will start burrowing underground, making them invulnerable as they circle around the arena until they jump in the air to throw projectiles at you. This move can be parried and dodged when timed correctly, and can be cancelled with Bow attacks. |
Yama's Seal Moves (Hero's Realm)
| Moves | Details |
|---|---|
| Shared Fortune |
Little Shou releases a burst of energy that attempts to empower the other sisters. If the attack connects with Little Fu or Little Lu, their Bond Gauge will rapidly increase, bringing them closer to their giant transformation. Keep the bosses separated in a triangle formation and prevent the line from hitting the other sisters. |
| Longevity Wish |
Dao Lord marks a few players with Longevity Wish. Marked players should quickly move away from the group to avoid interfering with other teammates while the mechanic resolves. Keep your distance from the party until the mark disappears, then continue attacking the boss. |
| Squeak Out |
The sisters burrow underground and move around the arena. When this happens, watch their position indicators and use Mighty Drop by pressing Jump + Q above them to force them out of the ground. Successfully hitting them with Mighty Drop will expose them again, allowing the party to continue dealing damage. |
| Blessings at Doorstep |
The sisters release a powerful shockwave that damages the entire party. Healers should prepare for teamwide damage and quickly heal everyone after the attack. |
| Great Fortune, Vast Fortune, Great Wealth |
One of the sisters grows into a giant form with greatly increased damage and durability. When this happens, small rodents will appear around the arena. Use Tai Chi to grab a rodent and throw it at the the Dao Lord to reduce their bond gauge and shrink her back to normal. |
| Pray for Yourself |
Dao Lord traps marked players in smoke, leaving them stunned and unable to move. Other players must use Tai Chi to grab a rodent and throw it at the trapped player or smoke to break the effect and free them. Players targeted by this mechanic should quickly move away from the center and other teammates to avoid trapping multiple players at once. |
| Fu, Lu, Shou, Enjoy! |
When the Dao Lord's gauge fills up, the boss begins spinning and attacks everything around it, creating a large AoE indicator on the ground. Players should quickly move outside the marked area to avoid the attack. Anyone caught inside the AoE will take heavy damage, so keep your distance until the spin ends before reengaging the boss. |
Dao Lord Boss Rewards
Unbound Cavern Quest Rewards
|
・Skyward Pendant x1 ・Rock Solid: Tome x1 ・Echo Jade x50 ・Kaifeng Exploration x50 ・Enlightenment Points x100 ・Character EXP x30000 ・Coins x30000 ・Medicinal Tales x1 ・Oscillating Jade x5 |
Where Winds Meet Related Guides
| All Boss Guides | |
|---|---|
| World Bosses | - |
Campaign Bosses
 Heartseeker Heartseeker
|
 Qianye Qianye
|
 Ye Wanshan Ye Wanshan
|
 The Void King The Void King
|
 Lucky Seventeen Lucky Seventeen
|
 Tian Ying Tian Ying
|
 Dao Lord Dao Lord
|
 Zheng the Frostwing Zheng the Frostwing
|
 Murong Yuan Murong Yuan
|
 God of Avarice God of Avarice
|
 River Master River Master
|
 Guo Xin Guo Xin
|
World Bosses
 Puppeteer - Sheng Wu
 Sleeping Daoist
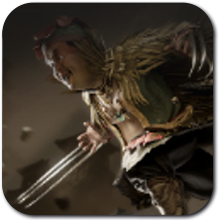 Earth Fiend Deity
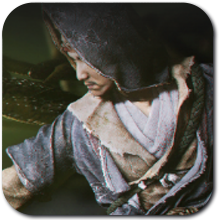 Snake Doctor
 Yi Dao
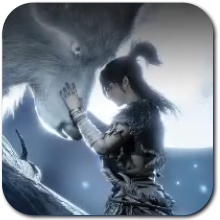 Wolf Maiden
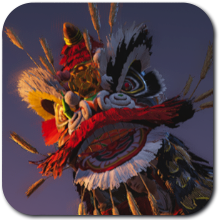 Twin Lions
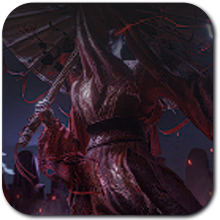 Ghost Master
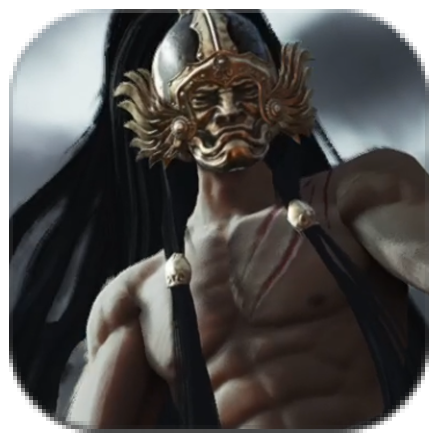 Nameless General
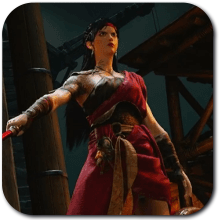 Feng Ruzhi
 Drunk Martial Artist
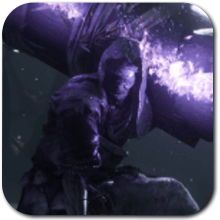 Coffin Master
Quest-related Bosses
 Dalang Dalang
|
 He Yuezhi He Yuezhi
|
 Shen Yiren Shen Yiren
|
Challenge Bosses
 Elder Gongsun Elder Gongsun
|
 Gongsun Deng Gongsun Deng
|
 Demon Goose Demon Goose
|
Comment
Author

Dao Lord Location and How to Beat
Rankings
- We could not find the message board you were looking for.
Gaming News


![The Seven Deadly Sins: Origin [First Impressions] | A Promising Start](https://img.game8.co/4440581/584e0bfb87908f12c4eab6e846eb1afd.png/thumb)
![The Liar Princess and the Blind Prince Review [PC] | Lovely to Look at but Tedious to Play](https://img.game8.co/4442586/8d95f5faf05780f1765ce7e0938bd825.jpeg/thumb)
![Marathon Cryo Archive Map Teased as [REDACTED] on Selection Screen](https://img.game8.co/4442236/6357203e58172f6de57f1991e7c39b22.png/thumb)
Popular Games

Genshin Impact Walkthrough & Guides Wiki
Umamusume: Pretty Derby Walkthrough & Guides Wiki
Pokemon Pokopia Walkthrough & Guides Wiki
Honkai: Star Rail Walkthrough & Guides Wiki
Monster Hunter Stories 3: Twisted Reflection Walkthrough & Guides Wiki
Arknights: Endfield Walkthrough & Guides Wiki
Wuthering Waves Walkthrough & Guides Wiki
Zenless Zone Zero Walkthrough & Guides Wiki
Pokemon TCG Pocket (PTCGP) Strategies & Guides Wiki
Monster Hunter Wilds Walkthrough & Guides Wiki


Recommended Games
Diablo 4: Vessel of Hatred Walkthrough & Guides Wiki
Cyberpunk 2077: Ultimate Edition Walkthrough & Guides Wiki
Fire Emblem Heroes (FEH) Walkthrough & Guides Wiki
Yu-Gi-Oh! Master Duel Walkthrough & Guides Wiki
Super Smash Bros. Ultimate Walkthrough & Guides Wiki
Pokemon Brilliant Diamond and Shining Pearl (BDSP) Walkthrough & Guides Wiki
Elden Ring Shadow of the Erdtree Walkthrough & Guides Wiki
Monster Hunter World Walkthrough & Guides Wiki
The Legend of Zelda: Tears of the Kingdom Walkthrough & Guides Wiki
Persona 3 Reload Walkthrough & Guides Wiki


All rights reserved
©1997-2025 NetEase, Inc. All Rights Reserved
The copyrights of videos of games used in our content and other intellectual property rights belong to the provider of the game.
The contents we provide on this site were created personally by members of the Game8 editorial department.
We refuse the right to reuse or repost content taken without our permission such as data or images to other sites.