God of Avarice Location and How to Beat
NEW: Hexi Map | Chapter 3 | Flute Mystic Skill
★ Unfettered and Everspring Build
☆ Liangzhou | Cat Fever | Prismatic Essence
✪ Updated: Best Weapon | Best Builds
☆ WWM Game8 Twitter: New tips daily!
Recruit using our Guild Recruitment Board!
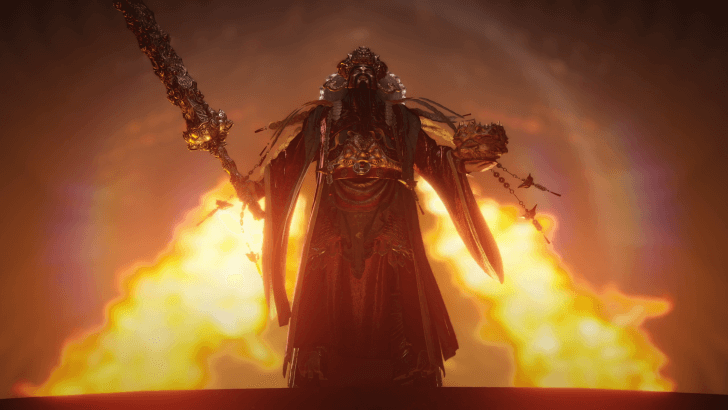
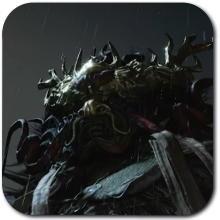
God of Avarice is a Campaign Boss that you can find at Kaifeng City in Where Winds Meet. Check out how to beat God of Avarice, their movesets and weaknesses, and the rewards and achievements you can claim here!
List of Contents
God of Avarice Boss Weakness
Basic Information and Recommmended Arts
 |
||
| Difficulty | Weakness | |
|---|---|---|
| ★★★★★ | TBD | |
| Recommended Arts | ||
| Martial Arts | ・Ninefold Umbrella ・Infernal Twindblades |
|
God of Avarice Location
Found During Chapter 2 Main Quest at Kaifeng City
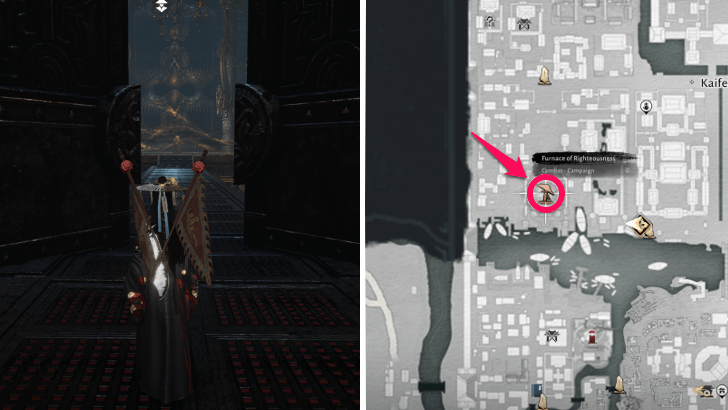
In order to unlock God of Avarice, you will need to progress the Chapter 2 Main Quest and complete the Furnace of Righteousness campaign quest to progress further.
Once you have finished the quest, you can find God of Avarice's Campaign version at the Kaifeng City area in the Kaifeng region.
Chapter 2: Universal Furnace Quests and Rewards
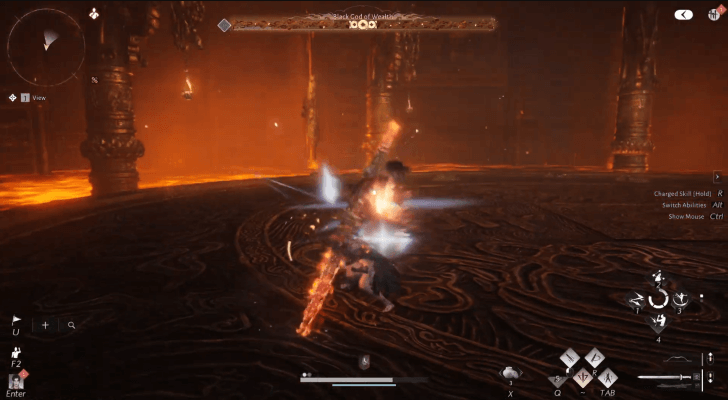
How to Beat God of Avarice (Campaign)
|
|
Sprint to Dodge the Gold Projectiles
God of Avarice has two projectiles moves that cannot be parried when it hits you. We highly recommend sprinting to the side so you can easily avoid the projectiles without having worry about your dodge timings.
Take note that the move where he summons a Gold Orb can also be easily avoided by running to the side. Keep in mind that God of Avarice can still attack while the Gold Orb is out so try to parry his melee attacks as often as possible.
Keep Attacking to Reduce the Money Bar During 2nd Phase
During his second phase, he will start charging up in the center of the arena and let out a short burst of Money Flowers that can damage you and covers his health bar with money. This state can make him invulnerable to staggers and knock down so we highly recommend whittling down the Money Bar as fast as you can with your attacks, while also focusing on dodging his attacks since he cannot be staggered.
Shoot the Staff With Your Bow
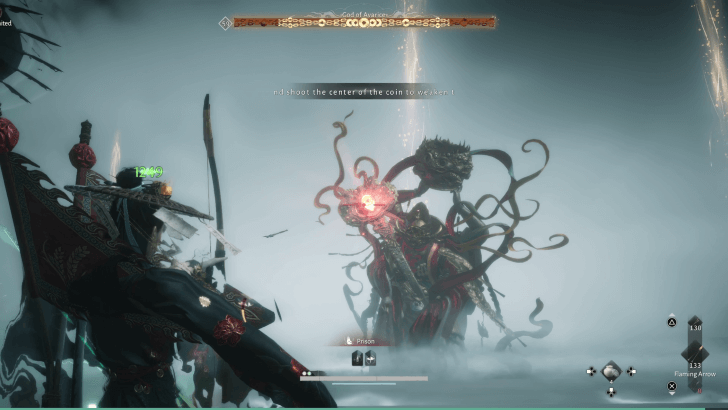
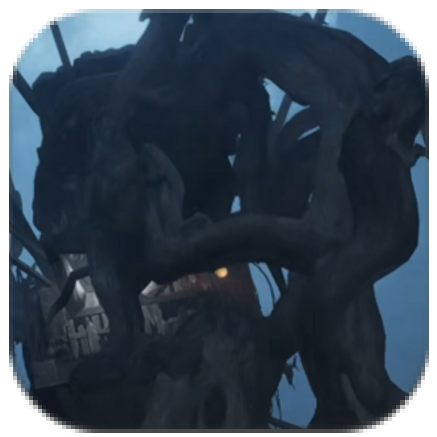
When God of Avarice reaches his 3rd phase, he will turn into a giant buddha statue with unique mechanics that you need to follow in order to defeat him. We recommend to always shoot his staff with your Bow whenever the eye turns red to slowly whittle down his Money HP bar.
Keep in mind that you only need to destroy the Money HP bar in order to defeat the God of Avarice's 3rd phase so take your time learning his moves and dodge whenever you can.
How to Beat God of Avarice (Yama's Seal)
|
|
Protect the Commoners by Maintaining the Shield
The main objective during the God of Avarice fight is to protect the civilians. Their HP cannot be restored, so players must constantly collect coins from Wealth From Above and press G to convert them into shield energy.
Always keep an eye on the shield gauge and replenish it whenever possible, as the boss frequently attacks it throughout the fight.
Assign Teams Before the Portal Phase
Before the portal mechanic begins, open the Team Manager and divide the raid into two groups. One team will enter the portal to attack the boss, while the other team stays behind to protect the civilians and defeat incoming enemies.
This preparation prevents confusion when the treasure basin activates, when it announces Teleport ready, pick a player to go, allowing players to quickly take their assigned roles.
Prioritize the Mage During Add Waves
When the boss summons enemies, always focus on defeating the mage leader first. The mage is the most dangerous enemy and can quickly overwhelm the civilians if left alive.
Once the mage is defeated, clear the remaining enemies before returning your focus to the boss.
Manage the Greed Meter Inside the Portal
Players inside the portal will accumulate Greed value over time. If the meter fills completely, the players will die instantly.
Leave the portal before the meter becomes full and return to the civilians to reduce your Greed. Teams may need to rotate in and out to continue dealing damage safely.
God of Avarice Moveset
| All God of Avarice Phases | ||
|---|---|---|
| Phase 1 | Phase 2 | Phase 3 |
Phase 1 God of Avarice Moves
| Moves | Details |
|---|---|
| Prosperous Shots | God of Avarice summons a gold orb that shoots out gold projectiles while he continues to attack you for the duration. This move cannot be parried and can only be dodged when timed correctly. |
| Sway of Gold | God of Avarice turns into a gold mist and floats to the center to shoot gold projectiles at you that can absorb your Coins once hit and slams into the ground. The projectiles cannot be parried and can be avoided by sprinting to the side, while the slam attack can be parried and dodged when timed correctly. |
| Golden Blitz | God of Avarice throws out two daggers towards you and jumps into the air to dash at you with a ground slam attack. This move can be parried and dodged when timed correctly. |
| Fourfold Combo | God of Avarice winds up his blade and swings at you with four consecutive attacks that has a slight delay at the end. This move can be parried and dodged when timed correctly. |
| Golden Fangs | God of Avarice performs a backflip and throws out three knives in front of him to follow up with a quick dash slash. This move can be parried and dodged when timed correctly. |
| Triple Swing | God of Avarice winds up his blade to slash at you three consecutive times with a delayed overhead slash at the end. This move can be parried and dodged when timed correctly. |
| Golden Whirlwind | God of Avarice slashes at you twice and then winds up his blade to execute a double consecutive swing attack. This move can be parried and dodged when timed correctly. |
Phase 2 God of Avarice Moves
| Moves | Details |
|---|---|
| Avarice Tornado | God of Avarice charges up his dual blades with a gold glow and executes a spinning dash attack towards you. This move cannot be parried and can only be dodged when timed correctly. |
| Twinblade Combo | God of Avarice merges his dual blades into one and rushes towards you with a three-hit combo that has a delayed slash at the end. This move can be parried and dodged when timed correctly. |
| Charged Thrust | God of Avarice merges his dual blades into one and winds it up behind him to deal a dashing thrust attack towards you. This move can be parried and dodged when timed correctly. |
| Golden Wheel | God of Avarice briefly winds up and executes spinning slashes towards you to follow up with a jumping overhead slash. This move can be parried and dodged when timed correctly. |
| Threefold Slash | God of Avarice performs three consecutive slashes towards you with the last one being a jumping slash. This move can be parried and dodged when timed correctly. |
| Golden Explosion | God of Avarice jumps backward and triggers an explosion in front of him to follow up with a thrust attack that has a gold glow then jumps up to slash you mid-air and finishes with a crosscut slam attack. The thrust attack cannot be parried while the rest of the attacks can be parried and dodged when timed correctly. |
| Charged Gold Slash | God of Avarice winds up his twinblades with a gold glow and dashes towards you to hit you with a wide sweeping slash. This move cannot be parried and can only be dodged when timed correctly. |
| Money Trees | God of Avarice moves to the center of the arena and rains down gold coins from above to follow up with an arena-wide slam attack to the ground. This move can be parried and dodged when timed correctly. |
| Money Flowers | God of Avarice moves to the center of the arena and throw out showers of gold twice in a cone in front of him only to follow up with an arena-wide gold shower. This move cannot be parried and can only be dodged when timed correctly. |
Phase 3 God of Avarice Moves
| Moves | Details |
|---|---|
| Wind Slash | God of Avarice charges up his staff with a red glow and sends out a series of wind slashes towards you. This move can be parried and dodged when timed correctly. |
| Army of Gold | God of Avarice summons various gold illusions around you that can dive at you with a gold glow while he continues to attack you with Wind Slashes. The gold illusion attacks cannot be parried and can only be dodged when timed correctly. |
| Spider Threads | God of Avarice shoots down a series of lasers throughout the field and follows up with a large laser beam that tracks your position. This move cannot be parried and can only be dodged when timed correctly. |
God of Avarice Moveset (Yama's Seal)
| All God of Avarice Yama's Seal Moves | ||
|---|---|---|
| Phase 1 | Phase 2 | |
Phase 1 Yama's Seal Moves
| Moves | Details |
|---|---|
| Wealth From Above |
The God of Avarice summons coins that fall from the sky, creating drop zones on the ground. Stand inside these zones to catch the coins before they hit the ground. After collecting coins, press G to convert them into energy that restores the commoners' shield. Maintaining the shield is crucial, as the commoners will take permanent damage if the shield breaks. |
| Treasures Gathered |
The God of Avarice summons gold-making vessels that will target the Commoners, damaging their shield gauge if the attack connects. Players with higher durability such as tanks or healers should move in front of the Commoners and intercept the attacks to protect them from taking damage. |
| Gold Toss |
The God of Avarice uses Gold Toss to launch an incoming attack at players. When this happens, prepare to deflect the attack to avoid taking damage and safely deal with the mechanic. |
| Golden Shackle |
The God of Avarice marks several players with Golden Shackle, creating damaging zones beneath them. Marked players should immediately move toward the edge of the arena and place the zones away from teammates and the commoners. After dropping the zone, get out of the area quickly to avoid taking continuous damage. |
| Golden Arc |
The God of Avarice marks players before teleporting directly to their location and performing a powerful strike. Watch for the mechanic icon above your character and prepare to deflect the incoming attack when the boss appears. |
Phase 2 Yama's Seal Moves
| Moves | Details |
|---|---|
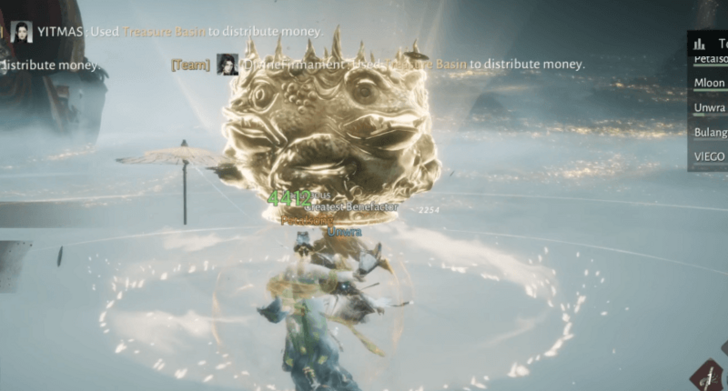
| Gimme the Goods |
A giant coin appears above the arena and begins preparing an attack. Players should gather beneath it and parry the strike to break its shield. Once the shield is broken, destroy the coin to obtain additional coins that can be used to restore the Commoner Shield Gauge. |
| Every Coin Counts |
The God of Avarice targets a player with a piercing line attack. The marked player should quickly move away from the party and ensure the attack is not aimed toward the Commoners. Position carefully and dodge the attack to prevent it from hitting allies or damaging the Commoners. |
| Power of Money |
During the add phase, a Mage enemy appears and begins casting Power of Money, threatening the Commoners. Players should prioritize defeating the Mage first before clearing the remaining enemies to prevent unnecessary damage to the Commoners and their shield. |
God of Avarice Boss Rewards
Furnace of Righteousness Quest Rewards
|
・Empty Pouch ・Eternal Prosperity ・Golden Toad Ring ・Two Fools ・Eternal Glory ・Yingying's Brocade Pouch ・Echo Jade x100 ・Commerce Coins x1,600 ・Kaifeng Exploration x710 ・Enlightenment Points x17,400 ・Character EXP x10,000 ・Coins x171,000 |
Furnace of Righteousness Walkthrough and Rewards
God of Avarice Campaign Rewards
|
・Greaves x2 ・Furnace Cosmetic Chest ・Crimson Leaves Chest ・Martial Arts Custom Tips x2 ・Oscillating Jade x2 ・Coin x3200 ・Character EXP x4000 +400 per level |
Where Winds Meet Related Guides
| All Boss Guides | |
|---|---|
| World Bosses | - |
Campaign Bosses
 Heartseeker Heartseeker
|
 Qianye Qianye
|
 Ye Wanshan Ye Wanshan
|
 The Void King The Void King
|
 Lucky Seventeen Lucky Seventeen
|
 Tian Ying Tian Ying
|
 Dao Lord Dao Lord
|
 Zheng the Frostwing Zheng the Frostwing
|
 Murong Yuan Murong Yuan
|
 God of Avarice God of Avarice
|
 River Master River Master
|
 Guo Xin Guo Xin
|
World Bosses
 Puppeteer - Sheng Wu
 Sleeping Daoist
 Earth Fiend Deity
 Snake Doctor
 Yi Dao
 Wolf Maiden
 Twin Lions
 Ghost Master
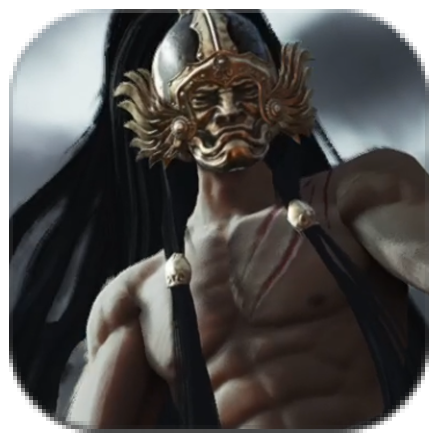 Nameless General
 Feng Ruzhi
 Drunk Martial Artist
 Coffin Master
Quest-related Bosses
 Dalang Dalang
|
 He Yuezhi He Yuezhi
|
 Shen Yiren Shen Yiren
|
Challenge Bosses
 Elder Gongsun Elder Gongsun
|
 Gongsun Deng Gongsun Deng
|
 Demon Goose Demon Goose
|
Comment
Author

God of Avarice Location and How to Beat
Rankings
Gaming News

![Monster Hunter Stories 3 Review [First Impressions] | Simply Rejuvenating](https://img.game8.co/4438641/2a31b7702bd70e78ec8efd24661dacda.jpeg/show)
![Monster Hunter Stories 3 Review [First Impressions] | Simply Rejuvenating](https://img.game8.co/4438641/2a31b7702bd70e78ec8efd24661dacda.jpeg/thumb)

![The Seven Deadly Sins: Origin [First Impressions] | A Promising Start](https://img.game8.co/4440581/584e0bfb87908f12c4eab6e846eb1afd.png/thumb)
Popular Games

Genshin Impact Walkthrough & Guides Wiki
Umamusume: Pretty Derby Walkthrough & Guides Wiki
Pokemon Pokopia Walkthrough & Guides Wiki
Honkai: Star Rail Walkthrough & Guides Wiki
Monster Hunter Stories 3: Twisted Reflection Walkthrough & Guides Wiki
Arknights: Endfield Walkthrough & Guides Wiki
Wuthering Waves Walkthrough & Guides Wiki
Zenless Zone Zero Walkthrough & Guides Wiki
Pokemon TCG Pocket (PTCGP) Strategies & Guides Wiki
Monster Hunter Wilds Walkthrough & Guides Wiki


Recommended Games
Diablo 4: Vessel of Hatred Walkthrough & Guides Wiki
Cyberpunk 2077: Ultimate Edition Walkthrough & Guides Wiki
Fire Emblem Heroes (FEH) Walkthrough & Guides Wiki
Yu-Gi-Oh! Master Duel Walkthrough & Guides Wiki
Super Smash Bros. Ultimate Walkthrough & Guides Wiki
Pokemon Brilliant Diamond and Shining Pearl (BDSP) Walkthrough & Guides Wiki
Elden Ring Shadow of the Erdtree Walkthrough & Guides Wiki
Monster Hunter World Walkthrough & Guides Wiki
The Legend of Zelda: Tears of the Kingdom Walkthrough & Guides Wiki
Persona 3 Reload Walkthrough & Guides Wiki


All rights reserved
©1997-2025 NetEase, Inc. All Rights Reserved
The copyrights of videos of games used in our content and other intellectual property rights belong to the provider of the game.
The contents we provide on this site were created personally by members of the Game8 editorial department.
We refuse the right to reuse or repost content taken without our permission such as data or images to other sites.