Nameless Sword and Strategic Sword Hybrid Build
NEW: Hexi Map | Chapter 3 | Flute Mystic Skill
★ Unfettered and Everspring Build
☆ Liangzhou | Cat Fever | Prismatic Essence
✪ Updated: Best Weapon | Best Builds
☆ WWM Game8 Twitter: New tips daily!
Recruit using our Guild Recruitment Board!
This is a build focusing on the Nameless Sword and Strategic Sword Martial Art school in Where Winds Meet. Read on to see a full build guide to these martial arts including its best Inner Ways, Mystic Skills to take, and the best gear set and substats to aim for, updated for Version 1.2.
List of Contents
Nameless Sword and Strategic Sword Build
Build Overview
| Jump Table | |||||
|---|---|---|---|---|---|
| Overview | Martial Arts | Inner Ways | |||
| Mystic Arts | Set and Stats | How to Play | |||
| Overview | |
|---|---|
| Martial Arts | |
| Role | DPS |
| Pros and Cons |
|
This is a dual sword build focusing on the Nameless Sword and Strategic Sword. Each weapon follows similar playstyle with mobility in mind but focuses on different aspects in combat. Utilize Nameless Sword's ranged attacks to poke and deal heavy damage from a distance or use Strategic to cause DoT and pop those for huge burst damage.
| Date | Changes |
|---|---|
| 1-27-2026 | ・Further optimized the build for Version 1.2. ・Removed Ghost Bind from the main loop as it is now suboptimal. ・Updated Inner Way and added Inner Way for PvP. ・Reworked Mystic Arts and added dedicated PvP options. ・Updated Stat Priority. ・ Updated Set Gear and added PvP option. ・Added PvP rotations. |
Martial Arts and Weapons
| Jump Table | |||||
|---|---|---|---|---|---|
| Overview | Martial Arts | Inner Ways | |||
| Mystic Arts | Set and Stats | How to Play | |||
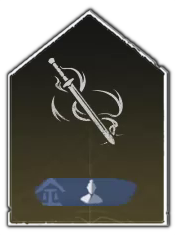
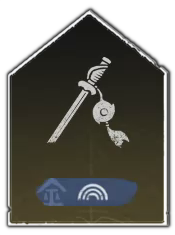
| Martial Art | |
|---|---|
|
Path: Bellstrike - Splendor |
Path: Bellstrike - Umbra |
For our weapons we utilize a flexible playstyle by playing two sword weapons which both offers mobility. What they differ with is Strategic Sword's combos are more melee oriented and faster while Nameless Sword relies on mobility and charged attacks from proper distance management. Learning which weapon to use on each situation is key to maximizing the build's potential.
Recommended Inner Ways
| Jump Table | |||||
|---|---|---|---|---|---|
| Overview | Martial Arts | Inner Ways | |||
| Mystic Arts | Set and Stats | How to Play | |||
| Inner Way | Details |
|---|---|
 Sword Horizon Sword Horizon |
After casting Strategic Sword's Martial Arts Skill, Special Skill, or Charged Skill, press the skill button at the perfect timing during the ending phase to cast Crisscrossing Swords and unleash follow-up attacks. If the target has 5 stacks of Bleed, remove all Bleed stacks and deal high Bleed damage once. |
 Sword Morph Sword Morph |
When Noname Sword's Charged Skill, Vagrant Sword is charged while the Qi shield is present, it unleashes multiple additional sword energy attacks at the 2nd charging stage. You can consume bonus Endurance to increase the sword energy's damage; each Endurance increases damage by 1%, up to 20%. |
 Morale Chant Morale Chant |
80% chance to gain one stack of Yi River when attacking or healing. Yi River: Increases Physical Damage and healing by 1% for 8 seconds, stacking up to 5 times. The chance to gain Yi River is only calculated once every 2 seconds. |
 Vital Leech Vital Leech |
Casting an Exhaustion Execution Skill restores HP equal to 8% of the damage dealt. |
For our Inner Ways, we need our two Inner Ways that adds new options to both weapons, particularly Sword Morph and Sword Horizon as both inner ways “completes” the weapon by adding their extra functionality. Sword Horizon gives us more options to consume 5 bleed stacks while Sword Morph focuses on activating Qi Shield for multiple waves.
Morale Chant is a passive damage buff that you'll always be able to utilize from either weapon and Wildfire Spark keeps the build from bricking or stopping by lessening the burden of endurance consumption. Meanwhile, Vital Leech provides much-needed sustain by restoring HP whenever you execute an enemy.
Alternative Inner Way for PVP
| Inner Way | Details |
|---|---|
 Fury Harvest Fury Harvest |
Vitality is required to cast Mystic Arts. Certain recovery actions have a 50% chance to grant 1 bonus Vitality. No bonus Vitality is rewarded when you gain Vitality by attacking, taking a hit, or successfully deflecting an attack. |
 Wildfire Spark Wildfire Spark |
Refunds 3.5% of the Endurance consumed. |
For PvP, consider trading Vital Leech for Fury Harvest. Since Mystic Arts consume Endurance and normal combat actions don’t generate it, Fury Harvest becomes crucial by giving you a chance to recover extra Endurance through recovery actions, allowing more frequent Mystic skill usage. Wildfire Spark is also a good alternative.
Best Mystic Skills
| Jump Table | |||||
|---|---|---|---|---|---|
| Overview | Martial Arts | Inner Ways | |||
| Mystic Arts | Set and Stats | How to Play | |||
| Mystic Arts | Effects |
|---|---|
 Wolflike Frenzy Wolflike Frenzy |
Knock down an enemy, followed with rapid strikes, and finish with an upward swing that disables the target. Effective against Cavalry and other units with Unstable Poise. Unstable Poise: These units have a Stance bar near their HP. Stance-break deals special hit and Physical damage. |
 Dragon's Breath Dragon's Breath |
Drink to enter Intoxicated. Breath fire with Qi, dealing damage over 2 hits plus Ignition. Gain 15% Damage Reduction and Fortitude. Intoxicated: Lasts 30s. Dragon's Breath and Drunken Poet can be used without drinking. Ignition: Target takes damage every 0.5s for 8s. |
 Drunken Poet Drunken Poet |
Drink deeply to enter the Intoxicated state, imitating the drunken grace of the Poet Immortal. Cast repeatedly for up to 5 strikes, each consuming 6 Vitality. Intoxicated: Lasts 30s. Dragon's Breath and Drunken Poet can be used without drinking. |
 Cloud Steps Cloud Steps |
Stomp on an enemy's shoulder to deal Physical Damage, other Attribute Damage effective against Cavalry and other units with Unstable Poise. |
By applying burn with Dragon’s Breath and following up with Drunken Poet, you can convert damage-over-time into a powerful burst that greatly amplifies your output. Cloud Steps is a great gap-closer and very useful against all enemies in general, but it is particularly great against mounted bosses like Sleeping Daoist and Ye Wanshan. Wolflike Frenzy knocks an opponent down and follows up with rapid strikes that deal high single-target damage and control, making it especially effective for punishing enemies.
Alternative Mystic Arts for PvP
| Stat Group | Recommended Substats |
|---|---|
 Serene Breeze Serene Breeze |
Channel Qi into your body to clear blockages in the veins. Can be used while under attack or control effects. On hit, reduces the target's Endurance recovery by 50% and deals damage for 8s. |
 Leaping Toad Leaping Toad |
Flip back to knock back and damage enemies, then lunge to apply Toad Venom. The third cast becomes Golden Toad Crash, a knockdown AoE slam. Toad Venom: Explodes after 5 seconds or on death. Can be Detonated by Lion's Roar. |
 Soaring Spin Soaring Spin |
Channel your Qi into a roaring thrust, dealing damage to units along the path. Then suddenly shift stance into a spiraling follow-up strike that catches enemies off-guard. Hitting a target reduces their Healing Received by 60% over 5s. |
In PvP, aside from the Mystic Skills listed above, Leaping Toad can be used to reposition and interrupt enemy animations, while Soaring Spin serves as a strong gap closer with solid damage. Serene Breeze plays a key role in PvP by allowing you to escape crowd control and reset unfavorable situations.
Recommended Set Gear and Stat Priorities
| Jump Table | |||||
|---|---|---|---|---|---|
| Overview | Martial Arts | Inner Ways | |||
| Mystic Arts | Set and Stats | How to Play | |||
Set Gear
| Stat Group | Recommended Substats |
|---|---|
 Hawkwing HawkwingWeapon |
2 Set Effect: +0.1% Affinity Rate
4 Set Effect: When any of your damage triggers Affinity, gain Hawkwing: Increases Physical Attack by 2% for 5 seconds, stacking up to 5 times. |
 Eaglerise EagleriseArmor |
2 Set Effect: +1 Physical Defense
4 Set Effect: Dealing damage over time or healing grants 1 stack of Eaglerise: Reduces damage taken by 1.2% for 10 seconds, stacking up to 5 times. At max stacks, receives an Eagle Guard effect that reduces the next incoming damage within 10 seconds by 90% (halved when the damage comes from a boss). This effect can only trigger once every 30 seconds. |
For our sets, the Hawkwing and Eaglerise are perfect due to the passive bonuses we can get the longer the fight goes on. Hawking lets us get ramping damage with our combos which continues due to our melee and ranged options while Eaglerise lets us take hits much easier while getting a strong damage reduction shield on full effect.
Alternative Gear for PvP
| Stat Group | Set Effect |
|---|---|
|
Hawkwing Weapon |
2 Set Effect: +0.1% Affinity Rate
4 Set Effect: When any of your damage triggers Affinity, gain Hawkwing: Increases Physical Attack by 2% for 5 seconds, stacking up to 5 times. |
 Calmwaters CalmwatersArmor |
2 Set Effect: +13 Physical Defense
4 Set Effect: A Perfect Dodge of an enemy attack has a 50% chance of restoring 3% of your Max HP and 10 Endurance. |
For PvP, consider switching to Calmwaters, as it rewards perfect dodges with a chance to restore HP and Endurance, both of which you'll need quite a bit when fighting other players.
Stat Priority
| 1st | Power |
| 2nd | Affinity Rate |
| 3rd | Bellstrike Attack |
| 4th | Max/Min Physical Attack |
| 5th | Critical Rate |
Power, Affinity Rate, and Bellstrike Attack will be the highest value stats you want to get for more consistent DPS. Mix/Max Phystical Attack is a good stat to aim for as well as it will let you maximize your damage output from multiple effects.
How to Play
| Jump Table | |||||
|---|---|---|---|---|---|
| Overview | Martial Arts | Inner Ways | |||
| Mystic Arts | Set and Stats | How to Play | |||
| Nameless Sword and Strategic Sword Playstyle |
|---|
|
|
Double Sword Rotations
- Start the fight with Strategic Sword's charged slash.
- Execute the 5 bleed with Inner Balance Strike III (Special Skill) and also create distance. Alternatively, you can also use Inner Track Slash and Crisscrossing Sword to continue the fight in melee range.
- Weapon conver to Nameless Sword then use Full Daunting Strike Combo.
- Create distance with Shadow Step then use Charged Attack to unleash your Qi Wave.
- When your enemy is exhausted, cast Dragon’s Breath to apply Burn, then immediately press Parry as the skill lands to animation-cancel, and follow up with Drunken Poet for extra burst damage.
- Use Cloud Steps to quickly close gaps, and Wolflike Frenzy when your main combos and skills are on cooldown or whenever a safe opportunity presents itself.
- After applying the Qi shield with Daunting Strike, you can follow up with a Charged Heavy Attack to release three powerful ranged blade slashes. They deal excellent damage, but require some setup, so it's best to use this when you have good distance and relative safety.
This is a standard rotation using both weapons. As they both have engage and disengage options, you can swap the order of the two and start with the Nameless Sword which gives this build extreme flexibility in how you approach fights.
Consume Bleed Stacks With Crisscrossing Sword or Inner Balance Strike III
To maximize the Strategic Sword's playstyle, play around the bleed stacks you inflict on opponents. When they have 5 bleed stacks, you can consume it with Crisscrossing Sword or Inner Balance Strike III. To reach 5 stacks, you can either use Charged Attack to dash into the enemy which will apply 4 bleed stacks immediately and another after a short delay.
You can also use Inner Track Slash to apply 5 bleed stacks if all slashes hits the enemy then comsume it immediately with Crisscrossing Sword for a swift combo.
Unleash Sword Waves by Using Vagrant Sword with a Qi Shield
To unleash multiple Qi Wave, you must use the Nameless Sword's Charged attack while having a Qi Shield and having the Sword Horizon Inner Way. This will let you unleash multiple waves for massive burst damage if executed perfectly.
PvP Tips and Tricks
This build thrives on constant pressure, mobility, and animation control. While it boasts extremely high DPS, its real strength comes from clean execution, weapon swapping, and smart use of Mystic Skills.
- Weapon switching is core to the build. Rotate between Nameless Sword and Strategic Sword to maintain DPS while your skills are on cooldown.
- Use Serene Breeze whenever you’re caught in an enemy’s combo to break free and regain control, or break any crowd control on you.
- Use Leaping Toad frequently to cancel animations and reposition. This lets you continue combos safely while avoiding counterattacks.
- When using the Strategic Sword, apply bleed stacks first, then detonate them with the special skill for massive damage. Never waste your Inner Balance Strike III without bleed stacks.
- Against the Vernal Umbrella users, parry their Spring Away shots until they land, or use Cloud Steps to bring them down. Be aggressive, but take care when your Serene Breeze is on coolwdown.
- When using Nameless Sword’s Charged Skill, activate it after gaining a Qi shield for multiple waves instead of a single strike. This massively boosts ranged pressure.
- Against mobile or defensive opponents, play patiently and rely on chip damage + affinity procs rather than forcing trades.
- Avoid overcommitting. If your combo fails, disengage using dodge or Cloud Steps, then re-enter once cooldowns reset.
- Use Cloud Steps to close gaps quickly and secure free damage on your target.
- Use Soaring Spin as a gap closer and apply strong healing-reduction debuff, if your opponent utilizes them.
- Against tanks, focus on consistent bleed application and affinity procs rather than burst. Let your sustained damage win the fight.
- It's a good opportunity to use Dragon’s Breath and Drunken Poet right after an execution, and consider animation-canceling Dragon’s Breath when necessary.
- Use Strategic Sword's Charge Skill Second Track Slash + Leaping Toad together to stay glued to your target, especially against evasive enemies.
Where Winds Meet Related Guides


Author

Nameless Sword and Strategic Sword Hybrid Build
Rankings
Gaming News

![Monster Hunter Stories 3 Review [First Impressions] | Simply Rejuvenating](https://img.game8.co/4438641/2a31b7702bd70e78ec8efd24661dacda.jpeg/show)
![The Seven Deadly Sins: Origin [First Impressions] | A Promising Start](https://img.game8.co/4440581/584e0bfb87908f12c4eab6e846eb1afd.png/thumb)
![The Liar Princess and the Blind Prince Review [PC] | Lovely to Look at but Tedious to Play](https://img.game8.co/4442586/8d95f5faf05780f1765ce7e0938bd825.jpeg/thumb)
![Marathon Cryo Archive Map Teased as [REDACTED] on Selection Screen](https://img.game8.co/4442236/6357203e58172f6de57f1991e7c39b22.png/thumb)
Popular Games

Genshin Impact Walkthrough & Guides Wiki
Umamusume: Pretty Derby Walkthrough & Guides Wiki
Pokemon Pokopia Walkthrough & Guides Wiki
Honkai: Star Rail Walkthrough & Guides Wiki
Monster Hunter Stories 3: Twisted Reflection Walkthrough & Guides Wiki
Arknights: Endfield Walkthrough & Guides Wiki
Wuthering Waves Walkthrough & Guides Wiki
Zenless Zone Zero Walkthrough & Guides Wiki
Pokemon TCG Pocket (PTCGP) Strategies & Guides Wiki
Monster Hunter Wilds Walkthrough & Guides Wiki


Recommended Games
Diablo 4: Vessel of Hatred Walkthrough & Guides Wiki
Cyberpunk 2077: Ultimate Edition Walkthrough & Guides Wiki
Fire Emblem Heroes (FEH) Walkthrough & Guides Wiki
Yu-Gi-Oh! Master Duel Walkthrough & Guides Wiki
Super Smash Bros. Ultimate Walkthrough & Guides Wiki
Pokemon Brilliant Diamond and Shining Pearl (BDSP) Walkthrough & Guides Wiki
Elden Ring Shadow of the Erdtree Walkthrough & Guides Wiki
Monster Hunter World Walkthrough & Guides Wiki
The Legend of Zelda: Tears of the Kingdom Walkthrough & Guides Wiki
Persona 3 Reload Walkthrough & Guides Wiki


All rights reserved
©1997-2025 NetEase, Inc. All Rights Reserved
The copyrights of videos of games used in our content and other intellectual property rights belong to the provider of the game.
The contents we provide on this site were created personally by members of the Game8 editorial department.
We refuse the right to reuse or repost content taken without our permission such as data or images to other sites.
who asked??