Gambit Beneath the Shimmer Walkthrough and Rewards
NEW: Hexi Map | Chapter 3 | Flute Mystic Skill
★ Unfettered and Everspring Build
☆ Liangzhou | Cat Fever | Prismatic Essence
✪ Updated: Best Weapon | Best Builds
☆ WWM Game8 Twitter: New tips daily!
Recruit using our Guild Recruitment Board!
Gambit Beneath the Shimmer is the final Jianghu Legacy in Kaifeng in Where Winds Meet. See this detailed guide for quest objectives, how to unlock it, and what rewards you receive from the quest and the Supreme Freedom Campaign.
List of Contents
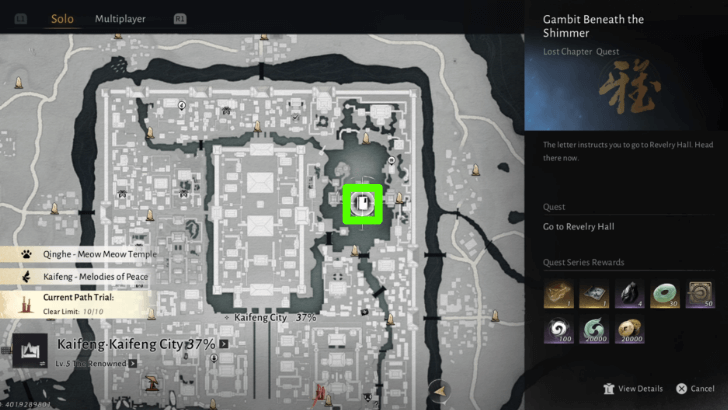
How to Unlock Gambit Beneath the Shimmer
Go to the Revelry Hall in Kaifeng City
 |
|
| Region | Kaifeng City , Kaifeng |
|---|---|
| Unlock Req. |
Shadows in Bloom Furnace of Righteousness; Ask the Wayfarer at Kaifeng City Kaifeng Exploration Progress - 6000 |
To unlock the Jianghu Legacy - Finale: Gambit Beneath the Shimmer, talk to the Wayfarer of Kaifeng City. The quest will be listed in your Journal tab. There, select the Jianghu Legacy to locate it on the map. You will have to go to the Revelry Hall in Kaifeng City.
Complete Jianghu Legacy 02 - Shadows in Bloom
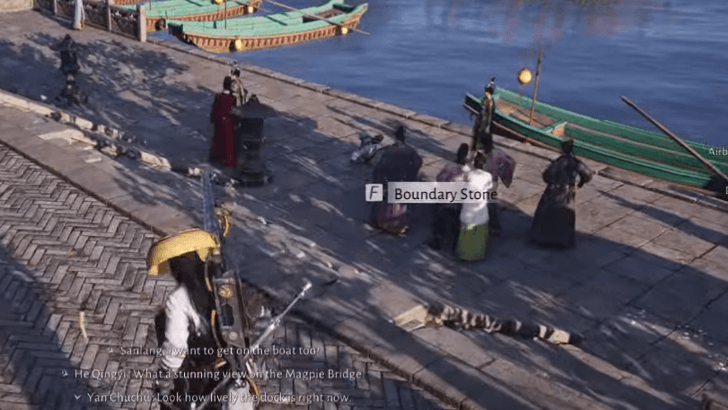
Shadows in Bloom is a Jianghu Legacy also found in the Velvet Shade area, just outside Revelry Hall. To initiate it, approach the crowd gathered around the dock near the Velvet Shade Boundary Stone.
Finish the Kaifeng Main Story
Unlocking this Jianghu Legacy also requires you to finish Chapter 2: Universal Furnace in the Kaifeng region. The last quest in the chapter is Furnace of Righteousness.
Chapter 2: Universal Furnace Walkthrough
Accumulate 6,000 Exploration Points in Kaifeng
You also need to accumulate 6,000 Exploration Points in Kaifeng as part of the unlock requirements. You can raise your exploration level by exploring Kaifeng, usually by completing side quests, expanding the world map, finding chests, and doing various activities.
Gambit Beneath the Shimmer Walkthrough
- Go to Revelry Hall
- Investigate Supreme Freedom
- Solve the Shadow Puzzle
- Make a Choice
- Go to the Second Floor
- Go to the Third Floor
- Go to the Fourth Floor
- Pursue the Stranger
- Survive the Five-Clawed Golden Dragon
- Confront the Stranger
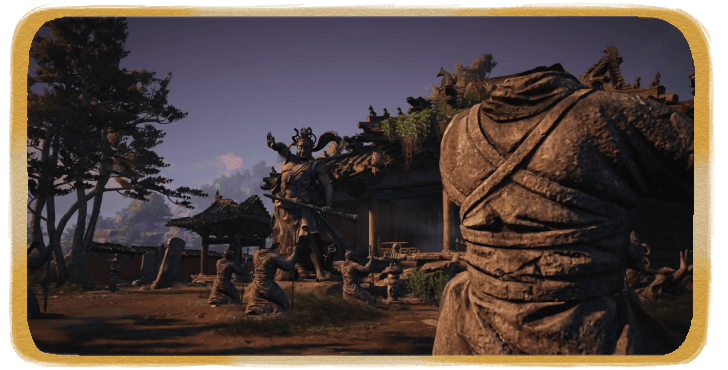
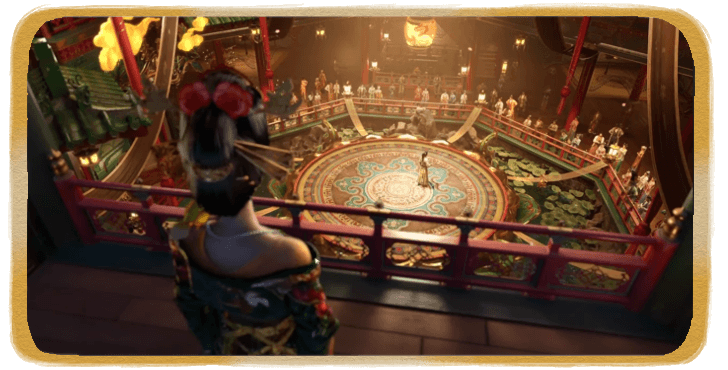
1. Go to Revelry Hall
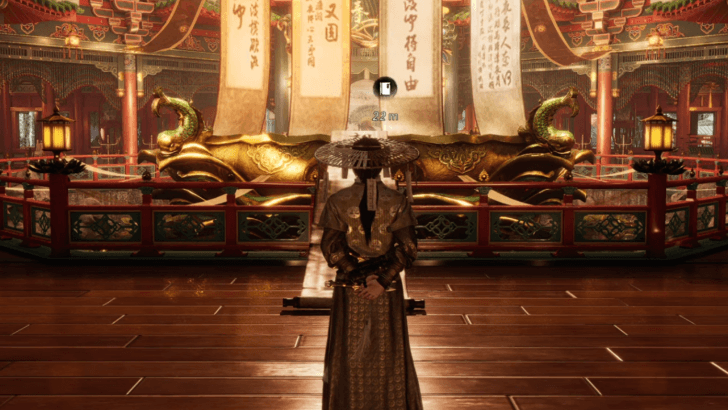
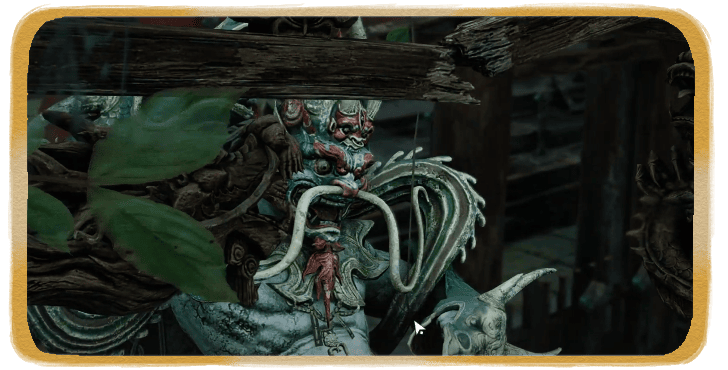
Teleport to Velvet Shade in Kaifeng City and head inside the empty Revelry Hall. A cutscene will play where a mysterious man lures you into an alternate version of the hall.
Follow the Golden Butterflies to the Objective
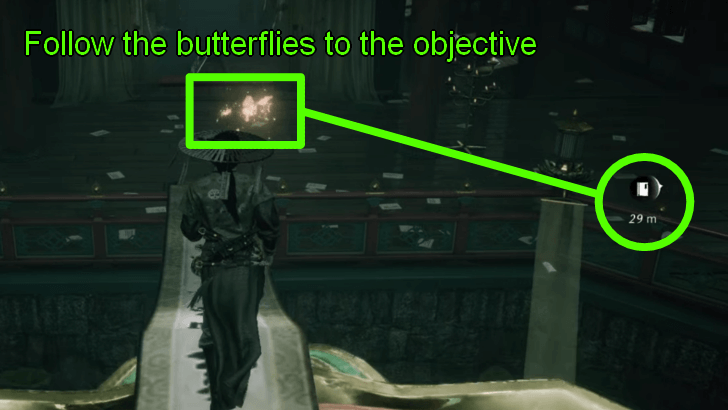
In the dark version of Revelry Hall, you will see a swarm of golden butterflies. Follow them to find your next objective.
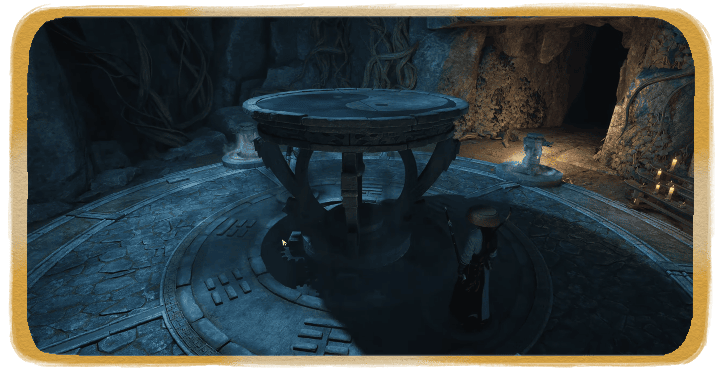
2. Investigate Supreme Freedom
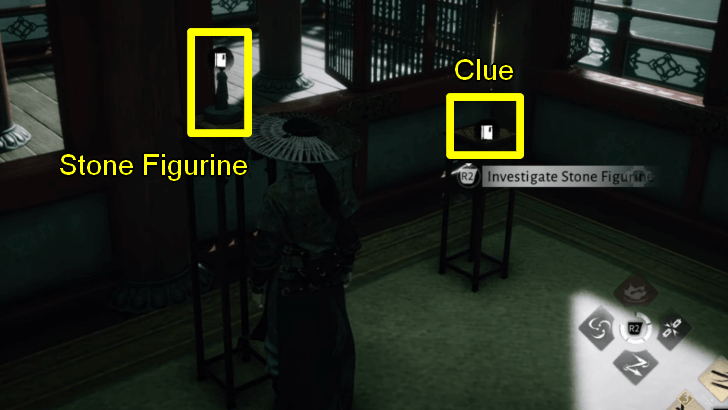
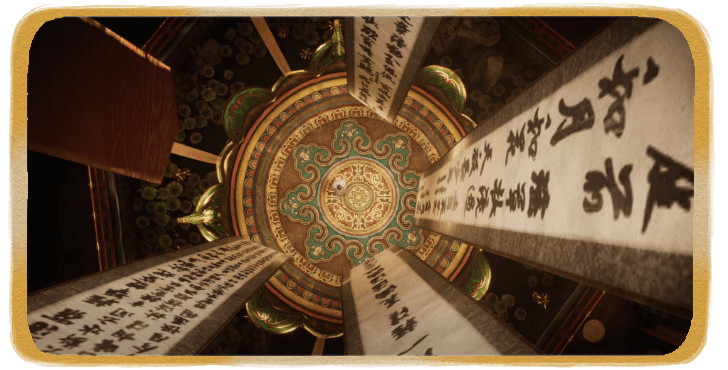
Follow the butterflies to a corner and investigate the clue and the figurine on the stands. Then, interact with the table at the center to place the figurine on the chessboard. You need to finish a game of chess to proceed, but it is not required to win the game.
Read the Mechanics to Learn About the Chess Pieces
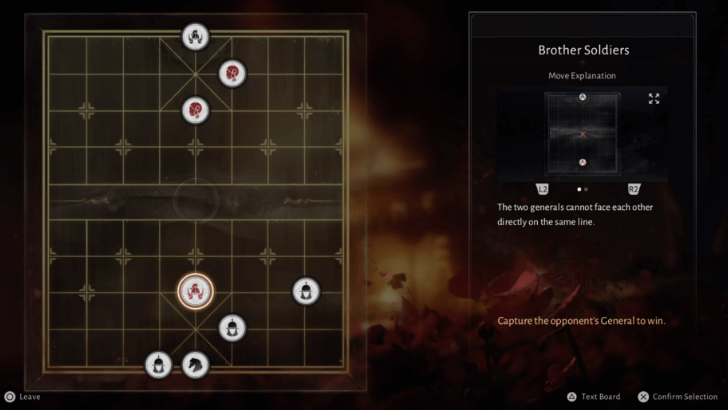
In the chess game, there is a panel to the side of the screen that explains the movements of each chess piece. Hover above the piece to find where you can place it on the board.
All Chess Locations and How to Play
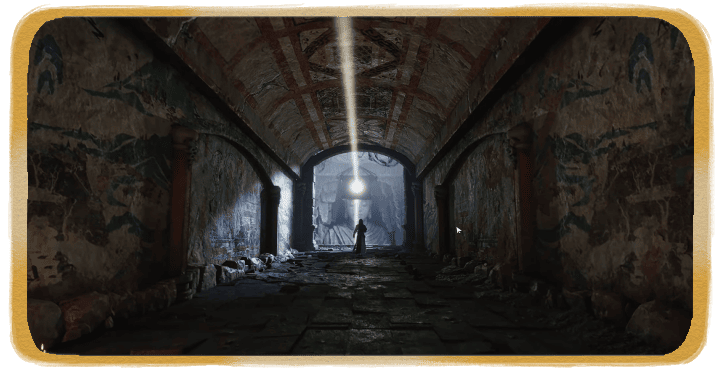
3. Solve the Shadow Puzzle
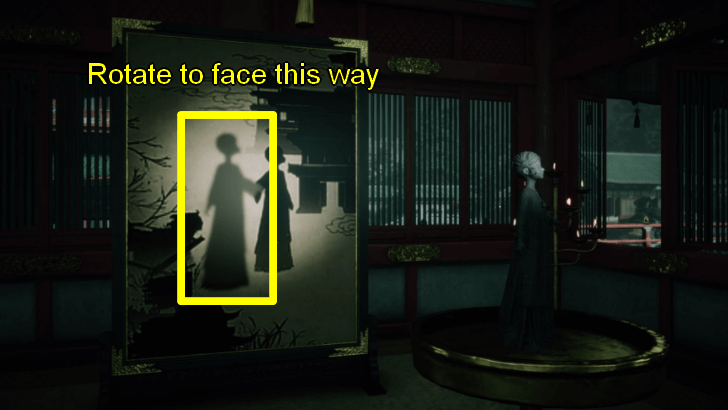
Next, follow the butterflies to where a screen is. Put the figurine on the stand in front of the candle. For this puzzle, you need to rotate the figurine so that it matches with the silhouette on the screen. If you are struggling to fit it, you can try nudging it until you find the right spot.
After the figurine has been set to its correct position, approach the screen to touch it.
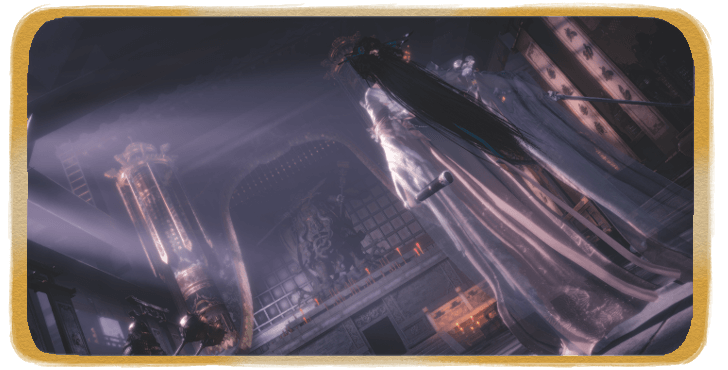
4. Make a Choice
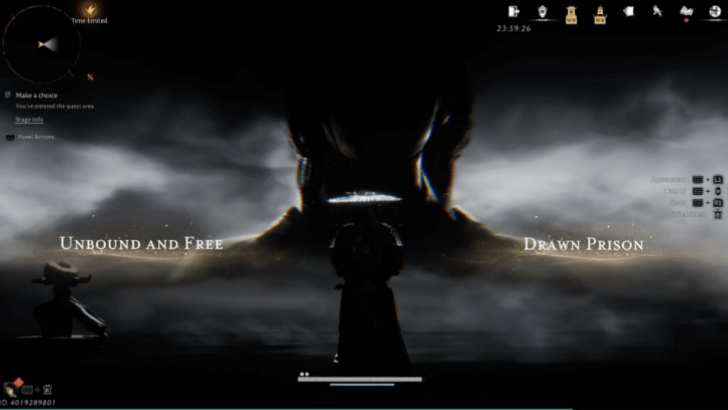
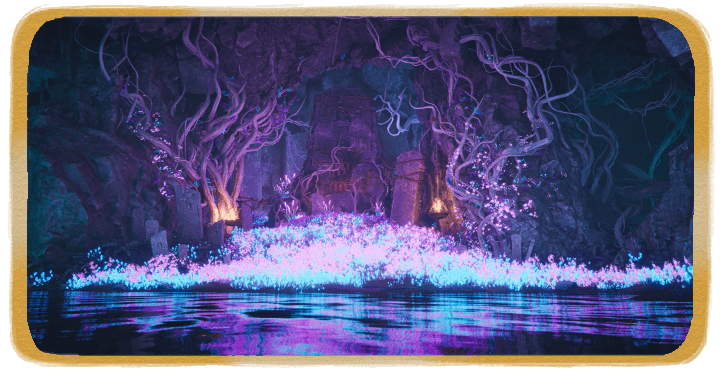
You will then be transported to a different dimension with stone pieces telling the story of twin girls. Make a choice between Unbound and Free or Drawn Prison. Note that neither choice changes the outcome of the quest and only changes the dialogue.
Leave the dimension by interacting with the floating text Brother Soldiers ahead to return to Supreme Freedom.
5. Go to the Second Floor
| 5.1 | 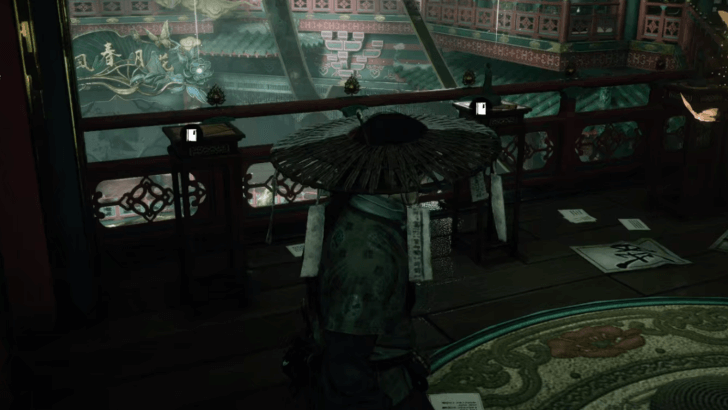 Follow the butterflies to the second floor, into a room with scrolls. View the clue and the figurine again, then play another game of chess on the table. |
|---|---|
| 5.2 | 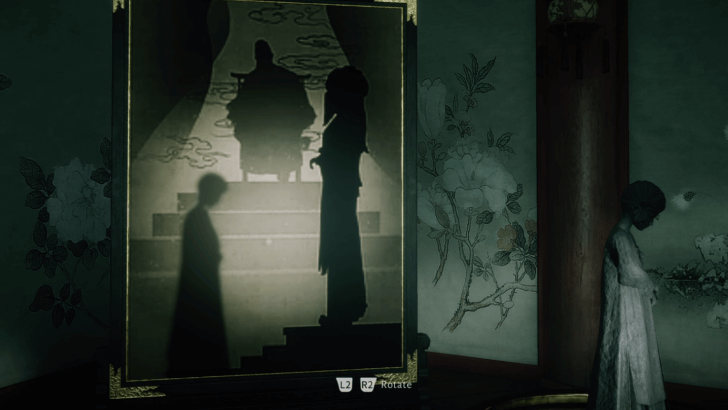 Leave the room and follow the quest marker to the next screen puzzle you have to solve. Then, touch the screen to be transported back to the dark dimension again. |
| 5.3 |  After a cutscene furthering the story of the twin girls, make your second choice between Soaring Across or Drooping Wings before leaving. |
6. Go to the Third Floor
| 6.1 | 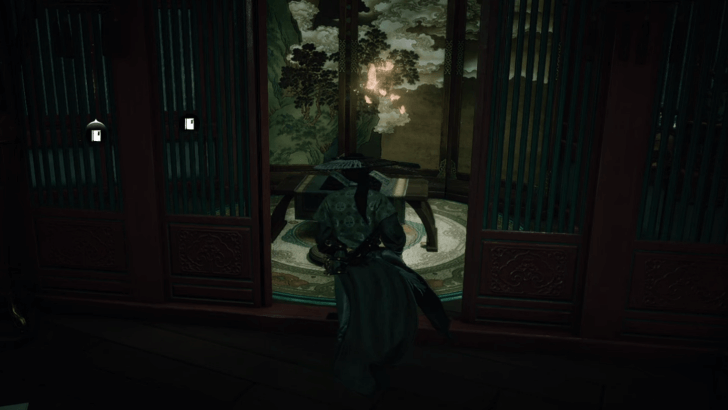 Follow the butterflies to the third floor, into a small room near the balcony outside. View the clue and the figurine inside the room, then finish the game of chess. |
|---|---|
| 6.2 | 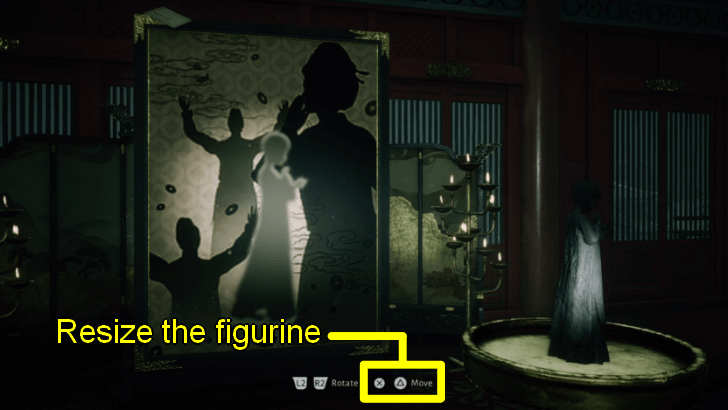 Go to the third screen to solve the puzzle. This time, you need to rotate the figurine and resize it to fit it into the silhouette. Touch the screen for a third time to learn more about the girls' story. |
| 6.3 | 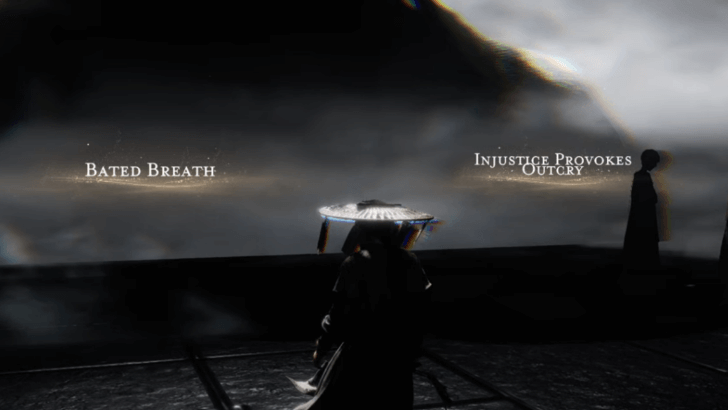 After the cutscene, make another choice between Bated Breath or Injustice Provokes Outcry before returning to Supreme Freedom. |
7. Go to the Fourth Floor
| 7.1 | 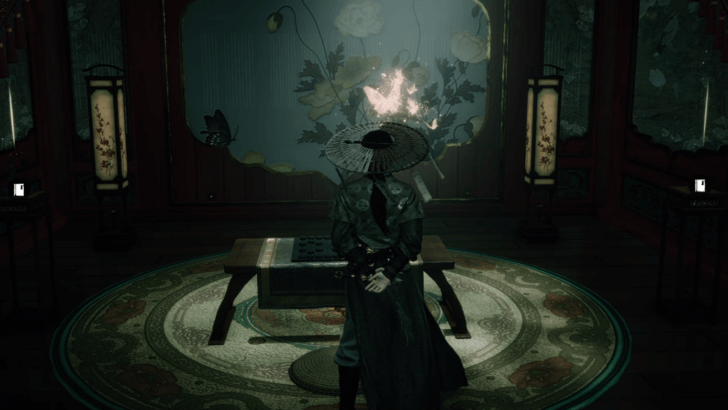 Follow the butterflies for the last time to the fourth floor, into a chamber. View the clue and the figurine inside, then finish the fourth game of chess. |
|---|---|
| 7.2 |  Leave the chamber to find the screen puzzle across it. Like the third puzzle, rotate and resize the figurine to fit it into the silhouett, then touch the screen for the final time. |
| 7.3 | 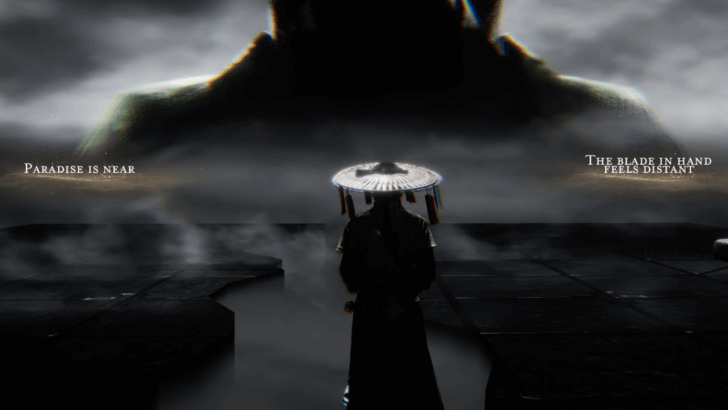 After witnessing the end of the girls' story, make your final choice: Paradise Is Near or The Blade in Hand Feels Distant. You will automatically leave and find yourself in a different dimension. |
8. Pursue the Stranger
| 8.1 | 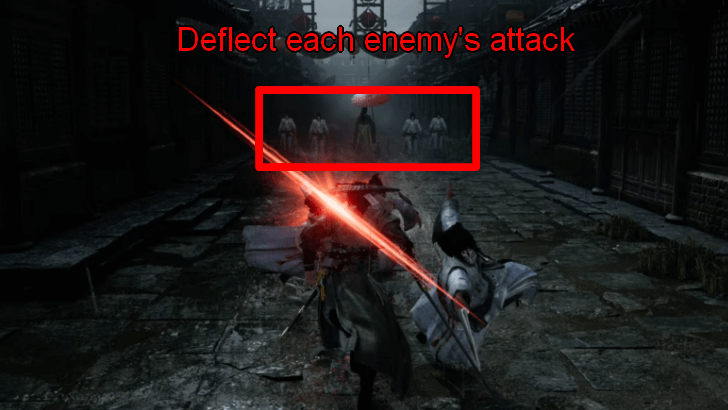 In this dimension, attempt to pursue the stranger by running ahead. You need to deflect the men's attacks until you reach the end of the segment. |
|---|---|
| 8.2 | 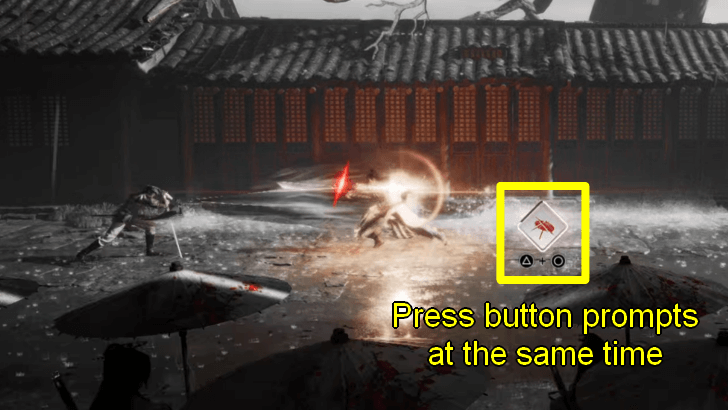 The screen will then shift to a side-scrolling segment. Continue deflecting the enemies' attacks until you reach the last one. Deflect the red attack and press the button prompts to defeat him. |
| 8.3 |  The screen will return to normal, but the enemies will now close in on you with spinning attacks. Deflect them to make it through the road, then deflect the last enemy's attack and press the button prompts to defeat him and finally end the segment. |
9. Survive the Five-Clawed Golden Dragon
| 9.1 | 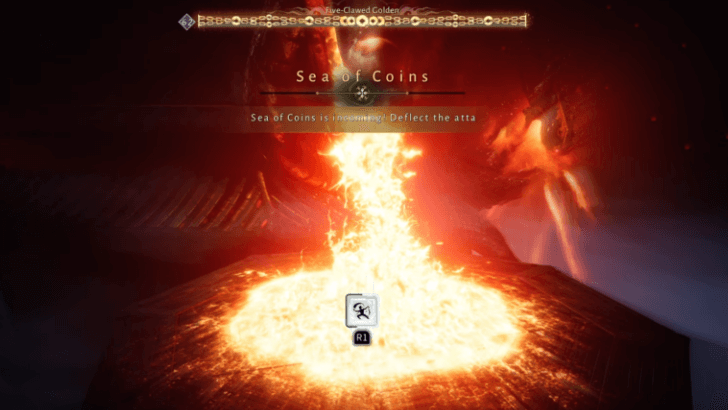 Next, you will find yourself on a platform facing the Five-Clawed Golden Dragon. You cannot beat the dragon normally, so you simply need to survive until the end. Deflect its waves of fire. |
|---|---|
| 9.2 | 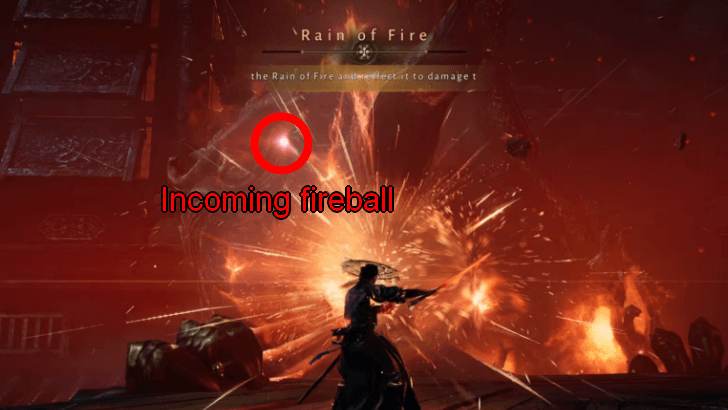 In its second phase, deflect its fireballs until it stops. The fireballs appear in quick succession, so make sure to parry them just as fast. |
| 9.3 | 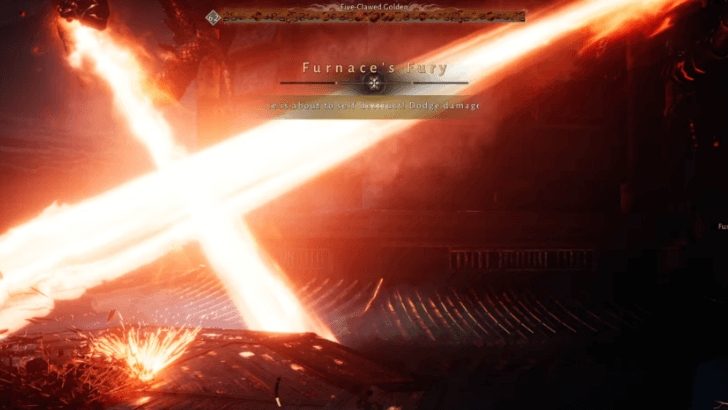 In the third and last phase, the two dragons on the sides of the furnace will spout two beams of flame on the platform. Simply dodge out of the way until it is over. |
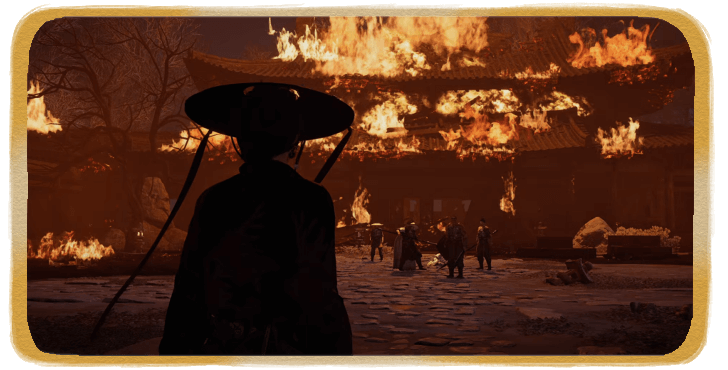
10. Confront the Stranger
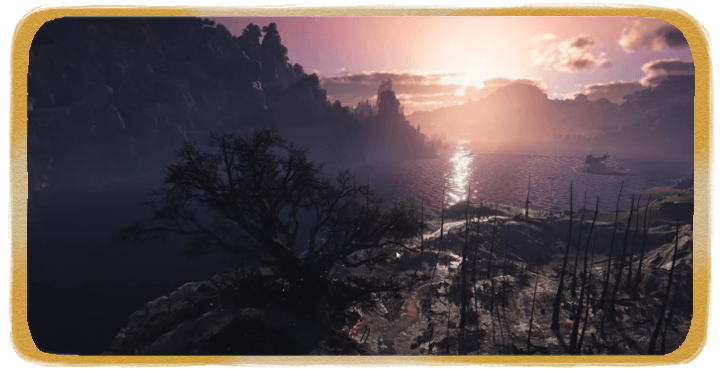
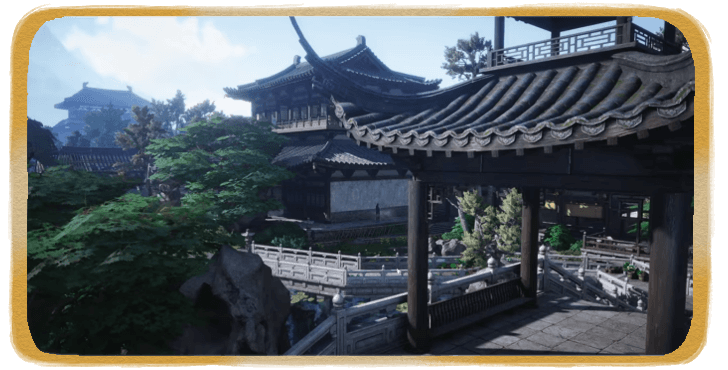
| 10.1 | 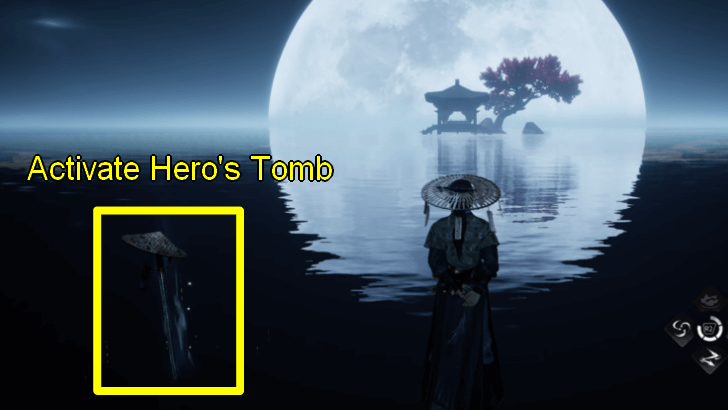 Finally, you will end up in a dimension with a lake and a pagoda ahead. Remember to activate the Hero's Tomb here as the boss battle can be difficult. Once ready, run toward the pagoda. You will trigger the boss fight midway. |
|---|---|
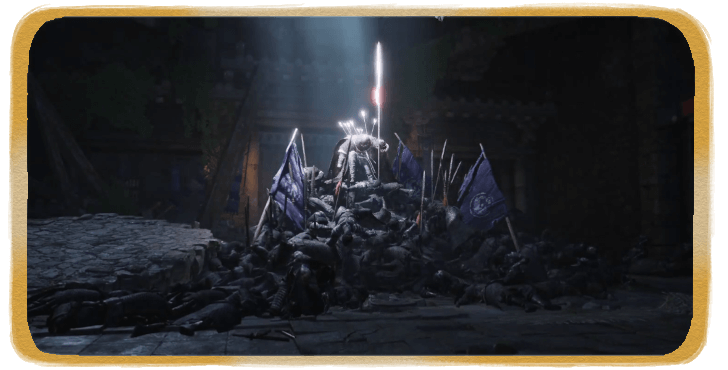
| 10.2 | 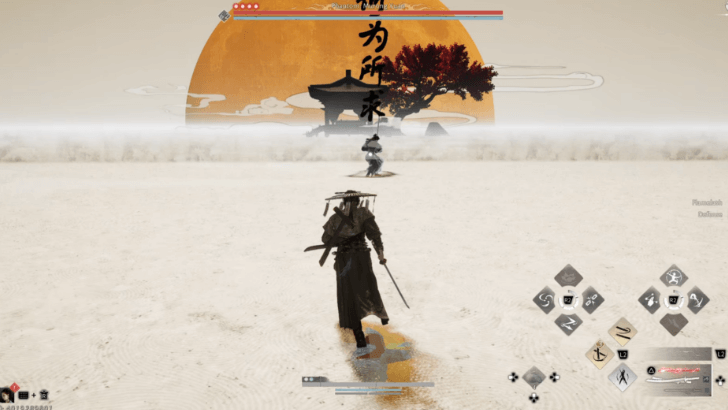 Defeat four bosses: Murong Yuan, Zheng E, the Dao Lord, and the River Master. If you are defeated, you need to restart the battle from the beginning. After you beat all four, a cutscene will play where you return to the real Revelry Hall, ending the quest. |
Campaign Unlocked: Supreme Freedom
After completing the quest Gambit Beneath the Shimmer, you unlock the Supreme Freedom Campaign in Revelry Hall. Here, you can battle all four bosses again to earn gear and rewards.
Gambit Beneath the Shimmer Boss Guide
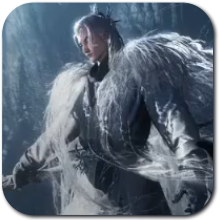
Murong Yuan Overview
 Murong Yuan Murong Yuan
|
Difficulty Rating | ★★★★★ |
|---|---|---|
| Location | ||
| Found at North Imperial Garden at Jadewood Court | ||
Murong Yuan is a boss fought during the Jinming Pool: Petalfall Banquet Quest. Whenever Murong Yuan performs a yellow attack during her first phase, you can use Meridian Touch to cancel it and knock her down for a few seconds. This is useful for giving you openings to perform your most powerful combos as you whittle down her health and Qi bar.
Murong Yuan Location and How to Beat
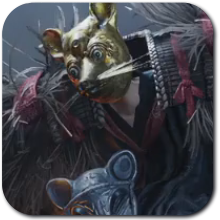
Zheng the Frostwing Overview
 Zheng the Frostwing Zheng the Frostwing
|
Difficulty Rating | ★★★★★ |
|---|---|---|
| Location | ||
| Found at the Ever-Normal Granery at Granery of Plenty | ||
Zheng the Frostwing is a boss fought during the Ever-Normal Granary Quest. During the first phase, Zheng the Frostwing will perform a fan attack that has a red glow which can be difficult to parry. We highly recommend equipping Meridian Touch and using it whenever he executes the fan attack to cancel it and knock him down for a few seconds, giving you time to dish out damage and whittle down his Qi bar.
Zheng the Frostwing Location and How to Beat
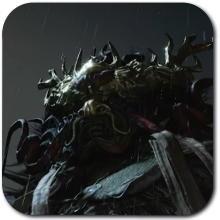
Dao Lord Overview
 Dao Lord Dao Lord
|
Difficulty Rating | ★★★★★ |
|---|---|---|
| Location | ||
| Enter the Coffin Shop at Kaifeng City | ||
Dao Lord is a boss fought during the Unbound Cavern Quest. During Dao Lord's second phase, he will split into 3 enemies with their own health bar that can all attack you simultaneously. Eventually, all 3 of them will submerge to the ground and pop out to attack you briefly in the air. We highly recommend using the Bow and shoot them with arrows as they pop out to help counter this move and shave off a small chunk of their health.
Dao Lord Location and How to Beat
River Master Overview
 River Master River Master
|
Difficulty Rating | ★★★★★ |
|---|---|---|
| Location | ||
| Roaring Sands, Kaifeng | ||
River Master is a boss fought during the Heavenfall Quest.
River Master Location and How to Beat
Gambit Beneath the Shimmer Rewards
Rewards from the Quest
|
・Lingering Melody x1
・Medicinal Tales x1 ・Lv. 3 Ebon Iron x4 ・Echo Jade x30 ・Kaifeng Exploration x50 ・Enlightenment Points x100 ・Character EXP x20,000 ・Coins x20,000 |
These are all the rewards you can get by doing Gambit Beneath the Shimmer. The rewards listed above are the total earned as you progress through the quest and upon completing it.
Rewards from the Campaign
|
・Tier 61 Rainwhisper or Moonflare Set x2 (Greaves excluded) ・Appearance - Sovereign's Solitude x1 ・Crimson Leaves Chest x1 (Chance) ・Stonesplit - Might Tips x2 ・Inner Way Note - Custom Chest x1 ・Attunement Stone - Gold Inlay x1 (Chance) ・Oscillating Jade x3 ・Coins x3,200 ・Character EXP x6,800 |
These are all the rewards you can get by doing the Supreme Freedom Campaign, which unlocks after completing Gambit Beneath the Shimmer.
Where Winds Meet Related Guides
| Types of Side Quests | |
|---|---|
| Jianghu Legacy | Campaign |
| World Affairs | Exploration |
| Encounters | Wandering Tales |
List Of All Qinghe Jianghu Legacy Quests
 Echoes in the Shrine Echoes in the Shrine
|
 Where a Thousand Buddhas Wept Where a Thousand Buddhas Wept
|
 Meridian Touch Meridian Touch
|
 Echoes of Old Battles Echoes of Old Battles
|
 Blind to the World Blind to the World
|
 Afterglow Afterglow
|
 Cries in the Distance Cries in the Distance
|
 The Promised Light The Promised Light
|
List Of All Kaifeng Jianghu Legacy Quests
 An Unholy Prophecy An Unholy Prophecy
|
 Streetwise Sage Streetwise Sage
|
 Veiled Blades Veiled Blades
|
 Shadows in Bloom Shadows in Bloom
|
 Under Another's Roof Under Another's Roof
|
 March of the Dead March of the Dead
|
 Twelve Years of Feuds Twelve Years of Feuds
|
 An Unnatural Omen An Unnatural Omen
|
 The River's Fury The River's Fury
|
 Gambit Beneath the Shimmer Gambit Beneath the Shimmer
|
Author

Gambit Beneath the Shimmer Walkthrough and Rewards
Rankings
Gaming News

![Monster Hunter Stories 3 Review [First Impressions] | Simply Rejuvenating](https://img.game8.co/4438641/2a31b7702bd70e78ec8efd24661dacda.jpeg/show)
![The Seven Deadly Sins: Origin [First Impressions] | A Promising Start](https://img.game8.co/4440581/584e0bfb87908f12c4eab6e846eb1afd.png/thumb)
![The Liar Princess and the Blind Prince Review [PC] | Lovely to Look at but Tedious to Play](https://img.game8.co/4442586/8d95f5faf05780f1765ce7e0938bd825.jpeg/thumb)
![Marathon Cryo Archive Map Teased as [REDACTED] on Selection Screen](https://img.game8.co/4442236/6357203e58172f6de57f1991e7c39b22.png/thumb)
Popular Games

Genshin Impact Walkthrough & Guides Wiki
Umamusume: Pretty Derby Walkthrough & Guides Wiki
Pokemon Pokopia Walkthrough & Guides Wiki
Honkai: Star Rail Walkthrough & Guides Wiki
Monster Hunter Stories 3: Twisted Reflection Walkthrough & Guides Wiki
Arknights: Endfield Walkthrough & Guides Wiki
Wuthering Waves Walkthrough & Guides Wiki
Zenless Zone Zero Walkthrough & Guides Wiki
Pokemon TCG Pocket (PTCGP) Strategies & Guides Wiki
Monster Hunter Wilds Walkthrough & Guides Wiki


Recommended Games
Diablo 4: Vessel of Hatred Walkthrough & Guides Wiki
Cyberpunk 2077: Ultimate Edition Walkthrough & Guides Wiki
Fire Emblem Heroes (FEH) Walkthrough & Guides Wiki
Yu-Gi-Oh! Master Duel Walkthrough & Guides Wiki
Super Smash Bros. Ultimate Walkthrough & Guides Wiki
Pokemon Brilliant Diamond and Shining Pearl (BDSP) Walkthrough & Guides Wiki
Elden Ring Shadow of the Erdtree Walkthrough & Guides Wiki
Monster Hunter World Walkthrough & Guides Wiki
The Legend of Zelda: Tears of the Kingdom Walkthrough & Guides Wiki
Persona 3 Reload Walkthrough & Guides Wiki


All rights reserved
©1997-2025 NetEase, Inc. All Rights Reserved
The copyrights of videos of games used in our content and other intellectual property rights belong to the provider of the game.
The contents we provide on this site were created personally by members of the Game8 editorial department.
We refuse the right to reuse or repost content taken without our permission such as data or images to other sites.
the bosses have only a single phase each for four total. They hit =much= harder than the versions of their own campaigns.The healing is not reduced so having a healing weapon (fan) is very beneficial.