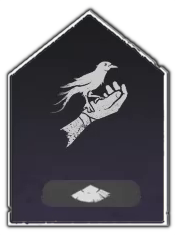
Vernal Umbrella and Inkwell Fan Build
NEW: Hexi Map | Chapter 3 | Flute Mystic Skill
★ Unfettered and Everspring Build
☆ Liangzhou | Cat Fever | Prismatic Essence
✪ Updated: Best Weapon | Best Builds
☆ WWM Game8 Twitter: New tips daily!
Recruit using our Guild Recruitment Board!
This is a build focusing on the Vernal Umbrella and Inkwell Fan Martial Art school in Where Winds Meet. Read on to see a full build guide to these martial arts including its best Inner Ways, Mystic Arts to take, and the best gear set and substats to aim for, updated for Version 1.3.
List of Contents
Vernal Umbrella and Inkwell Fan Build
Build Overview
| Jump Table | |||||
|---|---|---|---|---|---|
| Overview | Martial Arts | Inner Way | |||
| Mystic Arts | Set and Stats | How to Play | |||
| Overview | |
|---|---|
| Martial Arts | |
| Role | DPS |
| Pros and Cons |
|
This Silkbind Jade build in Where Winds Meet is a fast-paced projectile DPS setup focused on layering buffs, stacking Spring Shock, and unleashing boosted charge attacks while rotating quickly enough to maintain near-constant damage bonuses. It rewards clean execution and good positioning, turning your umbrella skills into heavy hitters as long as you keep your buffs active and your rotation tight.
| Date | Changes |
|---|---|
| 2-06-2026 | ・Further optimized the build for Version 1.3. ・Build Overview has been rewritten.. ・Removed Ghost Bind from the main loop as it is now suboptimal. ・Updated Inner Way. ・Reworked Mystic Arts and added dedicated PvP options. ・Updated Stat Priority. ・ Updated Set Gear. ・Updated How to Play and added PvP rotations. |
Martial Arts and Weapons
| Jump Table | |||||
|---|---|---|---|---|---|
| Overview | Martial Arts | Inner Way | |||
| Mystic Arts | Set and Stats | How to Play | |||
| Martial Art | |
|---|---|
|
Path: Silkbind - Jade |
Path: Silkbind - Jade |
Your damage mainly comes from the Vernal Umbrella, especially its charged projectile pressure once you’ve applied your buffs and debuffs. You use the Inkwell Fan to set up key effects (like Peak's Springless Silence into the pursuit heavy for Spring Shock stacks), then swap back to the umbrella to cash out with boosted projectile/charge damage while keeping the rotation tight enough to maintain your stacks and uptime.
How to Unlock All Martial Arts
Best Inner Ways
| Jump Table | |||||
|---|---|---|---|---|---|
| Overview | Martial Arts | Inner Way | |||
| Mystic Arts | Set and Stats | How to Play | |||
| Inner Way | Details |
|---|---|
 Blossom Barrage Blossom Barrage |
Vernal Umbrella's Martial Arts Skill Spring Sorrow can hold up to 2 stacks. Hitting a target applies the Combo effect: Increases Damage taken from the caster's Ballistic Skills by 10% for 8s. Affected Ballistic Skills include: Martial Arts Skill Let Spring Go, Special Skill Everbloom. |
 Morale Chant Morale Chant |
80% chance to gain one stack of Yi River when attacking or healing. Yi River: Increases Physical Damage and healing by 1% for 8 seconds, stacking up to 5 times. The chance to gain Yi River is only calculated once every 2 seconds. |
 Star Reacher Star Reacher |
Gain 10% Physical Attack Bonus for 8 seconds after knocking an enemy airborne. |
 Envigorated Warrior Envigorated Warrior |
Increases all damage and healing done by 5%. This effect is disabled for 5 seconds after being hit. Taking a hit also grants a Cage effect, increasing all damage taken by 5%. |
Morale Chant is a simple, always-on damage increase that requires no special conditions, making it pure value. Blossom Barrage directly enhances Spring Sorrow, improving both its damage contribution and how smoothly it fits into the cycle. Star Reacher became a staple after the update because it now works reliably on bosses, giving you a strong physical attack boost whenever you trigger Lingering Bone during your fan sequence.
Your fourth slot is more flexible and depends on content and gear level. Envigorated Warrior is the strongest general pick once upgraded, offering a steady damage boost without demanding perfect conditions. Fivefold Bleed is easier to level and adds useful crit damage, making it a solid early or mid-progression option. If your damage leans heavily on charge skills, Battle Anthem can pull ahead thanks to its charge damage bonus.
Vernal Umbrella and Inkwell Fan Mystic Arts
| Jump Table | |||||
|---|---|---|---|---|---|
| Overview | Martial Arts | Inner Way | |||
| Mystic Arts | Set and Stats | How to Play | |||
| Stat Group | Recommended Substats |
|---|---|
 Soaring Spin Soaring Spin |
Channel your Qi into a roaring thrust, dealing damage to units along the path. Then suddenly shift stance into a spiraling follow-up strike that catches enemies off-guard. Hitting a target reduces their Healing Received by 60% over 5s. |
 Cloud Steps Cloud Steps |
Stomp on an enemy's shoulder to deal Physical Damage, other Attribute Damage effective against Cavalry and other units with Unstable Poise. |
 Dragon's Breath Dragon's Breath |
Drink to enter Intoxicated. Breath fire with Qi, dealing damage over 2 hits plus Ignition. Gain 15% Damage Reduction and Fortitude. Intoxicated: Lasts 30s. Dragon's Breath and Drunken Poet can be used without drinking. Ignition: Target takes damage every 0.5s for 8s. |
 Drunken Poet Drunken Poet |
Drink deeply to enter the Intoxicated state, imitating the drunken grace of the Poet Immortal. Cast repeatedly for up to 5 strikes, each consuming 6 Vitality. Intoxicated: Lasts 30s. Dragon's Breath and Drunken Poet can be used without drinking. |
Soaring Spin is your gap-closing hammer and part of your rotation; use it to stick to targets that try to disengage or reposition, keeping your pressure relentless. Cloud Steps backs that up with fast, reliable mobility so you can chase, reposition, or instantly swap targets. It’s especially valuable in high-movement encounters against bosses like Sleeping Daoist and Ye Wanshan.
Tag enemies with Dragon’s Breath to apply Burn, then slam straight into Drunken Poet to detonate that damage into a brutal burst window. Together, this combo punches far above its weight and is perfect for shredding elites or chunking bosses between your main rotation cycles.
Though it’s not a must and not part of your main Mystics, you can actually cast Guardian Palm while holding your Charged Umbrella Light Attack, letting you dodge incoming attacks without fully dropping your charge,
Alternative Mystic Arts for PvP
| Stat Group | Recommended Substats |
|---|---|
 Wolflike Frenzy Wolflike Frenzy |
Knock down an enemy, followed with rapid strikes, and finish with an upward swing that disables the target. Effective against Cavalry and other units with Unstable Poise. Unstable Poise: These units have a Stance bar near their HP. Stance-break deals special hit and Physical damage. |
 Serene Breeze Serene Breeze |
Channel Qi into your body to clear blockages in the veins. Can be used while under attack or control effects. On hit, reduces the target's Endurance recovery by 50% and deals damage for 8s. |
 Leaping Toad Leaping Toad |
Flip back to knock back and damage enemies, then lunge to apply Toad Venom. The third cast becomes Golden Toad Crash, a knockdown AoE slam. Toad Venom: Explodes after 5 seconds or on death. Can be Detonated by Lion's Roar. |
 Meridian Touch Meridian Touch |
Chance to immobilize, deal Physical damage, and break Vital Points. Immobilize is ineffective against mighty enemies. Vital Points: These enemies have bound Qi bars. Breaking their Vital Points disables Qi regen, deals extra Physical damage and Qi Damage. |
In PvP, Serene Breeze is non-negotiable. It's your “get off me” button, ripping you out of enemy combos and crowd control so you can instantly reset and flip the momentum back in your favor.
Leaping Toad keeps you slippery and unpredictable, letting you reposition, disengage, apply poison, or knock enemies down when they least expect it. Pair that with Wolflike Frenzy, which brings heavy burst backed by Super Armor, and you suddenly have the green light to go in hard without getting stuffed mid-commit. Add Meridian Touch on top to choke your their Qi recovery.
Vernal Umbrella and Inkwell Fan Set Gear and Stat Priorities
| Jump Table | |||||
|---|---|---|---|---|---|
| Overview | Martial Arts | Inner Way | |||
| Mystic Arts | Set and Stats | How to Play | |||
Set Gear
| Stat Group | Recommended Substats |
|---|---|
 Hawkwing HawkwingWeapon |
2 Set Effect: +0.1% Affinity Rate
4 Set Effect: When any of your damage triggers Affinity, gain Hawkwing: Increases Physical Attack by 2% for 5 seconds, stacking up to 5 times. |
 Flawless Defense Flawless DefenseArmor |
2 Set Effect: +1 Physical Defense
4 Set Effect: Reduces damage taken by 5%. When HP falles below 60%, futher reduces damage taken by 1% for every 10% HP lost, stacking up to 5 times. |
Hawkwing Set is a solid choice for this build because it essentially gives you free damage every time you trigger an affinity hit. Each stack boosts your physical attack by 2% for 5 seconds, stacking up to 5 times for +10% total when you keep landing hits in a fight.
That said, Mistwillow Set is still a very good alternative, offering more consistent and reliable projectile/light attack bonuses without needing to ramp stacks, making it easier to maintain in less stable fights.
You may also consider Ivorybloom because it offers the highest raw damage ceiling by heavily rewarding you for staying at full health, but the downside is that any chip damage drops its bonus, making it risky and less consistent in messy fights or high-damage encounters.
For armor, we're using Flawless Defense set, but Eaglerise is also a good option.
Stat Priority
| 1st | Max Silkbind Attack |
| 2nd | Min Physical Attack |
| 3rd | Affinity Rate |
| 4th | Critical Rate |
| 5th | Agility |
As a ranged build, you want to prioritize as much damage as possible to maximize the safe DPS you're outputting from afar. Attack and Silkbind attack damage are highly valued substats you'll want to aim for when playing the build.
How to Play
| Jump Table | |||||
|---|---|---|---|---|---|
| Overview | Martial Arts | Inner Way | |||
| Mystic Arts | Set and Stats | How to Play | |||
| Silkbind - Deluge Playstyle |
|---|
|
|
Recommended Skill Rotations
- Cast Emerald Barrier with the Inkwell Fan to gain a 15s Projectile Damage buff.
- Swap to Vernal Umbrella and use Spring Sorrow to apply the Projectile Damage taken debuff on the target.
- Hold your Charged Umbrella Light Attack to build up your Blossom meter while dealing projectile damage.
- Once Blossom is full, cast Unfading Flower to throw the umbrella into the air and begin passive projectile pressure.
- Swap to Inkwell Fan and cast Peak's Springless Silence to apply Lingering Bone and trigger your Inner Way bonuses.
- Immediately follow with your Fan Heavy (Pursuit Attack) to gain Spring Shock stacks and a Charge Skill Damage buff.
- Use Soaring Spin (Mystic Skill) for high damage and to continue your buff window.
- Use Leaping Toad to reposition and extend your rotation flow.
- Animation cancel Leaping Toad with Emerald Barrier to refresh your Projectile Damage buff and restart the loop.
Jadewind Shield has a short I-Frame for Dodging Hits
The Jadewind Shield, which is your wind barrier, has a short I-Frame (Invincibility Frame) that lets you avoid being hit on use. It has a very precise timing, but mastering its timing will give you an additional safety option and a potential combo setup for your projectiles.
Set Enemies Airborne Then Follow it Up For Bonus Damage
After throwing enemies airborne with Peak's Springless Silence, you will be able to activate Windrider, which empowers your follow up skills.
Master the Dragon's Breath → Drunken Poet Combo
While not part of the main DPS rotation, the Dragon’s Breath → Drunken Poet combo is still a strong situational option. It works especially well after landing an execution, giving you a safe window to add extra pressure before returning to your standard loop.
To keep the combo practical, you can animation-cancel Dragon’s Breath as soon as the Burn is applied. This lets you transition more quickly into Drunken Poet or reposition if needed, particularly in PvP, where long animations can easily get you interrupted.
Cast Guardian Palm While Holding Spring Away
Though it's a bit niche and not a must as a Mystic Skill, you can actually cast Guardian Palm while holding your Charged Umbrella Light Attack Spring Away, letting you dodge incoming attacks without fully dropping your charge. It’s a handy trick for maintaining pressure while slipping past an enemy’s engage, especially when you’re expecting them to dive you mid-channel. It's useful against bosses like Tian Ying!
Guardian Palm Mystic Skill Effect and How to Unlock
PvP Tips and Tricks
In PvP, this build is all about taking it slow and using your abilities at the right moments, it thrives on a calculated, patient approach rather than reckless aggression. Your strength comes from controlling space with the Umbrella, forcing opponents to fight through constant projectile pressure while you stay just out of reach.
- You have two main playstyles in PvP, and you’ll usually mix both. You can play slow and ranged, using the Fan to fish for a stun and then cashing out with Spring Away (Charged Light) for big damage. Or you can play hit-and-run, leaning on Peak's Springless Silence for burst while poking with the Umbrella between cooldowns. Adapt based on how your opponent reacts.
- This build is strongest when you avoid direct brawling. You choose when to engage. Use parries, dodges, and Jadewind Shield to stall until you find a safe opening. Don’t rush damage, force your opponent to overcommit first.
- Try to make opponents use Cloud Steps before you go for Spring Away, since it can knock you out of the animation. Likewise, watch for Serene Breeze after you land a stun; good players will break out and try to parry your follow-up shots.
- Control space with the Umbrella. Treat Unfading Flower like a zoning tool as it keeps pressure on opponents while you reposition, refresh buffs, or bait dodges. Many PvP wins come from enemies panicking into bad approaches.
- Don't overtrust Jadewind Shield. It’s strong, but not absolute. Some abilities and animation momentum can slip around it. Keep moving and stay ready to dodge; the shield is a tool, not invincibility.
- Your biggest weakness is relentless aggression. If someone stays glued to you and doesn’t give space, the fight becomes much harder. This is where your parry timing, defensive mystics, and smart disengages matter most.
- Animation-cancel aggressively. Cancel Dragon’s Breath once Burn is applied, cancel Leaping Toad into Emerald Barrier, and keep transitions tight. Long animations are the main way this build gets punished.
- Executions give you a brief breathing window. After landing an execution, you can safely use Dragon’s Breath → Drunken Poet or re-establish Emerald Barrier and Spring Sorrow without pressure.
- If you get caught in an enemy combo, use Serene Breeze to break free from crowd control and regain control of the fight.
- Again, you win by patience, not burst greed. You are strongest when buffs are stacked and pressure is constant, overcommitting for a kill is how opponents flip the fight on you.
- Mystic skills are defensive tools first. Cloud Steps is mandatory for gap control and disengage, while Serene Breeze lets you break combos and reset when things go wrong. Don’t treat them as pure damage buttons. Surprise enemies with Wolflike Frenzy.
- Against other Vernal Umbrella users, parry their Spring Away shots until they land, or use Cloud Steps to force them down and remove their advantage.
Where Winds Meet Related Guides


Comment
umm thats not the most efficient combo..no wonder u put it in lowest tier. start with fan - shield - knock up and follow(triggered both inner art and passive) - swap to umbrella - shoot stun twice - charge airborne projectiles - open umbrella - stomp - palm - switch back to fan - repeat combo.
Author

Vernal Umbrella and Inkwell Fan Build
Rankings
- We could not find the message board you were looking for.
Gaming News

![Marathon Cryo Archive Map Teased as [REDACTED] on Selection Screen](https://img.game8.co/4442236/6357203e58172f6de57f1991e7c39b22.png/show)


Popular Games

Genshin Impact Walkthrough & Guides Wiki
Umamusume: Pretty Derby Walkthrough & Guides Wiki
Pokemon Pokopia Walkthrough & Guides Wiki
Honkai: Star Rail Walkthrough & Guides Wiki
Monster Hunter Stories 3: Twisted Reflection Walkthrough & Guides Wiki
Arknights: Endfield Walkthrough & Guides Wiki
Wuthering Waves Walkthrough & Guides Wiki
Zenless Zone Zero Walkthrough & Guides Wiki
Pokemon TCG Pocket (PTCGP) Strategies & Guides Wiki
Monster Hunter Wilds Walkthrough & Guides Wiki


Recommended Games
Diablo 4: Vessel of Hatred Walkthrough & Guides Wiki
Cyberpunk 2077: Ultimate Edition Walkthrough & Guides Wiki
Fire Emblem Heroes (FEH) Walkthrough & Guides Wiki
Yu-Gi-Oh! Master Duel Walkthrough & Guides Wiki
Super Smash Bros. Ultimate Walkthrough & Guides Wiki
Pokemon Brilliant Diamond and Shining Pearl (BDSP) Walkthrough & Guides Wiki
Elden Ring Shadow of the Erdtree Walkthrough & Guides Wiki
Monster Hunter World Walkthrough & Guides Wiki
The Legend of Zelda: Tears of the Kingdom Walkthrough & Guides Wiki
Persona 3 Reload Walkthrough & Guides Wiki


All rights reserved
©1997-2025 NetEase, Inc. All Rights Reserved
The copyrights of videos of games used in our content and other intellectual property rights belong to the provider of the game.
The contents we provide on this site were created personally by members of the Game8 editorial department.
We refuse the right to reuse or repost content taken without our permission such as data or images to other sites.
This should be amongst the top tiers