Tomb Mistveil Prison Dungeon Guide and All Chest Locations
NEW: Hexi Map | Chapter 3 | Flute Mystic Skill
★ Unfettered and Everspring Build
☆ Liangzhou | Cat Fever | Prismatic Essence
✪ Updated: Best Weapon | Best Builds
☆ WWM Game8 Twitter: New tips daily!
Recruit using our Guild Recruitment Board!
Tomb Mistveil Prison is a Mysterious Stage released with the 1.2 Live to Game Update of Where Winds Meet. Learn how to get all chests in the Tomb Mistveil Prison here!
| All Mistveil Guides | |
|---|---|
| Mist-Shrouded Prison | Tomb Mistveil Prison |
| Mistveil City (Cascading Water Ruins) | |
 Attention! |
We are currently rushing out guides as quickly as possible. More details will be added here soon! |
|---|
 under the page's title to be notified of any updates!
List of Contents
Tomb Mistveil Prison Chest Locations
Chest 1 Location
| 1.1 | 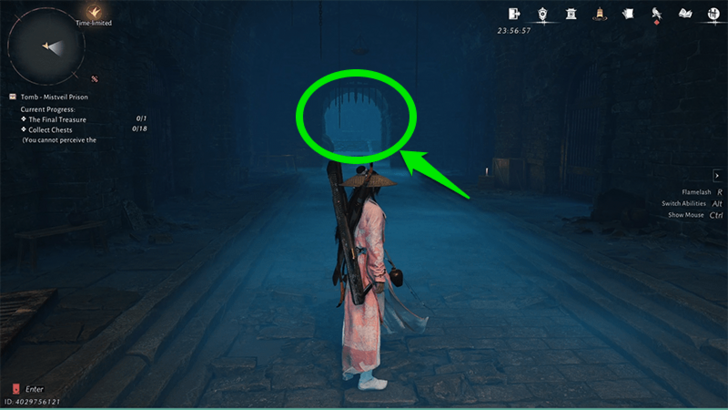 Head left from where you spawned in the dungeon towards a room with a note on the table, then head left again. Go upstairs then take the elevator down. |
|---|---|
| 1.2 | 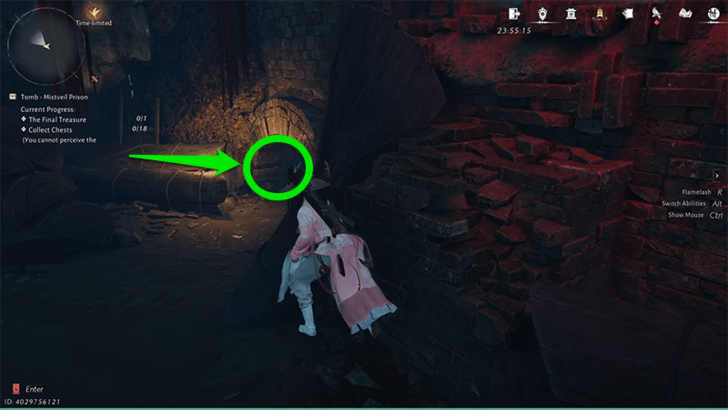 Keep going forward then left yourself drop down a floor. Turn around and crouch into the small hole. |
| 1.3 | 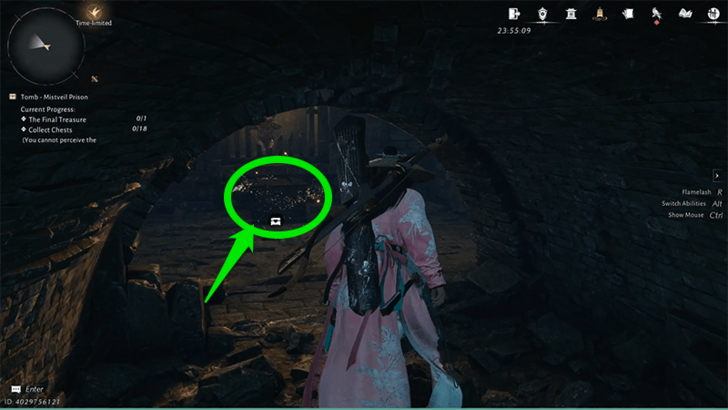 Get the chest at the end of the small crawl space. |
Chest 2 Location
| 2.1 | 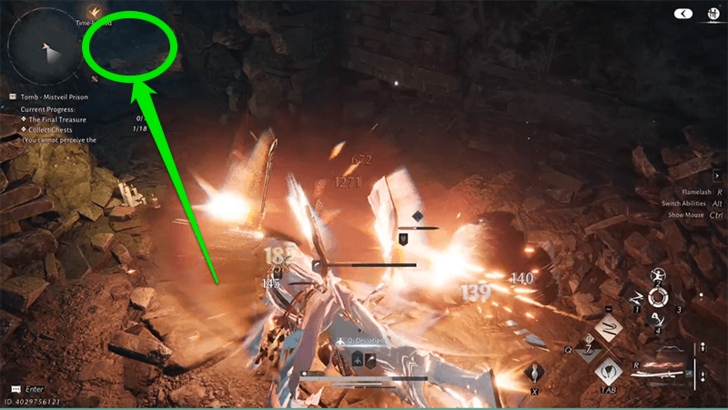 Once you get the first chest, the ground will cave in and rats will start attacking you. Defeat the rats. |
|---|---|
| 2.2 | 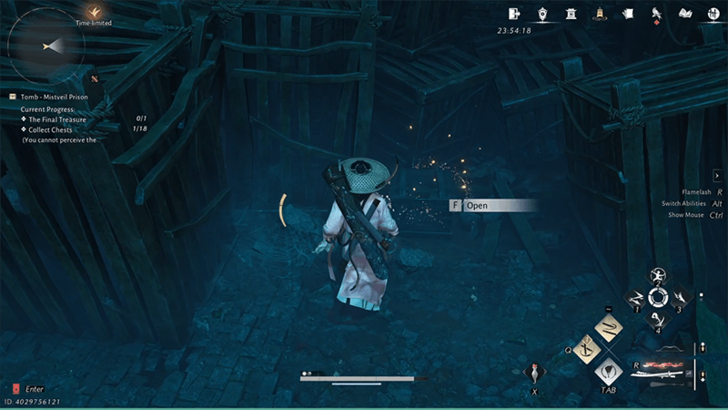 Go straight from the tuinnel towards the chest at the end of the room. |
Chest 3 Location
| 3.1 | 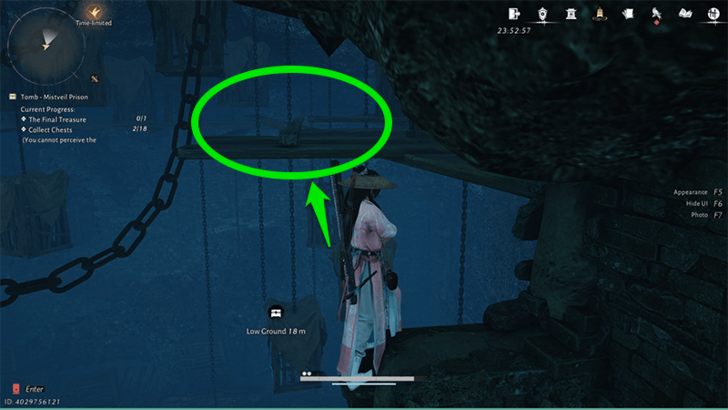 From the second chest, turn around and go up through the left tunnel. Climb the ladder then walk towards the catwalk. |
|---|---|
| 3.2 | 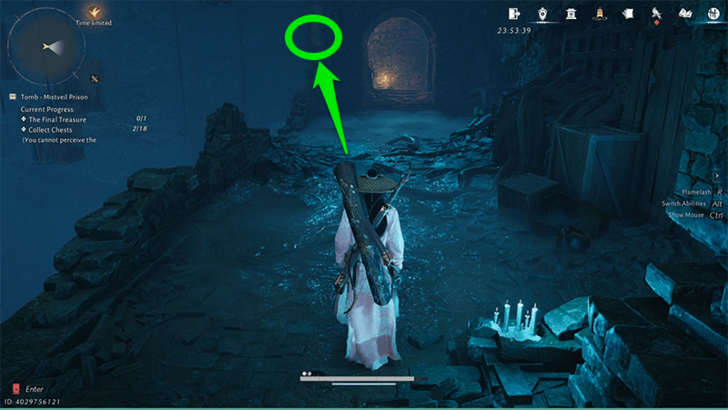 Walk on the edge of the catwalk and up the wall's small ledge. |
| 3.3 |  From the ledge, jump towards the wooden beams. |
| 3.4 | 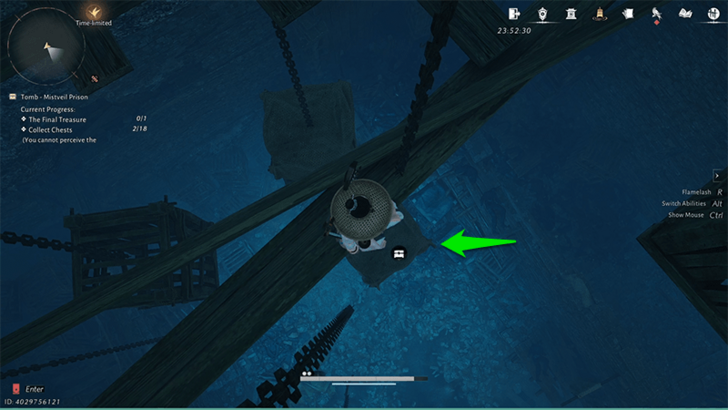 On the wooden beams, then let yourself fall onto the hanging cage where the chest is. |
Chest 4 Location
| 4.1 | 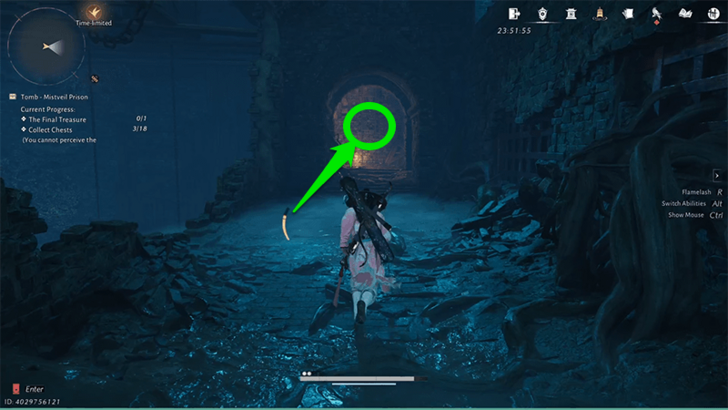 Fall from the hanging cage to the bottom floor again, then enter the left tunnel again up then climb the two ladders. |
|---|---|
| 4.2 | 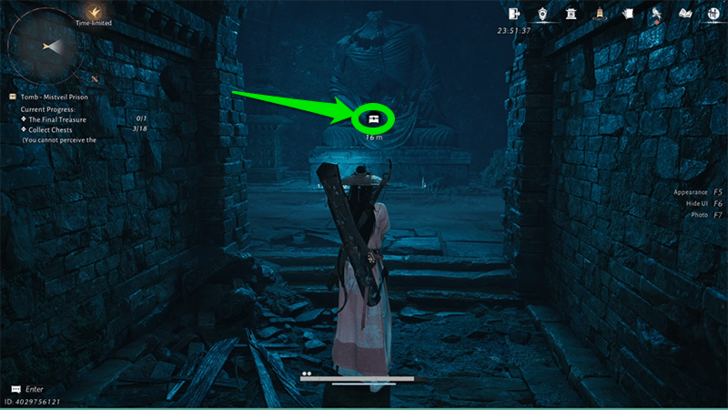 Grab the chest from the hands of the statue. Be careful not to step on the pressure plate in front of it to avoid getting hurt. |
Chest 5 Location
| 5.1 | 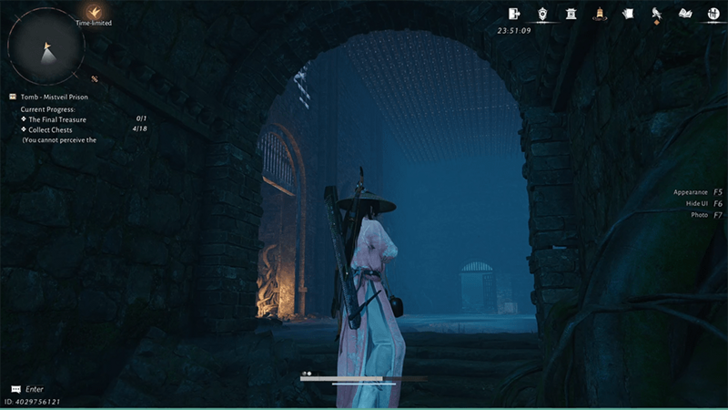 From the previous chest, head to the right pathway towards the next room. Be careful not to run too far into the room to avoid dying by the ceiling spikes. |
|---|---|
| 5.2 | 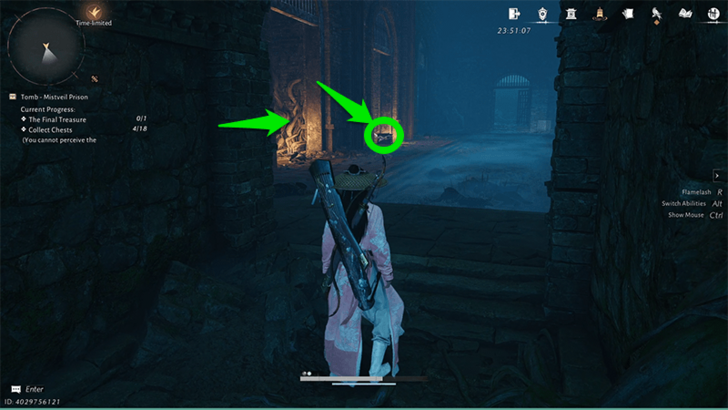 With the right timing, run towards the first left alcove. After the spikes fall again, run to the middle left alcove to get the chest. |
Chest 6 Location
| 6.1 | 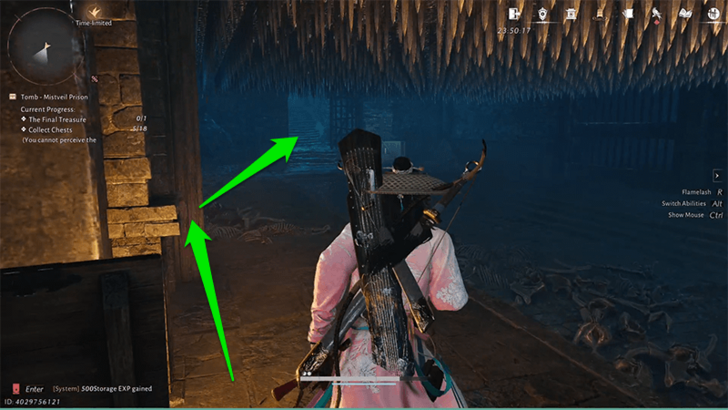 From the previous chest, run towards the third left alcove then towards the path behind the metal doors between the ceiling spike falls. |
|---|---|
| 6.2 | 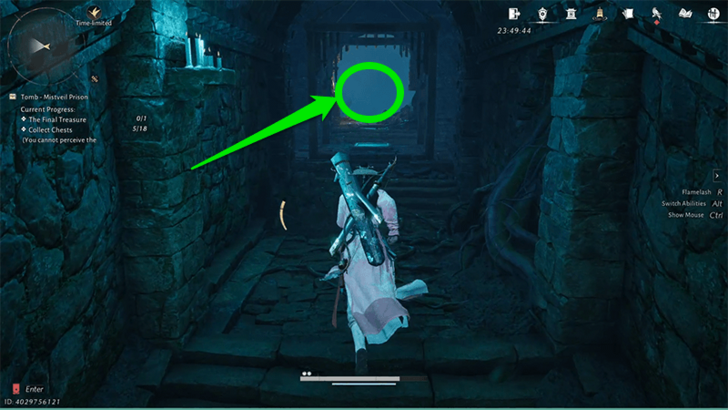 Head up the stairs on the right, then go past the elevator towards the middle. |
| 6.3 | 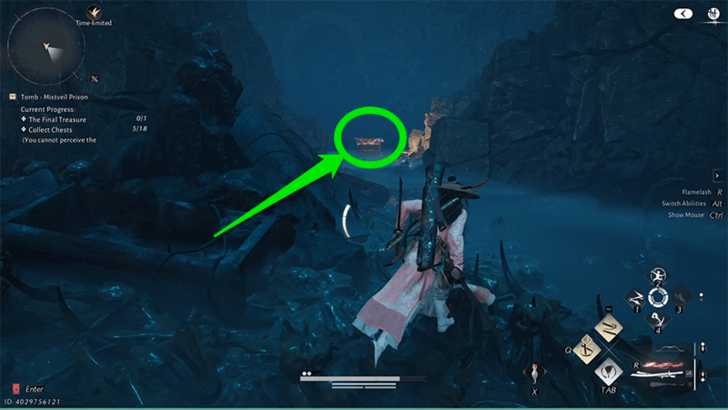 Then make a U-turn to the left where you'll see another chest. When walking up to the chest, two small rats and a big rat will spawn. Defeat the rats and get the chest. |
Chest 7 Location
| 7.1 | 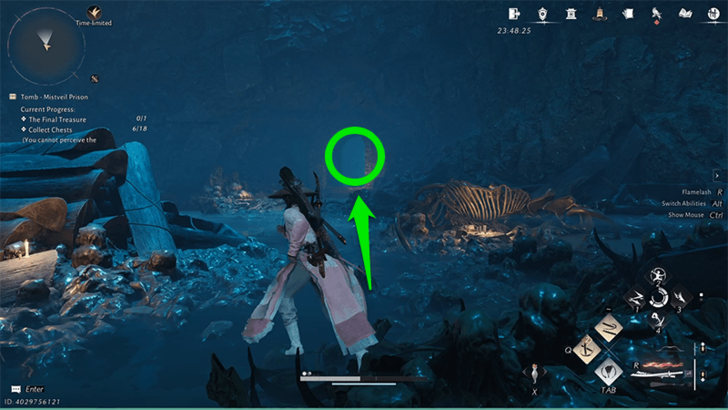 From the previous chest, turn around and enter the tunnel on the right. |
|---|---|
| 7.2 | 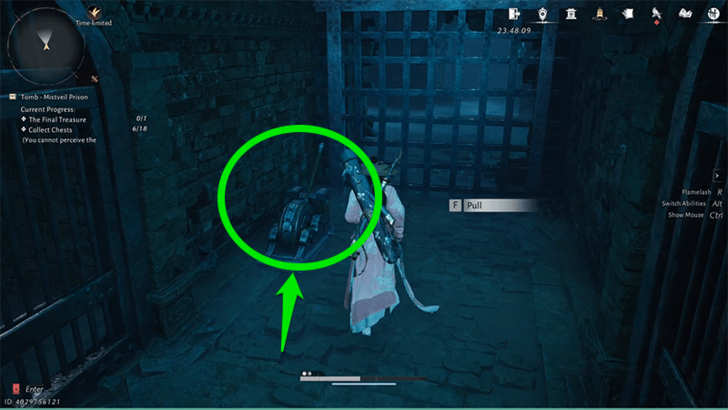 Open the metal gate by pulling the lever. This will lead you to the room with the note on the table. You will use this pathway later on. |
| 7.3 | 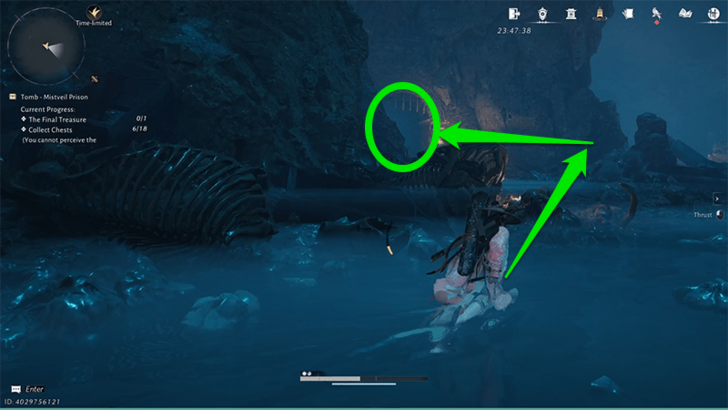 Then go back to the previous room, and enter the left tunnel and go up the elevator. |
| 7.4 | 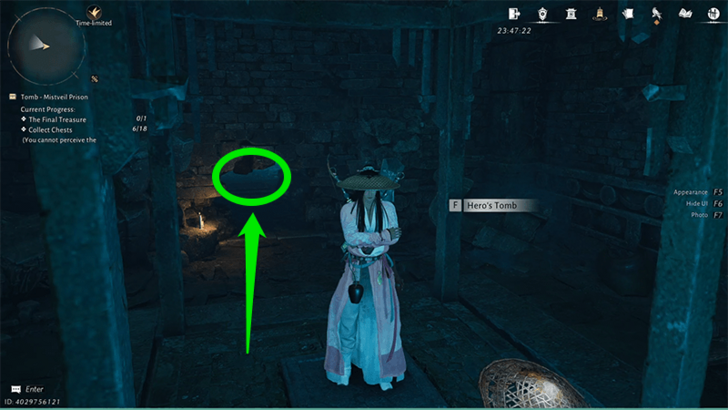 Then go back to the previous room, and enter the left tunnel and go up the elevator. Push the pressure plate once. |
| 7.5 | 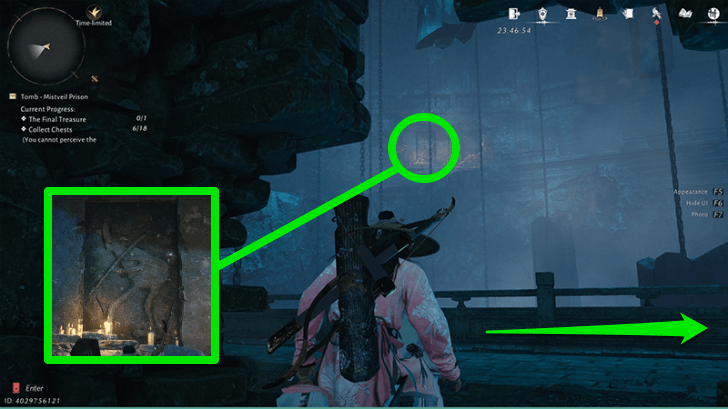 When you see the turning slab land on the creature with a stick, exit the hole and head right. |
| 7.6 | 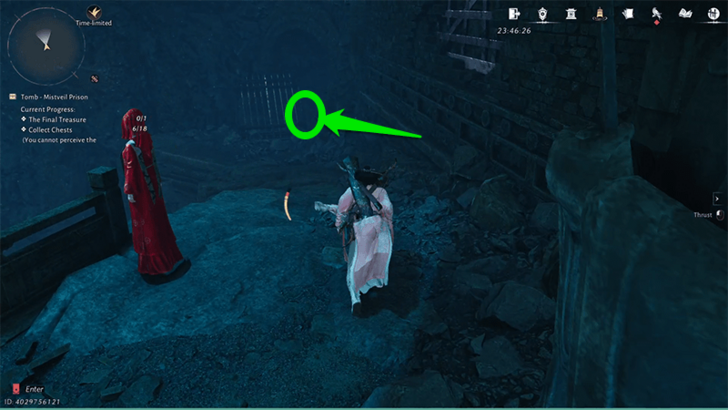 Go past the Lady in Red and get the chest in the corner. |
Chest 8 Location
| 8.1 | 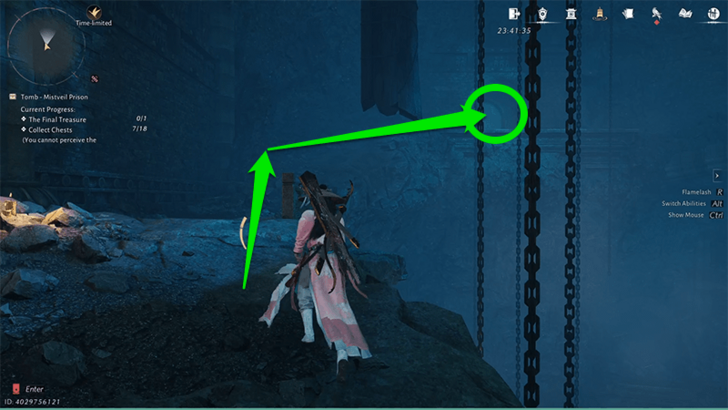 Go past the Lady in Red again, and go up the spiral slope and enter the room at the top. |
|---|---|
| 8.2 | 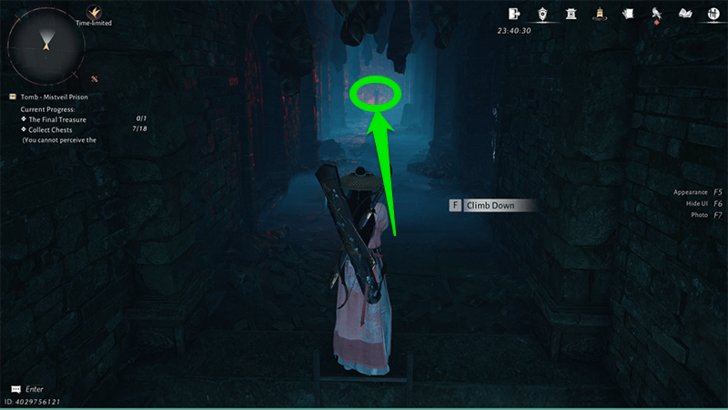 In the top room, go down the hole and follow the path. Go up the ladder until you see the Lady in Red at the end of the hallway. |
| 8.3 | 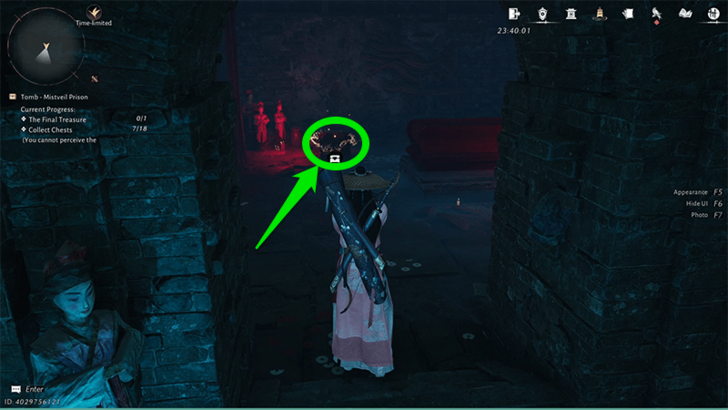 The Lady in Red will disappear once you walk up to her. Make two lefts and head straight for the chest beside the open coffin. |
Chest 9 Location
| 9.1 | 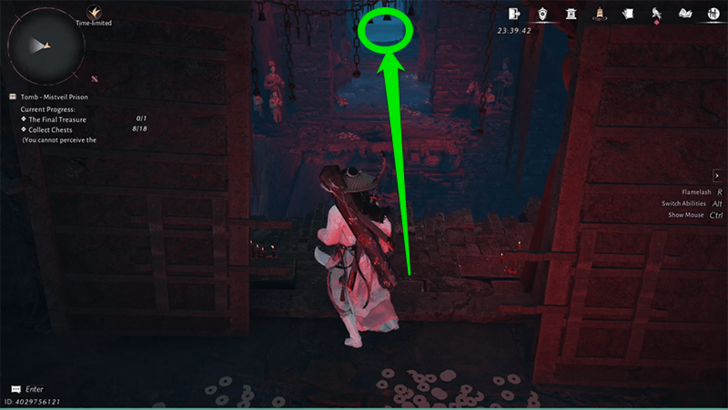 Head to the right and jump over the gap to go to the next room. |
|---|---|
| 9.2 | 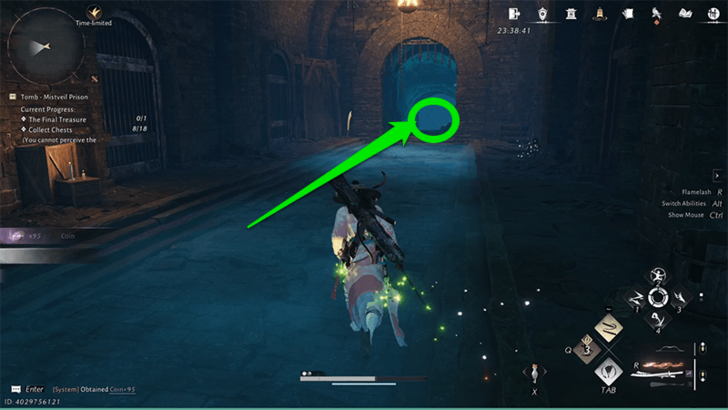 Defeat the enemies in this room and head downward to the room with the note on the table. |
| 9.3 | 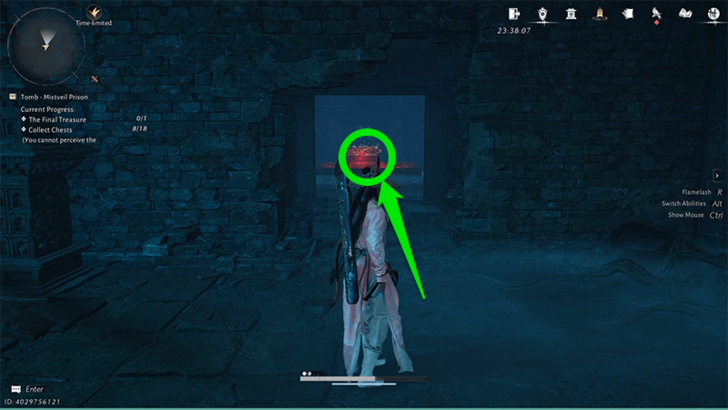 Make a right into the broken wall and get the chest in the middle of the next room. |
Chest 10 Location
| 10.1 | 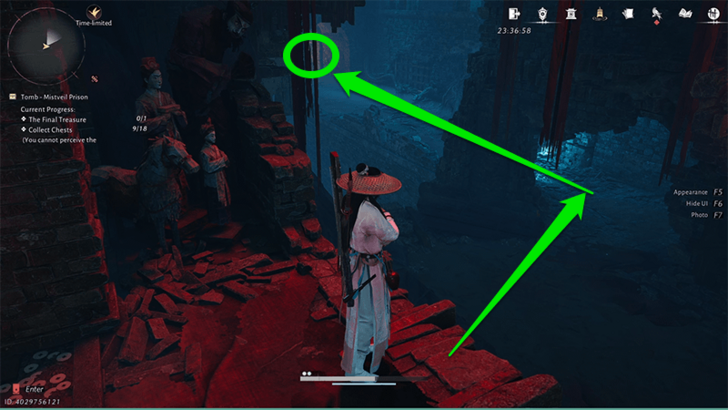 From the previous chest, turn around and go back to the gap. Go towards the catwalk, then climb the ladder at the end. |
|---|---|
| 10.2 | 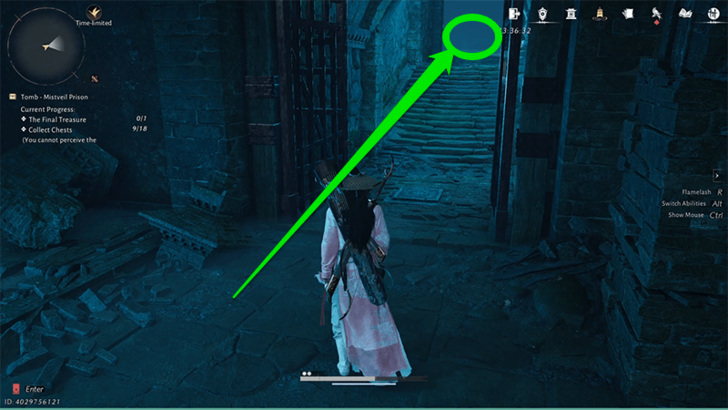 Face right towards the metal doors, and go up the stairs. Be careful of the pressure plate. |
| 10.3 | 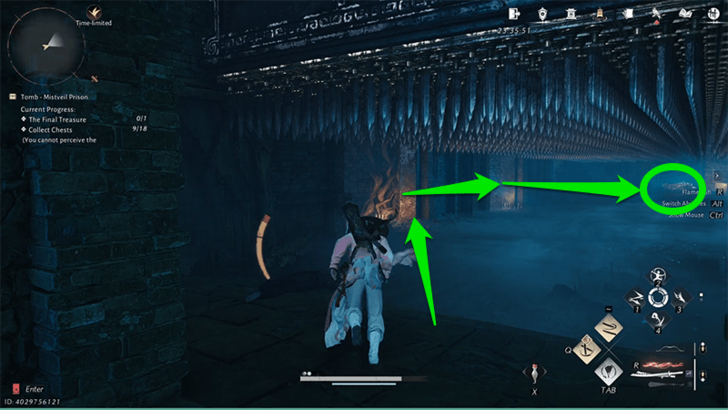 You find yourself in the room with the ceiling spikes again. Use the alcoves on the left, ignoring the Lady in Red in the middle one, to reach the chest at the end. |
Chest 11 Location
| 11.1 | 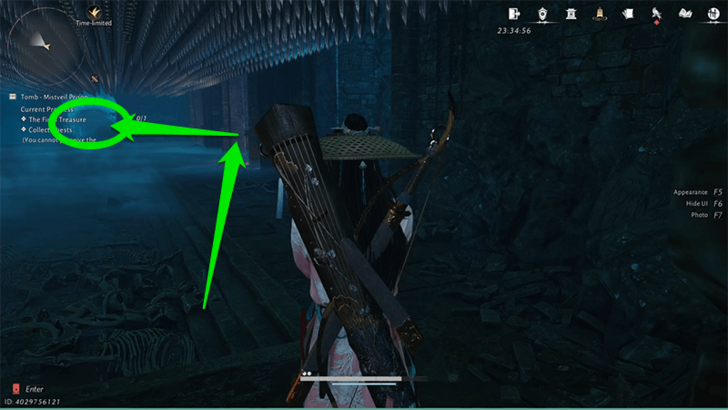 From the previous chest, turn back around and exit the room with the ceiling spikes. |
|---|---|
| 11.2 | 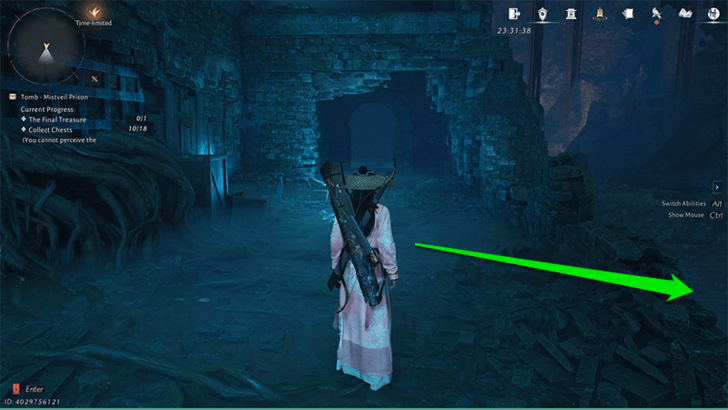 Head left back to the room with the pressure plate and go down the side of the catwalk. |
| 11.3 | 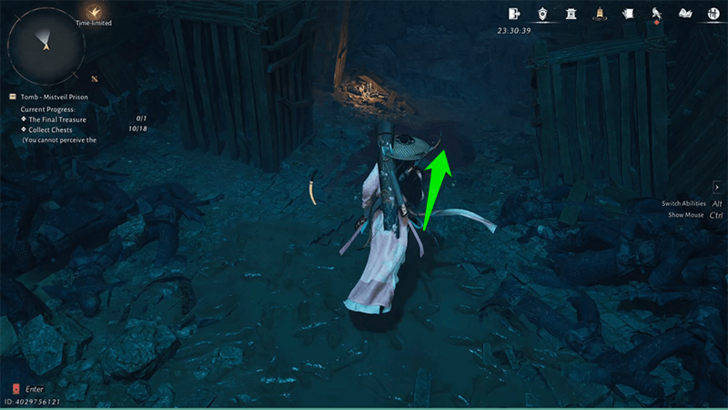 Head straight to the end of the room on the right then jump down the hole. Continue until you see the next open room and defeat three rats. |
| 11.4 | 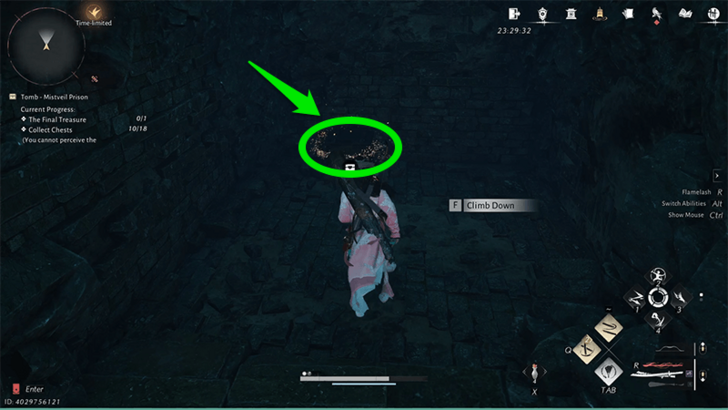 After defeating the rats, climb the ladder and get the chest. |
Chest 12 Location
| 12.1 | 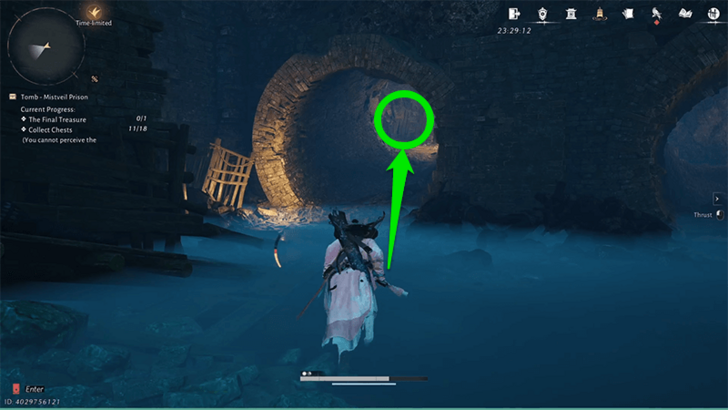 After claiming the previous chest, the ground will break. You can exit the tunnel, then go into the left tunnel. Go up the ladder again. |
|---|---|
| 12.2 | 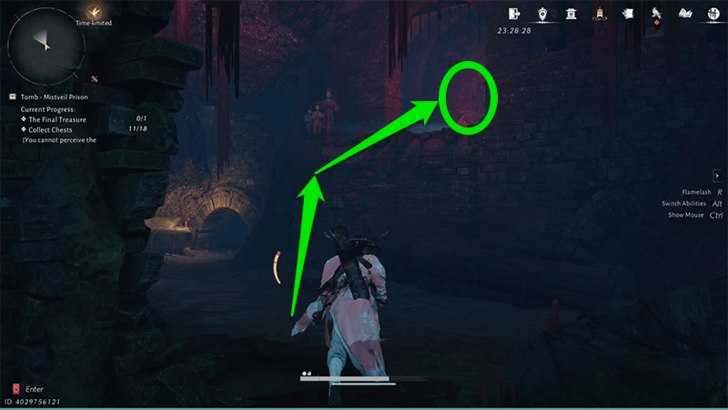 Turn to the left and jump up to the red hallway. Take the elevator up and walk straight through the hallway to return to the room with the note on the table. |
| 12.3 | 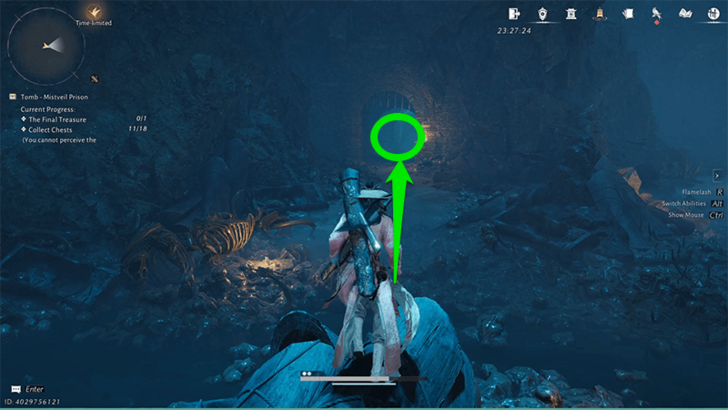 Keep walking straight past the table and exit into the open area. Face left and go into the tunnel. |
| 12.4 |  Activate the lever in the room and take the elevator up. Push the pressure plate once and wait until the turning slab shows a fish symbol. |
| 12.5 | 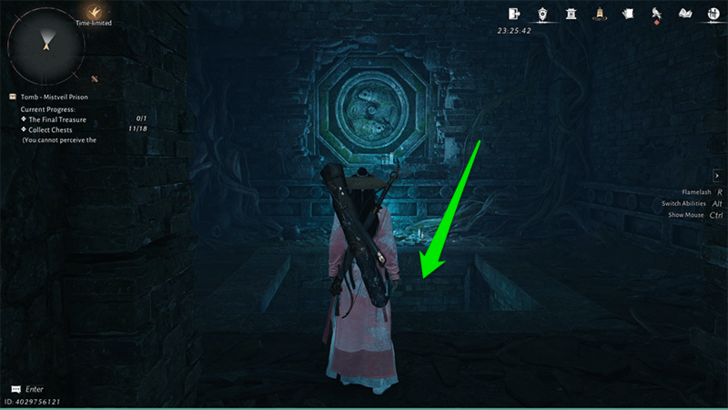 Go up the slope on the left towards the top room and down the hole. |
| 12.6 | 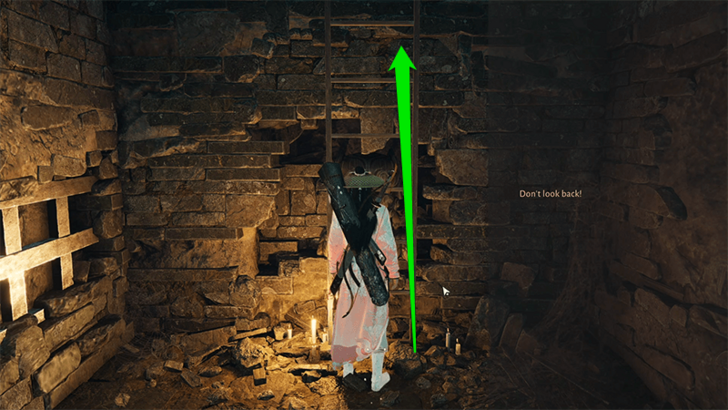 Walk towards the ladder then read the note. After reading, climb up the ladder and don't look back. If you look behind you, the Lady in Red will automatically catch up to you and eliminate you. |
| 12.7 | 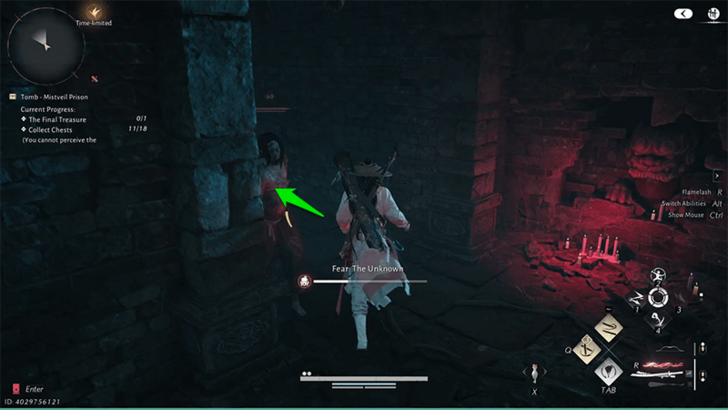 Run as fast as you can from the ladder to get rid of the Fear: The Unknown. At the end of the hallway, defeat the enemy to your left. |
| 12.8 | 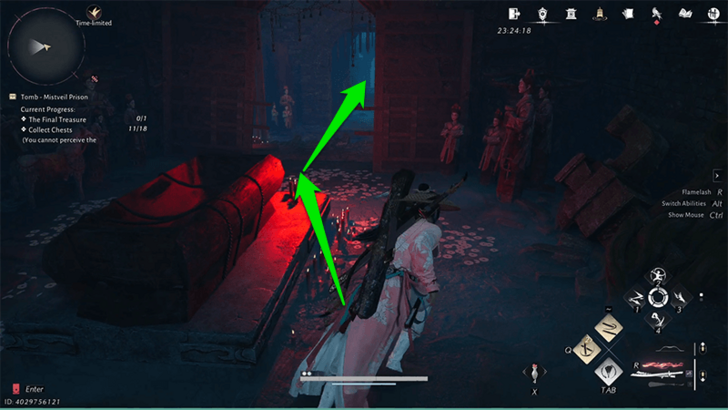 Go toward the room with the coffin, turn right, and jump the gap. |
| 12.9 | 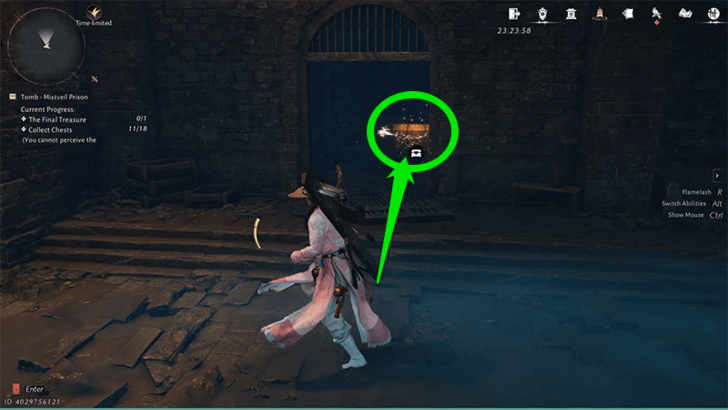 Continue moving forward until you see the chest on the third right alcove. |
Chest 13 Location
| 13.1 | 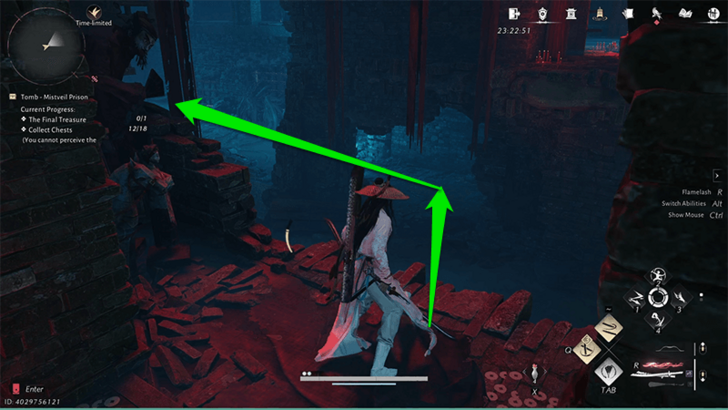 From the previous chest, go back up the stairs and back to the gap. Climb the ladder to the left of the catwalk. |
|---|---|
| 13.2 | 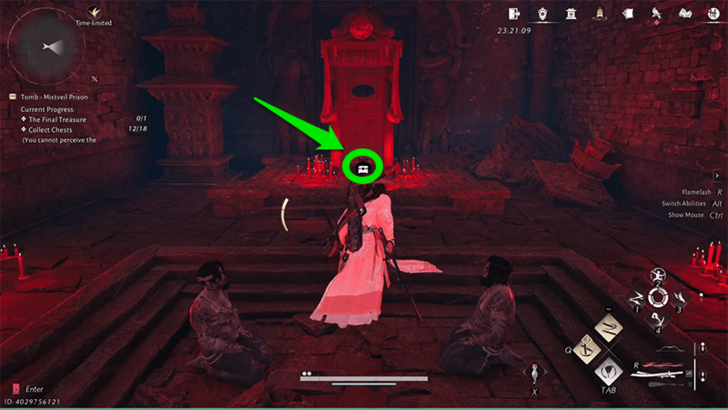 Go right from the position of the Lady in Red, and get the chest in the red room. |
Chest 14 Location
| 14.1 | 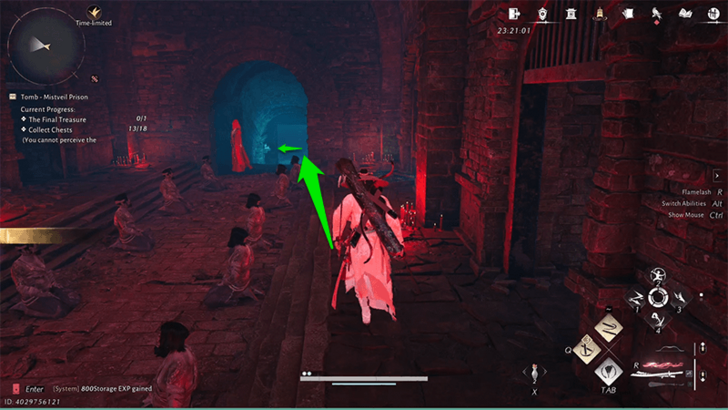 From the previous chest, exit the room while carefully avoiding the Lady in Red and doding the fire arrows while leaving the next room. |
|---|---|
| 14.2 | 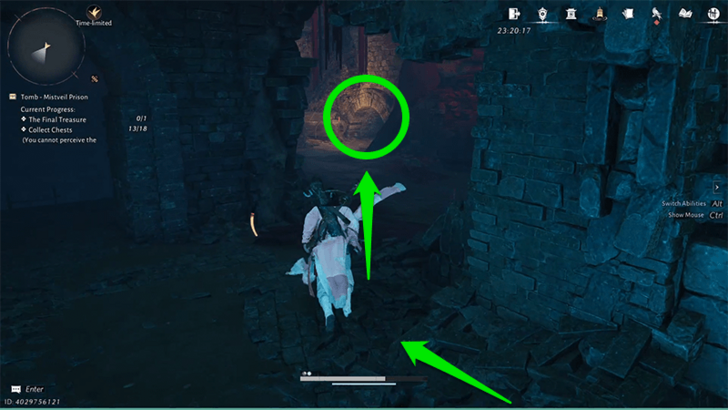 Climb down the ladder then walk along the catwalk towards the gap. Enter the small hole again. |
| 14.3 | 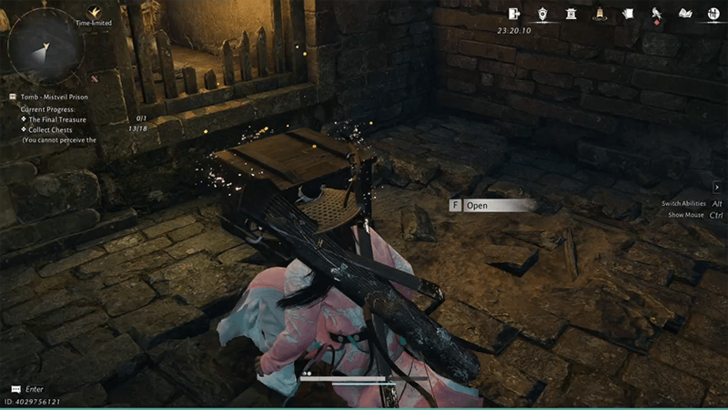 Another chest can be opened here, but the ground will not break anymore. |
Chest 15 Location
| 15.1 | 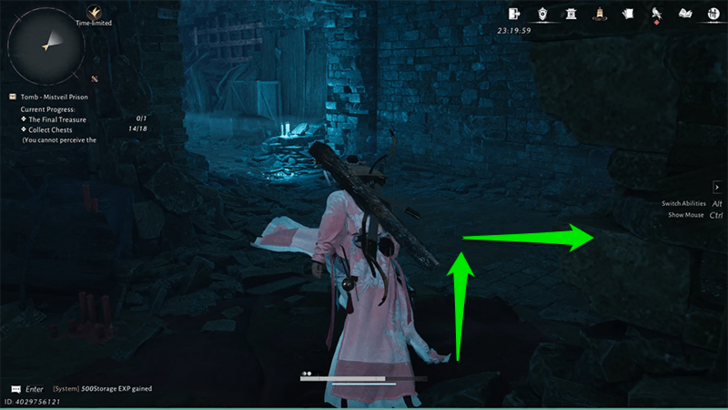 Exit the the small hole, then go down the ladder to the right. |
|---|---|
| 15.2 |  At the bottom of the ladder, you fill find another chest. |
Chest 16 Location
| 16.1 | 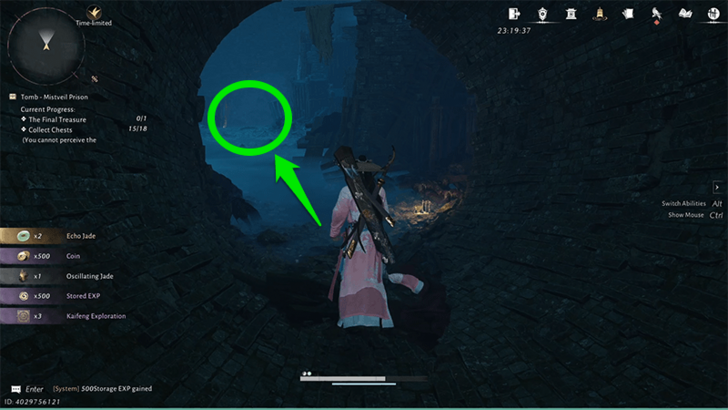 Exit the tunnel and descend the hole at the end of the bottom floor. |
|---|---|
| 16.2 | 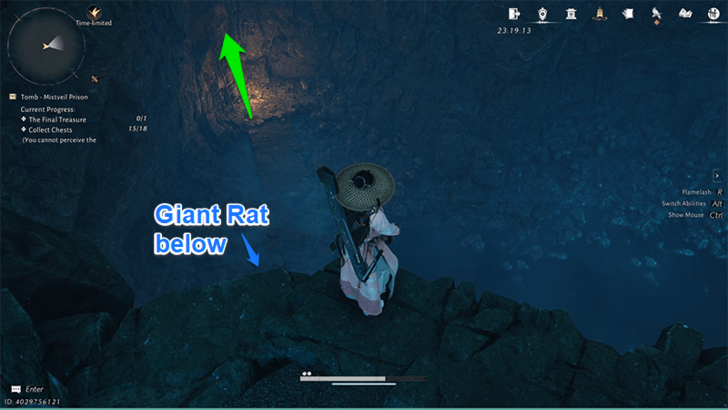 As you enter the open area, make your way towards the ladder at the end. You can choose to fight the giant rat below, or jump over it to avoid combat. |
| 16.3 | 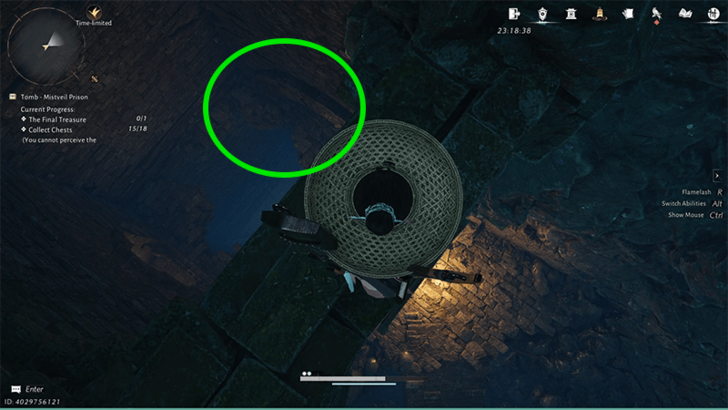 Drop onto the ledge to the right and crouch towards the exit of the small hole. |
| 16.4 | 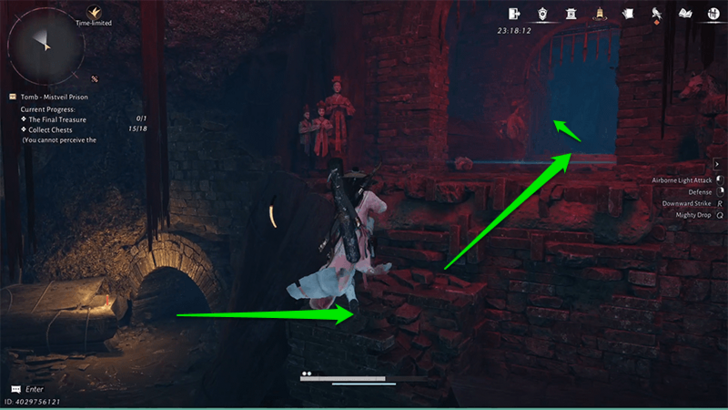 Jump towards the right hallway and take the elevator at the end to go up a floor. |
| 16.5 | 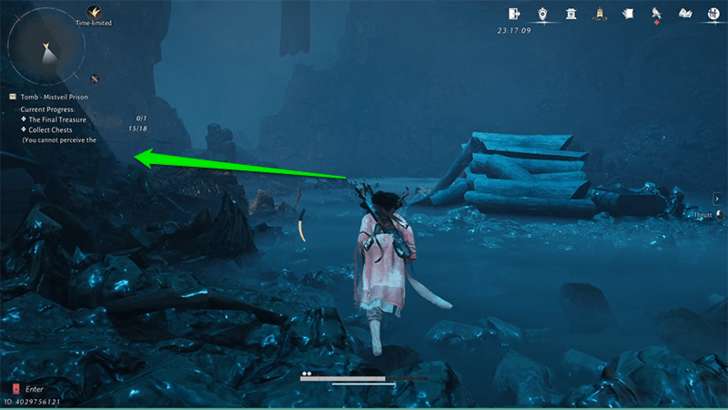 Walk to the very end of the hallway until you see the pile of coffins again. Take a left into the tunnel and take the elevator up. |
| 16.6 | 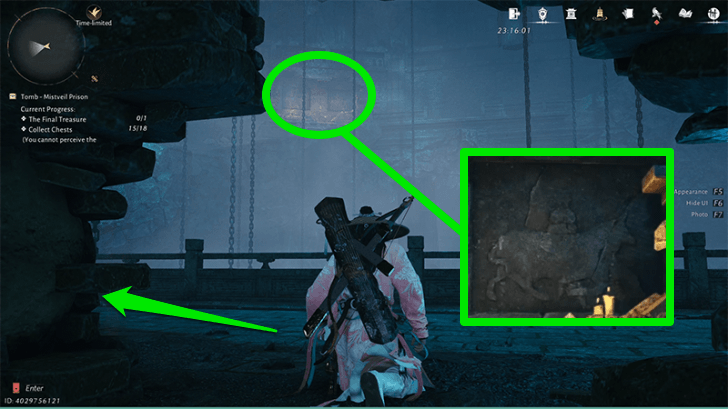 Push the pressure plate twice and wait until the turning slab shows a cow-like symbol. Go up the slope on the left again. |
| 16.7 | 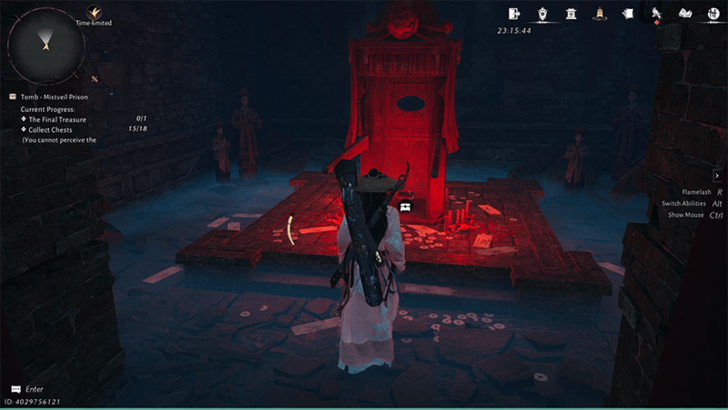 At the top, you will find a chest inside the red room. Take the chest and exit immediately to avoid the Lady in Red. |
Chest 17 Location
| 17.1 | 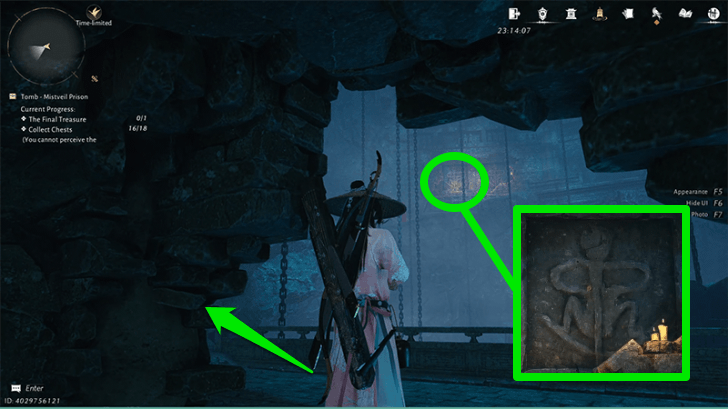 Return to the pressure plate and press it three times until the turning slab shows a meditation-like symbol. Go up the left slope again, quickly passing by the Lady in Red. |
|---|---|
| 17.2 | 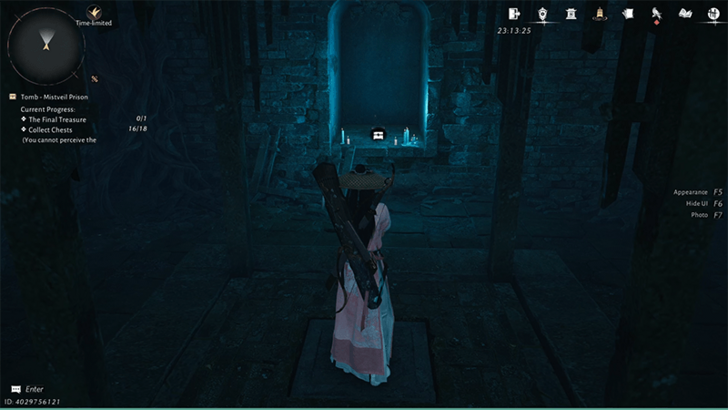 Take the elevator down and find the chest on a small shelf in front of you. |
Chest 18 Location
| 18.1 | 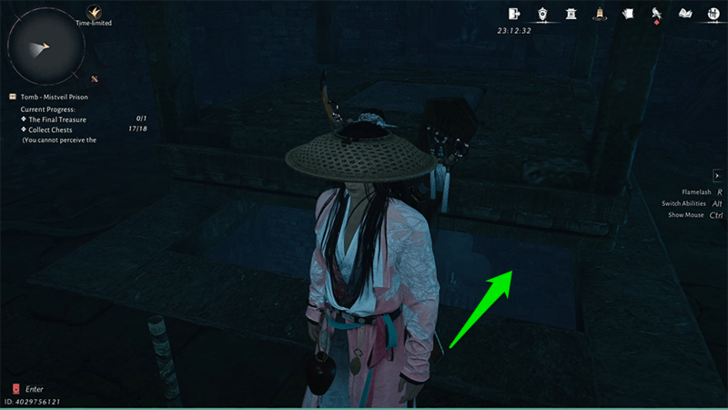 Activate the elevator and immediately hop off to reveal a hidden area below. |
|---|---|
| 18.2 | 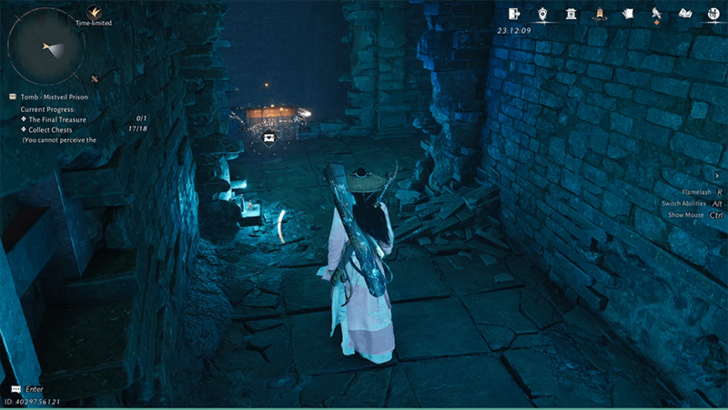 Jump down and take the ladder at the end of the hallway. Keep following the path until you reach the chest. |
Final Chest Location
| 19.1 | 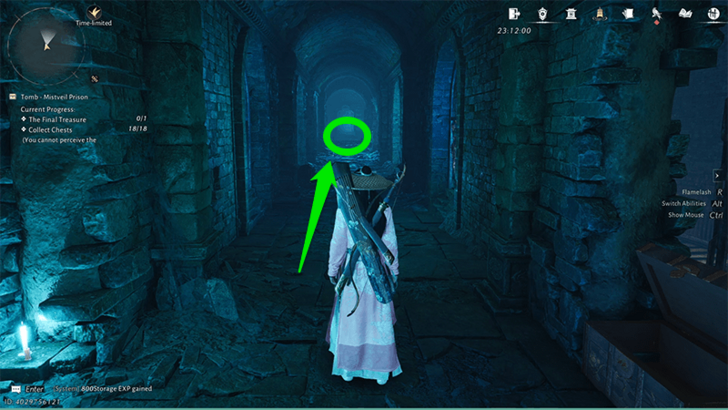 To reach the final chest, go down the ladder at the end of the hallway and follow the path until you reach the room with the red coffin. |
|---|---|
| 19.2 | 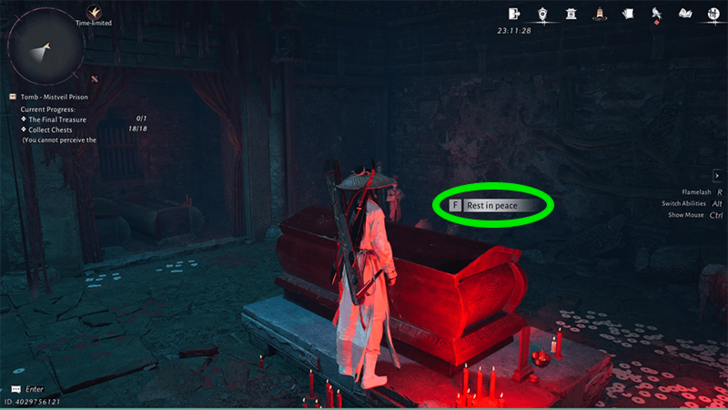 Perform the 'Rest in peace' interaction with the coffin to make sure that the Lady in Red will not block the exit at the end. |
| 19.3 | 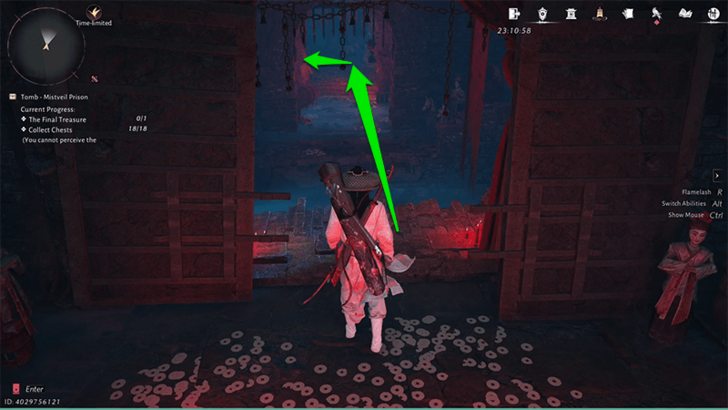 Jump the gap and take the elevator on the left again. |
| 19.4 | 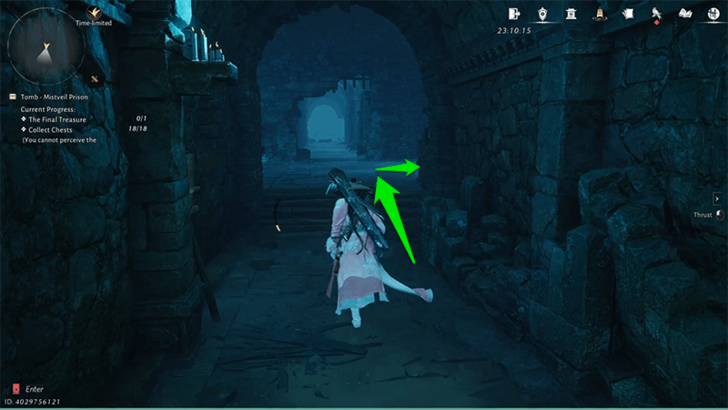 Follow the path towards the room with the note on the table then go right. |
| 19.5 | 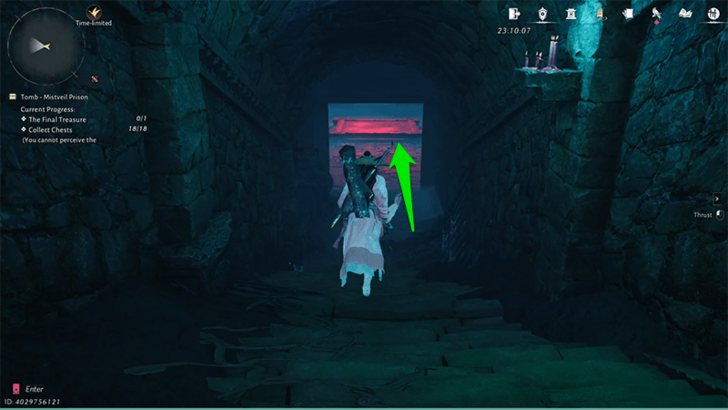 Continue through the hallway until you go down a set of stairs. The red pedestal is where the Lady in Red used to stand when you first spawned in the dungeon. |
| 19.6 | 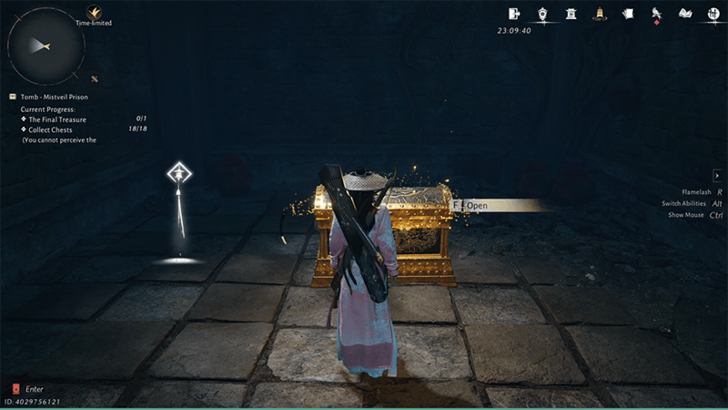 Go past the pedestal to exit the room, then keep walking the path to reach the final chest. Use the bell icon on the left of the chest to leave the dungeon. |
Tomb Mistveil Prison Rewards
First Clear Rewards
| ・Echo Jade x25 ・Coin x18000 ・Kaifeng Exploration x25 ・Ebony Bone x1 ・EXP x27000 ・Medicinal Tales x2 |
These are the one-time rewards for completing the challenges of the Tomb Mistveil Prison Dungeon.
Tomb Mistveil Prison Location
Inside Tomb Mistveil Forest
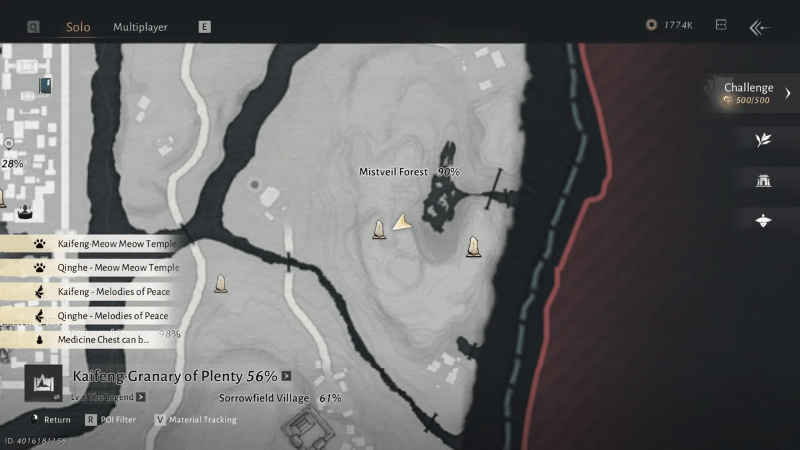
Tomb Mistveil Prison is found within Mistveil Forest. Unless you've completed The Ephemeral Blight first, you will not be able to explore Mistveil Forest unaffected by the poison mist. Additionally, you must first complete the Tomb Mistveil Prison Divinecraft Dungeon before accessing this area.
If you exit the stage midway, you can re-enter through the guidepost. Exiting will not result in lost progress and can be resumed any time you re-enter the stage.
Where Winds Meet Related Guides
All Dungeons
Comment
the ledge is in the hole. With the ladder at your back, edge to the right of the space and carefully drop down from there.
Author

Tomb Mistveil Prison Dungeon Guide and All Chest Locations
Rankings
- We could not find the message board you were looking for.
Gaming News

![Death Stranding 2: On The Beach [PC] Review | A Port That Delivers](https://img.game8.co/4447392/15310a0c9aa1b6843bb713b2ea216930.jpeg/show)


Popular Games

Genshin Impact Walkthrough & Guides Wiki
Umamusume: Pretty Derby Walkthrough & Guides Wiki
Crimson Desert Walkthrough & Guides Wiki
Monster Hunter Stories 3: Twisted Reflection Walkthrough & Guides Wiki
Honkai: Star Rail Walkthrough & Guides Wiki
Pokemon Pokopia Walkthrough & Guides Wiki
The Seven Deadly Sins: Origin Walkthrough & Guides Wiki
Wuthering Waves Walkthrough & Guides Wiki
Zenless Zone Zero Walkthrough & Guides Wiki
Arknights: Endfield Walkthrough & Guides Wiki


Recommended Games
Fire Emblem Heroes (FEH) Walkthrough & Guides Wiki
Diablo 4: Vessel of Hatred Walkthrough & Guides Wiki
Cyberpunk 2077: Ultimate Edition Walkthrough & Guides Wiki
Yu-Gi-Oh! Master Duel Walkthrough & Guides Wiki
Super Smash Bros. Ultimate Walkthrough & Guides Wiki
Pokemon Brilliant Diamond and Shining Pearl (BDSP) Walkthrough & Guides Wiki
Elden Ring Shadow of the Erdtree Walkthrough & Guides Wiki
Monster Hunter World Walkthrough & Guides Wiki
The Legend of Zelda: Tears of the Kingdom Walkthrough & Guides Wiki
Persona 3 Reload Walkthrough & Guides Wiki


All rights reserved
©1997-2025 NetEase, Inc. All Rights Reserved
The copyrights of videos of games used in our content and other intellectual property rights belong to the provider of the game.
The contents we provide on this site were created personally by members of the Game8 editorial department.
We refuse the right to reuse or repost content taken without our permission such as data or images to other sites.
Thank you, May you have a lot of wives.