Quest Puzzle Solutions
NEW: Hexi Map | Chapter 3 | Flute Mystic Skill
★ Unfettered and Everspring Build
☆ Liangzhou | Cat Fever | Prismatic Essence
✪ Updated: Best Weapon | Best Builds
☆ WWM Game8 Twitter: New tips daily!
Recruit using our Guild Recruitment Board!
Various Quests have puzzles you can solve that earn you skills and rewards in Where Wind Meets. Learn more about each puzzle found in the game and how to solve them in this guide!
 Attention! |
We are still adding more puzzles as we go along. More solutions will be added here soon! |
|---|
 under the page's title to be notified of any updates!
List of Contents
All Qinghe Puzzles
- Echoes of Old Battles - Wall Puzzle
- Blind to the World - Lake Puzzle
- Blind to the World - Bell Puzzle
- Cries in the Distance - Yin Yang Puzzle
- The Promised Light - Light Puzzle
- Crimson Cliff - Statue Puzzle
- Gleaming Abyss - Find All Deer Shadows
Echoes of Old Battles - Wall Puzzle Solution
| Left Wall | Right Wall |
 山 河 寸 土 |
 易不死誓 |
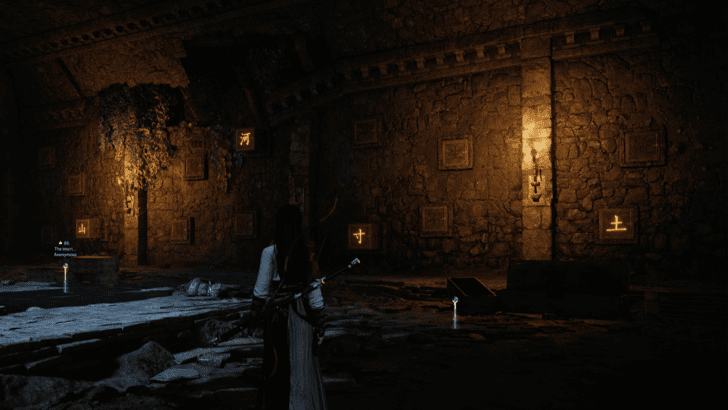
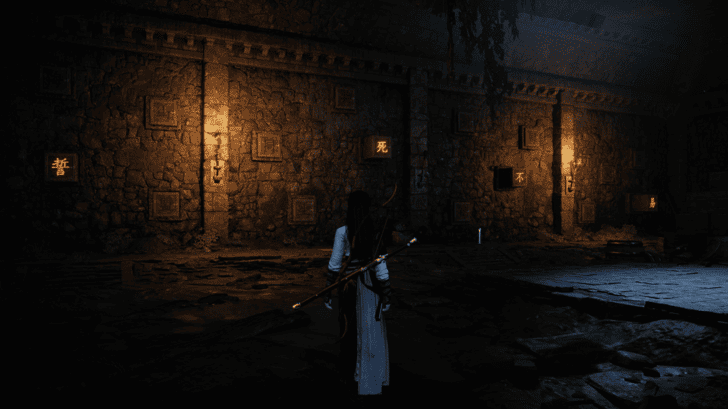
After learning the Yanyun Oath and the Yanyun Oath gesture. Perform the Oath in front of the Statue to reveal the Wall Puzzle. Pulling out the blocks on the wall will cause them to light up, and pushing them into the wall will cause them to dim.
To solve the puzzle, you must light up the stone blocks with the characters from the Yanyun Oath clue.
Echoes of Old Battles Walkthrough
Blind to the World - Lake Puzzle Solution

After draining the lake, go to the bottom where the Statue is. Uncle Tian will tell you to step on the large slab to trigger the Blind Girl statue's puzzle. This will cause four more slabs to appear around the statue. Solve the puzzle by stepping on the slabs in this order: North - East - South - West.
Blind to the World Walkthrough
Blind to the World - Bell Puzzle
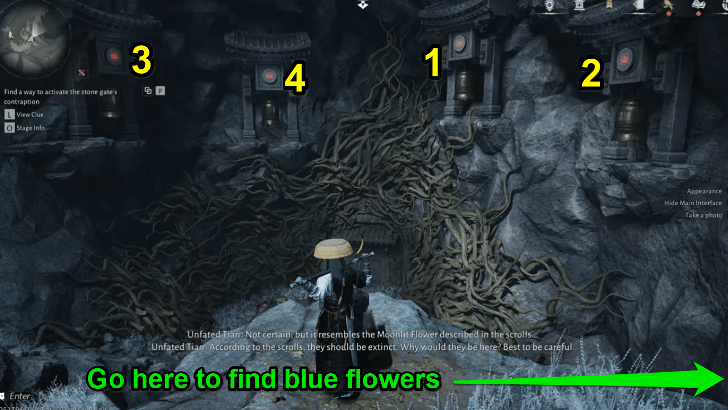
To unlock the stone gate run up the steps to find a contraption with four large bells. To get the right order, darken the screen by touching the Moonlit Flowers, then activate the contraption to get the sequence. Shoot the slabs above the bells in the correct order.
Blind to the World Walkthrough
Cries in the Distance - Yin Yang Puzzle
| Steps | Instructions |
|---|---|
| 6.1 | 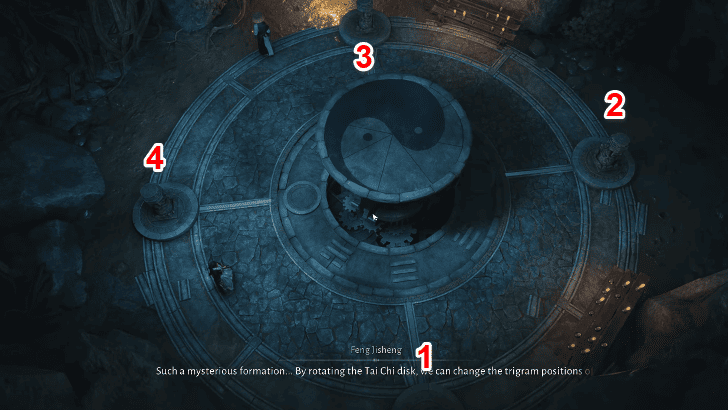 To solve the Puzzle, you need one set of opposing pillars to be facing each other, and another set to be facing away from each other. ★ 1 and 3 are the Heaven and Earth pair, which means they can move independently from each other. ★ 2 and 4 are the Water and Fire Pair, which means that they move with each other. ★ The two circles on the floor in the Yin Yang Dial Bind the Water and Fire Pair. |
| 6.2 |  First rotate pillars 1 and 3 to face each other. |
| 6.3 | 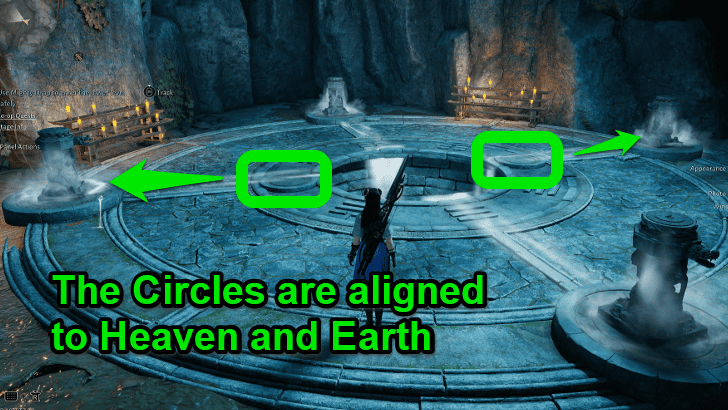 Rotate the Yin Yang Dial until the circles on the floor are aligned to Heaven(1) and Earth(3). This will let you rotate the Fire and Water pillars independently. |
| 6.4 | 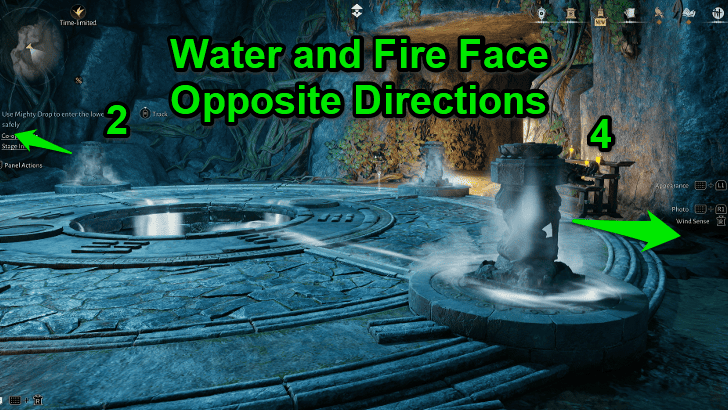 Rotate pillars 2 and 4 so they area facing away from each other. Make sure that you have rotated the Yin Yang Dial before this; otherwise, the pillars will rotate together. |
| 6.5 | The Yin Yang Dial will sink into the ground, revealing a path deeper into the mountain. |
Cries in the Distance Walkthrough
The Promised Light - Light Puzzle

Solve the light puzzle by redirecting the light into the hole in the wall. Approach a statue and use Meridian to turn the statue in the correct direction.
The Promised Light Walkthrough
Crimson Cliff - Statue Puzzle
After completing the Blind to the World quest, you can go back to the statue in the Crimson Cliff lake and get a treasure from the foot of the statue. Step onto the large slab in front of the statue. This will activate the puzzle.
The game is something like Simon-says, for the first 2 rounds, look at the slabs and step on the order that they glow, on the 3rd round listen for the order, each slab will have a distinct sound.
Statue Puzzle Solution
| Round | Solution |
|---|---|
| 1 | South → West → North → East |
| 2 | East → North → West → South |
| 3 | West → North → East → South |
Gleaming Abyss - Find All Deer Shadows
Drum's Top
| 1 |  Facing the coffin, turn slightly right to where the icon of the Deer Immortal is with blue torches. You have to shoot the vines between the torches to summon platforms from the water. |
|---|---|
| 2 | 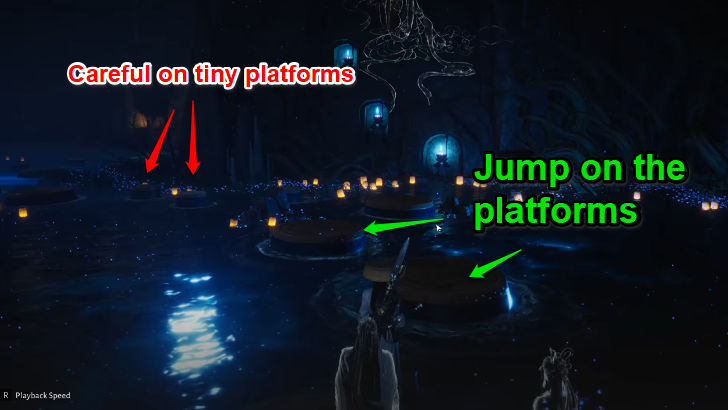 After the platforms rise, the ghostly figures will demonstrate that you have to jump on the platforms to reach the other side. |
| 3 | 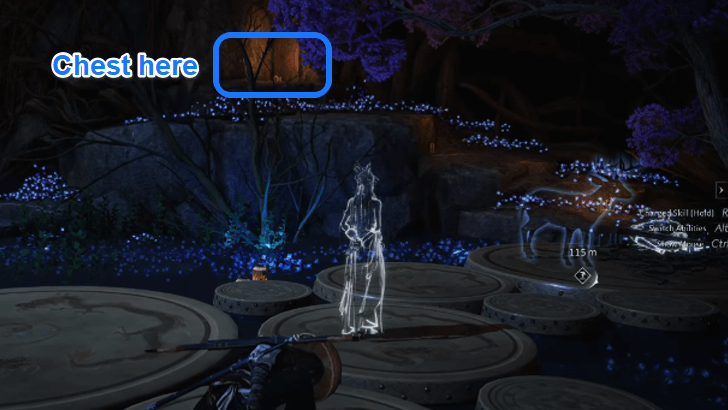 On the other side, sense the Dream Echo to send the Deer Shadow to the Stone Coffin. Just ahead are stairs leading to a chest. |
Vine's Depths
| 1 | 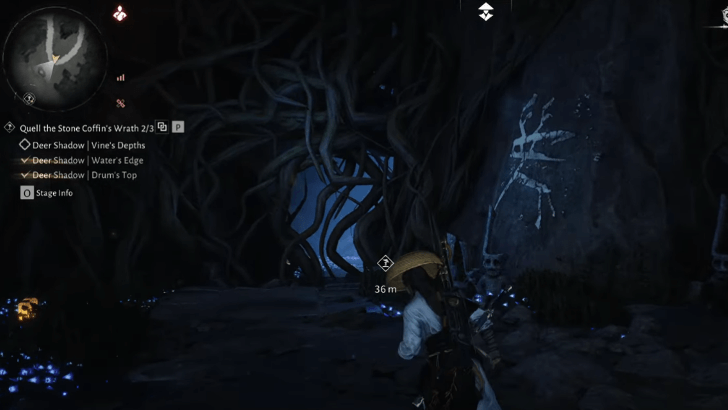 Facing the Stone Coffin, turn to the rightmost side of the area where you can see vines blocking a path. |
|---|---|
| 2 |  Go right, hugging the wall, until you see a hole to crouch into. The way inside is dark, so take a firefly in the vicinity to unlock the Glow of Fireflies Mystic Skill. Equip it to summon a swarm of fireflies to light your way. There are two paths in the passage: both lead to chests but the left is the right way to the Deer Shadow. |
| 3 | 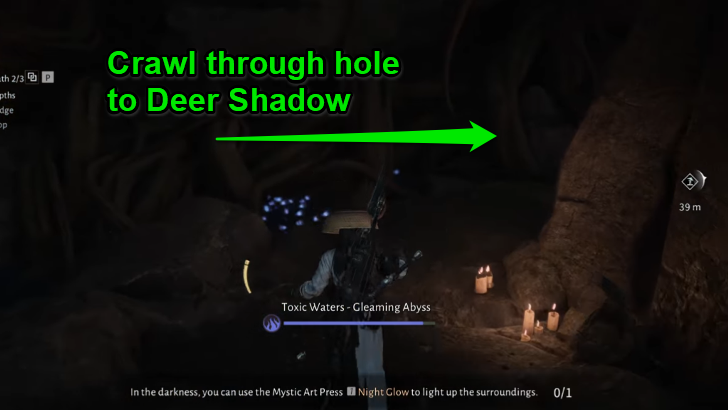 After opening the chest, turn around and you will see another passage lit by some candles. Crawl through another hole to find the Deer Shadow there. Sense the Dream Echo to send it to the Stone Coffin. |
| 4 | 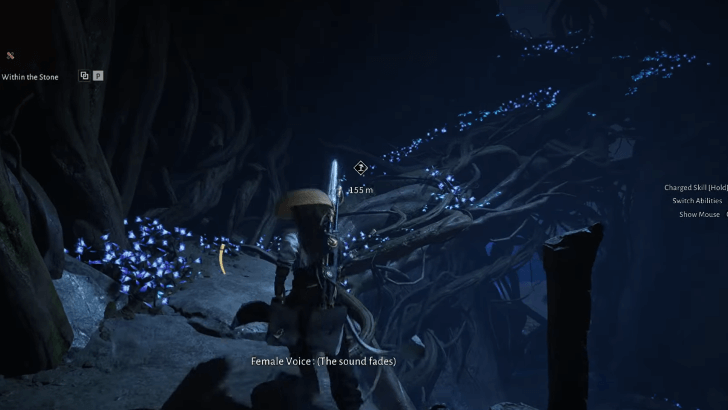 Leave the enclosed space by running up the path of roots. |
Water's Edge
| 1 | 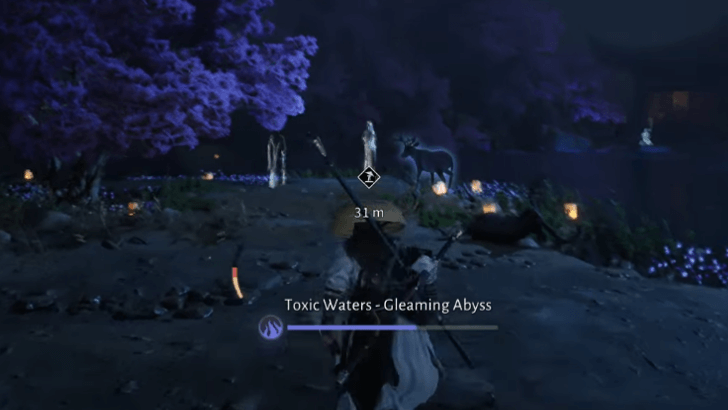 Facing the Stone Coffin, go left to see two ghostly figures by the toxic water. All you have to do is approach them and sense the Dream Echo. After the cutscene, the Deer Shadow will go to the coffin. |
|---|
All Kaifeng Puzzles
- Shadows in Bloom - Pass Bai Rong's Tuning Test
- Veiled Blades - Solve the Contraption Tower
- An Unnatural Omen - Tattered Eight Trigrams Puzzle
- An Unnatural Omen - Hexagram Puzzles
- An Unnatural Omen - Constellation Floor Puzzles
Shadows in Bloom - Pass Bai Rong's Tuning Test
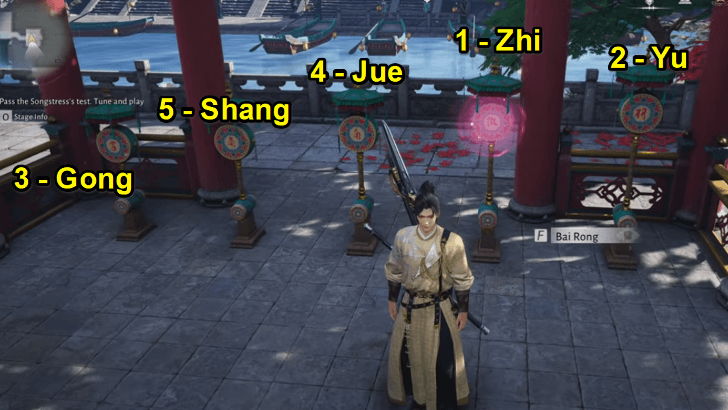
You have two options for Bai Rong's tuning test: Hard or Easy. Select Easy so that she will tell you the tune: Sol, La, Do, Mi, Re. Hit the drums in this order: Zhi, Yu, Gong, Jue, Shang. If you hit the right drum, it will glow with a pink hue.
Veiled Blades - Solve the Contraption Tower
Find the Hairpins
| Hairpin 1 |
|---|
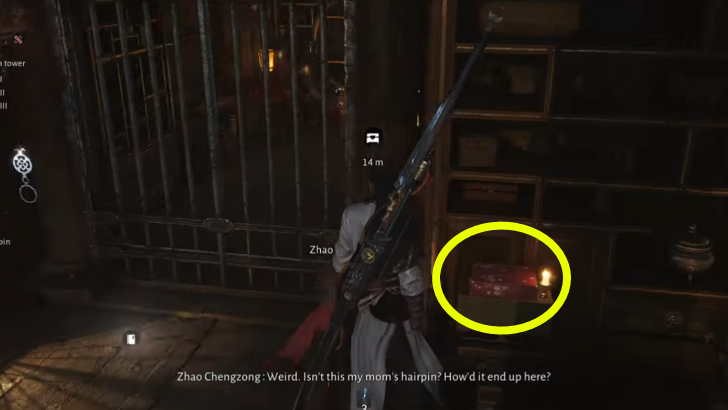 Go to the left side of the room where a chest is locked behind a gate. There is a shelf to the right of the gate with a red box. Take the hairpin from it. |
| Hairpin 2 |
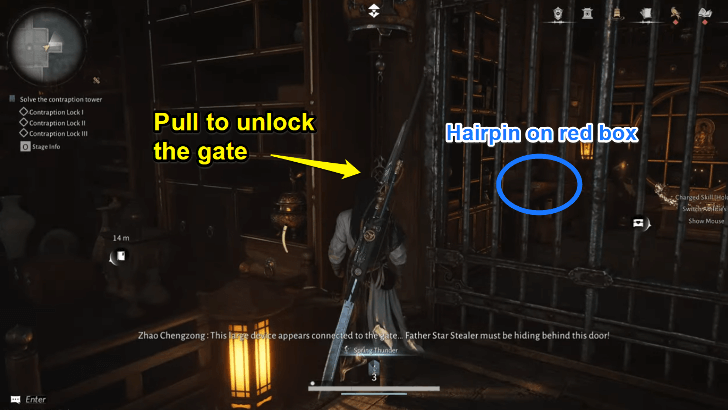 By the same gate is a mechanism for you to pull. This will unlock the gate, letting you get the hairpin on the red box and the chest inside. |
| Hairpin 3 |
 Go to the right side of the room with a dummy behind a gate. To the left of the gate is a cabinet. Open it to see a hole. Ask Chengzong to crawl through it, then wait for him to open the gate. Head in and take the hairpin from the dummy. |
Solve the Contraption Locks
| Contraption Lock I |
|---|
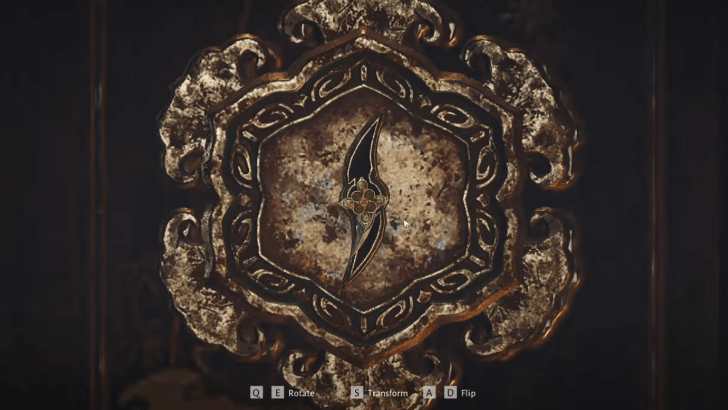 View the double-bladed Contraption Lock in front of the locked stone door. Rotate the hairpin so that the blade fits the shape of either hole. Then, transform the hairpin to fit the other half of the hole with the second blade. |
| Contraption Lock II |
 View the four-bladed Contraption Lock facing the right gate with the dummy. Flip and rotate the hairpin to fit one half of the keyhole, then transform it to fill the other half. |
| Contraption Lock III |
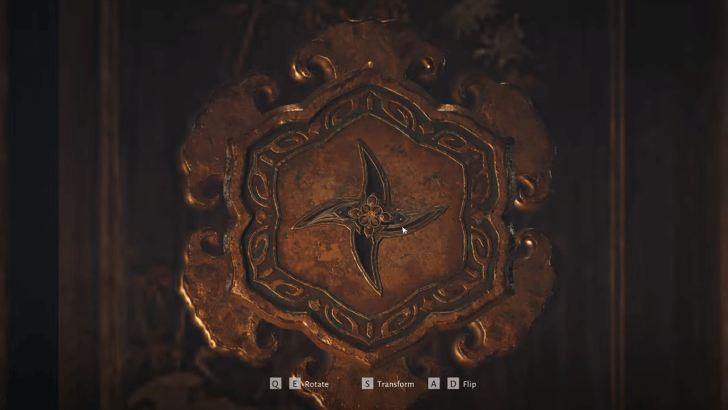 View the four-bladed Contraption Lock facing the left gate where the chest was. Like before, flip and rotate the hairpin to fit one half of the keyhole, then transform it to fit the other half. |
An Unnatural Omen - Tattered Eight Trigrams Puzzle
| 1 |  In the underground chamber, take the Tattered Eight Trigrams clue from the sitting corpse in front of you. |
|---|---|
| 2 |  Behind you, interact with the Bagua Wheel Platform to rotate the two rings on the dial. The symbols on the dial are the same as the ones found on the Tattered Eight Trigrams clue. Enlarge the picture above to see the puzzle solution more clearly. |
An Unnatural Omen - Hexagram Puzzles
| Heavenly Market Hexagram (White Tiger) |
|---|
 Rotate the ceiling panels to locate the White Tiger. The symbol on the Enclosure door will glow to indicate that it is correct. |
| Grand Tenuity Hexagram (Black Tortoise) |
 Because the Black Tortoise ceiling panel is already set, switch to the platforms instead. Keep rotating them until you find the platform with a blue streak flanked by two short streaks above and below it. |
| Purple Tenuity Hexagram (Vermilion Bird) |
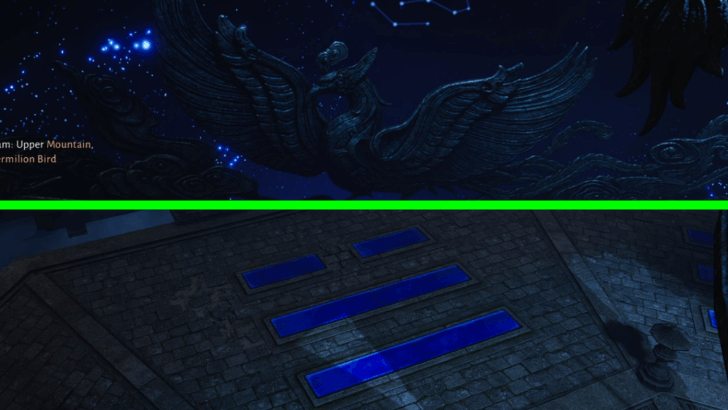 Rotate the ceiling panel to find the Vermilion Bird, then switch to the platforms. Find the platform with the symbol resembling an equal sign (=) with two short streaks above it. |
An Unnatural Omen - Constellation Floor Puzzles
| Heavenly Market Hexagram (White Tiger) Enclosure |
|---|
 Rotate the three rings to connect the constellations. |
| Grand Tenuity Hexagram (Black Tortoise) Enclosure |
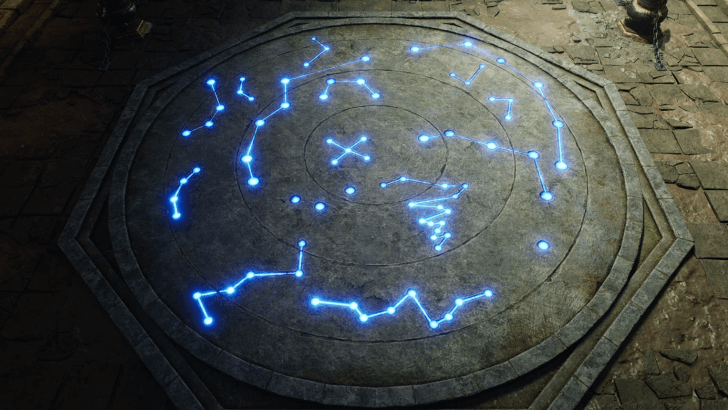 Like the first puzzle, simply rotate the rings to connect the constellations. |
| Purple Tenuity Hexagram (Vermilion Bird) Enclosure |
| This one is trickier as rotating one ring also affects the others. Start with the outermost ring as it is not affected by the rotation of the inner rings, letting you solve the inner rings independently. |
Where Winds Meet Related Guides

Meta Guides
 Weapons Martial Arts Tier List Weapons Martial Arts Tier List |
 Best Mystic Arts to Unlock Early Best Mystic Arts to Unlock Early |
 Best Inner Ways Tier List Best Inner Ways Tier List |
 Best Gear Sets Best Gear Sets |
 Best Starting Weapon Best Starting Weapon |
 Best Companions to Summon Best Companions to Summon |
Message Boards
 Character Sharing Board Character Sharing Board |
 Guild Recruitment Board Guild Recruitment Board |
 Photo Mode Sharing Board Photo Mode Sharing Board |
Beginner Guides
 Beginner's Guide and Best Starting Tips
 All Redeem Codes
 Difficulty Settings Guide
 How to Progress Efficiently
 Daily Reset Timer and Cap Unlocks
 Dailies and Weeklies Guide
 How to Increase World Level
 Story Explained
 How to Play Co-Op and Online Mode
 How to Self-Heal Illness
 How to Change Time
 How to Place Signposts
 How to Use Stored EXP
 Battle Pass Guide
 How To Use Wind Sense
 List of Achievements
 How To Farm Enlightenment Points
 How to Save Game Data
 How to Upgrade Healing Potions
 How to Rest
 Best Sect to Join
 Stamina System Explained
 Best Activities to Spend Energy
 Best Side Quests
 How to Level Up Fast
 Skill Theft Guide
 How to Get Commerce Coins
 How to Crouch
 List of Characters
Exploration Guides
 All Puzzle Solutions
 How To Farm Exploration Points
 How to Get Mount Early
 How to Fly
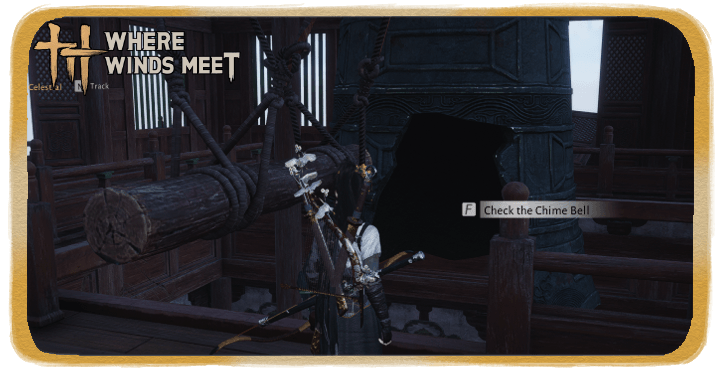 How to Repair Bell of Demoncalm
 How to Get to Ghostlight Market
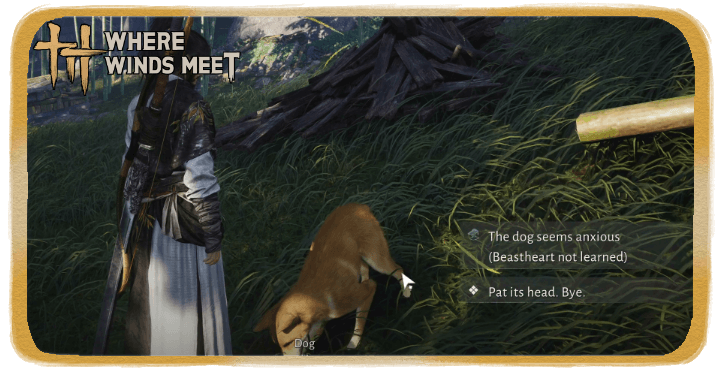 How to Unlock Beastheart
 How to Negate Fall Damage
 Jumping Explained
 Lock Picking Guide
 How to Unlock Roaring Sands
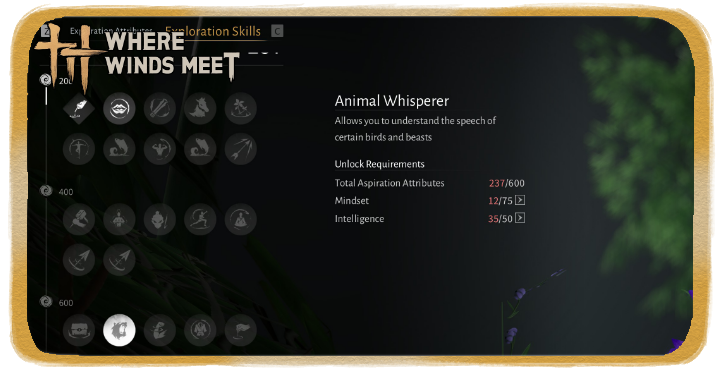 How to Talk to Animals
 How to Play Mahjong
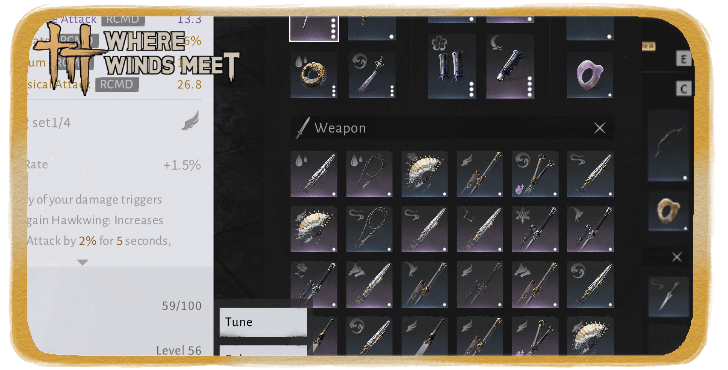 List of All Gear Sets
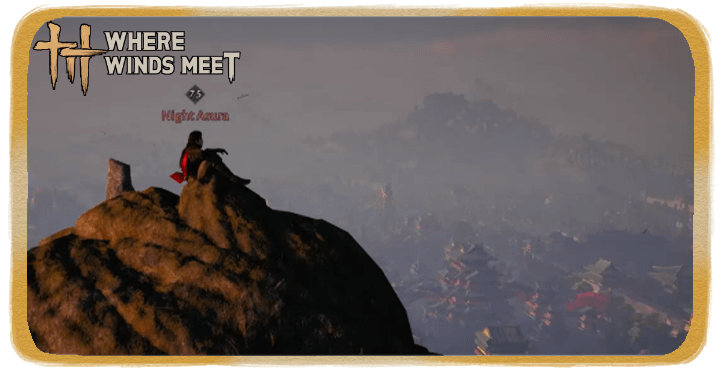 Should You Kill Night Asura?
 Cascading Water Ruins
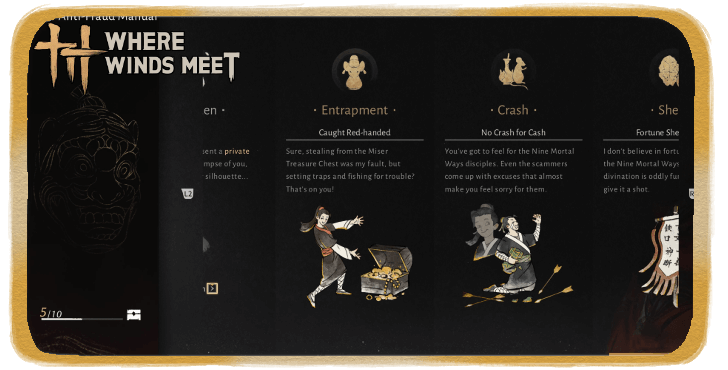 Anti-Fraud Manual Guide
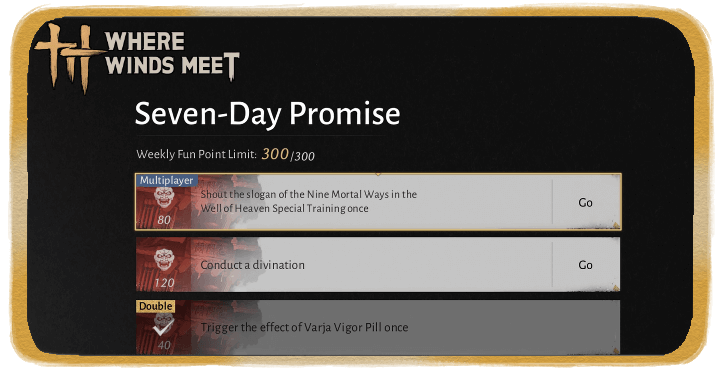 Seven-Day Promise Guide
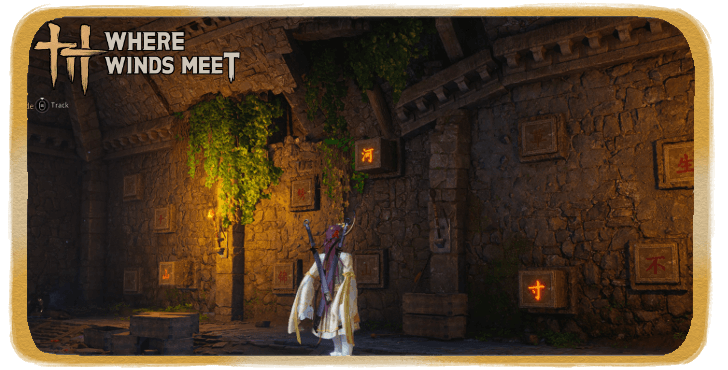 Solve the Puzzle on the Wall
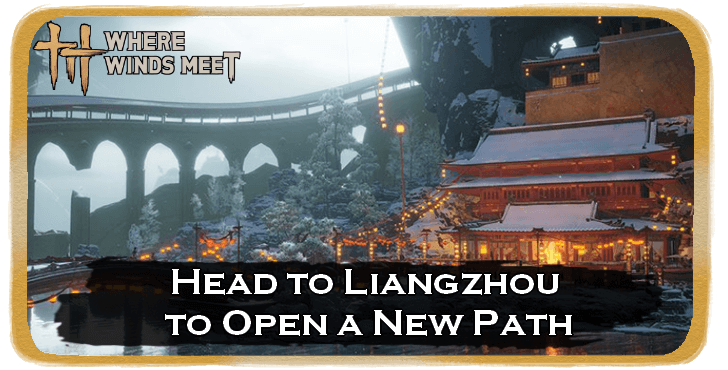 How to Head to Liangzhou
Combat Guides
 How to Parry Attacks and Parrying Tips
 PvP Guide
 Advanced Combat Guide
 How to Unlock Mystic Skill Slots
 Stats Explained
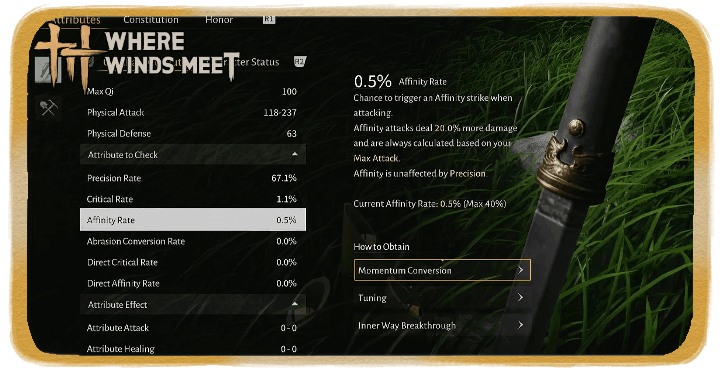 What is Affinity Damage?
 Gear Durability Explained
 Gear Rarity Explained
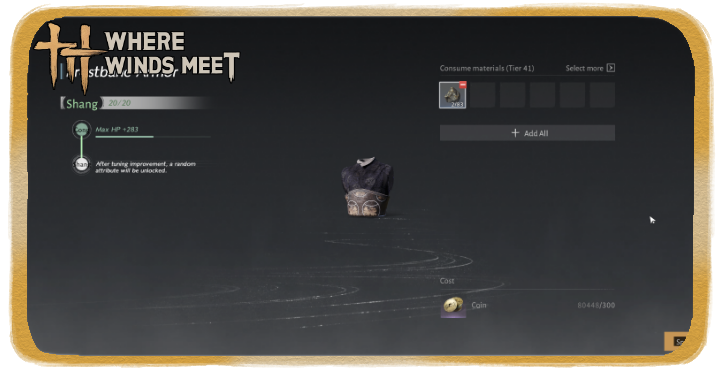 Gear Tuning Guide
 How to Upgrade Weapons
 How to Unlock Arsenal
 How to Increase Vitality
 Animation Canceling Guide
 Taiping Mausoleum Guide
 Perception Forest Guide
 How to Increase Perception
 How to Increase Mindset
 How to Increase Coordination
Character Creation Guides
 Character Creation Guide
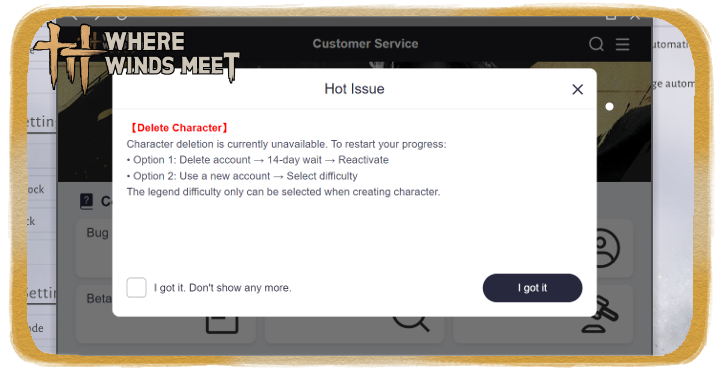 How to Delete Characters
 Best Starting Choices
 Can You Change Gender?
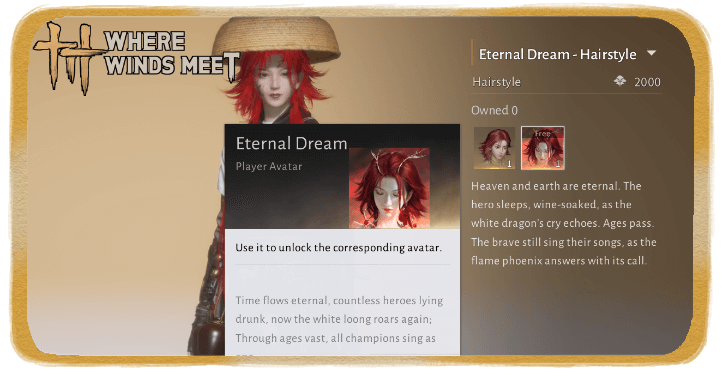 How to Change Hair Color
 Can You Have Multiple Characters?
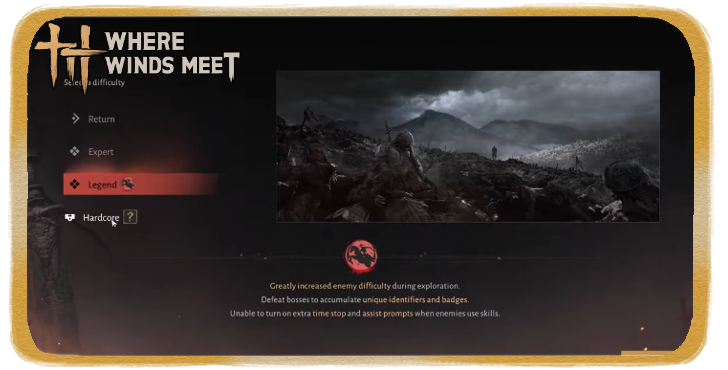 Should You Choose Legends Difficulty?
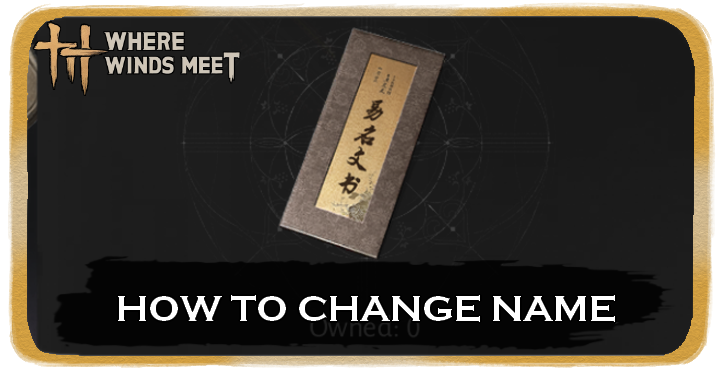 How to Change Name
Common Questions and Technical Guides
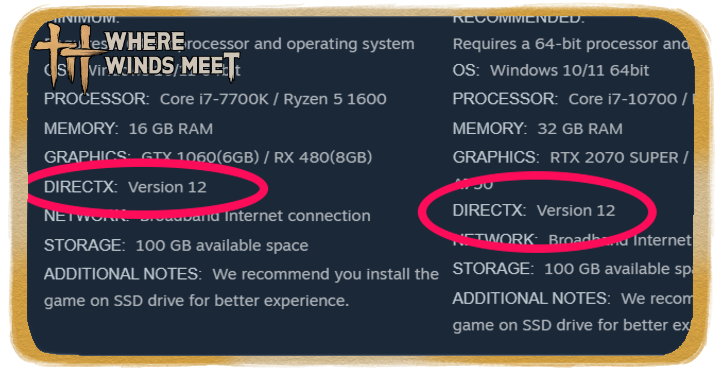 Should You Use DirectX 12?
 How Long is Where Winds Meet?
 What is the Max Level?
 What To Do With Old Gear?
 What are Pardon Parades?
 Death Penalty Explained
 All Missables and Points of No Return
 False Accusation Explained
 Endgame Guide
 How to Top Up
 How to Change Language
 How to Get Unstuck
 Best Settings Guide
 List of All Controls
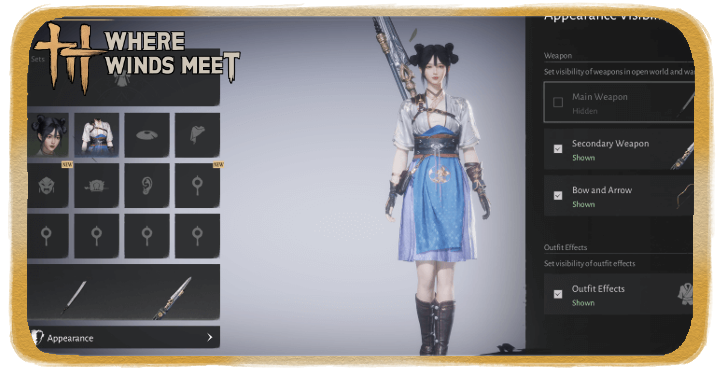 How to Hide Bow and Weapons
 How to Skip Cutscenes
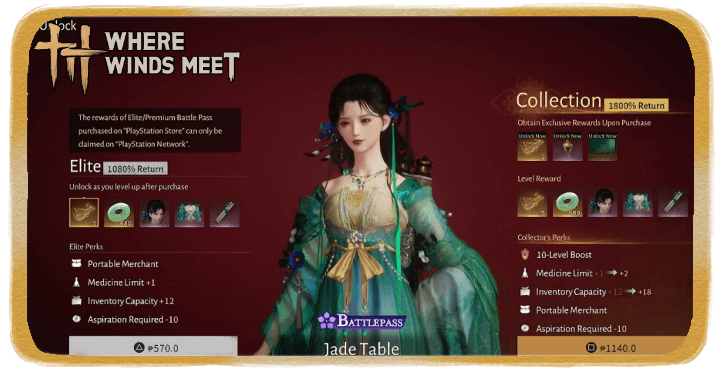 Microtransaction Guide
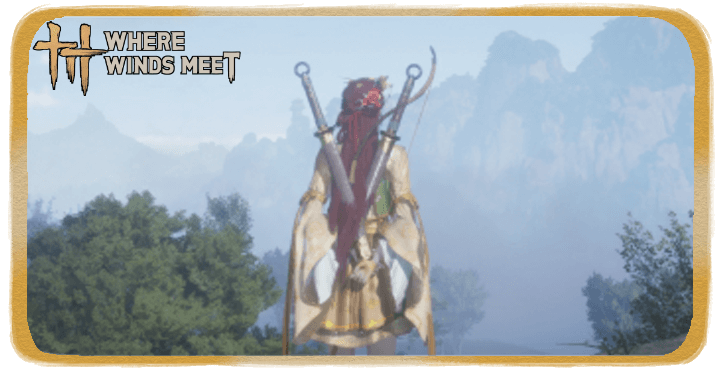 Upcoming Weapons and Martial Arts
Gameplay Features
 Gacha System Explained
 How to Unlock Fishing
 How to Disguise
 Wanted System and Law Violation
 Guild System Guide
 How to Leave Guild
 How to Leave Sect
 How to Unlock Base Building
 Romance System Explained
 How to Increase Intimacy
 Guild Wars Guide
 Season Challenges Guide
 Eastern Herald Quiz Answers
 Training Dummy Guide
 Spotlight Mode
Lore
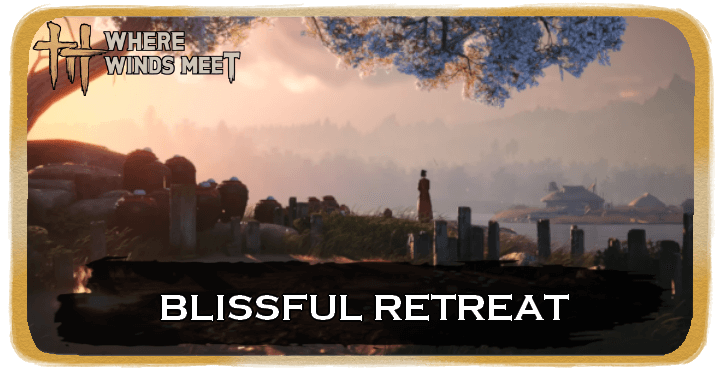 The Story of Blissful Retreat The Story of Blissful Retreat |
- | - |
Comment
Author

Quest Puzzle Solutions
Rankings
Gaming News


Popular Games

Genshin Impact Walkthrough & Guides Wiki
Umamusume: Pretty Derby Walkthrough & Guides Wiki
Pokemon Pokopia Walkthrough & Guides Wiki
Honkai: Star Rail Walkthrough & Guides Wiki
Monster Hunter Stories 3: Twisted Reflection Walkthrough & Guides Wiki
Arknights: Endfield Walkthrough & Guides Wiki
Wuthering Waves Walkthrough & Guides Wiki
Zenless Zone Zero Walkthrough & Guides Wiki
Pokemon TCG Pocket (PTCGP) Strategies & Guides Wiki
Monster Hunter Wilds Walkthrough & Guides Wiki


Recommended Games
Diablo 4: Vessel of Hatred Walkthrough & Guides Wiki
Cyberpunk 2077: Ultimate Edition Walkthrough & Guides Wiki
Fire Emblem Heroes (FEH) Walkthrough & Guides Wiki
Yu-Gi-Oh! Master Duel Walkthrough & Guides Wiki
Super Smash Bros. Ultimate Walkthrough & Guides Wiki
Pokemon Brilliant Diamond and Shining Pearl (BDSP) Walkthrough & Guides Wiki
Elden Ring Shadow of the Erdtree Walkthrough & Guides Wiki
Monster Hunter World Walkthrough & Guides Wiki
The Legend of Zelda: Tears of the Kingdom Walkthrough & Guides Wiki
Persona 3 Reload Walkthrough & Guides Wiki


All rights reserved
©1997-2025 NetEase, Inc. All Rights Reserved
The copyrights of videos of games used in our content and other intellectual property rights belong to the provider of the game.
The contents we provide on this site were created personally by members of the Game8 editorial department.
We refuse the right to reuse or repost content taken without our permission such as data or images to other sites.