Drunk Martial Artist Location and How to Beat
NEW: Hexi Map | Chapter 3 | Flute Mystic Skill
★ Unfettered and Everspring Build
☆ Liangzhou | Cat Fever | Prismatic Essence
✪ Updated: Best Weapon | Best Builds
☆ WWM Game8 Twitter: New tips daily!
Recruit using our Guild Recruitment Board!

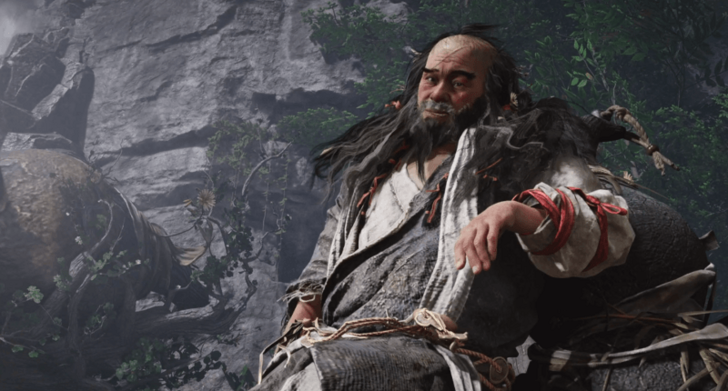
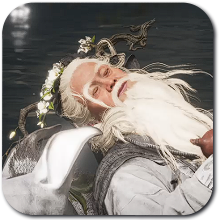
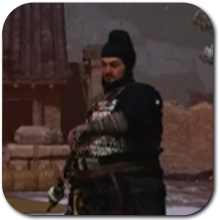
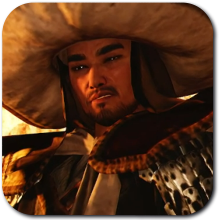
Drunk Martial Artist is a World Boss that you can find at Grand Canal, Jadewood Court in Where Winds Meet. Check out how to beat Drunk Martial Artist, their movesets and weaknesses, and the rewards and achievements you can claim here!
List of Contents
Drunk Martial Artist Overview
Basic Information and Recommmended Arts
 |
||
| Difficulty | Weakness | |
|---|---|---|
| ★★★★☆ | None | |
| Recommended Arts | ||
| Mystic Arts | ・Dragon's Breath ・Drunken Poet ・Wolflike Frenzy |
|
Drunk Martial Artist Location
On an Islet Northwest of the Southeast Camp Landmark
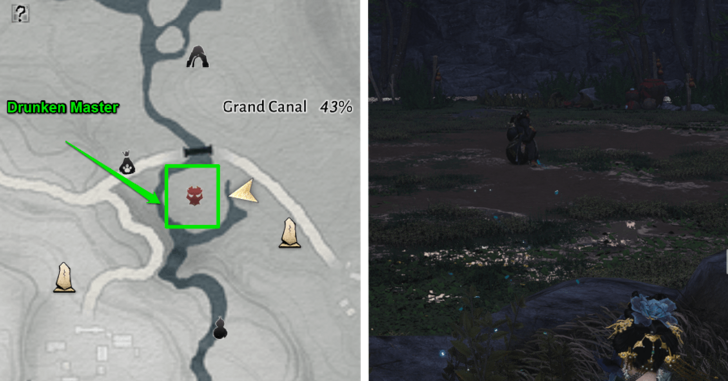
You can encounter the Drunk Martial Artist World Boss in the Kaifeng region.
You can find him on a small islet just northwest of the Southeast Camp boundary stone in the Grand Canal area.
How to Beat Drunk Martial Artist (World Boss)
|
|
Watch Out for Intoxication
Watch your Intoxication meter. It is not the most dangerous debuff on its own, but the visual and control effects can throw you off, especially if you are sensitive to motion effects or screen distortion.
Mind the Spilled Wine (Phase 2)
In Phase 2, watch for wine spilled on the ground. Several of his fire-based attacks can ignite these puddles, turning previously safe areas into burning hazards. Smart positioning and awareness of the arena floor will keep you alive longer than squeezing in risky damage.
Most Attacks Are Parryable
Overall, his attacks aren’t the most overwhelming. Most of them can be blocked or parried, and they aren’t especially fast, though the timing can feel unusual at first, which is where many early mistakes happen. Once you adjust to his rhythm, the fight becomes much more manageable.
Attack During His Downtime
Your best damage windows come between his attack sequences. He tends to idle for a noticeable moment after finishing a move, giving you time to step in safely.
Faster weapons especially can take advantage of these gaps, landing multiple hits before he starts his next attack. Don’t overcommit; get in, deal damage, and be ready to defend again!
How to Beat Drunk Martial Artist (Drunken Verse)
|
|
Control the Wine Meter
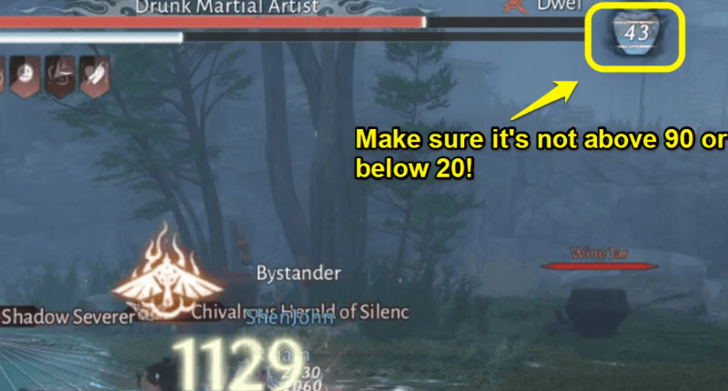
The Wine Meter next to the boss's HP controls how dangerous he becomes. You want to keep it between 20 and 90. If it rises above 90, he becomes Intoxicated, causing his abilities to deal significantly more damage. If it drops below 20, he will use Drink, shooting the meter past 100 and enraging anyway.
Destroying wine jars or using Dragon's Breath raises the meter, but be careful -- too many boosts at once can push him straight into Intoxication. Manage it steadily, not frantically.
Be Careful When Breaking Wine Jars
Wine jars are necessary for meter control, but they are also dangerous bait. While players attack a jar, the boss can cast Furious Strike, which roots the player in place and deals heavy damage.
Try to break jars when the boss has just finished an ability, and avoid sending too many players at once. Getting rooted during another mechanic often leads to unnecessary deaths.
Be Prepared When the Boss Uses Drink
If the Wine Meter falls below 20, the boss uses Drink, instantly pushing himself into Intoxication. This is a heavy damage phase, but not an automatic wipe.
Healers should be ready with cooldowns, and players should focus more on survival than damage.
Cross the Marks Through the Boss (Drink, My Friend)
Drink, My Friend marks two players with X indicators beneath their feet. The marked players must quickly reposition so their lines intersect through the boss. When executed properly, the mechanic resolves safely and prevents any follow-up attack.
If it is handled incorrectly, he immediately casts The Finest Wine, swinging his gourd to release powerful conal flame blasts in four directions that split the arena into burning quarters. This attack deals heavy group damage and can easily wipe teams that react too slowl
Don't Destroy Wine Jars Prematurely
Wine Jars are your main way to control the boss’s Wine Meter, so breaking them too early can cause problems later. If you destroy them when the meter is already stable, you risk pushing it too high or wasting a resource you might urgently need when it drops.
It’s best to save jars for when the meter is approaching the danger zone and coordinate who will break them. Triggering them at the wrong time can either force Intoxication or leave you with no way to recover when the meter falls too low.
Drunk Martial Artist Movesets
| All Drunk Martial Artist Movesets | ||
|---|---|---|
| World Boss Movesets Phase 1 | World Boss Movesets Phase 2 | Drunken Verse Movesets |
Phase 1
| Moves | Details |
|---|---|
| Gourd Toss | The boss flings his gourd at you in a multi-hit chain, with each toss flowing into the next. The final hit triggers a small explosion where the gourd lands. After the explosion, he has brief recovery, which is your window to punish. |
| Gourd Slam | Drunk Martial Artist jumps high into the air, clutching his gourd, then crashes straight down in a heavy slam that deals strong impact damage on landing. Easily parryable but easier to dodge! |
| Drunken Splash "Here! Drink up!" |
The boss staggers into a wild spin, swinging his gourd in a wide arc and spraying alcohol all around him. Anyone caught in the splash buildup becomes intoxicated, making the screen slightly blurry, though not the same kind that lets you use Dragon's Breath. It's easy to dodge and keep your distance. |
| Reeling Double Slam | The Drunk Martial Artist leaps into the air and slams his gourd down hard, just like a normal slam, but instead of recovering, he staggers forward drunkenly and smashes it down a second time in a follow-up hit. |
| Whirling Hangover "Good times and bad times come and go!" |
He spins in place three times, wildly swinging the gourd and spraying alcohol in a wide radius. Each rotation can inflict intoxication if you’re caught in the splash. After the third spin, he suddenly slams the gourd down in a red glint attack, triggering a small explosion on impact. |
| Drunken Rush | The Drunk Martial Artist lunges forward with a fast kick, closing distance suddenly, then immediately follows with a quick gourd swing aimed to catch you reacting late. Both hits can be parried. |
| Tipsy Forward Smash | The Drunk Martial Artist staggers forward clumsily, then suddenly drops into a heavy downward gourd slam right in front of him. Easy to avoid and parry! |
| Smash and Swig | He leaps into the air and crashes down with a heavy gourd slam, then immediately chains intohorizontal gourd swings to catch anyone who rushes in too early. The swings are slow, but erratic. |
Phase 2
| Moves | Details |
|---|---|
| Reveler's Firestorm | The Drunk Martial Artist quickly dodges backward to create space, then launches high into the air before crashing down in a devastating gourd slam. The impact unleashes a massive fiery explosion, igniting sections of the arena in spreading flames. These flames can spread even farther if they reach alcohol left behind from Drunken Splash, turning more of the battlefield into a burning hazard. |
| Drunken Splash – Phase 2 "Here! Drink up!" |
Just like in Phase 1, the Drunk Martial Artist spins wildly while swinging his gourd, splashing alcohol in a wide radius around him. Getting caught in the spray can inflict intoxication. However, if he has already ignited the arena with Reveler's Fire Storm, this move becomes far more dangerous as the alcohol he spreads can carry and extend the existing flames, causing the fire to spread into new areas of the battlefield. |
| Drunken Dragon's Breath | The Drunk Martial Artist plants his gourd and spins around, before suddenly spitting a stream of fire. The flame breath covers a wide cone and lingers briefly. Best answer is to sidestep or get behind him once you see the spin start. |
| Blazing Rain | The Drunk Martial Artist kicks his gourd high into the air, catches it mid-motion, and unleashes a shower of falling flames that rain down across the arena. The fire ignites the ground, leaving large sections of the battlefield burning and restricting safe movement. It can't be parried, and lingering flames can combine with other alcohol-based moves to expand the burn zone. |
| Drunkard's Rampage | The Drunk Martial Artist unleashes a long, relentless combo, chaining together multiple gourd techniques back-to-back with barely any pause. The sequence ends in a heavy finishing slam that counts as a red glint attack. |
| Riotous Revel Flurry | The Drunk Martial Artist leaps up and crashes down with a heavy gourd slam, then immediately follows with a series of wild, sweeping swings. Each swing spills alcohol across the ground, which can build intoxication if you stay too close. He finishes the sequence with a final crushing slam marked as a Red Glint Attack, which, if you parry successfully lets you stagger him. |
| Bottoms-Up | The Drunk Martial Artist leaps high into the air and crashes down with a Red Attack gourd slam. If the slam connects, he will grab you and force alcohol down your throat, inflicting intoxication. |
Drunken Verse Moveset
| Moves | Details |
|---|---|
| Gourd Smash | When a player is marked with a red indicator above their head, the boss is preparing Gourd Smash. The marked player must move away from the group to avoid hitting teammates. During Intoxication, this attack becomes far more lethal, so quick reactions are important. Running through the group instead of away from them is a common cause of wipes. |
| Furious Strike | Furious Strike is one of the boss’s most punishing control abilities. He targets players interacting with wine jars and briefly roots them in place, following up with a heavy hit. Getting caught by this at the wrong time can chunk a huge portion of your health. Try to attack jars only after he finishes another ability, and keep an eye on his animations instead of tunneling the objective. Being immobilized during overlapping mechanics is what usually turns this into a death sentence. |
| Drink | When the Wine Meter drops too low, the boss uses Drink, chugging his reserves and instantly pushing himself into Intoxication. This causes his abilities to hit much harder for a short period, turning otherwise manageable mechanics into real threats. Healers should be ready with strong cooldowns, and everyone should prioritize survival and clean movement. |
| Strong Brew | Strong Brew has the Drunk Martial Artist leap into the air before crashing down with a fiery AoE. The damage hits hard, especially if players are already hurt. Top off health bars before he lands, not after. Standing in overlapping fire zones after the slam is what usually finishes people off. |
| Drink, My Friend | This mechanic places X-shaped markers on players. Two marked players must position themselves so the lines intersect through the boss. Doing this correctly prevents a powerful raid-wide attack, Finest Wine. Extra players standing in the wrong place can block the correct angle, so only the assigned players should adjust. |
| Finest Wine | If Drink, My Friend is handled incorrectly, the boss immediately casts The Finest Wine, unleashing conal flame blasts in four directions that cover large sections of the arena. Each blast hits hard and can quickly overwhelm the group if players are slow to react. |
| Spirit Splash | Spirit Splash leaves burning trails across the arena, shrinking safe space over time. Movement becomes just as important as damage here. Try rotating around the arena together instead of scattering randomly. Running through jar areas or cornering yourself makes later mechanics harder. |
Drunk Martial Artist Rewards
Quest Completion Rewards
|
・Inner Way Note Custom Chest x5 ・Medicinal Tales x3 ・Echo Jade x20 ・Qinghe Exploration x50 ・Character EXP x8000 ・Coins x8000 |
Where Winds Meet Related Guides
| All Boss Guides | |
|---|---|
| World Bosses | - |
Campaign Bosses
 Heartseeker Heartseeker
|
 Qianye Qianye
|
 Ye Wanshan Ye Wanshan
|
 The Void King The Void King
|
 Lucky Seventeen Lucky Seventeen
|
 Tian Ying Tian Ying
|
 Dao Lord Dao Lord
|
 Zheng the Frostwing Zheng the Frostwing
|
 Murong Yuan Murong Yuan
|
 God of Avarice God of Avarice
|
 River Master River Master
|
World Bosses
 Puppeteer - Sheng Wu Puppeteer - Sheng Wu
|
 Sleeping Daoist Sleeping Daoist
|
Puppeteer - Curtaincall
|
 Earth Fiend Deity Earth Fiend Deity
|
 Snake Doctor Snake Doctor
|
 Yi Dao Yi Dao
|
 Wolf Maiden Wolf Maiden
|
 Twin Lions Twin Lions
|
 Ghost Master Ghost Master
|
 Nameless General Nameless General
|
 Feng Ruzhi Feng Ruzhi
|
 Drunk Martial Artist Drunk Martial Artist
|
 Coffin Master Coffin Master
|
Quest-related Bosses
 Dalang Dalang
|
 He Yuezhi He Yuezhi
|
 Shen Yiren Shen Yiren
|
Comment
Author

Drunk Martial Artist Location and How to Beat
Rankings
Gaming News

![Death Stranding 2: On The Beach [PC] Review | A Port That Delivers](https://img.game8.co/4447392/15310a0c9aa1b6843bb713b2ea216930.jpeg/show)


Popular Games

Genshin Impact Walkthrough & Guides Wiki
Umamusume: Pretty Derby Walkthrough & Guides Wiki
Crimson Desert Walkthrough & Guides Wiki
Monster Hunter Stories 3: Twisted Reflection Walkthrough & Guides Wiki
Honkai: Star Rail Walkthrough & Guides Wiki
Pokemon Pokopia Walkthrough & Guides Wiki
The Seven Deadly Sins: Origin Walkthrough & Guides Wiki
Wuthering Waves Walkthrough & Guides Wiki
Zenless Zone Zero Walkthrough & Guides Wiki
Arknights: Endfield Walkthrough & Guides Wiki


Recommended Games
Fire Emblem Heroes (FEH) Walkthrough & Guides Wiki
Diablo 4: Vessel of Hatred Walkthrough & Guides Wiki
Cyberpunk 2077: Ultimate Edition Walkthrough & Guides Wiki
Yu-Gi-Oh! Master Duel Walkthrough & Guides Wiki
Super Smash Bros. Ultimate Walkthrough & Guides Wiki
Pokemon Brilliant Diamond and Shining Pearl (BDSP) Walkthrough & Guides Wiki
Elden Ring Shadow of the Erdtree Walkthrough & Guides Wiki
Monster Hunter World Walkthrough & Guides Wiki
The Legend of Zelda: Tears of the Kingdom Walkthrough & Guides Wiki
Persona 3 Reload Walkthrough & Guides Wiki


All rights reserved
©1997-2025 NetEase, Inc. All Rights Reserved
The copyrights of videos of games used in our content and other intellectual property rights belong to the provider of the game.
The contents we provide on this site were created personally by members of the Game8 editorial department.
We refuse the right to reuse or repost content taken without our permission such as data or images to other sites.