Thundercry Blade and Stormbreaker Spear Build
NEW: Hexi Map | Chapter 3 | Flute Mystic Skill
★ Unfettered and Everspring Build
☆ Liangzhou | Cat Fever | Prismatic Essence
✪ Updated: Best Weapon | Best Builds
☆ WWM Game8 Twitter: New tips daily!
Recruit using our Guild Recruitment Board!
This is a build focusing on the Thundercry Blade and Stormbreaker Spear Martial Art school in Where Winds Meet. Read on to see a full build guide to these martial arts including its best Inner Ways, Mystic Arts to take, and the best gear set and substats to aim for, updated for Version 1.3.
List of Contents
Thundercry Blade and Stormbreaker Spear Build
Thundercry Blade and Stormbreaker Spear Overview
| Jump Table | |||||
|---|---|---|---|---|---|
| Overview | Martial Arts | Inner Way | |||
| Mystic Arts | Set and Stats | How to Play | |||
| Overview | |
|---|---|
| Martial Arts | |
| Role | Tank |
| Pros and Cons |
|
The Thundercry Blade and Stormbreaker Spear build focuses on a tanking role that aims to take aggression and reduce it via damage reduction capabilities while hitting enemies with big charged hits.
| Date | Changes |
|---|---|
| 2-18-2026 | ・Further optimized the build for Version 1.3. ・Removed Ghost Bind from the main loop as it is now suboptimal. ・Updated Inner Way and added Inner Way for PvP. ・Reworked Mystic Arts and added dedicated PvP options. ・Updated Stat Priority. ・ Updated Set Gear and added PvP option. ・Updated How to Play and added PvP rotations. |
Thundercry Blade and Stormbreaker Spear Martial Arts and Weapons
| Jump Table | |||||
|---|---|---|---|---|---|
| Overview | Martial Arts | Inner Way | |||
| Mystic Arts | Set and Stats | How to Play | |||
| Martial Art | |
|---|---|
|
Path: Stonesplit - Might |
Path: Stonesplit - Might |
The two Martial Arts from the Thundercry Blade and Stormbreaker Spear focus on tanking and managing your Fighting Spirit to use several tanking abilities to reduce damage taken or reduce the damage enemies deal. This setup is also capable of gaining shields and amplifying charged attacks from the Thundercry Blade so you can unleash devastating hits during the right situations and setup.
How to Unlock All Martial Arts
Thundercry Blade and Stormbreaker Spear Inner Ways
| Jump Table | |||||
|---|---|---|---|---|---|
| Overview | Martial Arts | Inner Way | |||
| Mystic Arts | Set and Stats | How to Play | |||
| Inner Way | Details |
|---|---|
 Morale Chant Morale Chant |
80% chance to gain one stack of Yi River when attacking or healing. Yi River: Increases Physical Damage and healing by 1% for 8 seconds, stacking up to 5 times. The chance to gain Yi River is only calculated once every 2 seconds. |
 Exquisite Scenery Exquisite Scenery |
Successfully defending with Thundercry Blade activates its special counterattack. Press Perception Skill or Heavy Attack to unleash a first stage Charged Heavy Attack without charging. This effect can only trigger once every 10 seconds. Hitting a target with a Varied Combo restores 1 bar of Battle Will (no more than 1 bar restored per cast). |
 Adaptive Steel Adaptive Steel |
Gain a Martial Skill effect based on the blade weapon you are using. The Martial Skill of Sword has a 10-second cooldown, while Dual Blades' Martial Skill has a cooldown of 25 seconds. |
 Art of Resistance Art of Resistance |
Increases the duration of your own HP shield and the bonus effects of its source skill by 4 seconds. |
For PvE tanking, Art of Resistance boosts Stonesplit stats and shield uptime for steady tankiness and Rain Whisper value, while Exquisite Scenery adds crit rate and crit damage plus free charged hits that fuel Mountain Shaker bursts. Morale Chant is, as ever, reliable damage boost, and Adaptive Steel is extremely efficient since it increases crit damage on Thundercry Blade charge skills, your main damage source.
If you are playing solo or your Art of Resistance is not upgraded yet, you can swap it out for Battle Anthem to gain more personal damage.
Alternative Inner Way for PVP
| Inner Way | Details |
|---|---|
 Vital Leech Vital Leech |
Casting an Exhaustion Execution Skill restores HP equal to 8% of the damage dealt. |
For PvP, swap Adaptive Steel for Vital Leech to turn your execution pressure into reliable self-sustain. Alternatively, you can run Trapped Beast as an emergency safeguard, generating a shield at low HP to help you live through sketchy moments.
Thundercry Blade and Stormbreaker Spear Mystic Arts
| Jump Table | |||||
|---|---|---|---|---|---|
| Overview | Martial Arts | Inner Way | |||
| Mystic Arts | Set and Stats | How to Play | |||
| Stat Group | Recommended Substats |
|---|---|
 Dragon's Breath Dragon's Breath |
Drink to enter Intoxicated. Breath fire with Qi, dealing damage over 2 hits plus Ignition. Gain 15% Damage Reduction and Fortitude. Intoxicated: Lasts 30s. Dragon's Breath and Drunken Poet can be used without drinking. Ignition: Target takes damage every 0.5s for 8s. |
 Drunken Poet Drunken Poet |
Drink deeply to enter the Intoxicated state, imitating the drunken grace of the Poet Immortal. Cast repeatedly for up to 5 strikes, each consuming 6 Vitality. Intoxicated: Lasts 30s. Dragon's Breath and Drunken Poet can be used without drinking. |
 Cloud Steps Cloud Steps |
Stomp on an enemy's shoulder to deal Physical Damage, other Attribute Damage effective against Cavalry and other units with Unstable Poise. |
 Golden Body Golden Body |
With relaxed shoulders and upright posture, gain an indestructible Golden Body for 8s, granting a Shield and 10 Qi Recovery. While the Shield holds, grant Fortitude and 15% Damage Reduction. |
Get Golden Body to help you tank more hits with your shields and damage reduction that stacks well with your weapon martial art effects. Applying Burn with Dragon’s Breath and then following up with Drunken Poet converts that damage-over-time into an immediate burst spike, making the pairing far more lethal than using either skill on its own. At the same time, Cloud Steps remains a dependable gap-closer for maintaining pressure, and it becomes especially valuable in fights against mounted bosses like Sleeping Daoist and Ye Wanshan.
As an alternative for Golden Body, Guardian Palm synergizes well with the Thundercry Blade's Sunrush Gale to help group up enemies and single-handedly destroy them with your AoE attacks.
Alternative Mystic Arts for PvP
| Stat Group | Recommended Substats |
|---|---|
 Wolflike Frenzy Wolflike Frenzy |
Knock down an enemy, followed with rapid strikes, and finish with an upward swing that disables the target. Effective against Cavalry and other units with Unstable Poise. Unstable Poise: These units have a Stance bar near their HP. Stance-break deals special hit and Physical damage. |
 Serene Breeze Serene Breeze |
Channel Qi into your body to clear blockages in the veins. Can be used while under attack or control effects. On hit, reduces the target's Endurance recovery by 50% and deals damage for 8s. |
 Free Morph Free Morph |
Vault into the air and unleash a storm of kicks. The first blow launches the target upward, followed by relentless mid air strikes to keep them aloft. Finally finish with a slam that deals damage on impact. |
 Soaring Spin Soaring Spin |
Channel your Qi into a roaring thrust, dealing damage to units along the path. Then suddenly shift stance into a spiraling follow-up strike that catches enemies off-guard. Hitting a target reduces their Healing Received by 60% over 5s. |
In addition to the Mystic Skills used for PvE, Serene Breeze is mandatory in PvP, as it lets you escape enemy combos and crowd control to reset and reposition. Free Morph is excellent for capitalizing on knockdowns, Soaring Spin helps you close distance quickly, and Wolflike Frenzy delivers strong burst damage while granting Super Armor to keep your pressure uninterrupted.
Thundercry Blade and Stormbreaker Spear Set Gear and Stat Priorities
| Jump Table | |||||
|---|---|---|---|---|---|
| Overview | Martial Arts | Inner Way | |||
| Mystic Arts | Set and Stats | How to Play | |||
Set Gear
| Stat Group | Recommended Substats |
|---|---|
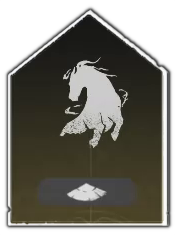
 Rainwhisper RainwhisperWeapon |
2 Set Effect: +40 Max HP
4 Set Effect: Increases all Critical DMG and healing by 10%, and further increases them by 15% when you have an HP shield. |
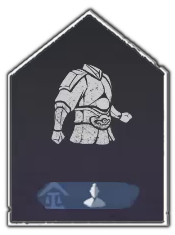
 Flawless Defense Flawless DefenseArmor |
2 Set Effect: +1 Physical Defense
4 Set Effect: Reduces damage taken by 5%. When HP falles below 60%, futher reduces damage taken by 1% for every 10% HP lost, stacking up to 5 times. |
Rainwhisper grants bonus Critical Damage while you have an HP shield, and this setup maintains shield uptime almost constantly. Thundercry Blade naturally provides a reliable shield, and Art of Resistance extends its duration, making the Rainwhisper bonus highly consistent
Flawless Defense is strong for this build because it gives consistent, unconditional damage reduction, which is exactly what a front-line tank needs in both PvE and PvP. The flat damage reduction is always active, and it scales higher when you drop below 60% HP, helping you survive burst windows and combo chains.
The Formbend Set is also solid alternative, as it extends your shield duration by 2 seconds, giving you more uptime and a bit more breathing room during pressure.
Alternative Gear for PvP
| Stat Group | Recommended Substats |
|---|---|
|
Rainwhisper Weapon |
2 Set Effect: +40 Max HP
4 Set Effect: Increases all Critical DMG and healing by 10%, and further increases them by 15% when you have an HP shield. |
 Calmwaters CalmwatersArmor |
2 Set Effect: +13 Physical Defense
4 Set Effect: A Perfect Dodge of an enemy attack has a 50% chance of restoring 3% of your Max HP and 10 Endurance. |
For PvP, you can opt for Calmwaters if you trust your dodge timing. It rewards Perfect Dodges with consistent health and endurance recovery, boosting your durability in drawn-out fights and letting you stay aggressive without running dry.
Stat Priority
| 1st | Max/Min Stonesplit |
| 2nd | Max HP |
| 3rd | Body |
| 4th | Max/Min Physical Attack |
| 5th | Critical Rate |
Max/Min Stonesplit, Max HP, and Body should be your main priorities. Thundercry Blade’s Charged Skills gain bonus Critical Rate based on your Max HP, so stacking HP not only increases your survivability but also directly boosts your damage.
Max/Min Physical Attack improves all your scaling damage sources, while additional Critical Rate ensures your heavy charged hits connect more consistently, increasing your overall burst.
How to Play Thundercry Blade and Stormbreaker Spear Build
| Jump Table | |||||
|---|---|---|---|---|---|
| Overview | Martial Arts | Inner Way | |||
| Mystic Arts | Set and Stats | How to Play | |||
| Stonesplit - Might Playstyle |
|---|
|
|
Recommended Skill Rotation
- Use Drunken Poet, then parry quickly to Animation Cancel. This lets follow-up skills like Dragon’s Breath to cast instantly.
- Cast Cloud Steps toward your opponent to quickly close distance or reposition before engaging.
- Activate Storm Roar to draw aggro and mitigate incoming damage as you engage
- Cast Thunder Shock to apply Vulnerable, increasing damage your target takes next.
- Use Dual-Weapon Skill to swap to Thundercry Blade.
- Activate Predator’s Shield to gain Fighting Spirit, boosting charge damage and reducing Endurance drain.
- Chain Avalanche until you run low on Endurance, keeping continuous pressure and damage. NOTE: When a boss enters the Exhausted state, you can extend a single instance of Avalanche into a continuous attack chain, allowing you to capitalize on the window for significantly increased damage.
- Cast Dragon’s Breath then Animation Cancel while buffs are still active for burst fire damage, maximizing output from Drunken Poet’s buffed state.
- Use Drunket Poet as many times as you can, then reset the combo.
Block Hits Instead of Dodging
You benefit more by blocking enemy hits instead of dodging, as blocking lets you replenish Fighting Spirit fast. Try to use enemy aggression as a tool to supplement your Fighting Spirit and unleash more hard hitting combos and debuffs.
Taunt to Protect Teammates
When playing multiplayer, you'll want to maximize your taunt ability to ensure your party members can focus on dealing damage. With extra sustain from a healer, you'll be able to survive enemy hits while also triggering your AoE attacks to dish out higher damage, which will benefit your whole team.
PvP Tips and Tricks
This build revolves around reacting to your opponent. You are durable and difficult to kill, but slower and more predictable, so you need to play patiently and look to outtrade rather than overwhelm.
- Always begin a 1v1 with your shield active and, if possible, preload Drunken Poet so you enter the fight with tenacity, buffs, and immediate pressure instead of walking in unprepared.
- Against aggressive melee players, focus on landing the free Charged Heavy strikes from Exquisite Scenery after successful blocks, and use Sunrush Gale to sneak in extra damage when they overcommit or get too comfortable in close range.
- Play fights slowly and deliberately, predicting enemy movement so your heavy charged attacks land cleanly. You may feel outpaced at times, and that’s normal; this is a slower, heavier playstyle.
- Keep Predator’s Shield active whenever possible, as maintaining that protection greatly improves your survivability and lets you take safer trades
- Use Sunrush Gale when your opponent is close to catch them off guard. it's not something to rely on, but it’s excellent for sneaking in some extra damage and disrupting their attacks at key moments.
- Use Serene Breeze whenever you’re caught in an enemy’s combo to break free and regain control, or break any crowd control on you.
- Cloud Steps and Soaring Spin are your key engage tools when you need to take initiative. Play around their mobility, and use the spear's superior speed to chase down opponents if you're having trouble sticking to them.
- With that in mind, respect enemy Cloud Steps. Because tanks use a lot of tenacity, Cloud Steps can counter you hard, so if you see an opponent jump, stop committing to tenacity skills and switch to block or parry instead.
- Against the Vernal Umbrella users, parry their Spring Away shots until they land, or use Cloud Steps to bring them down.
- Use Free Morph immediately after you knock the opponent down.
- Soaring Spin isn't only a gap closer, it also applies a strong healing-reduction debuff, if your opponent utilizes them.
- After an execution is a great moment to use Dragon’s Breath followed by Drunken Poet, and you can animation-cancel Dragon’s Breath when needed to keep your pressure flowing smoothly.
- In 3v3, Sunrush Gale shines in team fights, disrupting enemy animations and locking them in place, which creates strong follow-up damage opportunities for your team. You can use this to protect your healer.
- When you need to go on the offensive, use Cloud Steps to close the distance and follow up with Wolflike Frenzy for quick burst damage. Otherwise, it can be used defensively between enemy attacks to take advantage of its Super Armor and avoid being interrupted.
Where Winds Meet Related Guides


Author

Thundercry Blade and Stormbreaker Spear Build
Rankings
Gaming News

![The Liar Princess and the Blind Prince Review [PC] | Lovely to Look at but Tedious to Play](https://img.game8.co/4442586/8d95f5faf05780f1765ce7e0938bd825.jpeg/show)
![Monster Hunter Stories 3 Review [First Impressions] | Simply Rejuvenating](https://img.game8.co/4438641/2a31b7702bd70e78ec8efd24661dacda.jpeg/thumb)

![The Seven Deadly Sins: Origin [First Impressions] | A Promising Start](https://img.game8.co/4440581/584e0bfb87908f12c4eab6e846eb1afd.png/thumb)
Popular Games

Genshin Impact Walkthrough & Guides Wiki
Umamusume: Pretty Derby Walkthrough & Guides Wiki
Pokemon Pokopia Walkthrough & Guides Wiki
Honkai: Star Rail Walkthrough & Guides Wiki
Monster Hunter Stories 3: Twisted Reflection Walkthrough & Guides Wiki
Arknights: Endfield Walkthrough & Guides Wiki
Wuthering Waves Walkthrough & Guides Wiki
Zenless Zone Zero Walkthrough & Guides Wiki
Pokemon TCG Pocket (PTCGP) Strategies & Guides Wiki
Monster Hunter Wilds Walkthrough & Guides Wiki


Recommended Games
Diablo 4: Vessel of Hatred Walkthrough & Guides Wiki
Cyberpunk 2077: Ultimate Edition Walkthrough & Guides Wiki
Fire Emblem Heroes (FEH) Walkthrough & Guides Wiki
Yu-Gi-Oh! Master Duel Walkthrough & Guides Wiki
Super Smash Bros. Ultimate Walkthrough & Guides Wiki
Pokemon Brilliant Diamond and Shining Pearl (BDSP) Walkthrough & Guides Wiki
Elden Ring Shadow of the Erdtree Walkthrough & Guides Wiki
Monster Hunter World Walkthrough & Guides Wiki
The Legend of Zelda: Tears of the Kingdom Walkthrough & Guides Wiki
Persona 3 Reload Walkthrough & Guides Wiki


All rights reserved
©1997-2025 NetEase, Inc. All Rights Reserved
The copyrights of videos of games used in our content and other intellectual property rights belong to the provider of the game.
The contents we provide on this site were created personally by members of the Game8 editorial department.
We refuse the right to reuse or repost content taken without our permission such as data or images to other sites.
Great guide and you have everything about WWm splendind.