Lucky Seventeen Location and How to Beat
NEW: Hexi Map | Chapter 3 | Flute Mystic Skill
★ Unfettered and Everspring Build
☆ Liangzhou | Cat Fever | Prismatic Essence
✪ Updated: Best Weapon | Best Builds
☆ WWM Game8 Twitter: New tips daily!
Recruit using our Guild Recruitment Board!
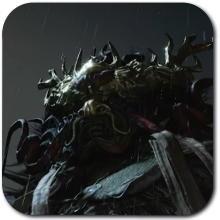
Lucky Seventeen is a Campaign Boss that you can find at Moonveil Mountain in Where Winds Meet. Check out how to beat Lucky Seventeen, their movesets and weaknesses, and the rewards and achievements you can claim here!
List of Contents
Lucky Seventeen Boss Weakness
Basic Information
 |
||
| Difficulty | Weakness | |
|---|---|---|
| ★★★★☆ | TBD | |
Lucky Seventeen Best Companion
The best companion to bring against Lucky Seventeen would be Yi Dao due to his ability to sustain the fight through tanking and healing. Yi Dao also periodically performs a ground attack that staggers Lucky Seventeen.
Lucky Seventeen's aggressive playstyle will easily decimate other companions like Elder Gongsun and Yuan Jin’Gang. While Yi Dao will help you deal with the boss's burst damage and prolong the fight to your advantage.
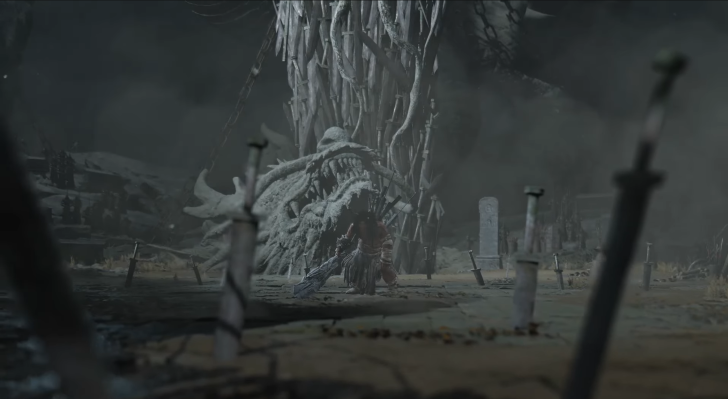
Lucky Seventeen Location
Found at Palace of Annals in Moonveil Mountain
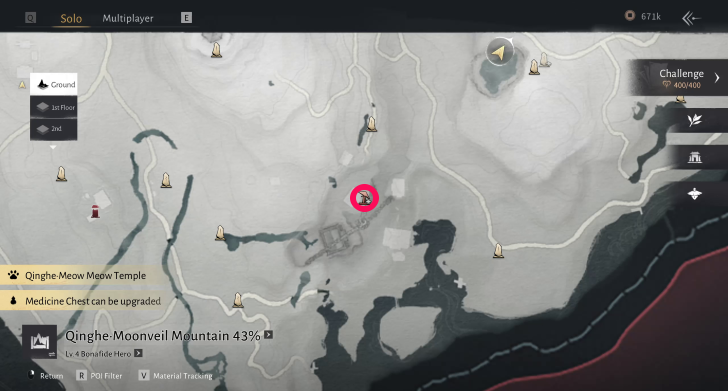
In order to unlock Lucky Seventeen, you will need to complete the Palace of Annals campaign quest to progress further.
Once you have finished the quest, you can find Lucky Seventeen's Campaign version at the Moonveil Mountain area in the Qinghe region.
How to Beat Lucky Seventeen (Campaign Boss)
|
|
Kite and Attack His Rear
We recommend kiting sideways, as Lucky Seventeen has a poor turn rate and targeting abilities. You can easily move around and poke him from his rear.
Be careful of Lucky Seventeen's ground attack that can still hit you from his back.
Use Ranged Weapons to Attack from Distance
We recommend using ranged weapons to attack Lucky Seventeen from a distance. The boss will be at a distance caused by overcharging his attacks past you.
Stay on a spot, attacking from a distance, and anticipating his bulldozing attack, which you should easily evade.
Panacea Fan Guide and How to Unlock
Parry his Melee Attacks
We recommend parrying Lucky Seventeen's melee attack, especially his Red Swing attack, which enables you to perform a counterattack.
During Phase 2, Lucky Seventeen's attack will have more reach, which would be more difficult to evade through moving sideways. On the positive side, this enables you to have more window for parrying.
How to Parry Attacks and Best Parrying Tips
How to Beat Lucky Seventeen (Hero's Realm)
|
|
Triple Jump During Earthshaker
Lucky Seventeen will leap and slam the ground, causing a large shockwave. Earthshaker's area of effect will be marked with glowing red on the ground.
We recommend performing a triple jump before impact to evade Earthshaker's damage.
Avoid Giant Swords
Lucky Seventeen will summon flaming Giant Swords to the battlefield. These Giant Swords cause damage per second around the area of effect marked with a red glow.
If entering the area is unavoidable, such as when needing to destroy smaller swords, you must actively sustain your health with healing.
Destroy the Smaller Swords
Lucky Seventeen will spawn four Swords in different directions while he channels Forge to continuously damage everyone. You will need to destroy the four swords to interrupt Forge.
We recommend destroying these four swords as soon as possible. Strategize as a team whether to split in different directions or deal with each sword together.
Catch Your Ally During Fury Strike
Lucky Seventeen will grab a player and send them flying toward a wall, and the trajectory is shown by a red glow on the floor. We recommend that other players stand in this red path to catch their teammate mid-air, preventing the crash damage.
During phase 2, the trajectory will be aimed towards one of the Giant Swords on the battlefield.
Lucky Seventeen Movesets
| All Lucky Seventeen Phases | |
|---|---|
| Phase 1 | Phase 2 |
| Hero's Realm | |
Phase 1 Lucky Seventeen Moves
| Moves | Details |
|---|---|
| The Call | Lucky Seventeen roars before jumping towards his opponent and smashing the ground. This move can be parried and dodged. |
| Rage: Lunge | Lucky Seventeen turns red and stomps the ground before jumping towards his opponent and smashing the ground. This move can be parried and dodged. |
| Rage: Charge | Lucky Seventeen turns red and stomps the ground before rushing forward and swinging his left hand. This move can be parried and dodged. |
| Sweep Combo | Lucky Seventeen sweeps with his left leg and follows it up with two punches from the ground. This move can be parried and dodged. |
| Headbutt | Lucky Seventeen rushes forward and headbutt his opponent, staggering them. This move can be parried and dodged. |
| Vulcan Touch | Lucky Seventeen charges his fists with a golden glow and flips the ground, causing debris to fly over that direction. This move can only be dodged and not parried. |
| Range: Punch | Lucky Seventeen turns red and stomps the ground and punches his opponent twice, staggering them. This move can be parried and dodged. |
| Blacksmith Combo | Lucky Seventeen stomps and follows up with a two-handed slam into a spinning jab. This move can be parried and dodged. |
| One, Two | Lucky Seventeen rushes forward with a two punch combo, causing staggers with each punch. This move can be parried and dodged. |
Phase 2 Lucky Seventeen Moves
| Moves | Details |
|---|---|
| The Grand Call | In Phase 2, Lucky Seventeen throws his sword towards his opponent and picks it up as an opening move. This move can be parried and dodged. |
| Weapon Combo | Lucky Seventeen swings his weapon and uses it to blunt his opponent. He uses a back swing as a final move. This move can be parried and dodged. |
| Vulcan Slam | Lucky Seventeen charges his weapon with a golden glow and smashes it violenty into the ground. This move can only be dodged and not parried. |
| Red Swing | Lucky Seventeen heavily swings his weapon with a red glow. This move can be perfect parried to trigger a counterattack and dodged when timed correctly. |
| Back Swing | Lucky Seventeen swings his weapon from a back hand, causing stagger to his opponent. This move can be parried and dodged. |
| Tornado Smash | Lucky Seventeen spins toward his opponent and smashes them upon contact. Each attack causes staggering to his opponents. This move can be parried and dodged. |
| Sweep Smash | Lucky Seventeen uses his weapon to sweep his opponent and then jumps, smashing his weapon to the ground to cause shockwaves. This move can be parried and dodged. |
| Stomp | Lucky Seventeen stomps the ground, causing shockwaves and disrupting his enemies. This move can be parried and dodged. |
| Enhancement | Lucky Seventeen spins aways from his opponent and enhances his weapon, causing more damage with each attack. This move can be parried and dodged. |
Hero's Realm Lucky Seventeen Attack Pattern
| Moves | Details |
|---|---|
| Dual Swing | Lucky Seventeen swings his hammer twice. We recommend waiting for the attack to end, or dodging backwards to avoid damage. |
| Forging Slam | Lucky Seventeen swings his hammer before slamming it in front of him. We recommend dodging to the side to avoid damage. |
| Inferno Surge | Seventeen slams his hammer onto the ground, which creates yellow circles on the ground that create flame eruptions after a delay. We recommend constantly moving during this attack to avoid the flames. |
| Vulcan Leap | Lucky Seventeen leaps into the air, then slams his hammer, creating a flame AoE on impact. We recommend running away from the landing zone to avoid damage. |
| Blaze of the Worthy | Seventeen throws his hammer forward, with the hammer arcing back to him after. We recommend staying behind Lucky Seventeen during this attack. |
| Echo Slam | Seventeen slams his hammer in front of him, dealing damage, which also creates a shockwave shortly after. We recommend dodging or parrying the shockwave, after dodging the initial slam. |
| Earthshaker | Lucky Seventeen leaps into the air, then slams his hammer damaging the entire arena. We recommend timing your dodge for the shockwave. |
| Forge | Lucky Seventeen spawns four swords, gains a shield, and continously hammers away, dealing damage to players near him. Destroy the four swords to cancel this attack. |
| Blade Eruption | During the second phase, Lucky Seventeen follows up his Dual Swing with a jump slam that spawns blades from the ground. We recommend dodging to the side to avoid damage. |
| Tempering | Lucky Seventeen slams his hammer multiple times, dealing damage to a wide cone in front of him. We recommend staying behind him at all times during this attack to avoid damage. |
| Giant Sword | Lucky Seventeen calls forth a giant sword that descends onto the arena, dealing AoE fire damage continously. We recommend staying away from the swords to minimize its impact. |
| Fury Strike | Lucky Seventeen will grab a player, send them flying in the air, and smash them against the wall. The trajectory of that player will be indicated by a red glow on the floor. |
Lucky Seventeen Boss Rewards
Lucky Seventeen Drops
|
・Echo Jade x50 ・Character XP x30000 ・Zhou Coin x30000 ・Medicinal Tales x1 ・Vital Leech: Tome x1 ・Oscillating Jade x5 |
Where Winds Meet Related Guides
| All Boss Guides | |
|---|---|
| World Bosses | - |
Campaign Bosses
 Heartseeker Heartseeker
|
 Qianye Qianye
|
 Ye Wanshan Ye Wanshan
|
 The Void King The Void King
|
 Lucky Seventeen Lucky Seventeen
|
 Tian Ying Tian Ying
|
 Dao Lord Dao Lord
|
 Zheng the Frostwing Zheng the Frostwing
|
 Murong Yuan Murong Yuan
|
 God of Avarice God of Avarice
|
 River Master River Master
|
World Bosses
 Puppeteer - Sheng Wu Puppeteer - Sheng Wu
|
 Sleeping Daoist Sleeping Daoist
|
Puppeteer - Curtaincall
|
 Earth Fiend Deity Earth Fiend Deity
|
 Snake Doctor Snake Doctor
|
 Yi Dao Yi Dao
|
 Wolf Maiden Wolf Maiden
|
 Twin Lions Twin Lions
|
 Ghost Master Ghost Master
|
 Nameless General Nameless General
|
 Feng Ruzhi Feng Ruzhi
|
Quest-related Bosses
 Dalang Dalang
|
 He Yuezhi He Yuezhi
|
 Shen Yiren Shen Yiren
|
Challenge Bosses
 Elder Gongsun Elder Gongsun
|
 Gongsun Deng Gongsun Deng
|
 Demon Goose Demon Goose
|
Comment
Author

Lucky Seventeen Location and How to Beat
Rankings
Gaming News


Popular Games

Genshin Impact Walkthrough & Guides Wiki
Umamusume: Pretty Derby Walkthrough & Guides Wiki
Pokemon Pokopia Walkthrough & Guides Wiki
Honkai: Star Rail Walkthrough & Guides Wiki
Monster Hunter Stories 3: Twisted Reflection Walkthrough & Guides Wiki
Arknights: Endfield Walkthrough & Guides Wiki
Wuthering Waves Walkthrough & Guides Wiki
Zenless Zone Zero Walkthrough & Guides Wiki
Pokemon TCG Pocket (PTCGP) Strategies & Guides Wiki
Monster Hunter Wilds Walkthrough & Guides Wiki


Recommended Games
Diablo 4: Vessel of Hatred Walkthrough & Guides Wiki
Cyberpunk 2077: Ultimate Edition Walkthrough & Guides Wiki
Fire Emblem Heroes (FEH) Walkthrough & Guides Wiki
Yu-Gi-Oh! Master Duel Walkthrough & Guides Wiki
Super Smash Bros. Ultimate Walkthrough & Guides Wiki
Pokemon Brilliant Diamond and Shining Pearl (BDSP) Walkthrough & Guides Wiki
Elden Ring Shadow of the Erdtree Walkthrough & Guides Wiki
Monster Hunter World Walkthrough & Guides Wiki
The Legend of Zelda: Tears of the Kingdom Walkthrough & Guides Wiki
Persona 3 Reload Walkthrough & Guides Wiki


All rights reserved
©1997-2025 NetEase, Inc. All Rights Reserved
The copyrights of videos of games used in our content and other intellectual property rights belong to the provider of the game.
The contents we provide on this site were created personally by members of the Game8 editorial department.
We refuse the right to reuse or repost content taken without our permission such as data or images to other sites.