This survey will take about 1 minute.
Your answers will help us to improve our website.
Where Winds Meet
Wandering Ark Location and How to Beat
03/06: Hexi Map | Chapter 3
★ Unfettered and Everspring Build
☆ Hexi Bosses: Guo Xin | Wandering Ark
✪ Updated: Best Weapon | Best Builds
☆ WWM Game8 Twitter: New tips daily!
Recruit using our Guild Recruitment Board!
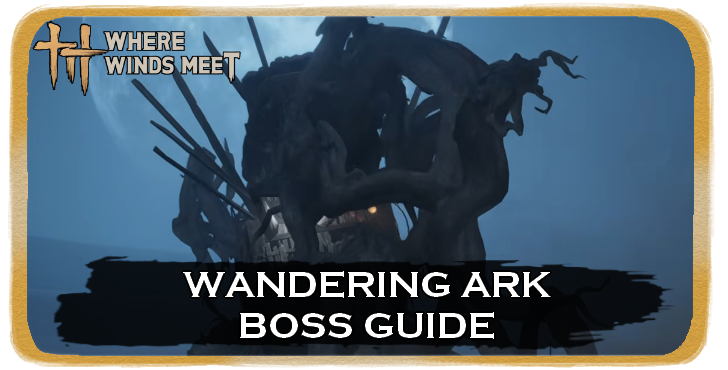
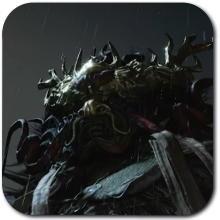
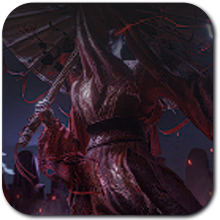
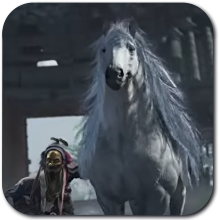
Wandering Ark is a World Boss that you can find at Shifting Sands in Where Winds Meet, introduced in the Hexi update. Check out how to beat Wandering Ark, their movesets and weaknesses, and the rewards and achievements you can claim here!
List of Contents
Wandering Ark Overview
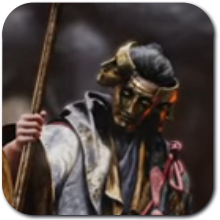
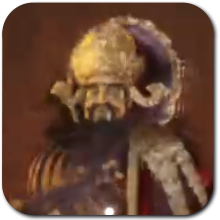
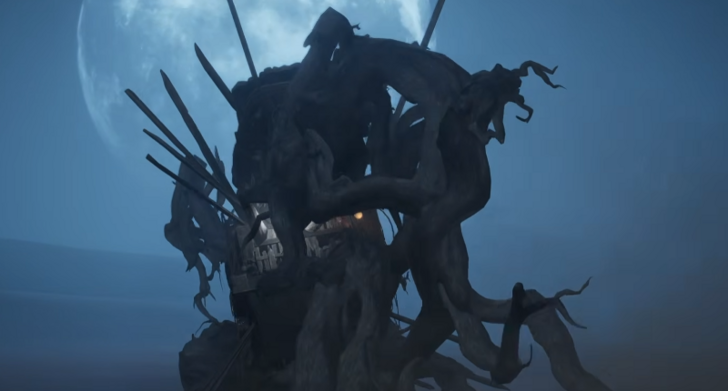 Wandering Ark Wandering Ark |
||
| Difficulty | Weakness | |
|---|---|---|
| ★★★☆☆ | None | |
| Recommended Arts | ||
| Martial Arts | ・Everspring Umbrella ・Nameless Sword ・Panacea Fan ・Vernal Umbrella |
|
| Mystic Arts | ・Cloud Steps ・Ghostly Steps |
|
Wandering Ark Location
Found in the Shifting Sands Northeast of Jade Gate Pass
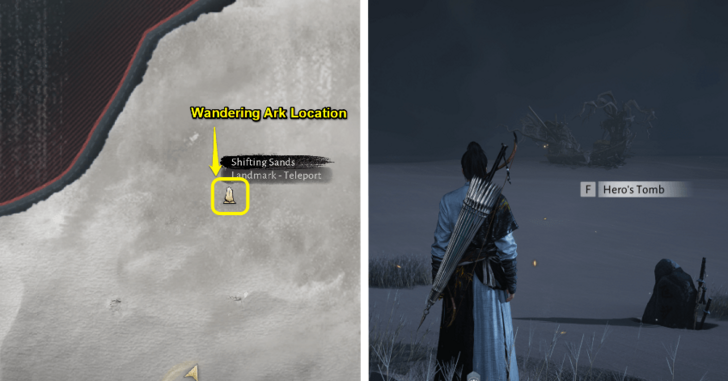
The Wandering Ark can be encountered in the Shifting Sands. To reach it, head northeast of Jade Gate Pass map and press forward through the sandstorm. Once the storm clears, you'll discover a nearby Boundary Stone, with the Wandering Ark waiting close by.
How to Beat Wandering Ark
|
|
Close the Distance Early
At the very start of the fight, the Wandering Ark will try to zone you out with ghostly volleys. Do not waste the opening by trading shots or jogging in slowly. Sprint in with intention, dodge the volleys, and get close as soon as you can, because it will stop using Phantom Volley once you are near it.
Destroy the Withered Branches on the Ark's Legs (Phase 1)
The Wandering Ark’s legs are bound with four glowing, withered branches. In Phase 1, destroying these branches is the primary way to deal meaningful damage and weaken it. Focus your attacks on them rather than mindlessly hitting the hull.
Martial Arts with ranged capabilities such as Vernal Umbrella, Nameless Sword, and Everspring Umbrella make this much easier, allowing you to safely target the branches while avoiding its slams and area attacks.
Attack the Moon Lantern When It Falls (Phase 1)
The Moon Lantern will usually fall to the ground after the Wandering Ark launches itself high into the air and crashes down. When this happens, quickly attack the lantern while it is exposed on the ground to deal significant damage and progress the fight more efficiently.
Master the Moonfall Mechanic (Phase 2)
In Phase 2, the Wandering Ark will begin using Moonfall, summoning a miniature moon that crashes down toward you. Sprint out of the red landing marker before impact, then interact with the moon once it lands to rewind time and launch it back at the boss.
Do this quickly, as the moon will explode after a short delay if left alone, damaging you. Successfully throwing it back deals massive damage and is the main way to pressure the Wandering Ark during this phase.
Target the Moon Lantern with Your Bow (Phase 2)
You can try shooting the Moon Lantern with your bow during Phase 2 to deal additional damage. However, its hitbox is quite small and difficult to land consistently, so this method can be unreliable. If you have the opportunity and a clear shot, it is worth attempting, but do not rely on it as your main strategy.
Focus on the Mechanics
The Wandering Ark is a gimmick-heavy boss, and most of your damage comes from correctly handling its mechanics rather than raw DPS. Pay attention to its special attacks, destroy the withered branches in Phase 1, and use the Moonfall mechanic in Phase 2 to deal significant damage.
Fighting it normally without engaging with these mechanics will make the battle much slower and more dangerous.
Wandering Ark Movesets
Phase 1 Attack Pattern
| Moves | Details |
|---|---|
| Phantom Volley | As you approach the Wandering Ark, it will fire ghostly volleys in your direction. Watch their timing and sprint just before they land to avoid taking unnecessary damage. Pace yourself and conserve your Endurance so you are not caught empty when you need to do a sprint or a dodge. The boss will stop using this attack once you close the distance and get near it. |
| Arkfall Slam | The Wandering Ark launches high into the air before crashing down into the sand in a massive slam. Simply move out of the impact zone and avoid the landing area. The moon lantern drops afterwards, so make sure to attack it. |
| Relentless Arkfall | The Wandering Ark launches into the air and slam-crashes into the sand three times in a row, with much faster pacing than its single jump. Don’t try to tank it. Keep moving, watch where it’s about to land, and sidestep each impact zone as it comes down. |
Phase 2 Attack Pattern
| Moves | Details |
|---|---|
| Ark Charge | The Wandering Ark barrels through the sand straight toward you in a sudden, high-speed rush. The charge is fast and direct, so sprint sideways rather than backward to escape its path. React quickly and clear the line of travel before it closes the distance. |
| Moonfall | The Wandering Ark soars high into the air and begins forming a miniature moon overhead. When the moon becomes whole, it crashes down toward you, marked by a circular red indicator on the ground. Sprint out of the marker before impact. Once the moon lands, interact with it immediately to use Cosmic Reversal and rewind time and hurl it back at the Wandering Ark. Do this quickly, or the moon will explode after a short delay, dealing heavy damage. This mechanic is the primary way to inflict significant damage during Phase 2. |
| Grasping Sandbloom | The Wandering Ark summons thorned brambles from beneath the sand, sending them surging toward you. As soon as they emerge, create distance and keep moving away from their path. |
| Phantom Fleetfall | The Wandering Ark rises into the air and summons smaller ghostly boats that rain down toward your position. Watch the ground for their landing zones and move out before they crash down. The projectiles are predictable, so simple repositioning is enough to avoid taking damage. |
| Moonlit Shadow Binding | The Wandering Ark traps you inside a miniature moon, suspending you helplessly before drawing you onto its deck. After a few seconds, it hurls you away for massive damage. Use Serene Breeze immediately to break free. |
| Shockwake Leap | The Wandering Ark lunges toward you and crashes down with force, creating a shockwave that launches you into the air on impact. Move out of its landing zone before it hits the ground. |
| Thornbound Barrage | The Wandering Ark summons a wall of brambles around you, then unleashes a Phantom Barrage while a circular marker tracks your movement. Keep moving to avoid the incoming projectiles and be careful not to brush against the thorns. Continue circling and kiting until both the brambles and the barrage fade. |
Wandering Ark Rewards
Wandering Ark Drops
|
・Echo Jade x20 ・Withered Twig x1 ・Inner Way: Custom Notes x5 ・Medicinal Tales x3 ・Hexi Exploration x50 ・Coin x12,000 |
Where Winds Meet Related Guides

| All Boss Guides | |
|---|---|
| World Bosses | - |
Campaign Bosses
 Heartseeker Heartseeker
|
 Qianye Qianye
|
 Ye Wanshan Ye Wanshan
|
 The Void King The Void King
|
 Lucky Seventeen Lucky Seventeen
|
 Tian Ying Tian Ying
|
 Dao Lord Dao Lord
|
 Zheng the Frostwing Zheng the Frostwing
|
 Murong Yuan Murong Yuan
|
 God of Avarice God of Avarice
|
 River Master River Master
|
World Bosses
 Puppeteer - Sheng Wu Puppeteer - Sheng Wu
|
 Sleeping Daoist Sleeping Daoist
|
Puppeteer - Curtaincall
|
 Earth Fiend Deity Earth Fiend Deity
|
 Snake Doctor Snake Doctor
|
 Yi Dao Yi Dao
|
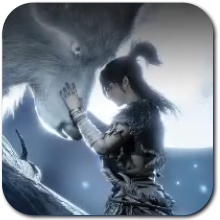 Wolf Maiden Wolf Maiden
|
 Twin Lions Twin Lions
|
 Ghost Master Ghost Master
|
 Nameless General Nameless General
|
 Feng Ruzhi Feng Ruzhi
|
 Drunk Martial Artist Drunk Martial Artist
|
 Coffin Master Coffin Master
|
Quest-related Bosses
 Dalang Dalang
|
 He Yuezhi He Yuezhi
|
 Shen Yiren Shen Yiren
|
Comment
Author

Wandering Ark Location and How to Beat
Please participate in our site
improvement survey
03/2026
improvement survey
03/2026
Would you assist in
improving Game8's site?
improving Game8's site?

×
We are listening to our users' valuable opinions and discussing how to act on them.
The information collected through this survey will be used for the purpose of improving our services. In addition, the information will only be disclosed a part of a statistic in a format that will not allow identification of personal information.
Begin Survey
Not Now
×
Please rate each item regarding Game8.co's Advertisements.
Amount of Ads
Very Dissatisfied
Somewhat Dissatisfied
Fine
Somewhat Satisfied
Highly Satisfied
Placement of Ads
Timing of Ad Display
Ad Loading Speed
Safeness of Ads
Content of Ads
×
Please rate each item regarding Game8.co's Quality of Articles.
Amount of information
Very Dissatisfied
Somewhat Dissatisfied
Fine
Somewhat Satisfied
Highly Satisfied
Frequency of updates
Speed of new information
Accuracy of articles
Understandibility of articles
Readability of sentences
×
Please rate each item regarding Game8.co's Usability of the Site.
Ease of finding information
Very Dissatisfied
Somewhat Dissatisfied
Fine
Somewhat Satisfied
Highly Satisfied
Loading Speed
Use of Color
Font Size
Visibility of Images
Easy to Understand Layout
×
Please rate each item regarding Game8.co's Message Boards, Comments.
Ease of Writing
Very Dissatisfied
Somewhat Dissatisfied
Fine
Somewhat Satisfied
Highly Satisfied
Readability
Ease in Finding Information
Comment Quality
Comment Quantity
Admin Response
×
Please rate each item regarding Game8.co's Site's new design.
Please rate our site's new design
Very Dissatisfied
Somewhat Dissatisfied
Fine
Somewhat Satisfied
Highly Satisfied
Do you think that the website's design change makes the site easier to use?
Has the new design made it easier for you to find information on the site?
Has the new design improved the overall visual appeal of the site?
How would you rate your overall satisfaction with the new design of the site?
×
How likely are you to recommend Game8 to someone you know?
Very Unlikely
0
1
2
3
4
5
6
7
8
9
10
Very Likely
If you have other opinions regarding potential improvement to the website, please share them with us. We would appreciate your honest opinion.
Note: This is a free response section, so you can proceed without entering anything.
Note: Please be sure not to enter any kind of personal information into your response.
Note: Please be sure not to enter any kind of personal information into your response.
×
Thank You
×
Thank you for participating in our survey! Your answers will help us to improve the quality of our website and services.
We hope you continue to make use of Game8.
We hope you continue to make use of Game8.
Close
Rankings
- We could not find the message board you were looking for.
Gaming News


![Slay the Spire 2 Review [Early Access] | Still the Deckbuilder to Beat](https://img.game8.co/4433115/44e19e1fb0b4755466b9e516ec7ffb1e.png/thumb)

Popular Games

Genshin Impact Walkthrough & Guides Wiki
Resident Evil Requiem (RE9) Walkthrough & Guides Wiki
Honkai: Star Rail Walkthrough & Guides Wiki
Monster Hunter Wilds Walkthrough & Guides Wiki
Umamusume: Pretty Derby Walkthrough & Guides Wiki
Pokemon TCG Pocket (PTCGP) Strategies & Guides Wiki
Arknights: Endfield Walkthrough & Guides Wiki
Wuthering Waves Walkthrough & Guides Wiki
Zenless Zone Zero Walkthrough & Guides Wiki
Digimon Story: Time Stranger Walkthrough & Guides Wiki


Recommended Games
Fire Emblem Heroes (FEH) Walkthrough & Guides Wiki
Yu-Gi-Oh! Master Duel Walkthrough & Guides Wiki
Super Smash Bros. Ultimate Walkthrough & Guides Wiki
Diablo 4: Vessel of Hatred Walkthrough & Guides Wiki
Pokemon Brilliant Diamond and Shining Pearl (BDSP) Walkthrough & Guides Wiki
Elden Ring Shadow of the Erdtree Walkthrough & Guides Wiki
Monster Hunter World Walkthrough & Guides Wiki
The Legend of Zelda: Tears of the Kingdom Walkthrough & Guides Wiki
Persona 3 Reload Walkthrough & Guides Wiki
Cyberpunk 2077: Ultimate Edition Walkthrough & Guides Wiki


All rights reserved
©1997-2025 NetEase, Inc. All Rights Reserved
The copyrights of videos of games used in our content and other intellectual property rights belong to the provider of the game.
The contents we provide on this site were created personally by members of the Game8 editorial department.
We refuse the right to reuse or repost content taken without our permission such as data or images to other sites.