Zeraora Guide: Builds and Best Items
☆ Upcoming: Articuno | Meganium | Typhlosion | Feraligatr
★ Latest News: Zapdos | Moltres | Version 1.22.1.5
☆ Popular Pages: Upcoming Pokemon | Tier List
★ Current Seasons: Ranked S34 | Battle Pass S39
☆ Join Game8's Pokemon Discord Server!
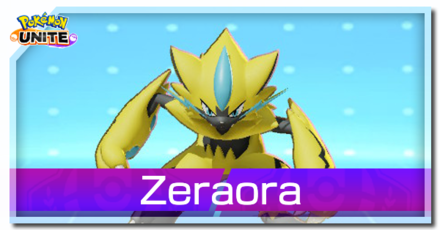
The best guide on how to play Zeraora in Pokemon UNITE for Nintendo Switch and Mobile. Check here for the best builds, Held and Battle items, movesets, as well as the latest nerfs, buffs, counters, matchups, how to get Zeraora, and more!
List of Contents
How to Get Zeraora License
Win 32 Battles to Complete the Zeraora Mission!

With the release of the mobile version, there is a new mission that will allow you to unlock Zeraora. This mission will require you to play and win 32 UNITE battles to get a free Zeraora License!
If you already have a Zeraora License from playing before the Mobile Release, you will instead be compensated with 8000 Aeos Coins! This is a sweet deal so try finishing this event whether you have Zeraora or not!
Zeraora Latest Nerfs & Buffs (4/24)
| Zeraora Changes | |
|---|---|
| Feature Removed | • Removed defense penetration. |
|
Discharge |
• Damage reduced by 17%-10%. • Shield amount reduced by 10%. |
Stat Updates
| 1.18.1.4 | Basic attack speed increased to 0-7.7% (Lv.1–15). |
|---|---|
| 1.18.2.6 | Removed defense penetration. |
Plasma Gale
| 1.3.1.2 | Damage to opposing Pokemon decreased from 2485 to 1975. (-20.5%) |
|---|---|
| 1.1.1.4 | Damage dealt to opposing Pokemon decreased from 2819 to 2485 (-12%). |
| 1.6.1.2 | Move is now learned at Lv. 9 |
Wild Charge
| 1.3.1.7 | Fixed a bug where KO-ing Pokemon will interrupt the move. Camera action adjusted. |
|---|---|
| 1.3.1.2 | Bugfix |
| 1.2.1.3 | Cooldown reduced from 12 to 8. Damage reduction while in Wild Charge effect increased. |
| 1.1.1.4 | Damage dealt to opposing Pokemon increased from 3068 to 3396 (+11%). Cooldown decreased from 12s to 11s. |
| 1.2.1.8 | Upgraded Version (+): Fixed a bug that causes more damage that expected when hitting multiple Pokemon. |
| 1.4.1.2 | Fixed a bug where the increase in the number of attacks due to sparks has been disabled. |
| 1.11.1.3 | Level learned changed from Level 8 to Level 7. Damage reduced by 5%. Cooldown increased from 9s to 10s. (+1s). Wild Charge +: Level learned changed from Level 14 to Level 13. Damage reduced by 5%.Cooldown increased from 9s to 10s. (+1s) |
| 1.13.1.4 | Damage increased by 13%. |
| 1.14.1.5 | Fixed an issue where Wild Charge+ damage remained in the location where it was activated. |
| 1.16.2.9 | Cooldown reduced from 10s to 9s. |
| 1.18.1.4 | Cooldown reduced from 9s to 8s. |
Spark
| 1.3.1.7 | Damage dealt to opposing Pokemon decreased 1545 → 1230 (-23%) |
|---|---|
| 1.3.1.2 | Adjusted controls. |
| 1.2.1.3 | Time in between cast lengthened! Spark Auto attacks now count towards Wild Charge bonus hits. |
| 1.1.1.4 | Bug Fixes |
| 1.9.1.2 | Fixed an issue where standard attack charges would sometimes not trigger after using this move. |
| 1.11.1.3 | Level learned changed from Level 6 to Level 5. Spark +: Level learned changed from Level 12 to Level 11. |
| 1.16.2.9 | Cooldown reduced from 10s to 9s. |
Volt Switch
| 1.4.1.7 | Damage increased from 1500 to 1883 (+26%). |
|---|---|
| 1.11.1.3 | Level learned changed from Level 6 to Level 5. Volt Switch +: Level learned changed from Level 12 to Level 11. |
| 1.13.1.4 | Damage increased by 20%. |
Slash
| 1.2.1.3 | Number of hits reduced, first hit damage increased. Total damage increased from 972 to 1006 (+3.4%) |
|---|
Discharge
| 1.3.1.2 | Damage to opposing Pokemon decreased from 3608 to 3024. (-16.9%), Shield effect decreased |
|---|---|
| 1.5.1.2 | Shield effect strengthened. |
| 1.6.1.2 | Damage increased from 3024 to 3232 . Cooldown reduced from 12s to 10s |
| 1.11.1.3 | Level learned changed from Level 8 to Level 7. Cooldown reduced from 10s to 8s. (-2s). Discharge +: Level learned changed from Level 14 to Level 13. Cooldown reduced from 10s to 8s. (-2s) |
| 1.16.2.9 | Shield amount increased by 15%. |
| 1.18.2.6 | Damage reduced by 17%-10%. Shield amount reduced by 10%. |
Volt Absorb
| 1.4.1.2 | Fixed a bug where the effect of Volt Absorb was activated after being KO'd. |
|---|
Zeraora Basic Info
| Zeraora | ||
|---|---|---|
 |
Role: Speedster Attack Type: Melee Damage Type: Physical Difficulty: Expert |
|
| "Zeraora can close the distance between itself and its opponents as fast as lightning, dealing massive amounts of damage all at once." | ||
Zeraora Best Lanes

|

|

|
Tips & Strategies for Every Lane
Strengths and Weaknesses
| Strengths | Weaknesses |
|---|---|
| ✔︎ Excellent combination of Dash and Attack moves. ✔︎ Has two playstyles depending on enemy team. |
✖︎ Needs to scale to mid-game to shine. ✖︎ Moves take a long time to learn. ✖︎ Can get easily picked off when its momentum gets stopped. |
Best Builds for Zeraora
| Zeraora Builds | |
|---|---|
| - | |
Discharge Build
Discharge Build

|
Moveset | Held Items | |||
|---|---|---|---|---|---|
| Battle Item | |||||
| Stats from Items (Lv. 40) | Recommended Lane | ||||
|
Attack: +38.5 Defense: +35 Sp. Def: +35 HP: +235 |
|
||||
| Emblem Color Combination | Target Emblem Stats | ||||
|
|
Positive Stats: • HP • Attack Free Negative Stats: • Sp. Atk • Defense • Sp. Def |
||||
| Note: The emblem color and stats here are suggestions only. The builds are still viable even without the suggested emblems. |
|||||
Discharge Build Explanation
| Build Explanation |
|---|
| This build is centered on dealing high AoE damage using Discharge with Volt Switch being the complimentary move to set it up. |
| · Attack Weight increases Zeraora's overall damage output, particularly for Discharge. · Weakness Policy further boosts Zeraora's damage whenever it takes hits, and it synergizes well with Volt Absorb's effect. · Focus Band improves Zeraora's defenses and gives it a healing tool. It also goes well with Volt Absorb's effect. · However, Muscle Band can be a replacement for Attack Weight, improving Zeraora's attacks through increased damage and attack speed. · Shedinja Doll allows Zeraora to avoid all damage and hindrances for a short time while still being able to deal damage via Discharge. It's also useful for buying some time while waiting for its moves to cooldown. · Full Heal can also work for the build, giving Zeraora a tool to purge off stuns and debuffs when needed. · The build's Boost Emblem loadout should consist of 6 Brown Emblems for more damage and 6 White Emblems additional HP. · This can be achieved by equipping at least two (2) Emblems that are both Brown and White. · Equip Emblems that improve Attack or HP to balance out Zeraora's offense and defense. · Sp. Atk., Sp. Def., and Defense can be freely traded for the other stats. |
Discharge Build Damage Test
| Items (@ Lvl 30) + Focus Band |
Discharge (@ Lvl 15) |
Volt Switch (@ Lvl 15) |
|---|---|---|
| Attack Weight (6 stacks) + Weakness Policy (4 stacks) |
3872 (w/ Volt Absorb) |
2747 (w/ Volt Absorb) |
Since the build is centered on Discharge and Volt Switch, equipping items that will maximize their damage is the ideal item combination.
As the results show, a fully-stacked Attack Weight and Weakness Policy will produce the highest damage for both moves.
As for alternatives, replacing Attack Weight with Muscle Band would be the best option. It scored the second best results but also improves Zeraora's attacks, which will be benefitial in the long run.
These damage tests are conducted using the Training Dummy in Practice Mode. The results are taken from the Total Damage data.
| Items (@ Lvl 30) + Focus Band | Discharge (@ Lvl 15) | Volt Switch (@ Lvl 15) |
|---|---|---|
| Muscle Band + Razor Claw | 3328 | 2335 |
| Muscle Band + Attack Weight (6 stacks) | 3576 | 2500 |
| Muscle Band + Weakness Policy (4 stacks) | 3656 (w/ Volt Absorb) | 2559 (w/ Volt Absorb) |
| Razor Claw + Attack Weight (6 stacks) | 3576 | 2500 |
| Razor Claw + Weakness Policy (4 stacks) | 3656 (w/ Volt Absorb) | 2559 (w/ Volt Absorb) |
| Attack Weight (6 stacks) + Weakness Policy (4 stacks) | 3872 (w/ Volt Absorb) | 2747 (w/ Volt Absorb) |
The tests above does not use any Emblems yet so it will scale higher if equipped.
Wild Charge Build
| Wild Charge Build | Moveset | Held Items | |||
|---|---|---|---|---|---|
| Battle Item | |||||
| Stats from Items (Lv. 40) | Recommended Lane | ||||
|
Attack: +38.5 Attack Speed: +8.70% Cooldown: -5.20% Unite Move Charge Rate: +7% |
|
||||
| Emblem Color Combination | Target Emblem Stats | ||||
|
|
Positive Stats: • HP • Attack Free Negative Stats: • Sp. Atk • Defense • Sp. Def |
||||
| Note: The emblem color and stats here are suggestions only. The builds are still viable even without the suggested emblems. |
|||||
Wild Charge Build Explanation
| Build Explanation |
|---|
| This build revolves around bursting down a target using Wild Charge with the help of Spark to maximize the number of attacks. |
|
· Muscle Band improves Zeraora's attacks through increased damage and attack speed. · Attack Weight increases Zeraora's overall damage output, particularly for Wild Charge. · Energy Amplifier further boosts Zeraora's damage whenever it uses Plasma Gale. It also reduces its move cooldowns. · However, Razor Claw can be a replacement for Muscle Band, giving Zeraora's attacks a slow effect whenever it uses a move and increased critical-hit rate. · Full Heal allows Zeraora to purge stuns and debuffs and perform its combos continuously. · Shedinja Doll can also work with the build, allowing Zeraora to buy some time while waiting for its moves to cooldown. · The build's Boost Emblem loadout should consist of 7 Black Emblems to minimize move cooldowns and 3 Emblems of any color. · Equip Emblems that improve Attack or HP to balance out Zeraora's offense and defense. · Sp. Atk., Sp. Def., and Defense can be freely traded for the other stats. |
Wild Charge Buid Damage Test
| Items (@ Lvl 30) |
Wild Charge (@ Lvl 15) (6 Slashes) |
Spark (@ Lvl 15) (No attacks) |
|---|---|---|
| Muscle Band + Attack Weight (6 stacks) + Energy Amplifier (Includes effect) |
8176 | 1656 |
Since the build is centered on mainly Wild Charge, equipping items that will maximize its damage is the ideal item combination.
As the results show, Muscle Band or Razor Claw, Energy Amplifier, and a fully-stacked Attack Weight will produce the highest Wild Charge damage output.
These damage tests are conducted using the Training Dummy in Practice Mode. The results are taken from the Total Damage data.
| Items (@ Lvl 30) | Wild Charge (@ Lvl 15) (6 Slashes) | Spark (@ Lvl 15) (No attacks) |
|---|---|---|
| Muscle Band + Razor Claw (Includes effect) + Attack Weight (6 stacks) | 6756 | 1392 |
| Muscle Band + Razor Claw + Energy Amplifier (Includes effect) | 7547 | 1533 |
| Muscle Band + Attack Weight (6 stacks) + Energy Amplifier (Includes effect) | 8176 | 1656 |
| Razor Claw + Attack Weight (6 stacks) + Energy Amplifier (Includes effect) | 8176 | 1656 |
The tests above does not use any Emblems yet so it will scale higher if equipped.
Zeraora Best Items & Moveset
Best Held Items
| Item | Explanation |
|---|---|
 Attack Weight Attack Weight
|
Attack Weight increases Zeraora's Attack stat for each goal scored. This allows it to further amplify Zeraora's damage output. |
 Energy Amplifier Energy Amplifier
|
Energy Amplifier gives Zeraora a large damage boost whenever it uses Plasma Gale. It also gives decent move cooldown reductions. |
 Focus Band Focus Band
|
Focus Band improves Zeraora's overall durability through increased defenses, and gives it a healing tool that goes well wit Volt Absorb. |
 Muscle Band Muscle Band
|
Muscle Band provides bonus damage for Zeraora's Standard Attacks. It also increases the Pokemon's attack speed, allowing it to get hits faster. |
 Razor Claw Razor Claw
|
Razor Claw increases Zeraora's Attack and critical hit chance. It also works great with Spark since the time window between each leap is enough time for Razor Claw's damage bonus to cooldown. |
 Weakness Policy Weakness Policy
|
Weakness Policy boosts Zeraora's Attack and HP stats. It also synergizes well with Volt Absorb, giving Zeraora increased damage. |
Held Item Tier List: Best Items to Equip
Best Battle Items
| Item | Explanation |
|---|---|
 Full Heal Full Heal
|
Full Heal allows Zeraora to purge off disables, enabling the Pokemon to perform its combos smoothly. |
 Eject Button Eject Button
|
Eject Button gives Zeraora more reach on top of its excellent assortment of dash moves |
 X Attack X Attack
|
X Attack improves Zeraora's burst potential through increased overall damage and faster attack speed.. |
 Shedinja Doll Shedinja Doll
|
Shedinja Doll suits Zeraora's diving gameplay, enabling it to avoid all damage for a short duration and buy time for its moves to cooldown when needed. |
Best Moveset
| Move | Explanation |
|---|---|
 Discharge Discharge
|
Discharge allows Zeraora to deal continuous damage damage across a wide range. It is great for both pressuring grouped enemies and securing Wild Pokemon. |
 Volt Switch Volt Switch
|
Volt Switch is a quick and easy dash move that allows Zeraora easily engage and disengage from combat. |
This moveset gives Zeraora more presence during teamfights and is simpler and quicker to execute. Discharge deals tons of AoE damage that also grants Zeraora a shield if it hits an opponent, making it the better choice for teamfights. Volt Switch gives Zeraora a quick and reliable mobility tool to set up Discharge.
Discharge and Wild Charge are Zeraora's primary damage moves. Each move has its pros and cons, although the purpose of both moves are still for bursting down targets.
When going for Discharge, Zeraora can deal a decent amount of damage in an area around it, making it great for teamfights. However, it does put the Pokemon at great risk whenever it uses the move since the Pokemon needs to stay on top of targets for the entire duration to maximize its damage, otherwise, the move will be wasted completely.
As for Wild Charge, it deals significantly more damage compared to Discharge but is generally only effective against a single target. In addition, for the move to deal its maximum damage, Zeraora must always use Spark or Volt Switch first to increase the number of attacks it performs during Wild Charge.
On the other hand, Volt Switch and Spark are Zeraora's complimentary dash moves. Although both moves can theoretically be paired with either of the other moves, there is a benefit from having a specific pair.
Volt Switch naturally works better with Discharge since Zeraora can quickly get in and out of fights with the move, giving the Pokemon a quick escape tool when needed. It also allows Zeraora to easily pull opponents that are stunned, which is virtually impossible to execute using Spark.
As for Spark, it's best paired with Wild Charge since it can maximize the number of attacks Zeraora does when using the move. It also enables Zeraora to stay on top of its target easier compared to Volt Switch thanks to its multiple activation and pounce mechanics.
Which Moveset Do You Think Is Best For Zeraora?
Let us know why in the comments!
Previous Poll Result
How to Play Zeraora
| Jump to Section | |
|---|---|
Jungler Role is Essential
When picking path to take at the start of the match, taking the Jungle area is highly recommended. It allows Zeraora to farm Wild Pokemon spawns uncontested so it can get to its strong moves as fast as possible. Thanks to its powerful dash moves, it also opens up strong gank opportunities as the game progresses.
Jungle Guide and Best Junglers
Cancel Buff Pokemon Charge Attack with Slash
To get the best flow for farming Wild Pokemon in the jungle, Use Slash to cancel Accelgor and Escavalier charge attack while the gauge is filling up to save you time from avoiding it or getting hit.
Slash: Zeraora Move Effect and Cooldown
Focus on Farming Until Level 8
Zeraora's power spikes are massive when it finally learns its damaging move at level 8. Unless they over extend, make sure to avoid directly fighting opponents and focus on getting EXP to reach higher levels. Doing this will give you access to Zeraora's powerful moveset like Spark and Discharge, which will be extremely powerful as you transition to the mid game. Try to aim for these power spikes before fighting for objectives and joining teamfights.
Gank Over Extending Opponents
During the early game, Slash is a strong single target burst move and you are likely stronger than laners due to your solo EXP in the Jungle. Jump in with Agility and quickly follow it up with Slash for a quick burst and possibly a kill.
Choose Moves According to Enemy Composition
Zeraora has two playstyles that can change your approach to teamfights. Evaluate the enemy composition first at the start of the game to know the best skill path to take.
Play as an Assassin for Easy Matchups

The Assassin playstyle excels at dealing heavy damage to a single target before weaving out of the fight. The moves it uses are Spark and Wild Charge. This combination of moves is best used against enemy team comps with low HP Pokemon and is especially good for targeting attackers like Decidueye and Pikachu.
Wild Charge: Zeraora Move Effect and Cooldown
Play as an AoE Damage Dealer for Bulky Targets

Going for the AOE move Discharge is perfect if the enemy team doesn't have a burst attacker or DPS that will instantly pressure you down after entering the fight. It is also great against a team with several disables as your Discharge still works even when Zeraora is stunned!
Discharge: Zeraora Move Effect and Cooldown
Lead the Fight Against Objectives
Another good thing to look out for are Boss Pokemon. Use you arsenal of dash moves to get to objectives spawns quickly and initiate the fight. you should have access to Fluffy Tail to make taking objectives like Regieleki or the Regi variants much easier. Overall, it is best that you intitiate the fight to capture objectives as much as possible to convince you team to follow suit.
Objectives Guide (Remoat Island): When to Target Bosses
Maximize your Dash Moves

Zeraora's Dash Moves are not just traversal moves, they can also be used for offensive plays. Volt Switch deals damage when enemies are caught in the path, so using it in melee range can be helpful in a pinch if you need extra damage and attack speed. On the other hand, Spark can hone in on targets if a standard attack is used while in the air. Use this to get in melee and auto attack range with your targets!
Moreover, they have unique synergy with your other moves, enhancing your effectiveness in combat.
Pull Enemies with Volt Switch and Discharge
Volt Switch and Discharge have an interesting interaction. Since Discharge pulls enemies towards you when it ends, you can use Volt Switch to pull them at a greater distance, allowing you to isolate targets and set up kills. To achieve this, Volt Switch in and use Discharge. With the right timing, use Volt Switch again as Discharge ends to pull enemies towards your initial position. This is a hard trick to pull off, but it's incredibly effective.
Volt Switch: Zeraora Move Effect and Cooldown
Increase Wild Charge Slashses with Spark
You can increase Wild Charge's slashes by 1 each time you use Spark for a total of 6 slashes, dealing more damage and prolonging your untargetable state. Given this, consume all Spark charges first before using Wild Charge for maximum damage.
Although using Volt Switch can also increase the number of slashes, Spark is the best option since it gives more slashes and acts as a better setup to Wild Charge.
Spark: Zeraora Move Effect and Cooldown
Invade Enemy Jungle Against Weaker Matchups

Being a Jungler with high mobility, you can invade the enemy central area to get free kills and even steal their camp to deny them EXP! This is especially true when you learn Spark as you are extremely hard to catch, which can make enemy speedsters like Gengar have a hard time catching up to you!
For the best counter-jungle, try to communicate to your team with quick chats that you are infiltrating the enemy's jungle camps so that they can adapt to it by defending goal zones or in near the base for the most value.
Use Plasma Gale for Massive Burst Damage
When diving a target, don't hesitate to use Plasma Gale to initiate and chip away its HP. You can also use it to secure kills instead since its a Sure-Hit move. For the best value, try to target it on grouped enemies to take advantage of the AoE blast!
Plasma Gale: Zeraora Move Effect and Cooldown
Fight While Inside the Electric Zone
When Plasma Gale hits its target, it leaves a circular electric zone at the target's position. Staying inside this zone increases your basic attack range and damage. You should take advantage of this effect and attack enemies who are inside the zone.
Progression and Leveling Guide
Top and Bottom Guide
Level 1 to 5
- Quickly clear out the Bunnelbies in the lane.
- Keep farming wild Pokemon in the lane to reach level 5 and learn your first move.
- At bottom lane, prioritize taking Indeedees for more exp.
Level 6 to 9
- Keep hunting Wild Pokemon to gain more EXP from farming Altaria and Swablus.
- Once you reach level 7, learn your second move.
- Help allies secure Regice, Registeel, or Regirock when it spawns, otherwise secure Regieleki.
- Upon reaching level 9, learn your Unite Move.
Level 10+
- Stick with allies to hunt targets, secure objectives, and push lanes.
- Reach at least level 13 or max level if possible before or when Groudon spawns for a fully-upgraded moveset.
- Make sure that your Unite Move is available when Groudon spawns.
- Help teammates win a teamfight and secure Groudon.
Jungle Guide
Level 1 to 5
- Quickly defeat Xatu
- Clear the first wave of jungle camps and reach level 5 to learn your first move.
- Help the top lane first or whatever lane needs help the most by securing Altaria and Swablus, getting knockouts, and scoring points.
Level 6 to 9
- Clear the second wave of jungle camps and reach at least level 7 to learn your second move.
- Secure Regidrago in the center to get more EXP.
- Help the bottom lane by securing Altaria and Swablus, getting kills, and scoring points.
- If possible, reach level 9 and learn your Unite Move before or when Regice, Registeel, or Regirock spawns.
- Help allies secure Regice, Registeel, or Regirock, with Registeel being the highest priority since it gives a damage buff to the party.
Level 10+
- Stick with allies to hunt targets, secure objectives, and push lanes.
- Reach at least level 13 or max level if possible before or when Groudon spawns for a fully-upgraded moveset.
- Make sure that your Unite Move is available when Groudon spawns.
- Help teammates win a teamfight and secure Groudon.
Zeraora Combos
Quick Slash Combo
| Quick Slash Combo | |
|---|---|
 |
|
| This is Zeraora's bread and butter combo for clearing jungle camps as well as ganking lanes. Agility allows Zeraora to position near his targets and Slash damages and knocks the target up. If followed up, this can easily result in a kill in the early game. | |
Assassin Combo
| Assassin Combo | |
|---|---|

|
|
| This is your main assassination combo. Spark gives Zeraora great mobility, which you can use to get quick hits and pressure a target. Once you get a couple of attacks in, activate Wild Charge before the target can respond. If done correctly, Wild Charge can deal a barrage of damage to a target while making Zeraora invincible for much longer. | |
Discharge Pull Combo
| Discharge Pull Combo | |
|---|---|
 |
|
| This combo needs good timing and may need a bit of practice to get use to. Volt Switch is a double reposition ability that can make you jump on a location then return to your previous location when used again. Once you get close to the target with the move, activate Discharge and continusly deal Standard Attack damage to start the combo. You need to time your boosted attack to land before Discharge explodes before activating Volt Switch again. If timed correctly, you will be able to pull enemies with you when you go back to your previous position. | |
Ultimate Plasma Gale Burst Combo
| Ultimate Plasma Gale Burst Combo | |
|---|---|
 |
|
| This is a quick in and out, burst combo great for hectic team fights where enemies are grouped. Start by moving around the battlefield and deal quick damage, alternating between Spark and Standard Attacks. Before activating Wild Charge, use Plasma Gale for wide AoE damage. You can then activate Wild Charge targeting a low HP target so you can alternate between enemies. | |
Matchups & Counters for Zeraora
Zeraora Matchups
| Matchup Notes | ||
|---|---|---|
| 1. The chart is based on our own experience playing Zeraora. 2. Pokemon within each tier are unordered 3. Any Pokemon not shown here are still under investigation. |
||
Hard Counter with Disabling Moves
Zeraora relies on quickly dashing in fights, bursting down targets with Wild Charge or Discharge, then dashing out. Pokemon that can quickly disable Zeraora and disrupt its combos are the ideal counters.
Hard Counters
| Pokemon | Explanation |
|---|---|
 Blastoise Blastoise
|
Rating: ★★★★★ • Has innately high defenses. • Can disrupt Zeraora's momentum with Surf, Hydro Pump, and Hydro Typhoon. • Rapid Spin and Water Spout combo can pressure Zeraora's HP. |
 Buzzwole Buzzwole
|
Rating: ★★★★★ • Has enough durability to survive Zeraora's damage. • Can disrupt Zeraora's combos with Leech Life or Superpower, and Smack Down. |
 Alolan Ninetales Alolan Ninetales
|
Rating: ★★★★ • Can disrupt Zeraora's assault and burst it down with Avalanche and Blizzard. |
Even Matchups for Zeraora
Utilizing Zeraora's mobility and high burst damage moves in a strategic manner can help it get the upper hand against these Pokemon. However, missing a move will most likely result in a loss for Zeraora.
Get Close and Burst Down Quickly
| Ranged, Fragile Pokemon with High Damage |
|---|
| How to Beat |
|
• These Pokemon prefer to keep their distance from opponents when fighting and have means to do so. They also have high damage potential that can knock out Zeraora quickly. However, they are fragile and can easily fall to Zeraora's combos. • Quickly close the gap with Volt Switch or Spark, then burst them down with Wild Charge or Discharge. • Alternatively, use Plasma Gale immediately after jumping in to add more burst damage. • Retreat if Zeraora misses. |
Avoid Prolonged Fights
| All-Rounders |
|---|
| How to Beat |
|
• All-Rounders rely mostly on their attacks or combos to deal damage. They are also durable enough to soak Zeraora's damage and will most likely win in a one-on-one brawl. However, Zeraora is more mobile than them and can dash in and out without taking too much damage from them. • Pressure their HP first by dashing in with Volt Switch or Spark, hitting them with Wild Charge or Discharge, then dashing out. • When their HP falls to half or less, do the same thing but finish them off this time. • Alternatively, Zeraora can use Plasma Gale to finish them off if their HP is low enough after doing a combo. |
Dodge and Retaliate
| High-mobility Pokemon with Burst Damage |
|---|
| How to Beat |
|
• Much like Zeraora, these Pokemon are incredibly agile and deal high burst damage. However, they become vulnerable when they miss their burst damage attempt. • Dodge their attempt with Volt Switch or Spark, then retaliate with Wild Charge or Discharge. • Alternatively, use Plasma Gale immediately after jumping in to add more burst damage. |
Group Up with Allies
| Highly Durable Pokemon |
|---|
| How to Beat |
| • These Pokemon are extremely durable and are not the ideal targets for Zeraora to take on alone. With that, it's best to group up with allies to bring them down with the help of Zeraora. |
Easy Matchups for Zeraora
Easy matchups are Pokemon that easily fall to Zeraora's burst combo and have little to no ways of defending themselves.
Get Close and Burst Down Quickly
| Ranged, Fragile Pokemon with High Damage |
|---|
| How to Beat |
|
• These Pokemon are typically found in the backlines during fights, providing damage from a distance. They also have high damage potential that can knock out Zeraora quickly. However, they are fragile and can easily fall to Zeraora's combos. • Quickly close the gap with Volt Switch or Spark, then burst them down with Wild Charge or Discharge. • Alternatively, use Plasma Gale immediately after jumping in to add more burst damage. |
Take Them Out First
| Supporters |
|---|
| How to Beat |
|
• These Pokemon usually stick with their allies and rarely venture alone. Although they themselves pose no threat to Zeraora, their support capabilities makes them valuable during fights. • Utilize Zeraora's burst damage combos to quickly take them out first. |
Utilize Superior Mobility
| Brawlers with Little to No Mobility |
|---|
| How to Beat |
|
• These Pokemon excel in close combat but have little to no mobility that allows them to get away from Zeraora. • Pressure their HP first by dashing in with Volt Switch or Spark, hitting them with Wild Charge or Discharge, then dashing out. • When their HP falls to half or less, do the same thing but finish them off this time. • Alternatively, Zeraora can use Plasma Gale to finish them off if their HP is low enough after doing a combo. |
Best Teammates for Zeraora
| Pokemon | Explanation |
|---|---|
 Pikachu Pikachu
 Slowbro Slowbro
 Wigglytuff Wigglytuff
|
Disablers |
| Pokemon with disabling moves can help Zeraora become a more effective assassin. Their AoE disabling moves like Thunderbolt and Sing are a great way to set up Discharge, keeping enemies in place for its duration and ensuring the move deals maximum damage. On the other hand, a move like Slowbeam can isolate any target and allow Zeraora to shred it using Wild Charge. | |
 Mr. Mime Mr. Mime
 Snorlax Snorlax
 Tsareena Tsareena
|
Frontliners |
| Although Zeraora can charge the frontlines, it can only do so if it's generally safe to dash in. This is where frontliners come in. They can give Zeraora room to safely dash in and out of the frontlines by taking the enemy's attention away from the Pokemon and direct it towards themselves. They can also use moves like Heavy Slam and Confusion to set up Zeraora's combos. |
Looking for teammates to synergize with you? Head over to our Friend Request Board to find other trainers to join you in your grind or just to hang out with!
Zeraora Moves
Move Slot 1 (R)
 Agility Agility
(Lv. 1 or 3) |
Move Type: Dash Damage Type: Status Cooldown: 6s Starting Damage: N/A Final Damage: N/A |
|---|---|
| Has the user perform a quick dash and increases the user's basic attack speed for a short time afterward. | |
 Spark Spark
(Lv. 5) Upgrade Lv. 11 |
Move Type: Dash Damage Type: Physical Cooldown: 9s Starting Damage: 615 Damage per leap: 205, Number of leaps: 3 Final Damage: 1230 Damage per leap: 410, Number of leaps: 3 |
|
Has the user leap at an opposing Pokemon while electricity charged, dealing damage to them. If the user uses its basic attack before reaching it's target Pokemon, the user will instead leap at the closest opposing Pokemon dealing damage to it. This move can be used three times before it goes on cooldown.
Upgrade: Also restores the user's HP if the user performs a basic attack before reaching its target Pokemon. |
|
 Volt Switch Volt Switch
(Lv. 5) Upgrade Lv. 11 |
Move Type: Dash Damage Type: Physical Cooldown: 8s Starting Damage: 1040 First Dash damage: 416, Second Dash damage: 624 Final Damage: 2269 First Dash: 905, 2nd Dash: 1364 |
|
Has the user perform a high-speed dash, dealing damage to any opposing Pokemon it hits and increasing the user's basic attack speed for a short time. Using this move within a set period of time will allow the user to immediately dash back to where it originally used the move.
Upgrade: Increase this move's damage and further increses basic attack speed. |
|
Move Slot 2 (ZR)
 Slash Slash
(Lv. 1 or 3) |
Move Type: Melee Damage Type: Physical Cooldown: 8.5s Starting Damage: 903 Damage per slash: 301, Number of slashes: 3 Final Damage: 1200 Damage per slash: 400, Number of slashes: 3 |
|---|---|
| Has the user pounce at an opposing Pokemon and attack with sharp claws. This move's final attack throws opposing Pokemon. | |
 Wild Charge Wild Charge
(Lv. 7) Upgrade Lv. 13 |
Move Type: Melee Damage Type: Physical Cooldown: 8s Starting Damage: 2139 (3 attacks) Initial attack damage: 1070, Succeeding attack damage: 535, Min/Max attacks: 3 / 6 Final Damage: 3467 (3 attacks) Initial attack damage: 1734, Succeeding attack damage: 867, Min/Max attacks: 3 / 6 |
|
Lunge in a chosen direction. If this Move hits a Pokemon, the user becomes untargetable and unleashes a series of hits at the target, dealing heavy damage but also dealing some damage to itself. Using Volt Switch, Spark, or a boosted attack before using this Move increases the number of hits made by this Move.
Upgrade: This Move also deals damage to enemies around the main target when it hits. |
|
 Discharge Discharge
(Lv. 7) Upgrade Lv. 13 |
Move Type: Melee Damage Type: Physical Cooldown: 12s Starting Damage: 1616 Damage per pulse: 202, Final pulse damage: 404, Number of pulses: 7 Final Damage: 2912 Damage per pulse: 364, Final pulse damage: 728, Number of pulses: 7 |
|
Creates a field of electricity that surrounds you, damaging nearby enemies and granting a shield if it hits an enemy. Hitting a paralyzed Pokemon with this skill pulls them towards you and damages them again.
Upgrade: Slows enemies hit by this Move for a short time. |
|
Unite Moves (ZL)
 Plasma Gale Plasma Gale
(Lv. 9) |
Move Type: Sure Hit Damage Type: Physical Cooldown: 112s Starting Damage: 1336 Final Damage: 1979 |
|---|---|
| Unleashes a blast of lightning, dealing damage to opposing Pokemon in the area of effect and throwing them. This also creates a zone of plasma that paralyzes opposing Pokemon caught inside it and increases the user's basic attack range and dealt while the user is inside it. | |
Standard Attack
|
|
Every third attack becomes boosted, dealing more damage, paralyzing the target and restores some of Zeraora's HP. |
|---|
Ability (Passive)
 Volt Absorb Volt Absorb
|
The Pokemon gains an electric charge whenever it receives damage, converting a portion of that damage into additional Attack. |
|---|
Zeraora Stats & Evolutions
Zeraora Evolutions
 Zeraora ZeraoraThis Pokemon does not evolve. |
Zeraora Stats
| Level | HP | Defense | Special Defense | Attack Damage |
|---|---|---|---|---|
| 1 | 3002 | 60 | 40 | 159 |
| 2 | 3120 | 69 | 46 | 176 |
| 3 | 3250 | 78 | 52 | 195 |
| 4 | 3393 | 88 | 59 | 216 |
| 5 | 3550 | 99 | 67 | 239 |
| 6 | 3723 | 112 | 75 | 265 |
| 7 | 3913 | 126 | 84 | 293 |
| 8 | 4122 | 141 | 94 | 324 |
| 9 | 4353 | 158 | 105 | 358 |
| 10 | 4607 | 176 | 117 | 396 |
| 11 | 4887 | 196 | 131 | 437 |
| 12 | 5195 | 218 | 146 | 483 |
| 13 | 5534 | 243 | 162 | 533 |
| 14 | 5908 | 270 | 180 | 588 |
| 15 | 6319 | 300 | 200 | 649 |
Attack Damage is the damage of the Basic Attack as tested against the Training Dummy.
Zeraora In-Game Stats Listing
| Offense | Endurance | Mobility | Scoring | Support |
|---|---|---|---|---|

|

|

|

|

|
Zeraora Skins (Holowear)
| Holowear | |
|---|---|
 Space Style Space Style
Zirco Trading:
|
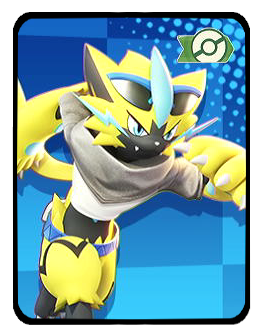 Training Style Training Style
|
 Power Plant Style Power Plant Style
Zirco Trading:
|
 Frontier Style Frontier Style
Event:
Season 5 Battle Pass |
 Band Style Band Style
Zirco Trading:
|
 Fashionable Style Fashionable Style
Zirco Trading:
|
Zeraora Character Spotlight
Zeraora Achievements
Discharge Achievement
| Discharge | |
|---|---|
| Pokemon | Move |
 Zeraora Zeraora
|
|
| Mission: In a single batle, pull in 2 or more Pokemon from the opposing team with Discharge or Discharg+ (5/10/20 battles total) |
|
| Medals & Points | Rewards |
|
|
|
|
|
|
|
|
|
List of Speedster Pokemon Achievements
Pokemon UNITE Related Guides

All Pokemon Guides and Builds
Upcoming Pokemon
 Articuno Articuno(TBA) |
 Meganium Meganium(TBA) |
 Typhlosion Typhlosion(TBA) |
 Feraligatr Feraligatr(TBA) |
Mega Evolutions
| Mega Evolved Pokemon | ||
|---|---|---|
 Mega Charizard X Mega Charizard X |
 Mega Charizard Y Mega Charizard Y |
 Mega Gyarados Mega Gyarados |
 Mega Lucario Mega Lucario |
 Mega Mewtwo X Mega Mewtwo X |
 Mega Mewtwo Y Mega Mewtwo Y |
Pokemon by Role
| All Pokemon Roles | |||||
|---|---|---|---|---|---|
 Attackers Attackers |
 All-Rounders All-Rounders |
 Defenders Defenders |
|||
 Speedsters Speedsters |
 Supporters Supporters |
||||
Pokemon by Characteristics
| Attack Type | |
|---|---|
 Melee Pokemon Melee Pokemon |
 Ranged Pokemon Ranged Pokemon |
 Physical Pokemon Physical Pokemon |
 Special Pokemon Special Pokemon |
| Stat Rankings | |
 HP Ranking HP Ranking |
 Defense Ranking Defense Ranking |
 Sp. Def. Ranking Sp. Def. Ranking |
 Basic Attack Ranking Basic Attack Ranking |
Comment
I got 38 KOs with volt switch wild charge and 196k dmg
Author
Zeraora Guide: Builds and Best Items
Rankings
Gaming News
Popular Games

Genshin Impact Walkthrough & Guides Wiki

Umamusume: Pretty Derby Walkthrough & Guides Wiki

Pokemon Pokopia Walkthrough & Guides Wiki

Honkai: Star Rail Walkthrough & Guides Wiki

Monster Hunter Stories 3: Twisted Reflection Walkthrough & Guides Wiki

Arknights: Endfield Walkthrough & Guides Wiki

Wuthering Waves Walkthrough & Guides Wiki

Zenless Zone Zero Walkthrough & Guides Wiki

Pokemon TCG Pocket (PTCGP) Strategies & Guides Wiki

Monster Hunter Wilds Walkthrough & Guides Wiki
Recommended Games

Diablo 4: Vessel of Hatred Walkthrough & Guides Wiki

Cyberpunk 2077: Ultimate Edition Walkthrough & Guides Wiki

Fire Emblem Heroes (FEH) Walkthrough & Guides Wiki

Yu-Gi-Oh! Master Duel Walkthrough & Guides Wiki

Super Smash Bros. Ultimate Walkthrough & Guides Wiki

Pokemon Brilliant Diamond and Shining Pearl (BDSP) Walkthrough & Guides Wiki

Elden Ring Shadow of the Erdtree Walkthrough & Guides Wiki

Monster Hunter World Walkthrough & Guides Wiki

The Legend of Zelda: Tears of the Kingdom Walkthrough & Guides Wiki

Persona 3 Reload Walkthrough & Guides Wiki
All rights reserved
©2021 Pokémon. ©1995–2021 Nintendo / Creatures Inc. / GAME FREAK inc.
©2021 Tencent.
The copyrights of videos of games used in our content and other intellectual property rights belong to the provider of the game.
The contents we provide on this site were created personally by members of the Game8 editorial department.
We refuse the right to reuse or repost content taken without our permission such as data or images to other sites.
 Absol
Absol Aegislash
 Alcremie
 Alolan Raichu
 Armarouge
 Azumarill
 Blaziken
 Blissey
 Ceruledge
 Chandelure
 Charizard
 Cinderace
 Clefable
 Comfey
 Cramorant
 Crustle
 Darkrai
 Decidueye
 Delphox
 Dhelmise
 Dodrio
 Dragapult
 Dragonite
 Duraludon
 Eldegoss
 Empoleon
 Espeon
 Falinks
 Galarian Rapidash
 Garchomp
 Gardevoir
 Gengar
 Glaceon
 Goodra
 Greedent
 Greninja
 Gyarados
 Ho-oh
Ho-oh Hoopa
Hoopa Inteleon
 Lapras
 Latias
 Latios
 Leafeon
 Lucario
 Machamp
 Mamoswine
 Meowscarada
 Meowth
 Metagross
 Mew
Mew Mimikyu
 Miraidon
 Moltres
 Pawmot
 Psyduck
 Sableye
 Scizor
 Sirfetch'd
 Suicune
 Sylveon
 Talonflame
 Tinkaton
 Trevenant
 Tyranitar
 Umbreon
 Urshifu
 Vaporeon
 Venusaur
 Zacian
 Zapdos
 Zoroark


![Monster Hunter Stories 3 Review [First Impressions] | Simply Rejuvenating](https://img.game8.co/4438641/2a31b7702bd70e78ec8efd24661dacda.jpeg/show)


![Monster Hunter Stories 3 Review [First Impressions] | Simply Rejuvenating](https://img.game8.co/4438641/2a31b7702bd70e78ec8efd24661dacda.jpeg/thumb)


I got 43 KOs cause of wild charge and volt switch