Metagross Guide: Best Builds and Moveset
☆ Upcoming: Articuno | Meganium | Typhlosion | Feraligatr
★ Latest News: Zapdos | Moltres | Version 1.22.1.5
☆ Popular Pages: Upcoming Pokemon | Tier List
★ Current Seasons: Ranked S34 | Battle Pass S39
☆ Join Game8's Pokemon Discord Server!
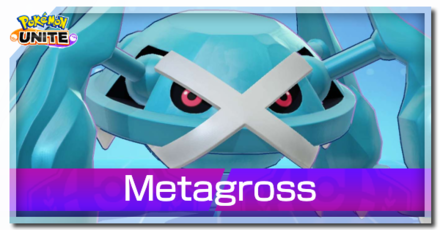
The best guide on how to play Metagross in Pokemon UNITE for Nintendo Switch and Mobile. Check here for Metagross best build, its price, cost, and role, Held and Battle items, moveset and skills, as well as the latest nerfs, buffs, counters, matchups, and more!
| Metagross Pages | |
|---|---|
 Release Date Release Date |
 Builds & Guide Builds & Guide |
List of Contents
Metagross Latest Nerfs & Buffs (5/12)
| Metagross Changes (December 5) | |
|---|---|
|
Meteor Mash |
• Cooldown decrease from 8s to 7s. |
Stat Updates
| 1.13.1.4 | Increased Defense from 90~505 to 90~550. Increase Sp. Defense from 70~370 to 70~410. |
|---|
Iron Defense
| 1.13.1.4 | Shield value increased by 100%. Boosted attack damage after the move increased by 30%. |
|---|
Meteor Mash
| 1.13.1.4 | Cooldown decreased from 11s to 8s (-2s). Shield amount increased to 20%. Shield duration increased from 3s to 5s (+2s). |
|---|---|
| 1.17.1.2 | Cooldown decrease from 8s to 7s. |
Zen Headbutt
| 1.13.1.4 | Cooldown decreased from 6s to 5s (-1s). |
|---|---|
| 1.14.1.6 | Damage increased by 13%. |
Gyro Ball
| 1.13.1.4 | Cooldown decreased from 5s to 4s (-1s). Damage increased by 30%. Shield strength increased by 30%. Shield duration increased from 3s to 4s (+1s). |
|---|---|
| 1.13.1.5 | Fixed an issue where more damage than expected was being received. |
| 1.14.1.6 | Damage increased by 10%. |
Magnet Rise
| 1.13.1.4 | Cooldown decreased from 10s to 8s (-2s). Movement speed bonus percentage increased from 60% to 80% (+20%). |
|---|---|
| 1.13.1.5 | Cooldown increased from 8s → 9s (+1s). Movement speed increase reduced from 80% → 60%. Duration reduced from 5s → 4s (-1). Reduced enhanced attack damage by 30%. |
Compute and Crush
| 1.13.1.4 | Cooldown decreased by 16%. Damage increased by 30% when targeting one opponent. Damage increased by 20% after creating walls. |
|---|---|
| 1.13.1.5 | Fixed an issue where the Unite move gauge would recover to 90% even though the move was activated. Fixed an issue where an invisible wall would remain even after the wall that had been generated was deleted. |
| 1.14.1.6 | Damage increased by 15%. |
Metagross Basic Info
| Metagross | ||
|---|---|---|
 |
Role: All-Rounder Attack Type: Melee Damage Type: Physical Difficulty: Intermediate |
|
| "Analyze the battlefield and annihilate opponents with this calculated All-Rounder!" | ||
Metagross Best Lanes

|

|

|
Tips & Strategies for Every Lane
Metagross Price and Cost

 UNITE License: Metagross UNITE License: Metagross |
|---|
As of January 2, 2024, Metagross is now purchasable for 13,000 Aeos Coins or 575 Aeos Gems! This comes one week after Metagross was first released and was only available to purchase with Aeos Gems.
Strengths and Weaknesses
| Strengths | Weaknesses |
|---|---|
|
✔︎ Useful initial moveset ✔︎ High durability via shields, damage reduction, and hindrance effect resistance ✔︎ Highly mobile ✔︎ Strong area damage ✔︎ Versatile gameplay |
✖︎ Efficiency of moves rely on hitting multiple targets |
Best Builds for Metagross
| Metagross Builds | |
|---|---|
Gyro Ball Build
Gyro Ball Build

|
Moveset | Held Items | |||
|---|---|---|---|---|---|
| Battle Item | |||||
| Stats from Items (Lv. 40) | Recommended Lane | ||||
|
Attack: +56 Critical-Hit Rate: +2.3% Attack Speed: +8.70% |
|
||||
| Emblem Color Combination | Target Emblem Stats | ||||
|
|
Positive Stats: • HP • Attack Free Negative Stats: • Sp. Atk • Defense • Sp. Def |
||||
| Note: The emblem color and stats here are suggestions only. The builds are still viable even without the suggested emblems. |
|||||
Gyro Ball Explanation
This build is centered on stunning opponents with Magnet Rise or Zenn Headbutt while constantly generating shields with Gyro Ball. It has a good balance of offense and defense through items.
- Muscle Band improves Metagross' attacks through increased damage and attack speed, allowing it to quickly build up Boosted Attacks and reduce Gyro Ball's cooldown.
- Weakness Policy allows Metagross to get stronger whenever it gets hits by opponents. It also gives a decent amount of HP for more durability.
- Focus Band makes Metagross more durable through increased defenses. It also acts as a survivability tool.
- Attack Weight or Accel Bracer can be a replacement for Focus Band to make the build into a pure-offense one, or Muscle Band for more damage on Gyro Ball.
- Eject Button gives Metagross a repositioning tool that can be used with Magnet Rise.
- X Speed can also work for the build, allowing Metagross to move faster and become immune to slows during Magnet Rise.
- The build's Boost Emblem loadout should consist of 6 Brown Emblems for more damage and 6 White Emblems additional HP. This can be achieved by having at least two (2) Emblems that are both Brown and White.
- Equip Emblems that improve Attack or HP to balance out Metagross' offense and defense.
- Sp. Atk., Sp. Def., and Defense can be freely traded for the other stats.
Gyro Ball Damage Test
| Items (Level 30) |
Gyro Ball (@ Lvl 15) |
Magnet Rise (@ Lvl 15) |
|---|---|---|
| Muscle Band + Weakness Policy (4 stacks) |
2357 | 2122 |
Since the build is centered on Gyro Ball, equipping items that will maximize its damage is the ideal item combination. Focus Band is a core item for the build, leaving only two (2) items for consideration.
Out of all the item combinations, Muscle Band and Weakness Policy will be the best for the build. The item combination produced decent results and is better suited for the build's gameplay.
These damage tests are conducted using the Training Dummy in Practice Mode. The results are taken from the Total Damage data.
| Note: The numbers in bold are the highest result for a specific test. |
| Items (Level 30) | Gyro Ball (@ Lvl 15) | Magnet Rise (@ Lvl 15) |
|---|---|---|
| Muscle Band + Razor Claw (Incldues effect) | 1904 | 1764 |
| Muscle Band + Attack Weight (6 stacks) | 2065 | 1569 |
| Muscle Band + Weakness Policy (4 stacks) | 2048 | 1557 |
| Razor Claw (Incldues effect) + Attack Weight (6 stacks) | 2065 | 1546 |
| Razor Claw (Incldues effect) + Weakness Policy (4 stacks) | 2048 | 1530 |
| Attack Weight (6 stacks) + Weakness Policy (4 stacks) | 2228 | 1315 |
The tests above does not use any Emblems yet so it will scale higher if equipped.
Meteor Mash Build
| Meteor Mash Build | Moveset | Held Items | |||
|---|---|---|---|---|---|
| Battle Item | |||||
| Stats from Items (Lv. 40) | Recommended Lane | ||||
|
Attack: +66.5 Movement Speed: +175 HP: +235 |
|
||||
| Emblem Color Combination | Target Emblem Stats | ||||
|
|
Positive Stats: • HP • Attack Free Negative Stats: • Sp. Atk • Defense • Sp. Def |
||||
| Note: The emblem color and stats here are suggestions only. The builds are still viable even without the suggested emblems. |
|||||
Meteor Mash Build Explanation
This is a full-offense build centered on bursting down targets with Meteor Mash and Magnet Rise, particularly their attack mechanic. The key to this build is combining Meteor Mash's punch and Magnet Rise's crash damage into one powerful attack.
- Muscle Band adds a HP-based bonus damage on Metagross' Meteor Mash attack, improving its burst damage.
- Razor Claw adds another layer of bonus damage on Metagross' Meteor Mash attack and giving it a slow effect.
- Attack Weight provides Metagross with a large Attack stat boost, increasing its overall damage output.
- Weakness Policy or Accel Bracer can be a replacement for Attack Weight.
- Eject Button gives Metagross a repositioning tool that can be used with Magnet Rise.
- X Speed can also work for the build, allowing Metagross to move faster and become immune to slows during Magnet Rise.
- The build's Boost Emblem loadout should consist of 6 Brown Emblems for more damage and 6 White Emblems additional HP. This can be achieved by having at least two (2) Emblems that are both Brown and White.
- Equip Emblems that improve Attack or HP to balance out Metagross' offense and defense.
- Sp. Atk., Sp. Def., and Defense can be freely traded for the other stats.
Meteor Mash Build Damage Test
| Items (Level 30) |
Meteor Mash (@ Lvl 15) Meteor Mash (Max Punch) (@ Lvl 15) |
Magnet Rise (@ Lvl 15) |
|---|---|---|
| Muscle Band + Razor Claw (Incldues effect) + Attack Weight (6 stacks) |
1940 3345 |
2520 |
Since the build is centered on Meteor Mash, equipping items that will maximize its damage is the ideal item combination.
Out of all the item combinations, Muscle Band, Razor Claw, and Attack Weight will be the best for the build. The item combination generated the highest Meteor Mash punch and Magnet Rise damage.
As for alternatives, replacing Attack Weight with Weakness Policy would be the ideal choice. The item combination produced results that are just slightly lower than the recommended build, but it doesn't require Metagross to stack items to gain the maximum bonus damage.
These damage tests are conducted using the Training Dummy in Practice Mode. The results are taken from the Total Damage data.
| Note: The numbers in bold are the highest result for a specific test. |
| Items (Level 30) | Meteor Mash (@ Lvl 15) Meteor Mash (Max Punch) (@ Lvl 15) | Magnet Rise (@ Lvl 15) |
|---|---|---|
| Muscle Band + Razor Claw (Incldues effect) + Attack Weight (6 stacks) | 1940 3345 | 1935 |
| Muscle Band + Razor Claw (Incldues effect) + Weakness Policy (4 stacks) | 1928 3323 | 1923 |
| Muscle Band + Attack Weight (6 stacks) + Weakness Policy (4 stacks) | 2112 3254 | 1699 |
| Razor Claw (Incldues effect) + Attack Weight (6 stacks) + Weakness Policy (4 stacks) | 2112 3278 | 1723 |
The tests above does not use any Emblems yet so it will scale higher if equipped.
Tank Build
| Tank Build | Moveset | Held Items | |||
|---|---|---|---|---|---|
| Battle Item | |||||
| Stats from Items (Lv. 40) | Recommended Lane | ||||
|
Attack: +35 Defense: +35 Sp. Def: +35 Attack Speed: +8.70% HP: +235 |
|
||||
| Emblem Color Combination | Target Emblem Stats | ||||
|
|
Positive Stats: • HP • Attack Free Negative Stats: • Sp. Atk • Defense • Sp. Def • Critical-Hit Rate |
||||
| Note: The emblem color and stats here are suggestions only. The builds are still viable even without the suggested emblems. |
|||||
Tank Build Explanation
This is a all-defensive build that utilizes Metagross' shield-generating moves to tank as much damage as possible for its allies. By default, Metagross will be using Gyro Ball and Magnet Rise as its moveset, but it can use any move combination for the build.
- Aeos Cookie provides Metagross with a large HP boost, especially when fully stacked.
- Focus Band improves Metagross' durability through increased defenses and acts as a survivability tool.
- Resonant Guard allows Metagross to generate additional shields whenever it deals damage, which stacks on top of its own. It also gives a decent amount of HP boost and HP recovery.
- Potion acts as an active healing tool that prolongs Metagross' life during fights.
- The build's Boost Emblem loadout should consist of 6 Brown Emblems for more damage and 6 White Emblems additional HP. This can be achieved by having at least two (2) Emblems that are both Brown and White.
- Equip Emblems that improve Attack or HP to balance out Metagross' offense and defense.
- Sp. Atk., Sp. Def., Defense, and Critical-Hit Rate can be freely traded for the other stats.
Tank Build Durability Test
| Items (Level 30) |
HP (@ Lvl 15) |
Sp. Def (@ Lvl 15) Defense (@ Lvl 15) |
|---|---|---|
| Aeos Cookie (6 stacks) + Focus Band + Resonant Guard |
10,040 | 400 535 |
Since this is a tank build, equipping items that will maximize Metagross' durability is the ideal item combination.
Out of all the item combinations, Aeos Cookie, Focus Band, and Resonant Guard will be the best for the build. Although its results are the same as having Buddy Barrier instead of Resonant Guard, having the bonus HP recovery and the ability to generate shields when dealing damage are far more benefitial for Metagross and better suits its gameplay.
The numbers here are taken from the stats data in Practice Mode.
| Note: The numbers in bold are the highest result for a specific test. |
| Items (Level 30) | HP (@ Lvl 15) | Sp. Def (@ Lvl 15) Defense (@ Lvl 15) |
|---|---|---|
| Aeos Cookie (6 stacks) + Focus Band + Buddy Barrier | 10,040 | 400 535 |
| Aeos Cookie (6 stacks) + Focus Band + Resonant Guard | 10,040 | 400 535 |
| Aeos Cookie (6 stacks) + Buddy Barrier + Resonant Guard | 10,490 | 370 505 |
| Focus Band + Buddy Barrier + Resonant Guard | 9050 | 400 535 |
The tests above does not use any Emblems yet so it will scale higher if equipped.
Metagross Best Items & Moveset
Best Held Items
| Item | Explanation |
|---|---|
 Attack Weight Attack Weight
|
Attack Weight provides Metagross with a large flat amount of Attack, increasing its overall damage output. |
 Aeos Cookie Aeos Cookie
|
Aeos Cookie gives Metagross a large HP boost, which can turn the Pokemon into a powerful tank. |
 Focus Band Focus Band
|
Focus Band makes Metagross more durable through increased defenses and recovery on top of its shield-generating moves. |
 Muscle Band Muscle Band
|
Muscle Band allows Metagross to quickly build up Boosted Attacks, which helps in spamming Meteor Mash or Gyro Ball. |
 Razor Claw Razor Claw
|
Razor Claw works particularly well with Metagross' Meteor Mash, giving its next basic attack more damage and a slowing effect. |
 Weakness Policy Weakness Policy
|
Weakness Policy works incredibly well with Metagross' arsenal of shield-generating moves, making the Pokemon stronger as it takes hits. |
 Resonant Guard Resonant Guard
|
Resonant Guard gives Metagross a decent amount of HP and HP recovery, and allows Metagross to generate an additional shield on top of its own whenever it deals damage. |
 Accel Bracer Accel Bracer
|
Accel Bracer provides Metagross with a lot of Attack stat whenever it knocks out opponents or gets an assist. It also grants cooldown reduction for its moves, which is beneficial for the Pokemon's gameplay. |
Best Battle Items
| Item | Explanation |
|---|---|
 Eject Button Eject Button
|
Eject Button gives Metagross a repositioning tool that can be used in a variety of ways. |
 X Speed X Speed
|
X Speed improves Metagross overall mobility on top of Zen Headbutt or Magnet Rise via increased movement speed and immunity from slows. |
 Potion Potion
|
Potion prolongs Metagross' life during fights through healing in addition to having the ability to generate shields. |
Best Moveset
| Move | Explanation |
|---|---|
 Gyro Ball Gyro Ball
|
Gyro Ball provides Metagross with damage and the ability to generate a shield for itself, making it a great move for teamfights. |
 Magnet Rise Magnet Rise
|
Magnet Rise allows Metagross to quickly maneuver around during fights. Its secondary activation can also become a strong area move. |
This moveset makes Metagross into a solid frontliner Pokemon capable of tanking and dealing damage at the same time.
Gyro Ball deals a ton of damage in an area around Metagross and also generates a shield for the Pokemon, especially when hitting opponents on the outer ring of the move.
Magnet Rise provides Metagross with mobility to stay on top of its opponents and set up Gyro Ball. It also throws enemies, which is another crowd control effect.
Which Moveset Do you Think is Best for Metagross?
Let us know why in the comments!
How to Play Metagross
| Jump to Section | |
|---|---|
Utilize Initial Moveset
Metagross' starting moves give the Pokemon incredible mobility, defense, and damage in the early game. Utilize them to give Metagross' team a strong start by pressuring opponents and scoring points.
Win Early Engagements with Iron Defense
Iron Defense grants Metagross a shield and makes its next attack into a Boosted Attack. Utilize the shield to mitigate damage, and use the Boosted Attack to quickly deplete the opponents' HP and win fights.
Iron Defense: Metagross Move Effect and Cooldown
Utilize Tackle's Long Range
Tackle's range is extremely long, especially for a starting move. Utilize the move's range to chase down opponents or escape in the early game. Remember that Metagross will only dash if it finds a target in a line, so when using Tackle to escape, be sure there are wild Pokemon nearby first.
Tackle: Metagross Move Effect and Cooldown
Take the Frontlines
Metagross' Meteor Mash, Gyro Ball, and Unite Move all generate shields that get stronger the more opponents they hit. Moreover, its ability, Clear Body, reduces the duration of hindrance effects that's based on the number of nearby opponents. With that, it's best to stay and fight at the frontlines to hit as many opponents as possible and take advantage of the shields and Metagross' ability, allowing the Pokemon to tank the opponents' damage instead of its allies. This will also give more room for Metagross' allies to attack freely.
Keep using Metagross' shield-generating moves to stay alive while also dealing damage constantly.
Utilize Boosted Attacks
Metagross' Boosted Attacks deal area damage, and it reduces Meteor Mash or Gyro Ball's cooldown whenever it hits an opponent. It's best to quickly build up Boosted Attacks and trigger its effect as frequently as possible, especially the cooldown reduction.
Combine Meteor Mash's Punch and Magnet Rise's Attack for Burst Damage
One neat trick to deal a ton of burst damage is to combine Meteor Mash's punch and Magnet Rise's attack mechanic into one strong attack. This will also deal area damage, which is useful for farming groups of wild Pokemon and fighting multiple opponents.
| Related Pages | |
|---|---|
 Meteor Mash Meteor Mash
|
 Magnet Rise Magnet Rise
|
Catch Multiple Opponents with Compute and Crush
Since the shield strengthens the more opponents are scanned when Compute and Crush is used, it's best to find the best position for Metagross to use Compute and Crush to maximize its shield effect.
Compute and Crush: Metagross Move Effect and Cooldown
Metagross Progression and Leveling Guide
Top and Bottom Guide
Level 1 to 5
- Quickly clear out the Bunnelbies in the lane.
- Keep farming wild Pokemon in the lane to reach level 5 and learn your first move.
- At bottom lane, prioritize taking Indeedees for more exp.
Level 6 to 9
- Keep hunting Wild Pokemon to gain more EXP from farming Altaria and Swablus.
- Once you reach level 7, learn your second move.
- Help allies secure Regice, Registeel, or Regirock when it spawns, otherwise secure Regieleki.
- Upon reaching level 9, learn your Unite Move.
Level 10+
- Stick with allies to hunt targets, secure objectives, and push lanes.
- Reach at least level 13 or max level if possible before or when Groudon spawns for a fully-upgraded moveset.
- Make sure that your Unite Move is available when Groudon spawns.
- Help teammates win a teamfight and secure Groudon.
Metagross Combos
Early Game Combos
These combos will help Metagross deal high amounts of damage in the early game.
Shield Bash Combo
| Shield Bash Combo | |
|---|---|
Iron Defense
►
Tackle
►
Standard Attack
(Boosted Attack) |
|
| Start the combo by activating Iron Defense to generate a shield and give Metagross a Boosted Attack. Pick a target to use Tackle on, then immediately follow up with a Boosted Attack to end the combo. | |
Main Combos
These are Metagross' combos once it learns both of its primary moves.
Mega Magnetic Punch Combo
| Mega Magnetic Punch Combo | |
|---|---|
Magnet Rise
►
Meteor Mash
►
Standard Attack
(While levitating) |
|
| Start by activating Magnet Rise to give Metagross a movement speed boost and alter its attack. Use Meteor Mash to charge up the punch. End combo by simply attacking once, which will trigger both Magnet Rise's attack mechanic and Meteor Mash's punch. This isn't much of a combo as it is just a special interaction when using Meteor Mash and Magnet Rise together. Remember to attack before Magnet Rise's effect expires to maximize damage. |
|
Magnetic Spin Combo
| Magnetic Spin Combo | |
|---|---|
Magnet Rise
►
Standard Attack
►
Gyro Ball
|
|
| Start by activating Magnet Rise to give Metagross a movement speed boost and alter its attack. Get close to a target, then attack while Magnet Rise is still active, which forces Metagross to forcefully land and knock up opponents. End the combo using Gyro Ball, making sure to hit opponents with the outer circle of the move. | |
Zen Punch/Spin Combo
| Zen Punch/Spin Combo | |
|---|---|
| Upon picking a target, initiate by using Zen Headbutt. Once at melee range, use Meteor Mash, then immediately follow up with the punch. If Metagross learned Gyro Ball instead of Meteor Mash, the combo ends when Gyro Ball is used. | |
Matchups & Counters for Metagross
Metagross Matchups
| Matchup Notes | ||
|---|---|---|
| 1. The chart is based on our own experience playing Metagross. 2. Pokemon within each tier are unordered 3. Any Pokemon not shown here are still under investigation. |
||
Best Counters
Since Metagross needs to constantly generate shields using its moves, Pokemon that can easily shred through its shield or stun it during fights can completely shut down the Pokemon.
| Pokemon | Explanation |
|---|---|
 Mega Mewtwo Y Mega Mewtwo Y
|
Rating: ★★★★★ • Can kite Metagross from range and quickly shred through shields with its attacks, especially when Mega evolved. • Can keep Metagross at bay using Future Sight. • Can easily dodge Metagross' attacks with Teleport or absorb damage with Recover. |
 Mamoswine Mamoswine
|
Rating: ★★★★★ • Can constantly disable Metagross using its Boosted Attacks and any of its moves. • Can tank a lot of damage. |
 Umbreon Umbreon
|
Rating: ★★★★ • Can steal Metagross' shields using Moonlight Prance. • Can disable Metagross and prevent it from using its moves with Snarl and/or Mean Look. |
Even Matchups
Utilizing Metagross' shield-generating moves to absorb damage and keep itself alive during fights will help the Pokemon get the upper hand against these Pokemon.
Close the Gap
| Ranged, Fragile Pokemon with High Damage |
|---|
| How to Beat |
|
• These Pokemon prefer to keep their distance from opponents when fighting. They also have high damage potential that can shred through Metagross' shields quickly. However, they are fragile and can get knocked out by Metagross fast once it gets close. • Quickly close the gap with Magnet Rise or Zen Headbutt, then burst them down with Meteor Mash or Gyro Ball. • Use Compute and Crush to finish them off should they survive the initial assault. |
Keep Generating Shields
| All-Rounders |
|---|
| How to Beat |
|
• These Pokemon excel in close combat and rely mostly on their attacks or combos to deal damage. They are also durable enough to survive Metagross damage. However, they have little to no stuns to prevent Metagross from constantly generating shields. • Keep using Meteor Mash or Gyro Ball to generate shield and absorb their damage while dealing damage in return. • Utilize Metagross' Boosted Attacks to deal increased damage and reduce Meteor Punch or Gyro Ball's cooldown while brawling. |
Dodge Their Burst Damage
| High-mobility Pokemon with Burst Damage |
|---|
| How to Beat |
|
• These Pokemon are incredibly agile and deal high burst damage. However, they become vulnerable when they miss their burst damage attempt. • Use Zen Headbutt or Magnet Rise to dodge their burst damage, then retaliate with Meteor Mash or Gyro Ball to burst them down. • Alternatively, Compute and Crush can be used to finish them off should they survive Metagross' retaliation. |
Utilize Their Numbers
| Supporters |
|---|
| How to Beat |
|
• These Pokemon usually stick with their allies and rarely venture alone. Although they themselves pose no threat to Metagross, their support capabilities makes them valuable during fights. • Take advantage of them being in close proximity to each other by using Meteor Mash or Gyro Ball and Compute and Crush to generate shields while dealing damage to them. |
Group Up with Allies
| Highly Durable Pokemon |
|---|
| How to Beat |
|
• These Pokemon are extremely durable, making it a tedious task for Metagross to take them down alone. With that, it's best to group up with allies to bring them down with the help of Metagross. • Use Zen Headbutt or Magnet Rise to stay on top of them. • Use Meteor Mash or Gyro Ball to deplete their HP. |
Easy Matchups
Easy matchups are Pokemon that will have a hard time penetrating through Metagross' shields and can easily get knock out by the Pokemon's damage.
Close the Gap
| Ranged, Fragile Pokemon with High Damage |
|---|
| How to Beat |
|
• These Pokemon prefer to keep their distance from opponents when fighting. They also have high damage potential that can shred through Metagross' shields quickly. However, they are fragile and can get knocked out by Metagross fast once it gets close. • Quickly close the gap with Magnet Rise or Zen Headbutt, then burst them down with Meteor Mash or Gyro Ball. • Use Compute and Crush to finish them off should they survive the initial assault. |
Utilize Their Numbers
| Supporters |
|---|
| How to Beat |
|
• These Pokemon usually stick with their allies and rarely venture alone. Although they themselves pose no threat to Metagross, their support capabilities makes them valuable during fights. • Take advantage of them being in close proximity to each other by using Meteor Mash or Gyro Ball and Compute and Crush to generate shields while dealing damage to them. |
Best Teammates for Metagross
| Pokemon | Explanation |
|---|---|
 Alolan Ninetales Alolan Ninetales
 Slowbro Slowbro
 Wigglytuff Wigglytuff
|
Pokemon with Strong Disables |
| Strong disabling moves like Sing and Slowbeam makes it easier for Metagross to hit opponents with its moves. | |
 Pikachu Pikachu
 Gardevoir Gardevoir
 Mew Mew
|
Backline Attackers |
| Attackers that are typically found in the backlines during fights can benefit from Metagross' frontline gameplay, allowing them to provide firepower from a safe distance while Metagross holds the frontline. | |
 Blissey Blissey
 Comfey Comfey
 Clefable Clefable
|
Pokemon with Strong Supportive Moves |
| Defensive or offensive support moves improve Metagross' efficiency during fights. Moves like Floral Healing, Soft-Boiled, and Moonlight ensures Metagross' survival in the frontlines. On the other hand, moves like Magical Leaf, Egg Bomb, and Gravity has some synergy with Metagross' moves. |
Looking for teammates to synergize with you? Head over to our Friend Request Board to find other trainers to join you in your grind or just to hang out with!
Metagross Moves
Move Slot 1 (R)
 Iron Defense Iron Defense
(Lv. 1 or 3) |
Move Type: Buff Damage Type: Physical Cooldown: 8s Starting Damage: N/A Final Damage: N/A |
|---|---|
| The user is granted a shield, and the user's next basic attack becomes a boosted attack. | |
 Meteor Mash Meteor Mash
(Lv. 5) Upgrade Lv. 11 |
Move Type: Melee Damage Type: Physical Cooldown: 7s Starting Damage: 884 Follow-Up Punch DMG: 1089 Final Damage: 1676 Follow-Up Punch DMG: 2078 |
|
Has the user charge power in its fist, dealing damage to opposing Pokemon in an area of effect while granting itself a shield. The more opposing Pokemon this move hits, the more the shield effect is strengthened and the more damage the user deals with its next basic attack. This next basic attack hits with a hard punch fired like a meteor, dealing damage to opposing Pokemon in an area of effect.
Upgrade: Restores the user's HP when the punch hits an opposing Pokemon. |
|
 Gyro Ball Gyro Ball
(Lv. 5) Upgrade Lv. 11 |
Move Type: Melee Damage Type: Physical Cooldown: 4s Starting Damage: 1149 Final Damage: 2025 |
|
Has the user spin rapidly, dealing damage to nearby opposing Pokemon. When the outer edge of the spin hits an opposing Pokemon, the user is granted a shield. If this move hits many opposing Pokemon, or hits Pokemon on the opposing team, the shield effect becomes stronger.
Upgrade: If the shield effect remains for a set amount of time, the user recovers the same amount of HP as the remaining shield effect. |
|
Move Slot 2 (ZR)
 Tackle Tackle
(Lv. 1 or 3) |
Move Type: Dash Damage Type: Physical Cooldown: 8.5s Starting Damage: 440 Final Damage: 557 |
|---|---|
| Has the user scan to see if there is an opposing Pokemon in front of it. If there is, the user charges toward the opposing Pokemon it finds, dealing damage to it. | |
 Zen Headbutt Zen Headbutt
(Lv. 7) Upgrade Lv. 13 |
Move Type: Dash Damage Type: Physical Cooldown: 5s Starting Damage: 658 Final Damage: 1220 |
|
Has the user fire a psychic wave in a forward direction, then charge toward opposing Pokemon it hits, dealing damage and throwing them.
Upgrade: Reduces damage taken from opposing Pokemon for a short time after the user deals damage. |
|
 Magnet Rise Magnet Rise
(Lv. 7) Upgrade Lv. 13 |
Move Type: Buff Damage Type: Status Cooldown: 8s Starting Damage: 603 Final Damage: 1062 |
|
Has the user levitate for a set amount of time using electrically-generated magnetism, increasing the user's movement speed. If the user performs a basic attack while levitating, the user falls on the ground forcefully, dealing damage to nearby opposing Pokemon and throwing them.
Upgrade: While levitating, the user receives reduced damage from opposing Pokemon. |
|
Unite Moves (ZL)
 Compute and Crush Compute and Crush
(Lv. 9) |
Move Type: Dash, Melee Damage Type: Physical Cooldown: 112s Starting Damage: 1972 Final Damage: 2731 |
|---|---|
| Has the user quickly analyze the position of nearby opposing Pokemon, granting the user a shield effect based on the number of opposing Pokemon analyzed. When 2 or fewer opposing Pokemon are analyzed, the user lunges toward the opposing Pokemon with the lowest HP, dealing damage to it. If an opposing Pokemon is knocked out by this move, the user recovers a portion of its Unite Move gauge. When 2 or more opposing Pokemon are analyzed, the user lunges toward the opponent with the lowest HP, dealing damage to nearby opposing Pokemon and creating a wall around itself. | |
Standard Attack
|
|
Becomes a boosted attack with every third attack, striking with an increased area of attack. When the Pokemon hits an opposing Pokemon with a boosted attack, the cooldown of Iron Defense, Meteor Mash, or Gyro Ball is reduced. When the user hits two or more opposing Pokemon with this boosted attack, the moves' cooldowns will be reduced even more. |
|---|
Ability (Passive)
 Clear Body Clear Body
|
All Evolution Stages
Reduces the duration of hindrance effects on the Pokemon when Pokemon from the opposing team are nearby. The more Pokemon from the opposing team there are, the more the duration of hindrance effects is reduced. |
|---|
Metagross Stats & Evolutions
Metagross Evolutions
| 1st Evolution | 2nd Evolution | Final Evolution |
|---|---|---|
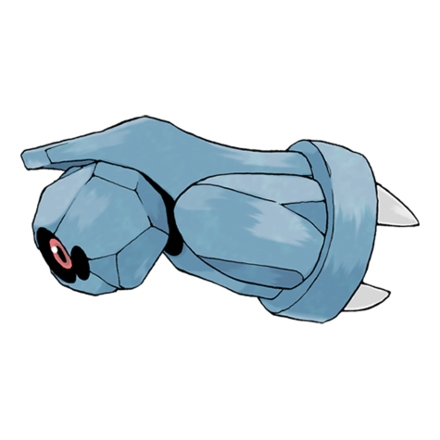 Beldum Beldum(Lv. 1) |
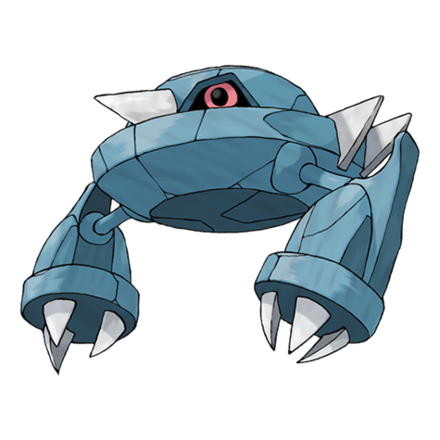 Metang Metang(Lv. 5) |
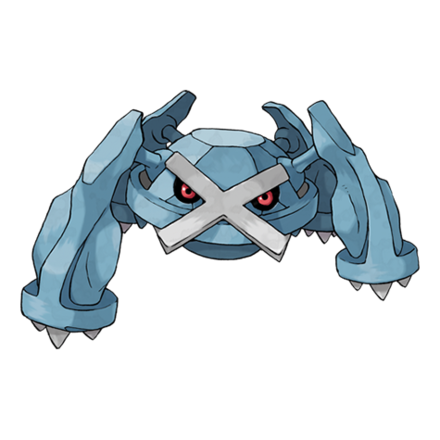 Metagross Metagross(Lv. 9) |
Metagross Stats
| Level | HP | Defense | Special Defense | Attack Damage |
|---|---|---|---|---|
| 1 | 3100 | 85 | 70 | 160 |
| 2 | 3172 | 92 | 75 | 165 |
| 3 | 3259 | 100 | 81 | 171 |
| 4 | 3363 | 110 | 88 | 179 |
| 5 | 3741 | 145 | 113 | 207 |
| 6 | 3891 | 159 | 123 | 218 |
| 7 | 4072 | 176 | 135 | 231 |
| 8 | 4289 | 196 | 150 | 247 |
| 9 | 5054 | 266 | 202 | 303 |
| 10 | 5366 | 295 | 223 | 326 |
| 11 | 5740 | 329 | 248 | 353 |
| 12 | 6189 | 370 | 278 | 386 |
| 13 | 6728 | 420 | 314 | 426 |
| 14 | 7374 | 479 | 358 | 473 |
| 15 | 8150 | 550 | 410 | 530 |
Attack Damage is the damage of the Basic Attack as tested against the Training Dummy.
Metagross In-Game Stat Listings
| Offense | Endurance | Mobility | Scoring | Support |
|---|---|---|---|---|

|

|

|

|

|
Metagross Skins (Holowear)
| Holowear | |
|---|---|
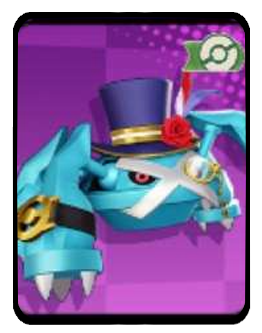 Phantom Thief Style Phantom Thief Style
Zirco Trading:
|
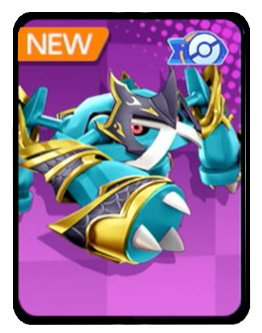 Darkness Style Darkness Style
Zirco Trading:
|
Metagross Character Spotlight
Metagross Achievements
Gyro Ball Achievement
| Gyro Ball | |
|---|---|
| Pokemon | Move |
 Metagross Metagross
|
|
| Mission: Hit 3 or more Pokemon from opposing team aat the same time with the outer edge of the spin of Gyro Ball or Gyro Ball+ (5/10/20 times total) |
|
| Medals & Points | Rewards |
|
|
|
|
|
|
|
|
|
List of All-Rounder Pokemon Achievements
Pokemon UNITE Related Guides

All Pokemon Guides and Builds
Upcoming Pokemon
 Articuno Articuno(TBA) |
 Meganium Meganium(TBA) |
 Typhlosion Typhlosion(TBA) |
 Feraligatr Feraligatr(TBA) |
Mega Evolutions
| Mega Evolved Pokemon | ||
|---|---|---|
 Mega Charizard X Mega Charizard X |
 Mega Charizard Y Mega Charizard Y |
 Mega Gyarados Mega Gyarados |
 Mega Lucario Mega Lucario |
 Mega Mewtwo X Mega Mewtwo X |
 Mega Mewtwo Y Mega Mewtwo Y |
Pokemon by Role
| All Pokemon Roles | |||||
|---|---|---|---|---|---|
 Attackers Attackers |
 All-Rounders All-Rounders |
 Defenders Defenders |
|||
 Speedsters Speedsters |
 Supporters Supporters |
||||
Pokemon by Characteristics
| Attack Type | |
|---|---|
 Melee Pokemon Melee Pokemon |
 Ranged Pokemon Ranged Pokemon |
 Physical Pokemon Physical Pokemon |
 Special Pokemon Special Pokemon |
| Stat Rankings | |
 HP Ranking HP Ranking |
 Defense Ranking Defense Ranking |
 Sp. Def. Ranking Sp. Def. Ranking |
 Basic Attack Ranking Basic Attack Ranking |
Author
Metagross Guide: Best Builds and Moveset
Rankings
- We could not find the message board you were looking for.
Gaming News
Popular Games

Genshin Impact Walkthrough & Guides Wiki

Umamusume: Pretty Derby Walkthrough & Guides Wiki

Pokemon Pokopia Walkthrough & Guides Wiki

Honkai: Star Rail Walkthrough & Guides Wiki

Monster Hunter Stories 3: Twisted Reflection Walkthrough & Guides Wiki

Arknights: Endfield Walkthrough & Guides Wiki

Wuthering Waves Walkthrough & Guides Wiki

Zenless Zone Zero Walkthrough & Guides Wiki

Pokemon TCG Pocket (PTCGP) Strategies & Guides Wiki

Monster Hunter Wilds Walkthrough & Guides Wiki
Recommended Games

Diablo 4: Vessel of Hatred Walkthrough & Guides Wiki

Cyberpunk 2077: Ultimate Edition Walkthrough & Guides Wiki

Fire Emblem Heroes (FEH) Walkthrough & Guides Wiki

Yu-Gi-Oh! Master Duel Walkthrough & Guides Wiki

Super Smash Bros. Ultimate Walkthrough & Guides Wiki

Pokemon Brilliant Diamond and Shining Pearl (BDSP) Walkthrough & Guides Wiki

Elden Ring Shadow of the Erdtree Walkthrough & Guides Wiki

Monster Hunter World Walkthrough & Guides Wiki

The Legend of Zelda: Tears of the Kingdom Walkthrough & Guides Wiki

Persona 3 Reload Walkthrough & Guides Wiki
All rights reserved
©2021 Pokémon. ©1995–2021 Nintendo / Creatures Inc. / GAME FREAK inc.
©2021 Tencent.
The copyrights of videos of games used in our content and other intellectual property rights belong to the provider of the game.
The contents we provide on this site were created personally by members of the Game8 editorial department.
We refuse the right to reuse or repost content taken without our permission such as data or images to other sites.
 Absol
Absol Aegislash
 Alcremie
 Alolan Raichu
 Armarouge
 Azumarill
 Blastoise
 Blaziken
 Buzzwole
 Ceruledge
 Chandelure
 Charizard
 Cinderace
 Cramorant
 Crustle
 Darkrai
 Decidueye
 Delphox
 Dhelmise
 Dodrio
 Dragapult
 Dragonite
 Duraludon
 Eldegoss
 Empoleon
 Espeon
 Falinks
 Galarian Rapidash
 Garchomp
 Gengar
 Glaceon
 Goodra
 Greedent
 Greninja
 Gyarados
 Ho-oh
Ho-oh Hoopa
Hoopa Inteleon
 Lapras
 Latias
 Latios
 Leafeon
 Lucario
 Machamp
 Meowscarada
 Meowth
 Mimikyu
 Miraidon
 Moltres
 Mr. Mime
 Pawmot
 Psyduck
 Sableye
 Scizor
 Sirfetch'd
 Snorlax
 Suicune
 Sylveon
 Talonflame
 Tinkaton
 Trevenant
 Tsareena
 Tyranitar
 Urshifu
 Vaporeon
 Venusaur
 Zacian
 Zapdos
 Zeraora
 Zoroark


![The Liar Princess and the Blind Prince Review [PC] | Lovely to Look at but Tedious to Play](https://img.game8.co/4442586/8d95f5faf05780f1765ce7e0938bd825.jpeg/thumb)
![Marathon Cryo Archive Map Teased as [REDACTED] on Selection Screen](https://img.game8.co/4442236/6357203e58172f6de57f1991e7c39b22.png/thumb)


ME LOVE METAGROSS . JDHBCCHHIUCH