Chandelure Guide: Best Builds and Moveset
☆ Upcoming: Articuno | Meganium | Typhlosion | Feraligatr
★ Latest News: Zapdos | Moltres | Version 1.22.1.5
☆ Popular Pages: Upcoming Pokemon | Tier List
★ Current Seasons: Ranked S34 | Battle Pass S39
☆ Join Game8's Pokemon Discord Server!
The best guide on how to play Chandelure in Pokemon UNITE for Nintendo Switch and Mobile. Check here for the best builds, Held and Battle items, movesets, as well as the latest nerfs, buffs, counters, matchups, and more!
| Chandelure Pages | |
|---|---|
 Chandelure Release Date Chandelure Release Date |
 Chandelure Guide Chandelure Guide |
List of Contents
Chandelure Latest Nerfs & Buffs (5/12)
| Chandelure Changes (December 5) | |
|---|---|
| Stat Buff |
• Defense increased from 35-175 to 35-200 (Lvl. 1-15). • Special Defense increased from 30-140 to 30-203 (Lvl. 1-15). |
Chandelure Stat Buff
| Lvl | Defense | Sp. Def. |
|---|---|---|
| 5 | 52 → 55 (+5.8%) |
44 → 52 (+18.2%) |
| 10 | 97 → 107 (+10.3%) |
80 → 107 (+33.8%) |
| 15 | 174 → 200 (+14.9%) |
140 → 203 (+45%) |
Stat Updates
| 1.17.1.2 | Defense increased from 35-175 to 35-200 (Lvl. 1-15). Special Defense increased from 30-140 to 30-203 (Lvl. 1-15). |
|---|
Imprison
| 1.9.2.8 | Fixed bugs that are causing extra effects to occur. Bugs fixed for the following effects on opposing Pokemon: status conditions |
|---|---|
| 1.11.1.3 | Cooldown increased from 10s to 11s. (+1s) |
| 1.15.1.2 | Cooldown reduced from 10s to 9.5s. |
Overheat
| 1.11.1.3 | Cooldown increased from 6s to 7.5s. (+1.5s) Overheat +: Cooldown increased from 5s to 6.5s. (+1.5s) |
|---|
Flamethrower
| 1.12.1.6 | Damage increased by 10%. |
|---|---|
| 1.15.1.2 | Cooldown reduced from 7.5s to 7s. |
Poltergeist
| 1.12.1.6 | Cooldown reduced from 10s to 7.5s. (-2.5s). Movement speed reduction changed from 65% for 1 second to 65% for 1 second + 40% for 1 second. Poltergeist +: Movement speed reduction changed from 85% for 1 second to 65% for 1 second + 50% for 1 second. |
|---|
Ignite Midnight
| 1.15.1.2 | Energy needed reduced by 10%. |
|---|
Chandelure Basic Info
| Chandelure | ||
|---|---|---|
 |
Tier Rating:
Role: Attacker Attack Type: Ranged Damage Type: Special Difficulty: Novice |
|
| "Ignite the arena with this fiery Attacker!" | ||
Chandelure Best Lanes

|

|

|
Tips & Strategies for Every Lane
Chandelure Price and Cost
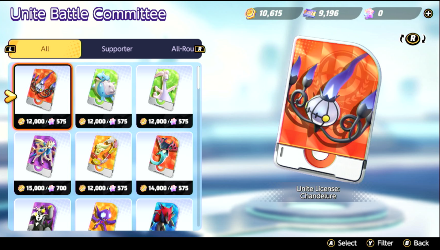
 UNITE License: Chandelure UNITE License: Chandelure |
|
|---|
As of May 4, 2023, Chandelure is now purchasable for 12,000 Aeos Coins or 575 Aeos Gems! This comes one week after Chandelure was first released and was only available to purchase with Aeos Gems.
Try Out Chandelure with Limited Licenses
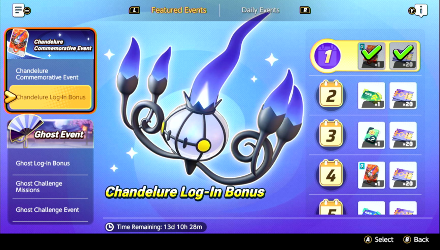
Players can get Chandelure Limited Licenses so they can try Chandelure without purchasing it with Gems! Head on over to Chandelure Log-In Bonus Event to get them!
Chandelure Log-In Bonus Event Guide
Strengths and Weaknesses
| Strengths | Weaknesses |
|---|---|
|
✔︎ High burst and DoT damage. ✔︎ Long-ranged. ✔︎ Can partially ignore Sp. Def. via Infiltration. ✔︎ Can prevent moves using Imprison. |
✖︎ Poor endurance. ✖︎ No mobility options outside of items |
Best Builds for Chandelure
| Chandelure Builds | |
|---|---|
| - | |
Overheat Build
Overheat Build

|
Moveset | Held Items | |||
|---|---|---|---|---|---|
| Battle Item | |||||
| Stats from Items (Lv. 40) | Recommended Lane | ||||
|
Sp. Atk: +123 HP: +245 |
|
||||
| Emblem Color Combination | Target Emblem Stats | ||||
|
|
Positive Stats: • Sp. Atk Free Negative Stats: • Attack • Critical-Hit Rate |
||||
| Note: The emblem color and stats here are suggestions only. The builds are still viable even without the suggested emblems. |
|||||
Overheat Build Explantion
| Build Explanation |
|---|
| This build is centered on stunning enemies using Imprison, then bombarding them with Overheat, maximizing the move's damage output. However, Poltergeist can also work, slowing and damaging enemies in an area. |
| · Choice Specs gives Chandelure a decent amount of Sp. Atk. stat and increases the Pokemon's minimum move damage. · Wise Glasses provides Chandelure with more Sp. Atk. thanks to its percentage bonus. · Slick Spoon works nicely with Chandelure's Infiltrator ability. It also supplies HP and more Sp. Atk. · However, Shell Bell can be a replacement for Slick Spoon, giving Chandelure a recovery tool. · Energy Amplifier is also a good replacement for Slick Spoon, giving Chandelure more firepower when it activates Ignite Midnight. · X Speed gives Chandelure the mobility it needs while using Overheat. · The build's Boost Emblem loadout should consist of 6 Green Emblems for more damage and 4 White Emblems additional HP. · Equip Emblems that improve Sp. Atk. to maximize Chandelure's damage output. · Attack and Critical-Hit Rate can be freely traded for the other stats. |
Overheat Build Damage Test
| Items (Level 30) |
Overheat (Total Damage) (@ Lvl 15) |
Ignite Midnight (@ Lvl 15) |
|---|---|---|
| Choice Specs (Includes Effect) + Wise Glasses + Slick Spoon |
8543 | 10,398 |
Since the build is centered on Overheat, equipping items that maximizes Chandelure's damage output is the ideal item combination.
As the results show, Choice Specs, Wise Glasses, and Slick Spoon will yield the best results considering Chandelure's limitations. The item combination does not require extra tasks to maximize the Pokemon's damage output.
Although the item combinations that have Sp. Atk. Specs included tend to produce the best results, the item isn't ideal for Chandelure since it will be too difficult for the Pokemon to fully stack it.
For alternatives, replacing Slick Spoon with Shell Bell would be the ideal choice. The item combination's results are just slightly lower than the recommended build, but it gives Chandelure a recovery tool.
On the other hand, for a more damage-oriented alternative, replacing Slick Spoon with Energy Amplifier would be the best option. The item combination produced the the second best results for Flamethrower and Ignite Midnight. However, this does require Chandelure to activate its unite move first.
These damage tests are conducted using the Training Dummy in Practice Mode. The results are taken from the Total Damage data.
| Note: The numbers in bold are the highest result for a specific test. |
| Items (Level 30) | Overheat (Total Damage) (@ Lvl 15) | Ignite Midnight (@ Lvl 15) |
|---|---|---|
| Choice Specs (Includes Effect) + Wise Glasses + Slick Spoon | 8543 | 10,398 |
| Choice Specs (Includes Effect) + Wise Glasses + Sp. Atk. Specs (6 Stacks) | 8976 | 10,842 |
| Choice Specs (Includes Effect) + Wise Glasses + Energy Amplifier (Includes Effect) | 9521 | 12,401 |
| Choice Specs (Includes Effect) + Slick Spoon + Sp. Atk. Specs (6 Stacks) | 8556 | 10,414 |
| Choice Specs (Includes Effect) + Slick Spoon + Energy Amplifier (Includes Effect) | 9081 | 11,933 |
| Choice Specs (Includes Effect) + Sp. Atk. Specs (6 Stacks) + Energy Amplifier (Includes Effect) | 9547 | 12,428 |
| Wise Glasses + Slick Spoon + Sp. Atk. Specs (6 Stacks) | 8356 | 10,229 |
| Wise Glasses + Slick Spoon + Energy Amplifier (Includes Effect) | 8844 | 11,718 |
| Wise Glasses + Sp. Atk. Specs (6 Stacks) + Energy Amplifier (Includes Effect) | 9284 | 12,211 |
| Slick Spoon + Sp. Atk. Specs (6 Stacks) + Energy Amplifier (Includes Effect) | 8879 | 11,749 |
| Choice Specs (Includes Effect) + Wise Glasses + Shell Bell | 8520 | 10,372 |
| Choice Specs (Includes Effect) + Slick Spoon + Shell Bell | 8127 | 9972 |
| Choice Specs (Includes Effect) + Shell Bell + Sp. Atk. Specs (6 Stacks) | 8534 | 10,389 |
| Choice Specs (Includes Effect) + Shell Bell + Energy Amplifier (Includes Effect) | 9079 | 11,901 |
| Wise Glasses + Slick Spoon + Shell Bell | 7941 | 9795 |
| Wise Glasses + Shell Bell + Energy Amplifier (Includes Effect) | 8820 | 11,687 |
| Wise Glasses + Shell Bell + Sp. Atk. Specs (6 Stacks) | 8336 | 10,200 |
| Slick Spoon + Shell Bell + Sp. Atk. Specs (6 Stacks) | 7957 | 9817 |
| Slick Spoon[ + Shell Bell + Energy Amplifier (Includes Effect) | 8442 | 11,267 |
| Shell Bell + Sp. Atk. Specs (6 Stacks) + Energy Amplifier (Includes Effect) | 8844 | 11,718 |
The tests above does not use any Emblems yet so it will scale higher if equipped.
Flamethrower Build
| Flamethrower Build | Moveset | Held Items | |||
|---|---|---|---|---|---|
| Battle Item | |||||
| Stats from Items (Lv. 40) | Recommended Lane | ||||
|
Sp. Atk: +123 HP: +245 |
|
||||
| Emblem Color Combination | Target Emblem Stats | ||||
|
|
Positive Stats: • Sp. Atk Free Negative Stats: • Attack • Critical-Hit Rate |
||||
| Note: The emblem color and stats here are suggestions only. The builds are still viable even without the suggested emblems. |
|||||
Flamethrower Build Explanation
| Build Explanation |
|---|
| This build utilizes Imprison and Flamethrower's long range to stun and burst targets down from afar, keeping Chandelure safe from the enemy's attention. |
| · Choice Specs gives Chandelure a nice amount of Sp. Atk. stat and increases Flamethrower's minimum move damage. · Wise Glasses provides Chandelure with extra Sp. Atk. thanks to its percentage bonus. · Slick Spoon works nicely with Chandelure's Infiltrator ability. It also supplies HP and more Sp. Atk. · However, Shell Bell can be a replacement for Slick Spoon, giving Chandelure a recovery tool. · Energy Amplifier is also a good replacement for Slick Spoon, giving Chandelure more firepower when it activates Ignite Midnight. · Eject Button gives Chandelure a repositioning tool when enemies try to approach it. · The build's Boost Emblem loadout should consist of 6 Green Emblems for more damage and 4 White Emblems additional HP. · Equip Emblems that improve Sp. Atk. to maximize Chandelure's damage output. · Attack and Critical-Hit Rate can be freely traded for the other stats. |
Flamethrower Build Damage Test
| Items (Level 30) |
Flamethrower (Total Damage) (@ Lvl 15) |
Ignite Midnight (@ Lvl 15) |
|---|---|---|
| Choice Specs (Includes Effect) + Wise Glasses + Slick Spoon |
2915 4396 |
10,398 |
Since the build is centered on Flamethrower, equipping items that maximizes Chandelure's damage output is the ideal item combination.
As the results show, Choice Specs, Wise Glasses, and Slick Spoon will yield the best results considering Chandelure's limitations. The item combination does not require extra tasks to maximize the Pokemon's damage output.
Although the item combinations that have Sp. Atk. Specs included tend to produce the best results, the item isn't ideal for Chandelure since it will be too difficult for the Pokemon to fully stack it.
For alternatives, replacing Slick Spoon with Shell Bell would be the ideal choice. The item combination's results are just slightly lower than the recommended build, but it gives Chandelure a recovery tool.
On the other hand, for a more damage-oriented alternative, replacing Slick Spoon with Energy Amplifier would be the best option. The item combination produced the the second best results for Flamethrower and Ignite Midnight. However, this does require Chandelure to activate its unite move first.
These damage tests are conducted using the Training Dummy in Practice Mode. The results are taken from the Total Damage data.
| Note: The numbers in bold are the highest result for a specific test. |
| Items (Level 30) | Flamethrower (Close Range) (@ Lvl 15) Flamethrower (Max Range) (@ Lvl 15) | Ignite Midnight (@ Lvl 15) |
|---|---|---|
| Choice Specs (Includes Effect) + Wise Glasses + Slick Spoon | 2915 4396 | 10,398 |
| Choice Specs (Includes Effect) + Wise Glasses + Sp. Atk. Specs (6 Stacks) | 3081 4634 | 10,842 |
| Choice Specs (Includes Effect) + Wise Glasses + Energy Amplifier (Includes Effect) | 3432 5049 | 12,401 |
| Choice Specs (Includes Effect) + Slick Spoon + Sp. Atk. Specs (6 Stacks) | 2920 4404 | 10,414 |
| Choice Specs (Includes Effect) + Slick Spoon + Energy Amplifier (Includes Effect) | 3283 4788 | 11,933 |
| Choice Specs (Includes Effect) + Sp. Atk. Specs (6 Stacks) + Energy Amplifier (Includes Effect) | 3443 5063 | 12,428 |
| Wise Glasses + Slick Spoon + Sp. Atk. Specs (6 Stacks) | 2492 3921 | 10,229 |
| Wise Glasses + Slick Spoon + Energy Amplifier (Includes Effect) | 2809 4290 | 11,718 |
| Wise Glasses + Sp. Atk. Specs (6 Stacks) + Energy Amplifier (Includes Effect) | 2936 4512 | 12,211 |
| Slick Spoon + Sp. Atk. Specs (6 Stacks) + Energy Amplifier (Includes Effect) | 2797 4306 | 11,749 |
| Choice Specs (Includes Effect) + Wise Glasses + Shell Bell | 2906 4382 | 10,372 |
| Choice Specs (Includes Effect) + Slick Spoon + Shell Bell | 2755 4171 | 9972 |
| Choice Specs (Includes Effect) + Shell Bell + Sp. Atk. Specs (6 Stacks) | 2912 4392 | 10,389 |
| Choice Specs (Includes Effect) + Shell Bell + Energy Amplifier (Includes Effect) | 3273 4796 | 11,901 |
| Wise Glasses + Slick Spoon + Shell Bell | 2358 3723 | 9795 |
| Wise Glasses + Shell Bell + Energy Amplifier (Includes Effect) | 2800 4277 | 11,687 |
| Wise Glasses + Shell Bell + Sp. Atk. Specs (6 Stacks) | 2486 3911 | 10,200 |
| Slick Spoon + Shell Bell + Sp. Atk. Specs (6 Stacks) | 2363 3731 | 9817 |
| Slick Spoon[ + Shell Bell + Energy Amplifier (Includes Effect) | 2645 4088 | 11,267 |
| Shell Bell + Sp. Atk. Specs (6 Stacks) + Energy Amplifier (Includes Effect) | 2809 4290 | 11,718 |
The tests above does not use any Emblems yet so it will scale higher if equipped.
Chandelure Best Items & Moveset
Best Held Items
| Item | Explanation |
|---|---|
 Energy Amplifier Energy Amplifier
|
Energy Amplifier gives Chandelure a massive damage boost when it uses Ignite Midnight. It also interacts nicely with how the move works. |
 Wise Glasses Wise Glasses
|
Wise Glasses works well with Chandelure's high Sp. Atk. stat. Its percentage bonus effect greatly boosts the Pokemon's damage. |
 Shell Bell Shell Bell
|
Shell Bell's healing works great with Chandelure'e high Sp. Atk. stat. It also gives a decent amount of Sp. Atk. and cooldown reduction. |
 Choice Specs Choice Specs
|
Choice Specs increases Chandelure's moves' burst damage potential by improving their minimum damage. |
 Slick Spoon Slick Spoon
|
Slick Spoon synergizes well with Infiltrator's Sp. Def. penetration, allowing Chandelure to deal even more damage. It also gives balanced stats. |
Best Battle Items
| Item | Explanation |
|---|---|
 Eject Button Eject Button
|
Eject Button provides Chandelure a quick repositioning tool, especially since the Pokemon needs to be at the backlines. |
 X Speed X Speed
|
X Speed gives Chandelure a versatile mobility tool. It also works well when using Overheat. |
Best Moveset
| Move | Explanation |
|---|---|
 Overheat Overheat
|
Overheat provides a more spammable means of damage during teamfights. Although how it works puts Chandelure in a potentially dangerous position, the Pokemon can still maneuver around when using the move. |
 Imprison Imprison
|
Imprison not only stuns targets but also prevents them from using their moves. It also has a long range that is useful for chasing targets. |
This moveset performs much better than its counterpart. Overheat has a significantly higher damage potential than Flamethrower, assuming all projectiles hit. Imprison's move-disabling effect and long range makes it incredibly effective during teamfights. It also provides better protection for Chandelure against aggressive opponents.
Choosing between Overheat and Flamethrower depends on whether a player prefers more damage or longer range. For more damge, Overheat would be the best option. For better range, Flamethrower is the ideal choice.
On the other hand, although Poltergeist and Imprison essentially have the same purpose, they have additional things to offer. Choose Poltergeist to deal additional damage on top of a slow. Choose Imprison for a stronger disabling move.
Which Moveset Do You Think is Best for Chandelure?
Let us know why in the comments!
How to Play Chandelure
| Jump to Section | |
|---|---|
Utilize Infiltrator to Knock Out Targets Quickly

When active, Infiltrator allows Chandelure to partially ignore its enemy's Sp. Defense. Utilize this ability by equipping held items like Slick Spoon to boost its effectiveness.
Upon reaching level 5, Chandelure can learn either Flamethrower or Overheat as its upgraded damaging move and will be able to assist in pushing lanes from a safe distance.
Slow Down and Burn Enemies with Ember
Chandelure can squeeze out damage early game with Ember. This move allows Chandelure to burn an enemy it hits while also slowing them down. Farm Wild Pokemon quickly and burn enemy Pokemon that tries to score in the allied goal during early game.
Mark Enemies with Night Shade
Night Shade lets Chandelure mark enemies and deal boosted attack damage with Ember and standard attacks. Utilize this move to farm Wild Pokemon and get to level 5 quickly by marking enemies first, then setting them in a burned state with Ember.
Secure Objectives with Upgraded Damaging Moves

Chandelure will be able to learn either Flamethrower or Overheat upon reaching level 5.
Choosing Overheat turns Chandelure into an aggressive AoE damage dealer that's perfect for diving in teamfights.
Choosing Flamethrower lets chandelure deal the most damage by staying as far away as possible and hit enemies with the explosion that goes out at maximum distance.
Both moves lets Chandelure deal huge amounts of damage, so make sure to choose the move that best suits your chosen build.
Burn Enemies with Flamethrower
Flamethrower is a powerful damaging move that lets Chandelure deal damage by firing a straight line of flames. This can be aimed anywhere, and targets that get hit will be afflicted with a Burn debuff.
Utilizing the damage dealt by this move requires proper positioning, since it deals the most damage by hitting enemy Pokemon with the follow-up explosion. An enemy that gets hit by Flamethrower's follow-up explosion gets increased damage, and grants Chandelure a temporary attack boost.
Deal Consecutive AoE Damage with Overheat
Overheat allows Chandelure to deal AoE damage consecutively at designated directions for 4 times. Using this move turns Chandelure into an aggressive and bursty ranged attacker at the cost of being unable to use standard attacks temporarily afterwards. This move is great for interrupting enemy setups or ambushing isolated enemies.
This move also synergizes well with Poltergeist or Imprison as both moves hinders enemy movement. Utilize this move to quickly secure objectives on the top and bottom lane.
Choose Hindrance Move Based on Playstyle
While securing objectives is part of an Attacker's resposibility, Chandelure will learn moves that hinders enemy movement and abilities by level 7.
Choose Poltergeist to summon a zone with floating furnitures and trap enemies inside. This move is useful for chasing down isolated targets and opening up ganking opportunites for allies.
Choose Imprison to temporarily disable enemies from using their abilities while slowing them down. Use this move to throw off enemy Pokemon that requires positioning or timing their moves.
Both moves have their own advantages, so choose the one that synergizes best with your chosen build.
Set Up Traps with Poltergeist
Chandelure is able to trap and slow its enemies down by using Potergeist. This move allows Chandelure to enclose targets in a zone filled with floating furnitures. It requires a bit of positioning and setting up, but this is a good support move that can help your allies escape safely from dangerous situations, or hinder enemy movement and open up ganking opportunities for your teammates.
Disable Enemy Abilities with Imprison
Imprison allows Chandelure to completely disable its opponents by releasing a dark zone in front of it. The first enemy to get hit is unable to use any of its abilities and can only deal standard attacks. Overwhelm melee-ranged enemies with this move and help your allies push lanes!
Unite Move Strategy
Chandelure's Unite Move Ignite Midnight dims its enemies' vision on the first activation, then fires a beam towards a designated direction. This move is best used when securing objectives, or during Rayquaza spawn teamfights. Hinder enemies from their setups, position Chandelure at an area where it can hit enemies the most.
Chandelure Progression and Leveling Guide
Top and Bottom Guide
Level 1 to 5
- Quickly clear out the Bunnelbies in the lane.
- Keep farming wild Pokemon in the lane to reach level 5 and learn your first move.
- At bottom lane, prioritize taking Indeedees for more exp.
Level 6 to 9
- Keep hunting Wild Pokemon to gain more EXP from farming Altaria and Swablus.
- Once you reach level 7, learn your second move.
- Help allies secure Regice, Registeel, or Regirock when it spawns, otherwise secure Regieleki.
- Upon reaching level 9, learn your Unite Move.
Level 10+
- Stick with allies to hunt targets, secure objectives, and push lanes.
- Reach at least level 13 or max level if possible before or when Groudon spawns for a fully-upgraded moveset.
- Make sure that your Unite Move is available when Groudon spawns.
- Help teammates win a teamfight and secure Groudon.
Jungle Guide
Level 1 to 5
- Quickly defeat Xatu
- Clear the first wave of jungle camps and reach level 5 to learn your first move.
- Help the top lane first or whatever lane needs help the most by securing Altaria and Swablus, getting knockouts, and scoring points.
Level 6 to 9
- Clear the second wave of jungle camps and reach at least level 7 to learn your second move.
- Secure Regidrago in the center to get more EXP.
- Help the bottom lane by securing Altaria and Swablus, getting kills, and scoring points.
- If possible, reach level 9 and learn your Unite Move before or when Regice, Registeel, or Regirock spawns.
- Help allies secure Regice, Registeel, or Regirock, with Registeel being the highest priority since it gives a damage buff to the party.
Level 10+
- Stick with allies to hunt targets, secure objectives, and push lanes.
- Reach at least level 13 or max level if possible before or when Groudon spawns for a fully-upgraded moveset.
- Make sure that your Unite Move is available when Groudon spawns.
- Help teammates win a teamfight and secure Groudon.
Chandelure Combos
Early Game Combos
This combo is effective for pressuring opponents in the early game.
Combustion Combo
| Combustion Combo | |
|---|---|
Night Shade
►
Standard Attack
or Boosted Attack ►
Ember
x2 |
|
| Start by marking the target with Night Shade, then follow up with a Standard or Boosted Attack to stun it. While the target is stunned, quickly use Ember twice for burst damage. | |
Main Combos
These combos use Chandelure's primary moves and tries to maximize their usage.
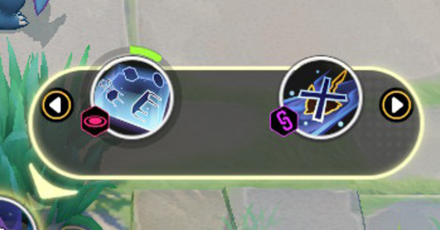
Bombardment Combo
| Bombardment Combo | |
|---|---|
| Start by either placing Poltergeist to slow enemies or use Imprison to stun them. Once they're slowed or stunned, use Mystical Fire while making sure all projectiles hit enemies. | |
Maximum Ignition Combo
| Maximum Ignition Combo | |
|---|---|
| Start by activating Ignite Midnight to obscure the target's vision. Lay down Imprison, then immediately follow up with Flamethrower at max range. Finish the combo with Ignite Midnight's second activation. The combo can be done even without using Ignite Midnight. |
|
Matchups & Counters for Chandelure
Chandelure Matchups
| Matchup Notes | ||
|---|---|---|
| 1. The chart is based on our own experience playing Chandelure. 2. Pokemon within each tier are unordered 3. Any Pokemon not shown here are still under investigation. |
||
Hard Counter With Burst Damage
Chandelure can snipe its enemies from a safe distance, but it's also fragile. Well-timed combos and some follow-up auto-attacks will make short work of Chandelure.
Best Counters
| Pokemon | Explanation |
|---|---|
 Talonflame Talonflame
|
Rating: ★★★★★ • Can quickly get close to Chandelure and burst it down using Brave Bird, or safely approach it using Fly. • Can displace Chandelure using Flame Sweep. |
 Zacian Zacian
|
Rating: ★★★★★ • Can quickly get close to Chandelure using Agility and burst it down with Sacred Sword or Metal Claw and attacks. |
 Dragapult Dragapult
|
Rating: ★★★★★ • Can sneak up to Chandelure using Phantom Force and take it down quickly with attacks and Dreep and Destroy. |
Even Matchups for Chandelure
Maintaining a safe distance with the help of Poltergeist or Imprison and successfully hitting Flamethrower or Overheat is the only way for Chandelure to get the upper hand against these Pokemon.
Strike First
| Ranged, Fragile Pokemon with High Damage |
|---|
|
|
| How to Beat |
|
• Much like Chandelure, these Pokemon prefer to keep their distance from opponents when fighting. They also have high damage potential that can knock out Chandelure quickly. However, they are fragile and can get knocked out by Chandelure fast. Winning against these Pokemon is all a matter of striking first. • When using Flamethrower, make sure to hit them at the tip of the move to deal increased damage and reduce the move's cooldown. • When using Overheat, make sure to hit them with all projectiles, especially the final shot for maximum damage. Also, move around while using the move to avoid getting attacked. • Lay down Poltergeist at their location to slow them, or use Imprison to prevent them from using their moves. • If needed, use Ignite Midnight to limit their vision, then burst them down with the move's second activation. |
Kite Them
| All-Rounders |
|---|
|
|
| How to Beat |
|
• These Pokemon excel in close combat and rely mostly on their attacks or combos to deal damage. They are also durable enough to tank Chandelure's damage. However, they're melee and can be easily kited by Chandelure's long-ranged moves. • Slow them using Poltergeist or prevent them from using their moves with Imprison, then kite them with Flamethrower or Overheat. • As a last resort or when they get close, use Ignite Midnight to limit their vision and burst them down with the move's second activation. |
Take Them Out First
| Supporters |
|---|
|
|
| How to Beat |
|
• These Pokemon usually stick with their allies and rarely venture alone. Although they themselves pose no threat to Chandelure, their support capabilities makes them valuable during fights. • It's best to take them out first using Flamethrower or Overheat with the help of Poltergeist or Imprison. • If needed, use Ignite Midnight to limit their vision and burst them down with the move's second activation. |
Group Up with Allies
| Highly Durable Pokemon |
|---|
|
|
| How to Beat |
|
• These Pokemon are extremely durable, making it difficult for Chandelure to take them down alone. With that, it's best to group up with allies to bring them down with the help of Chandelure. • Use Poltergeist or Imprison to disable them, then follow up with Flamethrower or Overheat. |
Easy Matchups for Chandelure
Pokemon that are easily kited by Chandelure's long-ranged moves are easy matchups for the Pokemon.
Take Them Out First
| Supporters |
|---|
|
|
| How to Beat |
|
• These Pokemon usually stick with their allies and rarely venture alone. Although they themselves pose no threat to Chandelure, their support capabilities makes them valuable during fights. • It's best to take them out first using Flamethrower or Overheat with the help of Poltergeist or Imprison. • If needed, use Ignite Midnight to limit their vision and burst them down with the move's second activation. |
Kite Them
| All-Rounders |
|---|
| How to Beat |
|
• These Pokemon excel in close combat and rely mostly on their attacks or combos to deal damage. They are also durable enough to tank Chandelure's damage. However, they're melee and can be easily kited by Chandelure's long-ranged moves. • Slow them using Poltergeist or prevent them from using their moves with Imprison, then kite them with Flamethrower or Overheat. • As a last resort or when they get close, use Ignite Midnight to limit their vision and burst them down with the move's second activation. |
Best Teammates for Chandelure
| Pokemon | Explanation |
|---|---|
 Alolan Ninetales Alolan Ninetales
 Slowbro Slowbro
 Wigglytuff Wigglytuff
|
Pokemon with Strong Disables |
| • These ally Pokemon are equipped with hard disabling skills and can help absorb most of the damage during team fights. This lets Chandelure roam freely and provide support from the backlines. These Pokemon also provides hard crowd control that shuts down targets, allowing Chandelure to double down on inflicting debuffs on enemies while contributing damage. | |
 Trevenant Trevenant
 Urshifu
Zacian Urshifu
Zacian
|
Aggressive Frontliners |
| • These All-Rounder allies are very sturdy and hard-hitting Pokemon that can assist Chandelure to push lanes and secure objectives faster. | |
 Comfey Comfey
 Eldegoss Eldegoss
 Mr. Mime Mr. Mime
|
Dedicated Supporters |
| • These ally Pokemon are Supporters that synergize well with Chandelure and provide the necessary heals, buffs, or shield it needs in order to push lanes, and assist in securing objectives. |
Looking for teammates to synergize with you? Head over to our Friend Request Board to find other trainers to join you in your grind or just to hang out with!
Chandelure Moves
Move Slot 1 (R)
 Ember Ember
(Lv. 1 or 3) |
Move Type: Area Damage Type: Special Cooldown: 7.5s Starting Damage: 427 Initial damage: 312, Burn damage per instance: 23, Number of instances: 5 Final Damage: 533 Initial damage: 373, Burn damage per instance: 32, Number of instances: 5 |
|---|---|
| Has the user shoot out a small flame, dealing damage to opposing Pokemon it hits, decreasing their movement speed, and leaving them burned. For a short time after this move is used, it can be used again. | |
 Flamethrower Flamethrower
(Lv. 5) Upgrade Lv. 11 |
Move Type: Area Damage Type: Special Cooldown: 7s Starting Damage: 944 Base damage: 754, Explosion damage: 1050, Burn damage per instance: 38, Number of instances: 5 Final Damage: 2298 Base damage: 1758, Explosion damage: 3039, Burn damage per instance: 108, Number of instances: 5, Damage increase: 19% |
|
Has the user shoot an intenst blast of fire in the designated direction, dealing damage to opposing Pokemon it hits and leaving them burned. The end of the blast explodes, dealing increased damage. If the explosion hits an opposing Pokemon, this move's cooldown is reduced.
Upgrade: When the explosion at the end of the blast hits an opposing Pokemon, the user deals increased damage for a short time. |
|
|
Overheat
(Lv. 5) Upgrade Lv. 11 |
Move Type: Ranged, Sure Hit Damage Type: Special Cooldown: 7.5s Starting Damage: 2505 Damage per projectile: 510, Number of projectiles: 3, Exploding flame damage (Max Heat Charges): 785, Burn damage per instance: 38, Number of instances: 5 Final Damage: 6503 Damage per projectile: 1359, Number of projectiles: 3, Exploding flame damage (Max Heat Charges): 1886, Burn damage per instance: 108, Number of instances: 5 |
|
Has the user throw consecutive flames in an arc into the designated area up to 3 times, dealing damage to oppsing Pokemon they hit and leaving them burned. When a flame hits an opposing Pokemon, the user gains one heat energy. If this move is used again, the user shoots out an exploding flame, dealing damage to opposing Pokemon it hits based on the user's amount of heat energy and leaving them burned. After using the follow-up attack, the user cannot use basic attacks for a short time.
Upgrade: Reduces this move's cooldown. |
|
Move Slot 2 (ZR)
 Night Shade Night Shade
(Lv. 1 or 3) |
Move Type: Hindrance Damage Type: Special Cooldown: 7.5s Starting Damage: 129 Final Damage: 230 |
|---|---|
| Makes opposing Pokemon in the area of effect see a frightening mirage, dealing damage to them and marking them. When the user deals damage again to marked opposing Pokemon, those Pokemon are left unable to act for a short time. | |
 Poltergeist Poltergeist
(Lv. 7) Upgrade Lv. 13 |
Move Type: Area Damage Type: Special Cooldown: 7.5s Starting Damage: 343 Damage per mirage: 343, Number of mirages: 4 Final Damage: 655 Damage per mirage: 655, Number of mirages: 4 |
|
Has the user create a zone of mysterious power, as well as mirages of floating furniture - such as tables and chairs - inside it. Any opposing Pokemon that comes in contact with a mirage takes damage and has its movement speed decreased. Opposing Pokemon that step on the zone's border will also have their movement speed decreased.
Upgrade: Strengthens the movement speed decrease applied to opposing Pokemon. |
|
|
Imprison
(Lv. 7) Upgrade Lv. 13 |
Move Type: Hindrance Damage Type: Special Cooldown: 9.5s Starting Damage: N/A Final Damage: N/A |
|
Has the user create a zone in front of itself. The first opposing Pokemon caught in it will be unable to move, and all opposing Pokemon in or that enter the zone become imprisoned and cannot use moves.
Upgrade: All opposing Pokemon caught in the zone when it is created will become unable to move. |
|
Unite Moves (ZL)
 Ignite Midnight Ignite Midnight
(Lv. 9) |
Move Type: Buff, Area Damage Type: Special Cooldown: 100s Starting Damage: 5404 Damage per instance: 736, Number of instances: 6, Final blast damage: 988 Final Damage: 9083 Damage per instance: 1238, Number of instances: 6, Final blast damage: 1655 |
|---|---|
| The user seals the area around itself in darkness and obsucres opposing Pokemon's vision for a short time. If this Unite Move is used again, the user continuously fires a beam of fire in a designated direction, dealing damage to opposing Pokemon it hits. The beam can be directed while fired, and its final blast deals increased damage. | |
Standard Attack
|
|
Becomes a boosted attack whenever a set amount of time passes, dealing damage to opposing enemies it hits. decreasing their movement speed, and leaving them burned. |
|---|
Ability (Passive)
 Infiltrator Infiltrator
|
When the Pokemon with this Ability deals damage to opposing Pokemon, its next attack partially ignores the opposing Pokemon's Sp. Def. This effect can stack up to 8 times maximum. |
|---|
Chandelure Stats & Evolutions
Chandelure Evolutions
| 1st Evolution | 2nd Evolution | Final Evolution |
|---|---|---|
 Litwick Litwick(Lv. 1) |
 Lampent Lampent(Lv. 5) |
 Chandelure Chandelure(Lv. 7) |
Chandelure Stats
| Level | HP | Defense | Special Defense | Attack Damage |
|---|---|---|---|---|
| 1 | 3200 | 35 | 30 | 135 |
| 2 | 3244 | 37 | 32 | 137 |
| 3 | 3297 | 40 | 35 | 140 |
| 4 | 3361 | 43 | 39 | 143 |
| 5 | 3593 | 55 | 52 | 155 |
| 6 | 3685 | 60 | 57 | 160 |
| 7 | 4106 | 82 | 80 | 181 |
| 8 | 4239 | 89 | 87 | 188 |
| 9 | 4399 | 97 | 96 | 196 |
| 10 | 4591 | 107 | 107 | 206 |
| 11 | 4821 | 119 | 120 | 218 |
| 12 | 5097 | 134 | 135 | 232 |
| 13 | 5428 | 152 | 153 | 249 |
| 14 | 5825 | 173 | 175 | 269 |
| 15 | 6300 | 200 | 203 | 295 |
Attack Damage is the damage of the Basic Attack as tested against the Training Dummy.
Chandelure In-Game Stat Listings
| Offense | Endurance | Mobility | Scoring | Support |
|---|---|---|---|---|
|
|

|
|

|
|
Chandelure Skins (Holowear)
| Holowear | |
|---|---|
 Orange UNITE Style Orange UNITE Style
Zirco Trading:
|
 Purple UNITE Style Purple UNITE Style
Zirco Trading:
|
 Magician Style Magician Style
Zirco Trading:
|
 Dainty Style Dainty Style
Zirco Trading:
|
Chandelure Character Spotlight
Chandelure Achievements
Overheat Achievement
| Overheat | |
|---|---|
| Pokemon | Move |
|
Chandelure
|
|
| Mission: Knock out Pokemon from the opposing team with the follow-up attack of Overheat or Overheat+ (20/40/80 times total) |
|
| Medals & Points | Rewards |
|
|
|
|
|
|
|
|
|
List of Attacker Pokemon Achievements
Pokemon UNITE Related Guides

All Pokemon Guides and Builds
 Absol
Absol Aegislash
 Alcremie
 Alolan Raichu
 Armarouge
 Azumarill
 Blastoise
 Blaziken
 Blissey
 Buzzwole
 Ceruledge
 Charizard
 Cinderace
 Clefable
 Cramorant
 Crustle
 Darkrai
 Decidueye
 Delphox
 Dhelmise
 Dodrio
 Dragonite
 Duraludon
 Empoleon
 Espeon
 Falinks
 Galarian Rapidash
 Garchomp
 Gardevoir
 Gengar
 Glaceon
 Goodra
 Greedent
 Greninja
 Gyarados
 Ho-oh
Ho-oh Hoopa
Hoopa Inteleon
 Lapras
 Latias
 Latios
 Leafeon
 Lucario
 Machamp
 Mamoswine
 Meowscarada
 Meowth
 Metagross
 Mew
Mew Mimikyu
 Miraidon
 Moltres
 Pawmot
 Pikachu
 Psyduck
 Sableye
 Scizor
 Sirfetch'd
 Snorlax
 Suicune
 Sylveon
 Tinkaton
 Tsareena
 Tyranitar
 Umbreon
 Vaporeon
 Venusaur
 Zapdos
 Zeraora
 Zoroark
Upcoming Pokemon
 Articuno Articuno(TBA) |
 Meganium Meganium(TBA) |
 Typhlosion Typhlosion(TBA) |
 Feraligatr Feraligatr(TBA) |
Mega Evolutions
| Mega Evolved Pokemon | ||
|---|---|---|
 Mega Charizard X Mega Charizard X |
 Mega Charizard Y Mega Charizard Y |
 Mega Gyarados Mega Gyarados |
 Mega Lucario Mega Lucario |
 Mega Mewtwo X Mega Mewtwo X |
 Mega Mewtwo Y Mega Mewtwo Y |
Pokemon by Role
| All Pokemon Roles | |||||
|---|---|---|---|---|---|
 Attackers Attackers |
 All-Rounders All-Rounders |
 Defenders Defenders |
|||
 Speedsters Speedsters |
 Supporters Supporters |
||||
Pokemon by Characteristics
| Attack Type | |
|---|---|
 Melee Pokemon Melee Pokemon |
 Ranged Pokemon Ranged Pokemon |
 Physical Pokemon Physical Pokemon |
 Special Pokemon Special Pokemon |
| Stat Rankings | |
 HP Ranking HP Ranking |
 Defense Ranking Defense Ranking |
 Sp. Def. Ranking Sp. Def. Ranking |
 Basic Attack Ranking Basic Attack Ranking |
Author

Chandelure Guide: Best Builds and Moveset
Rankings

Gaming News

![Monster Hunter Stories 3 Review [First Impressions] | Simply Rejuvenating](https://img.game8.co/4438641/2a31b7702bd70e78ec8efd24661dacda.jpeg/show)
![The Seven Deadly Sins: Origin [First Impressions] | A Promising Start](https://img.game8.co/4440581/584e0bfb87908f12c4eab6e846eb1afd.png/thumb)
![The Liar Princess and the Blind Prince Review [PC] | Lovely to Look at but Tedious to Play](https://img.game8.co/4442586/8d95f5faf05780f1765ce7e0938bd825.jpeg/thumb)
![Marathon Cryo Archive Map Teased as [REDACTED] on Selection Screen](https://img.game8.co/4442236/6357203e58172f6de57f1991e7c39b22.png/thumb)
Popular Games

Genshin Impact Walkthrough & Guides Wiki
Umamusume: Pretty Derby Walkthrough & Guides Wiki
Pokemon Pokopia Walkthrough & Guides Wiki
Honkai: Star Rail Walkthrough & Guides Wiki
Monster Hunter Stories 3: Twisted Reflection Walkthrough & Guides Wiki
Arknights: Endfield Walkthrough & Guides Wiki
Wuthering Waves Walkthrough & Guides Wiki
Zenless Zone Zero Walkthrough & Guides Wiki
Pokemon TCG Pocket (PTCGP) Strategies & Guides Wiki
Monster Hunter Wilds Walkthrough & Guides Wiki


Recommended Games
Diablo 4: Vessel of Hatred Walkthrough & Guides Wiki
Cyberpunk 2077: Ultimate Edition Walkthrough & Guides Wiki
Fire Emblem Heroes (FEH) Walkthrough & Guides Wiki
Yu-Gi-Oh! Master Duel Walkthrough & Guides Wiki
Super Smash Bros. Ultimate Walkthrough & Guides Wiki
Pokemon Brilliant Diamond and Shining Pearl (BDSP) Walkthrough & Guides Wiki
Elden Ring Shadow of the Erdtree Walkthrough & Guides Wiki
Monster Hunter World Walkthrough & Guides Wiki
The Legend of Zelda: Tears of the Kingdom Walkthrough & Guides Wiki
Persona 3 Reload Walkthrough & Guides Wiki


All rights reserved
©2021 Pokémon. ©1995–2021 Nintendo / Creatures Inc. / GAME FREAK inc.
©2021 Tencent.
The copyrights of videos of games used in our content and other intellectual property rights belong to the provider of the game.
The contents we provide on this site were created personally by members of the Game8 editorial department.
We refuse the right to reuse or repost content taken without our permission such as data or images to other sites.
Can you fix this Start by either placing Poltergeist to slow enemies or use Imprison to stun them. Once they're slowed or stunned, use "Mystical Fire" while making sure all projectiles hit enemies. It's supposed to be overheat