Boss Rush Guide: Mechanics and Event Dates
☆ Upcoming: Articuno | Meganium | Typhlosion | Feraligatr
★ Latest News: Zapdos | Moltres | Version 1.22.1.5
☆ Popular Pages: Upcoming Pokemon | Tier List
★ Current Seasons: Ranked S34 | Battle Pass S39
☆ Join Game8's Pokemon Discord Server!
Boss Rush is a temporary quick battle mode that has rerun for Pokemon UNITE! This mode features a new map where 5 players team up to defeat boss Pokemon in the fastest time! Read on to learn about Boss Rush's event dates and time, the mechanics, and the list of rewards!
List of Contents
- Boss Rush Event Dates
- How to Start Boss Rush
- Boss Rush Mechanics and Features
- Tips for Playing Boss Rush
- Best Pokemon to Use
- Boss Rush Rewards
- First Stage Boss Moves
- Araquanid
- Avalugg
- Drednaw
- Second Stage Boss Moves
- Regirock
- Registeel
- Regice
- Zapdos
- Articuno
- Final Stage Boss Moves
- Zacian
- Regigigas
- Boss Rush Challenge Missions
- Pokemon UNITE Related Guides
Boss Rush Event Dates
Boss Rush Season is Up!
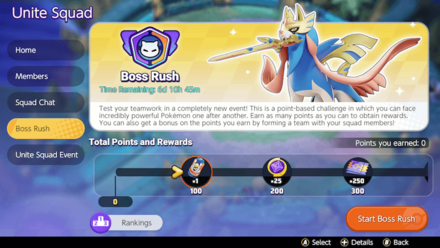
The Boss Rush game mode will rerun for three more waves from February 27, 2023! It will run for three periods from February to April 2023 so plan ahead with your squads!
Past Boss Rush Dates
| 1st Rush | July 21, 2022 12:00 AM PDT |
July 24, 2022 4:59 PM PDT |
|---|---|---|
| 2nd Rush | July 31, 2022 5:00 PM PDT |
August 7, 2022 4:59 PM PDT |
| 3rd Rush | August 14, 2022 5:00 PM PDT |
August 21, 2022 4:59 PM PDT |
| 4th Rush | February 27, 2023 04:00AM UTC |
March 5, 2023 11:59PM UTC |
| 5th Rush | March 13, 2023 04:00AM UTC |
March 19, 2023 11:59PM UTC |
| 6th Rush | March 27, 2023 04:00AM UTC |
April 2, 2023 11:59PM UTC |
How to Start Boss Rush
Access From Home Screen
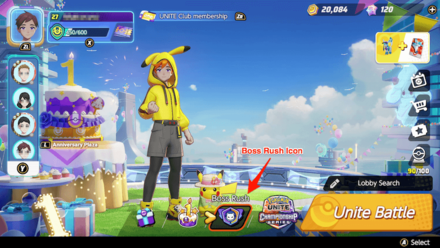
You can access Boss Rush by hitting on the Boss Rush icon beside UNITE Battle.
Access from UNITE Squad
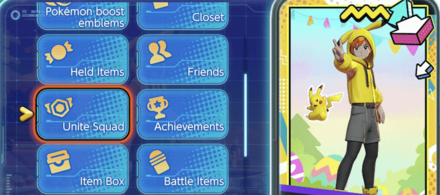
You may also access Boss Rush by going to Menu > UNITE Squad > Boss Rush.
Boss Rush Mechanics and Features
New PvE Experience in Pokemon UNITE

Boss Rush is a new Quick Battle format that will be the first PvE (Player vs Environment) game mode in Pokemon UNITE. 5 players will team up to fight powerful Boss Pokemon and try to take all of them down within 5 minutes!
Earn Points by Defeating Bosses
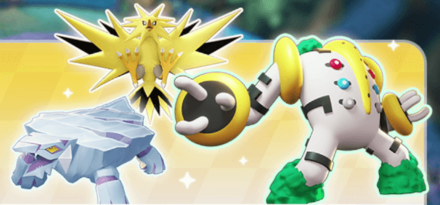
You earn points by defeating powerful bosses in this new game mode. Points earned will be added to the points pool of your current UNITE Squad so play with your mates to maximize rewards!
Unite Squad Integration

Boss Rush makes use of the UNITE Squad Feature and employ a Rankings system that will display the Pokemon UNITE Squad with most points.
UNITE Squads: How to Create and Join Squads
More Points if You Play with Your Squadmates!
Playing with your squadmates gives you additional points based on how many members of your UNITE Squad are in your party!
| Number of Squad Members in Party | Points Bonus |
|---|---|
| Solo / 1 member | No Bonus |
| 2 members | +40% |
| 3 members | +60% |
| 4 members | +80% |
| 5 members | +100% |
Note that the members should be part of your UNITE Squad - not just friends, for the game to count the bonus.
Exclusive Rewards After the Event
After the event ends, UNITE Squads will earn exclusive rewards based on their ranking in the Boss Rush
leaderboard. Grind hard with your squad and prove the power of friendship!
You may check the ranking of your squad by going to the Boss Guide menu and hitting Rankings.
Three Stages, Three Bosses

Boss Rush is composed of 3 stages, with each stage having different bosses. You are tasked to defeat three boss Pokemon within 5 minutes in the shortest time possible.
Two Sub Bosses and One Final Boss
For Waves 4 to 6 of Boss Rush, there will be a fixed roster of bosses per wave.
| Wave Number | Stage | Boss Lineup |
|---|---|---|
| Wave 4 (Feb. 27 - Mar. 05) |
Stage 1 | Drednaw |
| Stage 2 | Regirock | |
| Stage 3 | Zacian | |
| Wave 5 (Mar. 13 - Mar. 20) |
Stage 1 | Araquanid |
| Stage 2 | Registeel | |
| Stage 3 | Zacian | |
| Wave 6 (Mar. 27 - Apr. 2) |
Stage 1 | Avalugg |
| Stage 2 | Regice | |
| Stage 3 | Zacian |
Choose Between Three Difficulty Modes
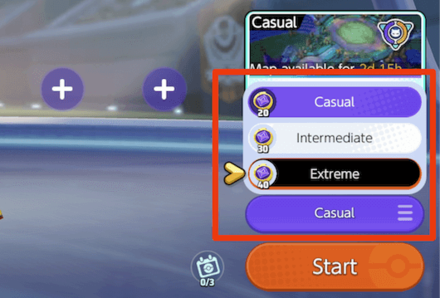
You may also choose between three difficulty modes, Casual, Intermediate, and Extreme each with their own unique modifier to make the fight harder!
| Casual | No modifiers |
|---|---|
| Intermediate | |
| Extreme |
Tips for Playing Boss Rush
Use the Aeos Shield Properly!
Zacian will periodically use its ultimate move, Behemoth Blade, to slice the whole arena and deal massive damage. To mitigate this, an Aeos Shield is provided at the center of the arena that one member of the team should use.
When holding the shield, don't forget to activate the shield in time for Behemoth Blade's swipe! Simply holding the shield does nothing, and can still damage your entire team.
How to Activate the Shield
To activate the shield, simply press Y on Switch or tap the Battle Item button on Mobile. You'll know the shield is activated when it glows yellow. The active window for the shield is really short however, so make sure to use it in time for Zacian's blade swipe.
Use Fluffy Tail
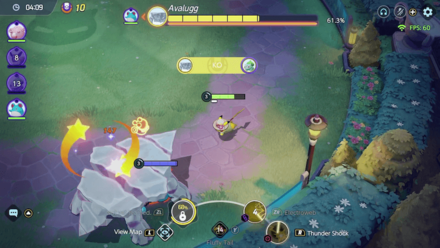
Boss Pokemon are considered wild Pokemon so Fluffy Tail would work on them. Use this to deal increased damage in this game mode.
Fluffy Tail Effect and How to Get
Take Berries from the Side!
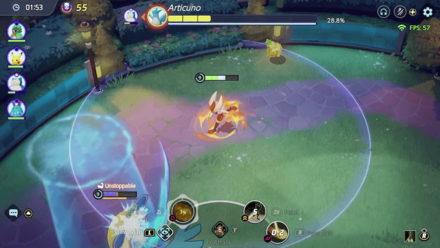
Sitrus Berries will periodically spawn during the entire fight. Use it whenever you're low on health.
Have a Healer in Your Team
| Pokemon with Heals | |||
|---|---|---|---|
 Blissey Blissey
|
 Eldegoss Eldegoss
|
 Clefable Clefable
|
 Comfey Comfey
|
Healers are extremely important in this game mode. Boss Pokemon deal huge damage so a constant stream of healing would be really helpful.
Fill Up the Stun Meter to Stun the Boss Pokemon!
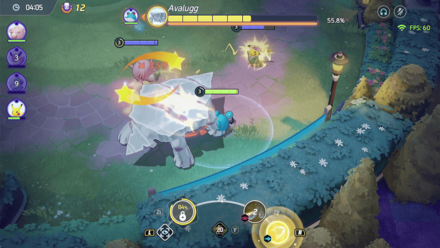
There is a special stun meter found below the Pokemon's HP that you need to fill up by attacking. Once filled up, the Boss Pokemon will be stunned for a short while and leaves it open for attacks!
Crowd Control Moves Does Not Work
Crowd Control from moves would not work on Boss Pokemon, as it always has even in the usual UNITE battle format.
Take Note of the Move Announcements
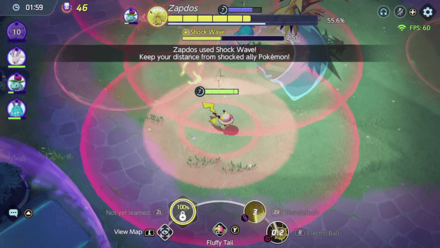
Upcoming Boss moves will be announced via a text below the Boss Pokemon health bar. Take note of the move to know how to respond!
Be Mindful of the Move Area of Effect Indicators
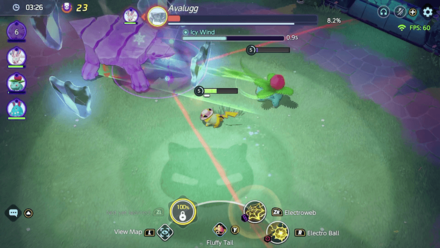
Some moves also have area of effect indicators, showing you which areas to avoid. Take note of this and evade them accordingly.
Best Pokemon to Use
Long Ranged Damage Dealers
| Longe Ranged Damage Dealers | ||
|---|---|---|
 Cinderace Cinderace
|
 Greninja Greninja
|
 Pikachu Pikachu
|
 Decidueye Decidueye
|
 Dragapult Dragapult
|
 Delphox Delphox
|
Pokemon with long ranged moves or long attack range are great against the bosses in Boss Rush. Pokemon like Greninja and Cinderace can attack relatively safely from a distance and chip away the bosses' HP. Also, Sp. Atk type Pokemon like Pikachu and Delphox can bombard the bosses with their low-cooldown, burst damage moves from a distance.
Brawlers and Physical Burst
| Melee Brawlers | |||
|---|---|---|---|
 Azumarill Azumarill
|
 Garchomp Garchomp
|
 Tsareena Tsareena
|
 Machamp Machamp
|
 Urshifu Urshifu
|
 Zacian Zacian
|
 Scizor Scizor
|
 Buzzwole Buzzwole
|
Brawler type Pokemon like Garchomp and Tsareena are also great picks for Boss Rush. They can pummel boss Pokemon with their attacks and/or combos while also tanking a bit of damage for the team.
Azumarill needs a special mention here as its unique passive Huge Power deals critical damage when facing one enemy. This is especially useful in this mode since you'll be facing one enemy Pokemon most of the time!
Mobile and High Burst Damage
| Mobile & Burst Pokemon | ||
|---|---|---|
 Absol Absol
|
 Zeraora Zeraora
|
 Lucario Lucario
|
 Dragonite Dragonite
|
 Urshifu Urshifu
|
 Zoroark Zoroark
|
Mobile Pokemon with high physical burst damage output like Absol and Zeraora can also do great in Boss Rush. Their moveset allows them to quickly manuveur around the area to dodge bosses' moves while also dealing high burst damage.
Healers and Shielders
| Strong Supports | ||
|---|---|---|
 Blissey Blissey
|
 Hoopa Hoopa
|
 Clefable Clefable
|
Strong supports like Blissey, Clefable, and Hoopa, although they don't do much damage, can provide the team with healing, shielding, and buffs. Their constant support can prevent their allies from dying and having to go back to the base, wasting time as a result.
Boss Rush Rewards
Individual Points Reward
These are the rewards you will get for the total points you have earned individually as a player.
| Accumulated Points | Reward |
|---|---|
| 100 |
|
| 200 |
|
| 300 |
|
| 500 |
|
| 1,000 |
|
| 1,500 |
|
| 2,000 |
|
| 4,000 |
|
| 6,000 |
|
| 8,000 |
|
| 10,000 |
|
| 20,000 |
|
| 25,000 |
|
| 50,000 |  Sticker (Zacian) Sticker (Zacian)
|
| Accumulated Points | Reward |
|---|---|
| 10,000 | |
| 25,000 | |
| 45,000 | (3-Day) |
| 60,000 | |
| 75,000 | (3-Day) |
UNITE Squad Rewards
Ranking at a certain bracket in the Boss Squad Leaderboard will reward your squad with unique goodies based on your placement.
| Ranking Bracket | Rewards |
|---|---|
| Rank 1 | |
| 2 - 10 | |
| 11 - 20 | |
| 21 - 100 | |
| 101 - 500 | |
| 501 - 1000 | |
| 1001 - 2500 | |
| 2501 - 5000 | |
| 5001 - 10000 | |
| 10001 - 999999 |
Stickers Change Per Rush
The stickers will change depending on the wave that you ranked in, as the ranks reset per wave. All other rewards are fixed though.
| Wave | Sticker Code |
|---|---|
| 1st Rush | S01 |
| 2nd Rush | S02 |
| 3rd Rush | S03 |
| 4th Rush | S04 |
| 5th Rush | S05 |
| 6th Rush | S06 |
First Stage Boss Pokemon Moves
Araquanid Boss Rush Moves
Sticky Web
| Sticky Web Attack Information |
|---|
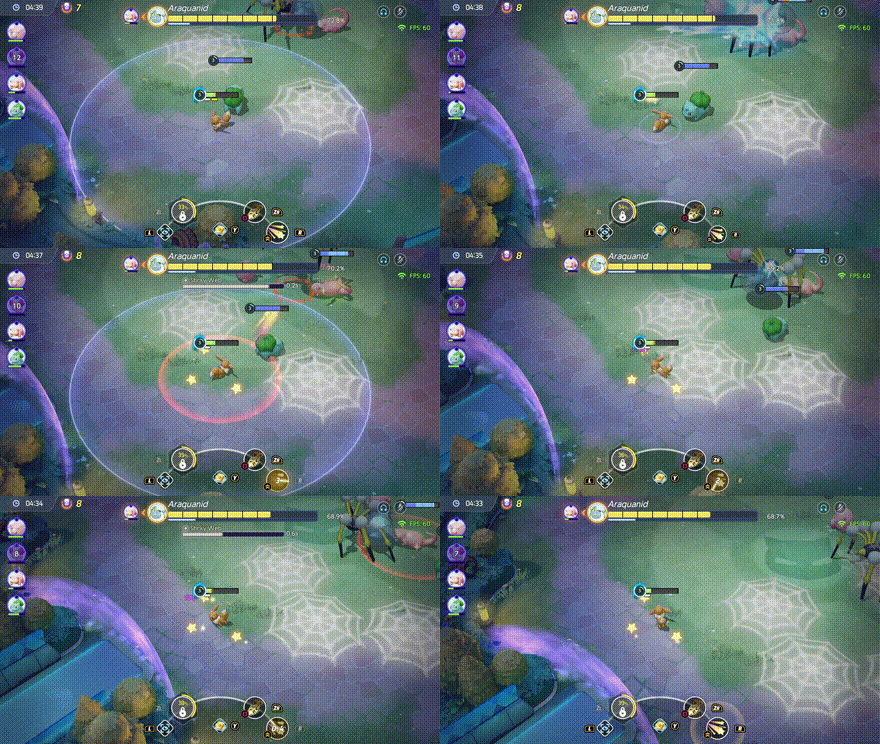 Sticky Web: Araquanid scatters web all over the battlefield, slowing down any Pokemon caught in the area of effect. · This move is pretty straightforward to avoid. Take note of the red indicator as Araquanid is about to throw its webs. · The webs stay on the ground for a while so avoid them at all costs. |
Hydro Pump
| Hydro Pump Attack Information |
|---|
 Hydro Pump: Araquanid charges water from its gut and lines up a strong water beam attack in a straight line. · This move hits on a straight line so use the charge time to avoid the red hitzone. |
Call to Family
| Call to Family Attack Information |
|---|
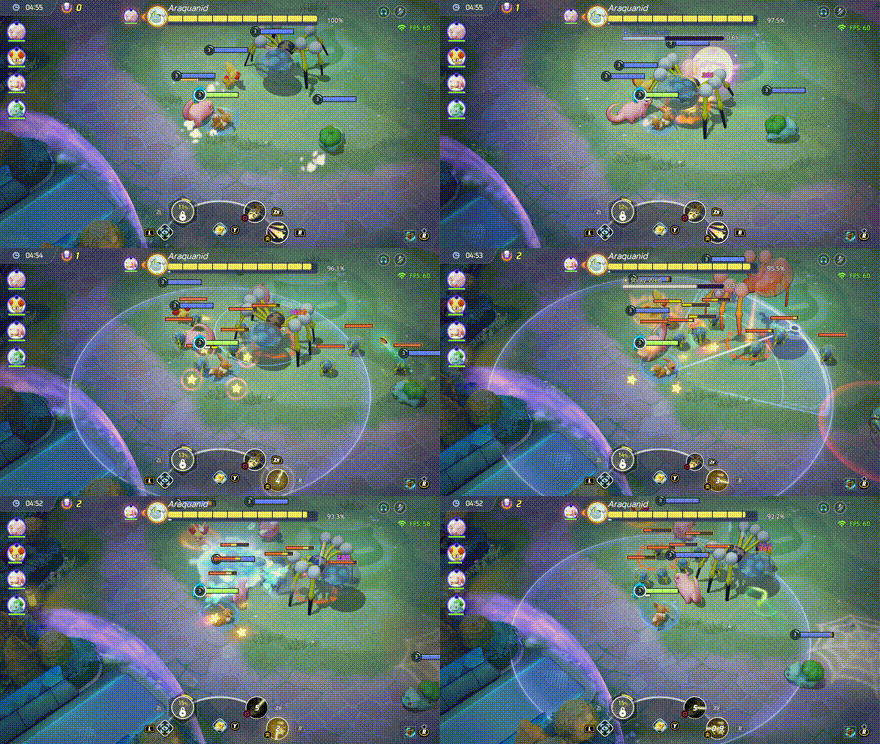 Call to Family: Araquanid summons a hoard of Dewpider that works in unison to destroy anything on its patch. · The Dewpiders can easily overwhelm you so try focusing on them before Araquanid. |
Avalugg Boss Rush Moves
Iron Defense
| Iron Defense Attack Information |
|---|
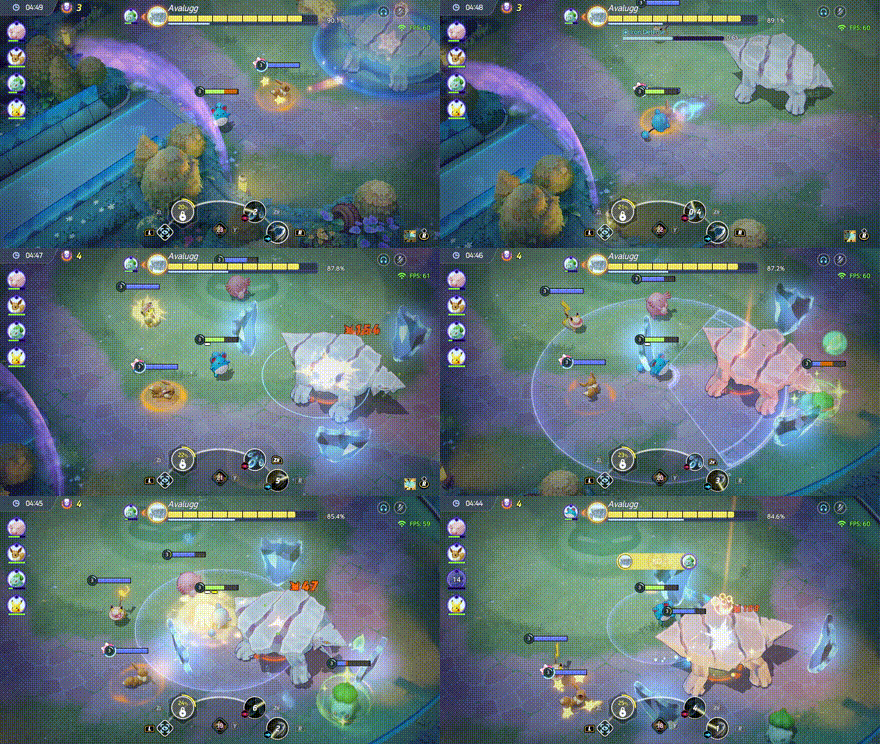 Iron Defense: Avalugg summons huge shields to bolder its defense and survive attacks from its enemies. · The move is used to protect Avalugg, not to be hit Pokemon. Just keep attacking while this move is up. |
Icy Wind
| Icy Wind Attack Information |
|---|
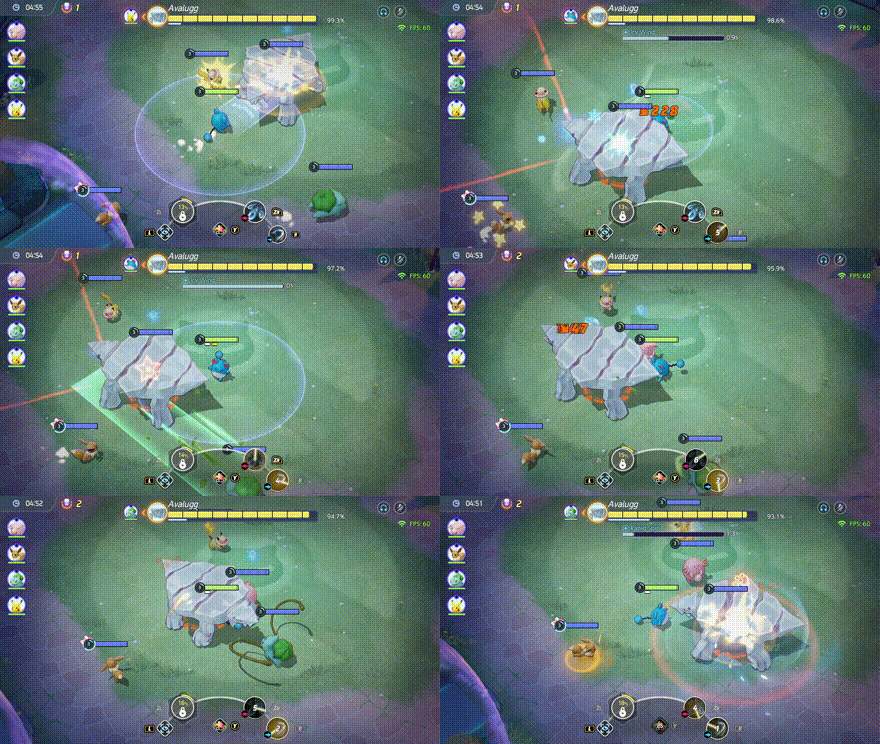 Icy Wind: Avalugg summons frigid winds in a cone, dealing damage and freezing allied Pokemon caught in the area of effect. · Run to the side of the cone or use Eject Button to quickly blink away! |
Rapid Spin
| Rapid Spin Attack Information |
|---|
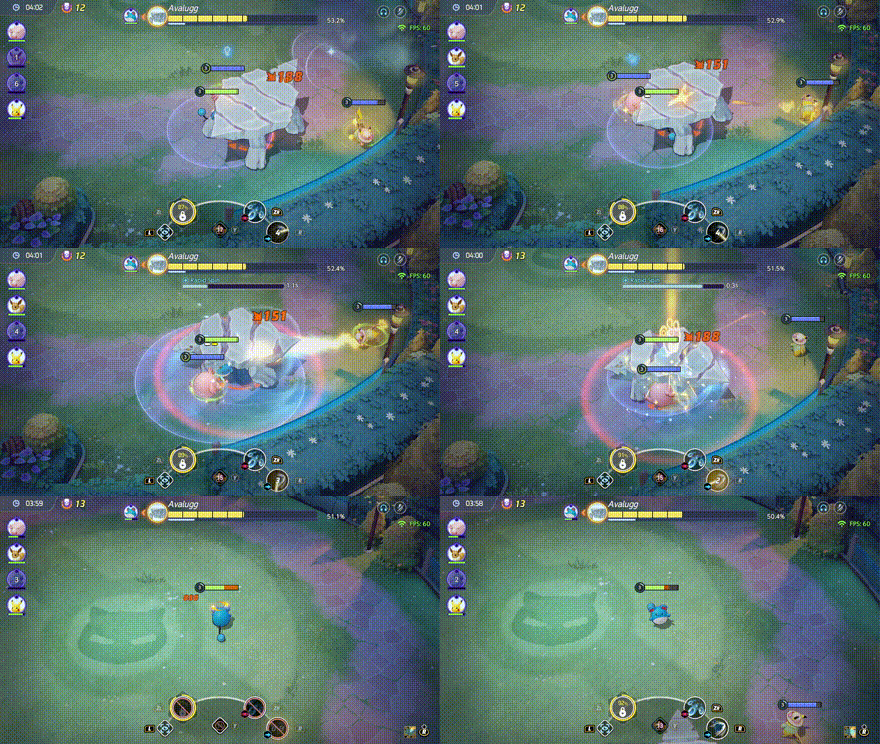 Rapid Spin: Avalugg spins around and sucks up anything caught in the area of effect. It then follows up with a huge shove attack that can push you far! · Be careful when you're near Avalugg as it can execute this move anytime. · When you see it doing this move though, do not approach Avalugg as it can pull you for the big finish! |
Drednaw Boss Rush Moves
Rock Slide
| Rock Slide Attack Information |
|---|
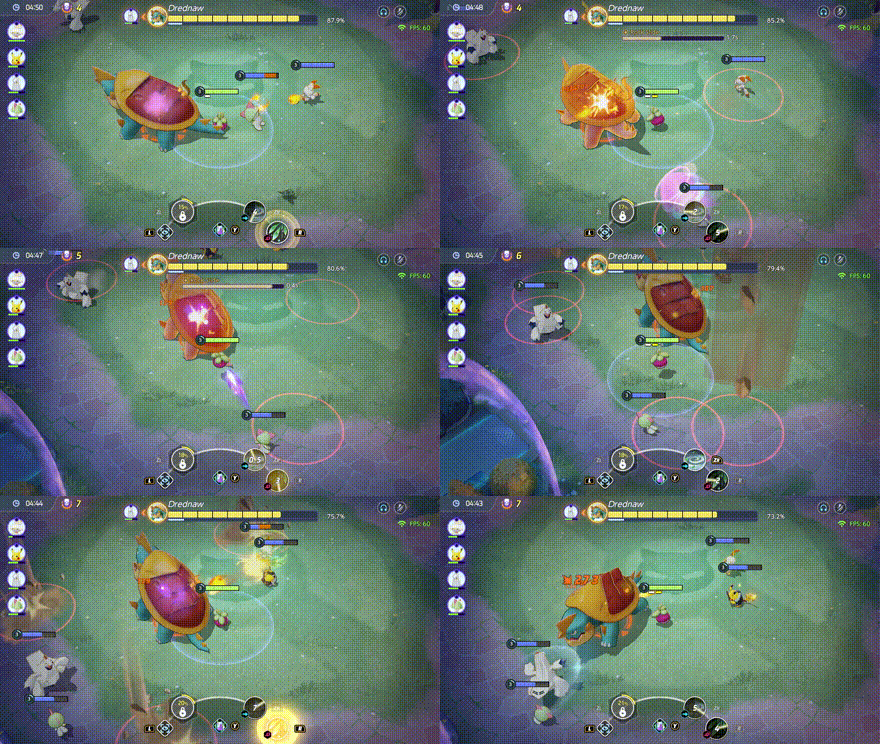 Rock Slide: Drednaw summons multiple rocks from the sky, targeting all allied Pokemon in the area. · Take note that this move has multiple instances that tracks you down as you move. · Always keep moving and get away from the red indicator. |
Body Slam
| Body Slam Attack Information |
|---|
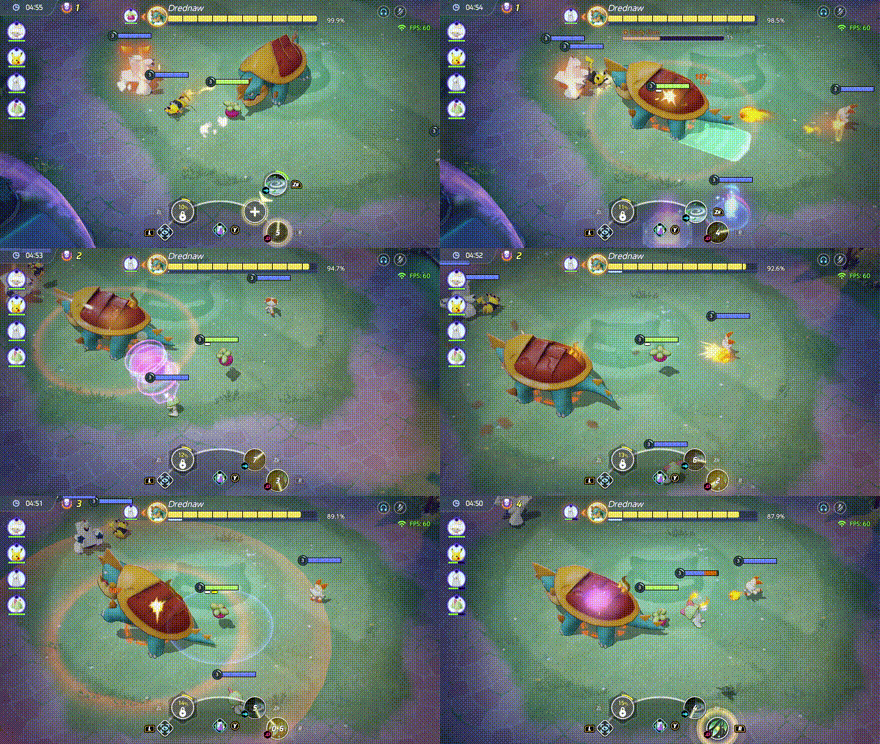 Body Slam: Drednaw slams its huge body on the ground twice creating two different hitzones for each. · The first slam's hitzone is near Drednaw so keep your distance. · The second slam has a wider hitzone but is safe below Drednaw, go near the Pokemon at this stage and go ham. |
Hydro Pump
| Hydro Pump Attack Information |
|---|
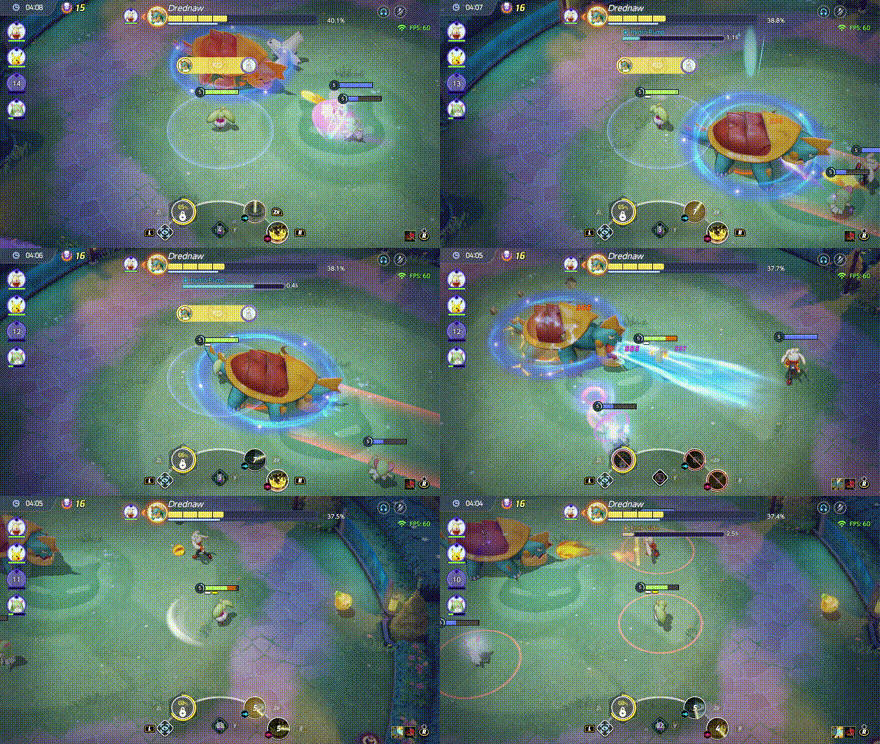 Hydro Pump: Drednaw charges water from inside it and lines up a strong water beam attack in a straight line. · This move hits on a straight line so use the charge time to avoid the red hitzone. |
Second Stage Boss Pokemon Moves
Regirock Boss Rush Moves
Rock Blast
| Rock Blast Attack Information |
|---|
| Rock Blast: Regirock hurls a series of rocks in a straight line. · A straight-line indicator will show up for this move. Avoid it when you can! |
Stone Edge
| Stone Edge Attack Information |
|---|
| Stone Edge: Regirock randomly targets three opponents, then summons rock pillars in a huge area around them. · This move can't be avoided if you're targeted, unless you can be shielded or healed by yourself or an ally. Damage negating abilities / moves will also help. |
Earth Power
| Earth Power Attack Information |
|---|
| Earth Power: Regirock summons stone pillars that propagate in an outward circular pattern. · Avoid the inner circular area because that will trigger first. Once it's done, try dashing inward as soon as it's done to avoid the outer circular area! |
Earthquake
| Earthquake Attack Information |
|---|
| Earthquake: Regirock shakes the ground and deals damage to everyone in the arena. · There is no counterplay for this move, but to only try to shield/heal yourself or your allies. · If you're low on health, chances are you will be KO'd. Try to keep your health topped up at all times! |
Ancient Power
| Ancient Power Attack Information |
|---|
| Ancient Power: Regirock sends out a huge shockwave that pushes all Pokemon to the side of the arena. It will then summon multiple rock pillars that will move in a circular direction as indicated by an arrow. · Try to avoid the first shockwave using shields and moves that will render you unstoppable. · Then, look out for pillars that will move in a circular line around the arena and avoid them at all costs. · They can either spawn in the outer parts or the inner parts of the arena so take note! |
Registeel Boss Rush Moves
Bulldoze
| Bulldoze Attack Information |
|---|
| Bulldoze: Registeel charges up then explodes, dealing damage is a huge area around it. · All healers and shielders should focus on topping up their allies during the charge time. Make sure you all have enough HP to tank the hit! |
Steel Roller
| Steel Roller Attack Information |
|---|
| Steel Roller: Registeel charges on a random player, knocking them back and stunning them for a few seconds. · Stay alive by topping up your health. If you're a supporter, focus on healing or shielding your teammates, especially those that are being targeted. |
Magnet Rise
| Magnet Rise Attack Information |
|---|
| Magnet Rise: Registeel summons pillars arranged in a circular array around the battlefield. The pillars does not deal damage, but can act as a reflector for its Focus Blast attack. · Always be wary that when Registeel does this move, it will follow it up with Focus Blast and Steel Roller. · The pillars can deflect its Focus Blast attacks in a random direction, so always be aware of your surroundings! |
Focus Blast
| Focus Blast Attack Information |
|---|
| Focus Blast: Registeel targets a direction and sends out a ball of energy. The ball will bounce around the battlefield until it hits an allied Pokemon, dealing huge damage. · Always be wary of this move as it can look like Registeel is aiming at nothing, but can actually bounce back later on. · Try to visualize where the ball would bounce towards, and avoid the area at all costs. · Registeel can use this after Magnet Rise, where the spikes can affect the direction of the ball and add to the chaos. |
Regice Boss Rush Moves
Blizzard
| Blizzard Attack Information |
|---|
| Blizzard: Regice summons frigid winds in a circle near it or far from it. The move area of effect is noted by the red areas. · This move is pretty easy to avoid so try getting away from the red area as much as possible. · Regice can also randomly choose to summon winds near or far from the Pokemon. It can also do it one after the other so stay on your toes! |
Hail
| Hail Attack Information |
|---|
| Hail: Regice summons a hail storm on one side of the map that lasts a very long time. It usually follows it up with Frost Breath. · Frost Breath makes the battlefield to be really slippery causing all allied Pokemon to slid until it hits a wall or boundary. · Regice uses this tactic so players would slide towards Hail for free damage. Always be mindful of Hail's location. |
Frost Breath
| Frost Breath Attack Information |
|---|
| Frost Breath: Regice expels ice energy that causes the ground to freeze and become slippery. Moving in one direction will cause Pokemon to slide in a straight line until it hits a wall or boundary. · Regice uses this move to cause chaos and panic · Players who mindlessly slide in random directions will find themselves in Regice's Hail attack, so be alert at all times. |
Icicle Spear
| Icicle Spear Attack Information |
|---|
| Icicle Spear: Regice summons two icicles that targets two random direction. It will attempt to target two Pokemon, so always be alert. · The best way to avoid this is to keep on moving and stay away from Regice. · The icicles have a long travel time, so walking parallel to the direction of the attack will effectively nullify this attack. |
Icy Wind
| Icy Wind Attack Information |
|---|
| Icy Wind: Regice charges up and expels frigid winds from itself in a huge area. · There is no counterplay with this move - just keep your health topped up or use your shields to be able to survive this move. |
Zapdos Boss Rush Moves
Shockwave
| Shockwave Attack Information |
|---|
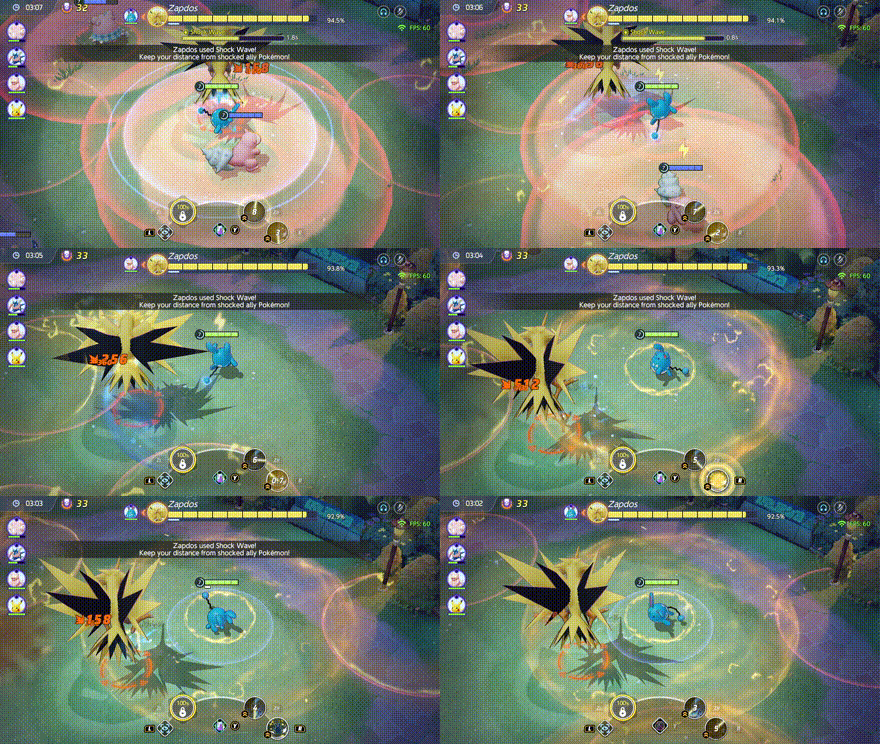 Shockwave: Zapdos electrifies its enemies, creating a zone of electricity around them. When electrified enemies go near their allies, it can deal huge damage. · Always avoid your teammates whenever Zapdos does this move! |
Brave Bird
| Brave Bird Attack Information |
|---|
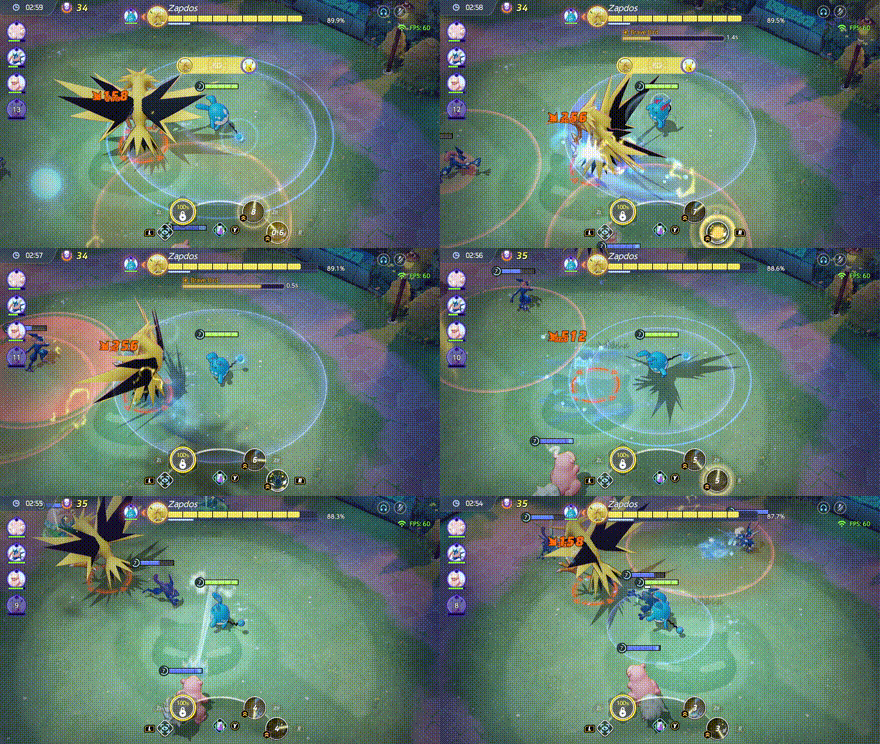 Brave Bird: Zapdos targets a specific area in the map, then swoops down to knock up anything caught in the hitzone. · When targeted by this move, towards the outside of the circle! You usually have enough time to do so so just keep moving! |
Charge Beam
| Charge Beam Attack Information |
|---|
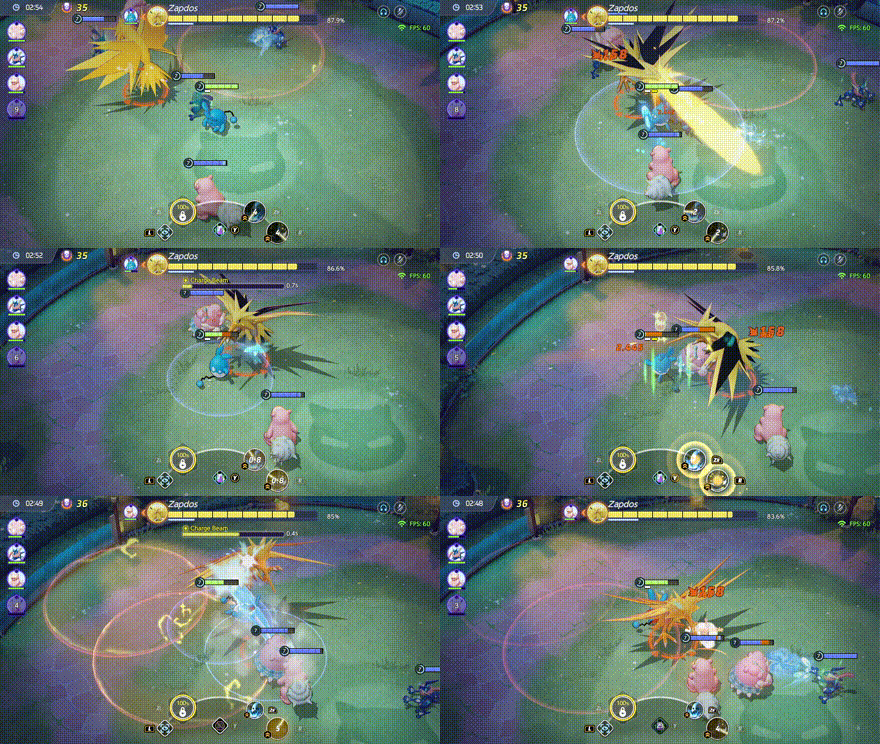 Charge Beam: Zapdos quickly charges to let out a quick thunder beam attack from its mouth. This doesn't show any hitzone so you can't prepare for it! · Yes the move does not show any hitzone, but it's quite easy to avoid by staying behind Zapdos at all times. |
Random Thunder Attacks
| Random Thunder Attacks Information |
|---|
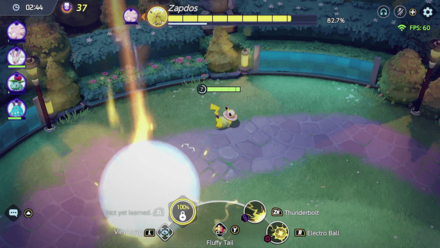 Random Thunder Attacks: Zapdos will periodically let out random Thunder attacks from the skies, denoted by a red hitzone appearing out of nowhere. · Keep moving because Zapdos will do this move periodically during the course of your battle! |
Articuno Boss Rush Moves
Blizzard
| Blizzard Attack Information |
|---|
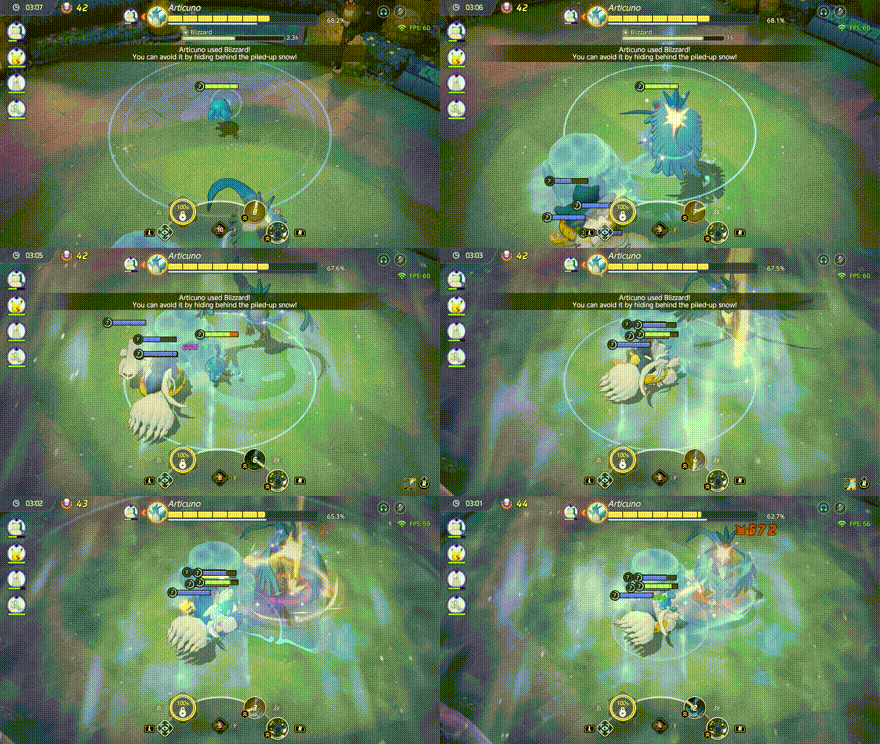 Blizzard: Articuno first summons huge ice rocks then hurls a powerful Blizzard that covers the whole battlefield. · This move has a huge wind up time to give you time to run behind the ice rocks. · The direction of the blizzard is the same direction Articuno is facing, so get behind the rock face opposite the oncoming wind. |
Ice Beam
| Ice Beam Attack Information |
|---|
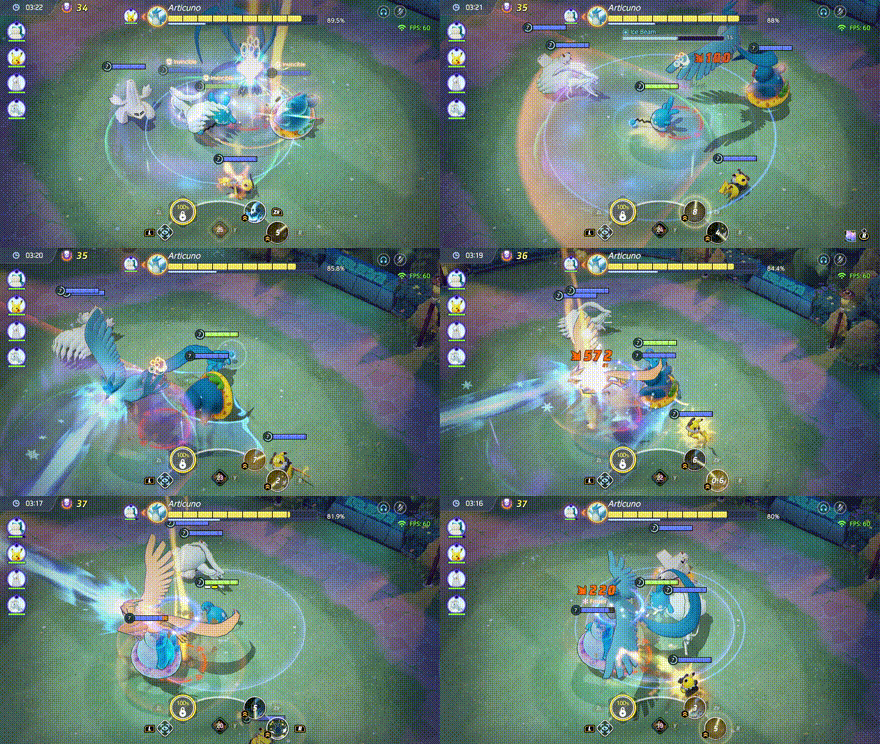 Ice Beam: Articuno charges up and sweeps an ice beam from left to right. The hitzone is conical but only beam has the hitbox. · Evade this move by going behind Articuno as it charges up. It's the safest area. |
Powder Snow
| Powder Snow Attack Information |
|---|
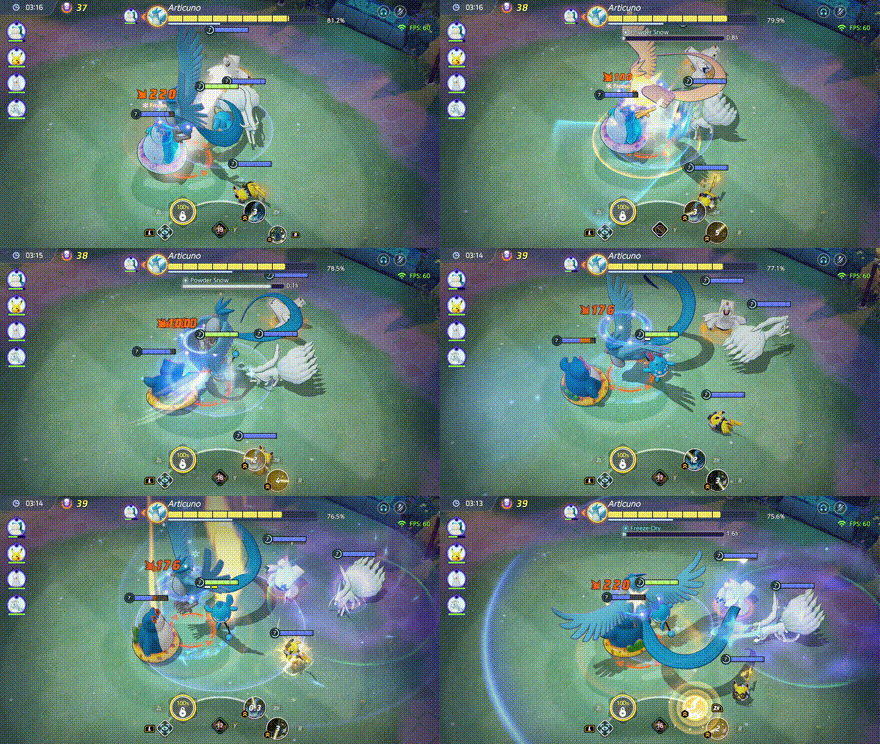 Powder Snow: Articuno quickly charges up and scatters icy powder in front of it. · Always stay behind Articuno as its moves are front facing! · Avoid this move by going behind Articuno. |
Avalanche
| Avalanche Attack Information |
|---|
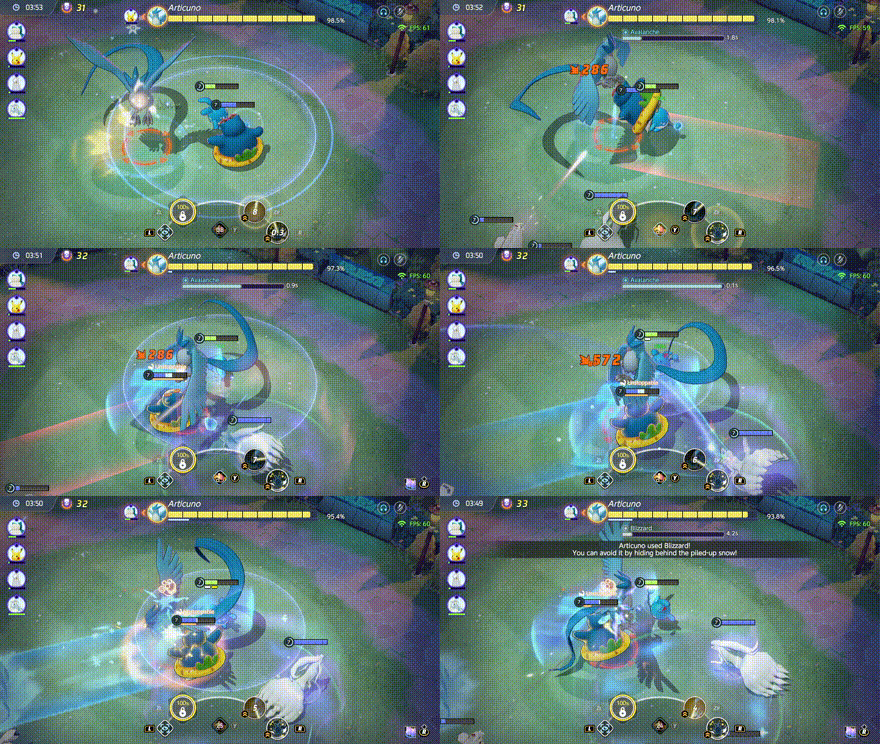 Avalanche: Articuno charges up then blows icy wind in a straight line, summoning an icy rock at the end of the hitzone. · The rock can serve as a zoning tool so be careful. · This move hits in a straight line so evading sideways does the trick. |
Freeze-Dry
| Freeze-Dry Attack Information |
|---|
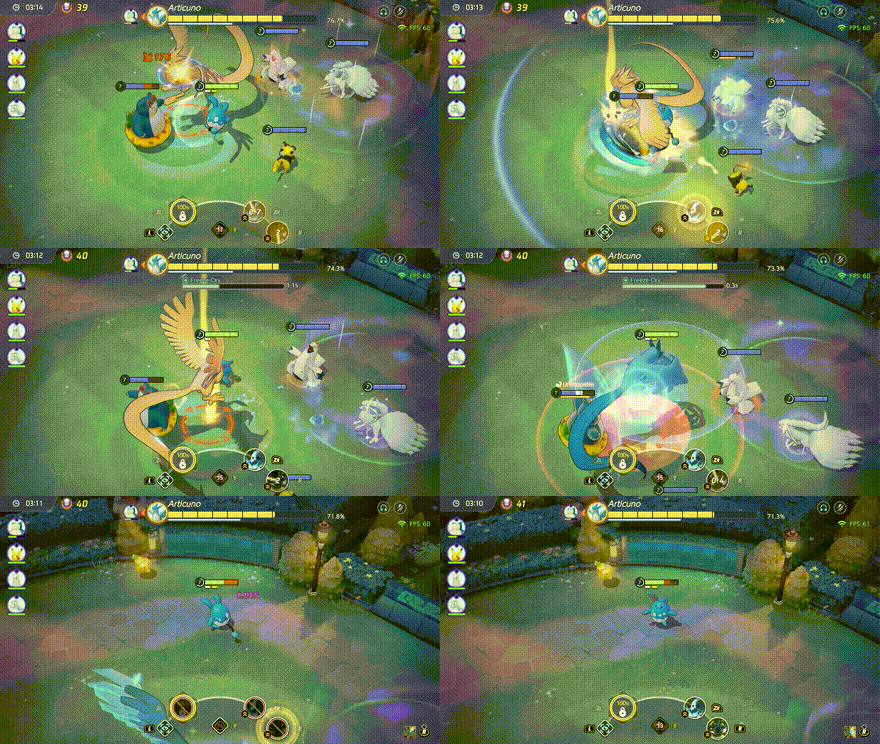 Freeze-Dry: Articuno charges frigid air inside its body, then lets out a huge attack that pushes opponents back! · Get away when you see Articuno charging. It is pretty quick so a prompt reaction time is needed! |
Final Stage Boss Pokemon Moves
Zacian Boss Rush Moves
Crowned Sword Mode
| Fairy King's Sword Mode Information |
|---|
| Crowned Sword Mode: When reduced to around 70% health, Zacian transforms and enters the Crowned Sword Mode. During this time, it has access to more moves including the devastatingly powerful Behemoth Blade attack. |
Iron Head
| Iron Head Attack Information |
|---|
| Iron Head: Zacian jumps on the side then targets a random Pokemon before following it up with a headbutt. Zacian will do this twice for a total of two targeted Pokemon. · There is no counterplay against this but to keep your health / shields topped up. · Supporters should try to focus their healing and/or shielding towards the Pokemon that's being targeted by Zacian. |
Psycho Cut
| Psycho Cut Attack Information |
|---|
| Psycho Cut: Zacian summons three blades of psychic energy and throws it in a cone. The blades will continue spinning on the sideskirts of the arena for a short time or until Zacian summons it back with Metal Claw. · Take note of the red cone indicator and avoid the attack. Remember that the blades persists in the outskirts of the arena, so avoid them at all costs. |
Metal Claw
| Metal Claw Attack Information |
|---|
| Metal Claw: Zacian charges then swipes a huge area infront of it with its sharp claws. Psycho Cut blades hovering behind Zacian during this move can be summoned back to Zacian, dealing damage to anyone behind it. · Take note of the huge, rectangular indicator for this move. Once the indicator has reached the end of the move, that's when Zacian will execute Metal Claw. · Also, when Zacian faces an area opposite lingering Psycho Cut blades, most often that not it's trying to summon those blades back so be careful and stay away from Zacian's back. |
Psycho-Metal Claw Combo
| Psycho-Metal Claw Combo Attack Information |
|---|
| Psycho-Metal Claw Combo: Zacian faces a direction opposite lingering Psycho Cut blades to perform Metal Claw. After the move, the lingering Psycho Cut blades will return to Zacian, dealing damage to Pokemon behind it. · Always be mindful if Zacian suddenly uses Metal Claw after using Psycho Cut. More often than not, it's trying to catch Pokemon camping on its back. |
Play Rough
| Play Rough Attack Information |
|---|
| Play Rough: Zacian charges to deal damage in an area around it. · A pretty straight-forward move that is easy to dodge. Simply get away from Zacian as it charges this move. |
Brutal Swing
| Brutal Swing Attack Information |
|---|
| Brutal Swing: Zacian charges its sword then swings it in a wide area around it. This can usually execute low health Pokemon so be careful. · The attack only affects Pokemon in the outer circle, so try to get as close as possible to Zacian when it does this move. |
Behemoth Blade
| Behemoth Blade Attack Information |
|---|
| Behemoth Blade: Considered to be Zacian's ultimate move, it charges up then swings a sword of pure energy that has an area of effects as big as the arena. · When Zacian starts using the move, the stage will spawn an Aeos Shield that one Pokemon from the party can use. · If you're the one holding the shield, point it towards Zacian & don't forget to activate the shield using the Battle Item button (press Y for Switch) in time for Zacian's big sword swipe! You'll know the timing from the red indicator on the stage. · If you're not the one holding the shield, stay behind the Pokemon holding it and pray that they time it right. Else, it can deal huge damage to everyone - no questions asked. |
Regigigas Boss Rush Moves
Slow Start
| Slow Start Attack Information |
|---|
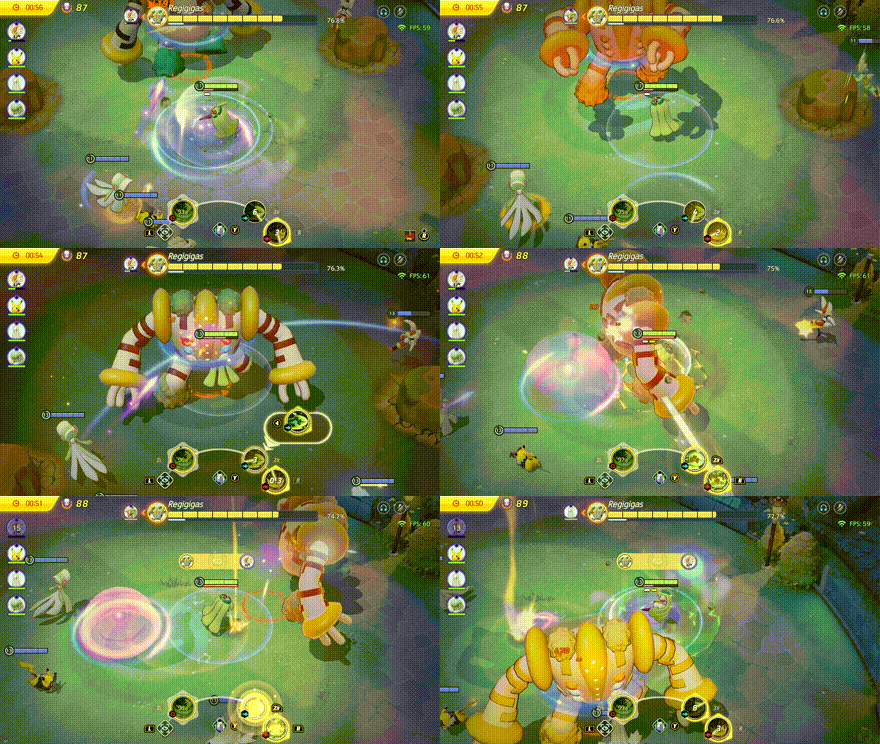 Slow Start: Like the mainline Pokemon games, Regigigas seems to have Slow Start in Boss Rush - starting really slow then ramping up its speed as the battle ensues. ・ Be careful when it roars and glow red, this means it's overcoming this detriment and is ready to pounce! ・ This will be the best time to use any dash move your Pokemon has to keep your distance away from Regigigas. Otherwise, you can use an Eject Button or X Speed to retreat. |
Crush Grip
| Crush Grip Attack Information |
|---|
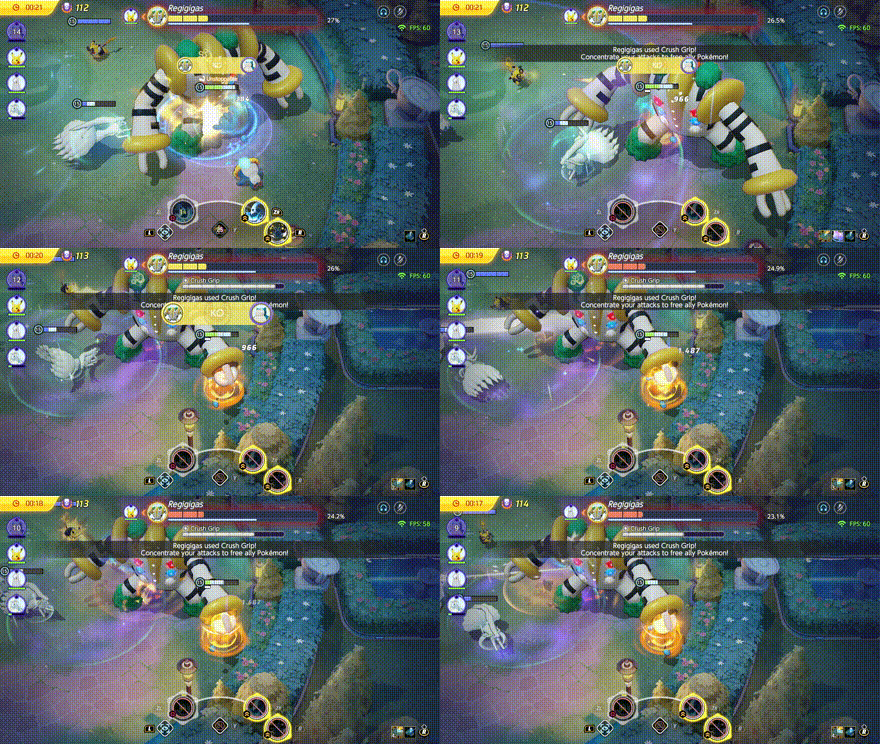 Crush Grip: Regigigas grabs a Pokemon and crushes it continously. ・ The remaining team will be able to break Regigiga's grip if they deal enough damage. If it is available, this is a good time to use your Unite Move to deal high amounts of damage to save your ally. |
Shockwave
| Shockwave Attack Information |
|---|
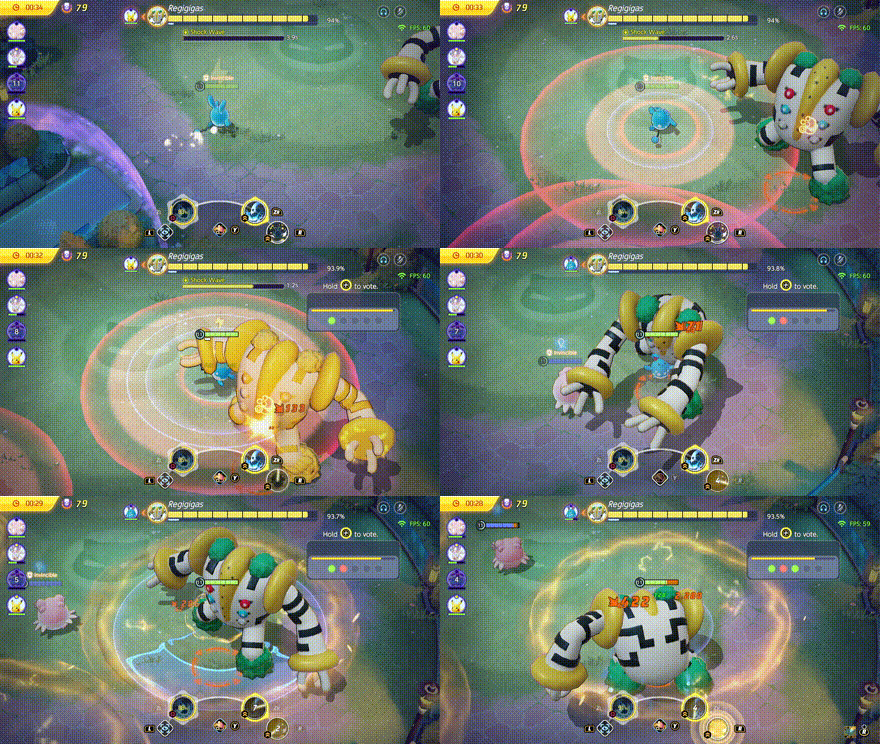 Shockwave: Regigigas selects three (3) allied Pokemon and generates field of electricity around them. Pokemon that are caught within the electric field will receive damage continously. ・ Once you are targeted, make sure to clear out and avoid sticking to your teammates before the move takes effect. ・ If you using a ranged Pokemon, you can still get in position and deal attacks. Otherwise, it is best to stay out of the fight completely if you are using a melee Pokemon. |
Rock Tomb
| Rock Tomb Attack Information |
|---|
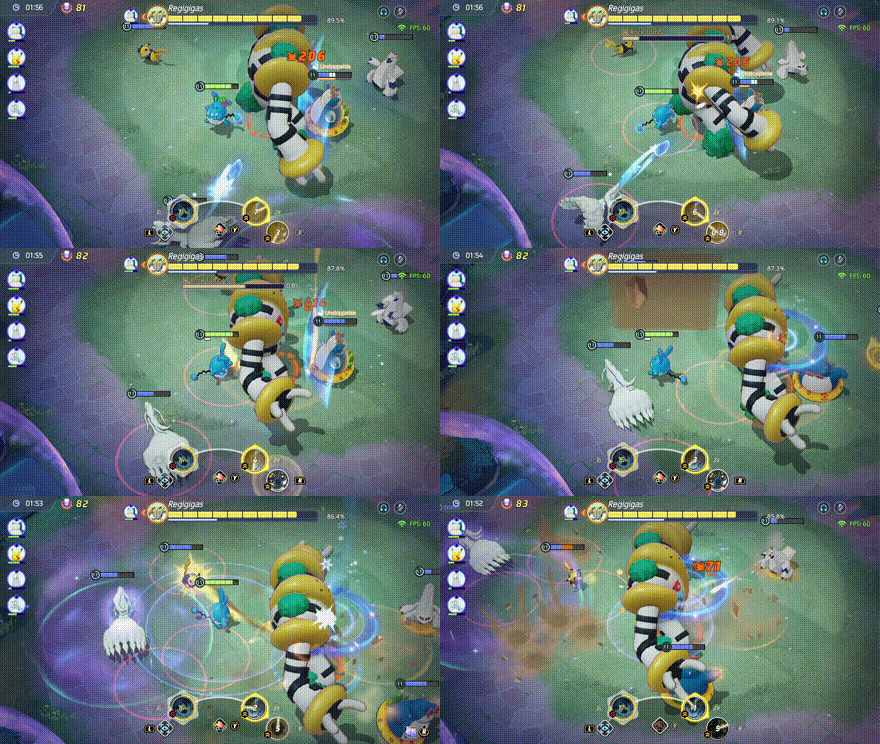 Rock Tomb: Regigigas summons boulders and crushes Pokemon. It then lets out a snow storm that deals damage to all Pokemon that are not taking cover. ・ When you see the red reticles below your Pokemon, stop attacking and evade the rocks that will fall. This is the best time to use any dash moves your Pokemon have. |
Rock Tomb + Icy Wind
| Rock Tomb + Icy Wind Attack Information |
|---|
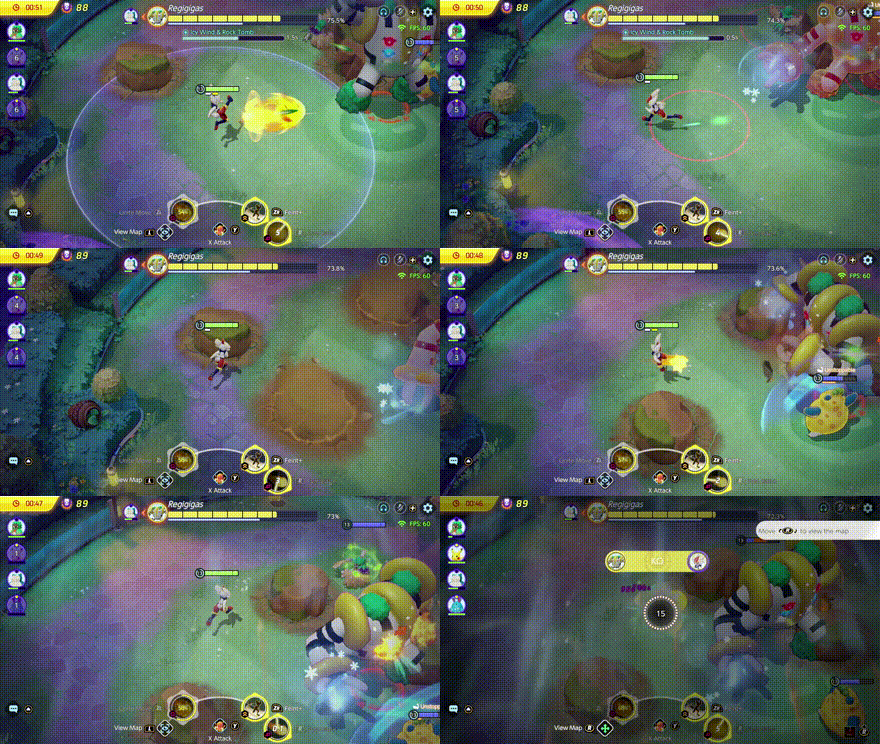 Rock Tomb + Icy Wind: Regigigas summons boulders and crushes Pokemon. It then lets out a snow storm that deals damage to all Pokemon that are not taking cover. ・ When the tall rocks land, quickly move towards them. Then, look at where Regigigas is facing as that will be the direction in which the blizzard will go. |
Boss Rush Challenge Missions
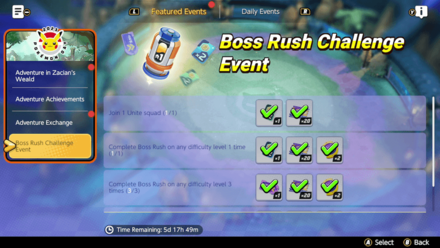
| Start Date | March 27, 2023 |
|---|---|
| End Date | April 2, 2023 11:59PM UTC |
This event is tied to every wave of the Boss Rush. It will also reset for each wave.
In addition to rewards obtained with the Boss Rush event, challenge missions are available to take for extra loot! These are very easy to accomplish and will be passively completed if you play the Boss Rush mode enough.
Boss Rush Challenge Missions Rewards
| Mission | Reward |
|---|---|
| Join 1 UNITE Squad |
|
| Complete Boss Rush on any difficulty level 1 time. |
|
| Complete Boss Rush on any difficulty level 3 times. |
|
| Complete Boss Rush on any difficulty level 5 times. |
|
Pokemon UNITE Related Guides

Current Seasons
| Event Name | End Date |
|---|---|
 Ranked Season 34 Ranked Season 34 |
April 16, 2026 6:30AM UTC |
 Battle Pass Season 39 Battle Pass Season 39 |
April 1, 2026 12:00AM UTC |
Repeating Events
| Event Name | Duration |
|---|---|
 Daily Missions Daily Missions |
Resets daily. Available everyday. |
 Score Challenge Score Challenge |
Available during weekends from Saturday to Monday. |
 Intense Battle Training Intense Battle Training |
Available This Week |
 Assist Crash Course! Assist Crash Course! |
Available Next Week |
 UNITE Day Weekend UNITE Day Weekend |
Available every first wekeend of the month |
Permanent Events
| Event Name | Duration |
|---|---|
 Gift Code Exchange Gift Code Exchange |
Available on all platforms. Codes can be redeemed. |
 Returning Player Event Returning Player Event |
Available for 14 days after returning from a 14 days or more absence from UNITE |
 14-Day Welcome Gifts 14-Day Welcome Gifts |
Log in for 14 days after account creation. |
 Beginner Challenge Beginner Challenge |
Activates after Trainer level 3 for only 30 days. |
 Super Item Enhancement Missions Event Guide Super Item Enhancement Missions Event Guide |
Available from September 22, 2021 (no deadline) |
 Zeraora Mission Zeraora Mission |
Available from September 22, 2021 (no deadline) |
 Held Item Enhancement Support Missions Held Item Enhancement Support Missions |
Available from September 22, 2021 (no deadline) |
 Max-Grade Trial Campaign Guide Max-Grade Trial Campaign Guide |
Available from September 22, 2021 (no deadline) |
 You can link your account and claim a reward! You can link your account and claim a reward! |
Available from November 16, 2021 (no deadline) |
 Weekly Log-In Bonus Weekly Log-In Bonus |
Log In at least once every week |
 First Recharge Special Coin Exchange First Recharge Special Coin Exchange |
Purchase any number of Aeos gems once |
Comment
Personally, I like using Mr. Mime with Psychic and Power Swap with fluffy tail. Link to the boss, heal from the boss, lower their defenses (?), and add to the stun meter.
Author
Boss Rush Guide: Mechanics and Event Dates
Rankings
- We could not find the message board you were looking for.
Gaming News
Popular Games

Genshin Impact Walkthrough & Guides Wiki

Umamusume: Pretty Derby Walkthrough & Guides Wiki

Pokemon Pokopia Walkthrough & Guides Wiki

Honkai: Star Rail Walkthrough & Guides Wiki

Monster Hunter Stories 3: Twisted Reflection Walkthrough & Guides Wiki

Arknights: Endfield Walkthrough & Guides Wiki

Wuthering Waves Walkthrough & Guides Wiki

Zenless Zone Zero Walkthrough & Guides Wiki

Pokemon TCG Pocket (PTCGP) Strategies & Guides Wiki

Monster Hunter Wilds Walkthrough & Guides Wiki
Recommended Games

Diablo 4: Vessel of Hatred Walkthrough & Guides Wiki

Cyberpunk 2077: Ultimate Edition Walkthrough & Guides Wiki

Fire Emblem Heroes (FEH) Walkthrough & Guides Wiki

Yu-Gi-Oh! Master Duel Walkthrough & Guides Wiki

Super Smash Bros. Ultimate Walkthrough & Guides Wiki

Pokemon Brilliant Diamond and Shining Pearl (BDSP) Walkthrough & Guides Wiki

Elden Ring Shadow of the Erdtree Walkthrough & Guides Wiki

Monster Hunter World Walkthrough & Guides Wiki

The Legend of Zelda: Tears of the Kingdom Walkthrough & Guides Wiki

Persona 3 Reload Walkthrough & Guides Wiki
All rights reserved
©2021 Pokémon. ©1995–2021 Nintendo / Creatures Inc. / GAME FREAK inc.
©2021 Tencent.
The copyrights of videos of games used in our content and other intellectual property rights belong to the provider of the game.
The contents we provide on this site were created personally by members of the Game8 editorial department.
We refuse the right to reuse or repost content taken without our permission such as data or images to other sites.


![Monster Hunter Stories 3 Review [First Impressions] | Simply Rejuvenating](https://img.game8.co/4438641/2a31b7702bd70e78ec8efd24661dacda.jpeg/show)
![The Liar Princess and the Blind Prince Review [PC] | Lovely to Look at but Tedious to Play](https://img.game8.co/4442586/8d95f5faf05780f1765ce7e0938bd825.jpeg/thumb)
![Marathon Cryo Archive Map Teased as [REDACTED] on Selection Screen](https://img.game8.co/4442236/6357203e58172f6de57f1991e7c39b22.png/thumb)


It's been 2 years. Not sure why they haven't updated it yet.