Crustle Guide: Builds and Best Items
☆ Upcoming: Articuno | Meganium | Typhlosion | Feraligatr
★ Latest News: Zapdos | Moltres | Version 1.22.1.5
☆ Popular Pages: Upcoming Pokemon | Tier List
★ Current Seasons: Ranked S34 | Battle Pass S39
☆ Join Game8's Pokemon Discord Server!
The best guide on how to play Crustle in Pokemon UNITE for Nintendo Switch and Mobile. Check here for the best builds, Held and Battle items, movesets, as well as the latest nerfs, buffs, counters, and more!
List of Contents
Crustle Latest Buffs and Nerfs (7/18)
| Crustle Changes | |
|---|---|
| Stat Buff | • Defense increased from 97 - 580 to 97 - 640. • Sp. Def. increased from 67 - 400 to 67 - 460. |
Crustle Stat Buff
| Lvl | Def | Sp. Def. |
|---|---|---|
| 5 | 198 → 211 (+6.6%) |
136 → 150 (+10.3%) |
| 10 | 326 → 353 (+8.3%) |
224 → 252 (+12.5%) |
| 15 | 580 → 640 (+10.3%) |
400 → 460 (+15%) |
Stat Updates
| 1.2.1.4 | Fixed a bug where Crustle's stat may gain an unintended strength boost in certain circumstances. |
|---|---|
| 1.2.1.3 | Melee range adjusted. |
| 1.19.2.6 | Defense increased from 97 - 580 to 97 - 640. Sp. Def. increased from 67 - 400 to 67 - 460. |
Sturdy
| 1.11.1.8 | Defense and Sp. Def. bonus increased from 5 + 1 x Level to 6 + 2 x Level (up to 10 levels). |
|---|
X-Scissor
| 1.5.1.6 | Cooldown reduced from 9s to 7s (-2s). |
|---|---|
| 1.11.1.8 | Cooldown decreased from 7s to 6s (-1s). X-Scissor +: Cooldown decreased from 6s to 5s. (-1s) |
| 1.14.1.2 | Damage decreased by 10%. |
| 1.17.1.2 | Cooldown increased from 6s to 6.5s. |
Standard Attack
| 1.3.1.7 | Damage dealt by the boosted attack increased. |
|---|
Stealth Rock
| 1.1.1.6 | Damage increased from 3,873 to 6,262 (+62%). Cooldown period reduced from 8 seconds to 6 seconds (-25%). |
|---|---|
| 1.5.2.7 | Move now activates faster. |
| 1.7.1.2 | Fixed a bug where stealth rock would deal increased damage at the start of the attack. |
| 1.7.1.9 | Cooldown reduced from 6s to 5s. (-1s) |
| 1.17.1.2 | Cooldown increased from 5s to 5.5s. Damage decreased by 8%. |
Rock Tomb
| 1.1.1.6 | Damage increased from 540+270+270=1081 total to 636+325+325=1286 total (+19%). |
|---|---|
| 1.5.2.7 | Move description changed. |
| 1.7.1.9 | Increased slow effect on opponents. |
| 1.17.1.2 | Cooldown increased from 5s to 5.5s. |
Rubble Rouser
| 1.7.1.9 | UNITE Gauge now fills up more easily. Static cooldown reduced from 134s to 110s. (-24s) |
|---|---|
| 1.11.1.8 | Recoil damage when receiving damage increased by 33%. Recoil damage latency decreased from 2s to 1s. (-1s) |
| 1.17.1.2 | Energy cost increased by 20%. |
Crustle Basic Info
| Crustle | ||
|---|---|---|
 |
Tier Rating:
Role: Defender Attack Type: Melee Damage Type: Physical Difficulty: Novice |
|
| "Crustle hinders its opponents using many different moves." | ||
Crustle Best Lanes

|

|

|
Tips & Strategies for Every Lane
Crustle Strengths and Weaknesses
| Strengths | Weaknesses |
|---|---|
| ✔︎ Has versatile gameplay. ✔︎ Strong crowd control moves. ✔︎ Extremely mobile with Shell Smash. |
✖︎ Effective use requires skill shot proficiency. ✖︎ Higher damage output at the cost of low defenses. |
Best Builds for Crustle
| Crustle Builds | |
|---|---|
X-Scissor (Damage) Build
X-Scissor (Damage) Build

|
Moveset | Held Items | |||
|---|---|---|---|---|---|
| Battle Item | |||||
| Stats from Items (Lv. 40) | Recommended Lane | ||||
|
Attack: +38.5 Defense: +35 Sp. Def: +35 HP: +235 |
|
||||
| Emblem Color Combination | Target Emblem Stats | ||||
|
|
Positive Stats: • Attack • Critical-Hit Rate Free Negative Stats: • Sp. Atk • Movement Speed |
||||
| Note: The emblem color and stats here are suggestions only. The builds are still viable even without the suggested emblems. |
|||||
X-Scissor Build Explanation
This is an offensive build that utilizes the effects of Shell Smash to increase X-Scissor's damage. It can also be modified a bit to give X-Scissor a chance to deal critical-hits.
- Attack Weight provides Crustle with a large damage boost, particularly for X-Scissor. It's also easy to stack thanks to the mobility Crustle gets from Shell Smash.
- Weakness Policy works well with Crustle's frontline/tank gameplay, increasing its Attack as it takes hits. It also gives a decent amount of damage and HP.
- Focus Band improves Crustle's durability through increased defenses, which is transformed into more damage when the Pokemon uses Shell Smash, and acts as a survivability tool.
- Tenacity Belt can be a replacement for Focus Band, providing the same defense increase but focusing more on durability due to its effect.
- For a different offensive approach, Scope Lens and Razor Claw can be equipped instead of the other two, giving X-Scissor a chance to deal critical-hits for each attack.
- Eject Button gives Crustle a quick repositioning tool, which can also be used to set up X-Scissor.
- The build's Boost Emblem loadout should consist of 6 White Emblems for maximum HP and 6 Brown Emblems for additional damage. This can be achieved by equipping at least two (2) Emblems that are both White and Brown.
- Equip Emblems that improve Attack or Critical-Hit Rate for more damage.
- Sp. Atk and Movement Speed can be freely traded for the other stats.
X-Scissor Build Damage Test
| Items (Level 30) |
X-Scissor (Base) (@ Lvl 15) |
X-Scissor (w/ Shell Smash) (@ Lvl 15) |
|---|---|---|
| Weakness Policy + Attack Weight (6 Stacks) |
2894 | 4434 |
Since the build is centered on X-Scissor, equipping items that will maximize its damage is the ideal item combination. Focus Band is a core item for the build, leaving only two (2) items left for consideration.
As the results show, Weakness Policy and a fully-stacked Attack Weight will produce the best results for the build. Weakness Policy works well with Crustle's tank gameplay and Attack Weight can be stacked quickly in the early game thanks to Shell Smash.
As for alternatives, although not shown in the test, replacing both items with Scope Lens and Razor Claw would be a great option. Both items will give X-Scissor a chance to deal critical-hit for each attack, dealing more damage than any of the results.
These damage tests are conducted using the Training Dummy in Practice Mode.
| Items (Level 30) | X-Scissor (Base) (@ Lvl 15) | X-Scissor (w/ Shell Smash) (@ Lvl 15) |
|---|---|---|
| Muscle Band + Razor Claw | 2287 | 3662 |
| Muscle Band + Attack Weight (6 Stacks) | 2643 | 4017 |
| Muscle Band + Weakness Policy (4 Stacks) | 2496 | 4036 |
| Razor Claw + Attack Weight (6 Stacks) | 2643 | 4017 |
| Razor Claw + Weakness Policy (4 Stacks) | 2496 | 4036 |
| Weakness Policy + Attack Weight (6 Stacks) | 2894 | 4434 |
The tests above does not use any Emblems yet so it will scale higher if equipped.
X-Scissor (Defensive) Build
| X-Scissor (Defense) Build | Moveset | Held Items | |||
|---|---|---|---|---|---|
| Battle Item | |||||
| Stats from Items (Lv. 40) | Recommended Lane | ||||
|
Defense: +35 Sp. Def: +35 Movement Speed: +175 HP: +805 HP Recovery: +21 |
|
||||
| Emblem Color Combination | Target Emblem Stats | ||||
|
|
Positive Stats: • HP • Attack Free Negative Stats: • Sp. Atk • Critical-Hit Rate |
||||
| Note: The emblem color and stats here are suggestions only. The builds are still viable even without the suggested emblems. |
|||||
X-Scissor (Defensive) Build Explanation
This is a defensive variation for X-Scissor that's centered around trapping opponents with Rock Tomb and shoving them towards it using X-Scissor.
- Exp. Share helps Crustle and its lane partner to level up faster, particularly in the early game. It also gives the Pokemon a decent amount of movement speed.
- Resonant Guard gives Crustle a nice amount of HP and HP recovery, and allows Crustle to generate another shield for itself and its allies when it deals damage.
- Focus Band improves Crustle's durability through increased defenses and acts as a survivability tool.
- Tenacity Belt can be a replacement for Focus Band, providing the same defense increase but focusing more on durability due to its effect.
- X Speed gives Crustle a nice mobility tool that essentially acts like Shell Smash due to their similar effects.
- The build's Boost Emblem loadout should consist of 6 White Emblems for maximum HP and 6 Brown Emblems for additional damage. This can be achieved by equipping at least two (2) Emblems that are both White and Brown.
- Equip Emblems that improve Attack or HP for more damage or durability.
- Sp. Atk and Critical-Hit Rate can be freely traded for the other stats.
Stealth Rock Build
| Stealth Rock Build | Moveset | Held Items | |||
|---|---|---|---|---|---|
| Battle Item | |||||
| Stats from Items (Lv. 40) | Recommended Lane | ||||
|
Attack: +49 Defense: +35 Sp. Def: +35 Movement Speed: +175 |
|
||||
| Emblem Color Combination | Target Emblem Stats | ||||
|
|
Positive Stats: • HP • Attack Free Negative Stats: • Sp. Atk • Defense • Sp. Def • Critical-Hit Rate |
||||
| Note: The emblem color and stats here are suggestions only. The builds are still viable even without the suggested emblems. |
|||||
Stealth Rock Build Explanation
This build revolves around trapping opponents with Rock Tomb, then laying down Stealth Rock to slow and damage them.
- Attack Weight provides Crustle with a large damage boost, maximizing its move damage.
- Float Stone gives Crustle the mobility to move around and use Rock Tomb and Stealth Rock. It also gives a decent amount of Attack stat for more damage.
- Focus Band improves Crustle's durability through increased defenses and acts as a survivability tool.
- Tenacity Belt can be a replacement for Focus Band, providing the same defense increase but focusing more on durability due to its effect.
- X Speed helps Crustle stack Attack Weight quickly and safely, especially during the early game. It's also a versatile mobility tool.
- The build's Boost Emblem loadout should consist of 6 White Emblems for maximum HP and 6 Brown Emblems for additional damage. This can be achieved by equipping at least two (2) Emblems that are both White and Brown.
- Equip Emblems that improve Attack or HP for more damage or durability.
- Sp. Atk, Sp. Def, Defense, Critical-Hit Rate can be freely traded for the other stats.
Stealth Rock Build Damage Test
| Items (Level 30) |
Rock Tomb (@ Lvl 15) |
Stealth Rock (Total Damage (@ Lvl 15) |
|---|---|---|
| Float Stone + Attack Weight (6 Stacks) |
1470 | 6662 |
Since the build is centered on Stealth Rock and Rock Tomb, equipping items that will maximize their damage is the ideal item combination. Focus Band is a core item for the build, leaving only two (2) items for consideration.
As the results show, Float Stone and a fully-stacked Attack Weight will generate the best results for the build. Float Stone's movement speed bonus and effect will give Crustle some mobility to move around and use Rock Tomb and Stealth Rock. It also provides a decent amount of Attack for more damage.
These damage tests are conducted using the Training Dummy in Practice Mode.
| Items (Level 30) | Rock Tomb (@ Lvl 15) | Stealth Rock (Total Damage (@ Lvl 15) |
|---|---|---|
| Muscle Band + Razor Claw | 1334 | 6366 |
| Muscle Band + Attack Weight (6 Stacks) | 1455 | 6631 |
| Muscle Band + Float Stone | 1350 | 6397 |
| Razor Claw + Attack Weight (6 Stacks) | 1455 | 6631 |
| Razor Claw + Float Stone | 1350 | 6397 |
| Float Stone + Attack Weight (6 Stacks) | 1470 | 6662 |
The tests above does not use any Emblems yet so it will scale higher if equipped.
Crustle Best Items & Moveset
Best Held Items
| Item | Explanation |
|---|---|
 Exp. Share Exp. Share
|
Exp. Share helps Crustle and its lane partner level up faster, especially in the early game. It also gives the Pokemon more movement speed. |
 Attack Weight Attack Weight
|
Attack Weight compliments Crustle's aggressive scoring playstyle, pushing for early lane pressure. |
 Aeos Cookie Aeos Cookie
|
Aeos Cookie adds more bulk to Crustle in the form of more HP. |
 Score Shield Score Shield
|
Score Shield helps guard Crustle's more aggressive playstyle, complementary with using an Attack Weight. |
 Float Stone Float Stone
|
Float Stone gives Crustle movement speed and damage simultaneously, giving the Pokemon some versatility. |
 Focus Band Focus Band
|
Focus Band compliments Crustle's passive, Sturdy, allowing Crustle to survive longer in fights. |
 Scope Lens Scope Lens
|
Scope Lens can improve X-Scissor by giving it a chance to deal critical-hit for each attack, increasing its overall damage drastically. |
 Razor Claw Razor Claw
|
Razor Claw works great with Shell Smash's low cooldown and usability, increasing Crustle's attack on top of the move's own effects. It also adds more critical-hit rate to X-Scissor. |
 Weakness Policy Weakness Policy
|
Weakness Policy is a great item that synergizes well with Crustle's innate durabiltiy thanks to its passive ability. With this, it can increase the potency of its auto-attacks. |
 Resonant Guard Resonant Guard
|
Resonant Guard works nicely with Crustle's gameplay, giving itself and its allies a shield when it deals damage. It also gives a nice amount HP and HP recovery. |
 Tenacity Belt Tenacity Belt
|
Tenacity Belt provides Crustle with a nice amount of Defense and Sp. Def., and its effect works well with the Pokemon's Shell Smash move. |
Best Battle Items
| Item | Explanation |
|---|---|
 Goal-Getter Goal-Getter
|
Goal-Getter makes scoring goals faster and easier. Combined with Shell Smash, the item enhances scoring capabilities. |
 Eject Button Eject Button
|
Eject Button is both an offensive and defensive tool for the build, allowing you to get a better position to use your moves or make an escape when things go awry. |
 X Speed X Speed
|
X Speed is a great item for Crustle if it doesn't learn Shell Smash, giving it similar effects in terms of mobility. |
 Potion Potion
|
With Crustle's high HP, Potion allows Crustle to recover a significant amount of HP so it can stay in the fight longer. |
Best Moveset
| Move | Explanation |
|---|---|
 X-Scissor X-Scissor
|
X-Scissor deals decent damage, although not as powerful as Stealth Rock, and can put enemies in bad a position during fights. |
 Shell Smash Shell Smash
|
Shell Smash is arguably Crustle's best move. It provides a massive boost to Crustle's damage output which improves Crustle's other moves, especially at low HP. |
This moveset turns Crustle's high defenses into raw damage. Shell Smash is a versatile move that suits Crustle's frontline gameplay. It converts a percentage of Crustle's Sp. Def and Defenses into damage, which works fine with either of the other moves. It also makes Cruslte incredibly mobile and resilient to disables and debuffs, perfect for a tank. X-Scissor is Crustle's best damage move. It has the potential to deal massive damage since it can deal critical-hits, particularly if the Pokemon equips an item that increases Critical-Hit Rate. It can also stun opponents when they're shoved towards a wall, turning it into a crowd control move.
For a more support-style moveset, picking Rock Tomb and Stealth Rock equips Crustle with some decent disables, which are great in teamfights.
Which Moveset Do You Think is Best for Crustle?
Let us know why in the comments!
Previous Poll Results
How to Play Crustle
| Jump to Section | |
|---|---|
Utilize Initial Moveset
Crustle has a strong initial moveset. Make sure to utilize them to gain some advantage in the early game.
Use Rock Slide to win fights, secure wild Pokemon, and defend goal zones. It can also be used to scout for enemies who might be hiding in grass.
As for Fury Cutter, utilize its damage increase effect to harass opponents out of the lane or just to secure wild Pokemon.
| Related Pages | |
|---|---|
Keep an Eye on Study Stacks and Utilize Them
Crustle can make itself more durable as it tanks damage thanks to its ability, Sturdy, increasing its Defense and Sp. Def. stats every time it loses a certain amount of HP. This effect can stack up to 10 times. Make sure to take advantage of this effect to tank for the team.
Sturdy: Crustle Ability Effects
Turn Defenses into Damage with Shell Smash
One effective way to utilize Sturdy stacks is to use Shell Smash. The move converts a set percentage of Crustle's Defense and Sp. Def. into Attack and Sp. Atk., increasing the Pokemon's damage output.
Shell Smash: Crustle Move Effect and Cooldown
Fight in the Frontlines
Since Crustle is a Defender, its primary gameplay revolves around fighting in the frontlines during fights to tank for its team and protect less durable allies.
Trap Opponents with Rock Tomb
Use Rock Tomb to trap opponents and set up a fight. The wall and slowing effect allows allies to easily follow up with their moves. Moreover, the move has a decent cast range, making it great against fleeing targets.
| Tip: One neat trick to make Rock Tomb more effective is to use it on opponents that are near walls or tight areas. If done right, they can be completely trapped between objects and Rock Tomb.. |
Rock Tomb: Crustle Move Effect and Cooldown
Shove Opponents with X-Scissor
Use X-Scissor to shove opponents away from allies or towards them depending on the situation. The move also deals quite a lot of damage since it has a chance to deal critical-hits per attack, making it a great generic offensive tool. Futhermore, if possible, shove opponents towards walls to stun them; this includes Rock Tomb.
X-Scissor: Crustle Move Effect and Cooldown
Zone Out Opponents with Stealth Rock
Stealth Rock is a great zoning tool. It can be used to effectively block off an area when taking objectives, force opponents out of grass, and defend goal zones. It's also great for chasing opponents due to its cast range and slowing effect.
Stealth Rock: Crustle Move Effect and Cooldown
Prolong Fights Using Rubble Rouser
It's best to use Rubble Rouser only when Crustle's HP gets to about half or below. This is mainly because Crustle can't gain any Sturdy stacks if Rubber Rouser's shield is absorbing all the damage and the Pokemon's HP remains the same.
It's better to stack up Sturdy's effect first by allowing Crustle to soak up damage, then activating Rubble Rouser when its HP becomes very low, allowing the Pokemon to utilize the Sturdy stacks while shielded. This is especially true when using Shell Smash.
Rubble Rouser: Crustle Move Effect and Cooldown
Stay Close to Opponents to Deal Damage
Once Rubble Rouser is activated, it's best to stay close to opponents since the move deals damage overtime to enemies that are within its area of effect.
Utilize the Return Damage Mechanic
On top of the damage the move deals overtime, Rubble Rouser also deals damage to opponents that hit Crustle while the move is active. Take advantage of this mechanic by dialing up the aggression.
Progression and Leveling Guide
Top and Bottom Guide
Level 1 to 5
- Quickly clear out the Bunnelbies in the lane.
- Keep farming wild Pokemon in the lane to reach level 4 and learn your first move.
- At bottom lane, prioritize taking Indeedees for more exp.
Level 6 to 9
- Keep hunting Wild Pokemon to gain more EXP from farming Altaria and Swablus.
- Once you reach level 6, learn your second move.
- Help allies secure Regice, Registeel, or Regirock when it spawns, otherwise secure Regieleki.
- Upon reaching level 9, learn your Unite Move.
Level 10+
- Stick with allies to hunt targets, secure objectives, and push lanes.
- Reach at least level 13 or max level if possible before or when Groudon spawns for a fully-upgraded moveset.
- Make sure that your Unite Move is available when Groudon spawns.
- Help teammates win a teamfight and secure Groudon.
Crustle Combos
Rock Tomb Combos
This set of combos utilizes the trapping capabilites of Rock Tomb.
Stealth Rock Trap Combo
| Stealth Rock Trap Combo | |
|---|---|
 |
|
Rock Tomb
►
Stealth Rock
►
Standard Attack
~ |
|
| Start by cutting your opponents path and prevent them from escaping with Rock Tomb. Then thro a Stealth Rock to create a kill zone in the crevice spawned by Rock Tomb. For this to work, you need to hit Rock Tomb directly behind the opponent and then use Stealth Rock right away. | |
X-Scissor Trap Combo
| X-Scissor Trap Combo | |
|---|---|
 td> td>
| |
| Create a wall behind the opponent, then smash them into the wall using X-Scissor to stun them. This will leave them open for more attacks from teammates or at the very least, render them unable to escape. | |
Ultimate Rubble Fighter Combo
| Ultimate Rubble Fighter Combo | |
|---|---|
 |
|
| This is an initiating combo that is great for brawls. Start by activating Rubble Rouser to generate a large amount of shields. Follow it up with Shell Smash to convert Crustle's defenses into offense. Then, seek out a target to fight. For a devastating entrance, use X-Scissor to stun the target in place before you start brawling. | |
Matchups & Counters for Crustle
Crustle Matchups
| Matchup Notes | ||
|---|---|---|
| 1. The chart is based on our own experience playing Crustle. 2. Pokemon within each tier are unordered 3. Any Pokemon not shown here are still under investigation. |
||
Hard Counter with Disables or Overpower with Damage
Crustle's moves gives the Pokemon incredible versatility in terms of gameplay, making the Pokemon hard to fully counter. However, Pokemon that are able to stun or overpower Crustle with damage can definitely win against it.
| Pokemon | Explanation |
|---|---|
 Venusaur Venusaur
|
Rating: ★★★★★ • Can quickly deplete Cruslte's HP from afar using Solar Beam. • Can overpower Cruslte in a fight with Petal Dance and Giga Drain. |
 Garchomp Garchomp
|
Rating: ★★★★ • Can win in a 1-on-1 brawl against Crustle thanks to its Boosted Attacks. • Can displace or reach Crustle with Dragon Rush. |
Even Matchups for Crustle
Taking advantage of Cruslte's versatile moveset and high durability can help it get the upper hand against these Pokemon.
Close the Gap or Force Them to Move
| Ranged, Fragile Pokemon with High Damage |
|---|
|
|
| How to Beat |
|
• These Pokemon prefer to keep their distance from opponents when fighting. They also have high damage potential that can be dangerous for Crustle. However, they are fragile and can get knocked out by Crustle fast. • When using Shell Smash, use the move to head straight for them, then follow up with X-Scissor to knock them out. • When using Stealth Rock, force them to relocate by trapping them first with Rock Tomb, then following up with it. • Use Rubble Rouser to stay alive longer when Crustle's HP is low. |
Disrupt Their Attacks or Combos
| All-Rounder |
|---|
|
|
| How to Beat |
|
• These Pokemon excel in close combat and rely mostly on their attacks or combos to deal damage. They are also durable enough to tank Crustle's damage. However, they do need to go toe to toe with Crustle to defeat it, putting them in range for the Pokemon's moves. • When using Shell Smash, activate it first to gain more damage, then disrupt their attacks or combos using X-Scissor. • When using Stealth Rock, force them to relocate by trapping them first with Rock Tomb, then following up with it. • Alternatively, just use Rubble Rouser when they decide to attack and fight them head on. |
Tank Their Damage, Then Retaliate
| High-mobility Pokemon with Burst Damage |
|---|
|
|
| How to Beat |
|
• These Pokemon are incredibly agile and deal high burst damage. However, Crustle can tank their damage and easily retaliate thanks to Sturdy. • When using Shell Smash, activate the move and just head straight for them, then follow up with X-Scissor. • When using Stealth Rock, place it in their path to discourage them from approaching, or wait for them to dash in, then trap them with Rock Tomb and follow up with Stealth Rock. • Use Rubble Rouser to stay alive longer when Crustle's HP is low. |
Utilize Their Numbers
| Supporters |
|---|
|
|
| How to Beat |
|
• These Pokemon usually stick with their allies and rarely venture alone. Although they themselves pose no threat to Crustle, their support capabilities makes them valuable during fights. • Take advantage of them being in close proximity to each other by either heading straight for them using Shell Smash, then following up with X-Scissor, or trapping them with Rock Tomb, then placing Stealth Rock on their position. • Use Rubble Rouser to stay alive longer when Crustle's HP is low. |
Group Up with Allies
| Highly Durable Pokemon |
|---|
|
|
| How to Beat |
|
• Much like Crustle, these Pokemon are extremely durable, making it difficult for the Pokemon to take them down alone. With that, it's best to group up with allies to bring them down with the help of Crustle. • When using Shell Smash, use it to stay in front of them, then push them back using X-Scissor. • When using Stealth Rock, trap them first with Rock Tomb, then place Stealth Rock on their position. |
Easy Matchups for Crustle
Crustle has enough offense that it can go toe-to-toe with these Pokemon. Once it catches them in Stealth Rock or disable them with X-Scissor, it will have a high chance of knocking these Pokemon down.
Close the Gap or Force Them to Move
| Ranged, Fragile Pokemon with High Damage |
|---|
|
|
| How to Beat |
|
• These Pokemon prefer to keep their distance from opponents when fighting. They also have high damage potential that can be dangerous for Crustle. However, they are fragile and can get knocked out by Crustle fast. • When using Shell Smash, use the move to head straight for them, then follow up with X-Scissor to knock them out. • When using Stealth Rock, force them to relocate by trapping them first with Rock Tomb, then following up with it. • Use Rubble Rouser to stay alive longer when Crustle's HP is low. |
Disrupt Their Attacks or Combos
| All-Rounder |
|---|
|
|
| How to Beat |
|
• These Pokemon excel in close combat and rely mostly on their attacks or combos to deal damage. They are also durable enough to tank Crustle's damage. However, they do need to go toe to toe with Crustle to defeat it, putting them in range for the Pokemon's moves. • When using Shell Smash, activate it first to gain more damage, then disrupt their attacks or combos using X-Scissor. • When using Stealth Rock, force them to relocate by trapping them first with Rock Tomb, then following up with it. • Alternatively, just use Rubble Rouser when they decide to attack and fight them head on. |
Tank Their Damage, Then Retaliate
| High-mobility Pokemon with Burst Damage |
|---|
|
|
| How to Beat |
|
• These Pokemon are incredibly agile and deal high burst damage. However, Crustle can tank their damage and easily retaliate thanks to Sturdy. • When using Shell Smash, activate the move and just head straight for them, then follow up with X-Scissor. • When using Stealth Rock, place it in their path to discourage them from approaching, or wait for them to dash in, then trap them with Rock Tomb and follow up with Stealth Rock. • Use Rubble Rouser to stay alive longer when Crustle's HP is low. |
Utilize Their Numbers
| Supporters |
|---|
|
|
| How to Beat |
|
• These Pokemon usually stick with their allies and rarely venture alone. Although they themselves pose no threat to Crustle, their support capabilities makes them valuable during fights. • Take advantage of them being in close proximity to each other by either heading straight for them using Shell Smash, then following up with X-Scissor, or trapping them with Rock Tomb, then placing Stealth Rock on their position. • Use Rubble Rouser to stay alive longer when Crustle's HP is low. |
Best Teammates for Crustle
| Pokemon | Explanation |
|---|---|
 Gardevoir Gardevoir
 Gengar Gengar
 Urshifu Urshifu
|
Combo-centric Damage Dealers |
| Pokemon whose gameplay centers on using combos can synergize well with Crustle. Crustle can use Rock Tomb and X-Scissor to block enemy movement and disable them, making it easier for them to execute their combos and finish off targets. | |
 Dodrio Dodrio
 Sableye Sableye
|
Speedy Scorers |
| Pokemon that can easily and aggressively score points throughout the game alongside Crustle can pressure the enemy team to rotate lanes and defend their goals or risk getting outscored. Crustle can use Shell Smash to mimic their gameplay all while staying versitile enough to join teamfights. | |
 Pikachu Pikachu
 Snorlax Snorlax
 Wigglytuff Wigglytuff
|
AoE Disablers |
| Pokemon with an arsenal of AoE disabling moves can benefit from Crustle's versitile moveset. They can easily land their AoE moves like Heavy Slam and Thunderbolt at enemies trapped inside Rock Tomb. They can also stun enemies and keep them inside Stealth Rock's area, dealing more damage as a result. | |
 Mr. Mime Mr. Mime
|
Frontline Duo |
| Mr. Mime has great synergy with Crustle and can become an unstoppable frontline duo. Mr. Mime can Power Swap Crustle and use Psychic as they chase down targets, causing a huge burst of damage around both of them. Alternatively, Mr. Mime can use Confusion to shove enemies towards Rock Tomb's wall and keep them in place as they continuously receive damage from Stealth Rock. |
Looking for teammates to synergize with you? Head over to our Friend Request Board to find other trainers to join you in your grind or just to hang out with!
Crustle Moves and Ability
Move Slot 1 (R)
 Fury Cutter Fury Cutter
(Lv. 1 or 3) |
Move Type: Melee Damage Type: Physical Cooldown: 3.5s Starting Damage: 494 Damage increase per hit: 20% Final Damage: N/A Damage increase per hit: 20% |
|---|---|
| Slashes opposing Pokemon with claws, dealing damage to them. Hitting the same opposing Pokemon multiple times in succession with this move increases the damage dealt. | |
|
X-Scissor
(Lv. 6) Upgrade Lv. 13 |
Move Type: Melee Damage Type: Physical Cooldown: 6.5s Starting Damage: 1317 First attack: 371, Second attack: 439, Third attack: 507 Final Damage: 1931 First attack: 542, Second attack: 644, Third attack: 745 |
|
Has the user dash forward with crossed claws, dealing damge to opposing Pokemon multiple times and shoving them. Leaves opposing Pokemon unable to act if they hit an object when shoved.
Upgrade: Reduces this move's cooldown. |
|
 Stealth Rock Stealth Rock
(Lv. 6) Upgrade Lv. 13 |
Move Type: Area Damage Type: Physical Cooldown: 5.5s Starting Damage: 3108 Initial damage: 255, Damage increase per instance: 10% to 15%, Number of instances: 8 Final Damage: 5758 Initial damage: 344, Damage increase per instance: 10% to 15%, Number of instances: 10 |
|
Throws many small rocks. When a rock hits an opposing Pokemon, or when the rocks have flown their full distance, a zone of many levitating rocks is created, dealing slowly-increasing damage over time to opposing Pokemon in the area of effect.
Upgrade: Increases the duration of this move's effects and decreases the movement speed of opposing Pokemon for a short time when this move hits. |
|
Move Slot 2 (ZR)
 Rock Slide Rock Slide
(Lv. 1 or 3) |
Move Type: Area Damage Type: Physical Cooldown: 6s Starting Damage: 270 Final Damage: 291 |
|---|---|
| Drops a large rock at the targeted area. When this move hits, it deals damage to opposing Pokemon in the area of effect and leaves them unable to act for a short time. | |
|
Shell Smash
(Lv. 4) Upgrade Lv. 11 |
Move Type: Buff Damage Type: Status Cooldown: 7s Starting Damage: N/A Final Damage: N/A |
|
Has the user smash its shell, converting a set percentage of Defense and Sp. Def into Attack and Sp. Atk and increasing the user's movement speed for a short time.
Upgrade: Increases this move's conversion rate. |
|
 Rock Tomb Rock Tomb
(Lv. 4) Upgrade Lv. 11 |
Move Type: Area Damage Type: Physical Cooldown: 5.5s Starting Damage: 897 Inital damage: 447 + 225, Damage when rock expires: 225 Final Damage: 1286 Inital damage: 636 + 325, Damage when rock expires: 325 |
|
Splits open the ground toward the designated area, dealing damage to opposing Pokemon in the area of effect and creating a barricade of rock. If used again, gets rid of the barricade.
Upgrade: Also decreases the movement speed of opposing Pokemon for a short time when this move hits. |
|
Unite Moves (ZL)
 Rubble Rouser Rubble Rouser
(Lv. 9) |
Move Type: Buff Damage Type: Physical Cooldown: 134s Starting Damage: 2120 Damage per instance: 212, Number of instances: 10 Final Damage: 2690 Damage per instance: 269, Number of instances: 10 |
|---|---|
| Grants the user a shield for a short time and elaves nearby opposing Pokemon unable to act, dealing them damage over time. If the user receives damage while this move is in effect, the move deals additional hits to nearby opposing Pokemon. | |
Standard Attack
|
|
Becomes a boosted attack with every third attack. When this boosted attack hits, it deals damage to opposing Pokemon in the area of effect and decreases their movement speed for a short time. |
|---|
Ability (Passive)
 Sturdy Sturdy
|
All Evolution Stages
Every time the Pokemon loses a certain amount of HP, its Defense and Sp. Def are increased. |
|---|
Crustle Stats & Evolutions
Crustle Evolutions
| 1st Evolution | Final Evolution |
|---|---|
 Dwebble Dwebble(Lv. 1) |
 Crustle Crustle(Lv. 4) |
Crustle Stats
| Level | HP | Defense | Special Defense | Attack Damage |
|---|---|---|---|---|
| 1 | 3300 | 97 | 67 | 175 |
| 2 | 3447 | 109 | 76 | 179 |
| 3 | 3615 | 123 | 86 | 183 |
| 4 | 4469 | 193 | 137 | 205 |
| 5 | 4692 | 211 | 150 | 211 |
| 6 | 4948 | 232 | 165 | 218 |
| 7 | 5242 | 256 | 182 | 226 |
| 8 | 5581 | 284 | 202 | 235 |
| 9 | 5971 | 316 | 225 | 245 |
| 10 | 6420 | 353 | 252 | 256 |
| 11 | 6936 | 396 | 283 | 269 |
| 12 | 7530 | 445 | 318 | 284 |
| 13 | 8213 | 501 | 359 | 301 |
| 14 | 8998 | 566 | 406 | 321 |
| 15 | 9900 | 640 | 460 | 344 |
Attack Damage is the damage of the Basic Attack as tested against the Training Dummy.
Crustle In-Game Stat Listings
| Offense | Endurance | Mobility | Scoring | Support |
|---|---|---|---|---|

|
|
|
|

|
Crustle Skins (Holowear)
| Holowear | |
|---|---|
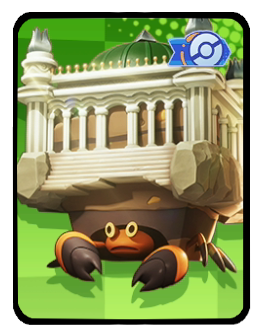 Shrine Style Shrine Style
|
 Cake Style Cake Style
Zirco Trading:
|
 Starry Night Style Starry Night Style
Zirco Trading:
|
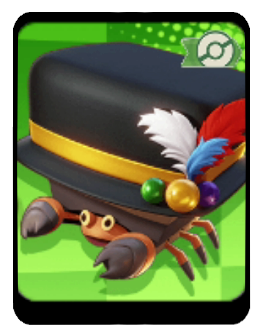 Tuxedo Style Tuxedo Style
|
Crustle Character Spotlight
Crustle Achievements
X-Scissor Achievement
| X-Scissor | |
|---|---|
| Pokemon | Move |
|
Crustle
|
|
| Mission: In a single battle, show Pokemon from the opposing team into an obstacle 2 or more times with X-Scissor or X-Scissor+ (5/10/20 battles total) |
|
| Medals & Points | Rewards |
|
|
|
|
|
|
|
|
|
List of Defender Pokemon Achievements
Pokemon UNITE Related Guides

All Pokemon Guides and Builds
 Absol
Absol Aegislash
 Alcremie
 Alolan Ninetales
 Alolan Raichu
 Armarouge
 Azumarill
 Blastoise
 Blaziken
 Blissey
 Buzzwole
 Ceruledge
 Chandelure
 Charizard
 Cinderace
 Clefable
 Comfey
 Cramorant
 Darkrai
 Decidueye
 Delphox
 Dhelmise
 Dragapult
 Dragonite
 Duraludon
 Eldegoss
 Empoleon
 Espeon
 Falinks
 Galarian Rapidash
 Glaceon
 Goodra
 Greedent
 Greninja
 Gyarados
 Ho-oh
Ho-oh Hoopa
Hoopa Inteleon
 Lapras
 Latias
 Latios
 Leafeon
 Lucario
 Machamp
 Mamoswine
 Meowscarada
 Meowth
 Metagross
 Mew
Mew Mimikyu
 Miraidon
 Moltres
 Pawmot
 Psyduck
 Scizor
 Sirfetch'd
 Slowbro
 Suicune
 Sylveon
 Talonflame
 Tinkaton
 Trevenant
 Tsareena
 Tyranitar
 Umbreon
 Vaporeon
 Zacian
 Zapdos
 Zeraora
 Zoroark
Upcoming Pokemon
 Articuno Articuno(TBA) |
 Meganium Meganium(TBA) |
 Typhlosion Typhlosion(TBA) |
 Feraligatr Feraligatr(TBA) |
Mega Evolutions
| Mega Evolved Pokemon | ||
|---|---|---|
 Mega Charizard X Mega Charizard X |
 Mega Charizard Y Mega Charizard Y |
 Mega Gyarados Mega Gyarados |
 Mega Lucario Mega Lucario |
 Mega Mewtwo X Mega Mewtwo X |
 Mega Mewtwo Y Mega Mewtwo Y |
Pokemon by Role
| All Pokemon Roles | |||||
|---|---|---|---|---|---|
 Attackers Attackers |
 All-Rounders All-Rounders |
 Defenders Defenders |
|||
 Speedsters Speedsters |
 Supporters Supporters |
||||
Pokemon by Characteristics
| Attack Type | |
|---|---|
 Melee Pokemon Melee Pokemon |
 Ranged Pokemon Ranged Pokemon |
 Physical Pokemon Physical Pokemon |
 Special Pokemon Special Pokemon |
| Stat Rankings | |
 HP Ranking HP Ranking |
 Defense Ranking Defense Ranking |
 Sp. Def. Ranking Sp. Def. Ranking |
 Basic Attack Ranking Basic Attack Ranking |
Comment
you're basically a raidboss. Good to know.
Author

Crustle Guide: Builds and Best Items
Rankings
- We could not find the message board you were looking for.
Gaming News


![Monster Hunter Stories 3 Review [First Impressions] | Simply Rejuvenating](https://img.game8.co/4438641/2a31b7702bd70e78ec8efd24661dacda.jpeg/thumb)
Popular Games

Genshin Impact Walkthrough & Guides Wiki
Umamusume: Pretty Derby Walkthrough & Guides Wiki
Pokemon Pokopia Walkthrough & Guides Wiki
Honkai: Star Rail Walkthrough & Guides Wiki
Monster Hunter Stories 3: Twisted Reflection Walkthrough & Guides Wiki
Arknights: Endfield Walkthrough & Guides Wiki
Wuthering Waves Walkthrough & Guides Wiki
Zenless Zone Zero Walkthrough & Guides Wiki
Pokemon TCG Pocket (PTCGP) Strategies & Guides Wiki
Monster Hunter Wilds Walkthrough & Guides Wiki


Recommended Games
Diablo 4: Vessel of Hatred Walkthrough & Guides Wiki
Cyberpunk 2077: Ultimate Edition Walkthrough & Guides Wiki
Fire Emblem Heroes (FEH) Walkthrough & Guides Wiki
Yu-Gi-Oh! Master Duel Walkthrough & Guides Wiki
Super Smash Bros. Ultimate Walkthrough & Guides Wiki
Pokemon Brilliant Diamond and Shining Pearl (BDSP) Walkthrough & Guides Wiki
Elden Ring Shadow of the Erdtree Walkthrough & Guides Wiki
Monster Hunter World Walkthrough & Guides Wiki
The Legend of Zelda: Tears of the Kingdom Walkthrough & Guides Wiki
Persona 3 Reload Walkthrough & Guides Wiki


All rights reserved
©2021 Pokémon. ©1995–2021 Nintendo / Creatures Inc. / GAME FREAK inc.
©2021 Tencent.
The copyrights of videos of games used in our content and other intellectual property rights belong to the provider of the game.
The contents we provide on this site were created personally by members of the Game8 editorial department.
We refuse the right to reuse or repost content taken without our permission such as data or images to other sites.
These builds are very outdated. And far from the most accurate and not as many options as there should be. Use to love this site now feel it's trash