Cramorant Guide: Builds and Best Items
☆ Upcoming: Articuno | Meganium | Typhlosion | Feraligatr
★ Latest News: Zapdos | Moltres | Version 1.22.1.5
☆ Popular Pages: Upcoming Pokemon | Tier List
★ Current Seasons: Ranked S34 | Battle Pass S39
☆ Join Game8's Pokemon Discord Server!

The best guide on how to play Cramorant in Pokemon UNITE for Nintendo Switch and Mobile. Check here for the best builds, Held and Battle items, movesets, as well as the latest nerfs, buffs, counters, matchups, and more!
List of Contents
Cramorant Latest Nerfs & Buffs (3/5)
| Cramorant Changes |
|---|
|
• Mechanic Change: Can now move while catching an Arrokuda. |
|
• Mechanic Change: Added effect that increases attack speed by 40% for 3s after use. |
|
• Damage increased by 10% • Cooldown reduction on hit increased from 5% to 8%. |
|
• Recovery amount increased by 10%. |
|
• Damage increased by 12%. |
Stat Updates
| 1.13.1.2 | From level 9 above, it now restores 12.5% of the damage dealt by special attacks. |
|---|---|
| 1.17.2.10 | Attack Speed changed from 1.1-1.5 to 1.1-1.6 (Lvl. 1-15) |
Gulp Missile
| 1.22.1.5 | Mechanic Change: Can now move while catching an Arrokuda. |
|---|
Standard Attack
| 1.3.1.2 | Fixed a bug where the Boosted Attack did not cause critical damage. |
|---|---|
| 1.2.1.3 | (Boosted Attack) Damage dealt to opposing Pokemon increased. |
| 1.10.1.2 | Fixed an issue where a single Arrokuda would sometimes bounce between multiple opposing Pokémon and deal too much damage. |
Hurricane
| 1.1.1.6 | Fixed a bug where Drednaw and Zapdos couldn't be damaged with this attack. |
|---|---|
| 1.13.1.2 | Cooldown decreased from 9s → 8s. |
| 1.14.1.6 | Damage increased by 15%. |
| 1.17.2.10 | Cooldown decreased from 8s to 7.5s. |
| 1.22.1.5 | Mechanic Change: Added effect that increases attack speed by 40% for 3s after use. |
Whirlpool
| 1.1.1.4 | Total damage dealt to opposing Pokemon decreased from 2160 to 1856 (-14%). |
|---|
Air Slash
| 1.4.1.7 | Cooldown increased from 5s to 7s. |
|---|---|
| 1.5.1.2 | Number of blades is increased to 5. |
| 1.7.1.2 | Cooldown increased from 7s to 8s (+1s). |
| 1.7.1.7 | Healing received per blade decreased from 392 to 261 (-33%). |
| 1.22.1.5 | Damage increased by 10%. Cooldown reduction on hit increased from 5% to 8%. Air Slash +: Recovery amount increased by 10%. |
Dive
| 1.2.1.3 | Cooldown reduced. |
|---|---|
| 1.1.1.4 | Damage dealt to opposing Pokemon increased from 974 to 1219 (+25%). |
| 1.2.1.8 | Fixed a bug where Cramorant may not be displayed correctly after the move is used. |
| 1.4.1.7 | Damage decreased from 1219 to 719 (-41%). Boosted attacks after using the move strengthened. |
| 1.6.1.3 | Maximum range bug fix. |
| 1.7.1.2 | Charge time cooldown increased. |
| 1.12.1.4 | Fixed a bug where additional damage was not dealt by the boosted basic attack after Dive was used. Fixed a bug that caused launched Arrokuda to continue to flop around for longer than expected. |
| 1.14.1.6 | Time to replenish a charge reduced from 6s to 5s. |
| 1.16.2.6 | Cooldown increased from 1.5s to 2s. Time to replenish a charge increased from 5s to 6s. |
Surf
| 1.2.1.3 | Damage dealt to opposing Pokemon decreased from 2682 to 2477 (-7.6%). |
|---|---|
| 1.6.1.3 | Damage bug fix. |
| 1.17.1.2 | Surf +: Slow duration increased from 2s to 3s. |
| 1.17.2.10 | Cooldown decreased from 8s to 7.5s. |
Gatling Gulp Missile
| 1.2.1.3 | Damage dealt to opposing Pokemon decreased from 2335 to 1188 (-49.1%). |
|---|---|
| 1.5.1.2 | Damage increased from 1188 to 1262 (+6%). Cooldown decreased from 134s to 124s (+7%). |
| 1.6.1.3 | Activation timing bug fix. |
| 1.12.1.2 | Fixed a bug that could cause two Pokemon to attack at the same time. |
| 1.15.1.2 | Damage decreased by 15%. |
| 1.22.1.5 | Damage increased by 12%. |
Cramorant Basic Info
| Cramorant | ||
|---|---|---|
 |
Tier Rating:
Role: Attacker Attack Type: Ranged Damage Type: Special Difficulty: Expert |
|
| "Cramorant is the Gulp Pokémon. Cramorant’s Ability, Gulp Missile, allows it to attack by spitting out prey it catches with Dive." | ||
Cramorant Best Lanes

|

|

|
Tips & Strategies for Every Lane
Strengths and Weaknesses
| Strengths | Weaknesses |
|---|---|
| ✔︎ High Burst Damage. ✔︎ Strong Early Game. ✔︎ Powerful Unite move. |
✖︎ Needs to be accurate with moves. ✖︎ Very fragile. |
Best Builds for Cramorant
| Cramorant Builds | |
|---|---|
| - | |
Dive Build
Dive Build

|
Moveset | Held Items | |||
|---|---|---|---|---|---|
| Battle Item | |||||
| Stats from Items (Lv. 40) | Recommended Lane | ||||
|
Sp. Atk: +79 HP: +770 |
|
||||
| Emblem Color Combination | Target Emblem Stats | ||||
|
|
Positive Stats: • Sp. Atk Free Negative Stats: • Attack • Critical-Hit Rate |
||||
| Note: The emblem color and stats here are suggestions only. The builds are still viable even without the suggested emblems. |
|||||
Dive Build Explanation
This is a high-mobility build utilizing the Boosted Attack mechanic from Dive and the burst damage from Air Slash to take out opponents.
- Choice Specs provides Cramorant with a nice amount of Sp. Atk. stat, and increases its minimum move damage, particularly for Air Slash.
- Slick Spoon adds more Sp. Atk. stat and allows Cramorant to ignore a portion of its target's Sp. Def., resulting to more damage dealt.
- Buddy Barrier gives Cramorant a large amount of HP for some durability, and grants it a shield when it uses Gatling Gulp Missile.
- Energy Amplifier can be a replacement for Choice Specs, giving Cramorant a large damage increase during Gatling Gulp Missile and some cooldown reduction for its moves.
- Eject Button gives Cramorant another repositioning tool on top of Dive.
- X Speed can also work to serve the same purpose.
- The build's Boost Emblem loadout should consist of 6 Green Emblems for more damage and 7 Black Emblems for some cooldown reduction. This can be achieved by equipping at least three (3) Emblems that are both Green and Black.
- Equip Emblems that improve Sp. Atk. to further increase Cramorant's damage output.
- Attack and Critical-hit Rate can be freely traded for the other stats.
Dive Build Damage Test
| Items (@Lvl 30) |
Air Slash (@ Lvl 15) |
Boosted Attack (@ Lvl 15) |
|---|---|---|
| Choice Specs (Includes effect) + Slick Spoon |
1751 | 1006 |
Since the build is centered on Air Slash and Boosted Attacks, equipping items that will maximizee their damage ouput is the ideal item combination. Buddy Barrier is a core item for the build, leaving only two (2) items left for consideration.
Out of all the item combinations, Choice Specs and Slick Spoon will be the best for the build. It produced the highest Air Slash damage while maintaining a considerable Boosted Attack damage result.
These damage tests are conducted in Practice Mode with Goodra as the Training Partner. The Pokemon is set to level 15 and has no items equipped. The results are calculated by substracting the Training Partner's max HP and its HP after taking damage.
| Note: The numbers in bold are the highest result for a specific test. |
| Items (@Lvl 30) | Air Slash (@ Lvl 15) | Boosted Attack (@ Lvl 15) |
|---|---|---|
| Wise Glasses + Choice Specs (Includes effect) | 1693 | 970 |
| Wise Glasses + Slick Spoon | 1580 | 1044 |
| Wise Glasses + Sp. Atk. Specs (6 stacks) | 1550 | 1024 |
| Choice Specs (Includes effect) + Slick Spoon | 1751 | 1006 |
| Choice Specs (Includes effect) + Sp. Atk. Specs (6 stacks) | 1718 | 985 |
| Slick Spoon + Sp. Atk. Specs (6 stacks) | 1609 | 1060 |
The tests above does not use any Emblems yet so it will scale higher if equipped.
Surf Build
| Surf Build | Moveset | Held Items | |||
|---|---|---|---|---|---|
| Battle Item | |||||
| Stats from Items (Lv. 40) | Recommended Lane | ||||
|
Sp. Atk: +123 HP: +245 |
|
||||
| Emblem Color Combination | Target Emblem Stats | ||||
|
|
Positive Stats: • HP • Sp. Atk Free Negative Stats: • Attack • Critical-Hit Rate |
||||
| Note: The emblem color and stats here are suggestions only. The builds are still viable even without the suggested emblems. |
|||||
Surf Build Explanation
This build is centered on stunning and bursting down opponents using Surf and Hurricane from the backlines.
- Wise Glasses gives Cramorant a large Sp. Atk. stat boost thanks to its percentage bonus effect.
- Choice Specs provides Cramorant with more Sp. Atk. stat and increases its minimum move damage.
- Slick Spoon further adds more Sp. Atk. stat and allows Cramorant to ignore a portion of its target's Sp. Def., resulting to more damage dealt.
- Eject Button gives Cramorant a repositioning tool to keep its distance from enemies.
- X Speed can also work to serve the same purpose.
- The build's Boost Emblem loadout should consist of 6 Green Emblems for more damage and 7 Black Emblems for some cooldown reduction. This can be achieved by equipping at least three (3) Emblems that are both Green and Black.
- Equip Emblems that improve Sp. Atk. to further increase Cramorant's damage output.
- Attack and Critical-hit Rate can be freely traded for the other stats.
Surf Build Damage Test
| Items (Level 30) |
Hurricane (@ Lvl 15) |
Surf (@ Lvl 15) |
|---|---|---|
| Wise Glasses + Choice Specs (Includes effect) + Slick Spoon |
1220 | 2050 |
Since the build is centered on Surf and Hurricane, equipping items that will maximize their damage is the ideal item combination.
As the results show, Wise Glasses, Choice Specs, and Slick Spoon will produce the best results for the build.
These damage tests are conducted in Practice Mode with Goodra as the Training Partner. The Pokemon is set to level 15 and has no items equipped. The results are taken by substracting the Pokemon's max HP and its HP after taking damage.
| Note: The numbers in bold are the highest result for a specific test. |
| Items (Level 30) | Hurricane (@ Lvl 15) | Surf (@ Lvl 15) |
|---|---|---|
| Wise Glasses + Choice Specs (Includes effect) + Slick Spoon | 1220 | 2050 |
| Wise Glasses + Choice Specs (Includes effect) + Sp. Atk. Specs (6 stacks) | 1183 | 1981 |
| Wise Glasses + Choice Specs (Includes effect) + Curse Incense | 1116 | 1874 |
| Wise Glasses + Slick Spoon + Sp. Atk. Specs (6 stacks) | 1005 | 1865 |
| Wise Glasses + Slick Spoon + Curse Incense | 953 | 1770 |
| Wise Glasses + Sp. Atk. Specs (6 stacks) + Curse Incense | 933 | 1731 |
| Choice Specs (Includes effect) + Slick Spoon + Sp. Atk. Specs (6 stacks) | 1220 | 2048 |
| Choice Specs (Includes effect) + Slick Spoon + Curse Incense | 1152 | 1939 |
| Choice Specs (Includes effect) + Sp. Atk. Specs (6 stacks) + Curse Incense | 1133 | 1900 |
| Slick Spoon (Includes effect) + Sp. Atk. Specs (6 stacks) + Curse Incense | 966 | 1794 |
The tests above does not use any Emblems yet so it will scale higher if equipped.
Cramorant Best Items & Moveset
Best Held Items
| Item | Explanation |
|---|---|
 Buddy Barrier Buddy Barrier
|
Buddy Barrier gives a shield that helps Cramorant survive while in stationary when activating its Unite Move. |
 Energy Amplifier Energy Amplifier
|
Energy Amplifier gives Cramorant a large damage boost while using Gatling Gulp Missile. |
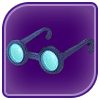 Wise Glasses Wise Glasses
|
Wise Glasses gives Cramorant a large Sp. Atk. boost thanks to its percentage bonus effect, increasing the Pokemon's damage output. |
 Shell Bell Shell Bell
|
Shell Bell increases Cramorant's survivability since Shell Bell heals more when using Sp. Atk. based moves. |
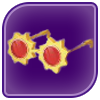 Choice Specs Choice Specs
|
Similar to Wise Glasses, Choice Specs gives Cramorant's moves an extra punch by adding extra damage per move hit. |
 Slick Spoon Slick Spoon
|
Slick Spoon enhances Cramorant's damage potential by ignoring a portion of its target's Sp. Def. stat, especially against high durability Pokemon. It also provides increased Sp. Atk. and HP, which are essential to the Pokemon. |
Best Battle Items
| Item | Explanation |
|---|---|
 Eject Button Eject Button
|
Eject Button gives Cramorant another repositioning tool on top of Dive, improving its maneuverability. |
 X Speed X Speed
|
X Speed improves Cramorant's mobility through increased movement speed and immunity from slows. |
Best Moveset
| Move | Explanation |
|---|---|
 Air Slash Air Slash
|
Air Slash deals a decent amount of burst damage when all projectiles hit. It also synergizes well with Dive. |
 Dive Dive
|
Dive gives Cramorant a mobility tool that makes up for its lack thereof. It can be turned into a damage tool since each use turns Cramorant's attacks into Boosted Attacks. |
This moveset gives Cramorant a nice balance of damage and mobility, which makes ups for the Pokemon's low mobility and durability. Dive improves Cramorant's mobility during fights. It allows the Pokemon to kite opponents since it turns Cramorant's attack into a Boosted Attack for each use. Air Slash allows Cramorant to deal high burst damage and also synergizes well with Dive.
Dive and Surf are Cramorant's first damage moves but comes in different forms. Dive is a dash move that deals damage to opponents in the designated area. It also gives Cramorant a Boosted Attack when its use, which can adds more damage. Surf is a straightforward damage move that also disables targets caught in its path.
Air Slash and Hurricane are Cramorant's second set of damage moves and differ only in their ease of use. Air Slash deals more damage compared to Hurricane but requires Cramorant to be at almost melee range for all projectiles to hit and deal maximum damage. On the other hand, Hurricane deals lesser damage but is simpler to use and stuns opponents.
Generally, Air Slash should always be paired with Dive since Air Slash requires proper positioning from Cramorant to be effective, which is something that Dive provides. Meanwhile, Surf and Hurricane typically go well together due to them being crowd control moves and the damage they can deal, which is more effective during fights.
Which Moveset Do You Think is Better for Cramorant?
Why is it the best? Let us know in the comments!
Previous Poll Results
How to Play Cramorant
| Jump to Section | |
|---|---|
Pressure Your Opponents with Whirlpool
Whirlpool is the move you want to get at Lv. 1 as it allows you to farm Wild Pokemon and deal continous damage to your opponents from afar. Feather Dance can reduce your opponent's attack and movement speed, but it does not do any damage, so get Whirlpool instead.
Get to Level 6 Fast
Focus on farming wild Pokemon and get to level 6 as fast as possible so you'll gain access to your primary moves. Once you reach level 6, you can start to get aggressive.
Choose Moveset Based on Playstyle
You need to choose your moveset based on your preferred playstyle and build. Generally, there are two directions you can take for Cramorant, each having its advantages and disadvantages.
Choose Hurricane and Surf for Burst Damage
Choosing Hurricane and Surf gives you a powerful burst damage and crowd control combo. However, you always need to keep a safe distance from your enemies, preferably behind your allies.
Choose Dive and Air Slash for Mobility
On the other hand, Dive and Air Slash gives you incredible mobility, allowing you to slip in and out of fights. Use Dive to get close as possible to your target, then follow up with Air Slash immediately. If things go awry, use Dive again to disengage.
Keep Triggering Gulp Missile
Gulp Missile turns your next attack into a Boosted Attack when you have a specific interaction with Whirlpool, Surf, or Dive.
Gulp Missile: Cramorant Ability Effects
Step on the Whirlpool
In the early game, you can trigger Gulp Missile by stepping on the Whirlpool when you cast it.
Whirlpool: Cramorant Move Effect and Cooldown
Pass Through Surf Waves
If you're using Surf, you can trigger Gulp Missile by passing through the waves. Remember that the effect triggers for each wave so make sure to pass through both of them to utilize the Boosted Attacks.
Surf: Cramorant Move Effect and Cooldown
Use Dive
For Dive, you simply have to use it to trigger Gulp Missile. However, since the move itself doesn't do damage, you always need to follow up with a Boosted Attack each time you use it.
Dive: Cramorant Move Effect and Cooldown
Use Gattling Gulp Missile at a Safe Position
When using Cramorant's Unite move, you are able to deal a ton of damage in a short amount of time but at the cost of being unable to move. This can make it easy for other Pokemon to get to you and take you out during your Unite move. You will want to be at the back of your team or inside grass when you use it to make it harder for the enemy team to reach you.
Progression and Leveling Guide
Top and Bottom Guide
Level 1 to 4
- Quickly clear out the Bunnelbies in the lane.
- Keep farming wild Pokemon in the lane to reach level 4 and learn your first move.
- At bottom lane, prioritize taking Indeedees for more exp.
Level 5 to 8
- Keep hunting Wild Pokemon to gain more EXP from farming Altaria and Swablus.
- Once you reach level 6, learn your second move.
- Help allies secure Regice, Registeel, or Regirock when it spawns, otherwise secure Regieleki.
- Upon reaching level 8, learn your Unite Move.
Level 9+
- Stick with allies to hunt targets, secure objectives, and push lanes.
- Reach at least level 12 or max level if possible before or when Groudon spawns for a fully-upgraded moveset.
- Make sure that your Unite Move is available when Groudon spawns.
- Help teammates win a teamfight and secure Groudon.
Jungle Guide
Level 1 to 5
- Quickly defeat Xatu
- Clear the first wave of jungle camps and reach level 4 to learn your first move.
- Help the top lane first or whatever lane needs help the most by securing Altaria and Swablus, getting knockouts, and scoring points.
Level 6 to 9
- Clear the second wave of jungle camps and reach at least level 6 to learn your second move.
- Secure Regidrago in the center to get more EXP.
- Help the bottom lane by securing Altaria and Swablus, getting kills, and scoring points.
- If possible, reach level 9 and learn your Unite Move before or when Regice, Registeel, or Regirock spawns.
- Help allies secure Regice, Registeel, or Regirock, with Registeel being the highest priority since it gives a damage buff to the party.
Level 10+
- Stick with allies to hunt targets, secure objectives, and push lanes.
- Reach at least level 12 or max level if possible before or when Groudon spawns for a fully-upgraded moveset.
- Make sure that your Unite Move is available when Groudon spawns.
- Help teammates win a teamfight and secure Groudon.
Cramorant Combos
Early Game Pressure Combo
| Early Game Pressure Combo | |
|---|---|
|
|
| This is a quick and easy combo in the early game for pressuring opponents. Start by hitting your target with a Feather Dance to reduce their movement speed. Quickly activate Whirlpool to deal a lot of damage if they stand within the affected area for too long. | |
Disable Burst Combo
| Disable Burst Combo | |
|---|---|
 |
|
| Similar to the early game combo, you will want to start with Hurricane to incapacitate enemies, which will make it easier to follow it up with Surf for a clean one-two punch. Make sure to keep hitting the target with Standard Attacks while the waves crash to maximize Cramorant's Boosted Attacks | |
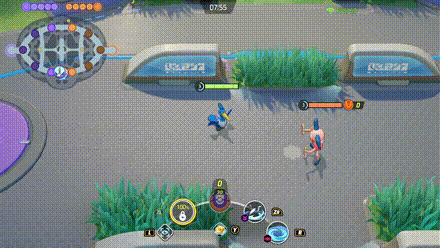
Dive Initiator Combo
| Dive Initiator Combo | |
|---|---|
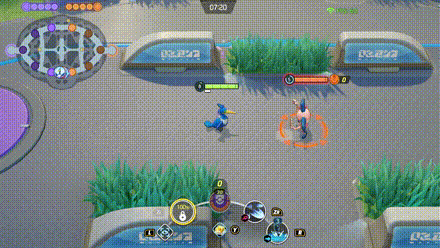 |
|
| This is an up-and-close offensive combo that focuses on bombarding the target with attacks while being mobile. Dive will be your initiating move, allowing you to get close to the enemy and knock them back. Following it up with Air Slash at point-blank range will maximize its damage and pushes you away from the enemy, to get some distance in between and allow you to pelt them with your basic attacks from a safer distance. | |
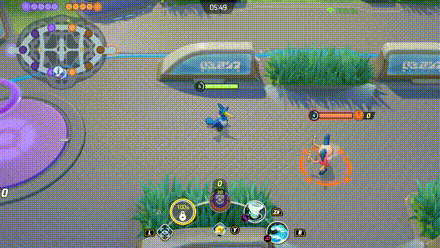
Ultimate Gatling Surf Combo
| Ultimate Gatling Surf Combo | |
|---|---|
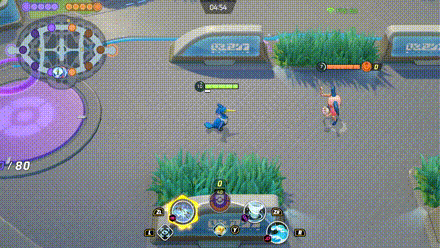 |
|
| This combo sets up Gatling Gulp Missile for maximum damage. It is recommended for fighting single targets. Start by incapacitating the target with a Hurricane, then follow it up with a Surf. When Cramorant gets an Arrokuda from the wave, immediately attack to get increased damage. Finally, activate Gatling Gulp Missile and bombard the target with Standard Attacks as the wave brings them closer to you. | |
Matchups & Counters for Cramorant
Cramorant Matchups
| Matchup Notes | ||
|---|---|---|
| 1. The chart is based on our own experience playing Cramorant. 2. Pokemon within each tier are unordered 3. Any Pokemon not shown here are still under investigation. |
||
Hard Counter With High Mobility and Burst Damage
Cramorant can quickly lose a fight when its opponent manages to get close and burst him down. Also, keep in mind that most of Cramorant's moves can be avoided if you can dodge them with quick reactions and good timing.
Best Counters
| Pokemon | Explanation |
|---|---|
 Absol Absol
|
Rating: ★★★★★ • Can quickly get close and burst down to Cramorant using Sucker Punch or Night Slash • Moves are mobile enough to make Dive or Hurricane miss. |
 Snorlax Snorlax
|
Rating: ★★★★ • Can tank Cramorant's burst damage. • Can prevent Cramorant from getting a good position using Heavy Slam or Yawn, and Block. |
 Delphox Delphox
|
Rating: ★★★★ • Can force Cramorant to use Dive defensively with Fire Spin. • Can match Dive's mobility with Flame Charge. • Can force Cramorant to cancel Gatling Gulp Missile with Fanciful Fireworks. |
Even Matchups for Cramorant
Ensuring that Cramorant hits opponents with its moves is the Pokemon's best bet in winning against these Pokemon.
Strike First
| Fragile, Ranged Pokemon with High Damage |
|---|
|
|
| How to Beat |
|
• Much like Cramorant, these Pokemon prefer to keep their distance from opponents while fighting and have a high damage potential. However, they are fragile and can be knocked out fast. Winning against them is just a matter of striking first. • When using Surf and Hurricane, find an opening first before bursting them down. • When using Dive and Air Slash, make sure to get close enough to them so that all of Air Slash's projectiles hit, or use Dive to dodge their moves and quickly follow up with a Boosted Attack. • As a last resort, use Gatling Gulp Missile to finish them off but be sure that Cramorant is in a good spot. |
Utilize Range Advantage
| Brawlers |
|---|
| How to Beat |
|
• These Pokemon excel in close combat and rely mostly on their attacks to deal damage. They are also durable enough to tank Cramorant's damage. However, they need to get to melee range first before they can deal damage. Utilize Cramorant's range to win against them. • When using Surf and Hurricane, keep doing the combo until they get knocked out but retreat when they try to get close. • When using Dive and Air Slash, use one charge of Dive to get close to them and follow up with Air Slash, then another charge to move back out. Alternatively, just kite them by using Dive and following up with a Boosted Attacks. • As a last resort, use Gatling Gulp Missile to finish them off. |
Utilize Their Numbers
| Supporters |
|---|
|
|
| How to Beat |
|
• These Pokemon usually stick with their allies and rarely venture alone. Although they don't necessarily pose a threat to Cramorant, their support capabilities makes them valuable during fights. • Take advantage of them being in close proximity to each other by using Surf and Hurricane or spamming Boosted Attacks with the help of Dive. • Alternatively, just use Gatling Gulp Missile to make them scatter but be sure Cramorant is in a good spot. |
Group Up with Allies
| Highly Durable Pokemon |
|---|
| How to Beat |
| • These Pokemon are extremely durable and have means of consistently healing themselves, making it hard for Cramorant to take them down alone. With that, it's best to group up with allies to bring them down with the help of Cramorant. |
Easy Matchups
Easy matchups are opponents that are susceptible to burst damage or have a hard time dealing with disables.
Utilize Their Numbers
| Supporters |
|---|
|
|
| How to Beat |
|
• These Pokemon usually stick with their allies and rarely venture alone. Although they don't necessarily pose a threat to Cramorant, their support capabilities makes them valuable during fights. • Take advantage of them being in close proximity to each other by using Surf and Hurricane or spamming Boosted Attacks with the help of Dive. • Alternatively, just use Gatling Gulp Missile to make them scatter but be sure Cramorant is in a good spot. |
Best Teammates for Cramorant
| Pokemon | Explanation |
|---|---|
 Mew Mew
 Venusaur Venusaur
|
Easy enemy takedowns |
| These Pokemon have powerful burst attacks and are capable of stunning enemies from a safe distance, allowing Cramorant to concentrate on dealing damage. | |
 Mr. Mime Mr. Mime
 Sableye Sableye
|
Stuns and Debuffs |
| These Pokemon have means of inflicting debuffs and shutting down targets with their moves. This allows Cramorant to catch up and take enemies down easier when pushing lanes. | |
 Slowbro
Snorlax Slowbro
Snorlax
|
Tanky Disablers |
| These Pokemon can lead the charge and help Cramorant setup its attacks with their disabling moves during a lane push or when securing objectives. | |
Absol
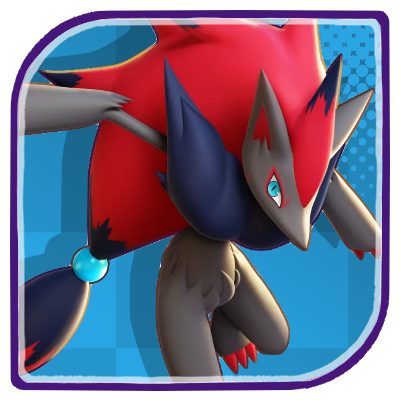 Zoroark Zoroark
|
High Burst Damagers |
| These Pokemon help contribute damage through pinning down enemies with combos and burst attacks. While it's still recommended to go with either a Defender or Supporter ally, Speedsters are a huge help when trying to dominate lanes as early as possible. | |
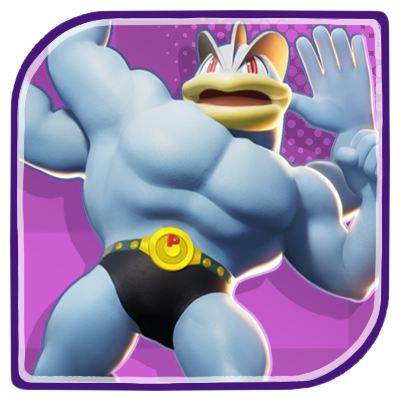 Machamp Machamp
 Urshifu Urshifu
|
Hard-hitting Initiators |
| These Pokemon are very dependable allies as they have means to buff or sustain themselves. Whether it's securing objectives or pushing lanes, Machamp and Urshifu are built to initiate clashes, stun enemies, and create openings for their teammates. |
Looking for teammates to synergize with you? Head over to our Friend Request Board to find other trainers to join you in your grind or just to hang out with!
Cramorant Moves
Move Slot 1 (R)
 Whirlpool Whirlpool
(Lv. 1 or 3) |
Move Type: Area Damage Type: Special Cooldown: 5s Starting Damage: 1280 Initial Damage: 112, Damage Increase: Approximately 10% Final Damage: 1856 Initial Damage: 159, Damage Increase: Approximately 11% to 12% |
|---|---|
| Creates a whirlpool that deals damage to opposing Pokemon in the area of effect. This move's area of effect slowly shrinks, but the damage dealt slowly increases. Just before the whirlpool disappears, it decreases the movement speed of opposing Pokemon in the area of effect for a short time. The user can also catch Arrokuda or other prey by entering the whirlpool. | |
|
Dive
(Lv. 4) Upgrade Lv. 11 |
Move Type: Dash Damage Type: Special Cooldown: 2s (Charge time: 6s) Starting Damage: 546 Final Damage: 1219 |
|
Changes the designated area into a puddle and has the user dive to that area, dealing damage to opposing Pokemon and shoving them whenthey hit. The user also catches Arrokuda or other wild Pokemon as they emerge from the puddle. A maximum of three uses can be kept in reserve for this move.
Upgrade: Increases damage dealt by this move. |
|
 Surf Surf
(Lv. 4) Upgrade Lv. 11 |
Move Type: Hindrance Damage Type: Special Cooldown: 7.5s Starting Damage: 1356 Final Damage: 2477 |
|
Attacks with a wave that deals damage to opposing Pokemon. Once the wave has traveled its full distance, it returns the way it came, dealing damage to opposing Pokemon once again and pulling them back with the wave. The user can also catch Arrokuda or other prey by entering the wave.
Upgrade: When the first wave hits opposing Pokemon, it also decreases their movement speed for a short time. |
|
Move Slot 2 (ZR)
 Feather Dance Feather Dance
(Lv. 1 or 3) |
Move Type: Hindrance Damage Type: Status Cooldown: 8s Starting Damage: N/A Final Damage: N/A |
|---|---|
| Decreases the Attack and movement speed of opposing Pokemon for a short time | |
|
Air Slash
(Lv. 6) Upgrade Lv. 13 |
Move Type: Ranged Damage Type: Special Cooldown: 8s Starting Damage: 1179 Damage per projectile: 236, Number of projectiles: 5 Final Damage: 2715 Damage per projectile: 543, Number of projectiles: 5 |
|
Has the user shoot out many blades of air while moving backward to create distance. Deals damage to opposing Pokemon in the area of effect and reduces this move's cooldown when it hits.
Upgrade: Restore the user's HP every time a blade of air hits an opposing Pokemon |
|
 Hurricane Hurricane
(Lv. 6) Upgrade Lv. 13 |
Move Type: Ranged Damage Type: Special Cooldown: 7.5s Starting Damage: 811 Final Damage: 1660 |
|
Creates a fierce wind, throwing opposing Pokemon that get caught in it and throwing them.
Upgrade: Increases the user's movement speed for a short time. |
|
Unite Moves (ZL)
 Gatling Gulp Missile Gatling Gulp Missile
(Lv. 9) |
Move Type: Ranged Damage Type: Special Cooldown: 124s Starting Damage: 756 Damage per projectile: 756, Number of projectiles: 10 Final Damage: 1198 Damage per projectile: 1198, Number of projectiles: 10 |
|---|---|
| Creates a puddle at the user's current location. The user continuosly uses its mouth to grab Arrokuda from the puddle and spits them out to attack the nearest opposing Pokemon. The user cannot move or use other moves while this move is in effect. | |
Standard Attack
|
|
Becomes a boosted attack with every fourth attack. This boosted attack spits Arrokuda or other Pokemon at opposing Pokemon and bounces towards any other neaby opponents dealing damage. |
|---|
Ability (Passive)
 Gulp Missile Gulp Missile
|
When the Pokemon uses certain moves, it catches some form of prey in its mouth. Afterward, when the Pokemon receives damage, it spits the prey out as a counterattack at an opposing Pokemon. The type of prey and effect differ based on the user's remaining HP |
|---|
Cramorant Stats & Evolutions
Cramorant Evolutions
 Cramorant CramorantThis Pokemon does not evolve. |
Cramorant Stats
| Level | HP | Defense | Special Defense | Attack Damage |
|---|---|---|---|---|
| 1 | 3292 | 60 | 40 | 134 |
| 2 | 3399 | 69 | 46 | 139 |
| 3 | 3517 | 78 | 52 | 145 |
| 4 | 3647 | 88 | 59 | 151 |
| 5 | 3789 | 99 | 67 | 158 |
| 6 | 3946 | 112 | 75 | 166 |
| 7 | 4118 | 126 | 84 | 175 |
| 8 | 4308 | 141 | 94 | 185 |
| 9 | 4517 | 158 | 105 | 196 |
| 10 | 4748 | 176 | 117 | 208 |
| 11 | 5002 | 196 | 131 | 221 |
| 12 | 5281 | 218 | 146 | 235 |
| 13 | 5589 | 243 | 162 | 250 |
| 14 | 5928 | 270 | 180 | 267 |
| 15 | 6301 | 300 | 200 | 286 |
Attack Damage is the damage of the Basic Attack as tested against the Training Dummy.
Cramorant In-Game Stats Listing
| Offense | Endurance | Mobility | Scoring | Support |
|---|---|---|---|---|
|
|
|
|

|

|
Cramorant Skins (Holowear)
| Holowear | |
|---|---|
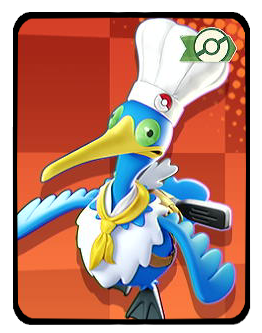 Cook Style Cook Style
|
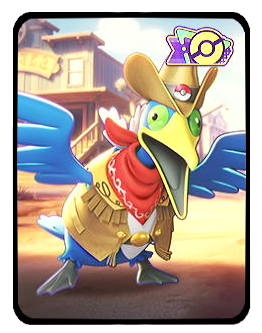 Frontier Style Frontier Style
Zirco Trading:
|
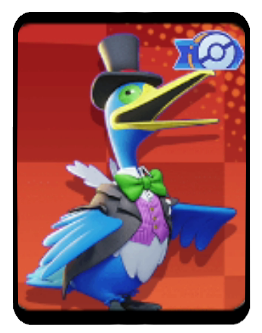 Tuxedo Style Tuxedo Style
|
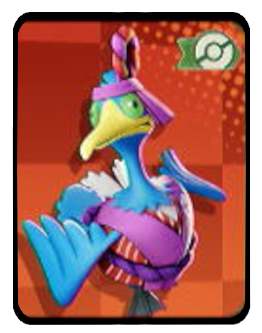 Pokebuki Style Pokebuki Style
Event:
Season 18 Battle Pass |
 Hip-Hop Style Hip-Hop Style
Event:
UNITE Club Membership |
|
Cramorant Character Spotlight
Cramorant Achievements
Surf Achievement
| Surf | |
|---|---|
| Pokemon | Move |
|
Cramorant
|
|
| Mission: In a single battle, hit Pokemon from the opposing team with Surf or Surf+ a total of 5 or more times (5/10/20 battles total) |
|
| Medals & Points | Rewards |
|
|
|
|
|
|
|
|
|
List of Attacker Pokemon Achievements
Pokemon UNITE Related Guides

All Pokemon Guides and Builds
 Aegislash
 Alcremie
 Alolan Ninetales
 Alolan Raichu
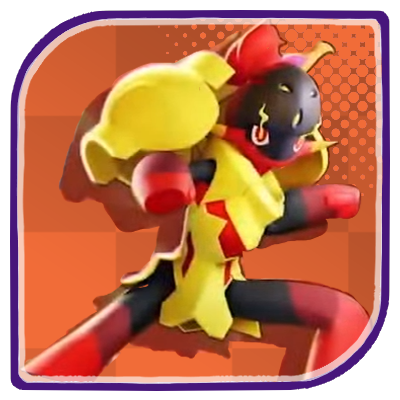 Armarouge
 Azumarill
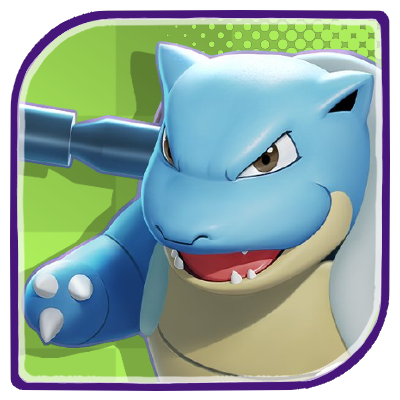 Blastoise
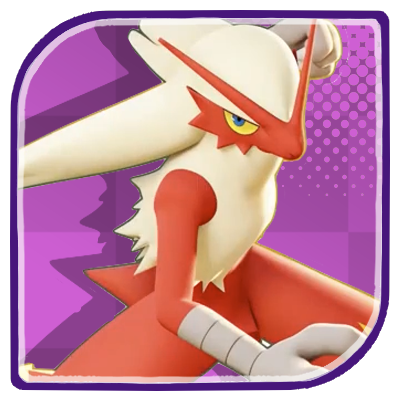 Blaziken
 Blissey
 Buzzwole
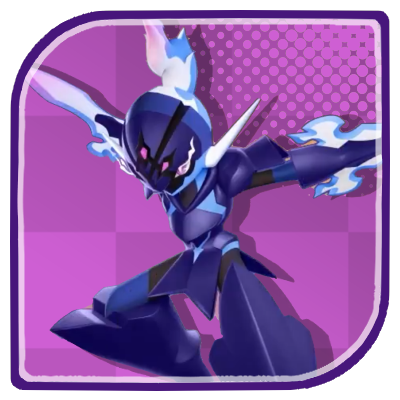 Ceruledge
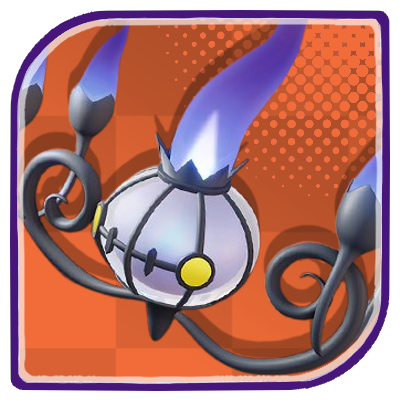 Chandelure
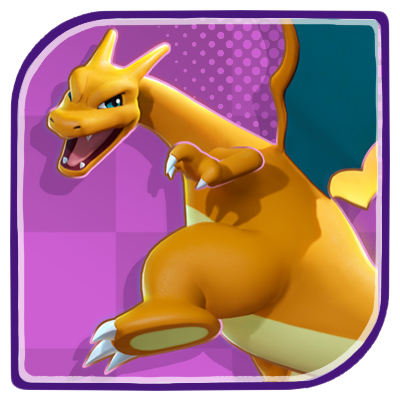 Charizard
 Cinderace
 Clefable
 Comfey
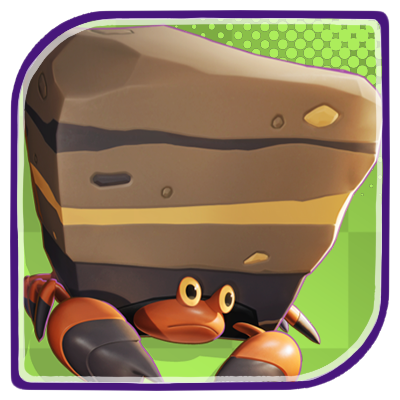 Crustle
 Darkrai
 Decidueye
 Dhelmise
 Dodrio
 Dragapult
 Dragonite
 Duraludon
 Eldegoss
 Empoleon
 Espeon
 Falinks
 Galarian Rapidash
 Garchomp
 Gardevoir
 Gengar
 Glaceon
 Goodra
 Greedent
 Greninja
 Gyarados
 Ho-oh
Ho-oh Hoopa
Hoopa Inteleon
 Lapras
 Latias
 Latios
 Leafeon
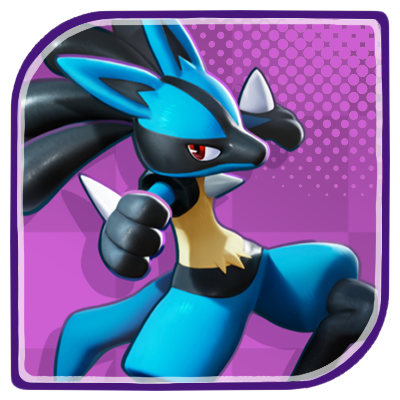 Lucario
 Mamoswine
 Meowscarada
 Meowth
 Metagross
 Mimikyu
 Miraidon
 Moltres
 Pawmot
 Pikachu
 Psyduck
 Scizor
 Sirfetch'd
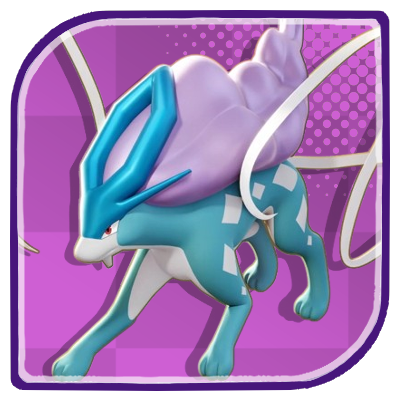 Suicune
 Sylveon
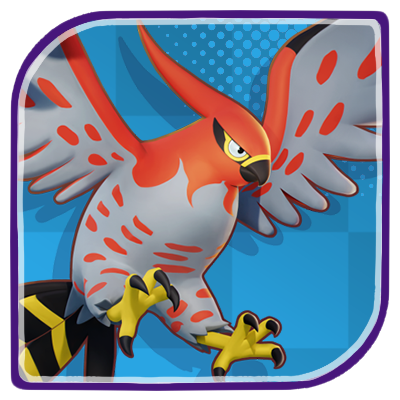 Talonflame
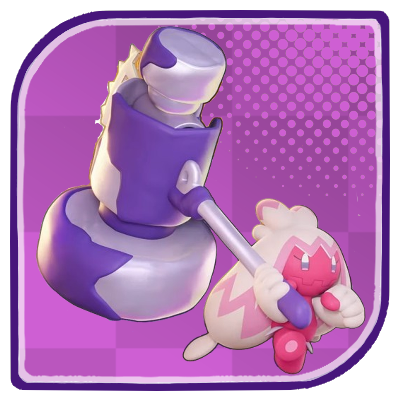 Tinkaton
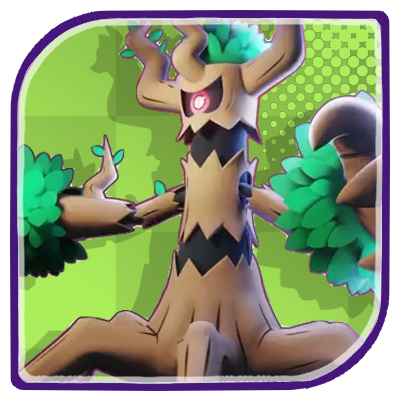 Trevenant
 Tsareena
 Tyranitar
 Umbreon
 Vaporeon
 Wigglytuff
 Zacian
 Zapdos
 Zeraora
Upcoming Pokemon
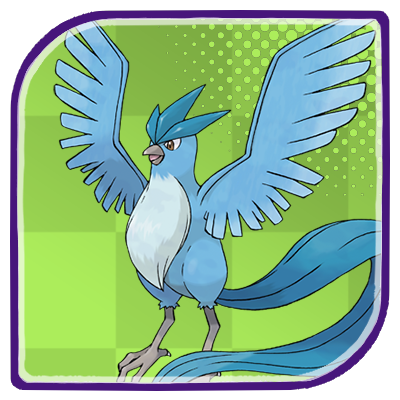 Articuno Articuno(TBA) |
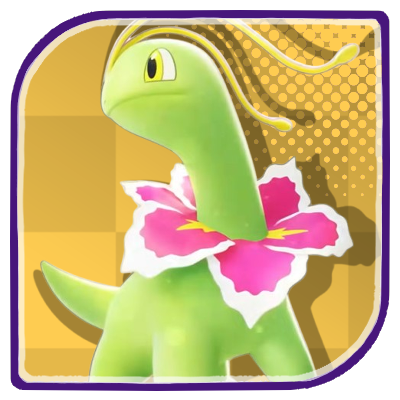 Meganium Meganium(TBA) |
 Typhlosion Typhlosion(TBA) |
 Feraligatr Feraligatr(TBA) |
Mega Evolutions
| Mega Evolved Pokemon | ||
|---|---|---|
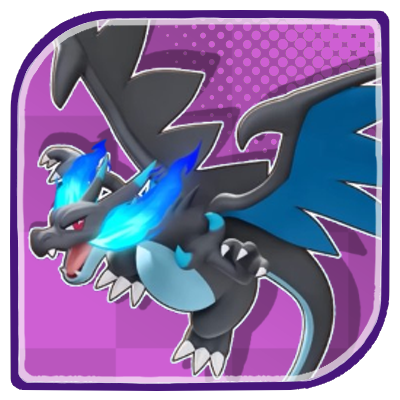 Mega Charizard X Mega Charizard X |
 Mega Charizard Y Mega Charizard Y |
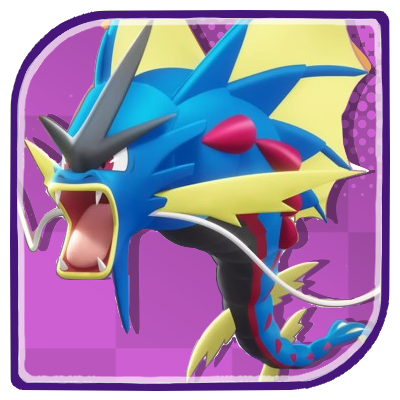 Mega Gyarados Mega Gyarados |
 Mega Lucario Mega Lucario |
 Mega Mewtwo X Mega Mewtwo X |
 Mega Mewtwo Y Mega Mewtwo Y |
Pokemon by Role
| All Pokemon Roles | |||||
|---|---|---|---|---|---|
 Attackers Attackers |
 All-Rounders All-Rounders |
 Defenders Defenders |
|||
 Speedsters Speedsters |
 Supporters Supporters |
||||
Pokemon by Characteristics
| Attack Type | |
|---|---|
 Melee Pokemon Melee Pokemon |
 Ranged Pokemon Ranged Pokemon |
 Physical Pokemon Physical Pokemon |
 Special Pokemon Special Pokemon |
| Stat Rankings | |
 HP Ranking HP Ranking |
 Defense Ranking Defense Ranking |
 Sp. Def. Ranking Sp. Def. Ranking |
 Basic Attack Ranking Basic Attack Ranking |
Comment
Cramorant is amazing! I have a ribbon and play dive air slash
Author
Cramorant Guide: Builds and Best Items
Rankings
- We could not find the message board you were looking for.
Gaming News


![Monster Hunter Stories 3 Review [First Impressions] | Simply Rejuvenating](https://img.game8.co/4438641/2a31b7702bd70e78ec8efd24661dacda.jpeg/thumb)
Popular Games

Genshin Impact Walkthrough & Guides Wiki
Umamusume: Pretty Derby Walkthrough & Guides Wiki
Pokemon Pokopia Walkthrough & Guides Wiki
Honkai: Star Rail Walkthrough & Guides Wiki
Monster Hunter Stories 3: Twisted Reflection Walkthrough & Guides Wiki
Arknights: Endfield Walkthrough & Guides Wiki
Wuthering Waves Walkthrough & Guides Wiki
Zenless Zone Zero Walkthrough & Guides Wiki
Pokemon TCG Pocket (PTCGP) Strategies & Guides Wiki
Monster Hunter Wilds Walkthrough & Guides Wiki


Recommended Games
Diablo 4: Vessel of Hatred Walkthrough & Guides Wiki
Cyberpunk 2077: Ultimate Edition Walkthrough & Guides Wiki
Fire Emblem Heroes (FEH) Walkthrough & Guides Wiki
Yu-Gi-Oh! Master Duel Walkthrough & Guides Wiki
Super Smash Bros. Ultimate Walkthrough & Guides Wiki
Pokemon Brilliant Diamond and Shining Pearl (BDSP) Walkthrough & Guides Wiki
Elden Ring Shadow of the Erdtree Walkthrough & Guides Wiki
Monster Hunter World Walkthrough & Guides Wiki
The Legend of Zelda: Tears of the Kingdom Walkthrough & Guides Wiki
Persona 3 Reload Walkthrough & Guides Wiki


All rights reserved
©2021 Pokémon. ©1995–2021 Nintendo / Creatures Inc. / GAME FREAK inc.
©2021 Tencent.
The copyrights of videos of games used in our content and other intellectual property rights belong to the provider of the game.
The contents we provide on this site were created personally by members of the Game8 editorial department.
We refuse the right to reuse or repost content taken without our permission such as data or images to other sites.
Just got back from the game since quitting on year 2021. And I'm Cramorant main. Damn they nerfed him many times. Suxxx