Machamp Guide: Builds and Best Items
☆ Upcoming: Articuno | Meganium | Typhlosion | Feraligatr
★ Latest News: Zapdos | Moltres | Version 1.22.1.5
☆ Popular Pages: Upcoming Pokemon | Tier List
★ Current Seasons: Ranked S34 | Battle Pass S39
☆ Join Game8's Pokemon Discord Server!
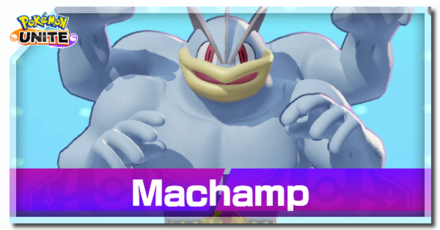
The best guide on how to play Machamp in Pokemon UNITE for Nintendo Switch and Mobile. Check here for the best builds, Held and Battle items, movesets, as well as the latest nerfs, buffs, counters, and more!
List of Contents
Machamp Latest Nerfs & Buffs (12/25)
| Machamp Changes | |
|---|---|
|
Cross Chop + |
• Attack buff per standard attack hit increased from 2 to 3. |
|
Submission |
• Cooldown decreased from 9s to 8s. |
|
Barrage Blow |
• Defense/Sp. Def. buff increased from 250 to 300. |
Stat Updates
| 1.14.1.5 | Defense increased from 98~490 to 100~510 (Level 1~15). Special Defense increased from 64~320 to 70~350 (Level 1~15) |
|---|
Standard Attack
| 1.1.1.4 | Basic Attack: Bug Fixes |
|---|---|
| 1.4.1.2 | After level 7, the health recovery effect of normal attacks is increased. |
Cross Chop
| 1.1.1.4 | Damage dealt to opposing Pokemon decreased from 1322 to 941 (-29%). |
|---|---|
| 1.21.1.7 | Cross Chop +: Attack buff per standard attack hit increased from 2 to 3. |
Close Combat
| 1.1.1.4 | Damage dealt to opposing Pokemon increased from 2353 to 2521 (+7%) . |
|---|---|
| 1.4.1.2 | Move effect strengthened. |
| 1.16.2.6 | Cooldown decreased from 8.5s to 7s. |
Barrage Blow
| 1.2.1.3 | Fixed a bug with the shove effect. Fixed a bug with the move being used on super jump pads. |
|---|---|
| 1.16.2.6 | Punches are now performed immediately upon activation. Defense/Sp. Def. increased from 200 to 250. Movement speed buff increased from 5% to 10%. Attack speed buff decreased from 30% to 25%. Duration decreased from 10s to 8s. |
| 1.21.1.7 | Defense/Sp. Def. buff increased from 250 to 300. |
Submission
| 1.4.1.2 | Effect on Machamp will still apply even if the effects of Submission does not affect the opponent Pokemon. |
|---|---|
| 1.7.1.2 | Cooldown decreased from 11s to 9s (-2s). |
| 1.14.1.5 | Damage increased by 23%. |
| 1.17.1.2 | Attack Speed buff decreased from 50% to 40%. Submission +: Attack Speed buff decreased from 60% to 50%. |
| 1.21.1.7 | Cooldown decreased from 9s to 8s. |
Karate Chop
| 1.4.1.2 | Damage is increased from 658 to 733 (+11%). |
|---|
Dynamic Punch
| 1.4.1.2 | Move range increased. |
|---|---|
| 1.7.1.2 | Damage decreased from 1240 to 896 (-28%). |
| 1.17.1.2 | Dynamic Punch +: Attack decreased from 20% to 12%. |
Machamp Basic Info
| Machamp | ||
|---|---|---|
 |
Role: All-Rounder Attack Type: Melee Damage Type: Physical Difficulty: Intermediate |
|
| "Machamp is a Pokémon that specializes in melee combat, powered by its strong fighting moves." | ||
Machamp Best Lanes

|

|

|
Tips & Strategies for Every Lane
Strengths and Weaknesses
| Strengths | Weaknesses |
|---|---|
| ✔︎ Highly mobile. ✔︎ Can ignore hindrances with unstoppable status effect. ✔︎ Can get stronger with various buffs. |
✖︎ Gets strong quite late. |
Best Builds for Machamp
| Machamp Builds | |
|---|---|
| - | |
Critical-Hit Build
Critical-Hit Build

|
Moveset | Held Items | |||
|---|---|---|---|---|---|
| Battle Item | |||||
| Stats from Items (Lv. 40) | Recommended Lane | ||||
|
Attack: +38.5 Critical-Hit Rate: +9.3% Critical-Hit Damage: +14% |
|
||||
| Emblem Color Combination | Target Emblem Stats | ||||
|
|
Positive Stats: • HP • Attack • Critical-Hit Rate Free Negative Stats: • Sp. Atk • Defense • Sp. Def |
||||
| Note: The emblem color and stats here are suggestions only. The builds are still viable even without the suggested emblems. |
|||||
Ciritical-Hit Build Explanation
This build is centered on utilizing the increased critical-hit rate effect of Cross Chop to burst down targets. Dynamic Punch or Submission can be used as Machamp's other move.
- Razor Claw gives Machamp a small amount of critical-hit rate that can stack on top of Cross Chop's increased critical-hit rate effect. It also improves Machamp's attacks through increased damage and a slow effect whenever it uses a move.
- Scope Lens further increases Machamp's critical-hit rate on top of Razor Claw and Cross Chop's own increased critical-hit rate effect. It also increases Machamp's critical-hit damage, particularly for Cross Chop.
- Attack Weight provides Machamp with a large Attack stat boost, increasing its damage output.
- Muscle Band can be a replacement for Attack Weight, especially when going for Submission instead of Dynamic Punch, improving Machamp's attacks through increased damage and attack speed.
- Eject Button gives Machamp a quick repositioning tool for various situations.
- X Attack can also work with the build, giving Machamp more damage.
- The build's Boost Emblem loadout should consist of 6 Brown Emblems for more damage and 6 White Emblems additional HP. This can be achieved by having at least two (2) Emblems that are both Brown and White.
- Equip Emblems that improve Attack, Critical-Hit Rate, or HP to balance out Machamp's offense and defense.
- Sp. Atk., Sp. Def., and Defense can be freely traded for the other stats.
Critical-Hit Build Damage Test
| Items (@Lvl 30) |
Cross Chop (@ Lvl 15) Cross Chop (Critical-Hit) (@ Lvl 15) |
Dynamic Punch (@ Lvl 15) Submission (@ Lvl 15) |
|---|---|---|
| Razor Claw + Scope Lens + Attack Weight (6 stacks) |
1044 2213 |
1040 1826 |
Since the build is centered on Cross Chop, equipping items that will maximize its damage is ideal item combination.
Out of all the item combinations, Razor Claw, Scope Lens, and Attack Weight will be the best for the build. Although the item combination did not generate the highest results, having the increased critical-hit rate from Razor Claw and Scope Lens better suits the build's goal.
As for alternatives, replacing Attack Weight with Muscle Band would be the best choice. The bonus attack damage works particularly well with Submission since Machamp's attack damage is applied when it grabs a target, dealing significantly more damage.
The damage tests are conducted using the Training Dummy in Practice Mode. The results are taken from the Total Damage data.
| Note: The numbers in bold are the highest result for a specific test. |
| Items (@Lvl 30) | Cross Chop (@ Lvl 15) Cross Chop (Critical-Hit) (@ Lvl 15) | Dynamic Punch (@ Lvl 15) Submission (@ Lvl 15) |
|---|---|---|
| Muscle Band + Razor Claw + Scope Lens | 970 2056 | 936 2372 |
| Muscle Band + Razor Claw + Attack Weight (6 stacks) | 1059 2118 | 1060 2581 |
| Muscle Band + Razor Claw + Weakness Policy (4 stacks) | 1046 2092 | 1028 2551 |
| Muscle Band + Scope Lens + Attack Weight (6 stacks) | 1044 2213 | 1040 2234 |
| Muscle Band + Scope Lens + Weakness Policy (4 stacks) | 1030 2183 | 1004 2208 |
| Muscle Band + Attack Weight (6 stacks) + Weakness Policy (4 stacks) | 1128 2256 | 1140 2390 |
| Razor Claw + Scope Lens + Attack Weight (6 stacks) | 1044 2213 | 1040 1826 |
| Razor Claw + Scope Lens + Weakness Policy (4 stacks) | 1030 2183 | 1004 1793 |
| Razor Claw + Attack Weight (6 stacks) + Weakness Policy (4 stacks) | 1128 2256 | 1140 2025 |
| Scope Lens + Attack Weight (6 stacks) + Weakness Policy (4 stacks) | 1112 2357 | 1116 1642 |
The tests above does not use any Emblems yet so it will scale higher if equipped.
Brawler Build
| Brawler Build | Moveset | Held Items | |||
|---|---|---|---|---|---|
| Battle Item | |||||
| Stats from Items (Lv. 40) | Recommended Lane | ||||
|
Attack: +38.5 Defense: +35 Sp. Def: +35 Critical-Hit Rate: +2.3% |
|
||||
| Emblem Color Combination | Target Emblem Stats | ||||
|
|
Positive Stats: • HP • Attack Free Negative Stats: • Sp. Atk • Defense • Sp. Def |
||||
| Note: The emblem color and stats here are suggestions only. The builds are still viable even without the suggested emblems. |
|||||
Brawler Build Explanation
This build is centered on stunning opponents with Dynamic Punch, then following up with Close Combat, which will deal more damage to stunned targets. It also utilizes the Attack stat and movement speed increase from Dynamic Punch to improve Machamp's brawling capabilities.
- Razor Claw synergizes well with Dynamic Punch's Attack stat increase effect, allowing Machamp's attacks to deal more damage after using the move.
- Attack Weight provides Machamp with a large Attack stat boost, increasing the Pokemon's overall damage output.
- Focus Band improves Machamp's durability through increased defenses and acts as a survivability tool, making the Pokemon tougher to take down while brawling.
- Muscle Band can be a replacement for Razor Claw, improving Machamp's attacks via increased damage and attack speed.
- For a full-on damage build, Weakness Policy can replace Focus Band, giving Machamp more damage in exchange for durability.
- Eject Button gives Machamp a versatile mobility tool to use for various purposes.
- X Attack can also work with the build, giving Machamp even more damage.
- The build's Boost Emblem loadout should consist of 6 Brown Emblems for more damage and 6 White Emblems additional HP. This can be achieved by having at least two (2) Emblems that are both Brown and White.
- Equip Emblems that improve Attack or HP to balance out Machamp's offense and defense.
- Sp. Atk., Sp. Def., and Defense can be freely traded for the other stats.
Brawler Build Damage Test
| Items (@Lvl 30) |
Close Combat (@ Lvl 15) Dynamic Punch (@ Lvl 15) |
Standard Attack (@ Lvl 15) Boosted Attack (@ Lvl 15) |
|---|---|---|
| Razor Claw (Include effect) + Attack Weight (6 stacks) |
3375 1040 |
896 1188 |
Since the build is centered on Machamp's brawling capabilities, equipping items that will maximize its overall damage output is the ideal item combination. Focus Band is a core item for the build, leaving only two (2) items for consideration.
Out of all the item combinations, Razor Claw and Attack Weight will be the best for the build. It generated the second highest move damage while maintaining a decent attack damage. Moreover, Dynamic Punch's Attack stat increase effect goes well with Razor Claw's bonus damage effect.
As for alternatives, replacing Razor Claw with Muscle Band would be the best option. The item combination has the same move damage results as the recommended build but with better attack damage.
For a full-on damage build, replacing Focus Band with Weakness Policy would be the ideal choice. The item combination will have the highest possible damage for all tests.
The damage tests are conducted using the Training Dummy in Practice Mode. The results are taken from the Total Damage data.
| Note: The numbers in bold are the highest result for a specific test. |
| Items (@Lvl 30) | Close Combat (@ Lvl 15) Dynamic Punch (@ Lvl 15) | Standard Attack (@ Lvl 15) Boosted Attack (@ Lvl 15) |
|---|---|---|
| Muscle Band + Razor Claw (Include effect) | 3022 936 | 1143 1397 |
| Muscle Band + Attack Weight (6 stacks) | 3375 1040 | 944 1236 |
| Muscle Band + Weakness Policy (4 stacks) | 3310 1004 | 930 1215 |
| Razor Claw (Include effect) + Attack Weight (6 stacks) | 3375 1040 | 896 1188 |
| Razor Claw (Include effect) + Weakness Policy (4 stacks) | 3310 1004 | 875 1160 |
| Attack Weight (6 stacks) + Weakness Policy (4 stacks) | 3703 1116 | 654 981 |
The tests above does not use any Emblems yet so it will scale higher if equipped.
Machamp Best Items & Moveset
Best Held Items
| Item | Explanation |
|---|---|
 Attack Weight Attack Weight
|
Attack Weight provides Machamp with a large Attack stat boost, increasing its overall damage output. |
 Focus Band Focus Band
|
Focus Band is a good alternative item for dealing with burst-type enemies, giving Machamp breathing room to retaliate. |
 Scope Lens Scope Lens
|
Scope Lens maximizes Machamp's critical-hit rate and critical-hit damage output, which also works with its moves. |
 Muscle Band Muscle Band
|
Muscle Band is good for improving Machamp's basic attacks, giving it increased attack speed and percentage-based attacks. |
 Razor Claw Razor Claw
|
Razor Claw provides a small critical-hit increase which improves Machamp's basic attack damage and gives its basic attacks a movement slow effect after using moves. |
 Weakness Policy Weakness Policy
|
Weakness Policy works well with Machamp's frontline gameplay, increasing its damage output as it takes hits from opponents. |
Best Battle Items
| Item | Explanation |
|---|---|
 Eject Button Eject Button
|
Eject Button gives Machamp more mobility to set up more team plays, extends its chases, and improves the chances of escaping sticky situations. |
 X Attack X Attack
|
X Attack gives Machamp more damage and improves its attack speed. |
Best Moveset
| Move | Explanation |
|---|---|
 Dynamic Punch Dynamic Punch
|
Dynamic Punch gives Machamp damage, mobility, and a crowd control tool. It's perfect for initiating fights. |
 Cross Chop Cross Chop
|
Cross Chop allows Machamp to burst down targets with one strike thanks to its critical-hit mechanic. It also functions as a mobility tool. |
This moveset gives Machamp incredible mobility, burst damage, and teamfight capabilities. Dynamic Punch is great for initiating and controlling fights since Machamp lunges at a direction, then damages and stuns opponents in the area. Cross Chop has a chance to deal a critical-hit to targets with one strike, allowing Machamp to burst down multiple opponents. It's also useful for chasing opponents or as a general mobility tool since it's also dash move.
Dynamic Punch and Submission are Machamp's disabling moves, but they differ in how they function and the buffs they give.
Dynamic Punch works as a dash move and affects multiple targets. It also increases Machamp's Attack stat and movement speed. Submission initially works as a buff move, giving Machamp immunity from hindrances and increased movement speed. When Machamp attacks a target while the move is active, the Pokemon grabs a target and stuns it. It also increases Machamp's critical-hit rate and attack speed once the move ends.
Cross Chop and Close Combat are Machamp's primary damage moves. Although Cross Chop deals less damage intially, it does have a chance to deal critical-hit damage, which deals significantly more. It also gives Machamp a mobility tool since it's a dash move. On the other hand, Close Combat deals more damage in a more consistent manner, but it's quite harder to use effectively since Machamp needs to aim the move manually.
Which Moveset Do You Think Is Best For Machamp?
Let us know why in the comments!
Previous Poll Result
How to Play Machamp
| Jump to Section | |
|---|---|
Force Early-game Engagements
Machamp has considerable damage even in the early game. A quick Karate Chop together with Bulk Up can run down enemies. Try to apply pressure on your enemies and take fights early on, but be careful not to overextend.
Pair Up Moves for Varied Playstyles
Machamp's moves grant it various buffs and immunities, giving the Pokemon a certain advantage over its targets. Pairing certain moves gives Machamp a variety of playstyles to work with.
Pair Cross Chop with Dynamic Punch for Stronger Attacks
Cross Chop and Dynamic Punch can improve Machamp's basic attacks via increased critical-hit rate, Attack, attack speed, and movement speed. Additionally, this move combination gives Machamp incredible mobility, allowing you to easily dive targets.
Pair Close Combat with Submission for Easy Lock Downs
Close Combat and Submission give you a great way to lock down target, turning you into an initiator. Use Submission first to gain immunity from hindrances as you approach and grab your target. Then follow up with Close Combat to deal heavy damage.
Pair Close Combat with Dynamic Punch for a Balanced Kit
Close Combat and Dynamic Punch is an all-purpose move combination, giving you mobility, damage, and a stun. It works decently for almost all scenarios.
Flank Enemies
Although Machamp can ignore stuns and other negative status effects, it's still prone to high burst damage from Attackers since it isn't as durable as Defenders. Given this, it's best to approach enemies from the grass or flank to reach your targets and minimize the damage you take.
Use Submission and Barrage Blow Buff Together
Using the buffs from Submission and Barrage Blow grant you a massive boost in damage and attack speed. Don't use Barrage Blow just for the finisher since it has a lengthy buff so use it at the beginning of the fight.
Progression and Leveling Guide
Top and Bottom Guide
Level 1 to 5
- Quickly clear out the Bunnelbies in the lane.
- Keep farming wild Pokemon in the lane to reach level 5 and learn your first move.
- At bottom lane, prioritize taking Indeedees for more exp.
Level 6 to 9
- Keep hunting Wild Pokemon to gain more EXP from farming Altaria and Swablus.
- Once you reach level 7, learn your second move.
- Help allies secure Regice, Registeel, or Regirock when it spawns, otherwise secure Regieleki.
- Upon reaching level 9, learn your Unite Move.
Level 10+
- Stick with allies to hunt targets, secure objectives, and push lanes.
- Reach at least level 13 or max level if possible before or when Groudon spawns for a fully-upgraded moveset.
- Make sure that your Unite Move is available when Groudon spawns.
- Help teammates win a teamfight and secure Groudon.
Machamp Combos
Early Game Combo
| Early Game Combo | |
|---|---|
 |
|
Bulk Up
►
Karate Chop
►
Standard Attack
~ |
|
| This is Machamp's early game combo. Take advantage of the protection and movement speed you get from Bulk Up to get close to the target. Once you are within range, Use Karate Chop to deal damage. Proceed to pressure the target with Standard Attacks. | |
High Crit Beatdown Combo
| High Crit Beatdown Combo | |
|---|---|
|
|
Submission
►
Cross Chop
►
Standard Attack
~ |
|
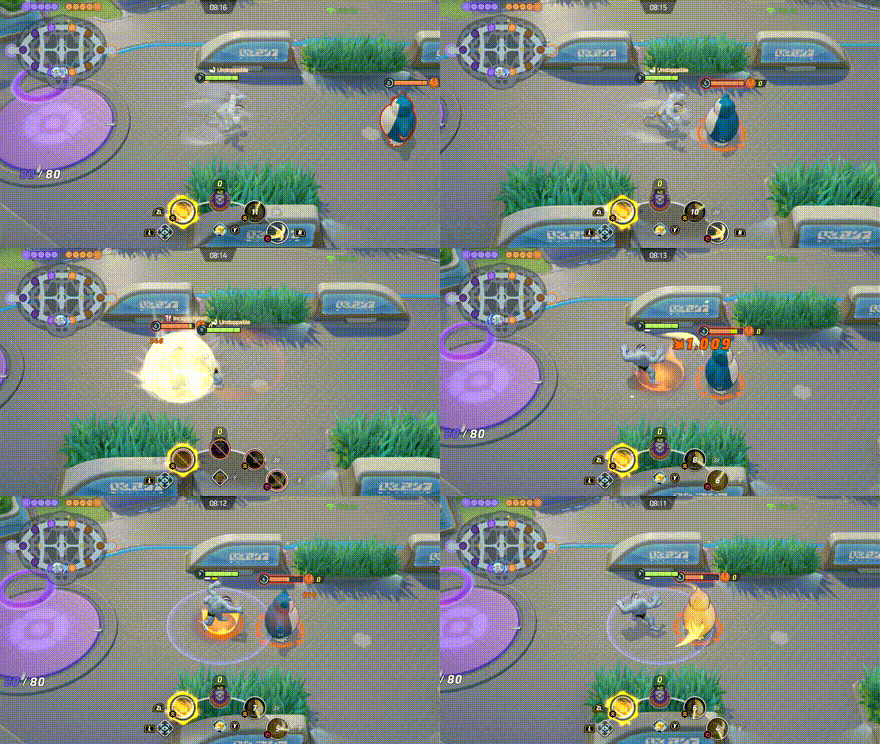
| This is your single target burst combo that is great for chasing down opponents and putting them in a bad spot. Start by activating Submission to get a boost in movement speed and locate your target. Once you get close enough, dealing damage with a Standard Attack will make Machamp carry the target and incapacitate them, allowing you to follow up with a Cross Chop. When Cross Chop lands, Machamp's critical hit rate increases, which can help you burst down the target faster. | |
Barrage Blow Combos
This set of combos focuses on setting up Barrage Blow to pin down targets.
Ultimate Thousand Punches Combo
| Ultimate Thousand Punches Combo | |
|---|---|
 |
|
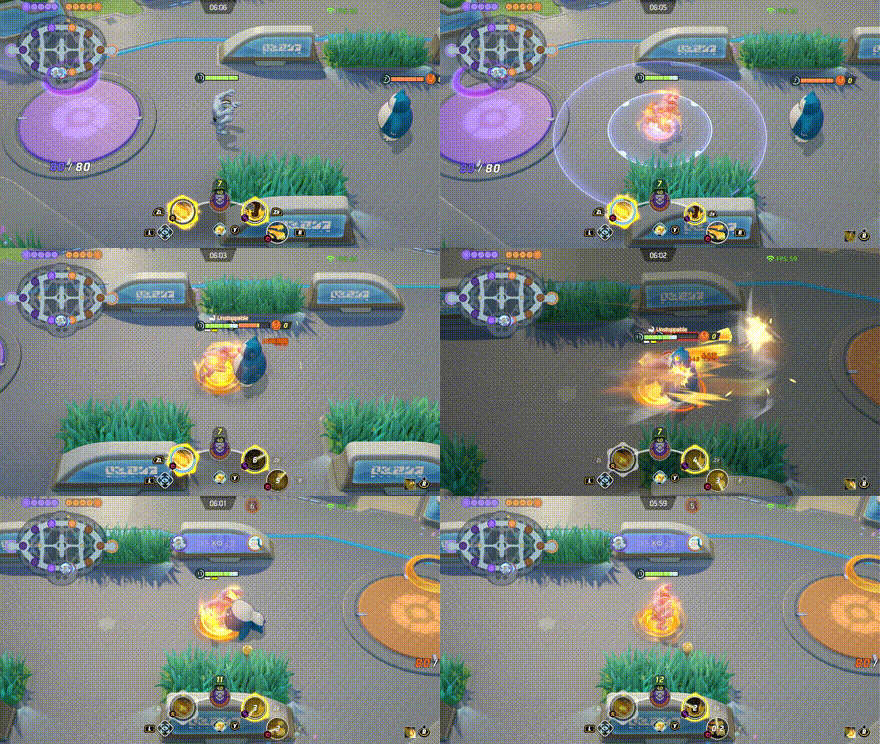
| Start by activating Barrage Blow and seek out a target. Initiate the fight with Dynamic Punch and quickly follow up with a Close Combat while they are stunned. After that, use Barrage Blow's second activation to deal more punches and knock the target down. | |
Ultimate Displacer Combo
| Ultimate Displacer Combo | |
|---|---|
 |
|
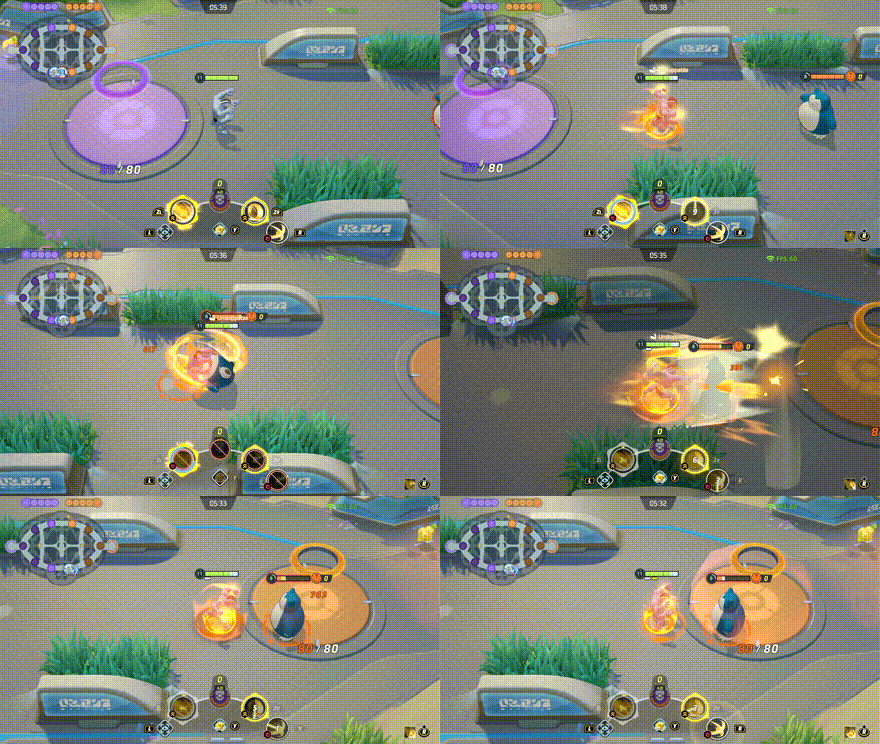
| Start by activating Barrage Blow and Submission. Once you have your sights on a target, quickly get close to them with Cross Chop. After that, a Standard Attack once to incapacitate them with Submission's effect. When the target is lined up, you can then activate Barrage Blow's second activation. | |
Matchups & Counters for Machamp
Machamp Matchups
| Matchup Notes | ||
|---|---|---|
| 1. The chart is based on our own experience playing Machamp. 2. Pokemon within each tier are unordered 3. Any Pokemon not shown here are still under investigation. |
||
Hard Counter Immunity Piercing Moves
Since Machamp can't usually be stopped by normal means because of its buffs and immunities, there are certain Pokemon that have moves that can ignore immunities.
Best Counters
| Pokemon | Explanation |
|---|---|
 Slowbro Slowbro
|
Rating: ★★★★★ • Can ignore Machamp's immunities and completely disable it using Slowbeam. • Has high durability and can nullify Machamp's damage using Amnesia. • Can control Machamp with Surf, Telekinesis, and Scald. |
 Snorlax Snorlax
|
Rating: ★★★★★ • Can control Machamp's movements and counter Submission using Block. • Can recover HP quickly using Power Nap. |
 Alolan Ninetales Alolan Ninetales
|
Rating: ★★★★ • Can kite, freeze, and deal considerable Machamp using Avalanche and Blizzard. |
Even Matchups for Machamp
Machamp can utilize its buffs and immunities to get on top of these Pokemon, ignore disables, and beat them down with attacks.
Close the Gap
| Ranged, Fragile Pokemon with High Damage |
|---|
| How to Beat |
|
• These Pokemon prefer to keep their distance from opponents when fighting have high damage potential that can take out Machamp quickly. However, they are fragile and can't win in a brawl against Machamp. • Quickly close the gap with Dynamic Punch, Submission, or Cross Chop, them beat them down with attacks. • Alternatively, Machamp can charge them down with Barrage Blow. |
Utilize Buffs
| All-Rounders |
|---|
| How to Beat |
|
• Much like Machamp, these Pokemon excel in close combat and rely mostly on their attacks or combos to deal damage. However, Machamp's buffs can give it an advantage against them. • Use Submission or Dynamic Punch to disable them, then utilize its attack buff to beat them down with attacks. • Use Cross Chop or Close Combat to quickly deal a ton of damage. • If necessary, use Barrage Blow to finish them off. |
Disable Them When They Approach
| High-mobility Pokemon with Burst Damage |
|---|
| How to Beat |
|
• These Pokemon are incredibly agile and deal high burst damage. However, they become vulnerable when they miss their burst damage attempt or get disabled. • Use Dynamic Punch or Submission when they approach to prevent them from setting up their moves. • Use Cross Chop or Close Combat to quickly deal a ton of damage. • Alternatively, Machamp can also use Dynamic Punch, Submission, or Cross Chop to dodge their burst attempt, then quickly retaliate with attacks. |
Group Up with Allies
| Highly Durable Pokemon |
|---|
| How to Beat |
|
• These Pokemon are extremely durable, making them difficult for Machamp to take them down alone. With that, it's best to group up with allies to bring them down with the help of Machamp. • Use Dynamic Punch or Submission to lock them down and set up for Machamp's allies. • Use Cross Chop or Close Combat to quickly deplete their HP. |
Utilize Their Numbers
| Supporters |
|---|
| How to Beat |
|
• These Pokemon usually stick with their allies and rarely venture alone. Although they don't necessarily pose a threat to Machamp, their support capabilities makes them valuable during fights. • Take advantage of them being in close proximity with their allies by using Dynamic Punch, Cross Chop or Close Combat, and Barrage Blow. |
Easy Matchups for Machamp
Easy matchups are Pokemon that have low durability and mobility, and have little to no means of stopping Machamp's aggression.
Close the Gap
| Ranged, Fragile Pokemon with High Damage |
|---|
| How to Beat |
|
• These Pokemon prefer to keep their distance from opponents when fighting have high damage potential that can take out Machamp quickly. However, they are fragile and can't win in a brawl against Machamp. • Quickly close the gap with Dynamic Punch, Submission, or Cross Chop, them beat them down with attacks. • Alternatively, Machamp can charge them down with Barrage Blow. |
Disable Them When They Approach
| High-mobility Pokemon with Burst Damage |
|---|
| How to Beat |
|
• These Pokemon are incredibly agile and deal high burst damage. However, they become vulnerable when they miss their burst damage attempt or get disabled. • Use Dynamic Punch or Submission when they approach to prevent them from setting up their moves. • Use Cross Chop or Close Combat to quickly deal a ton of damage. • Alternatively, Machamp can also use Dynamic Punch, Submission, or Cross Chop to dodge their burst attempt, then quickly retaliate with attacks. |
Utilize Their Numbers
| Supporters |
|---|
| How to Beat |
|
• These Pokemon usually stick with their allies and rarely venture alone. Although they don't necessarily pose a threat to Machamp, their support capabilities makes them valuable during fights. • Take advantage of them being in close proximity with their allies by using Dynamic Punch, Cross Chop or Close Combat, and Barrage Blow. |
Best Teammates for Machamp
| Pokemon | Explanation |
|---|---|
 Alolan Ninetales Alolan Ninetales
 Pikachu Pikachu
|
Aggressive Stallers |
| These Pokemon have powerful burst attacks that are capable of disrupting enemies. When partnered up with these Pokemon, Machamp can easily take down enemies and push lanes. | |
 Mr. Mime Mr. Mime
 Sableye Sableye
|
Stuns and Debuffs |
| These Pokemon have the means of inflicting debuffs and shutting down targets with their moves. This helps Machamp dominate the lane quickly and have enough time to steal enemy camps. | |
 Slowbro Slowbro
 Snorlax Snorlax
|
Tanky Disablers |
| These Pokemon can lead the charge, soak up damage, and help Machamp setup its attacks thanks to their disabling moves. | |
 Gengar Gengar
 Zoroark Zoroark
|
High Burst Damagers |
| These Pokemon help contribute damage through pinning down enemies with combos and burst attacks. While it's still recommended to go with either a Defender or Supporter ally, Speedsters are a huge help when trying to dominate lanes as early as possible. | |
 Tsareena Tsareena
 Urshifu Urshifu
|
Hard-hitting Initiators |
| These Pokemon are very dependable allies as they have means to buff or sustain themselves. Whether it's securing objectives or pushing lanes, Tsareena and Urshifu are built to initiate clashes, stun enemies, and create openings for their teammates. |
Looking for teammates to synergize with you? Head over to our Friend Request Board to find other trainers to join you in your grind or just to hang out with!
Machamp Moves
Move Slot 1 (R)
 Karate Chop Karate Chop
(Lv. 1 or 3) |
Move Type: Melee Damage Type: Physical Cooldown: 6s Starting Damage: 678 Final Damage: 733 |
|---|---|
| Attacks opposing Pokemon with a sharp chop. | |
 Cross Chop Cross Chop
(Lv. 7) Upgrade Lv. 11 |
Move Type: Dash Damage Type: Physical Cooldown: 6s Starting Damage: 588 Final Damage: 941 |
|
Has the user deliver a double chop with forearms crossed while dashing forward. This also increases the user's critical-hit rate.
Upgrade: Increases Attack with each basic attack, up to a set max. |
|
 Close Combat Close Combat
(Lv. 7) Upgrade Lv. 11 |
Move Type: Melee Damage Type: Physical Cooldown: 7s Starting Damage: 1360 Basic punch: 194 x 4, Final punch: 584 Final Damage: 2521 Basic punch: 360 x 4, Final punch: 1081 |
|
Unleashes a series of punches in the designated direction, dealing increased damage with the last punch. The user can move while using this move and becomes immune to hindrances.
Upgrade: Deals increased damage to Pokemon that are afflicted by a status condition. |
|
Move Slot 2 (ZR)
 Bulk Up Bulk Up
(Lv. 1 or 3) |
Move Type: Buff Damage Type: Status Cooldown: 10s Starting Damage: N/A Final Damage: N/A |
|---|---|
| After using this move, the user becomes immune to hindrances for a short time, its movement speed and Attack are increased, and its basic attack speed is increased. The user's next basic attack also becomes a boosted attack. | |
 Submission Submission
(Lv. 5) Upgrade Lv. 13 |
Move Type: Hindrance Damage Type: Status Cooldown: 8s Starting Damage: 922 Grab damage: 461, Slam damage: 461 Final Damage: 1632 Grab damage: 816, Slam damage: 816 |
|
Increases the user's movement speed and makes it immune to hindrances. When the user's next basic attack hits, the attack deals increased damage and slams the opposing Pokemon onto the ground, leaving it unable to act. Once this move ends, the user's critical-hit rate and basic attack speed are increased for a short time.
Upgrade: Further increases critical-hit rate and increases basic attack speed. |
|
 Dynamic Punch Dynamic Punch
(Lv. 5) Upgrade Lv. 13 |
Move Type: Dash Damage Type: Physical Cooldown: 9s Starting Damage: 476 119 x 4 Final Damage: 896 224 x 4 |
|
Has the user jump to the designated location, dealing damage to opposing Pokemon in the area of effect and leaving them unable to act when it hits. For a short time after using this move, the user becomes immune to hindrances and its movement speed and Attack are increased. The user's next basic attack also becomes a boosted attack.
Upgrade: Further increases Attack and movement speed. |
|
Unite Moves (ZL)
 Barrage Blow Barrage Blow
(Lv. 9) |
Move Type: Buff Damage Type: Status Cooldown: 133s Starting Damage: 3912 Basic punch: 489 x 6, Final punch: 978 Final Damage: 6000 Basic punch: 750 x 6, Final punch: 1500 |
|---|---|
| Increases Movement Speed, attack, Defense, Sp. Defense for a short duration. If used again, unleashes a combo attack, dealing damage to opposing Pokemon in the area of effect and shoving them. The final blow deals an especially large amount of damage. | |
Standard Attack
|
|
Becomes a boosted attack with every third attack, dealing increased damage and slowing Movement Speed of the target when it hits. |
|---|
Ability (Passive)
 Guts Guts
|
All Evolution Stages
Increases the Pokemon's Attack when the Pokemon is afflicted by a status condition. |
|---|
Machamp Stats & Evolutions
Machamp Evolutions
| 1st Evolution | 2nd Evolution | Final Evolution |
|---|---|---|
 Machop Machop(Lv. 1) |
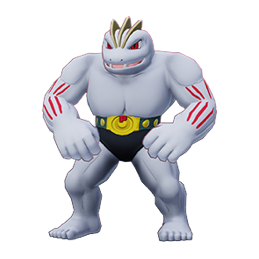 Machoke Machoke(Lv. 5) |
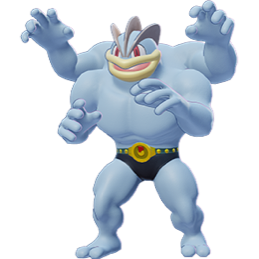 Machamp Machamp(Lv. 9) |
Machamp Stats
| Level | HP | Defense | Special Defense | Attack Damage |
|---|---|---|---|---|
| 1 | 3250 | 100 | 70 | 165 |
| 2 | 3313 | 106 | 74 | 170 |
| 3 | 3389 | 113 | 79 | 175 |
| 4 | 3480 | 121 | 85 | 181 |
| 5 | 3809 | 152 | 106 | 205 |
| 6 | 3940 | 164 | 114 | 214 |
| 7 | 4097 | 179 | 124 | 225 |
| 8 | 4286 | 197 | 136 | 239 |
| 9 | 4953 | 259 | 178 | 287 |
| 10 | 5225 | 284 | 195 | 306 |
| 11 | 5551 | 314 | 216 | 329 |
| 12 | 5942 | 350 | 241 | 357 |
| 13 | 6411 | 394 | 271 | 391 |
| 14 | 6974 | 447 | 307 | 431 |
| 15 | 7650 | 510 | 350 | 479 |
Attack Damage is the damage of the Basic Attack as tested against the Training Dummy.
Machamp In-Game Stat Listings
| Offense | Endurance | Mobility | Scoring | Support |
|---|---|---|---|---|

|

|

|

|

|
Machamp Skins (Holowear)
| Holowear | |
|---|---|
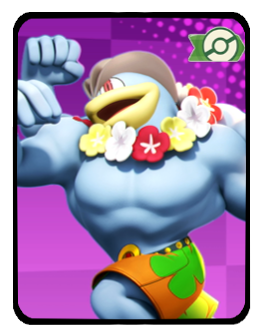 Beach Style Beach Style
|
 Adept Style Adept Style
Zirco Trading:
|
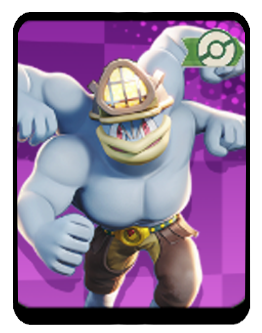 Excavation Style Excavation Style
Event:
Badge Exchange |
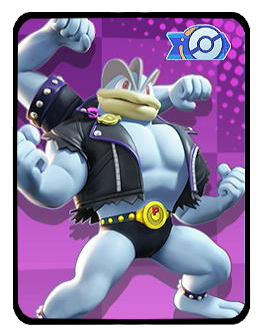 Punk Style Punk Style
Zirco Trading:
|
 Tuxedo Style Tuxedo Style
Event:
UNITE Club Membership |
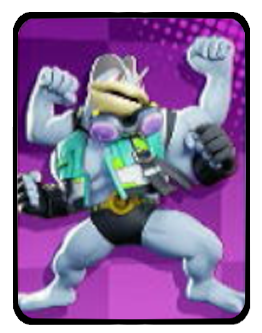 Neo Street Style Neo Street Style
Event:
Cumulative Aeos Gems Bonus |
Machamp Character Spotlight
Machamp Achievements
Dynamic Punch Achievement
| Dynamic Punch | |
|---|---|
| Pokemon | Move |
 Machamp Machamp
|
|
| Mission: Hit 2 or more Pokemon from the opposing team at the same time with Dynamic Punch or Dynamic Punch+ (10/20/40 times total) |
|
| Medals & Points | Rewards |
|
|
|
|
|
|
|
|
|
List of All-Rounder Pokemon Achievements
Pokemon UNITE Related Guides

All Pokemon Guides and Builds
Upcoming Pokemon
 Articuno Articuno(TBA) |
 Meganium Meganium(TBA) |
 Typhlosion Typhlosion(TBA) |
 Feraligatr Feraligatr(TBA) |
Mega Evolutions
| Mega Evolved Pokemon | ||
|---|---|---|
 Mega Charizard X Mega Charizard X |
 Mega Charizard Y Mega Charizard Y |
 Mega Gyarados Mega Gyarados |
 Mega Lucario Mega Lucario |
 Mega Mewtwo X Mega Mewtwo X |
 Mega Mewtwo Y Mega Mewtwo Y |
Pokemon by Role
| All Pokemon Roles | |||||
|---|---|---|---|---|---|
 Attackers Attackers |
 All-Rounders All-Rounders |
 Defenders Defenders |
|||
 Speedsters Speedsters |
 Supporters Supporters |
||||
Pokemon by Characteristics
| Attack Type | |
|---|---|
 Melee Pokemon Melee Pokemon |
 Ranged Pokemon Ranged Pokemon |
 Physical Pokemon Physical Pokemon |
 Special Pokemon Special Pokemon |
| Stat Rankings | |
 HP Ranking HP Ranking |
 Defense Ranking Defense Ranking |
 Sp. Def. Ranking Sp. Def. Ranking |
 Basic Attack Ranking Basic Attack Ranking |
Comment
Submison can make enemy get flinch and close combat is build so mych damage
Author
Machamp Guide: Builds and Best Items
Rankings
Gaming News
Popular Games

Genshin Impact Walkthrough & Guides Wiki

Umamusume: Pretty Derby Walkthrough & Guides Wiki

Pokemon Pokopia Walkthrough & Guides Wiki

Honkai: Star Rail Walkthrough & Guides Wiki

Monster Hunter Stories 3: Twisted Reflection Walkthrough & Guides Wiki

Arknights: Endfield Walkthrough & Guides Wiki

Wuthering Waves Walkthrough & Guides Wiki

Zenless Zone Zero Walkthrough & Guides Wiki

Pokemon TCG Pocket (PTCGP) Strategies & Guides Wiki

Monster Hunter Wilds Walkthrough & Guides Wiki
Recommended Games

Diablo 4: Vessel of Hatred Walkthrough & Guides Wiki

Cyberpunk 2077: Ultimate Edition Walkthrough & Guides Wiki

Fire Emblem Heroes (FEH) Walkthrough & Guides Wiki

Yu-Gi-Oh! Master Duel Walkthrough & Guides Wiki

Super Smash Bros. Ultimate Walkthrough & Guides Wiki

Pokemon Brilliant Diamond and Shining Pearl (BDSP) Walkthrough & Guides Wiki

Elden Ring Shadow of the Erdtree Walkthrough & Guides Wiki

Monster Hunter World Walkthrough & Guides Wiki

The Legend of Zelda: Tears of the Kingdom Walkthrough & Guides Wiki

Persona 3 Reload Walkthrough & Guides Wiki
All rights reserved
©2021 Pokémon. ©1995–2021 Nintendo / Creatures Inc. / GAME FREAK inc.
©2021 Tencent.
The copyrights of videos of games used in our content and other intellectual property rights belong to the provider of the game.
The contents we provide on this site were created personally by members of the Game8 editorial department.
We refuse the right to reuse or repost content taken without our permission such as data or images to other sites.
 Absol
Absol Aegislash
 Alcremie
 Alolan Raichu
 Armarouge
 Azumarill
 Blastoise
 Blaziken
 Blissey
 Buzzwole
 Ceruledge
 Chandelure
 Charizard
 Cinderace
 Clefable
 Comfey
 Cramorant
 Crustle
 Darkrai
 Decidueye
 Delphox
 Dhelmise
 Dodrio
 Dragapult
 Dragonite
 Duraludon
 Eldegoss
 Empoleon
 Espeon
 Falinks
 Galarian Rapidash
 Garchomp
 Gardevoir
 Glaceon
 Goodra
 Greedent
 Greninja
 Gyarados
 Ho-oh
Ho-oh Hoopa
Hoopa Inteleon
 Lapras
 Latias
 Latios
 Leafeon
 Lucario
 Mamoswine
 Meowscarada
 Meowth
 Metagross
 Mew
Mew Mimikyu
 Miraidon
 Moltres
 Pawmot
 Psyduck
 Scizor
 Sirfetch'd
 Suicune
 Sylveon
 Talonflame
 Tinkaton
 Trevenant
 Tyranitar
 Umbreon
 Vaporeon
 Venusaur
 Wigglytuff
 Zacian
 Zapdos
 Zeraora


![Monster Hunter Stories 3 Review [First Impressions] | Simply Rejuvenating](https://img.game8.co/4438641/2a31b7702bd70e78ec8efd24661dacda.jpeg/show)


![Monster Hunter Stories 3 Review [First Impressions] | Simply Rejuvenating](https://img.game8.co/4438641/2a31b7702bd70e78ec8efd24661dacda.jpeg/thumb)


Honestly close combat and submission is really the best moveset