Dragonite Guide: Builds and Best Items
☆ Upcoming: Articuno | Meganium | Typhlosion | Feraligatr
★ Latest News: Zapdos | Moltres | Version 1.22.1.5
☆ Popular Pages: Upcoming Pokemon | Tier List
★ Current Seasons: Ranked S34 | Battle Pass S39
☆ Join Game8's Pokemon Discord Server!

The best guide on how to play Dragonite in Pokemon UNITE for Nintendo Switch and Mobile. Check here for the best builds, Held and Battle items, movesets, as well as the latest nerfs, buffs, counters, matchups, and more!
| Dragonite Pokemon Pages | |
|---|---|
 Dragonite Release Date Dragonite Release Date |
 Dragonite Builds Dragonite Builds |
List of Contents
Dragonite Latest Nerfs & Buffs (10/23)
| Dragonite Changes | |
|---|---|
|
Hyper Beam |
• Additional damage with max Dragon Dance stacks decreased from 20% to 15% of opponent's max HP. |
Stat Updates
| 1.5.1.6 | Increase in the Attack stat. |
|---|---|
| 1.10.1.3 | Attack stat increased from 520 to 550. Attack speed increased from 130% to 150%. |
| 1.19.2.8 | Defense increased from 78 - 415 to 78 - 465. Sp. Def. increased from 60 - 315 to 60 - 360. |
Standard Attack
| 1.4.1.2 | Attack range reduced. |
|---|---|
| 1.16.2.6 | Duration of Electricity effects on opposing Pokemon decreased from 0.6s to 0.5s. |
Hyper Beam
| 1.4.1.2 | Damage reduced from 6624 to 6386 (-4%). |
|---|---|
| 1.7.1.2 | Damage dealt reduced. |
| 1.11.1.3 | Cooldown increased from 8s to 10s. (+2s) |
| 1.14.1.2 | Cooldown increased from 10s to 11.5s. |
| 1.18.2.6 | Cooldown reduced from 11.5s to 10.5s. |
| 1.20.3.10 | Additional damage with max Dragon Dance stacks decreased from 20% to 15% of opponent's max HP. |
Extreme Speed
| 1.4.1.2 | Range increased. Cooldown reduced. Bug fixes. |
|---|
Outrage
| 1.9.1.2 | Boosted attack damage increased by 10%. |
|---|---|
| 1.16.2.6 | Enhanced normal attack damage decreased by 10%. |
| 1.18.2.6 | Attack speed buff increased from 30% to 35%. |
Draco Impact
| 1.4.1.2 | Unite Move gauge consumption increased. |
|---|---|
| 1.9.1.2 | UNITE move gauge reduced by 20%. |
Dragon Dance
| 1.7.1.2 | Cooldown increased 5s to 5.5s (-0.5s). |
|---|
Multiscale
| 1.10.1.3 | Damage reduction percentage increased from 25% to 30%. |
|---|
Dragonite Basic Info
| Dragonite | ||
|---|---|---|
 |
Role: All-Rounder Attack Type: Ranged Damage Type: Physical Difficulty: Novice |
|
| "Harnessing the power of fire, water, and electricity, Dragonite is a powerhouse that’s ready to stomp its way to victory." | ||
Dragonite Best Lanes

|

|

|
Tips & Strategies for Every Lane
Strengths and Weaknesses
| Strengths | Weaknesses |
|---|---|
| ✔︎ Highly Versatile moveset. ✔︎ Unite Move has great range that spans almost half the map ✔︎ Moves have low cooldown. |
✖︎ Moves upgrade late in the game ✖︎ Struggles against crowd control moves. |
Best Builds for Dragonite
| Dragonite Builds | |
|---|---|
| - | |
Outrage Build
Outrage Build

|
Moveset | Held Items | |||
|---|---|---|---|---|---|
| Battle Item | |||||
| Stats from Items (Lv. 40) | Recommended Lane | ||||
|
Attack: +35 Defense: +35 Sp. Def: +35 Attack Speed: +8.70% HP: +235 |
|
||||
| Emblem Color Combination | Target Emblem Stats | ||||
|
|
Positive Stats: • HP • Attack • Critical-Hit Rate Free Negative Stats: • Sp. Atk • Defense • Sp. Def |
||||
| Note: The emblem color and stats here are suggestions only. The builds are still viable even without the suggested emblems. |
|||||
Outrage Build Explanation
| Build Explanation |
|---|
| This build is centered on isolating targets using Extreme Speed, then beating them down with Outrage. However, Dragon Dance can be used instead of Extreme Speed for more damage and attack speed. It can be used in any lane, but it's best ran in the jungle so Dragonite can reach level 8 at fast as possible. |
| · Muscle Band is Dragonite's main farming and fighting tool, increasing is attack speed and giving its attacks HP-based bonus damage. · Weakness Policy synergizes with Multiscale since it resets whenever Extreme Speed is used. · Focus Band improves Dragonite's durability through increased defenses and acts as a survivability tool, which helps it survive while attacking targets during Outrage. · Drain Crown can be a replacement for Weakness Policy, giving Dragonite's attacks a lifesteal effect, which works well with the Pokemon's water Boosted Attacks. · Also, Rapid-Fire Scarf can be a replacement for Muscle Band, granting Dragonite a massive attack speed and increasing the Pokemon's efficiency during Outrage. · Full Heal allows Dragonite to purge stuns and debuffs from itself, especially during Outrage, enabling it to continue attacking. It also works for Outrage's self-stun effect. · However, X Attack can also work for the build, improving Dragonite's effeciency during Outrage. · The build's Boost Emblem loadout should consist of 6 White Emblems for maximum HP and 6 Brown Emblems for additional damage. · This can be achieved by equipping at least two (2) Emblems that are both White and Brown. · Equip Emblems that improve Attack or Critical-Hit Rate, and HP for more damage and durability. · Sp. Atk, Sp. Def., and Defense can be freely traded for the other stats. |
Outrage Build Damage Test
| Items (Level 30) |
Extreme Speed (@ Lvl 15) |
Outrage (Water) (@ Lvl 15) Outrage (Electric) (@ Lvl 15) Outrage (Fire) (@ Lvl 15) |
|---|---|---|
| Muscle Band + Weakness Policy (4 stacks) |
738 | 1333 1333 11,199 |
Since the build is centered on Outrage, equipping items that will maximize Dragonite's attacks during Outrage is the ideal item combination. Focus Band is a core item for the build, leaving only two (2) items for consideration.
Out of all the item combinations, Muscle Band and Weakness Policy will be the best for the build. The bonus damage and attack speed from Muscle Band works well with Outrage's special attacks, improving Dragonite's overall damage output each attack. As for Weakness Policy, it synergizes with Multiscale since it resets whenever Extreme Speed is used and the build's melee brawler gameplay.
As for alternatives, replacing Weakness Policy with Drain Crown and/or Muscle Band with Rapid-Fire Scarf are all viable options for the build. Drain Crown provides slightly lower stats and damage as Weakness Policy, but the item's lifesteal effect works extremely well with Outrage's special attacks. On the other hand, Rapid-Fire Scarf's massive attack speed bonus can be a reasonable exchange for Muscle Band's bonus damage.
These damage tests are conducted using the Training Dummy in Practice Mode.
| Items (Level 30) | Extreme Speed (@ Lvl 15) | Outrage (Water) (@ Lvl 15) Outrage (Electric) (@ Lvl 15) Outrage (Fire) (@ Lvl 15) |
|---|---|---|
| Muscle Band + Razor Claw (Includes effect) | 681 | 1540 1540 11,416 |
| Muscle Band + Attack Weight (6 stacks) | 743 | 1342 1342 11,207 |
| Muscle Band + Weakness Policy (4 stacks) | 738 | 1333 1333 11,199 |
| Razor Claw (Includes effect) + Attack Weight (6 stacks) | 743 | 1329 1329 11,230 |
| Razor Claw (Includes effect) + Weakness Policy (4 stacks) | 738 | 1317 1317 11,219 |
| Attack Weight (6 stacks)+ Weakness Policy (4 stacks) | 807 | 1099 1099 10,989 |
The tests above does not use any Emblems yet so it will scale higher if equipped.
Hyper Beam Build
| Hyper Beam Build | Moveset | Held Items | |||
|---|---|---|---|---|---|
| Battle Item | |||||
| Stats from Items (Lv. 40) | Recommended Lane | ||||
|
Attack: +35 Defense: +35 Sp. Def: +35 Critical-Hit Rate: +2.3% Attack Speed: +8.70% |
|
||||
| Emblem Color Combination | Target Emblem Stats | ||||
|
|
Positive Stats: • Attack • Critical-Hit Rate Free Negative Stats: • Sp. Atk • Defense • Sp. Def |
||||
| Note: The emblem color and stats here are suggestions only. The builds are still viable even without the suggested emblems. |
|||||
Hyper Beam Build Explanation
| Build Explanation |
|---|
| This build utilizes Dragonite's ranged attacks to kite enemies using Dragon Dance and bursting them down with a fully-charged Hyper Beam. Remember that water-type boosted attacks reduce the cooldown of Dragonite's moves, utilize this to constantly use them. |
| · Muscle Band improves Dragonite's attacks through increased damage and attack speed, which goes well with Dragon Dance. · Razor Claw synergizes well with Dragon Dance's cooldown reduction mechanic, allowing Dragonite to deal even more damage on its attacks. · Focus Band boosts Dragonite's durability through increased defenses and acts as a survivability tool. · Scope Lens can be a replacement for Focus Band, trading durability for improved critical-hits. · Eject Button gives Dragonite an extra repositioning tool for kiting targets and setting up for Hyper Beam. · However, X Attack can also work for the build, giving Dragonite more damage and attack speed. · The build's Boost Emblem loadout should consist of 6 White Emblems for maximum HP and 6 Brown Emblems for additional damage. · This can be achieved by equipping at least two (2) Emblems that are both White and Brown. · Equip Emblems that improve Attack or Critical-Hit Rate for more damage. · Sp. Atk, Sp. Def., and Defense can be freely traded for the other stats. |
Hyper Beam Build Damage Test
| Items (Level 30) |
Hyper Beam (Fully Charged) (@ Lvl 15) |
Standard Attack (w/ 3 Dragon Dance Stacks) (@ Lvl 15) |
|---|---|---|
| Muscle Band + Razor Claw (Includes effect) |
22892 | 1458 |
Since the build is centered on Standard Attacks and Hyper Beam, equipping items that will maximize their damage is the ideal item combination. Focus Band is a core item for the build, leaving only two (2) items for consideration.
Out of the item combinations, Muscle Band and Razor Claw will be the best for the build. Although the item combination generated the lowest Hyper Beam damage, the bonus Standard Attack damage from Muscle Band and Razor Claw is benefitial in the long run since attacking is required to set up Hyper Beam.
As for alternatives, replacing Focus Band with Scope Lens would be the best option. The increased critical-hit rate and damage from Scope Lens works nicely with the build's gameplay.
These damage tests are conducted using the Training Dummy in Practice Mode.
| Items (Level 30) | Hyper Beam (Fully Charged) (@ Lvl 15) | Standard Attack (w/ 3 Dragon Dance Stacks) (@ Lvl 15) |
|---|---|---|
| Muscle Band + Razor Claw (Includes effect) | 22892 | 1458 |
| Muscle Band + Attack Weight (6 stacks) | 23170 | 1172 |
| Muscle Band + Weakness Policy (4 stacks) | 23098 | 1148 |
| Razor Claw (Includes effect) + Attack Weight (6 stacks) | 23170 | 1238 |
| Razor Claw (Includes effect) + Weakness Policy (4 stacks) | 23098 | 1202 |
| Attack Weight (6 stacks)+ Weakness Policy (4 stacks) | 23403 | 890 |
The tests above does not use any Emblems yet so it will scale higher if equipped.
Dragonite Best Items & Moveset
Best Held Items
| Item | Explanation |
|---|---|
 Focus Band Focus Band
|
Focus Band increases Dragonite's durability through increased static defenses and gives a reliable survivability tool. |
 Scope Lens Scope Lens
|
Scope Lens turns Dragonite into a deadly attacker, giving each attack a chance to critical-hit. It also synergizes well with Outrage and Dragon Dance. |
 Muscle Band Muscle Band
|
Muscle Band is a staple damage item for Dragonite regardless of the build, increasing its damage and attack speed. |
 Razor Claw Razor Claw
|
Razor Claw is particularly effective only when choosing Outrage and Dragon Dance, utilizing Outrage's melee attacks and Dragon Dance's cooldown reduction effect. |
 Weakness Policy Weakness Policy
|
Weakness Policy provides some HP and increases damage as Dragonite takes damage. It suits Dragonite's frontliner gameplay, particularly when using Outrage. |
 Rapid-Fire Scarf Rapid-Fire Scarf
|
Rapid-Fire Scarf gives Dragonite a massive attack speed boost that works for both of its builds. |
 Drain Crown Drain Crown
|
Drain Crown gives Dragonite's attacks a lifesteal effect, which works well with its water Boosted Attacks, especially during Outrage. |
Best Battle Items
| Item | Explanation |
|---|---|
 Slow Smoke Slow Smoke
|
Slow Smoke pairs really well with Dragonite's moves, adding a decent crowd control to Dragonite's kit. |
 Eject Button Eject Button
|
Eject Button provides additional mobility on top of Dragonite's Dash moves, enabling it to reposition quickly. |
 X Attack X Attack
|
X Attack compliments Dragonite's frontliner gameplay, further increasing its damage output. |
Best Moveset
| Move | Explanation |
|---|---|
 Extreme Speed Extreme Speed
|
Extreme Speed allows Dragonite to isolate a target and stun it, which synergizes well with Outrage. It also resets Multiscale's cooldown each time it's used. |
 Outrage Outrage
|
Outrage turns Dragonite into a powerful melee brawler that can quickly decimate opponents and boss Pokemon. |
Outrage makes Dragonite into a melee Pokemon but greatly improves its attacks. These attacks deal devastating damage, which can quickly take out opponents, and allow Dragonite to secure objectives by itself. Extreme Speed allows Dragonite to quickly get to melee range and stay on top of opponents, particularly during Outrage. It also gives Dragonite the benefit of always having Multiscale available since the move resets the ability's cooldown whenever it's used.
Dragonite's playstyle depends on whether you choose Hyper Beam or Outrage. Hyper Beam maintains Dragonite's ranged capabilities but offers a high burst damage tool. Outrage turns Dragonite into a melee brawler that has a special interaction with boosted attacks. When choosing Hyper Beam, Dragon Dance should always be its pair due to their synergy. On the other hand, Dragon Dance or Extreme Speed works well with Outrage.
Which Moveset Do You Think is Best for Dragonite?
Let us know why in the comments!
Previous Poll Results
How to Play Dragonite
| Jump to Section | |
|---|---|
Rush Level 8
Dragonite gets access to Multiscale and its primary damage move when it reaches level 8. This gives Dragonite a power spike in both offense and defense and allows it to properly engage in 1-on-1 fights. Get to level 8 as early as you can so you can snowball from there.
Go to the Jungle
The safest and most efficient way to reach level 8 is to go to the jungle at the start of the game.
Jungle Guide and Best Junglers
Engage Fights Using your Dash Moves
Dragonite's Dash moves will be key in getting you to the right position for your damaging moves. Once it reaches level 5, Dragonite will have access to 2 different dash moves: Extreme Speed is a good initiating move that can inflict stun to the target, while Dragon Dance increases both Dragonite's attack and movement speed. Plan ahead to what damaging move you are taking once getting to level 8 so you can fully take advantage of the extra mobility.
Change Gameplay Based on Chosen Moves
You have change your gameplay based on your chosen moveset to use them effectively. You should also consider the items you equip as they'll help you execute the gameplay better.
Kite and Burst Targets with Dragon Dance and Hyper Beam
If you choose Dragon Dance and Hyper Beam, you should utilize the mobility from Dragon Dance to kite targets with ranged attacks, then finish them off with Hyper Beam. The key here is knowing where to dash when using Dragon Dance, keeping in mind attack distance and Hyper Beam angle.
Beat Down Targets with Extreme Speed and Outrage
If you're going for Outrage and Extreme Speed, you should isolate a target using Extreme Speed, then pummel them with Outrage.
However, should you go for Dragon Dance instead, the gameplay remains the same, although you can't isolate targets anymore. You'll also gain increased attack speed each time you use it, allowing for quicker knockouts.
Whichever you pick, remember to keep Outrage active by constantly landing attacks while sticking to your target.
Utilize Boosted Attacks
Dragonite's Boosted Attacks improve as it evolves. Once fully-evolved, you gain all the Boosted Attacks from previous evolutions. Although you have no control over them, understanding their effects can give you an extra edge during fights.
Refresh Boosted Attacks using Dragon Breath
Using Dragon Breath instantly gives you a Boosted Attack. You can deal decent damage by doing this combo: Boosted Attack -> Dragon Breath -> Boosted Attack. Use the combo in early game engagements.
Dragon Breath: Dragonite Move Effect and Cooldown
Reduce your Moves' Cooldown
Each time you perform a Boosted Attack, it reduces your moves' cooldown by one (1), allowing you to constantly use them in fights. This effect works great with Dragon Dance since the move increases your attack speed and also reduces its own cooldown when you attack. It also has great synergy with Outrage since all your attacks become Boosted Attacks, triggering their effects each hit.
Utilize Dragon Dance Effects
Keep using Dragon Dance to amplify your moves' and standard attacks' damage output. Also, utilize the attack speed increase to attack continuously after using Dragon Dance and trigger its cooldown reduction mechanic, allowing you to use it more frequently and stack damage faster.
Dragon Dance: Dragonite Move Effect and Cooldown
Use Dragon Dance to Improve Hyper Beam
| Normal Activation | 1st Dragon Dance Activation | 2nd Dragon Dance Activation | 3rd Dragon Dance Activation |
|---|---|---|---|
 |
 |
 |
 |
Using Dragon Dance will increase the damage output of Hyper Beam for around 3 seconds, it stacks up to 3 times. Be sure to hold off your Hyper Beam activation to get the most damage as possible.
Dragon Dance: Dragonite Move Effect and Cooldown
Secure Objectives with Hyper Beam
Use Hyper Beam, a fully-charged one if possible, to secure objectives like Registeel. If you're trying to steal them from enemies, you need to time it properly since the move takes a bit of time to fire.
Hyper Beam: Dragonite Move Effect and Cooldown
Utilize Draco Impact's Mechanics
Draco Impact's unique aiming and recharge mechanics allows you to use it more freely than most Pokemon, making it effective in many situations. Taking advantage of these effects helps make a difference in your gameplay and effectiveness in the game.
Draco Impact: Dragonite Move Effect and Cooldown
Be Careful When you Activate Draco Impact
Once Draco Impact is activated, Dragonite will still be susceptible to attacks before it flies to the destination, making it possible to get knocked down as Dragonite channels the move. Given this, it's best to know when it's safe to use it.
Having a Buddy Barrier or Focus Band equipped will give Dragonite extra shields and defense to protect it before and after using Draco Impact.
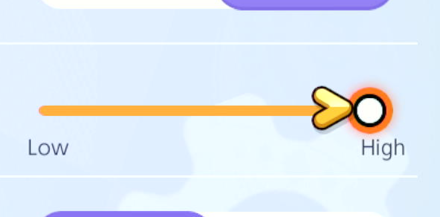
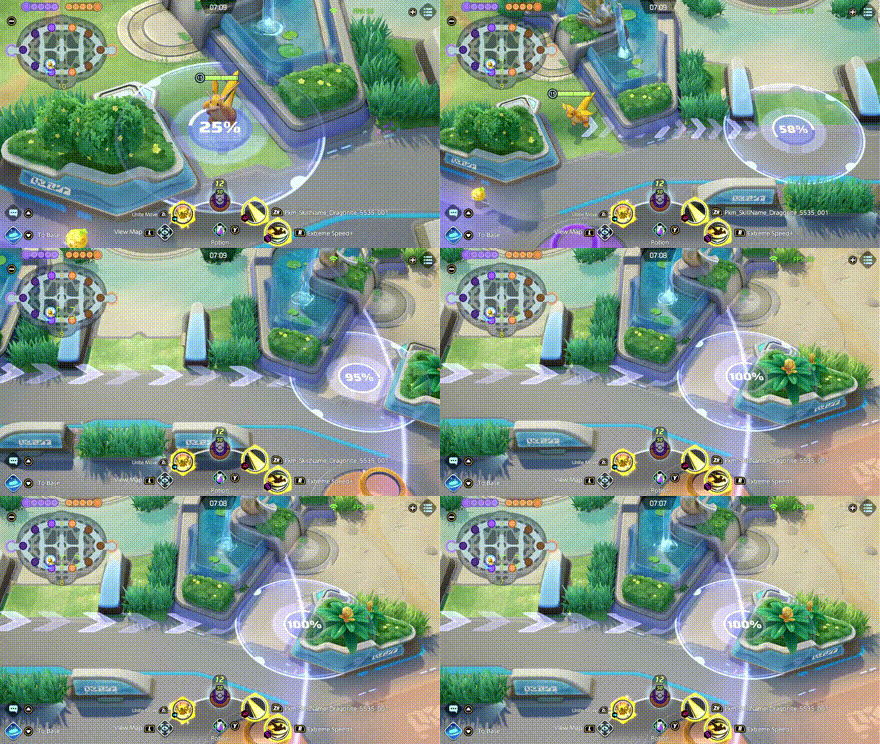
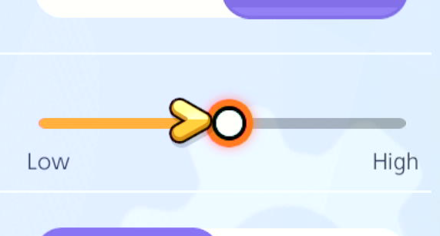
Increase Move Target Sensitivity
| Setting | In-Game |
|---|---|
 |
 |
 |
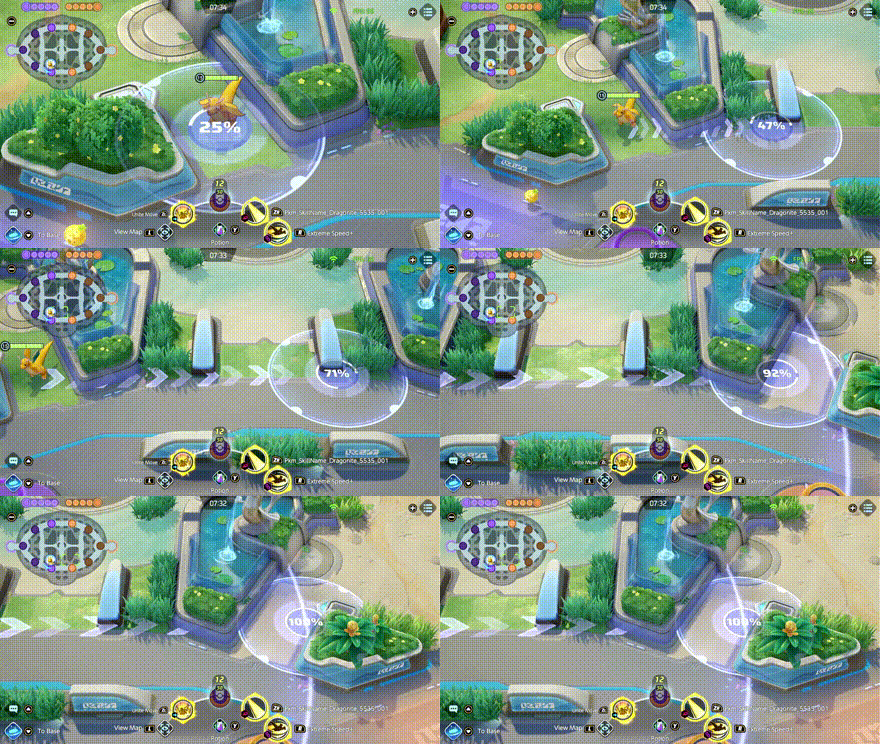 |
You can increase Draco Impact's targeting speed by setting the Move Panel Sensitivity to High in the Controls Setting. This allows you to speed up Draco Impact's reticle speed when targeting opponents from across the map. It can also help you get out of tricky situations by using the Unite move as a escape mechanism.
Hurry Towards Enemy Goal Zones
Use Draco Impact to quickly travel towards enemy goal zones and score. This is especially useful during the last few minutes of the game where you need to score as many as you can before the timer ends.
Pick Off Fleeing Enemies
You can also use Draco Impact to pick off or chase fleeing enemies, especially when they are low on HP. You don't need to knock out targets with the move itself, although it's possible, you just need to land as close as you can so you'll be able to chase them.
Escape Bad Fights
Although it's best to avoid using Draco Impact to escape, if it's crucial for you to stay alive, then you can use it as an emergency escape tool. However, you don't need to cast it to the max distance to escape, just enough to disengage from the enemies.
Progression and Leveling Guide
Top and Bottom Guide
Level 1 to 5
- Quickly clear out the Bunnelbies in the lane.
- Keep farming wild Pokemon in the lane to reach level 5 and learn your first move.
- At bottom lane, prioritize taking Indeedees for more exp.
Level 6 to 9
- Keep hunting Wild Pokemon to gain more EXP from farming Altaria and Swablus.
- Once you reach level 7, learn your second move.
- Help allies secure Regice, Registeel, or Regirock when it spawns, otherwise secure Regieleki.
- Upon reaching level 9, learn your Unite Move.
Level 10+
- Stick with allies to hunt targets, secure objectives, and push lanes.
- Reach at least level 13 or max level if possible before or when Groudon spawns for a fully-upgraded moveset.
- Make sure that your Unite Move is available when Groudon spawns.
- Help teammates win a teamfight and secure Groudon.
Jungle Guide
Level 1 to 5
- Quickly defeat Xatu
- Clear the first wave of jungle camps and reach level 5 to learn your first move.
- Help the top lane first or whatever lane needs help the most by securing Altaria and Swablus, getting knockouts, and scoring points.
Level 6 to 9
- Clear the second wave of jungle camps and reach at least level 7 to learn your second move.
- Secure Regidrago in the center to get more EXP.
- Help the bottom lane by securing Altaria and Swablus, getting kills, and scoring points.
- If possible, reach level 9 and learn your Unite Move before or when Regice, Registeel, or Regirock spawns.
- Help allies secure Regice, Registeel, or Regirock, with Registeel being the highest priority since it gives a damage buff to the party.
Level 10+
- Stick with allies to hunt targets, secure objectives, and push lanes.
- Reach at least level 13 or max level if possible before or when Groudon spawns for a fully-upgraded moveset.
- Make sure that your Unite Move is available when Groudon spawns.
- Help teammates win a teamfight and secure Groudon.
Dragonite Combos
Endless Outrage Combo
| Endless Outrage Combo | |
|---|---|
| This is a melee, brawl combo that is single-target focused. Start with Extreme Speed to get close to the target while also stunning them in place. Then, immediately use Outrage to start the stream of damage. Attack at least 5 times or until both Extreme Speed and Outrage are available, then repeat the combo. | |
Super Hyper Beam Combo
| Super Hyper Beam Combo | |
|---|---|
Dragon Dance
+
Standard Attack
3x ►
Dragon Dance
+
Standard Attack
3x ►
Dragon Dance
+
Standard Attack
3x ►
Hyper Beam
|
|
| This is a high burst combo that utilizes a supercharged Hyper Beam. Start by circling the target with Dragon Dance while continuously using Standard Attacks to deal damage. Each boosted attack will reduce Dragon Dance's cooldown, allowing you to chain together multiple activations. Each time you activate the move, Hyper Beam will increase in damage. After around 3 activations of Dragon Dance, you can then use Hyper Beam to deal massive damage to all enemies caught in its path. | |
Ultimate Dragon Impact Combo
| Ultimate Dragon Impact Combo | |
|---|---|
| This is a variation of the of the Endless Combo, but adds Draco Impact for a strong start. Start by activating Draco Impact from afar to catch your opponent's by surprise. Then, use extreme Extreme Speed and Outrage to wreak havoc. | |
Matchups & Counters for Dragonite
All Dragonite Matchups
| Matchup Notes | ||
|---|---|---|
| 1. The chart is based on our own experience playing Dragonite. 2. Pokemon within each tier are unordered 3. Any Pokemon not shown here are still under investigation. |
||
Hard Counter With Disables and Better Damage
Dragonite takes a bit of time before it can reach its power spike at level 8. Most of Dragonite's hard matchups take advantage of this by beating it in terms of damage output. Dragonite also struggles against crowd control moves that can disrupt its flow of damage, especially when using Outrage.
Best Counters
| Pokemon | Explanation |
|---|---|
 Trevenant Trevenant
|
Rating: ★★★★★ • Can disrupt Dragonite's moves and attacks with Horn Leech, Wood Hammer, and Phantom Forest. • Can tank a lot of Dragonite's damage and has strong sustainability. |
 Leafeon Leafeon
|
Rating: ★★★★ • Can quickly burst down Dragonite, or at least force it to play defensively, with Razor Leaf or Solar Blade, and Emerald Two-Step • Has superior movement speed and mobility, allowing it to easily dodge or escape Dragonite. |
 Mr. Mime Mr. Mime
|
Rating: ★★★★ • Can disrupt Dragonite's combos using Power Swap or Barrier, Confusion or Psychic, and Showtime!. |
Even Matchups for Dragonite
While weak early on, Dragonite can get the upper hand against these Pokemon if it reach level 8 as fast as possible, and successfully perform its combos.
Head Straight for Them Using Extreme Speed or Draco Impact
| Ranged, Fragile Pokemon with High Damage |
|---|
| How to Beat |
|
• These Pokemon prefer to keep their distance from opponents when fighting. They also have high damage potential that can be dangerous for Dragonite. However, they are fragile and can get knocked out by Dragonite fast. • When using Outrage, use Extreme Speed to quickly get to melee range before beating them down with attacks with the help of Outrage. • When using Hyper Beam, use Draco Impact on their position to force them to move, then use Dragon Dance to dodge their moves and charge up Hyper Beam. Once Hyper Beam is fully charge, use it on them to finish them off. |
Kite Them with Range Attacks or Brawl with Them Using Outrage
| All-Rounders |
|---|
| How to Beat |
|
• Much like Dragonite, these Pokemon excel in close combat and rely mostly on their attacks or combos to deal damage. They are also durable enough to tank Dragonite's damage. However, being a ranged Pokemon, Dragonite can kite them with ranged attacks. Alternatively, Dragonite can also go toe to toe with them with the help of Outrage. • When using Hyper Beam, use Dragon Dance to keep them at firing range while kiting them with attacks, and also charge up Hyper Beam. Once Hyper Beam is fully charged, use it to finish them off. • When using Outrage, use Extreme Speed to stay on top of them, then beat them down with superior melee damage, utilizing each effect of Dragonite's Boosted Attacks to win the fight. |
Dodge Their Burst Damage
| High-mobility Pokemon with Burst Damage |
|---|
| How to Beat |
|
• These Pokemon are incredibly agile and deal high burst damage. However, they become vulnerable when they miss their burst damage attempt. • When using Hyper Beam, dodge their moves using Dragon Dance, then retaliate with attacks and Hyper Beam. • When using Outrage, disrupt their moves using Extreme Speed, then beat them down with melee attacks. • When necessary, use Draco Impact to escape. |
Take Them Out First
| Supporters |
|---|
| How to Beat |
|
• These Pokemon usually stick with their allies and rarely venture alone. Although they themselves pose no threat to Dragonite, their support capabilities makes them valuable during fights. • It's best to take them out first during fights either by bursting them down with Hyper Beam or beating them with melee attacks with the help of Outrage. |
Group Up With Allies
| Highly Durable Pokemon |
|---|
| How to Beat |
|
• These Pokemon are extremely durable, making it difficult for Dragonite to take them down alone. With that, it's best to group up with allies to bring them down with the help of Dragonite. • When using Hyper Beam, use Dragon Dance to keep them at firing range while kiting them with attacks, and also charge up Hyper Beam. Once Hyper Beam is fully charged, use it to finish them off. • When using Outrage, use Extreme Speed to stay on top of them, then beat them down with superior melee damage. |
Easy Matchups for Dragonite
Easy matchups are Pokemon that have no effective means of stopping or escaping Dragonite's combos.
Head Straight for Them Using Extreme Speed or Draco Impact
| Ranged, Fragile Pokemon with High Damage |
|---|
| How to Beat |
|
• These Pokemon prefer to keep their distance from opponents when fighting. They also have high damage potential that can be dangerous for Dragonite. However, they are fragile and can get knocked out by Dragonite fast. • When using Outrage, use Extreme Speed to quickly get to melee range before beating them down with attacks with the help of Outrage. • When using Hyper Beam, use Draco Impact on their position to force them to move, then use Dragon Dance to dodge their moves and charge up Hyper Beam. Once Hyper Beam is fully charge, use it on them to finish them off. |
Kite Them with Range Attacks or Brawl with Them Using Outrage
| All-Rounders |
|---|
| How to Beat |
|
• Much like Dragonite, these Pokemon excel in close combat and rely mostly on their attacks or combos to deal damage. They are also durable enough to tank Dragonite's damage. However, being a ranged Pokemon, Dragonite can kite them with ranged attacks. Alternatively, Dragonite can also go toe to toe with them with the help of Outrage. • When using Hyper Beam, use Dragon Dance to keep them at firing range while kiting them with attacks, and also charge up Hyper Beam. Once Hyper Beam is fully charged, use it to finish them off. • When using Outrage, use Extreme Speed to stay on top of them, then beat them down with superior melee damage, utilizing each effect of Dragonite's Boosted Attacks to win the fight. |
Take Them Out First
| Supporters |
|---|
| How to Beat |
|
• These Pokemon usually stick with their allies and rarely venture alone. Although they themselves pose no threat to Dragonite, their support capabilities makes them valuable during fights. • It's best to take them out first during fights either by bursting them down with Hyper Beam or beating them with melee attacks with the help of Outrage. |
Best Teammates for Dragonite
| Pokemon | Explanation |
|---|---|
 Blissey Blissey
 Eldegoss Eldegoss
|
Increases Survivability |
| Pokemon that provide healing and shielding pair well with Dragonite, allowing him to survive longer in fights and keep dealing damage. Eldegoss' Cotton Guard is particularly useful during Outrage since it heals and provides a shield, prolonging Dragonite's rampage. Meanwhile, Blissey's Helping Hand coupled with Dragon Dance gives Dragonite a massive attack speed boost, which is effective for either of its playstyles. | |
 Machamp Machamp
 Snorlax Snorlax
 Wigglytuff Wigglytuff
|
Frontline Disablers |
| Pokemon that have AoE crowd control moves and can join Dragonite in the frontlines pair well with the Pokemon, allowing Dragonite to freely burst down targets while they're disabled. They can set up Dragonite's moves using abilities like Heavy Slam and Sing. They can also deal decent damage during clashes, making it easier for Dragonite to knock out targets. | |
 Gengar Gengar
 Pikachu Pikachu
 Urshifu Urshifu
|
High Burst Damage |
| Dragonite can also benefit from Pokemon with high burst damage. The damage they can deal using moves like Electro Ball and Wicked Blow should be more than enough for Dragonite to finish off targets with a fully-charged Hyper Beam or a few swipes during Outrage. |
Looking for teammates to synergize with you? Head over to our Friend Request Board to find other trainers to join you in your grind or just to hang out with!
Dragonite Moveset
Move Slot 1 (R)
 Twister Twister
(Lv. 1 or 3) |
Move Type: Ranged Damage Type: Physical Cooldown: 8s Starting Damage: 363 Final Damage: 403 |
|---|---|
| Creates a twister and relases it in the designated direction, dealing damage to any opposing Pokemon it hits and decreasing their movement speed for a short time. | |
 Dragon Dance Dragon Dance
(Lv. 5) Upgrade Lv. 11 |
Move Type: Dash Damage Type: Physical Cooldown: 5.5s Starting Damage: N/A Attack damage increase: 8% Final Damage: N/A Attack damage increase: 8% |
|
Has the user move to the designated location while performing a mystical dance, increasing the user's damage dealt, movement speed, and basic attack speed for a short time. During this short time, when one of the user's basic attacks hits an opposing Pokemon, it reduces this move's cooldown. Each time this move is used, the user's damage dealt increases (up to three times).
Upgrade: Further increases the user's movement speed if there are opposing Pokemon nearby when the dance ends. |
|
 Extreme Speed Extreme Speed
(Lv. 5) Upgrade Lv. 11 |
Move Type: Dash Damage Type: Physical Cooldown: 7.5s Starting Damage: 341 Final Damage: 657 |
|
Has the user leap at the designated opposing Pokemon and throw it, dealing damage to opposing Pokemon in the area of effect and shoving them. Also decreases the movement speed of opposing Pokemon it hits for a short time. using this move will reset Multiscale's cooldown.
Upgrade: If the user's movement speed is currently decreased when it uses this move, that movement speed decrease is negated before the move is used. |
|
Move Slot 2 (ZR)
 Dragon Breath Dragon Breath
(Lv. 1 or 3) |
Move Type: Ranged Damage Type: Physical Cooldown: 8s Starting Damage: 604 Final Damage: 784 |
|---|---|
| Has the user exhale a mighty gust in the designated direction. if the move hits an opposing Pokemon, the user's next basic attack becomes a boosted attack. | |
 Hyper Beam Hyper Beam
(Lv. 8) Upgrade Lv. 13 |
Move Type: Ranged Damage Type: Physical Cooldown: 10.5s Starting Damage: 955 Damage with one Dragon Dance stack: 6200, Damage with two Dragon Dance stacks: 11458, Damage with three Dragon Dance stacks: 16739 Final Damage: 1490 Damage with one Dragon Dance stack: 6891, Damage with two Dragon Dance stacks: 12313, Damage with three Dragon Dance stacks: 17781 |
|
Has the user aim at the designated opposing Pokemon, charge up power, and then unleash a beam of light that sweeps up the ground in a straight line. In addition to the beam's base damage, it also deals additional damage to opposing Pokemon it hits equal to a set percentage of their max HP. The user is left unable to act for a short time after using this move.
Upgrade: Reduces damage the user recieves when using this move, including when charging up power. |
|
 Outrage Outrage
(Lv. 8) Upgrade Lv. 13 |
Move Type: Area Damage Type: Physical Cooldown: 8s Starting Damage: 10806 (Slam) Final Damage: 11256 (Slam) |
|
Has the user start rampaging, stomping the ground and dealing damage to opposing Pokemon in the area of effect. Also triggers the additional effect of the most recently used boosted basic attack once again. During the rampage, all of the user's basic attacks become special melee boosted attacks with increased attack speed. When the rampage ends, the user is left unable to act for a short time.
Upgrade: Reduces the duration of hinderance effects inflicted on the user when the user is rampaging. |
|
Unite Moves (ZL)
 Draco Impact Draco Impact
(Lv. 9) |
Move Type: Ranged Damage Type: Physical Cooldown: Max Range: 112s Starting Damage: 1641 Final Damage: 2228 |
|---|---|
| Has the user fly high into the air before crashing down with several comets on a designated area, dealing damage to opposing Pokemon in the area of effect and throwing them. The farther the user flies, the more the Unite Move gauge is consumed. While this Unite Move is being used, the user becomes immune to hinderances. | |
Standard Attack
Becomes a boosted attack with every third attack, blasting water in front of the user. This boosted attack deals damage to opposing Pokemon it hits and reduces the cooldown of all the user's moves. The water attack also has the additional effect of restoring the user's HP when it hits. |
Becomes a boosted attack with every third attack, dealing damage to opposing Pokemon it hits and reducing the cooldown of all the user's moves. The boosted attack alternates between a water attack and an electric attack with every use. If the water attack hits, it triggers the same additional effect as Dratini's boosted basic attack. If the electric attack hits, it leaves the opposing Pokemon unable to act for a short time. |
Becomes a boosted attack with every third attack, dealing damage to opposing Pokemon it hits and reducing the cooldown of all the user's moves. The boosted attack alternates between a water, electric, and fire attack, in that order, with every use. If the water or electric attacks hit, they trigger the same additional effects as Dragonair's boosted basic attacks. If the fire attack hits, it deals additional damage to the opposing Pokemon. |
Ability (Passive)
 Marvel Scale Marvel Scale
|
Increases the Pokemon's Defense when the Pokemon is afflicted by Status Condition |
|---|
 Multiscale Multiscale
|
Reduces the damage the Pokemon recieves for a short times and goes on cooldown after being triggered |
|---|
Dragonite Stats & Evolutions
Dragonite Evolutions
| 1st Evolution | 2nd Evolution | Final Evolution |
|---|---|---|
 Dratini Dratini(Lv. 1) |
 Dragonair Dragonair(Lv. 5) |
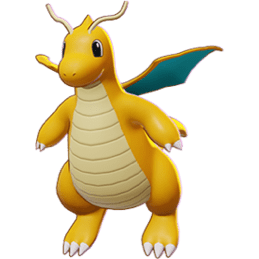 Dragonite Dragonite(Lv. 8) |
Dragonite Stats
| Level | HP | Defense | Special Defense | Attack Damage |
|---|---|---|---|---|
| 1 | 3050 | 78 | 60 | 165 |
| 2 | 3117 | 84 | 64 | 170 |
| 3 | 3198 | 91 | 69 | 177 |
| 4 | 3295 | 99 | 75 | 185 |
| 5 | 3647 | 128 | 97 | 214 |
| 6 | 3787 | 140 | 106 | 225 |
| 7 | 3955 | 154 | 117 | 239 |
| 8 | 4627 | 209 | 160 | 294 |
| 9 | 4869 | 229 | 175 | 314 |
| 10 | 5159 | 253 | 194 | 338 |
| 11 | 5507 | 282 | 216 | 367 |
| 12 | 5925 | 316 | 243 | 401 |
| 13 | 6426 | 357 | 275 | 442 |
| 14 | 7028 | 406 | 314 | 491 |
| 15 | 7750 | 465 | 360 | 550 |
Attack Damage is the damage of the Basic Attack as tested against the Training Dummy.
Dragonite In-Game Stat Listings
| Offense | Endurance | Mobility | Scoring | Support |
|---|---|---|---|---|

|

|

|

|

|
Dragonite Skins (Holowear)
| Holowear | |
|---|---|
 Holiday Style Holiday Style
Zirco Trading:
|
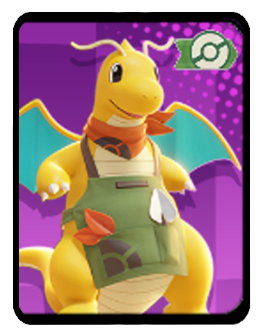 Gardening Style Gardening Style
Event:
Season 5 Battle Pass |
 Marine Style Marine Style
Zirco Trading:
|
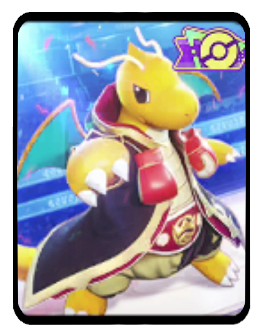 Champion Style Champion Style
Event:
Season 8 Battle Pass |
 Warm Style Warm Style
Zirco Trading:
|
 Marching Band Style Marching Band Style
Event:
UNITE Club Membership |
Dragonite Character Spotlight
Dragonite Achievements
Outrage Achievement
| Outrage | |
|---|---|
| Pokemon | Move |
 Dragonite Dragonite
|
|
| Mission: In a single battle, knock out Pokemon from the opposing team while rampaging under the effect of Outrage or Outrage+ 4 or more times (5/10/20 battles total) |
|
| Medals & Points | Rewards |
|
|
|
|
|
|
|
|
|
List of All-Rounder Pokemon Achievements
Pokemon UNITE Related Guides

All Pokemon Guides and Builds
Upcoming Pokemon
 Articuno Articuno(TBA) |
 Meganium Meganium(TBA) |
 Typhlosion Typhlosion(TBA) |
 Feraligatr Feraligatr(TBA) |
Mega Evolutions
| Mega Evolved Pokemon | ||
|---|---|---|
 Mega Charizard X Mega Charizard X |
 Mega Charizard Y Mega Charizard Y |
 Mega Gyarados Mega Gyarados |
 Mega Lucario Mega Lucario |
 Mega Mewtwo X Mega Mewtwo X |
 Mega Mewtwo Y Mega Mewtwo Y |
Pokemon by Role
| All Pokemon Roles | |||||
|---|---|---|---|---|---|
 Attackers Attackers |
 All-Rounders All-Rounders |
 Defenders Defenders |
|||
 Speedsters Speedsters |
 Supporters Supporters |
||||
Pokemon by Characteristics
| Attack Type | |
|---|---|
 Melee Pokemon Melee Pokemon |
 Ranged Pokemon Ranged Pokemon |
 Physical Pokemon Physical Pokemon |
 Special Pokemon Special Pokemon |
| Stat Rankings | |
 HP Ranking HP Ranking |
 Defense Ranking Defense Ranking |
 Sp. Def. Ranking Sp. Def. Ranking |
 Basic Attack Ranking Basic Attack Ranking |
Comment
I also like Dragon Dance+Outrage. Other than my penchant for dragon type moves, it deals very high damage plus crowd control. My build is Muscle Band, Razor Claw and Svope Lens for critical hits. (Honestly, I dont think its special attack because I get many kills with my build, in offline mode)
Author
Dragonite Guide: Builds and Best Items
Rankings
- We could not find the message board you were looking for.
Gaming News
Popular Games

Genshin Impact Walkthrough & Guides Wiki

Umamusume: Pretty Derby Walkthrough & Guides Wiki

Pokemon Pokopia Walkthrough & Guides Wiki

Honkai: Star Rail Walkthrough & Guides Wiki

Monster Hunter Stories 3: Twisted Reflection Walkthrough & Guides Wiki

Arknights: Endfield Walkthrough & Guides Wiki

Wuthering Waves Walkthrough & Guides Wiki

Zenless Zone Zero Walkthrough & Guides Wiki

Pokemon TCG Pocket (PTCGP) Strategies & Guides Wiki

Monster Hunter Wilds Walkthrough & Guides Wiki
Recommended Games

Diablo 4: Vessel of Hatred Walkthrough & Guides Wiki

Cyberpunk 2077: Ultimate Edition Walkthrough & Guides Wiki

Fire Emblem Heroes (FEH) Walkthrough & Guides Wiki

Yu-Gi-Oh! Master Duel Walkthrough & Guides Wiki

Super Smash Bros. Ultimate Walkthrough & Guides Wiki

Pokemon Brilliant Diamond and Shining Pearl (BDSP) Walkthrough & Guides Wiki

Elden Ring Shadow of the Erdtree Walkthrough & Guides Wiki

Monster Hunter World Walkthrough & Guides Wiki

The Legend of Zelda: Tears of the Kingdom Walkthrough & Guides Wiki

Persona 3 Reload Walkthrough & Guides Wiki
All rights reserved
©2021 Pokémon. ©1995–2021 Nintendo / Creatures Inc. / GAME FREAK inc.
©2021 Tencent.
The copyrights of videos of games used in our content and other intellectual property rights belong to the provider of the game.
The contents we provide on this site were created personally by members of the Game8 editorial department.
We refuse the right to reuse or repost content taken without our permission such as data or images to other sites.
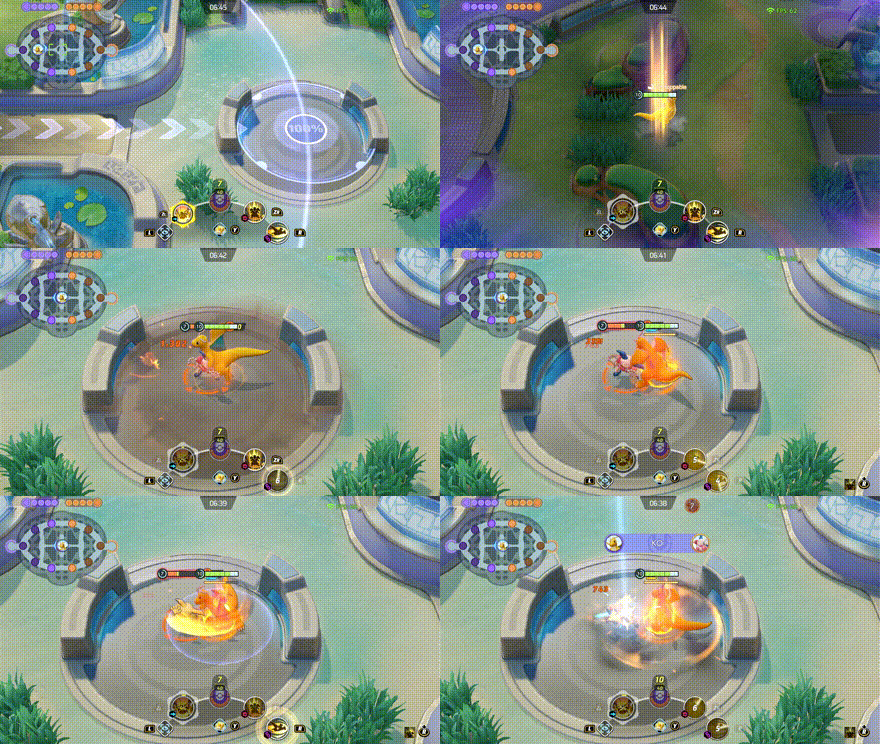
 Full Heal


 Absol
Absol Aegislash
 Alcremie
 Alolan Ninetales
 Alolan Raichu
 Armarouge
 Azumarill
 Blastoise
 Blaziken
 Buzzwole
 Ceruledge
 Chandelure
 Charizard
 Cinderace
 Clefable
 Comfey
 Cramorant
 Crustle
 Darkrai
 Decidueye
 Delphox
 Dhelmise
 Dodrio
 Dragapult
 Duraludon
 Empoleon
 Espeon
 Falinks
 Galarian Rapidash
 Garchomp
 Gardevoir
 Glaceon
 Goodra
 Greedent
 Greninja
 Gyarados
 Ho-oh
Ho-oh Hoopa
Hoopa Inteleon
 Lapras
 Latias
 Latios
 Lucario
 Mamoswine
 Meowscarada
 Meowth
 Metagross
 Mew
Mew Mimikyu
 Miraidon
 Moltres
 Pawmot
 Psyduck
 Sableye
 Scizor
 Sirfetch'd
 Slowbro
 Suicune
 Sylveon
 Talonflame
 Tinkaton
 Tsareena
 Tyranitar
 Umbreon
 Vaporeon
 Venusaur
 Zacian
 Zapdos
 Zeraora
 Zoroark


![The Liar Princess and the Blind Prince Review [PC] | Lovely to Look at but Tedious to Play](https://img.game8.co/4442586/8d95f5faf05780f1765ce7e0938bd825.jpeg/thumb)
![Marathon Cryo Archive Map Teased as [REDACTED] on Selection Screen](https://img.game8.co/4442236/6357203e58172f6de57f1991e7c39b22.png/thumb)


why is dragonite rated b? s tier all the way!