Garchomp Guide: Builds and Best Items
☆ Upcoming: Articuno | Meganium | Typhlosion | Feraligatr
★ Latest News: Zapdos | Moltres | Version 1.22.1.5
☆ Popular Pages: Upcoming Pokemon | Tier List
★ Current Seasons: Ranked S34 | Battle Pass S39
☆ Join Game8's Pokemon Discord Server!

The best guide on how to play Garchomp in Pokemon UNITE for Nintendo Switch and Mobile. Check here for the best builds, Held and Battle items, movesets, as well as the latest nerfs, buffs, counters, matchups, and more!
List of Contents
Garchomp Latest Buffs and Nerfs (3/5)
| Garchomp Changes |
|---|
|
• Cooldown after triggering decreased from 2s to 0.6s. • Reflected damage ratio decreased from 30% to 12.5%. |
|
• Damage reduction effect increased from 30% to 45%. |
|
• Damage increased by 8%. |
Stat Updates
| 1.3.1.2 | Gible: Level at Pokemon evolves changed to 5. Gabite: Level at which move is learned changed to 9 |
|---|---|
| 1.2.1.3 | Defense and Sp. Defense increased. |
| 1.1.1.6 | Movement speed increased. |
| 1.7.1.9 | Increased: Attack Stat |
| 1.14.2.10 | Reduction rate of interruption time received increased from 0%~20% to 0%~25% (Level 1~15). |
| 1.17.2.10 | Critical-Hit Rate reduced from 10% to 5% (Lvl.5-8) and 20% to 10% (Lvl. 9-15). |
| 1.21.2.12 | HP increased from 3050–7750 to 3300–8150. Defense increased from 90–472 to 98–520. Sp. Def increased from 67–367 to 86–410. Critical-Hit Rate (at Lv. 5) increased from 5% to 7.5%. Critical-Hit Rate (at Lv. 9) increased from 10% to 15%. |
Standard Attack
| 1.4.1.3 | Bug fixes |
|---|---|
| 1.2.1.8 | Attack Speed increased. |
| 1.11.1.8 | Boosted Attack: Damage increased by about 10%. Healing increased from 15% of damage dealt to 20% of damage dealt. (+5%) |
| 1.17.1.2 | Attack Speed decreased by 0-7.5% (Lvl. 1-15). |
| 1.18.2.7 | Boosted Attack: Healing based on damage dealt increased by 50%. |
Bulldoze
| 1.1.1.6 | Damage increased from 292 to 381 (+30%). |
|---|---|
| 1.19.2.6 | Damage decreased by 7% - 9%. |
Dig
| 1.4.1.3 | Status increases have been reduced |
|---|---|
| 1.3.1.2 | Level learned changed from lv. 6 to lv. 5. Dig +: Level learned changed from lv. 12 to lv. 11 |
| 1.4.1.2 | Move description text changed. |
| 1.14.2.10 | Damage increased by 10%. |
| 1.18.2.7 | Defense & Sp. Def buff duration increased from 3s to 4s. Cooldown reduced from 8s to 7.5s. |
| 1.19.2.6 | Throw duration decreased from 1s to 0.6s. |
Earthquake
| 1.3.1.2 | Level learned changed from lv. 8 to lv. 7. Earthquake +: Level learned changed from lv. 13 to lv.14 |
|---|---|
| 1.4.1.2 | Move description text changed. |
| 1.14.2.10 | Damage increased by 15%. |
| 1.17.1.2 | Damage decreased by 5%. Earthquake +: Damage decreased by 5%. Movement speed reduction decreased from 40% to 20%. |
| 1.18.2.7 | Cooldown reduced from 7s to 6.5s. |
| 1.19.2.6 | Damage decreased by 10%. |
Dragon Claw
| 1.3.1.2 | Level learned changed from lv. 8 to lv. 7. Dragon Claw+: Level learned changed from lv. 13 to lv. 14 |
|---|---|
| 1.4.1.2 | Move description text changed. |
| 1.7.1.9 | Damage increased from 785 to 875. (+11%) Slow effect on opponents increased. Dragon Claw+: Damage increased from 1581 to 1758. (+11%) Slow effect on opponents increased. |
| 1.19.2.6 | Damage decreased by 10%. |
Dragon Rush
| 1.3.1.2 | Level learned changed from lv. 6 to lv. 5. Dragon Rush +: Level learned changed from lv. 12 to lv.11 |
|---|---|
| 1.1.1.6 | Cooldown period reduced from 8 seconds to 6 seconds (-25%). |
| 1.2.1.8 | Damage is increased from 549 to 912 (+66%). |
| 1.4.1.2 | Move description text changed. |
| 1.14.2.10 | Cooldown reduced from 6s to 5s. Dragon Rush +: Cooldown reduced from 5s to 4s. |
| 1.17.1.2 | Cooldown increased from 5s to 5.5s. |
| 1.22.1.5 | Damage reduction effect increased from 30% to 45%. |
Rough Skin
| 1.2.1.3 | Cooldown interval between procs, decreased. |
|---|---|
| 1.2.1.11 | Fixed a bug that caused more damage than expected when receiving Zeraora's Wild Charge. |
| 1.22.1.5 | Cooldown after triggering decreased from 2s to 0.6s. Reflected damage ratio decreased from 30% to 12.5%. |
Livid Outrage
| 1.3.1.2 | Level learned changed from lv. 10 to lv. 9 |
|---|---|
| 1.11.1.8 | Amount of energy required reduced by about 17%. |
| 1.22.1.5 | Damage increased by 8%. |
Garchomp Basic Info
| Garchomp | ||
|---|---|---|
 |
Role: All-Rounder Attack Type: Melee Damage Type: Physical Difficulty: Intermediate |
|
| "Garchomp’s Ability, Rough Skin, means it can sometimes cause damage to Pokémon that hit it, so opponents that attack Garchomp carelessly may just get struck back. What’s more, using Dig lets Garchomp sneak-attack its opponents from underground." | ||
Garchomp Best Lanes

|

|

|
Tips & Strategies for Every Lane
Garchomp Strengths and Weaknesses
| Strengths | Weaknesses |
|---|---|
| ✔︎ High damage output, especially when Boosted Attack meter is full. ✔︎ Strong engage moves that can displace and drag opponents. |
✖︎ Very slow early game. ✖︎ Unite Move is hard to control. |
Best Builds for Garchomp
| Garchomp Builds | |
|---|---|
| - | |
Double Dragon Build
Double Dragon Build

|
Moveset | Held Items | |||
|---|---|---|---|---|---|
| Battle Item | |||||
| Stats from Items (Lv. 40) | Recommended Lane | ||||
|
Attack: +31.5 Critical-Hit Rate: +7.0% Critical-Hit Damage: +14% Attack Speed: +19.20% |
|
||||
| Emblem Color Combination | Target Emblem Stats | ||||
|
|
Positive Stats: • Attack • Critical-Hit Rate Free Negative Stats: • Sp. Atk • Defense • Sp. Def |
||||
| Note: The emblem color and stats here are suggestions only. The builds are still viable even without the suggested emblems. |
|||||
Double Dragon Build Explanation
This build is centered on building up Garchomp's Boosted Attacks as fast as possible and maintaining it to beat down targets with the help of Dragon Rush and Dragon Claw. However, Earthquake can also be used instead of Dragon Claw
- Muscle Band is Garchomp's primary farming and fighting tool, giving its attacks an HP-based bonus damage.
- Rapid-Fire Scarf helps Garchomp build up Boosted Attacks faster through its massive attack speed boost effect.
- Scope Lens increases Garchomp's chances of dealing critical-hits and increasing their damage.
- Focus Band can be a replacement for Muscle Band to give Garchomp better durability and survivability.
- Eject Button gives Garchomp an additional repositioning tool on top of Dragon Rush, which also allows the Pokemon to perform creative plays.
- X Speed can also work for the build, giving Garchomp the mobility to stay on top of its targets.
- The build's Boost Emblem loadout should consist of 6 Brown Emblems for more damage and 6 White Emblems additional HP. This can be achieved by having at least two (2) Emblems that are both Brown and White.
- Equip Emblems that improve Attack or Critical-Hit Rate to further improve Garchomp's attacks.
- Sp. Atk., Sp. Def., and Defense can be freely traded for the other stats.
Double Dragon Build Damage Test
| Items (Level 30) |
Standard Attack (@ Lvl 15) Standard Attack (Critical-Hit) (@ Lvl 15) |
Boosted Attack (@ Lvl 15) Boosted Attack (Critical-Hit) (@ Lvl 15) |
|---|---|---|
| Muscle Band + Scope Lens + Rapid-Fire Scarf |
903 1918 |
11010 22615 |
Since the build is centered primarily on Garchomp's Boosted Attacks, equipping items that will help Garchomp build them up faster and maximize their damage is the ideal item combination.
Out of all the item combinations, Muscle Band, Scope Lens, and Rapid-Fire Scarf will be the best for the build. The item combination provides everything Garchomp needs to quickly build up Boosted Attacks and knock out opponents.
As for alternatives, replacing Muscle Band with Focus Band would be the best option. The massive attack speed bonus from Rapid-Fire Scarf will be more benefitial for Garchomp compared to the effects of Muscle Band.
These damage tests are conducted using the Training Dummy in Practice Mode. The results are taken from the Total Damage data.
| Note: The numbers in bold are the highest result for a specific test. |
| Items (Level 30) | Standard Attack (@ Lvl 15) Standard Attack (Critical-Hit) (@ Lvl 15) | Boosted Attack (@ Lvl 15) Boosted Attack (Critical-Hit) (@ Lvl 15) |
|---|---|---|
| Muscle Band + Scope Lens + Rapid-Fire Scarf | 903 1918 | 11010 22615 |
| Muscle Band + Scope Lens + Attack Weight (6 stacks) | 981 2141 | 11104 22767 |
| Muscle Band + Rapid-Fire Scarf + Attack Weight (6 stacks) | 993 1626 | 11118 22876 |
| Scope Lens + Rapid-Fire Scarf + Attack Weight (6 stacks) | 618 1773 | 10740 22401 |
The tests above does not use any Emblems yet so it will scale higher if equipped.
Earthquake Build
| Earthquake Build | Moveset | Held Items | |||
|---|---|---|---|---|---|
| Battle Item | |||||
| Stats from Items (Lv. 40) | Recommended Lane | ||||
|
Attack: +35 Defense: +35 Sp. Def: +35 Attack Speed: +8.70% HP: +235 |
|
||||
| Emblem Color Combination | Target Emblem Stats | ||||
|
|
Positive Stats: • Attack • Critical-Hit Rate Free Negative Stats: • Sp. Atk • Defense • Sp. Def |
||||
| Note: The emblem color and stats here are suggestions only. The builds are still viable even without the suggested emblems. |
|||||
Earthquake Build Explanation
This build is similar to Double Dragon but uses Dig and Earthquake instead. However, Dragon Rush can also be used instead of Dig.
- Muscle Band is Garchomp's primary farming and fighting tool, giving its attacks an HP-based bonus damage.
- Rapid-Fire Scarf helps Garchomp build up Boosted Attacks faster through its massive attack speed boost effect.
- Scope Lens increases Garchomp's chances of dealing critical-hits and increasing their damage.
- Focus Band can be a replacement for Muscle Band to give Garchomp better durability and survivability.
- Eject Button gives Garchomp an additional repositioning tool on top of Dragon Rush, which also allows the Pokemon to perform creative plays.
- X Speed can also work for the build, giving Garchomp the mobility to stay on top of its targets.
- The build's Boost Emblem loadout should consist of 6 Brown Emblems for more damage and 6 White Emblems additional HP. This can be achieved by having at least two (2) Emblems that are both Brown and White.
- Equip Emblems that improve Attack or Critical-Hit Rate to further improve Garchomp's attacks.
- Sp. Atk., Sp. Def., and Defense can be freely traded for the other stats.
Earthquake Build Damage Test
| Items (Level 30) |
Standard Attack (@ Lvl 15) Standard Attack (Critical-Hit) (@ Lvl 15) |
Boosted Attack (@ Lvl 15) Boosted Attack (Critical-Hit) (@ Lvl 15) |
|---|---|---|
| Muscle Band + Scope Lens + Rapid-Fire Scarf |
903 1918 |
11010 22615 |
Since the build is also centered primarily on Garchomp's Boosted Attacks, equipping items that will help Garchomp build them up faster and maximize their damage is the ideal item combination.
Out of all the item combinations, Muscle Band, Scope Lens, and Rapid-Fire Scarf will be the best for the build. The item combination provides everything Garchomp needs to quickly build up Boosted Attacks and knock out opponents.
As for alternatives, replacing Muscle Band with Focus Band would be the best option. The massive attack speed bonus from Rapid-Fire Scarf will be more benefitial for Garchomp compared to the effects of Muscle Band.
These damage tests are conducted using the Training Dummy in Practice Mode. The results are taken from the Total Damage data.
| Note: The numbers in bold are the highest result for a specific test. |
| Items (Level 30) | Standard Attack (@ Lvl 15) Standard Attack (Critical-Hit) (@ Lvl 15) | Boosted Attack (@ Lvl 15) Boosted Attack (Critical-Hit) (@ Lvl 15) |
|---|---|---|
| Muscle Band + Scope Lens + Rapid-Fire Scarf | 903 1918 | 11010 22615 |
| Muscle Band + Scope Lens + Attack Weight (6 stacks) | 981 2141 | 11104 22767 |
| Muscle Band + Rapid-Fire Scarf + Attack Weight (6 stacks) | 993 1626 | 11118 22876 |
| Scope Lens + Rapid-Fire Scarf + Attack Weight (6 stacks) | 618 1773 | 10740 22401 |
The tests above does not use any Emblems yet so it will scale higher if equipped.
Garchomp Best Items & Moveset
Best Held Items
| Item | Explanation |
|---|---|
 Focus Band Focus Band
|
Focus Band is the best defensive item for Garchomp since Garchomp needs to stay alive for as long as possible to stack its boosted attacks. |
 Scope Lens Scope Lens
|
Scope Lens works well with the attack speed increase from Garchomp's boosted attacks, adding a chance to deal massive critical-hit damage. |
 Muscle Band Muscle Band
|
Muscle Band is a must-have item for Garchomp to be effective in battles, improving its boosted attack gameplay. |
 Rapid-Fire Scarf Rapid-Fire Scarf
|
Rapid-Fire Scarf allows Garchomp to build up its Boosted Attacks much faster thanks to its massive attack speed boost effect. |
Best Battle Items
| Item | Explanation |
|---|---|
 Full Heal Full Heal
|
Full Heal provides a way for Garchomp to purge disables, and become immune to them for a duration, allowing Garchomp to hack enemies uninterrupted. |
 Eject Button Eject Button
|
Eject Button is the best battle item for Garchomp, giving a way to escape or chase enemies. In particular, it has a special interaction with Garchomp's moves. |
 X Speed X Speed
|
X Speed gives Garchomp more mobility and makes it easier to stay on top of its targets while it's attacking. |
Best Moveset
| Move | Explanation |
|---|---|
 Dragon Claw Dragon Claw
|
Dragon Claw allows Garchomp to control enemy movement, which makes it easier to attack them. |
 Dragon Rush Dragon Rush
|
Dragon Rush is a strong initiation tool to get Garchomp started on hacking its targets. It's also a decent escape tool when things go awry. |
This moveset makes it easier for Garchomp to build up its Boosted Attacks. Dragon Rush allows Garchomp to isolate and displace enemies, which is a great way to set up fights. Dragon Claw helps Garchomp build up Boosted Attacks faster aside from simply attacking. It can also alter Dragon Rush and turn it into a disabling move when used together.
Dragon Rush and Dig are Garchomp's mobility or initiation moves. They practically serve the same purpose of allowing Garchomp to get close to its targets and attack them, but they differ in how they function. Dragon Rush shoves enemies towards the designated direction while reducing the damage taken by Garchomp. Dig, on the other hand, throws opponents instead of shoving them. It also increases Garchomp's Defense and Sp. Def. stats, which is similar to Dragon Rush's reduced damage effect.
Dragon Claw and Earthquake are Garchomp's primary damage moves, which also help the Pokemon build up Boosted Attacks faster. Both do essentially the same thing but functions in different ways. Dragon Claw has Garchomp attack twice in front of it and has a special interaction with Dragon Rush. Meanwhile, Earthquake affects enemies around Garchomp.
Choosing which moves to use should always depend on making it easier for Garchomp to build up its Boosted Attacks since that is the Pokemon's core gameplay.
Which Moveset Do You Think is Best for Garchomp?
Why is it the best? Let us know in the comments!
Previous Poll Result
How to Play Garchomp
| Jump to Section | |
|---|---|
Increase Garchomp's Lethality with Boosted Attacks
Garchomp's attacks become Boosted Attacks with every fifth attack, dealing increased damage and gives Garchomp HP recovery based on the target's max HP. Maintaining theis aggression will allows you to go toe-to-toe with event the sturdiest Pokemon, so make sure to keep you boosted meter full at all times!
Boosted Attacks Guide: How to Use
Build Up Boosted Meter with Wild Pokemon
To ensure Garchomp's boosted attack effect is online before a fight, seek out and attack Wild Pokemon first. Doing this will allow you to get the benefits of the boosted attack earlier when faced against opposing Pokemon.
Solo Boss Pokemon
Another way to take advantage of Garchomp's Boosted Attacks is by taking objectives like Regieleki for your team. Because of the effects of your Boosted Attacks favoring enemies with high HP, you can potentially take out objectives by yourself.
Make Early Game Farming Faster with Sand Attack
Sand Attack is a debuff move that restricts enemy vision, but that doesn't mean that it's useless against farming Wild Pokemon. Though it may not have direct damage compared to Bulldoze, Sand Attack grants an attack speed buff to Garchomp, making it easier to stack up towards a full Boosted Attack to speed up the damage.
Sand Attack: Garchomp Move Effect and Cooldown
Pick Moveset Based on Playstyle
Choosing the moves you need is critical to how fights will play out. Although you can essentially go with any move combination, choosing the right set will allow you to execute Garchomp's combos.
Learn Dragon Moves for Isolating Combos
The Dragon Claw + Dragon Rush combo is a good dueling tool that has more range and damage but focuses more on damaging single targets. It is also great for displacing a target onto a disadvantageous position, making it easier for you and your team to follow up with a clean knock down.
Learn Ground Moves for Initiating Combos
The Dig + Earthquake combo, on the other hand, is a quick knock-up skill that is easily followed up by area damage that gains a Slow later in the game. This combination turns Garchomp into a straight up brawler that can contend with its fellow All-Rounders.
Hunt Down Easy Matchups
Garchomp can easily take on other Pokemon that are easy matchups. Thanks to its passive ability, Rough Skin, Garchomp can take and give a beating to opponents - especially if you can sustain its basic attacks. Just make sure to save a Dragon Rush for pursuit or a quick getaway.
Go For Prolonged Duels
Garchomp gains an attack speed boost when he lands a skill or an attack on an enemy. This makes his damage ramp up during a duel, so try to force long trades against enemies to maximize your buff.
Get Escavalier Buff for Easier Knockouts
Since Garchomp needs to be able to continually attack its target to build and maintain its Boosted Attacks, getting Escavalier's buff makes it easier for Garchomp to stay on top of its target.
Escavalier: Spawn Time, Buff, and Information
Farm Wild Pokemon to Heal Up
Remember that Empowered auto attacks are AOE (area-of-effect), so you can lifesteal across multiple Wild Pokemon like in this clip.
Aside from increasing his attack speed, Garchomp's boosted attack also heals him for a small amount. This slowly stacks up on prolonged fights so instead of going back to base, try farming wild Pokemon to heal up!
Aim Properly During Livid Outrage
Livid Outrage gives Garchomp a sudden burst of strength to swipe and slam enemies. The move, however, may feel shaky and hard to control, but its ability to turn and aim is rather easy if you get the hang of its aiming. Just remember to point your analog stick to your desired target at all times and Garchomp will easily turn around in that direction, even if it's a complete 180-degree turn. The dashes also cover a bit of distance so you can also use them to chase enemies!
Livid Outrage: Garchomp Move Effect and Cooldown
Progression and Leveling Guide
Top and Bottom Guide
Level 1 to 5
- Quickly clear out the Bunnelbies in the lane.
- Keep farming wild Pokemon in the lane to reach level 5 and learn your first move.
- At bottom lane, prioritize taking Indeedees for more exp.
Level 6 to 9
- Keep hunting Wild Pokemon to gain more EXP from farming Altaria and Swablus.
- Once you reach level 7, learn your second move.
- Help allies secure Regice, Registeel, or Regirock when it spawns, otherwise secure Regieleki.
- Upon reaching level 9, learn your Unite Move.
Level 10+
- Stick with allies to hunt targets, secure objectives, and push lanes.
- Reach at least level 13 or max level if possible before or when Groudon spawns for a fully-upgraded moveset.
- Make sure that your Unite Move is available when Groudon spawns.
- Help teammates win a teamfight and secure Groudon.
Garchomp Combos
Sand Trap Combo
| Sand Trap Combo | |
|---|---|
 |
|
Sand Attack
►
Bulldoze
►
Standard Attack
|
|
| This is Garchomp's quick and easy, early game combo that is great for over extending opponents. Start by hitting the target with a Sand Attack to disrupt their vision. Quickly activate Bulldoze and proceed to circle the target while dealing Standard Attacks. | |
Dragon Rush Combos
This set of combos takes advantage of Dragon Rush and Dragon Claw. They are essentially similar combos that have you displace a target but have slight differences in activation and effects.
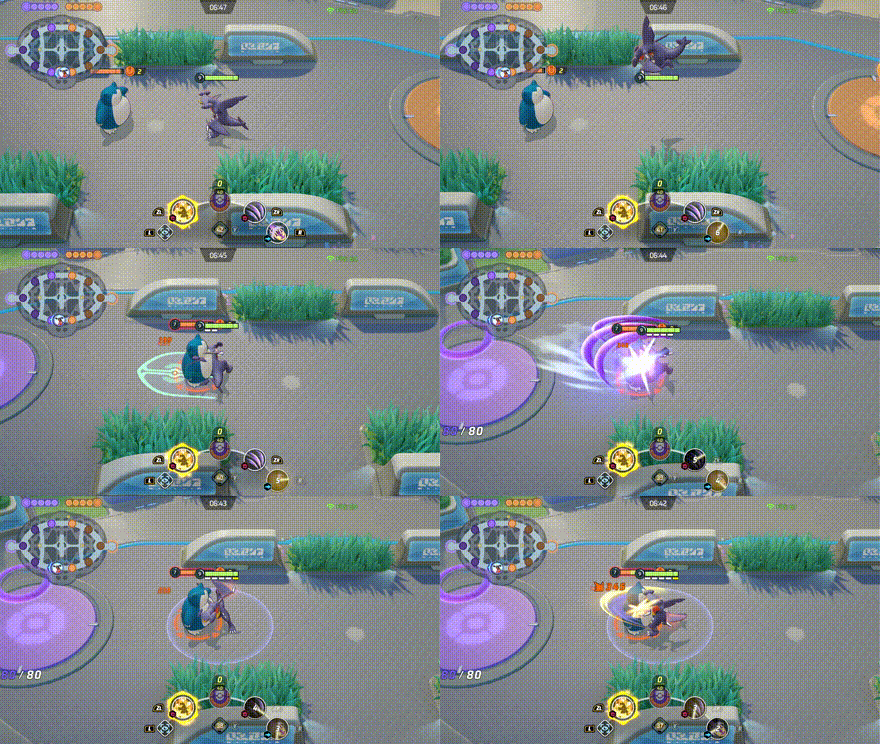
Dragon Rush Combo (Variation 1)
| Dragon Combo (Variation 1) | |
|---|---|
 |
|
| This variation seperates the two moves so you can take advantage of both of their effects. Dragon Claw is a strong 2 hit combo that also boosts your attack speed afterwards. | |
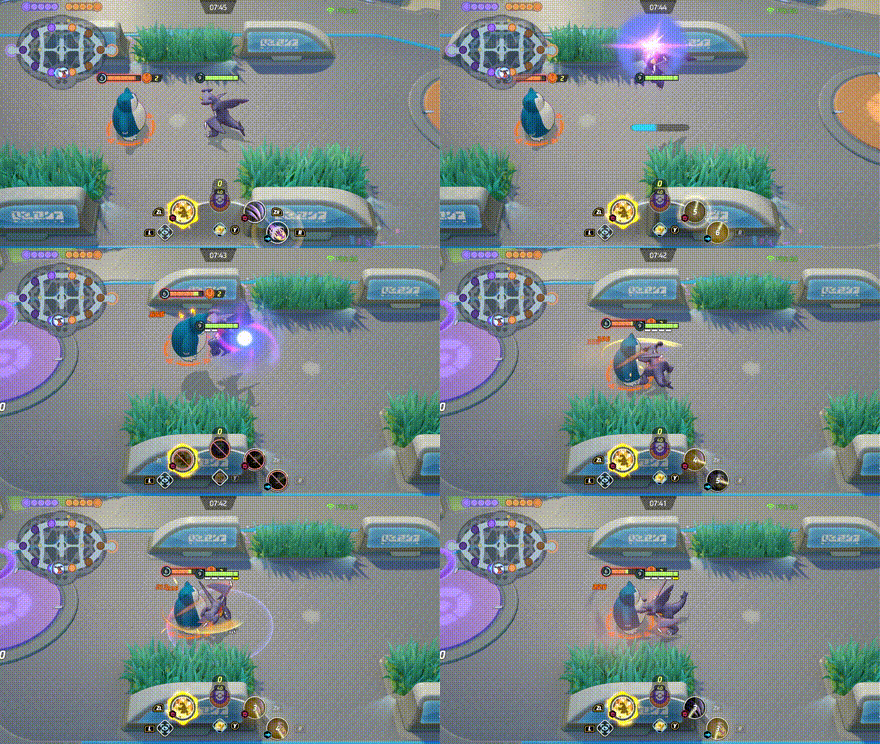
Dragon Rush Combo (Variation 2)
| Dragon Combo (Variation 2) | |
|---|---|
 |
|
| This is the second variation combines both moves for a more, bursty attack. After casting Dragon Rush, use Dragon Claw mid-flight to trigger the combo, causing Dragon Claw to knock enemies up. | |
Dig and Quake Combo
| Dragon Combo | |
|---|---|
 |
|
Dig
►
Earthquake
►
Standard Attack
~ |
|
| This combo allows Garchomp to engage enemies at a range. Start by activating Dig to close the distance between you and a target. At the end of its path, the move knocks enemies up, which makes it a great setup for Earthquake. After that, proceed to bombard the target with Standard Attacks. | |
Ultimate Initiator Combo
| Ultimate Initiator Combo | |
|---|---|
 |
|
| This combo is similar to the Dig and Quake combo, but uses Garchomp's Unite Move as a finisher. Start by activating Dig to close the distance between you and a target and activate Earthquake. Thanks to Earthquake's slow, it's also great to follow it up with Livid Outrage. | |
Matchups & Counters for Garchomp
Garchomp Matchups
| Matchup Notes | ||
|---|---|---|
| 1. The chart is based on our own experience playing Garchomp. 2. Pokemon within each tier are unordered 3. Any Pokemon not shown here are still under investigation. |
||
Hard Counter With Kiting, High Mobility, or Disables
Since Garchomp is a melee Pokemon and has low mobility, it can easily be kited by hard-hitting ranged Pokemon or outplayed by high mobility Pokemon. Pokemon with strong disabling moves are also great counters.
Best Counters
| Pokemon | Explanation |
|---|---|
 Slowbro Slowbro
|
Rating: ★★★★★ • Can render Garchomp useless with Slowbeam. • Can disrupt Garchomp's attacks with Surf and/or Telekinesis. • Can cripple Garchomp's movement using Scald. |
 Alolan Ninetales Alolan Ninetales
|
Rating: ★★★★★ • Can freeze Garchomp and deal considerable damage with Avalanche and Blizzard. |
 Dodrio Dodrio
|
Rating: ★★★★ • Can disrupt Garchomp and deal considerable damage with Drill Peck. • Has superior movement speed. |
Even Matchups for Garchomp
Garchomp can take any Pokemon in a duel as long as it can continuously hit its target and maintain its boosted attack stacks.
Close the Gap
| Ranged, Fragile Pokemon with High Damage |
|---|
| How to Beat |
|
• These Pokemon prefer to keep their distance from opponents when fighting have high damage potential that can take out Garchomp quickly. However, they are fragile and can't win in a brawl against Garchomp. • Quickly close the gap with Dragon Rush or Dig, then follow up with Dragon Claw or Earthquake to build up Boosted Attacks and beat them down. • If necessary, use Livid Outrage to finish them off while becoming immune to disables. |
Stand and Fight
| All-Rounders |
|---|
| How to Beat |
|
• Much like Garchomp, these Pokemon excel in close combat and rely mostly on their attacks or combos to deal damage. However, Garchomp's powerful attacks can overpower them. • Use moves to help Garchomp build up Boosted Attacks quickly. • Brawl with them and beat them down with Boosted Attacks. • If necessary, use Livid Outrage to finish them off. |
Watch Out for Their Disables
| Pokemon with Disabling Moves |
|---|
| How to Beat |
|
• These Pokemon will lose in a brawl against Garchomp. However, they have disabling moves that can help them get the upper hand. • Try to dodge their disabling moves, or use Full Heal to purge them and become immune. • Use moves to help Garchomp build up Boosted Attacks quickly. • Brawl with them and beat them down with Boosted Attacks. • If necessary, use Livid Outrage to finish them off while becoming immune to disables. |
Easy Matchups
Easy matchups are Pokemon that allow Garchomp to freely stack up its boosted attacks, or Pokemon that can be burst down fast.
Beat Them Down with Attacks
| High-Durability Pokemon |
|---|
| How to Beat |
|
• These Pokemon have high durability but will certainly lose in a melee brawl against Garchomp. Their high durability also allows Garchomp to build up and maintain Boosted Attacks easily. • Use moves to help Garchomp build up Boosted Attacks quickly. • Brawl with them and beat them down with Boosted Attacks. • If necessary, use Livid Outrage to finish them off. |
Utilize Their Numbers
| Supporters |
|---|
| How to Beat |
|
• These Pokemon usually stick with their allies and rarely venture alone. Although they themselves pose no threat to Garchomp, their support capabilities makes them valuable during fights. • Take advantage of their numbers to build up Boosted Attacks faster and beat them down with it. • If necessary, use Livid Outrage to finish them off. |
Best Teammates for Garchomp
| Pokemon | Explanation |
|---|---|
 Mew Mew
 Mr. Mime Mr. Mime
|
Aggressive Support |
| Pokemon that provide offensive and defensive support can help Garchomp beat down its targets. Using moves like Coaching and Power Swap on Garchomp keeps it alive and gives it crucial buffs for fighting, improving the Pokemon's efficiency as a brawler. They also have high burst damage moves like Solar Beam and Psychic that can bring down a target's HP low enough for Garchomp to finish them off. Moreover, their disabling moves like Surf and Confusion can keep enemies in place while Garchomp builds up its Boosted Attacks or to keep them away from Garchomp entirely. | |
 Alolan Ninetales Alolan Ninetales
 Snorlax Snorlax
 Wigglytuff Wigglytuff
|
Strong AoE Disablers |
| Since Garchomp relies on its melee attacks to take out targets, Pokemon with strong AoE disabling moves can prevent enemies from escaping Garchomp's attacks. Freezing enemies with Avalanche and Blizzard, blocking their path using Block, and putting them to sleep using Sing are some ways that can help Garchomp stay at melee range. The more targets that are disabled the more Garchomp can capitalize on the situation. | |
 Eldegoss Eldegoss
|
Dedicated Supporter |
| Having a dedicated supporter like Eldegoss can help Garchomp get through its tedious early game. Keeping Garchomp alive using Cotton Guard while adding a bit of aggression with Leaf Tornado gives Garchomp a fighting chance against most lane duos. |
Looking for teammates to synergize with you? Head over to our Friend Request Board to find other trainers to join you in your grind or just to hang out with!
Garchomp Moves
Move Slot 1 (R)
 Sand Attack Sand Attack
(Lv. 1 or 3) |
Move Type: Debuff Damage Type: Status Cooldown: 6s Starting Damage: N/A Final Damage: N/A |
|---|---|
| Hurls sand, narrowing the field of vision of opposing Pokemon and decreasing their movement speed for a short time when it hits. This also increases the user's movement speed and basic attack speed. | |
 Dragon Rush Dragon Rush
(Lv. 5) Upgrade Lv. 11 |
Move Type: Dash Damage Type: Physical Cooldown: 5.5s Starting Damage: 484 Final Damage: 936 |
|
Has the user back up to create distance before diving to attack in the designated direction, shoving opposing Pokemon. The user can use Dragon Claw while creating distance at the beginning of the move to create a combo attack, which strengthens Dragon Claw’s effect that decreases the opposing Pokemon's movement speed. This move reduces the damage the user receives while using it.
Upgrade: The user becomes immune to hindrances while using this move. |
|
 Dig Dig
(Lv. 5) Upgrade Lv. 11 |
Move Type: Dash Damage Type: Physical Cooldown: 7.5s Starting Damage: 531 Final Damage: 980 |
|
Has the user burrow underground and move quickly in the designated direction, jumping out when it comes in contact with an opposing Pokemon or it has traveled a maximum distance. This jump deals damage to opposing Pokemon in the area of effect and throws them. Using this move increases the user’s Defense and Sp. Def. for a short time.
Upgrade: Increases the length of the time opposing Pokemon are thrown when the user jumps out from the ground. |
|
Move Slot 2 (ZR)
 Bulldoze Bulldoze
(Lv. 1 or 3) |
Move Type: Area Damage Type: Physical Cooldown: 5s Starting Damage: 439 Final Damage: 582 |
|---|---|
| Has the user stomp down on the ground, dealing damage to opposing Pokemon in the area of effect. | |
 Dragon Claw Dragon Claw
(Lv. 7) Upgrade Lv. 13 |
Move Type: Melee Damage Type: Physical Cooldown: 5s Starting Damage: 788 First Hit: 355, Second Hit: 433 Final Damage: 1579 First Hit: 718, Second Hit: 861 |
|
Has the user attack twice in front of itself using its claws. The first attack deals damage to the opposing Pokemon and then throws them. The second deals increased damage and decreases the movement speed of the opposing Pokemon for a short time.
Upgrade: Increases damage dealt by this move. |
|
 Earthquake Earthquake
(Lv. 7) Upgrade Lv. 13 |
Move Type: Area Damage Type: Physical Cooldown: 6.5s Starting Damage: 995 Stomp: 479, Aftershock: 258 x 2 Final Damage: 1798 Stomp: 856, Aftershock: 471 x 2 |
|
Has the user jump high into the air and crash forcefully to the ground, dealing damage over time to opposing Pokemon in the area of effect and decreasing their movement speed for a short time.
Upgrade: For a short time, further decreases the movement speed of opposing Pokemon that are in the move's area of effect and especially close to the user. |
|
Unite Moves (ZL)
 Livid Outrage Livid Outrage
(Lv. 9) |
Move Type: Melee Damage Type: Physical Cooldown: 111s Starting Damage: 8943 First Attack: 1181, Second Attack: 1448, Third Attack: 1718, Fourth Attack: 2105, Fifth Attack: 2491 Final Damage: 12622 First Attack: 1774, Second Attack: 2140, Third Attack: 2510, Fourth Attack: 2903, Fifth Attack: 3295 |
|---|---|
| Has the user unleash a powerful chain attack while dashing forward. The final attack throws opposing Pokemon but also leaves the user unable to act for a short time. | |
Standard Attack
|
|
Become a boosted attack with every fifth attack, dealing increased damage and restoring the user's HP. For a short time after a boosted attack hits, every time one of the user's basic attacks or moves hits an opposing Pokemon, the user's basic attack speed is increased. |
|---|
Ability (Passive)
 Rough Skin Rough Skin
|
All Evolution Stages
When the Pokemon is struck by a melee attack, a portion of the damage recieved is reflected back at the attacker. |
|---|
Garchomp Stats & Evolutions
Garchomp Evolutions
| 1st Evolution | 2nd Evolution | Final Evolution |
|---|---|---|
 Gible Gible(Lv. 1) |
 Gabite Gabite(Lv. 5) |
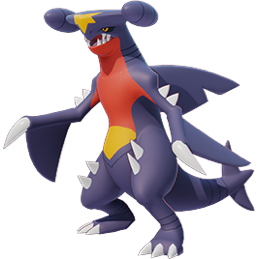 Garchomp Garchomp(Lv. 9) |
Garchomp Stats
| Level | HP | Defense | Special Defense | Attack Damage |
|---|---|---|---|---|
| 1 | 3300 | 98 | 86 | 165 |
| 2 | 3370 | 104 | 91 | 170 |
| 3 | 3453 | 111 | 96 | 176 |
| 4 | 3554 | 120 | 103 | 183 |
| 5 | 3916 | 152 | 127 | 209 |
| 6 | 4061 | 164 | 137 | 219 |
| 7 | 4234 | 179 | 148 | 232 |
| 8 | 4442 | 197 | 162 | 247 |
| 9 | 5177 | 261 | 211 | 300 |
| 10 | 5476 | 287 | 231 | 322 |
| 11 | 5835 | 319 | 255 | 348 |
| 12 | 6266 | 356 | 284 | 379 |
| 13 | 6784 | 401 | 319 | 417 |
| 14 | 7405 | 455 | 360 | 462 |
| 15 | 8150 | 520 | 410 | 516 |
Attack Damage is the damage of the Basic Attack as tested against the Training Dummy.
Garchomp In-Game Stats Listing
| Offense | Endurance | Mobility | Scoring | Support |
|---|---|---|---|---|

|

|

|

|

|
Garchomp Skins (Holowear)
| Holowear | |
|---|---|
 Beach Style Beach Style
|
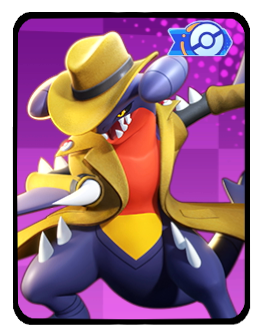 Stakeout Style Stakeout Style
|
 Holiday Style Holiday Style
Zirco Trading:
|
 Masquerade Style Masquerade Style
Zirco Trading:
|
 Martial Arts Style Martial Arts Style
Zirco Trading:
|
 Tuxedo Style Tuxedo Style
Zirco Trading:
|
 Wanderer Style Wanderer Style
Zirco Trading:
|
 Martial Arts Style (Green) Martial Arts Style (Green)
Zirco Trading:
|
Garchomp Character Spotlight
Garchomp Achievements
Boosted Attack Achievement
| Boosted Attack | |
|---|---|
| Pokemon | Move |
 Garchomp Garchomp
|
|
| Mission: In a single battle, knock out 3 or more Pokemon from the opposing team with a boosted attack (5/10/20 battles total) |
|
| Medals & Points | Rewards |
|
|
|
|
|
|
|
|
|
List of All-Rounder Pokemon Achievements
Pokemon UNITE Related Guides

All Pokemon Guides and Builds
Upcoming Pokemon
 Articuno Articuno(TBA) |
 Meganium Meganium(TBA) |
 Typhlosion Typhlosion(TBA) |
 Feraligatr Feraligatr(TBA) |
Mega Evolutions
| Mega Evolved Pokemon | ||
|---|---|---|
 Mega Charizard X Mega Charizard X |
 Mega Charizard Y Mega Charizard Y |
 Mega Gyarados Mega Gyarados |
 Mega Lucario Mega Lucario |
 Mega Mewtwo X Mega Mewtwo X |
 Mega Mewtwo Y Mega Mewtwo Y |
Pokemon by Role
| All Pokemon Roles | |||||
|---|---|---|---|---|---|
 Attackers Attackers |
 All-Rounders All-Rounders |
 Defenders Defenders |
|||
 Speedsters Speedsters |
 Supporters Supporters |
||||
Pokemon by Characteristics
| Attack Type | |
|---|---|
 Melee Pokemon Melee Pokemon |
 Ranged Pokemon Ranged Pokemon |
 Physical Pokemon Physical Pokemon |
 Special Pokemon Special Pokemon |
| Stat Rankings | |
 HP Ranking HP Ranking |
 Defense Ranking Defense Ranking |
 Sp. Def. Ranking Sp. Def. Ranking |
 Basic Attack Ranking Basic Attack Ranking |
Comment
Gary got buffed after i posted this and took a break, now he's a proper diver. glass cannon dragon build is pretty scary, i was on the receiving end and it HURT.
Author
Garchomp Guide: Builds and Best Items
Rankings
- We could not find the message board you were looking for.
Gaming News
Popular Games

Genshin Impact Walkthrough & Guides Wiki

Umamusume: Pretty Derby Walkthrough & Guides Wiki

Pokemon Pokopia Walkthrough & Guides Wiki

Honkai: Star Rail Walkthrough & Guides Wiki

Monster Hunter Stories 3: Twisted Reflection Walkthrough & Guides Wiki

Arknights: Endfield Walkthrough & Guides Wiki

Wuthering Waves Walkthrough & Guides Wiki

Zenless Zone Zero Walkthrough & Guides Wiki

Pokemon TCG Pocket (PTCGP) Strategies & Guides Wiki

Monster Hunter Wilds Walkthrough & Guides Wiki
Recommended Games

Diablo 4: Vessel of Hatred Walkthrough & Guides Wiki

Cyberpunk 2077: Ultimate Edition Walkthrough & Guides Wiki

Fire Emblem Heroes (FEH) Walkthrough & Guides Wiki

Yu-Gi-Oh! Master Duel Walkthrough & Guides Wiki

Super Smash Bros. Ultimate Walkthrough & Guides Wiki

Pokemon Brilliant Diamond and Shining Pearl (BDSP) Walkthrough & Guides Wiki

Elden Ring Shadow of the Erdtree Walkthrough & Guides Wiki

Monster Hunter World Walkthrough & Guides Wiki

The Legend of Zelda: Tears of the Kingdom Walkthrough & Guides Wiki

Persona 3 Reload Walkthrough & Guides Wiki
All rights reserved
©2021 Pokémon. ©1995–2021 Nintendo / Creatures Inc. / GAME FREAK inc.
©2021 Tencent.
The copyrights of videos of games used in our content and other intellectual property rights belong to the provider of the game.
The contents we provide on this site were created personally by members of the Game8 editorial department.
We refuse the right to reuse or repost content taken without our permission such as data or images to other sites.
 Absol
Absol Aegislash
 Alcremie
 Alolan Raichu
 Armarouge
 Azumarill
 Blastoise
 Blaziken
 Blissey
 Buzzwole
 Ceruledge
 Chandelure
 Charizard
 Cinderace
 Clefable
 Comfey
 Cramorant
 Crustle
 Darkrai
 Decidueye
 Delphox
 Dhelmise
 Dragapult
 Dragonite
 Duraludon
 Empoleon
 Espeon
 Falinks
 Galarian Rapidash
 Gardevoir
 Gengar
 Glaceon
 Goodra
 Greedent
 Greninja
 Gyarados
 Ho-oh
Ho-oh Hoopa
Hoopa Inteleon
 Lapras
 Latias
 Latios
 Leafeon
 Lucario
 Machamp
 Mamoswine
 Meowscarada
 Meowth
 Metagross
 Mimikyu
 Miraidon
 Moltres
 Pawmot
 Pikachu
 Psyduck
 Sableye
 Scizor
 Sirfetch'd
 Suicune
 Sylveon
 Talonflame
 Tinkaton
 Trevenant
 Tsareena
 Tyranitar
 Umbreon
 Urshifu
 Vaporeon
 Venusaur
 Zacian
 Zapdos
 Zeraora
 Zoroark


![The Liar Princess and the Blind Prince Review [PC] | Lovely to Look at but Tedious to Play](https://img.game8.co/4442586/8d95f5faf05780f1765ce7e0938bd825.jpeg/show)
![Marathon Cryo Archive Map Teased as [REDACTED] on Selection Screen](https://img.game8.co/4442236/6357203e58172f6de57f1991e7c39b22.png/thumb)


I think this is biased against him, I main him and I think he should be at least A tier, the unite love isn’t that hard it just takes practice and skill, the right emblem build (I go for full health) works amazing giving him the early game durability needed, with drain crown, sash, and muscle band, the recent nerf wasn’t even that bad