Dodrio Guide: Best Builds and Moveset
☆ Upcoming: Articuno | Meganium | Typhlosion | Feraligatr
★ Latest News: Zapdos | Moltres | Version 1.22.1.5
☆ Popular Pages: Upcoming Pokemon | Tier List
★ Current Seasons: Ranked S34 | Battle Pass S39
☆ Join Game8's Pokemon Discord Server!
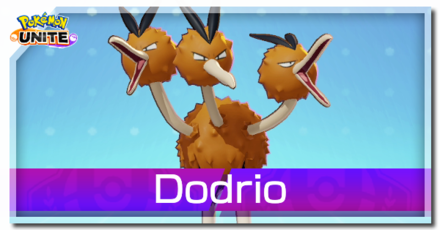
The best guide on how to play Dodrio in Pokemon UNITE for Nintendo Switch and Mobile. Check here for the best builds, Held and Battle items, cost in gems and coins, movesets, as well as the latest nerfs, buffs, counters, matchups, and more!
| Dodrio Pokemon Pages | |
|---|---|
 Dodrio Release Date Dodrio Release Date |
 Dodrio Guide Dodrio Guide |
List of Contents
Dodrio Latest Nerfs & Buffs (11/13)
| Dodrio Changes | |
|---|---|
|
Jump Kick |
• Damage decreased by 10%. |
|
Jump Kick + |
• Second hit stun duration reduced from 1s to 0.6s. |
Agility
| 1.8.1.4 | Cooldown increased from 10s to 11s. (+1s). Movement speed effect reduced by 20%. |
|---|---|
| 1.17.1.2 | Cooldown decreased from 11s to 9s. |
Tri Attack
| 1.7.1.9 | HP recovery decreased. |
|---|---|
| 1.7.1.11 | Reduced the damage dealt when not the Sprint gauge is not full from 1225 to 975. (-20%) Reduced the additional damage and healing of Standard Attacks after using this move. |
| 1.15.1.2 | Damage decreased by 12%. |
Drill Peck
| 1.7.1.9 | Cooldown reduced from 7.5s to 6s. (-1.5s) |
|---|---|
| 1.13.1.4 | Damage reduced by 10%. |
| 1.17.1.2 | Damage increased by 6%. |
Jump Kick
| 1.7.1.9 | Cooldown reduced from 8s to 7.5s. (-1.5s) Sprint Gauge gained from this move is increased. |
|---|---|
| 1.8.1.4 | Cooldown decreased from 7.5s to 6.5s. (-1s) |
| 1.9.2.8 | Fixed bugs that affected the following: Activation Timing |
| 1.20.3.11 | Damage decreased by 10%. Jump Kick +: Second hit stun duration reduced from 1s to 0.6s. |
Quick Attack
| 1.7.1.9 | Fixed a bug on the cooldown reduction effect of this move. |
|---|
Standard Attack
| 1.10.1.3 | Boosted attack damage decreased by 10%. |
|---|---|
| 1.13.1.3 | Fixed an issue where the dash gauge was increasing when moving with enhanced attacks. |
Triple Trample
| 1.13.1.4 | Attack increase effect of move reduced from 30% to 25%. |
|---|
Dodrio Basic Info
| Dodrio | ||
|---|---|---|
 |
Role: Speedster Attack Type: Melee Damage Type: Physical Difficulty: Expert |
|
| "Peck apart the competition and prove that three heads are better than one with this nimble Speedster!" | ||
Dodrio Best Lanes

|

|

|
Tips & Strategies for Every Lane
Strengths and Weaknesses
| Strengths | Weaknesses |
|---|---|
|
✔︎ Insanely fast movement speed ✔︎ Can have flexibility in scoring because of the triple score mechanic ✔︎ Great with Hit-and-Run playstyles |
✖︎ Quite squishy ✖︎ Relies heavily on the Sprint Mechanic so it is extremely weak against crowd control ✖︎ Cannot exploit the overdunk scoring mechanic |
Dodrio Cost and Price
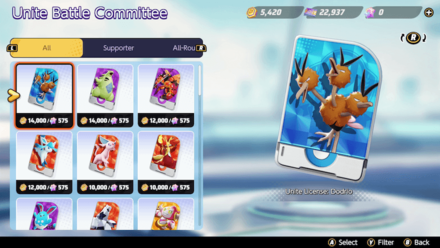
As of September 22, 2022, Dodrio is now purchaseable for 14,000 Aeos Coins! This comes one week after Dodrio becomes available to purchase with Aeos Gems!
Best Builds for Dodrio
| Dodrio Builds | |
|---|---|
| - | |
Tri Attack Build
Tri Attack Build

|
Moveset | Held Items | |||
|---|---|---|---|---|---|
| Battle Item | |||||
| Stats from Items (Lv. 40) | Recommended Lane | ||||
|
Attack: +66.5 Critical-Hit Rate: +2.3% Movement Speed: +175 |
|
||||
| Emblem Color Combination | Target Emblem Stats | ||||
|
|
Positive Stats: • Attack • Movement Speed Free Negative Stats: • Sp. Atk |
||||
| Note: The emblem color and stats here are suggestions only. The builds are still viable even without the suggested emblems. |
|||||
Tri Attack Build Explanation
| Build Explanation |
|---|
| This build is centered on bursting down targets using mainly Tri Attack and Boosted Attacks. Agility helps keep Dodrio's gauge full as it dashes in and out. |
| · Razor Claw provides Dodrio a decent amount of Attack stat and improves its Boosted Attacks whenever it uses a move. · Attack Weight further gives Dodrio an Attack stat boost, increasing its overall damage output. · Float Stone is a core item for the build, giving Dodrio more Attack stat and greatly improving its movement speed. · However, Muscle Band can be a great replacement for Attack Weight, further improving Dodrio's attacks. It also eliminates the need to stack. · Full Heal acts as Dodrio's additional tool for purging off disables like stuns and slows. · The build's Boost Emblem loadout should consist of 6 Attack Emblems for more damage and 4 White Emblems for additional HP. · Equip Emblems that improve Attack or HP to maximize Dodrio's damage. · Sp. Atk can be freely traded for the other stats. |
Tri Attack Build Damage Test
| Items (@ Lvl 30) + Float Stone |
Tri Attack (Boosted) (@ Lvl 15) Tri Attack (Normal) (@ Lvl 15) |
Boosted Attack (@ Lvl 15) |
|---|---|---|
| Razor Claw (Includes Effect) + Attack Weight (6 Stacks) |
2814 1126 |
2769 |
Since the build is centered on Tri Attack, equipping items that will maximize its damage is the ideal combination. Float Stone is a core item for the build, leaving only two more items for consideration.
As the results show, Razor Claw and a fully-stacked Attack Weight will yield the best damage output for Tri Attack. Although the item combination did not produce the best Boosted Attack damage, the value is only marginally lower than the highest score.
As for alternatives, replacing Attack Weight with Muscle Band would be the ideal option. The item combination scored the highest Boosted Attack damage with only slightly lower Tri Attack damage. Muscle Band also improves Dodrio's farming speed should it go in the jungle.
These damage tests are conducted using the Training Dummy in Practice Mode. The results are taken from the Total Damage data.
| Note: The numbers in bold are the highest result for a specific test. |
| Items (@ Lvl 30) + Float Stone | Tri Attack (Boosted) (@ Lvl 15) Tri Attack (Normal) (@ Lvl 15) | Boosted Attack (@ Lvl 15) |
|---|---|---|
| Muscle Band + Razor Claw (Includes Effect) | 2595 1038 | 2884 |
| Muscle Band + Attack Weight (6 Stacks) | 2814 1126 | 2186 |
| Razor Claw (Includes Effect) + Attack Weight (6 Stacks) | 2814 1126 | 2769 |
The tests above does not use any Emblems yet so it will scale higher if equipped.
Drill Peck Build
| Drill Peck Build | Moveset | Held Items | |||
|---|---|---|---|---|---|
| Battle Item | |||||
| Stats from Items (Lv. 40) | Recommended Lane | ||||
|
Attack: +66.5 Critical-Hit Rate: +2.3% Movement Speed: +175 |
|
||||
| Emblem Color Combination | Target Emblem Stats | ||||
|
|
Positive Stats: • HP • Attack • Movement Speed Free Negative Stats: • Sp. Atk |
||||
| Note: The emblem color and stats here are suggestions only. The builds are still viable even without the suggested emblems. |
|||||
Drill Peck Build Explanation
| Build Explanation |
|---|
| This build utilizes Drill Peck to burst and shove enemies while keeping Dodrio's gauge up with Jump Kick. |
| · Razor Claw provides Dodrio a decent amount of Attack stat and improves its Boosted Attacks whenever it uses a move. · Attack Weight further gives Dodrio an Attack stat boost, increasing its overall damage output. · Float Stone is a core item for the build, giving Dodrio more Attack stat and greatly improving its movement speed. · However, Muscle Band can be a great replacement for Razor Claw, improving Dodrio's attacks overall. · Full Heal acts as Dodrio's additional tool for purging off disables like stuns and slows. · The build's Boost Emblem loadout should consist of 6 Attack Emblems for more damage and 4 White Emblems for additional HP. · Equip Emblems that improve Attack or HP to maximize Dodrio's damage. · Sp. Atk can be freely traded for the other stats. |
Drill Peck Build Damage Test
| Items (@ Lvl 30) + Float Stone |
Drill Peck (Boosted) Jump Kick |
Boosted Attack (@ Lvl 15) |
|---|---|---|
| Razor Claw (Includes Effect) + Attack Weight (6 Stacks) |
12,262 1566 |
2016 |
Since the build is centered on Drill Peck and Jump Kick, equipping items that will maximize their damage is the ideal combination. Float Stone is a core item for the build, leaving only two more items for consideration.
As the results show, Razor Claw and a fully-stacked Attack Weight will yield the best damage output for Drill Peck and Jump Kick. The item combination produced the best result for Drill Peck and Jump Kick while scoring second for Boosted Attack damage.
As for alternatives, replacing Razor Claw with Muscle Band would be the ideal option. The item combination scored the same as the recommended build but has a slightly lower Boosted Attack damage. Muscle Band also improves Dodrio's farming speed should it go in the jungle.
These damage tests are conducted using the Training Dummy in Practice Mode. The results are taken from the Total Damage data.
| Note: The numbers in bold are the highest result for a specific test. |
| Items (@ Lvl 30) + Float Stone | Drill Peck (Boosted) Jump Kick | Boosted Attack (@ Lvl 15) |
|---|---|---|
| Muscle Band + Razor Claw (Includes Effect) | 11,987 1456 | 2196 |
| Muscle Band + Attack Weight (6 Stacks) | 12,262 1566 | 1979 |
| Razor Claw (Includes Effect) + Attack Weight (6 Stacks) | 12,262 1566 | 2016 |
The tests above does not use any Emblems yet so it will scale higher if equipped.
Dodrio Best Items & Moveset
Best Held Items
| Item | Explanation |
|---|---|
 Attack Weight Attack Weight
|
Each stack of Attack Weight adds extra Attack stat for Dodrio, which increases the Pokemon's damage. Thanks to Dodrio's unique scoring method, you will be able to reach the max stat bonus faster. |
 Aeos Cookie Aeos Cookie
|
Each stack of Aeos Cookie adds extra HP for Dodrio, increasing the Pokemon's survivability. Thanks to Dodrio's unique scoring method, you will be able to reach the max stat bonus faster. |
 Float Stone Float Stone
|
The extra movement speed out of combat allows Dodrio to traverse the map efficiently. Moreover, the item synergizes well with Dodrio's Sprint mechanic, allowing it to fill up the meter faster. |
 Focus Band Focus Band
|
Focus Band increases Dodrio's survivability. It can help the Pokemon recover lost HP during fights, which is especially helpful during early-game skirmishes. |
 Muscle Band Muscle Band
|
Muscle Band increases Dodrio's Standard Attack damage. The item synergizes well with Dodrio's fast-paced gameplay. |
 Razor Claw Razor Claw
|
Razor Claw adds a slow effect each time Dodrio hits with its moves. This allows it to line up it shots properly for better combos. It also increases the Pokemon's critical hit rate. |
Best Battle Items
| Item | Explanation |
|---|---|
 Full Heal Full Heal
|
Full Heal helps Dodrio block enemy crowd control and get around any form of hindrance that can disrupt its movement. |
 X Speed X Speed
|
X Speed provides a sudden boost in movement speed that contributes to realizing Dodrio's gameplay. The faster Dodrio's movement speed, the faster it can fill up the Sprint Gauge. |
 X Attack X Attack
|
X Attack offers additional firepower for Dodrio's burst moves. It also makes farming Wild Pokemon camps easier. |
Best Moveset
| Move | Explanation |
|---|---|
 Tri Attack Tri Attack
|
Tri Attack allows Dodrio to be more elusive thanks to the moves ability to turn into a ranged attack. Having up to two (2) activations makes it a lethal move, especially if you can take advantage of the cooldown reduction effect of Run Away. |
 Agility Agility
|
Agility synergizes well with Dodrio's Sprint mechanic as you get increased movement speed. It also allows you to get pass hindrances if you get pinned down. |
This moveset helps realize Dodrio's fast-paced, high-intensity gameplay and allows the Pokemon to make unique plays. It is also a great combination if you are looking to go all in on Dodrio's scoring-focus gameplay.
If you prefer to play Dodrio as a typical Speedster with burst damage, learn Drill Peck instead. Once you fill-up the Sprint Gauge, the move turns into an effective disabling move that can displace multiple enemies in one stride. For Dodrio's dash move, if you prefer more damage and wall traversal, opt for Jump Kick instead.
Which Moveset Do You Think is Best for Dodrio?
Let us know your thoughts in the comments!
Previous Poll Result
How to Play Dodrio
| Jump to Section | |
|---|---|
Keep Moving
Dodrio's strength relies on its Sprint mechanic, which incentivizes you for playing around with The Pokemon's fast-paced gameplay. You must always max out the Sprint Gauge below Dodro's health bar as you will get extra movement speed, as well as a chance to augment your damaging moves. You can do this by constantly moving around the battlefield and keeping momentum as much as possible.
Note that if your momentum is disrupted, the sprint gauge will rapidly deplete, and you will have to start moving again or use your dash moves to get back the Sprint Gauge.
Run Away: Dodrio Passive Effect and Cooldown
Be Mindful of Movement Speed Effects
The Sprint build up is dependent on each time Dodrio takes a step. Simply put, the faster Dodrio's movement speed is, the faster the Sprint Gauge will fill up. So, passing over allied Lane Flux or using X Speed will increase Dodri's movement speed which, in turn, also fills up the Sprint Gauge faster. This also means that you will generate less sprint if you are slowed down by a move, Slow Smoke, or the orange lane flux near enemy goal zones.
Maintain Momentum After Using a Move
Dodrio will tend to stop mid-animation every time you use a move. If you are looking to get the enhanced effect from Sprint Gauge, make sure to allot a few seconds to move around the target before following up with attacks. Otherwise, you may only deal basic attacks and be left open for a counter.
Jungler Role is Recommended
To get the fastest start possible, you should take the Jungle path to get ahead in EXP. Not only will Dodrio benefit from the uncontested farming, but it can also traverse the central area of Theia Sky Ruins efficiently thanks to its movement speed and dash moves. Moreover, Dodrio will have access to both of its early game moves at level 2, which is extremely helpful in clearing Wild Pokemon camps faster.
Jungle Guide and Best Junglers
Reduce Cooldowns with Boosted Attacks

When the Sprint Gauge is full, Dodrio's Standard Attack turns into a charging move that will deal damage to the direction it's facing and consume all of the sprint. If this attack hits opposing an Pokemon, all of Dodrio's move cooldowns are reduced by around 1 second. Take note of this when you are performing combos as you can burst down targets with just a couple hits. For the best value, try to move around opponents with either Agility or Jump Kick and attack once the Sprint Gauge is full.
Get the Most Out of Dash Moves
Aside from constantly moving, Dodrio's dash moves can also help the Pokemon fill up the Sprint Gauge. Depending on how you want to approach brawls, one choice may be more efficient in generating Sprint Gauge than the other.
Get More Damage with Jump Kick
Jump Kick is a more aggressive move that has Dodrio jump to deal damage. When the move hits an opposing Pokemon or obstacle, the Sprint Guage fills up. Moreover, Jump Kick also allows Dodrio to jump over small walls, making traversal and ganking enemies easier.
Get Extra Movement Speed with Agility
Agility is a quick and consistent way to fill the Sprint Gauge gauge. Make sure to activate the move before engaging a target to take advantage of the increase in movement speed. Alternatively, using the move removes all negative status effects, which you can use to retreat from fights if you miss hitting your combos.
Pick Damaging Move Based on Playstyle
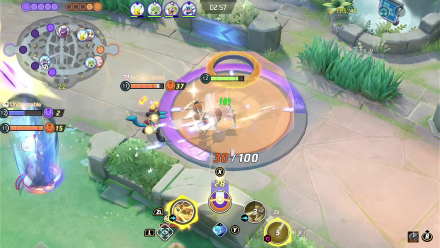
Both of Dodrio's damaging moves offer a decent amount of firepower, but their true strength lies from their enhanced form when you use them while the Sprint Gauge is full. They have differences that offer distinct playstyles.
Get Ranged Attacks with Tri Attack
Tri Attack is a quick AoE attack that can inflict debuffs to the targets it hit. You can save up to two (2) charges of the move, allowing you to get more damage in at any point.
When the Sprint Gauge is full, the move will become a ranged attack where you can shoot three projectiles in quick succession. If a projectile hits an opposing Pokemon, it also applies status effects. This essentially turns Dodrio into a mobile turret that is great for providing high amounts of damage from a safe distance.
Displace Opponents with Drill Peck
Drill Peck is a great burst move that has you bombard an enemy with multiple attacks. Once upgraded, Dodrio will recover a set amount of HP each time the move hits, giving you extra survivability when you are in a pinch.
When the Sprint Gauge is full, you will be able to shove and displace enemies away from their position. This allows you to isolate single targets and burst them down for a quick and easy knockdown
Multi-Scoring Strategy
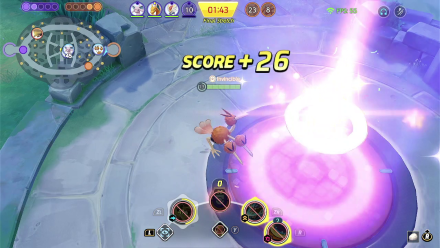
Dodrio has a unique scoring method compared to other Pokemon in the roster. It evenly divides its collected Aeos Energy into three portions and deposits them into the goal one at a time. This opens up different scoring strategies that are exclusive to the Pokemon. Below are our findings during our time with Dodrio.
Does Not Make Stacking Items Faster
Although Dodrio's scoring is seperated into three dunks, only the third dunk is counted for triggering a score-related Held Item. In our tests, we were able to only get one (1) Aeos Cookie trigger when Dodrio scored all of its points in a goal zone. So, when you are looking to stack bonuses, make sure to score the full points to get the benefits.
Retreat Mid-Scoring Animation
Having your scoring meter separated into three intervals allows you to cancel scoring completely mid-charge. You can do this by simply walking away or using a move. This will be helpful for quickly transitioning into the offensive or retreating when you see opponents coming after you.
Be Mindful of Over-Dunks
One downside of the multiple-scoring mechanic is the inability to over-score your energy. Usually, you would want to break goal zones with more than enough energy so you can get the most points in. However, because Dodrio deposits energy three times, it tends to break a goal zone early with the least amount of points. This will be evident during the final stretch of the match, where points are doubled each time you score a goal. For the best value, try to score at the goal zone near the enemy base as it does not break unlike the ones in the lanes.
Instantly Score in Vulnerable Goal Zones
One way to score all points in one go is to dunk your Aeos Energy at a goal zone made vulnerable by objectives like Regieleki, Zapdos, or Rotom. This gets around the over-dunk problem with Dodrio's triple-score mechanic.
Start Fights Strong with Triple Trample
Triple Trample is a long-ranged, initiating move that is great for ganking opponents. A great strategy is to use this move after respawning from a knockout to quickly get back to the fight, or quickly transition to lanes.
Alternatively, you can also use the Unite Move as a disengage tool for escapes. However, you may need to tweak you aiming controls for a better usability.
Dodrio Progression and Leveling Guide
Top and Bottom Guide
Level 1 to 5
- Quickly clear out the Bunnelbies in the lane.
- Keep farming wild Pokemon in the lane to reach level 5 and learn your first move.
- At bottom lane, prioritize taking Indeedees for more exp.
Level 6 to 9
- Keep hunting Wild Pokemon to gain more EXP from farming Altaria and Swablus.
- Once you reach level 7, learn your second move.
- Help allies secure Regice, Registeel, or Regirock when it spawns, otherwise secure Regieleki.
- Upon reaching level 9, learn your Unite Move.
Level 10+
- Stick with allies to hunt targets, secure objectives, and push lanes.
- Reach at least level 13 or max level if possible before or when Groudon spawns for a fully-upgraded moveset.
- Make sure that your Unite Move is available when Groudon spawns.
- Help teammates win a teamfight and secure Groudon.
Jungle Guide
Level 1 to 5
- Quickly defeat Xatu
- Clear the first wave of jungle camps and reach level 5 to learn your first move.
- Help the top lane first or whatever lane needs help the most by securing Altaria and Swablus, getting knockouts, and scoring points.
Level 6 to 9
- Clear the second wave of jungle camps and reach at least level 7 to learn your second move.
- Secure Regidrago in the center to get more EXP.
- Help the bottom lane by securing Altaria and Swablus, getting kills, and scoring points.
- If possible, reach level 9 and learn your Unite Move before or when Regice, Registeel, or Regirock spawns.
- Help allies secure Regice, Registeel, or Regirock, with Registeel being the highest priority since it gives a damage buff to the party.
Level 10+
- Stick with allies to hunt targets, secure objectives, and push lanes.
- Reach at least level 13 or max level if possible before or when Groudon spawns for a fully-upgraded moveset.
- Make sure that your Unite Move is available when Groudon spawns.
- Help teammates win a teamfight and secure Groudon.
Dodrio Combos
Double Strike Combo
| Double Strike Combo | |
|---|---|
| |
|
| This is your early-game burst combo. Start by moving around to fill up the Sprint Gauge. Seek out a target, then use Quick Attack to initiate. While keeping momentum, use Peck to finish the combo. If you manage to maintain the Run Away gauge, Peck will deal increased damage. | |
Tri Attack Brawl Combo
| Tri Attack Brawl Combo | |
|---|---|
| |
|
Agility
►
Run Away
(Full Charge) +
Tri Attack
►
Standard Attack
(Boosted Attack) ►
Tri Attack
►
Standard Attack
|
|
| This combo gives Dodrio a strong start with Tri Attack. Before performing the combo, make sure that the Sprint Gauge is full and you have two (2) charges of Tri Attack. Start the combo by heading toward a target with a full Run Away gauge. Activate Tri Attacks's first activation to fire elemental attacks at the target. While keeping momentum, deal your boosted attack to get close and deal damage. Finish the combo by using Tri Attacks's second activation, which deals melee damage. Once Agility is upgraded, you can instantly fill up your Sprint Gauge without having to constantly move. | |
Drill Peck Combos
This set of combos utilizes Drill Peck to displace targets. It is important that you fill the Run Away gauge first before performing the combos.
Drill Peck Displacer Combo
| Drill Peck Displacer Combo | |
|---|---|
| |
|
| This variation allows you to isolate targets and put them in a bad spot. Start by filling up the Sprint Gauge and charge towards the target with Jump Kick. While keeping momentum, make sure to use the move's jump to land behind the target. Then, use Drill Peck. Ideally, you would want to push the target toward your teammates or an allied goal zone for a quick knockdown. | |
Drill Peck Shove Combo
| Drill Peck Shove Combo | |
|---|---|
| |
|
| This variation is a more straightforward burst combo. Start by filling up the Sprint Gauge and charge towards the target with Drill Peck. After pushing the target, immediately activate Jump Kick. Make sure to land both attacks near the target for maximum damage. | |
Ultimate Combo
This set of combos takes advantage of Triple Trample's long-range and great ambushing capability. These combos are best performed at single targets.
Ultimate Elemental Trample Combo
| Ultimate Elemental Trample Combo | |
|---|---|
| |
|
| Start by initiating the fight with Triple Trample and stun the target in place. While keeping momentum, use the range attacks from Tri Attack to deal damage as you maintain your distance from the target. Then, quickly get close with Jump Kick. Once within range, use your boosted attack to deal increased damage. Finish the combo by hitting the target with Tri Attack's second activation. | |
Ultimate Multi-Strike Push Combo
| Ultimate Multi-Strike Push Combo | |
|---|---|
| |
|
| Start by initiating the fight with Triple Trample and stun the target in place. While keeping momentum, displace the target with Drill Peck. Before the move Drill Peck finishes, activate Jump Kick and land both attacks near the target for the max amount of damage. | |
Matchups & Counters for Dodrio
Dodrio Matchups
| Matchup Notes | ||
|---|---|---|
| 1. The chart is based on our own experience playing Dodrio. 2. Pokemon within each tier are unordered 3. Any Pokemon not shown here are still under investigation. |
||
Hard Counter with Slow or Disables
Dodrio is at its best when it gets to run around and wreak havoc without obstruction. Pokemon with a lot of disabling or slowing moves can completely stop Dodrio's momentum.
Hard Counters
| Pokemon | Explanation |
|---|---|
 Pikachu Pikachu
|
Rating: ★★★★★ • Almost all of its moves have slow and/or stun effects that disrupt Dodrio's Sprint. • Can learn to Electro Ball, which is an effective sure-hit move that can keep up with Dodrio. • Can make score stacking hard in the early game with Electroweb shutdowns. |
 Slowbro Slowbro
|
Rating: ★★★★★ • Innately high durability stat will make it hard to brawl against. • Can disable Dodrio using Surf, Telekinesis, and Slowbeam or slow it using Scald. |
 Clefable Clefable
|
Rating: ★★★★ • Can prevent Dodrio from using its dash moves and sprint gauge boosted attacks using Gravity. |
Even Matchups for Dodrio
Facing these Pokemon head-on in a brawl is not a good idea. Generally, it's best to employ hit and run tactics when fighting even matchups, taking advantage of Dodrio's mobility to make it hard to catch. Also, always make sure that Dodrio's sprint gauge is full before engaging in a fighht. Note that, unless Dodrio can chain boosted attacks, it kit has a long cooldown, making missing even more punishing.
Close the Gap
| Ranged, Fragile Pokemon with High Damage |
|---|
| How to Beat |
|
• These Pokemon prefer to keep their distance from opponents when fighting. They also have high damage potential that can be dangerous for Dodrio. However, they are fragile and can get knocked out by Dodrio fast. • Quickly approach them, then use Tri Attack or Drill Peck to burst them down. • Use Agility or Jump Kick to keep the sprint gauge full. • Alternatively, use Triple Trample to head straight for them, before bursting them down with Tri Attack or Drill Peck, and Boosted Attacks. |
Utilize Superior Movement Speed
| All-Rounders |
|---|
| How to Beat |
|
• These Pokemon excel in close combat and rely mostly on their attacks or combos to deal damage. They are also durable enough to tank Dodrio's damage. However, Dodrio has a significant movement speed advantage and can just run around them to burst them down. • Quickly move in and out while using Tri Attack or Drill Peck, and Boosted Attacks to damage them until they fall. • Use Agility or Jump Kick to keep the sprint gauge full. • If needed, use Triple Trample to finish them off. |
Avoid Getting Disabled
| Pokemon with Disabling Moves |
|---|
| How to Beat |
|
• These Pokemon have strong disabling moves that can be a nuisance for Dodrio during fights. However, their damage isn't enough to force Dodrio to be on the defensive. • Utilize Dodrio's superior mobility to dodge their disabling moves, then retaliate with Tri Attack or Drill Peck. • If needed, use Triple Trample to finish them off. |
Strike First
| High-mobility Pokemon with Burst Damage |
|---|
| How to Beat |
|
• Much like Dodrio, these Pokemon are incredibly agile and deal high burst damage. Winning against them is just a matter of striking first. • Utilize Dodrio's superior movement speed to dodge their moves, then retaliate with Tri Attack or Drill Peck. • Use Agility or Jump Kick to keep the sprint gauge full. • If needed, use Triple Trample to strike first from a distance. |
Group Up with Allies
| Highly Durable Pokemon |
|---|
| How to Beat |
|
• These Pokemon are extremely durable, making it difficult for Dodrio to take them down alone. With that, it's best to group up with allies to bring them down with the help of Dodrio. • Use Tri Attack or Drill Peck and Boosted Attacks to deplete their HP. • Use Agility or Jump Kick to keep the sprint gauge full. |
Easy Matchups for Dodrio
Easy matchups are Pokemon that have little to no means of stopping Dodrio's movements.
Close the Gap
| Ranged, Fragile Pokemon with High Damage |
|---|
| How to Beat |
|
• These Pokemon prefer to keep their distance from opponents when fighting. They also have high damage potential that can be dangerous for Dodrio. However, they are fragile and can get knocked out by Dodrio fast. • Quickly approach them, then use Tri Attack or Drill Peck to burst them down. • Use Agility or Jump Kick to keep the sprint gauge full. • Alternatively, use Triple Trample to head straight for them, before bursting them down with Tri Attack or Drill Peck, and Boosted Attacks. |
Utilize Superior Movement Speed
| All-Rounders |
|---|
| How to Beat |
|
• These Pokemon excel in close combat and rely mostly on their attacks or combos to deal damage. They are also durable enough to tank Dodrio's damage. However, Dodrio has a significant movement speed advantage and can just run around them to burst them down. • Quickly move in and out while using Tri Attack or Drill Peck, and Boosted Attacks to damage them until they fall. • Use Agility or Jump Kick to keep the sprint gauge full. • If needed, use Triple Trample to finish them off. |
Take Them Out First
| Supporters |
|---|
| How to Beat |
|
• These Pokemon usually stick with their allies and rarely venture alone. Although they themselves pose no threat to Dodrio, their support capabilities makes them valuable during fights. • It's best to take them out first using Tri Attack or Drill Peck and Boosted Attacks to remove their team's support. • Use Agility or Jump Kick to keep the sprint gauge full. • If needed, use Triple Trample to finish them off. |
Best Teammates for Dodrio
| Pokemon | Explanation |
|---|---|
 Blissey Blissey
 Eldegoss Eldegoss
|
Provdes Buffs |
| Since Dodrio needs to constantly move around to maintain its Sprint Gauge, Pokemon that provide movement speed buffs or removes negative status effects from Dodrio will improve and help Dodrio's fast-paced gameplay. Eldegoss' Leaf Tornado not only provides a movement speed boost, it also deals decent damage, which Dodrio can use to follow up with its moves. On the other hand, Blissey's Safeguard removes negative status effects from Dodrio, particularly slows, and gives it a shield, allowing the Pokemon to keep moving. | |
 Snorlax Snorlax
 Pikachu Pikachu
 Wigglytuff Wigglytuff
|
Disablers |
| Pokemon with strong disabling moves can help set up Dodrio's own moves since they can be quite difficult hit properly. AoE moves like Heavy Slam and Sing are useful during big clashes where opponents tend to group closely together, keeping multiple targets in place as Dodrio dives in with Tri Attack or Drill Peck. Alternatively, strong single-target disables like Volt Tackle ensures that Dodrio can easily follow up with its moves. | |
 Crustle Crustle
 Sableye Sableye
 Talonflame Talonflame
|
Aggressive Scorers |
| Pokemon with a similar gameplay or at least can score aggressively like Dodrio makes for an interesting team comp. Since the game's objective is to score more points than the other team, having Dodrio and a Pokemon like Sableye in the same team pressures opponents to constantly rotate lanes and defend their goals or risk getting outscored by the two Pokemon. This tactic becomes more effective during the last minutes of the match where points are double since it can create space for allies to secure Rayquaza. |
Looking for teammates to synergize with you? Head over to our Friend Request Board to find other trainers to join you in your grind or just to hang out with!
Dodrio Moveset
Move Slot 1 (R)
 Peck Peck
(Lv. 1 or 2) |
Move Type: Melee Damage Type: Physical Cooldown: 5s Starting Damage: 383 Damage with full Sprint Gauge: 639 Final Damage: 457 Damage with full Sprint Gauge: 764 |
|---|---|
| Has the user move forward while jabbing with its beaks. When the sprint gauge is full, the user instead charges forward while jabbing with its beaks. Using this move fully consumes the sprint gauge. | |
 Tri Attack Tri Attack
(Lv. 5) Upgrade Lv. 11 |
Move Type: Melee Damage Type: Physical Cooldown: 1s Starting Damage: 415 Damage with full Sprint Gauge: 1117, Damage per projectile with full Spring Gauge: 347, Number of projectiles: 3, Burn damage: 19, Number of instances: 3 Final Damage: 849 Damage with full Sprint Gauge: 2290, Damage per projectile with full Spring Gauge: 714, Number of projectiles: 3, Burn damage: 37, Number of instances: 3 |
|
Has the user attack with its beaks in a cone in front of itself, dealing damage to opposing Pokemon and applying one of the following random effects: a decrease to Attack and damage over time for a set amount of time, a decrease to basic attack speed, or a decrease to movement speed. When the user's sprint gauge is full, the user instead shoots out three projectiles-one red, one yellow, and one blue–in the designated direction. If a projectile hits an opposing Pokemon, the projectile deals damage and applies one of the aforementioned effects based on its color. After this move is used, the user's next basic attack deals additional damage and restores some of the user's HP. A maximum of two uses can be kept in reserve for this move.
Upgrade: The user's next basic attack after using this move restores more HP. When the user's sprint gauge is full, this move's cooldown is reduced. |
|
 Drill Peck Drill Peck
(Lv. 5) Upgrade Lv. 11 |
Move Type: Melee Damage Type: Physical Cooldown: 6s Starting Damage: 831 (eval at /var/lib/app/app/models/saola/condition/base/if_eval.rb:24):1: unterminated string meets end of file ...l Sprint Gauge: 10382 ([277 x 5 ... ^ (eval at /var/lib/app/app/models/saola/condition/base/if_eval.rb:24):1: syntax error, unexpected end-of-input, expecting ')' ...l Sprint Gauge: 10382 ([277 x 5 ... ^ Final Damage: 1776 (eval at /var/lib/app/app/models/saola/condition/base/if_eval.rb:24):1: unterminated string meets end of file ...l Sprint Gauge: 11957 ([592 x 5 ... ^ (eval at /var/lib/app/app/models/saola/condition/base/if_eval.rb:24):1: syntax error, unexpected end-of-input, expecting ')' ...l Sprint Gauge: 11957 ([592 x 5 ... ^ |
|
Has the user move forward while striking with its sharp beaks multiple times, dealing damage to opposing Pokemon it hits. When the user's sprint gauge is full, the user dashes forward while striking with its sharp beaks multiple times, dealing damage to opposing Pokemon it hits and shoving them. Using this move fully consumes the sprint gauge.
Upgrade: Reduces this move's cooldown. Also, when this move hits opposing Pokemon, it restores a portion of the user's HP based on the amount of damage dealt. |
|
Move Slot 2 (ZR)
 Quick Attack Quick Attack
(Lv. 1 or 2) |
Move Type: Dash Damage Type: Physical Cooldown: 10s Starting Damage: 314 Final Damage: 443 |
|---|---|
| Has the user dash forward, increasing its movement speed for a short time and dealing damage to opposing Pokemon it hits. This move's cooldown is reduced if it hits opposing Pokemon. | |
 Agility Agility
(Lv. 7) Upgrade Lv. 13 |
Move Type: Buff Damage Type: Status Cooldown: 9s Starting Damage: N/A Final Damage: N/A |
|
Makes the user immune to hindrances and charges its sprint gauge. Afterward, the user's movement speed increases for a short time, and its sprint gauge charges faster.
Upgrade: After this move is used, the user's sprint gauge becomes fully charged. |
|
 Jump Kick Jump Kick
(Lv. 7) Upgrade Lv. 13 |
Move Type: Dash Damage Type: Physical Cooldown: 6.5s Starting Damage: 738 Kick damage: 369, Landing damage: 369 Final Damage: 1244 Kick damage: 622, Landing damage: 622 |
|
Has the user leap forward while kicking. If this move makes contact with an opposing Pokemon or obstacle, the user leaps over it and stomps the ground when it lands, dealing damage to opposing Pokemon in the area of effect and decreasing their movement speed for a short time. If this move makes contact with an opposing Pokemon or obstacle, the user's sprint gauge charges. If this move makes contact with an opposing Pokemon, its cooldown is reduced.
Upgrade: When the user stomps the ground after leaping, opposing Pokemon in the area of effect are also left unable to act. |
|
Unite Moves (ZL)
 Triple Trample Triple Trample
(Lv. 9) |
Move Type: Dash Damage Type: Physical Cooldown: 134s Starting Damage: 1045 Final Damage: 1583 |
|---|---|
| Has the user run to the designated location. While running, the user is immune to hindrances. If the user makes contact with opposing Pokemon while running, it deals damage to them and throws them into the air. When the user arrives at the designated location, its Attack increases for a short time, and it is granted a shield. Also, its sprint gauge charges faster for a short time. | |
Standard Attack
|
|
Becomes a boosted attack every third attack, dealing consecutive blows with each of the user's heads. When the user's sprint gauge is full, its basic attack will have it charge in the direction it's facing and consume all of the sprint gauge. If this charging attack hits opposing Pokemon, all of the user's move cooldowns are reduced. |
|---|
Ability (Passive)
 Run Away Run Away
|
All Evolution Stages
The Pokemon's movement speed increases when opposing Pokemon are nearby. While the Pokemon is moving, its sprint gauge charges. When its sprint gauge is full, the Pokemon starts running with increased movement speed. If the Pokemon's movement speed decreases below a set speed, the sprint gauge will rapidly deplete. When Doduo scores a goal, it evenly divides the collected Aeps Energy into two portions and deposits them into the goal one at a time. After Doduo evolves into Dodrio, when it scores a goal, it evenly divides its collected Aeos Energy into three portions and deposits them into the goal one at a time. |
|---|
Dodrio Stats & Evolutions
Dodrio Evolutions
| 1st Evolution | Final Evolution |
|---|---|
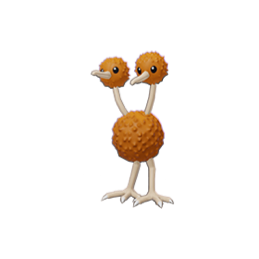 Doduo Doduo(Lv. 1) |
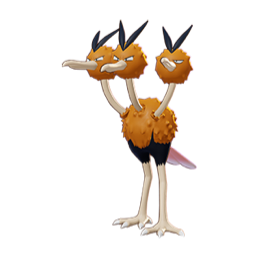 Dodrio Dodrio(Lv. 5) |
Dodrio Stats
| Level | HP | Defense | Special Defense | Attack Damage |
|---|---|---|---|---|
| 1 | 3050 | 45 | 35 | 150 |
| 2 | 3122 | 51 | 39 | 161 |
| 3 | 3205 | 57 | 43 | 173 |
| 4 | 3300 | 64 | 48 | 187 |
| 5 | 3735 | 98 | 70 | 251 |
| 6 | 3861 | 108 | 76 | 269 |
| 7 | 4006 | 119 | 83 | 290 |
| 8 | 4173 | 132 | 91 | 314 |
| 9 | 4365 | 147 | 101 | 342 |
| 10 | 4586 | 164 | 112 | 374 |
| 11 | 4840 | 184 | 125 | 411 |
| 12 | 5133 | 207 | 140 | 454 |
| 13 | 5469 | 233 | 157 | 503 |
| 14 | 5856 | 263 | 177 | 560 |
| 15 | 6300 | 298 | 200 | 625 |
Attack Damage is the damage of the Basic Attack as tested against the Training Dummy.
Dodrio In-Game Stat Listings
| Offense | Endurance | Mobility | Scoring | Support |
|---|---|---|---|---|

|

|

|

|

|
Dodrio Skins (Holowear)
| Holowear | |
|---|---|
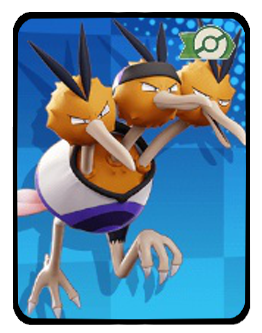 Purple Unite Style Purple Unite Style
Zirco Trading:
|
 Orange Unite Style Orange Unite Style
Zirco Trading:
|
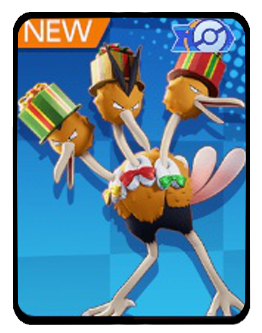 Gift Box Style Gift Box Style
Zirco Trading:
|
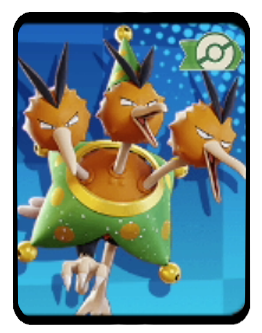 Performer Style Performer Style
Event:
Season 14 Battle Pass |
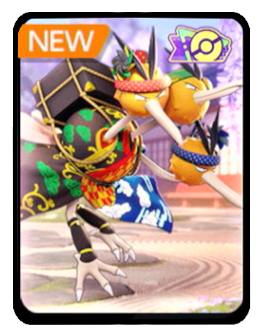 Pokebuki Style Pokebuki Style
Zirco Trading:
|
|
Dodrio Character Spotlight
Dodrio Achievements
Drill Peck Achievement
| Drill Peck | |
|---|---|
| Pokemon | Move |
 Dodrio Dodrio
|
|
| Mission: Shove 2 or more Pokemon from the opposing team at the same time with Drill Peck or Drill Peck+ while sprinting (10/20/40 times total) |
|
| Medals & Points | Rewards |
|
|
|
|
|
|
|
|
|
List of Speedster Pokemon Achievements
Pokemon UNITE Related Guides

All Pokemon Guides and Builds
Upcoming Pokemon
 Articuno Articuno(TBA) |
 Meganium Meganium(TBA) |
 Typhlosion Typhlosion(TBA) |
 Feraligatr Feraligatr(TBA) |
Mega Evolutions
| Mega Evolved Pokemon | ||
|---|---|---|
 Mega Charizard X Mega Charizard X |
 Mega Charizard Y Mega Charizard Y |
 Mega Gyarados Mega Gyarados |
 Mega Lucario Mega Lucario |
 Mega Mewtwo X Mega Mewtwo X |
 Mega Mewtwo Y Mega Mewtwo Y |
Pokemon by Role
| All Pokemon Roles | |||||
|---|---|---|---|---|---|
 Attackers Attackers |
 All-Rounders All-Rounders |
 Defenders Defenders |
|||
 Speedsters Speedsters |
 Supporters Supporters |
||||
Pokemon by Characteristics
| Attack Type | |
|---|---|
 Melee Pokemon Melee Pokemon |
 Ranged Pokemon Ranged Pokemon |
 Physical Pokemon Physical Pokemon |
 Special Pokemon Special Pokemon |
| Stat Rankings | |
 HP Ranking HP Ranking |
 Defense Ranking Defense Ranking |
 Sp. Def. Ranking Sp. Def. Ranking |
 Basic Attack Ranking Basic Attack Ranking |
Author
Dodrio Guide: Best Builds and Moveset
Rankings
- We could not find the message board you were looking for.
Gaming News
Popular Games

Genshin Impact Walkthrough & Guides Wiki

Umamusume: Pretty Derby Walkthrough & Guides Wiki

Pokemon Pokopia Walkthrough & Guides Wiki

Honkai: Star Rail Walkthrough & Guides Wiki

Monster Hunter Stories 3: Twisted Reflection Walkthrough & Guides Wiki

Arknights: Endfield Walkthrough & Guides Wiki

Wuthering Waves Walkthrough & Guides Wiki

Zenless Zone Zero Walkthrough & Guides Wiki

Pokemon TCG Pocket (PTCGP) Strategies & Guides Wiki

Monster Hunter Wilds Walkthrough & Guides Wiki
Recommended Games

Diablo 4: Vessel of Hatred Walkthrough & Guides Wiki

Cyberpunk 2077: Ultimate Edition Walkthrough & Guides Wiki

Fire Emblem Heroes (FEH) Walkthrough & Guides Wiki

Yu-Gi-Oh! Master Duel Walkthrough & Guides Wiki

Super Smash Bros. Ultimate Walkthrough & Guides Wiki

Pokemon Brilliant Diamond and Shining Pearl (BDSP) Walkthrough & Guides Wiki

Elden Ring Shadow of the Erdtree Walkthrough & Guides Wiki

Monster Hunter World Walkthrough & Guides Wiki

The Legend of Zelda: Tears of the Kingdom Walkthrough & Guides Wiki

Persona 3 Reload Walkthrough & Guides Wiki
All rights reserved
©2021 Pokémon. ©1995–2021 Nintendo / Creatures Inc. / GAME FREAK inc.
©2021 Tencent.
The copyrights of videos of games used in our content and other intellectual property rights belong to the provider of the game.
The contents we provide on this site were created personally by members of the Game8 editorial department.
We refuse the right to reuse or repost content taken without our permission such as data or images to other sites.
 Absol
Absol Aegislash
 Alcremie
 Alolan Ninetales
 Alolan Raichu
 Armarouge
 Azumarill
 Blastoise
 Blaziken
 Buzzwole
 Ceruledge
 Chandelure
 Charizard
 Cinderace
 Comfey
 Cramorant
 Darkrai
 Decidueye
 Delphox
 Dhelmise
 Dragapult
 Dragonite
 Duraludon
 Empoleon
 Espeon
 Falinks
 Galarian Rapidash
 Garchomp
 Gardevoir
 Gengar
 Glaceon
 Goodra
 Greedent
 Greninja
 Gyarados
 Ho-oh
Ho-oh Hoopa
Hoopa Inteleon
 Lapras
 Latias
 Latios
 Leafeon
 Lucario
 Machamp
 Mamoswine
 Meowscarada
 Meowth
 Metagross
 Mew
Mew Mimikyu
 Miraidon
 Moltres
 Mr. Mime
 Pawmot
 Psyduck
 Scizor
 Sirfetch'd
 Suicune
 Sylveon
 Tinkaton
 Trevenant
 Tsareena
 Tyranitar
 Umbreon
 Urshifu
 Vaporeon
 Venusaur
 Zacian
 Zapdos
 Zeraora
 Zoroark


![Monster Hunter Stories 3 Review [First Impressions] | Simply Rejuvenating](https://img.game8.co/4438641/2a31b7702bd70e78ec8efd24661dacda.jpeg/show)
![The Liar Princess and the Blind Prince Review [PC] | Lovely to Look at but Tedious to Play](https://img.game8.co/4442586/8d95f5faf05780f1765ce7e0938bd825.jpeg/thumb)
![Marathon Cryo Archive Map Teased as [REDACTED] on Selection Screen](https://img.game8.co/4442236/6357203e58172f6de57f1991e7c39b22.png/thumb)


The aiming macanic is bad because you have to face the enmey to aim it at them