Blastoise Guide: Builds and Best Items
☆ Upcoming: Articuno | Meganium | Typhlosion | Feraligatr
★ Latest News: Zapdos | Moltres | Version 1.22.1.5
☆ Popular Pages: Upcoming Pokemon | Tier List
★ Current Seasons: Ranked S34 | Battle Pass S39
☆ Join Game8's Pokemon Discord Server!

The best guide on how to play Blastoise in Pokemon UNITE for Nintendo Switch and Mobile. Check here for the best builds, Held and Battle items, movesets, as well as the latest nerfs, buffs, counters, matchups, and more!
| Blastoise Pokemon Pages | |
|---|---|
 Blastoise Release Date Blastoise Release Date |
 Blastoise Builds Blastoise Builds |
List of Contents
Blastoise Latest Nerfs and Buffs (3/5)
| Blastoise Changes |
|---|
|
• Damage decreased by 15%. • Shield amount decreased by 15%. |
|
• Required Energy increased from 80,000 to 90,000 (12.5% increase). |
Stat Updates
| 1.1.1.7 | Blastoise released. |
|---|---|
| 1.12.1.6 | Level to evolve into Blastoise changed from Lvl 9 to Lvl 7. |
| 1.16.2.6 | Defense increased from 100~600 to 100~650 (Level 1~15). Special Defense increased from 70~420 to 70~455 (Level 1~15). |
| 1.18.2.7 | HP increased from 3225-9800 to 3225-10300. |
Standard Attack
| 1.3.1.2 | Fixed a bug where the enhanced attack did not cause critical damage. |
|---|---|
| 1.7.1.11 | Boosted Attack: Increased the damage dealt to opponents. |
Rapid Spin
| 1.2.1.3 | Fixed a bug causing attacks performed while spinning to decrease the movement speed of opposing Pokemon. • Fixed a bug allowing the user to use either Hydro Pump or Water Spout at the same time as basic attacks while spinning. |
|---|---|
| 1.4.1.7 | Effects strengthened. |
| 1.4.1.8 | Fixes a bug where Rapid Spin deals more damage than intended. |
| 1.5.1.6 | Effect on user changed from Unstoppable to Hindrance Resistance. |
| 1.16.2.6 | Defense/Sp. Def. increased by 50%. |
| 1.17.1.6 | Cooldown decreased from 11s to 10s. Rapid Spin +: Defense increased by 12%. Special Defense increased by 12%. |
Water Spout
| 1.2.1.8 | Cooldown reduced from 11s to 7.5s |
|---|---|
| 1.14.1.6 | Damage reduced by 10%. |
| 1.18.2.7 | Movement speed reduction changed from 35% for 1s to 20% for 2s. Now applies movement speed reduction once when used during Rapid Spin. |
Hydro Pump
| 1.2.1.8 | Damage decreased from 1598 to 1460 (-9%) |
|---|---|
| 1.5.1.6 | Cooldown reduced from 8.5s to 7s (-1.5s). |
| 1.7.1.11 | Duration of hindrance effect on opponents increased. |
| 1.14.1.6 | Damage reduced by 10%. Stun duration decreased from 1s to 0.6s. Hydro Pump +: Damage reduced by 10%. |
| 1.16.2.6 | Cooldown decreased from 7.5s to 7s. |
| 1.17.1.6 | Cooldown decreased from 7s to 6s. |
| 1.18.2.7 | Incapacitation duration increased from 0.5s to 0.75s when used during Rapid Spin. |
| 1.21.1.7 | Cooldown reduced from 6s to 5.5s. Damage increased by 10%. |
Hydro Typhoon
| 1.2.1.8 | Damage decreased from 3368 to 2666 (-21%). |
|---|---|
| 1.5.1.6 | Damage dealt to the opposing Pokemon decreased from 2666 to 2023 (-24%). |
| 1.7.1.7 | Recharge rate increased from 134s to 140s (+6s). |
| 1.17.1.6 | Energy required reduced by 11%. |
| 1.22.1.5 | Required Energy increased from 80,000 to 90,000 (12.5% increase). |
Surf
| 1.7.1.7 | Cooldown reduced from 12s to 10s (-2s). |
|---|---|
| 1.7.1.11 | Cooldown reduced from 10s to 9s. (-1s) |
| 1.16.2.6 | Cooldown decreased from 9s to 8.5s. |
| 1.17.1.6 | Cooldown decreased from 8.5s to 7.5s. Surf +: Shield increased by 35%. |
| 1.21.1.7 | Now grants a shield when the move hits. Cooldown reduced from 7.5s to 7s. Surf +: Shield amount increased by 20%. |
| 1.22.1.5 | Damage decreased by 15%. Shield amount decreased by 15%. |
Water Gun
| 1.7.1.7 | Damage increased from 617 to 676 (+10%). |
|---|---|
| 1.14.1.6 | Damage reduced by 15%. |
Skull Bash
| 1.7.1.7 | Damage increased from 417 to 469 (+12%). |
|---|
Blastoise Basic Info
| Blastoise | ||
|---|---|---|
 |
Tier Rating:
Role: Defender Attack Type: Ranged Damage Type: Special Difficulty: Intermediate |
|
| "Blastoise is a durable ranged defender that can make use of its several mobility skills to move itself and enemies into the ideal areas of the battlefield." | ||
Blastoise Best Lanes

|

|
|
Tips & Strategies for Every Lane
Blastoise Strengths and Weaknesses
| Strengths | Weaknesses |
|---|---|
| ✔︎ High HP and defenses. ✔︎ Has ranged Standard Attacks. ✔︎ Offers great crowd control moves. |
✖︎ Long Cooldowns. ✖︎ Weak early game. |
Best Builds for Blastoise
| Blastoise Builds | |
|---|---|
| - | |
Hydro-Surf Build
Hydro-Surf

|
Moveset | Held Items | |||
|---|---|---|---|---|---|
| Battle Item | |||||
| Stats from Items (Lv. 40) | Recommended Lane | ||||
|
Sp. Atk: +35 Defense: +35 Sp. Def: +35 HP: +245 Cooldown: -5.20% Unite Move Charge Rate: +7% |
|
||||
| Emblem Color Combination | Target Emblem Stats | ||||
|
|
Positive Stats: • HP • Sp. Atk Free Negative Stats: • Attack • Movement Speed • Critical-Hit Rate |
||||
| Note: The emblem color and stats here are suggestions only. The builds are still viable even without the suggested emblems. |
|||||
Hydro-Surf Build Explanation
This build utilizes Surf and Hydro Pump to displace enemies and disrupt their positioning. The key to this build is getting the proper angle to shove targets with Surf and Hydro Pump.
- Slick Spoon gives Blastoise a decent amount of HP and Sp. Atk. It also grants Sp. Def. penetration for added damage.
- Energy Amplifier provides cooldown reductions, and it gives a massive damage boost whenever Blastoise uses Hydro Typhoon.
- Focus Band is a staple defensive item for the build, giving Blastoise the durability and survivability it needs to keep displacing enemies.
- Wise Glasses or Choice Specs can be a replacement for Slick Spoon for more damage.
- For a more defensive build, replace Slick Spoon and Energy Amplifier with Resonant Guard and Exp. Share.
- Tenacity Belt can be a replacement for Focus Band, providing the same defense increase but focusing more on durability due to its effect.
- Vanguard Bell can also be a replacement for Focus Band or Energy Amplifier, allowing Blastoise to restore HP when it hits opponents with its moves.
- Eject Button gives Blastoise a repositioning tool to better set up Surf and Hydro Pump.
- The build's Boost Emblem loadout should consist of 6 Green Emblems for more damage and 6 White Emblems for additional HP. This can be achieved by equipping at least two (2) Emblems that are both Green and White.
- Equip Emblems that improve Sp. Atk or HP to balance Blastoise's offense and defense.
- Attack and Critical-Hit Rate can be freely traded for the other stats.
Hydro-Surf Build Damage Test
| Items (Level 30) |
Hydro Pump (@ Lvl 15) Surf (@ Lvl 15) |
Hydro Typhoon (@ Lvl 15) |
|---|---|---|
| Slick Spoon + Energy Amplifier (Includes Effect) |
2709 1940 |
2507 |
Since the build focuses on displacing enemies with Surf and Hydro Pump, equipping items that will balance Blastoise's offense and defense is the ideal build. Focus Band is a core defensive item for the build.
As the result show, equipping Slick Spoon and Energy Amplifier would be the best item choice. Even if the item combination did not produce the best results in terms of damage, it is the most balanced item combination. It only scored the second best damage output but gives HP and cooldown reduction in return, which is perfect for the build.
As for alternatives, replacing Energy Amplifier with Choice Specs would be the best choice. The item combination maintains a good balance of offense and defense without the need for using Hydro Typhoon.
These damage tests are conducted using the Training Dummy in Practice Mode. The results are taken from the Total Damage data.
| Note: The numbers in bold are the highest result for a specific test. |
| Items (Level 30) | Hydro Pump (@ Lvl 15) Surf (@ Lvl 15) | Hydro Typhoon (@ Lvl 15) |
|---|---|---|
| Choice Specs (Includes Effect) + Wise Glasses | 2651 1976 | 2476 |
| Choice Specs (Includes Effect) + Sp. Atk. Specs (6 Stacks) | 2751 2053 | 2572 |
| Choice Specs (Includes Effect) + Energy Amplifier (Includes Effect) | 3023 2244 | 2815 |
| Choice Specs (Includes Effect) + Slick Spoon | 2562 1905 | 2388 |
| Slick Spoon + Energy Amplifier (Includes Effect) | 2709 1940 | 2507 |
| Slick Spoon + Sp. Atk. Specs (6 Stacks) | 2448 1754 | 2269 |
| Slick Spoon + Wise Glasses | 2364 1694 | 2190 |
| Wise Glasses + Energy Amplifier (Includes Effect) | 2793 2001 | 2586 |
| Wise Glasses + Sp. Atk. Specs (6 Stacks) | 2529 1814 | 2348 |
| Energy Amplifier + Sp. Atk. Specs (6 Stacks) | 2898 2077 | 2686 |
The tests above does not use any Emblems yet so it will scale higher if equipped.
Rapid Spin Build
| Rapid Spin Build | Moveset | Held Items | |||
|---|---|---|---|---|---|
| Battle Item | |||||
| Stats from Items (Lv. 40) | Recommended Lane | ||||
|
Sp. Atk: +72 Defense: +35 Sp. Def: +35 |
|
||||
| Emblem Color Combination | Target Emblem Stats | ||||
|
|
Positive Stats: • HP • Sp. Atk Free Negative Stats: • Attack • Movement Speed • Critical-Hit Rate |
||||
| Note: The emblem color and stats here are suggestions only. The builds are still viable even without the suggested emblems. |
|||||
Rapid Spin Build Explanation
This build is centered on maximizing the damage of Blastoise's Rapid Spin and Water Spout combo. It's best to play safe early on until Blastoise reaches level 7 to get both of its moves.
- Wise Glasses provides Blastoise with more Sp. Atk. thanks to its percentage bonus.
- Sp. Atk. Specs further boosts Blastoise's Sp. Atk. stat, boosting its damage output significantly.
- Focus Band increases Blastoise's durability through increased defenses and also acts a survivability tool, which works well during Rapid Spin.
- Slick Spoon can be an atlernative to Wise Glasses, sacrificing damage slightly for more HP.
- Energy Amplifier can also be an alternative to Wise Glasses for more damage and cooldown reductions.
- Tenacity Belt can be a replacement for Focus Band, providing the same defense increase but focusing more on durability due to its effect.
- Eject Button gives Blastoise a repositioning tool during Rapid Spin.
- However, X Speed can also work for the build to increase Blastoise's overall mobility.
- The build's Boost Emblem loadout should consist of 6 Green Emblems for more damage and 6 White Emblems for additional HP. This can be achieved by equipping at least two (2) Emblems that are both Green and White.
- Equip Emblems that improve Sp. Atk or HP to balance Blastoise's offense and defense.
- Attack and Critical-Hit Rate can be freely traded for the other stats.
Rapid Spin Build Damage Test
| Items (Level 30) |
Rapid Spin + Water Spout (Total Damage) (@ Lvl 15) |
Hydro Typhoon (@ Lvl 15) |
|---|---|---|
| Choice Specs (Includes Effect) + Wise Glasses + Sp. Atk. Specs (6 Stacks) |
11,004 | 2737 |
Since the build is centered on maximizing Blastoise's Rapid Spin and Water Spout combo, equipping items that will yield the highest possible combo damage is the ideal item combination.
As the results show, Choice Specs, Wise Glasses, and a fully-stacked Sp. Atk. Specs will produce the best damage output. The item combination gives Blastoise a massive Sp. Atk. stat boost, especially once Sp. Atk. Specs is fully stacked.
As for alternatives, replacing Choice Specs with Energy Amplifier would be the best option. The item combination produced the second best damage output for the combo. However, it does require Blastoise to fully stack Sp. Atk. Specs and trigger Energy Amplifier's effect first to reach maximum damage.
For the best build that requires no setup in any way, replacing Sp. Atk. Specs with Slick Spoon would be the ideal choice. The item combination is a straightfoward damage build that also gives some durability via HP.
For a more defensive build, replacing Choice Specs with Focus Band would be the best alternative. However, the item combination does require Blastoise to stack Sp. Atk. Specs first for maximum effect.
That being said, for the best defensive build that requires no setup, replacing Sp. Atk. Specs with Focus Band instead would be the prime option.
These damage tests are conducted using the Training Dummy in Practice Mode. The results are taken from the Total Damage data.
| Note: The numbers in bold are the highest result for a specific test. |
| Items (Level 30) | Rapid Spin + Water Spout (Total Damage) (@ Lvl 15) | Hydro Typhoon (@ Lvl 15) |
|---|---|---|
| Choice Specs (Includes Effect) + Wise Glasses + Slick Spoon | 10,126 | 2541 |
| Choice Specs (Includes Effect) + Wise Glasses + Sp. Atk. Specs (6 Stacks) | 11,004 | 2737 |
| Choice Specs (Includes Effect) + Wise Glasses + Energy Amplifier (Includes Effect) | 10,284 | 2995 |
| Choice Specs (Includes Effect) + Slick Spoon + Sp. Atk. Specs (6 Stacks) | 10,548 | 2633 |
| Choice Specs (Includes Effect) + Slick Spoon + Energy Amplifier (Includes Effect) | 9644 | 2888 |
| Choice Specs (Includes Effect) + Sp. Atk. Specs (6 Stacks) + Energy Amplifier (Includes Effect) | 10,472 | 3111 |
| Wise Glasses + Slick Spoon + Sp. Atk. Specs (6 Stacks) | 10,626 | 2402 |
| Wise Glasses + Slick Spoon + Energy Amplifier (Includes Effect) | 9758 | 2649 |
| Wise Glasses + Sp. Atk. Specs (6 Stacks) + Energy Amplifier (Includes Effect) | 10,809 | 2841 |
| Slick Spoon + Sp. Atk. Specs (6 Stacks) + Energy Amplifier (Includes Effect) | 10,308 | 2745 |
| Items (Level 30) + Focus Band | Rapid Spin + Water Spout (Total Damage) (@ Lvl 15) | Hydro Typhoon (@ Lvl 15) |
|---|---|---|
| Choice Specs (Includes Effect) + Wise Glasses | 9845 | 2476 |
| Choice Specs (Includes Effect) + Sp. Atk. Specs (6 Stacks) | 10,258 | 2572 |
| Choice Specs (Includes Effect) + Energy Amplifier (Includes Effect) | 9564 | 2815 |
| Choice Specs (Includes Effect) + Slick Spoon | 9450 | 2388 |
| Slick Spoon + Energy Amplifier (Includes Effect) | 9110 | 2507 |
| Slick Spoon + Sp. Atk. Specs (6 Stacks) | 9912 | 2269 |
| Slick Spoon + Wise Glasses | 9466 | 2190 |
| Wise Glasses + Energy Amplifier (Includes Effect) | 9482 | 2586 |
| Wise Glasses + Sp. Atk. Specs (6 Stacks) | 10,332 | 2348 |
| Energy Amplifier + Sp. Atk. Specs (6 Stacks) | 10,017 | 2686 |
The tests above does not use any Emblems yet so it will scale higher if equipped.
Blastoise Best Items & Moveset
Best Held Item
| Item | Explanation |
|---|---|
 Exp. Share Exp. Share
|
Exp. Share allows Blastoise to level up faster in the early game. It also gives a nice amount of HP and movement speed. |
 Sp. Atk. Specs Sp. Atk. Specs
|
Sp. Atk. Specs gives Blastoise a large damage boost once it's fully stacked. |
 Energy Amplifier Energy Amplifier
|
Energy Amplifier provides Blastoise cooldown reductions for its moves and a large damage boost after it uses Hydro Typhoon. |
 Focus Band Focus Band
|
Focus Band is Blastoise's core tank item, increasing its static defenses and providing a reliable means of survivability, especially during Rapid Spin. |
 Wise Glasses Wise Glasses
|
Wise Glasses is one of Blastoise's go-to damage item, increasing its moves' damage, particularly the Water Spout and Rapid spin combo. |
 Choice Specs Choice Specs
|
Choice Specs functions similarly to Wise Glasses, increasing Blastoise's moves' damage. It's a great item for burst damage moves like Hydro Pump. |
 Slick Spoon Slick Spoon
|
Slick Spoon boosts Blastoise's damage output by ignoring a portion of its target's Sp. Def., particularly when using Rapid Spin and Water Spout. Its Sp. Atk. and HP bonuses also fit well with the Pokemon's gameplay. |
 Resonant Guard Resonant Guard
|
Resonant Guard allows Blastoise to generate a small shield for itself and its allies whenever it deals damage, which suits its Defender role. It also provides a decent amount of HP and HP regeneration. |
 Tenacity Belt Tenacity Belt
|
Tenacity Belt provides Blastoise with a nice amount of Defense and Sp. Def., and its effect works well with the Pokemon's Defender role. |
 Vanguard Bell Vanguard Bell
|
Vanguard Bell provides Blastoise with a decent amount of HP and the ability to restore its HP when it hits opponents with its hindrances, like Surf and Hydro Typhoon. |
Best Battle Item
| Item | Explanation |
|---|---|
 Eject Button Eject Button
|
Eject Button enables Blastoise to set-up kills for the team via the Unite move. It also allows Blastoise to stay on top of enemies even while using Rapid Spin, maximizing the damage output. |
 X Speed X Speed
|
X Speed improves Blastoise's overall mobility. It can be used offensively and defensively depending on the situation. |
 Potion Potion
|
Potion works great with Blastoise's innate HP, healing it for a large amount. It provides some survivability to Blastoise during Rapid Spin since it's exposed to enemy attacks. |
Best Moveset
| Move | Explanation |
|---|---|
 Surf Surf
|
Surf is a versatile move that gives Blastoise crowd control and mobility during fights. |
 Hydro Pump Hydro Pump
|
Hydro Pump deals high damage, displace opponents, and can prolong Surf's stun when used together. |
This moveset gives Blastoise a great pair of crowd control moves that also deal decent damage. Using Surf and Hydro Pump together can disrupt opponents for a considerable amount of time during fights, allowing Blastoise's team to follow up with their own moves and attacks.
Choosing a moveset depends on the player's playstyle. For an aggressive playstyle, always choose Water Spout and Rapid Spin. For a typical defender playstyle, Surf and Hydro Pump are the best choice.
Which Moveset Do You Think is Best For Blastoise?
Let us know why in the comments!
Previous Poll Results
How to Play Blastoise
| Jump to Section | |
|---|---|
Setup Knockouts in the Early Game
Use Skull Bash and Water Gun in the early game to set up knockouts. The best way to execute this is by using Skull Bash to quickly go behind your targets, then pushing them back with Water Gun.
Reach Level 7 Quickly
Try to reach level 7 as soon as you can so you can access your full moveset. Don't get too aggressive in the early game, and only fight if you have an advantage over your opponents. Focus on defending your goal zone, farming wild Pokemon, and scoring points if given chance.
Use Boosted Attacks to Reduce Move Cooldowns
Blastoise's Boosted Attacks will reduce your move cooldowns by 1 second per use. This will still play in effect even if no enemies are nearby! If your moves are down and a crucial fight is about to happen, don't hesitate to fire some empty attacks in the air to reduce your moves' cooldowns.
Change Playstyle Based on Moveset
Blastoise generally has two playstyles; a traditional tank or an Sp. Atk damage dealer. These playstyles depend on which moveset you chose. Knowing and understanding how these move combinations work together allows you to play the Pokemon more effectively.
Get Aggressive with Rapid Spin and Water Spout
Rapid Spin and Water Spout turns Blastoise into an AoE damage dealer, especially when used together. If you're going with this move combination, you need to be aggressive once you have them both. Aim for squishy targets like Pikachu as you can potentially knockout them out within the duration of Rapid Spin. You can also try to steal objectives like Regieleki from the enemy.
Displace Enemies with Surf and Hydro Pump
Surf and Hydro Pump allow you to displace and control enemy movements. You can shove targets towards your team or zone them out entirely from areas. You can also set up fights and make it easier for your allies to follow up with their moves.
Save Hydro Typhoon for Teamfights
Hydro Typhoon is one of the best teamfight move in the game thanks to its wide AoE, stun, and damage. Try to save Hydro Typhoon only for teamfights as much as possible as it'll give you and your team a better chance in winning the fight. Morever, it's best to use it at the start of the fight rather than as a finisher.
Hydro Typhoon: Blastoise Move Effect and Cooldown
Use Eject Button for Better Positioning
You can use Eject Button to get a better position and use Hydro Typhoon. You can either use it before Hydro Typhoon or during it.
Eject Button Effect and How to Get
Progression and Leveling Guide
Top and Bottom Guide
Level 1 to 5
- Quickly clear out the Bunnelbies in the lane.
- Keep farming wild Pokemon in the lane to reach level 5 and learn your first move.
- At bottom lane, prioritize taking Indeedees for more exp.
Level 6 to 9
- Keep hunting Wild Pokemon to gain more EXP from farming Altaria and Swablus.
- Once you reach level 7, learn your second move.
- Help allies secure Regice, Registeel, or Regirock when it spawns, otherwise secure Regieleki.
- Upon reaching level 9, learn your Unite Move.
Level 10+
- Stick with allies to hunt targets, secure objectives, and push lanes.
- Reach at least level 13 or max level if possible before or when Groudon spawns for a fully-upgraded moveset.
- Make sure that your Unite Move is available when Groudon spawns.
- Help teammates win a teamfight and secure Groudon.
Blastoise Combos
Bash and Push Combs
| Bash and Push Combo | |
|---|---|
 |
|
| This combo allows you to position yourself behind the enemy to push them towards your allies. Start by stunning the target with a Skull Bash, then pushing them back with a Water Gun. Abuse this during the early levels when your allies are ganking your lane. | |
Upgraded Bash and Push Combo
| Upgraded Bash and Push Combo | |
|---|---|
 |
|
| This is an upgraded version of Bash and Push Combo, but uses Hydro Pump instead of Water Gun for pushing the target. You will be able to do this once Blastoise reaches level 5 and learns Hydro Pump. | |
Rapid Spin Combos
This set of combos takes advantage of Rapid Spin to deal consistent damage while also having hindrance resistance.
Rapid Spin Spout Combo
| Rapid Spin Spout Combo | |
|---|---|
 |
|
| This variation is great for apllying constant pressure in an area. Start by pressuring the target from afar with Water Spout. Then go into the Rapid Spin. At this point, you can either use a Standard Attack or activate Water Spout. For the highest possible value, alternate between the two inputs until Rapid Spin finishes. | |
Rapid Spin Pump Combo
| Rapid Spin Pump Combo | |
|---|---|
 |
|
| This variation is great for displacing opponents. Start by hitting a target with a Hydro Pump. Then go into the Rapid Spin. At this point, you can either use a Standard Attack or activate Hydro Pump. For the highest possible value, quickly activate Hydro Pump after Rapid Spin so you can have it on cooldown and use it a second time. | |
Ultimate Typhoon Displacer Combo
| Ultimate Typhoon Displacer Combo | |
|---|---|
 |
|
| This is a hard crowd control combo that incapacitates opponents in an are with Blastoise's Unite Move. Start by cover ground with Surf. Make sure to use the move going towards the center of the battle where the enemies are. Then, activate Hydro Typhoon to stun all oppponents. Finish the move by hitting a target with a Hydro Pump. | |
Blastoise Matchups and Best Counters
All Blastoise Matchups
| Matchup Notes | ||
|---|---|---|
| 1. The chart is based on our own experience playing Blastoise. 2. Pokemon within each tier are unordered 3. Any Pokemon not shown here are still under investigation. |
||
Hard Counter with Kiting
Pokemon that can kite Blastoise from afar and have means to dodge its moves are effective against it.
Best Counters
| Pokemon | Explanation |
|---|---|
 Cinderace Cinderace
|
Rating: ★★★★★ • Can kite Blastoise from a considerable range with high damage output via critical hits and fast Standard Attacks • Can dodge Blastoise's moves using Blaze Kick or Feint. |
 Mega Mewtwo Y Mega Mewtwo Y
|
Rating: ★★★★★ • Can kite Blastoise from a considerable range with high damage output via critical hits and fast Standard Attacks, or Psystrike. • Can dodge Blastoise's moves using Teleport. |
Even Matchups for Blastoise
Utilizing Blastoise's versatile moveset consisting of crowd controls and strong area damage can help the Pokemon get the upper hand against these Pokemon.
Get Close and Burst them Down
| Fragile, Ranged Pokemon with High Damage |
|---|
|
|
| How to Beat |
| • These Pokemon prefer to keep their distance from opponents when fighting. They also have high damage potential that can shred through Blastoise's HP quickly. However, they are fragile and can get knocked out by Blastoise fast. • Quickly close the gap with Surf, then burst them down with Hydro Pump and Hyro Typhoon, or use the Rapid Spin and Waterspout combo to quickly take them out. |
Disrupt Their Attacks/Combos
| All-Rounders |
|---|
|
|
| How to Beat |
|
• All-Rounders excel in close combat and rely mostly on either their attacks or combos to deal damage. They are also quite durable. • Disrupt their attacks or combos using Surf, Hyro Pump, and Hyro Typhoon. • Avoid fighting them head on while Blastoise's moves are still on cooldown. |
Utilize Their Numbers
| Supporters |
|---|
| How to Beat |
|
• These Pokemon typically stick with their allies and rarely venture alone. Although they don't necessarily pose any threat to Blastoise, their support capabilities makes them valuable during fights. • Take advantage of them being in close proximity to each other by using Surf, Hyro Pump, and Hydro Typhoon, or use the Rapid Spin and Waterspout combo to force them to scatter. |
Group Up with Allies
| Highly Durable Pokemon |
|---|
|
|
| How to Beat |
|
• These Pokemon are extremely durable and also have crowd control moves, making it a tedious task for Blastoise to take them down alone. With that, it's best to group up with allies to bring them down with the help of Blastoise. • Use Surf and Hydro Pump to prevent them from using their moves and set up for Blastoise's allies, or use the Rapid Spin and Waterspout combo to help dish out more damage. |
Dodge Their Burst Damage Attempt
| High-Mobility Pokemon with Burst Damage |
|---|
| How to Beat |
|
• These Pokemon are highly mobile and can deal tons of damage quickly. However, they can be vulnerable if they miss their burst attempt. Although Blastoise can tank a lot of their damage, it can be forced to play defensively. • Dodge their moves and wait for an opening, or try to catch them with Surf, Hydro Pump, and Hydro Typhoon on their attempt. |
Easy Matchups
Take advantage of Blastoise's high defense and decent damage to quickly knock out these Pokemon.
Get Close and Burst them Down
| Fragile, Ranged Pokemon with High Damage |
|---|
|
[align]
|
| How to Beat |
| • These Pokemon prefer to keep their distance from opponents when fighting. They also have high damage potential that can shred through Blastoise's HP quickly. However, they are fragile and can get knocked out by Blastoise fast. • Quickly close the gap with Surf, then burst them down with Hydro Pump and Hyro Typhoon, or use the Rapid Spin and Waterspout combo to quickly take them out. |
Disrupt Their Attacks/Combos
| All-Rounders |
|---|
|
|
| How to Beat |
|
• All-Rounders excel in close combat and rely mostly on either their attacks or combos to deal damage. They are also quite durable. • Disrupt their attacks or combos using Surf, Hyro Pump, and Hyro Typhoon. • Avoid fighting them head on while Blastoise's moves are still on cooldown. |
Utilize Their Numbers
| Supporters |
|---|
|
|
| How to Beat |
|
• These Pokemon typically stick with their allies and rarely venture alone. Although they don't necessarily pose any threat to Blastoise, their support capabilities makes them valuable during fights. • Take advantage of them being in close proximity to each other by using Surf, Hyro Pump, and Hydro Typhoon, or use the Rapid Spin and Waterspout combo to force them to scatter. |
Dodge Their Burst Damage Attempt
| High-Mobility Pokemon with Burst Damage |
|---|
|
|
| How to Beat |
|
• These Pokemon are highly mobile and can deal tons of damage quickly. However, they can be vulnerable if they miss their burst attempt. Although Blastoise can tank a lot of their damage, it can be forced to play defensively. • Dodge their moves and wait for an opening, or try to catch them with Surf, Hydro Pump, and Hydro Typhoon on their attempt. |
Best Teammates for Blastoise
| Pokemon | Explanation |
|---|---|
 Greninja Greninja
 Venusaur Venusaur
|
High Damaging Snipers |
| These Pokemon have powerful burst attacks and are capable of stunning enemies from a safe distance. Blastoise can lead the charge for these Pokemon while they deal damage and secure objectives. | |
 Blissey Blissey
 Mr. Mime Mr. Mime
|
Shields and Sustain |
| These Pokemon are capable of providing buffs, shields, and AoE heals during fights. This allows Blastoise to become sturdier and easily dominate lanes. | |
 Slowbro Slowbro
 Snorlax Snorlax
|
Tanky Disablers |
| As fellow Defenders that have disabling abilities, these Pokemon can lead the charge, soak up damage, and help Blastoise setup its attacks with their disabling moves. | |
 Absol Absol
 Zoroark Zoroark
|
High Burst Damagers |
| These Pokemon help contribute damage through pinning down enemies with combos and burst attacks. While it's still recommended to go with either a Defender or Supporter ally, Speedsters are a huge help when trying to dominate lanes as early as possible. | |
 Machamp Machamp
 Tsareena Tsareena
|
Hard-hitting Initiators |
| These Pokemon are very dependable allies as they have means to buff or sustain themselves. Whether it's securing objectives or pushing lanes, Machamp and Tsareena are built to initiate clashes, stun enemies, and create openings for their teammates. |
Looking for teammates to synergize with you? Head over to our Friend Request Board to find other trainers to join you in your grind or just to hang out with!
Blastoise Moves
Move Slot 1 (R)
 Water Gun Water Gun
(Lv. 1 or 3) |
Move Type: Ranged Damage Type: Special Cooldown: 9s Starting Damage: 516 Final Damage: 575 |
|---|---|
| Attacks with a shot of water, shoving opposing Pokemon and decreasing their movement speed for a short time. | |
 Water Spout Water Spout
(Lv. 5) Upgrade Lv. 11 |
Move Type: Area Damage Type: Special Cooldown: 7.5s Starting Damage: 912 Damage per instance: 152, Number of instances: 6 Final Damage: 1974 Damage per instance: 329, Number of instances: 6 |
|
Spouts water toward the designated location, decreasing the movement speed of opposing Pokemon in the area of effect for a short time.
Upgrade: Increases damage dealt by this move. |
|
|
Hydro Pump
(Lv. 5) Upgrade Lv. 11 |
Move Type: Ranged Damage Type: Special Cooldown: 5.5s Starting Damage: 1047 Long range damage: 349, Medium range damage: 698, Short range damage: 1047 Final Damage: 1971 Long range damage: 657, Medium range damage: 1314, Short range damage: 1971 |
|
Has the user attack by blasting out a huge volume of water, dealing damage to opposing Pokemon and shoving them when it hits.
Upgrade: Increases damage dealt by this move. |
|
Move Slot 2 (ZR)
 Skull Bash Skull Bash
(Lv. 1 or 3) |
Move Type: Dash Damage Type: Special Cooldown: 10s Starting Damage: 380 Final Damage: 469 |
|---|---|
| Fiercely rams an opposing Pokemon and leaves it unable to act. | |
 Rapid Spin Rapid Spin
(Lv. 7) Upgrade Lv. 13 |
Move Type: Buff Damage Type: Special Cooldown: 10s Starting Damage: 1820 Damage per instance: 182, Number of instances: 10 Final Damage: 2680 Damage per instance: 268, Number of instances: 10 |
|
Has the user spin rapidly, dealing damage over time to nearby opposing Pokemon. Changes the mechanics of the user's basic attacks as well as its Hydro Pump and Water Spout moves. Using this move resets the cooldown of Hydro Pump or Water Spout. While this move is in effect, the user becomes immune to hindrances. In addition, the user's next basic attack after this move ends becomes a boosted attack.
Upgrade: Also reduces the damage the user receives while using this move. |
|
|
Surf
(Lv. 7) Upgrade Lv. 13 |
Move Type: Dash Damage Type: Special Cooldown: 7s Starting Damage: 934 Final Damage: 1326 |
|
Has the User charge forward on a wave, shoving opposing Pokemon and leaving them unable to act. The user becomes immune to hindrances while using this move and can jump in a designated direction once this move ends.
Upgrade: Also grants a shield when this move hits. |
|
Unite Moves (ZL)
 Hydro Typhoon Hydro Typhoon
(Lv. 9) |
Move Type: Disable Damage Type: Cooldown: 100s Starting Damage: 1527 Final Damage: 2023 |
|---|---|
| Has the user spout water to attack while spinning, throwing opposing Pokemon in a large area. This also grants the user a shield. | |
Standard Attack
|
|
Becomes a boosted attack with every third attack, dealing continual damage and decreasing the movement speed of opposing Pokemon for a short time when it hits. After the user uses a boosted attack, the cooldown of its other moves is reduced. |
|---|
Ability (Passive)
 Torrent Torrent
|
All Evolution Stages
When the Pokemon is at half HP or less, its Attack and Sp. Atk are increased. |
|---|
Blastoise Stats & Evolutions
Blastoise Evolutions
| 1st Evolution | 2nd Evolution | Final Evolution |
|---|---|---|
 Squirtle Squirtle(Lv. 1) |
 Wartortle Wartortle(Lv. 5) |
 Blastoise Blastoise(Lv. 7) |
Blastoise Stats
| Level | HP | Defense | Special Defense | Attack Damage |
|---|---|---|---|---|
| 1 | 3225 | 100 | 70 | 150 |
| 2 | 3326 | 108 | 75 | 152 |
| 3 | 3447 | 117 | 82 | 154 |
| 4 | 3593 | 128 | 90 | 157 |
| 5 | 4122 | 169 | 119 | 168 |
| 6 | 4333 | 185 | 130 | 172 |
| 7 | 5293 | 205 | 144 | 190 |
| 8 | 5597 | 229 | 160 | 196 |
| 9 | 5961 | 312 | 218 | 204 |
| 10 | 6398 | 346 | 242 | 214 |
| 11 | 6923 | 387 | 271 | 224 |
| 12 | 7552 | 436 | 305 | 238 |
| 13 | 8307 | 495 | 346 | 252 |
| 14 | 9213 | 565 | 395 | 270 |
| 15 | 10300 | 650 | 455 | 292 |
Attack Damage is the damage of the Basic Attack as tested against the Training Dummy.
Blastoise In-Game Stat Listings
| Offense | Endurance | Mobility | Scoring | Support |
|---|---|---|---|---|

|

|
|
|
|
Blastoise Skins (Holowear)
| Holowear | |
|---|---|
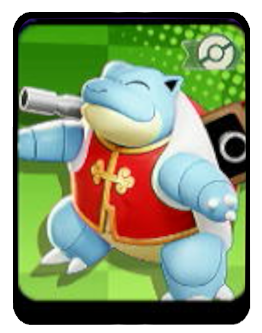
 Fashionable Style Fashionable Style
Zirco Trading:
|
 Firefighter Style Firefighter Style
Zirco Trading:
|
 Holiday Style Holiday Style
Zirco Trading:
|
 Tuxedo Style Tuxedo Style
Zirco Trading:
|
 Pokebuki Style Pokebuki Style
Event:
Season 7 Battle Pass |
 Sacred Style Sacred Style
Zirco Trading:
|
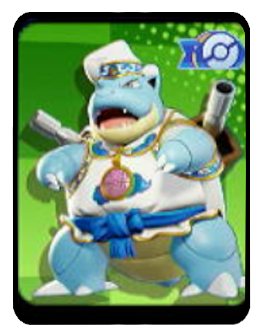
 New Year Style New Year Style
Event:
UNITE Club Membership |
 Stage Style Stage Style
Zirco Trading:
|
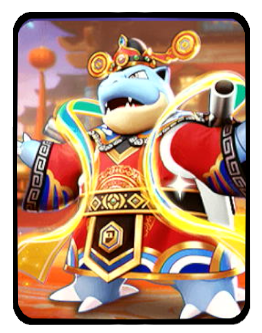 New Year Festival Style New Year Festival Style
Event:
Treasure Chest Challenge |
 Sunglasses Style Sunglasses Style
Event:
Battle Challenge |
Blastoise Character Spotlight
Blastoise Achievements
Hydro Pump Achievement
| Hydro Pump | |
|---|---|
| Pokemon | Move |
|
Blastoise
|
|
| Mission: Show 2 or more Pokemon from the opposing team at the same time with Hydro Pump or Hydro Pump+ (10/20/40 times total) |
|
| Medals & Points | Rewards |
|
|
|
|
|
|
|
|
|
List of Defender Pokemon Achievements
Pokemon UNITE Related Guides

All Pokemon Guides and Builds
 Aegislash
 Alcremie
 Alolan Ninetales
 Alolan Raichu
 Armarouge
 Azumarill
 Blaziken
 Buzzwole
 Ceruledge
 Chandelure
 Charizard
 Clefable
 Comfey
 Cramorant
 Crustle
 Darkrai
 Decidueye
 Delphox
 Dhelmise
 Dodrio
 Dragapult
 Dragonite
 Duraludon
 Eldegoss
 Empoleon
 Espeon
 Falinks
 Galarian Rapidash
 Garchomp
 Gardevoir
 Gengar
 Glaceon
 Goodra
 Greedent
 Gyarados
 Ho-oh
Ho-oh Hoopa
Hoopa Inteleon
 Lapras
 Latias
 Latios
 Leafeon
 Lucario
 Mamoswine
 Meowscarada
 Meowth
 Metagross
 Mew
Mew Mimikyu
 Miraidon
 Moltres
 Pawmot
 Pikachu
 Psyduck
 Sableye
 Scizor
 Sirfetch'd
 Suicune
 Sylveon
 Talonflame
 Tinkaton
 Trevenant
 Tyranitar
 Umbreon
 Urshifu
 Vaporeon
 Wigglytuff
 Zacian
 Zapdos
 Zeraora
Upcoming Pokemon
 Articuno Articuno(TBA) |
 Meganium Meganium(TBA) |
 Typhlosion Typhlosion(TBA) |
 Feraligatr Feraligatr(TBA) |
Mega Evolutions
| Mega Evolved Pokemon | ||
|---|---|---|
 Mega Charizard X Mega Charizard X |
 Mega Charizard Y Mega Charizard Y |
 Mega Gyarados Mega Gyarados |
 Mega Lucario Mega Lucario |
 Mega Mewtwo X Mega Mewtwo X |
Mega Mewtwo Y |
Pokemon by Role
| All Pokemon Roles | |||||
|---|---|---|---|---|---|
 Attackers Attackers |
 All-Rounders All-Rounders |
 Defenders Defenders |
|||
 Speedsters Speedsters |
 Supporters Supporters |
||||
Pokemon by Characteristics
| Attack Type | |
|---|---|
 Melee Pokemon Melee Pokemon |
 Ranged Pokemon Ranged Pokemon |
 Physical Pokemon Physical Pokemon |
 Special Pokemon Special Pokemon |
| Stat Rankings | |
 HP Ranking HP Ranking |
 Defense Ranking Defense Ranking |
 Sp. Def. Ranking Sp. Def. Ranking |
 Basic Attack Ranking Basic Attack Ranking |
Comment
Guys listen to this. Max sp.atk blastoise with sp.atk specs, wise glasses, drive lens, 6 white and green emblems and his passive torrent increase his base sp atk stat 412 to 859! 412+112+29+29+23%+20%= 859
Author

Blastoise Guide: Builds and Best Items
Rankings

Gaming News

![Monster Hunter Stories 3 Review [First Impressions] | Simply Rejuvenating](https://img.game8.co/4438641/2a31b7702bd70e78ec8efd24661dacda.jpeg/show)
![The Liar Princess and the Blind Prince Review [PC] | Lovely to Look at but Tedious to Play](https://img.game8.co/4442586/8d95f5faf05780f1765ce7e0938bd825.jpeg/thumb)
![Marathon Cryo Archive Map Teased as [REDACTED] on Selection Screen](https://img.game8.co/4442236/6357203e58172f6de57f1991e7c39b22.png/thumb)

Popular Games

Genshin Impact Walkthrough & Guides Wiki
Umamusume: Pretty Derby Walkthrough & Guides Wiki
Pokemon Pokopia Walkthrough & Guides Wiki
Honkai: Star Rail Walkthrough & Guides Wiki
Monster Hunter Stories 3: Twisted Reflection Walkthrough & Guides Wiki
Arknights: Endfield Walkthrough & Guides Wiki
Wuthering Waves Walkthrough & Guides Wiki
Zenless Zone Zero Walkthrough & Guides Wiki
Pokemon TCG Pocket (PTCGP) Strategies & Guides Wiki
Monster Hunter Wilds Walkthrough & Guides Wiki


Recommended Games
Diablo 4: Vessel of Hatred Walkthrough & Guides Wiki
Cyberpunk 2077: Ultimate Edition Walkthrough & Guides Wiki
Fire Emblem Heroes (FEH) Walkthrough & Guides Wiki
Yu-Gi-Oh! Master Duel Walkthrough & Guides Wiki
Super Smash Bros. Ultimate Walkthrough & Guides Wiki
Pokemon Brilliant Diamond and Shining Pearl (BDSP) Walkthrough & Guides Wiki
Elden Ring Shadow of the Erdtree Walkthrough & Guides Wiki
Monster Hunter World Walkthrough & Guides Wiki
The Legend of Zelda: Tears of the Kingdom Walkthrough & Guides Wiki
Persona 3 Reload Walkthrough & Guides Wiki


All rights reserved
©2021 Pokémon. ©1995–2021 Nintendo / Creatures Inc. / GAME FREAK inc.
©2021 Tencent.
The copyrights of videos of games used in our content and other intellectual property rights belong to the provider of the game.
The contents we provide on this site were created personally by members of the Game8 editorial department.
We refuse the right to reuse or repost content taken without our permission such as data or images to other sites.
Guys the rapid spin build should be changed to Focus band, Sp. attack specs, Curse incense. Blastoise already does more than enough dmg at lv.14 especially when you're the jungler in your team. Plus Blastoise's passive will further increase that dmg, the lower your hp is. What we need is something to counter the enemy's healing. Because the enemy can just outheal the dmg we deal since it's a dps combo. So instead implement the curse incense!