Greninja Guide: Builds and Best Items
☆ Upcoming: Articuno | Meganium | Typhlosion | Feraligatr
★ Latest News: Zapdos | Moltres | Version 1.22.1.5
☆ Popular Pages: Upcoming Pokemon | Tier List
★ Current Seasons: Ranked S34 | Battle Pass S39
☆ Join Game8's Pokemon Discord Server!
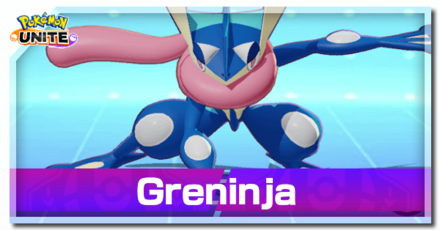
The best guide on how to play Greninja in Pokemon UNITE for Nintendo Switch and Mobile. Check here for the best builds, Held and Battle items, movesets, as well as the latest nerfs, buffs, counters, and more!
List of Contents
Greninja Latest Nerfs & Buffs (3/5)
| Greninja Changes |
|---|
|
Stat Buff
• HP increased from 3000~5420 to 3200~6000. • Sp. Def increased from 30~149 to 64~240. |
|
Standard Attack • Boosted Attack: Damage increased by 8%. |
|
• Damage increased by 10%. |
|
• Cooldown decreased from 13s to 12s. • Movement speed increase increased from 10% to 30%. |
Greninja Stat Buff
| Lvl | HP | Sp. Def. |
|---|---|---|
| 5 | 3308 → 3556 (+7.5%) |
45 → 86 (+91.1%) |
| 10 | 4086 → 4456 (+9.1%) |
83 → 143 (+72.3%) |
| 15 | 5420 → 6000 (+10.7%) |
149 → 240 (+61.1%) |
Stat Updates
| 1.2.1.3 | Attack and max HP decreased. |
|---|---|
| 1.15.1.7 | Attack increased from 146-460 to 146-500 (Lv.1-15). |
| 1.18.1.4 | HP increased from 3000 - 5152 to 3000 - 5420 (Lv. 1 - 15). |
| 1.22.1.5 | HP increased from 3000~5420 to 3200~6000. Sp. Def increased from 30~149 to 64~240. |
Standard Attack
| 1.3.1.2 | Boosted attack bugfix |
|---|---|
| 1.1.1.4 | Basic Attack: Bug Fixes |
| 1.22.1.5 | Boosted Attack: Damage increased by 8%. |
Bubble
| 1.22.1.5 | Damage increased by 10%. |
|---|
Smokescreen
| 1.2.1.3 | Fixed a bug causing the Smokescreen+ effect to trigger even before the move is upgraded. |
|---|---|
| 1.1.1.6 | Attack damage boost after using decreased from about 1.75x to about 1.2x (-75%). Increased the cooldown period from 11 seconds to 13 seconds (+18%). |
| 1.5.1.6 | Fixed bug(s) causing one or more effects not to trigger. |
| 1.15.1.7 | Boosted Attack damage increased by 12%. |
| 1.22.1.5 | Cooldown decreased from 13s to 12s. Movement speed increase increased from 10% to 30%. |
Surf
| 1.5.1.6 | Damage dealt to opposing Pokemon decreased from 1625 to 1402 (-14%). |
|---|
Water Shuriken
| 1.3.1.2 | Cooldown lengthened from 5s to 6s. (+1s) Bugfix: opposing Pokemon movement speed decrease. |
|---|---|
| 1.2.1.3 | Fixed a bug affecting the decrease to opposing Pokemon's movement speed. |
| 1.1.1.6 | Cooldown period decreased from 7 seconds to 5 seconds (-29%). Damage per hit increased from 755 to 890 (+18%). |
| 1.7.1.9 | Fixed the number of shurikens to 4. Damage increased. Water Shuriken+: Fixed the number of shurikens to 5. Damage increased. |
| 1.13.1.2 | Movement speed reduction effect increased from 25% → 35%. Movement speed increase changed from 15% → 25%. |
| 1.18.1.4 | Healing reduced by 25%. |
Double Team
| 1.3.1.2 | Damage to opposing Pokemon decreased. |
|---|---|
| 1.2.1.3 | Improvement the movement of the illusory copies. |
| 1.1.1.6 | Cooldown period decreased from 11 seconds to 9 seconds (-18%). |
| 1.7.1.9 | Damage increased. |
| 1.13.1.2 | Cooldown decreased from 9s → 8s. Double Team +: Cooldown decreased from 8s → 7s. |
| 1.18.1.4 | Illusion damage increased by 8%. |
Torrent
| 1.2.1.3 | Attack increase buff weakened. |
|---|
Water Burst Shuriken
| 1.3.1.2 | Bugfix: opposing Pokemon movement speed decreased. Cooldown increased from around 164s to around 166s. (+2s) |
|---|---|
| 1.2.1.3 | Adjusted the move to allow it to trigger more quickly. |
| 1.5.1.2 | UNITE Move Cooldown Reduced from 163s to 134s (-18%). |
| 1.15.1.7 | Energy needed decreased by 25%. Damage increased by 20%. |
Greninja Basic Info
| Greninja | ||
|---|---|---|
 |
Role: Attacker Attack Type: Ranged Damage Type: Physical Difficulty: Expert |
|
| "Greninja is a Pokémon that uses smokescreens and illusory copies of itself to hide." | ||
Greninja Best Lanes

|

|

|
Tips & Strategies for Every Lane
Strengths and Weaknesses
| Strengths | Weaknesses |
|---|---|
| ✔︎ Speedster-like mobility and stealth for superb Jungling. ✔︎ High Standard Attack damage for both melee and ranged attacks. ✔︎ Moveset can disrupt enemy aiming and vision. |
✖︎ High skill ceiling with many skill-shot accuracy based moves. ✖︎ Very Fragile. ✖︎ Takes a long time to reach power spike. |
Best Builds for Greninja
| Greninja Builds | |
|---|---|
| - | |
Ranged Build
Ranged Build

|
Moveset | Held Items | |||
|---|---|---|---|---|---|
| Battle Item | |||||
| Stats from Items (Lv. 40) | Recommended Lane | ||||
|
Attack: +38.5 Defense: +35 Sp. Def: +35 Attack Speed: +8.70% |
|
||||
| Emblem Color Combination | Target Emblem Stats | ||||
|
|
Positive Stats: • Attack • Critical-Hit Rate Free Negative Stats: • Sp. Atk • Defense • Sp. Def |
||||
| Note: The emblem color and stats here are suggestions only. The builds are still viable even without the suggested emblems. |
|||||
Ranged Build Explanation
This build is centered on dealing damage and sustaining HP using Water Shuriken and utilizing the illusion mechanic from Double Team. It can be used in any lane, preferably the bottom lane.
- Muscle Band improves Greninja's attacks by dealing HP-based bonus damage.
- Attack Weight provides Greninja a massive damage boost for both its attacks and moves, especially when fully stacked.
- Focus Band improves Greninja's durability and gives it more healing on top of Water Shuriken.
- X Attack gives Greninja more damage for faster knockouts.
- The build's Boost Emblem loadout should consist of 6 Brown Emblems for more damage and 6 White Emblems for additional HP. This can be achieved by having at least two (2) Emblems that are both Brown and White.
- Equip Emblems that improve Attack or Critical-Hit Rate to maximize Greninja's attack and move damage.
- Sp. Atk. Sp. Def., and Defense can be freely traded for the other stats.
Ranged Build Damage and Healing Test
| Items (Level 30) |
Standard Attack (@ Lvl 15) Standard Attack (w/ Critical-Hit) (@ Lvl 15) |
Water Shuriken Damage (Total) (@ Lvl 15) Healing (Per Hit) (@ Lvl 15) |
|---|---|---|
| Muscle Band + Attack Weight (6 Stacks) |
925 1490 |
5420 179 |
Since the build is centered on Water Shuriken and ranged attacks, equipping items that increase the move's effectiveness and Greninja's ranged attacks is the ideal item combination. Focus Band is a staple item for the build, giving Greninja more sustain and durability.
As the results show, a Muscle Band and a fully-stacked Attack Weight will yield the best outcome for the build. Although the item combination did average in the critical-hit tests, it did score the highest in terms of Standard and Boosted Attacks, and Water Shuriken damage and healing.
For alternatives, replacing Attack Weight with Razor Claw would be the best option. The item combination produced the second best score in all tests and still deals a high amount of damage output.
However, should critical-hit become a factor, replacing Attack Weight with Scope Lens instead is the ideal choice.
The damage tests are conducted using the Training Dummy in Practice Mode. The results are taken from the Total Damage data.
The healing test results are taken from the green floating text above the Pokemon.
| Items (Level 30) | Standard Attack (@ Lvl 15) Boosted Attack (@ Lvl 15) | Standard Attack (w/ Critical-Hit) (@ Lvl 15) Boosted Attack (w/ Critical-Hit) (@ Lvl 15) |
|---|---|---|
| Muscle Band + Scope Lens | 835 930 | 1723 1924 |
| Muscle Band + Razor Claw | 850 (1115 w/ Razor Claw Effect) 948 (1213 w/ Razor Claw Effect) | 1340 (1605 w/ Razor Claw Effect) 1536 (1801 w/ Razor Claw Effect) |
| Muscle Band + Attack Weight (6 Stacks) | 925 1038 | 1490 1716 |
| Razor Claw + Attack Weight (6 Stacks) | 565 (1605 w/ Razor Claw Effect) 678 (980 w/ Razor Claw Effect) | 1130 (1605 w/ Razor Claw Effect) 1356 (1658 w/ Razor Claw Effect) |
| Scope Lens + Attack Weight (6 Stacks) | 550 660 | 1578 1811 |
| Scope Lens + Razor Claw | 475 (732 w/ Razor Claw Effect) 570 (827 w/ Razor Claw Effect) | 1363 (1620 w/ Razor Claw Effect) 1564 (1821 w/ Razor Claw Effect) |
| Items (Level 30) | Water Shuriken Damage (Total) (@ Lvl 15) | Water Shuriken Healing (Per Hit) (@ Lvl 15) |
|---|---|---|
| Muscle Band + Scope Lens | 4815 | 160 |
| Muscle Band + Razor Claw | 4915 | 163 |
| Muscle Band + Attack Weight (6 Stacks) | 5420 | 179 |
| Razor Claw + Attack Weight (6 Stacks) | 5420 | 179 |
| Scope Lens + Attack Weight (6 Stacks) | 5320 | 176 |
| Scope Lens + Razor Claw | 4815 | 160 |
The tests above does not use any Emblems yet so it will scale higher if equipped.
Assassin Build
| Assassin Build | Moveset | Held Items | |||
|---|---|---|---|---|---|
| Battle Item | |||||
| Stats from Items (Lv. 40) | Recommended Lane | ||||
|
Attack: +38.5 Critical-Hit Rate: +7.0% Critical-Hit Damage: +14% Attack Speed: +8.70% |
|
||||
| Emblem Color Combination | Target Emblem Stats | ||||
|
|
Positive Stats: • Attack • Critical-Hit Rate Free Negative Stats: • Sp. Atk • Defense • Sp. Def |
||||
| Note: The emblem color and stats here are suggestions only. The builds are still viable even without the suggested emblems. |
|||||
Assassin Build Explanation
This build utilizes the instant knockout and cooldown reset mechanics from Surf to take out targets one by one and the stealth from Smokescreen to allow Greninja to sneak up on enemies. It's best used in the jungle to give Greninja an early level advantage.
- Muscle Band improves Greninja's attacks by dealing HP-based bonus damage. It also synergizes well with the Pokemon's melee attacks.
- Scope Lens makes Greninja's attacks deadlier by increasing its critical-hit rate and damage.
- Attack Weight provides Greninja a massive damage boost for both its attacks and moves, especially when fully stacked.
- However, Rapid-Fire Scarf can be a replacement for Attack Weight, giving Greninja a massive attack speed, particularly for its melee attacks.
- Accel Bracer can also be a replacement for Attack Weight since it goes well with Surf's HP-based damage.
- X Attack gives Greninja more damage for faster knockouts.
- The build's Boost Emblem loadout should consist of 6 Brown Emblems for maximum damage and 6 White Emblems for additional HP. This can be achieved by having at least two (2) Emblems that are both Brown and White.
- Equip Emblems that improve Attack or Critical-Hit Rate to maximize Greninja's attack damage.
- Sp. Atk. Sp. Def., and Defense can be freely traded for the other stats.
Assassin Build Damage Test
| Items (Level 30) |
Standard Attack (@ Lvl 15) Boosted Attack (@ Lvl 15) |
Standard Attack (w/ Critical-Hit) (@ Lvl 15) Boosted Attack (w/ Critical-Hit) (@ Lvl 15) |
|---|---|---|
| Muscle Band + Scope Lens + Attack Weight (6 Stacks) |
925 1038 |
1980 2364 |
Since the build relies bringing down a target's HP low enough for Surf to instantly knock it out, equipping items that enhances Greninja's attacks is the ideal item combination.
As the results show, Muscle Band, Scope Lens, and a fully-stacked Attack Weight will yield the best outcome. Although the item combination did not generate the highest Standard and Boosted Attack damage, its result is only slightly lower than the highest score but produced the best critical-hit results.
For alternatives, it will ultimately depend on whether a player prefers better Standard Attacks or better critical-hits.
For a build with better Standard Attacks, replacing Scope Lens with Razor Claw would be the best option. On the other hand, for a build with better critical-hits, replacing Attack Weight with Razor Claw would be the best choice.
These damage tests are conducted using the Training Dummy in Practice Mode. The results are taken from the Total Damage data.
| Note: The numbers in bold are the highest result for a specific test. |
| Items (Level 30) | Standard Attack (@ Lvl 15) Boosted Attack (@ Lvl 15) | Standard Attack (w/ Critical-Hit) (@ Lvl 15) Boosted Attack (w/ Critical-Hit) (@ Lvl 15) |
|---|---|---|
| Muscle Band + Scope Lens + Attack Weight (6 Stacks) | 925 1038 | 1980 2364 |
| Muscle Band + Scope Lens + Razor Claw | 850 (1115 w/ Razor Claw Effect) 948 (1213 w/ Razor Claw Effect) | 1765 (2030 w/ Razor Claw Effect) 1973 (2238 w/ Razor Claw Effect) |
| Muscle Band + Razor Claw + Attack Weight (6 Stacks) | 940 (1250 w/ Razor Claw Effect) 1056 (1453 w/ Razor Claw Effect) | 1520 (1830 w/ Razor Claw Effect) 1752 (2062 w/ Razor Claw Effect) |
| Scope Lens + Razor Claw + Attack Weight (6 Stacks) | 565 (867 w/ Razor Claw Effect) 678 (980 w/ Razor Claw Effect) | 1620 (1922 w/ Razor Claw Effect) 1860 (2162 w/ Razor Claw Effect) |
The tests above does not use any Emblems yet so it will scale higher if equipped.
Greninja Best Items & Moveset
Best Held Items
| Item | Explanation |
|---|---|
 Attack Weight Attack Weight
|
Attack Weight provides a large damage boost for Greninja's attacks and moves. It can also improve Water Shuriken's healing. |
 Focus Band Focus Band
|
Focus Band increases Greninja's static defenses and is an effective survivability tool during fights. |
 Scope Lens Scope Lens
|
Scope Lens improves Greninja's attack damage via critical-hits. It works well with Surf since critical-hits allow Greninja to quickly shred through an enemy's HP before executing it with the move. |
 Muscle Band Muscle Band
|
Muscle Band is a must-have item for Greninja, increasing its attack damage and attack speed. It's benefitial for Greninja since each attack reduces Water Shuriken's cooldown after using it. |
 Rapid-Fire Scarf Rapid-Fire Scarf
|
Rapid-Fire Scarf gives Greninja a massive attack speed boost which goes well with its Boosted Attacks. |
 Charging Charm Charging Charm
|
Charging Charm provides Greninja mobility and burst damage, which suits the Pokemon's stealthy gameplay. |
 Accel Bracer Accel Bracer
|
Accel Bracer provides Greninja with more Attack as it knocks out opponents, which fits the Pokemon's gameplay. |
Best Battle Items
| Item | Explanation |
|---|---|
 Full Heal Full Heal
|
Full Heal ensures Greninja's survivability through immunity, allowing it to ignore most disables in the game. |
 X Attack X Attack
|
X Attack gives Greninja a decent damage and attack speed boost for faster knockouts. |
Best Moveset
| Move | Explanation |
|---|---|
 Water Shuriken Water Shuriken
|
Water Shuriken allows Greninja to burst down enemies in quick succession. It also gives it more sustainability because of the additional heal from each shuriken hit. |
 Double Team Double Team
|
Double Team can confuse opponents while providing a quick escape from dangerous situations, as well as a great dash move that can deal incidental damage from the illusions it generates. |
The combination of Water Shuriken and Double Team has a nice little interaction. The illusions generated from Double Team mimics Greninja's actions, including moves. Using Water Shuriken means your illusions also throws Water Shurikens, allowing you to deal incidental damage.
Greninja's effectiveness lies on how well you've mastered the Pokemon, not necessarily on which moveset you chose. Any move combination will do as long as you know how they work.
Which Moveset Do You Think is Best for Greninja?
Let us know why in the comments!
Previous Poll Result
How to Play Greninja
| Jump to Section | |
|---|---|
Be Aware of Your Positioning
Positioning is everything when it comes to using Greninja effectively. Keeping aware of Greninja's position in relation to the opponents will help set up smoother KOs, and snowball the game in its team's favor.
Farm Safely Until Level 7
Greninja reaches its peak offensive potential at Level 7 when it learns Surf or Water Shuriken. Avoid engaging in team fights early on to focus on farming Wild Pokemon.
Take the Jungle for Safer and Faster Farm
The most efficient and safest way to get levels is by taking the jungler role. Greninja has enough mobility and damage to clear the jungle camps quickly.
Be Elusive
One of Greninja's moveset gives it its trademark elusiveness, allowing it to make clever plays. Although both moves are Dash moves, each has their use in specific scenarios.
Confuse Enemies with Double Team
The illusions created from Double Team mimics Greninja's actions in the game. If it uses Surf or Water Shuriken, the illusions will do the same. Use this unique mechanic to confuse enemies and force them to guess the real one.
 Note Note |
The illusions also deal small damage when they attack. |
|---|
Double Team: Greninja Move Effect and Cooldown
Utilize the Stealth and Vision Obstruction from Smokescreen
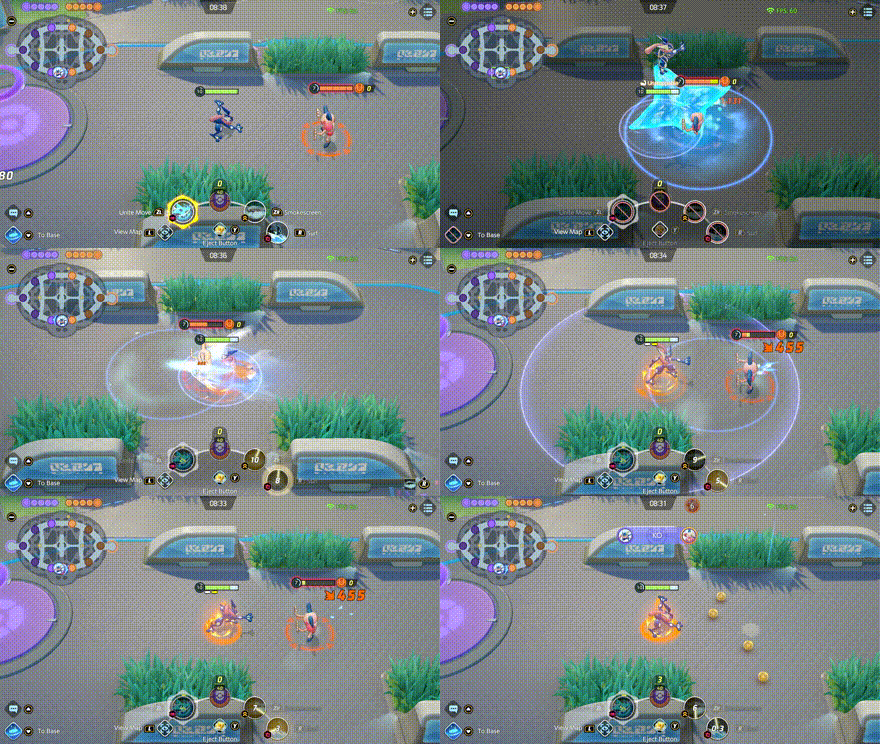
Using Smokescreen turns Greninja invisible for a while and obstructs the vision of opponents who are caught inside it. Both effects are useful for surprising targets or getting close to them.
Smokescreen: Greninja Move Effect and Cooldown
Avoid Hindrances
Greninja gains the Unstoppable status effect for a short duration when it uses Double Team or Smokescreen, allowing it to become immune to hindrances for that time window. With proper timing, Greninja can completely avoid certain moves like Flare Blitz with this mechanic.
Switch Between Ranged and Melee Attacks
By default, Greninja is a ranged Pokemon, but if it attacks at close range, it performs melee attacks. Both attacks have special effects that give Greninja some flexibility. Switching between ranged and melee attacks is an important mechanic to utilize Greninja.
Use Ranged Attacks to Reduce Move Cooldowns
Greninja's ranged attacks reduce the cooldown of Bubble, Water Shuriken, or Surf. Use ranged attacks if Greninja's moves are still on cooldown to hasten the process and to chip away the targets' HP from a safe distance.
Use Melee Attacks to Finish Off Targets
Greninja's melee attacks deal increased damage the lower the target's HP is, allowing it to burst them down quickly. Use Double Team, Smokescreen, or Waterburst Shuriken to get close to your targets, then keep hitting them with melee attacks until they get knocked out.
Moreover, melee attacks are great for setting up Surf and triggering its cooldown reset.
Utilize Torrent
Greninja's passive ability, Torrent, increases its Attack and movement speed when its HP is at half or below. Greninja can turn things around even at low HP, but be extremely cautious as the Pokemon might just end up getting knocked out. Knowing when to continue fighting and to retreat is key to utilizing the ability.
Torrent: Greninja Ability Effect and Cooldown
Set the Tempo
As the team's carry, Greninja will be setting the tempo of the game depending on how active it is in the map. Greninja needs to be the one making plays for its team to allow for smoother transitions between each phase of the game.
Hunt Targets
Greninja excels in a 1v1 fights since due to its damage and trickery. Roam around the map and hunt targets if possible to give the team space and time to reach their power spikes.
Secure Objectives
Greninja should also focus on securing objectives like Regieleki for its team, whether it's taking them by itself or stealing them from enemies. Greninja can use Surf and/or Waterburst Shuriken to steal or secure objectives.
Steal Farm from the Enemy
If Greninja is not hunting targets or securing objectives, it should be stealing farm from the enemy, particularly in their jungle. Use Surf or Water Shuriken to farm wild Pokemon as fast as possible. If things go awry, use Smokescreen or Double Team to quickly escape.
Progression and Leveling Guide
Top and Bottom Guide
Level 1 to 5
- Quickly clear out the Bunnelbies in the lane.
- Keep farming wild Pokemon in the lane to reach level 5 and learn your first move.
- At bottom lane, prioritize taking Indeedees for more exp.
Level 6 to 9
- Keep hunting Wild Pokemon to gain more EXP from farming Altaria and Swablus.
- Once you reach level 7, learn your second move.
- Help allies secure Regice, Registeel, or Regirock when it spawns, otherwise secure Regieleki.
- Upon reaching level 9, learn your Unite Move.
Level 10+
- Stick with allies to hunt targets, secure objectives, and push lanes.
- Reach at least level 13 or max level if possible before or when Groudon spawns for a fully-upgraded moveset.
- Make sure that your Unite Move is available when Groudon spawns.
- Help teammates win a teamfight and secure Groudon.
Jungle Guide
Level 1 to 5
- Quickly defeat Xatu
- Clear the first wave of jungle camps and reach level 5 to learn your first move.
- Help the top lane first or whatever lane needs help the most by securing Altaria and Swablus, getting knockouts, and scoring points.
Level 6 to 9
- Clear the second wave of jungle camps and reach at least level 7 to learn your second move.
- Secure Regidrago in the center to get more EXP.
- Help the bottom lane by securing Altaria and Swablus, getting kills, and scoring points.
- If possible, reach level 9 and learn your Unite Move before or when Regice, Registeel, or Regirock spawns.
- Help allies secure Regice, Registeel, or Regirock, with Registeel being the highest priority since it gives a damage buff to the party.
Level 10+
- Stick with allies to hunt targets, secure objectives, and push lanes.
- Reach at least level 13 or max level if possible before or when Groudon spawns for a fully-upgraded moveset.
- Make sure that your Unite Move is available when Groudon spawns.
- Help teammates win a teamfight and secure Groudon.
Greninja Combos
Early Pressure Combo
| Early Pressure | |
|---|---|
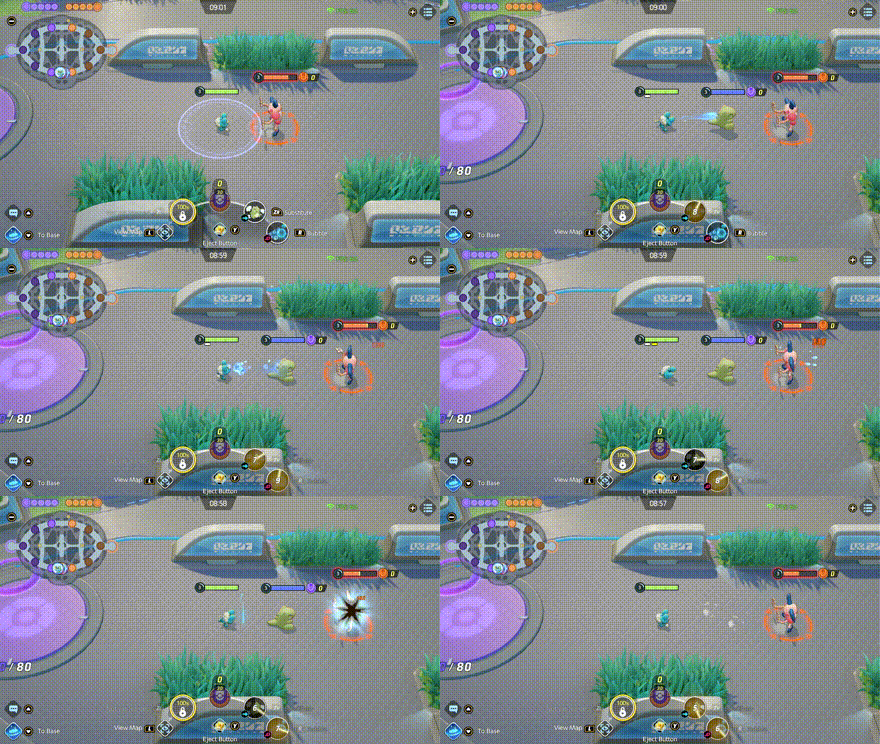
| This is Greninja's early game combo great for maintaining distance while chipping away at the opponent's health. Start by using Substitute and disengaging from the fight. Then, use the cover provided by the substitute doll to attack with Bubble at a safe distance. | |
Double Team Combos
This set of combos takes advantage of the illusions generated by Double Team to deal extra damage. Since the illusions will imitate Greninja's actions, you will be able to duplicate your moves when you use them. The combos are great for bursting down single targets.
Hyper Surf Combo
| Hyper Surf Combo | |
|---|---|
 |
|
Double Team
►
Surf
►
Standard Attack
|
|
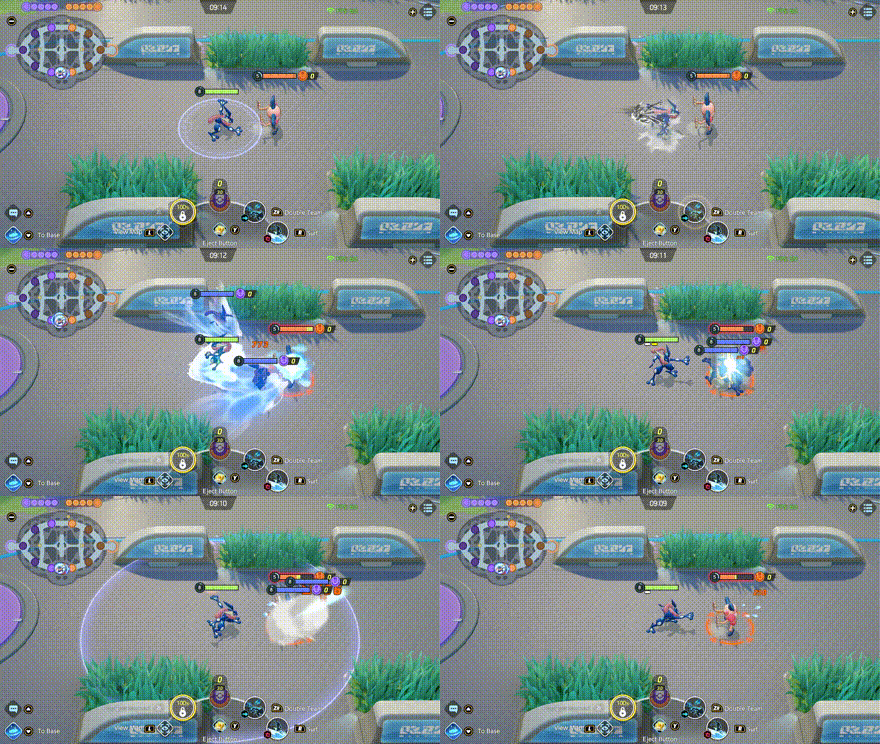
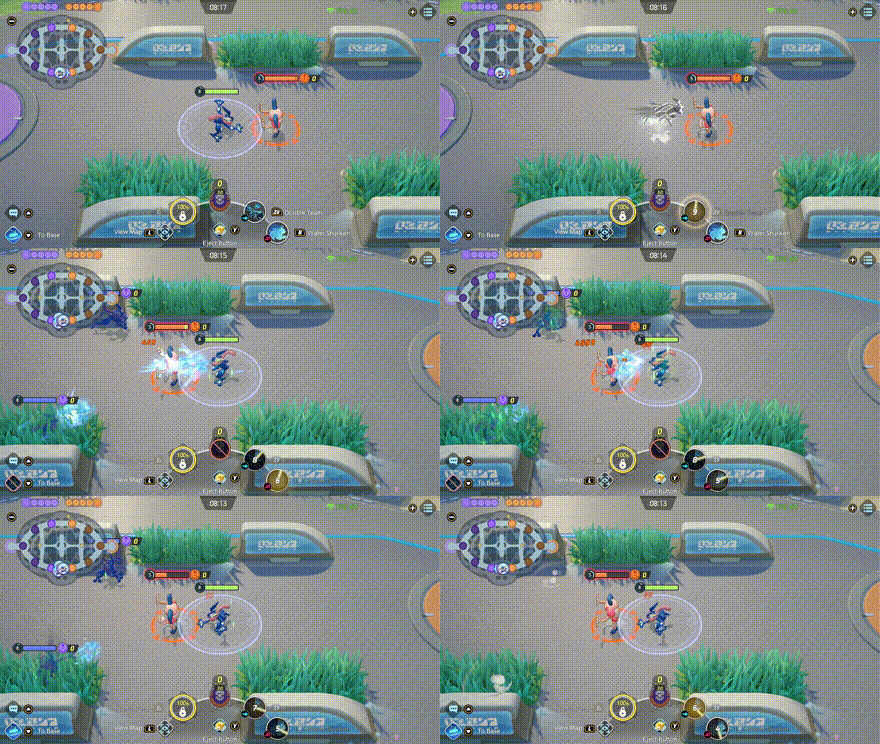
| Start with Double Team to close the distance on an opponent, then follow it up with a Surf. It's best to use this combo to finish off low health opponents in order to get the refresh for the Surf move. | |
Three-Point Shuriken Combo
| Three-Point Shuriken Combo | |
|---|---|
| Use Double Team to create illusions around the target. Then, use Water Shuriken, aiming at the target. You can add a few attacks afterwards to reduce Water Shuriken's cooldown. | |
Ultimate Combos
This set of combos uses Waterburst Shuriken to engage the fight and bring the target's HP low enough for your other moves to finish the combo.
Ultimate Double Team Burst Combo
| Ultimate Double Team Burst Combo | |
|---|---|
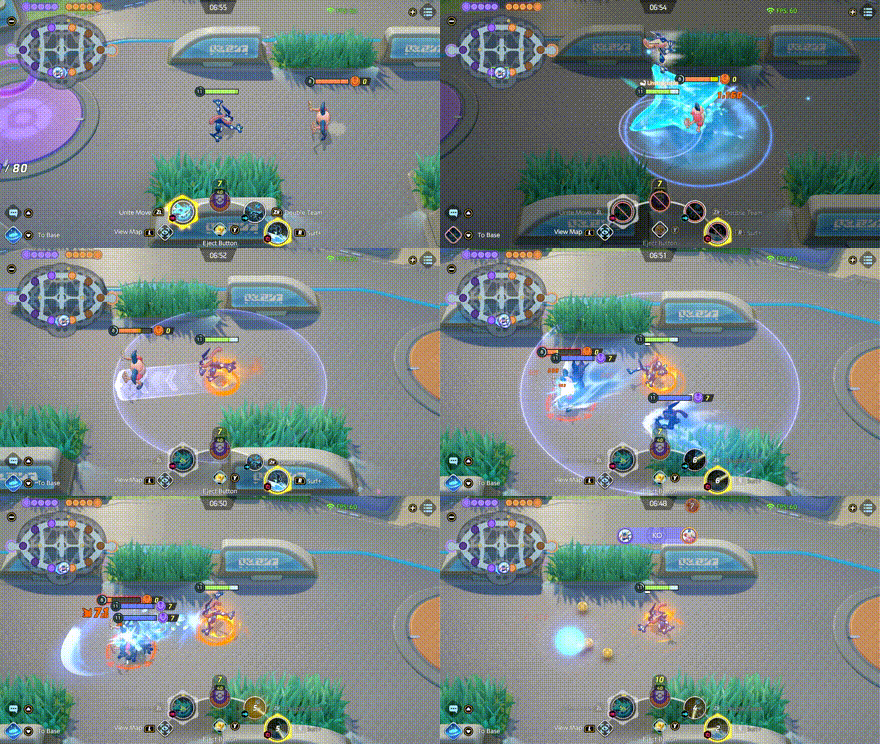
| Start by engaging the target with Waterburst Shuriken. Then, activate Double Team to surround the target. Quickly activate either Surf or Water Shuriken to deal the finishing strikes. | |
Ultimate Shadow Strikes Burst Combo
| Ultimate Shadow Strikes Burst Combo | |
|---|---|
| Start by engaging the target with Waterburst Shuriken. Then, activate Surf disrupt the target's vision. Quickly activate either Surf or Water Shuriken to deal the finishing strikes. | |
Matchups & Counters for Greninja
Greninja Matchups
| Matchup Notes | ||
|---|---|---|
| 1. The chart is based on our own experience playing Greninja. 2. Pokemon within each tier are unordered 3. Any Pokemon not shown here are still under investigation. |
||
Hard Counter With Crowd Control or Burst Damage
Greninja relies on its high mobility moves to maneuver around opponents to get quick hits and eventually take them down with a Surf or Water Shuriken. Because of its low endurance, Greninja lethality drastically falls if it is unable to move or is quickly bursted down.
Best Counters
| Pokemon | Explanation |
|---|---|
 Gengar Gengar
|
Rating: ★★★★★ • Can sneak up on Greninja using Phantom Ambush and burst it down quickly with Dream Eater and Shadow Ball or Sludge Bomb and Hex. |
 Espeon Espeon
|
Rating: ★★★★ • Can stun and burst down Greninja from range using Psyshock. • Can determine the real Greninja when it uses Double Team with Future Sight. • Can completely stop Greninja's assault using Psychic Solare. |
 Clefable Clefable
|
Rating: ★★★ • Can prevent Greninja from using Smokescreen or Double Team with Gravity. • Can outheal Greninja's damage using Moonlight. |
Even Matchups for Greninja
Greninja can get the upper hand against these Pokemon by relying on stealth or deception to make it hard for opponents to target it.
Head Straight for Them Using Waterburst Shuriken
| Ranged, Fragile Pokemon with High Damage |
|---|
| How to Beat |
|
• Much like Greninja, these Pokemon prefer to keep their distance from opponents when fighting. They also have high damage potential that can take out Greninja quickly. However, they are fragile and can get knocked out by Greninja fast. • Head straight for them by initiating with Waterburst Shuriken to deplete their HP and force them to play defensively, then finish them off with Surf or Water Shuriken. • Use Smokescreen or Double Team to dodge their attacks. |
Use Smokescreen or Double Team and Kite Them
| All-Rounders |
|---|
| How to Beat |
|
• These Pokemon excel in close combat and rely mostly on their attacks or combos to deal damage. They are also durable enough to tank Greninja's damage. However, they're melee and are susceptible to getting kited from range. • Use Smokescreen or Double Team to dodge their attacks or combos and keep a safe distance from them, then kite them with ranged attacks and Water Shuriken, or kite them with ranged attacks first and finish them off with Surf. • As a last resort, use Waterburst Shuriken to quickly deplete their HP before finishing them off. |
Dodge Their Burst Damage, Then Retaliate
| High-mobility Pokemon with Burst Damage |
|---|
| How to Beat |
|
• These Pokemon are incredibly agile and deal high burst damage. However, they become vulnerable when they miss their burst damage attempt. • Use Smokescreen or Double Team to dodge their moves, then retaliate with Water Shuriken and attacks, or quickly deplete their HP with attacks first and finish them off with Surf. • Alternatively, Greninja can use Waterburst Shuriken after dodging their moves to quickly deplete their HP, then finish them off with Water Shuriken or Surf. |
Take Them Out First
| Supporters |
|---|
| How to Beat |
|
• These Pokemon usually stick with their allies and rarely venture alone. Although they themselves pose no threat to Greninja, their support capabilities makes them valuable during fights. • It's best to take them out first by using Waterburst Shuriken at their location, then follow up with Water Shuriken, or finish them off with Surf. • Use Smokescreen or Double Team to confuse them. |
Group Up with Allies
| Highly Durable Pokemon |
|---|
| How to Beat |
|
• These Pokemon are extremely durable, making it difficult for Greninja to take them down alone. With that, it's best to group up with allies to bring them down with the help of Greninja. • Help in bringing their HP down, then finish them off with Surf. Alternatively, just kite them from range using Water Shuriken and range attacks. |
Easy Matchups for Greninja
These matchups are generally easy for Greninja to face as they little to no means of catching Greninja.
Head Straight for Them Using Waterburst Shuriken
| Ranged, Fragile Pokemon with High Damage |
|---|
| How to Beat |
|
• Much like Greninja, these Pokemon prefer to keep their distance from opponents when fighting. They also have high damage potential that can take out Greninja quickly. However, they are fragile and can get knocked out by Greninja fast. • Head straight for them by initiating with Waterburst Shuriken to deplete their HP and force them to play defensively, then finish them off with Surf or Water Shuriken. • Use Smokescreen or Double Team to dodge their attacks. |
Use Smokescreen or Double Team and Kite Them
| All-Rounders |
|---|
| How to Beat |
|
• These Pokemon excel in close combat and rely mostly on their attacks or combos to deal damage. They are also durable enough to tank Greninja's damage. However, they're melee and are susceptible to getting kited from range. • Use Smokescreen or Double Team to dodge their attacks or combos and keep a safe distance from them, then kite them with ranged attacks and Water Shuriken, or kite them with ranged attacks first and finish them off with Surf. • As a last resort, use Waterburst Shuriken to quickly deplete their HP before finishing them off. |
Take Them Out First
| Supporters |
|---|
| How to Beat |
|
• These Pokemon usually stick with their allies and rarely venture alone. Although they themselves pose no threat to Greninja, their support capabilities makes them valuable during fights. • It's best to take them out first by using Waterburst Shuriken at their location, then follow up with Water Shuriken, or finish them off with Surf. • Use Smokescreen or Double Team to confuse them. |
Best Teammates for Greninja
| Pokemon | Explanation |
|---|---|
 Alolan Ninetales Alolan Ninetales
 Gardevoir Gardevoir
|
Aggressive Stallers |
| These Pokemon have powerful burst attacks that are capable of disrupting enemies. When partnered up with these Pokemon, Greninja can easily take down enemies and push lanes. | |
 Blissey Blissey
 Mr. Mime Mr. Mime
|
Sustain and Buffs |
| These Pokemon have means of stunning and shutting down targets with their moves. They also provide healing opportunities and buffs for Greninja so it can stand its ground and fight longer during clashes. | |
 Crustle Crustle
 Snorlax Snorlax
|
Tanky Disablers |
| These Pokemon can lead the charge, soak up damage, and help Greninja setup its attacks thanks to their disabling moves. This way, Greninja can easily dominate lanes and take enemy camps to stall the enemy's level progression. | |
 Absol Absol
 Zoroark Zoroark
|
High Burst Damagers |
| These Pokemon help contribute damage through pinning down enemies with combos and burst attacks. While it's still recommended to go with either a Defender or Supporter ally, Speedsters are a huge help when trying to dominate lanes as early as possible. | |
 Machamp Machamp
 Tsareena Tsareena
|
Hard-hitting Initiators |
| These Pokemon are very dependable allies as they have means to buff or sustain themselves. Whether it's securing objectives or pushing lanes, Machamp and Tsareena are built to initiate clashes, stun enemies, and create openings for their teammates. |
Looking for teammates to synergize with you? Head over to our Friend Request Board to find other trainers to join you in your grind or just to hang out with!
Greninja Moves
Move Slot 1 (R)
 Bubble Bubble
(Lv. 1 or 3) |
Move Type: Ranged Damage Type: Physical Cooldown: 9s Starting Damage: 744 Damage per bubble: 372, Number of bubbles: 2 Final Damage: 942 Damage per bubble: 471, Number of bubbles: 2 |
|---|---|
| Attacks with spray of bubbles, decreasing the movement speed of opposing Pokemon for a short time when it hits. | |
 Surf Surf
(Lv. 7) Upgrade Lv. 11 |
Move Type: Melee Damage Type: Physical Cooldown: 9s Starting Damage: 894 Final Damage: 1402 |
|
Has the user ride a wave, dealing damage to opposing Pokemon and restoring the user's HP. If this move knocks out an opposing Pokemon its cooldown is reset. This move deals increased damage to opposing Pokemon with low HP.
Upgrade: Increases the amount of HP restored. |
|
 Water Shuriken Water Shuriken
(Lv. 7) Upgrade Lv. 11 |
Move Type: Ranged Damage Type: Physical Cooldown: 6s Starting Damage: 2316 Shuriken damage: 579, Number of Shurikens: 4, Heal per hit: 3% of Max HP Final Damage: 4715 Shuriken damage: 943 , Number of Shurikens: 5, Heal per hit: 3% of Max HP |
|
Throws shurikens made of water in quick succession. Decreases the movement speed of opposing Pokemon for a short time and restores the user's HP when it hits. Also increases the user's movement speed while using this move.
Upgrade: Increases the number of attacks for this move. |
|
Move Slot 2 (ZR)
 Substitute Substitute
(Lv. 1 or 3) |
Move Type: Dash Damage Type: Status Cooldown: 8s Starting Damage: N/A Final Damage: N/A |
|---|---|
| Leaves behind the Substitute doll for the user while it's moving forward | |
 Smokescreen Smokescreen
(Lv. 5) Upgrade Lv. 13 |
Move Type: Dash Damage Type: Status Cooldown: 12s Starting Damage: N/A Final Damage: N/A |
|
Creates a smokescreen and has the user roll away from its current location. Immediately afterward, the user begins sneaking and has its movement speed increased for a short time. This also makes its next basic attack a boosted attack.
Upgrade: Increases Attack for a short time when the user stops sneaking. |
|
 Double Team Double Team
(Lv. 5) Upgrade Lv. 13 |
Move Type: Dash Damage Type: Physical Cooldown: 8s Starting Damage: N/A Clones can deal damage Final Damage: N/A Clones can deal damage |
|
Quickly moves the user away from the current position, creating illusory copies of them to aid in battle.
Upgrade: Reduces this move's cooldown. |
|
Unite Moves (ZL)
 Waterburst Shuriken Waterburst Shuriken
(Lv. 9) |
Move Type: Area Damage Type: Physical Cooldown: 134s Starting Damage: 2738 Initial damage: 1369, Explosion damage: 1369 Final Damage: 3960 Initial damage: 1980, Explosion damage: 1980 |
|---|---|
| Has the user throw a giant water shuriken toward the designated area, dealing damage to opposing Pokemon in the area of effect and decreasing their movement speed for a short time when this Unite Move hits. The water shuriken then immediately explodes, dealing damage to opposing Pokemon in the area of effect once again and throwing them. Once this Unite Move ends, the user may jump in a designated direction. | |
Standard Attack
|
|
At long range, reduces the cooldown Bubble, Water Shuriken, or Surf when it hits. At close range, deals increased damage the lower the opposing Pokemon's remaining HP is. Becomes a boosted attack every third attack. As a boosted attack at long range, deals increased damage to opposing Pokemon and decreases their movement speed for a short time. As a boosted attack at close range, deals more damage |
|---|
Ability (Passive)
 Torrent Torrent
|
All Evolution Stages
When the Pokemon is at half HP or less, its Attack and movement speed are increased. |
|---|
Greninja Stats & Evolutions
Greninja Evolutions
| 1st Evolution | 2nd Evolution | Final Evolution |
|---|---|---|
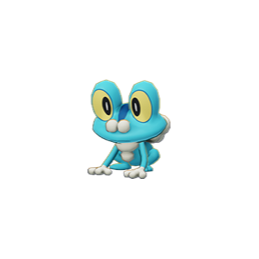 Froakie Froakie(Lv. 1) |
 Frogadier Frogadier(Lv. 5) |
 Greninja Greninja(Lv. 7) |
Greninja Stats
| Level | HP | Defense | Special Defense | Attack Damage |
|---|---|---|---|---|
| 1 | 3200 | 50 | 64 | 146 |
| 2 | 3240 | 53 | 67 | 151 |
| 3 | 3288 | 56 | 70 | 156 |
| 4 | 3346 | 60 | 73 | 162 |
| 5 | 3556 | 75 | 86 | 186 |
| 6 | 3639 | 81 | 92 | 195 |
| 7 | 4019 | 108 | 116 | 238 |
| 8 | 4139 | 117 | 123 | 252 |
| 9 | 4283 | 127 | 132 | 268 |
| 10 | 4456 | 139 | 143 | 287 |
| 11 | 4664 | 154 | 156 | 310 |
| 12 | 4913 | 172 | 172 | 338 |
| 13 | 5211 | 193 | 190 | 372 |
| 14 | 5570 | 219 | 213 | 412 |
| 15 | 6000 | 250 | 240 | 460 |
Attack Damage is the damage of the Basic Attack as tested against the Training Dummy.
Greninja In-Game Stat Listings
| Offense | Endurance | Mobility | Scoring | Support |
|---|---|---|---|---|

|

|

|

|

|
Greninja Skins (Holowear)
| Holowear | |
|---|---|
 Hero Style Hero Style
Zirco Trading:
|
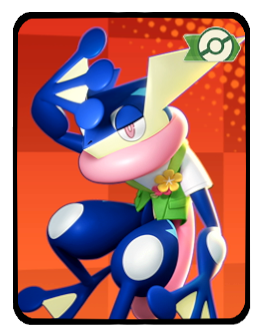 Fashionable Style Fashionable Style
|
 Theater Style Theater Style
Event:
Season 6 Battle Pass |
 Wanderer Style Wanderer Style
Zirco Trading:
|
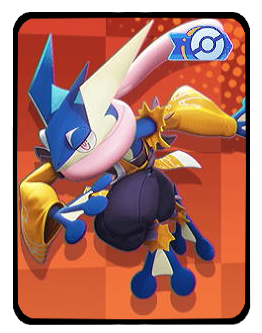 Practice Style Practice Style
Zirco Trading:
|
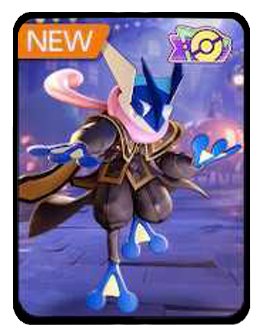 Costume Party Style Costume Party Style
Zirco Trading:
|
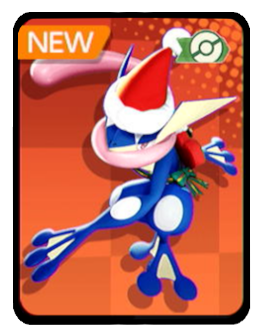 Holiday Style Holiday Style
Zirco Trading:
|
 Neo Street Style Neo Street Style
Event:
Season 26 Battle Pass |
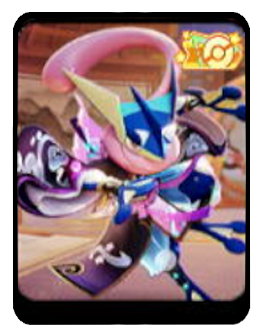 Fairy-Tale Style Fairy-Tale Style
Event:
Treasure Chest Challenge |
|
Greninja Character Spotlight
Greninja Achievements
Surf Achievement
| Surf | |
|---|---|
| Pokemon | Move |
 Greninja Greninja
|
|
| Mission: In a single battle, knock out 3 or more Pokemon from the opposing team with Surf or Surf+ (5/10/20 battles total) |
|
| Medals & Points | Rewards |
|
|
|
|
|
|
|
|
|
List of Attacker Pokemon Achievements
Pokemon UNITE Related Guides

All Pokemon Guides and Builds
Upcoming Pokemon
 Articuno Articuno(TBA) |
 Meganium Meganium(TBA) |
 Typhlosion Typhlosion(TBA) |
 Feraligatr Feraligatr(TBA) |
Mega Evolutions
| Mega Evolved Pokemon | ||
|---|---|---|
 Mega Charizard X Mega Charizard X |
 Mega Charizard Y Mega Charizard Y |
 Mega Gyarados Mega Gyarados |
 Mega Lucario Mega Lucario |
 Mega Mewtwo X Mega Mewtwo X |
 Mega Mewtwo Y Mega Mewtwo Y |
Pokemon by Role
| All Pokemon Roles | |||||
|---|---|---|---|---|---|
 Attackers Attackers |
 All-Rounders All-Rounders |
 Defenders Defenders |
|||
 Speedsters Speedsters |
 Supporters Supporters |
||||
Pokemon by Characteristics
| Attack Type | |
|---|---|
 Melee Pokemon Melee Pokemon |
 Ranged Pokemon Ranged Pokemon |
 Physical Pokemon Physical Pokemon |
 Special Pokemon Special Pokemon |
| Stat Rankings | |
 HP Ranking HP Ranking |
 Defense Ranking Defense Ranking |
 Sp. Def. Ranking Sp. Def. Ranking |
 Basic Attack Ranking Basic Attack Ranking |
Author
Greninja Guide: Builds and Best Items
improvement survey
03/2026
improving Game8's site?

Your answers will help us to improve our website.
Note: Please be sure not to enter any kind of personal information into your response.

We hope you continue to make use of Game8.
Rankings
- We could not find the message board you were looking for.
Gaming News
Popular Games

Genshin Impact Walkthrough & Guides Wiki

Honkai: Star Rail Walkthrough & Guides Wiki

Umamusume: Pretty Derby Walkthrough & Guides Wiki

Pokemon Pokopia Walkthrough & Guides Wiki

Resident Evil Requiem (RE9) Walkthrough & Guides Wiki

Monster Hunter Wilds Walkthrough & Guides Wiki

Wuthering Waves Walkthrough & Guides Wiki

Arknights: Endfield Walkthrough & Guides Wiki

Pokemon FireRed and LeafGreen (FRLG) Walkthrough & Guides Wiki

Pokemon TCG Pocket (PTCGP) Strategies & Guides Wiki
Recommended Games

Diablo 4: Vessel of Hatred Walkthrough & Guides Wiki

Fire Emblem Heroes (FEH) Walkthrough & Guides Wiki

Yu-Gi-Oh! Master Duel Walkthrough & Guides Wiki

Super Smash Bros. Ultimate Walkthrough & Guides Wiki

Pokemon Brilliant Diamond and Shining Pearl (BDSP) Walkthrough & Guides Wiki

Elden Ring Shadow of the Erdtree Walkthrough & Guides Wiki

Monster Hunter World Walkthrough & Guides Wiki

The Legend of Zelda: Tears of the Kingdom Walkthrough & Guides Wiki

Persona 3 Reload Walkthrough & Guides Wiki

Cyberpunk 2077: Ultimate Edition Walkthrough & Guides Wiki
All rights reserved
©2021 Pokémon. ©1995–2021 Nintendo / Creatures Inc. / GAME FREAK inc.
©2021 Tencent.
The copyrights of videos of games used in our content and other intellectual property rights belong to the provider of the game.
The contents we provide on this site were created personally by members of the Game8 editorial department.
We refuse the right to reuse or repost content taken without our permission such as data or images to other sites.
 Aegislash
 Alcremie
 Alolan Raichu
 Armarouge
 Azumarill
 Blastoise
 Blaziken
 Buzzwole
 Ceruledge
 Chandelure
 Charizard
 Cinderace
 Comfey
 Cramorant
 Darkrai
 Decidueye
 Delphox
 Dhelmise
 Dodrio
 Dragapult
 Dragonite
 Duraludon
 Eldegoss
 Empoleon
 Falinks
 Galarian Rapidash
 Garchomp
 Glaceon
 Goodra
 Greedent
 Gyarados
 Ho-oh
Ho-oh Hoopa
Hoopa Inteleon
 Lapras
 Latias
 Latios
 Leafeon
 Lucario
 Mamoswine
 Meowscarada
 Meowth
 Metagross
 Mew
Mew Mimikyu
 Miraidon
 Moltres
 Pawmot
 Pikachu
 Psyduck
 Sableye
 Scizor
 Sirfetch'd
 Slowbro
 Suicune
 Sylveon
 Talonflame
 Tinkaton
 Trevenant
 Tyranitar
 Umbreon
 Urshifu
 Vaporeon
 Venusaur
 Wigglytuff
 Zacian
 Zapdos
 Zeraora


![Everwind Review [Early Access] | The Shaky First Step to A Very Long Journey](https://img.game8.co/4440226/ab079b1153298a042633dd1ef51e878e.png/thumb)

![Monster Hunter Stories 3 Review [First Impressions] | Simply Rejuvenating](https://img.game8.co/4438641/2a31b7702bd70e78ec8efd24661dacda.jpeg/thumb)


bro telling u smoke doesn't actually work if you fast damage, water shura and double team cooks