Pokemon UNITE Tier List (March 2026)
☆ Upcoming: Articuno | Meganium | Typhlosion | Feraligatr
★ Latest News: Zapdos | Moltres | Version 1.22.1.5
☆ Popular Pages: Upcoming Pokemon | Tier List
★ Current Seasons: Ranked S34 | Battle Pass S39
☆ Join Game8's Pokemon Discord Server!
Pokemon UNITE tier list (March 2026) — see the best Pokemon to use and buy in the current meta after Moltres' release.
| Pokemon UNITE Main Tier Lists | ||
|---|---|---|
 Pokemon Tier List Pokemon Tier List |
 Held Items Tier List Held Items Tier List |
 Battle Items Tier List Battle Items Tier List |
 Solo-Queue Tier List Solo-Queue Tier List |
 Low-Elo Tier List Low-Elo Tier List |
 Free Character Tier List Free Character Tier List |
List of Contents
Best Pokemon Tier List
Tier List Updated: March 2, 2026.
|
|
|
|
|
|
|
|
 
|
Pokemon in each Tier are arranged alphabetically and are not ordered in a particular way.
| Legend |
|---|
|
|
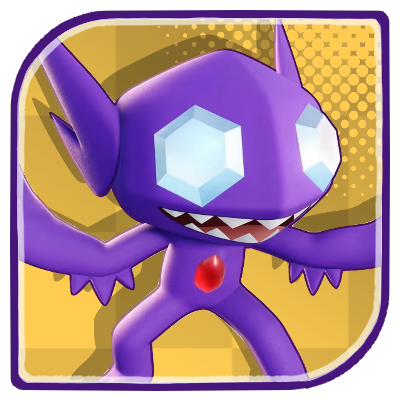
Tier List Under Evaluation!
With the release of version 1.22.1.5 and Moltres, the tier list is now under evaluation. Check back for updates!
For details about the patch, check out the link below:
Version 1.22.1.5 Patch Note Updates
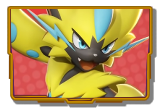
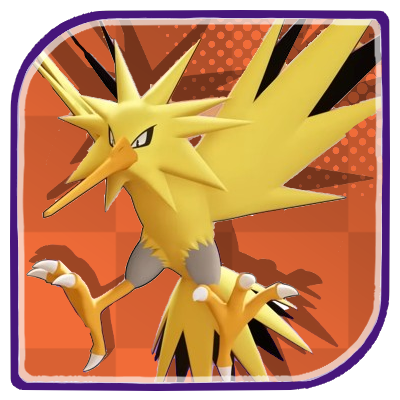
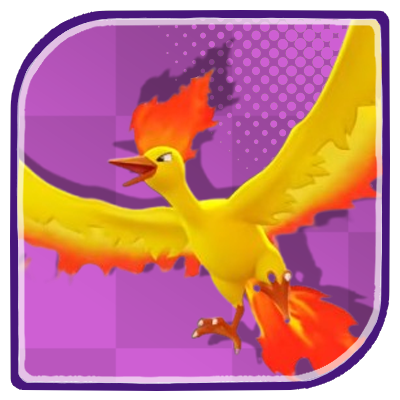
Zapdos SS Tier
With a proper lineup surrounding Zapdos, the Pokemon can unleash devastating attacks from a distance and easily win teamfights. However, if left in a bad position, it will fall quickly due to its lack of mobility and durability.
How Would You Rank Zapdos?
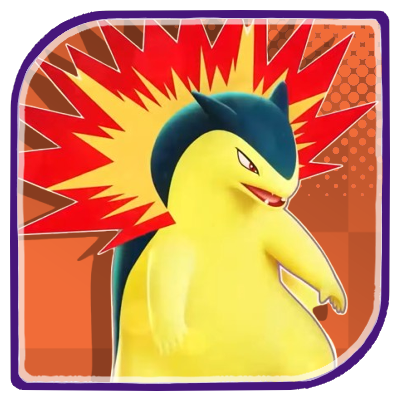
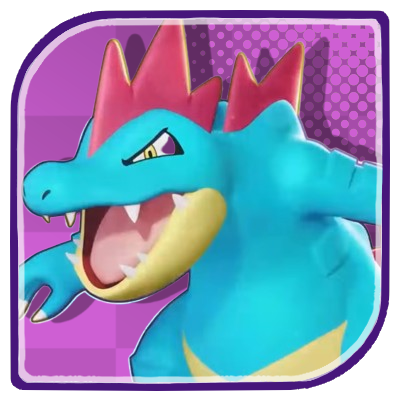
Meganium, Typhlosion, and Feraligatr are Coming to UNITE!
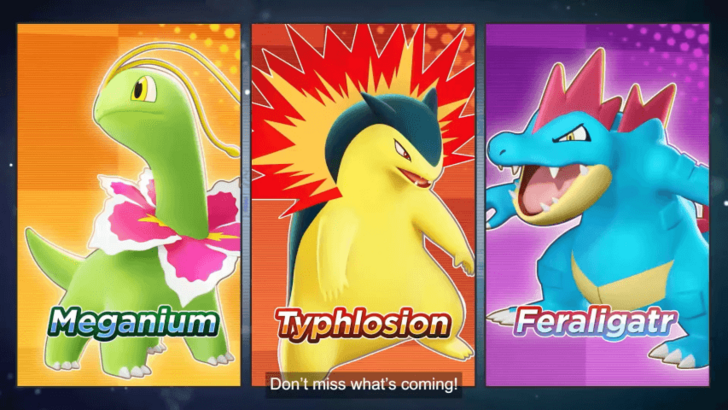
As announced in the Pokemon Presents livestream on February 27, 2026, Meganium, Typhlosion, and Feraligatr are set to release some time in 2026!
| Pokemon Release Dates | ||
|---|---|---|
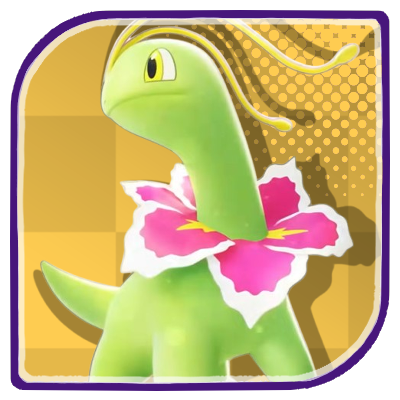 Meganium Meganium
(TBA) |
 Typhlosion Typhlosion
(TBA) |
 Feraligatr Feraligatr
(TBA) |
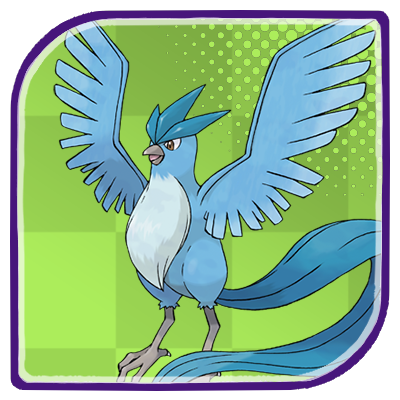
Articuno, Zapdos, and Moltres are Coming to UNITE!
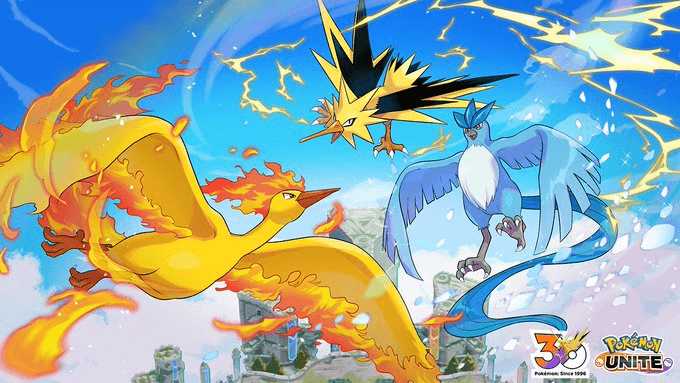
The three (3) Gen 1 legendaries are coming to UNITE and shake up the meta once again!
Zapdos will release on February 27, 2026 while Artirucno and Moltres will release in the near future after that.
| Pokemon Release Dates | ||
|---|---|---|
|
Zapdos
(Released) |
 Articuno Articuno
(TBA) |
 Moltres Moltres
(TBA) |
Tier List Updates (March 2026)
New Pokemon Placement
| Update Date | Pokemon | Summary |
|---|---|---|
| 3/2 |
Zapdos
|
Enters SS Tier • Although it lacks mobility and durability, which is common for Attackers, Zapdos' impact in teamfights is unquestionable thanks to its damage. |
Tier List Explanation
SS Tier
| Pokemon | Tier | Best Lane |
|---|---|---|
|
Alcremie
|
|
Top/Bot |
| A Well-Rounded Supporter | ||
| Alcremie is a well-rounded Supporter. It can provide strong offensive and defensive support for its team via shields, healing, and buffs, giving them a decent advantage during fights. The Pokemon is also built simple enough to pick up and master. | ||
|
Blissey
|
|
Bot |
| The Perfect Support | ||
| Blissey offers reliable healing, shielding, buffing and debuffing while boasting the highest HP in the roster. It has replaced Eldegoss as the best and most reliable healer in the game. It's a great counter against burst damage Pokemon, making it a great pick in the current meta. However, its effectiveness heavily relies on always being at the side of another Pokemon, it can't function well alone. | ||
|
Darkrai
|
|
Jungle |
| Shadowy Nightmare | ||
| Darkrai is a Speedster with a different method of bursting down targets. While other Speedsters just needs to hit their moves to take out targets, Darkrai needs to always inflict its targets with sleep to trigger its ability, Bad Dreams, which is where much of the Pokemon's damage originates. With the huge buffs it received in Version 1.16.2.7, it's in a far better state that it was when it was released. | ||
|
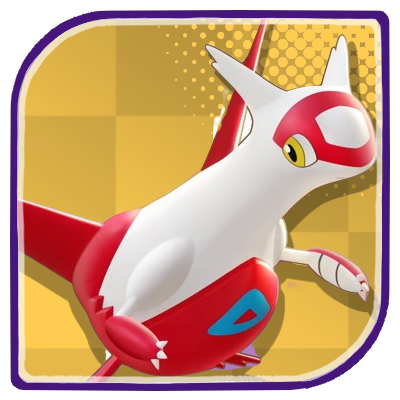
Latias
|
|
Top/Bot |
| Unconventional Supporter | ||
| Latias is an odd Pokemon—it's a Supporter but has damage potenial like that of an Attacker or a damage dealer in general. The only thing that makes it practically a Supporter is Dragon Cheer since as it buffs allies. The rest of its moves deal a lot of damage, particularly Dragon Breath or Dragon Pulse, and have useful effects like Sp. Def. reduction. Additionally, it has the unique ability to quickly fly over to an allied Latios anywhere on the map. | ||
|
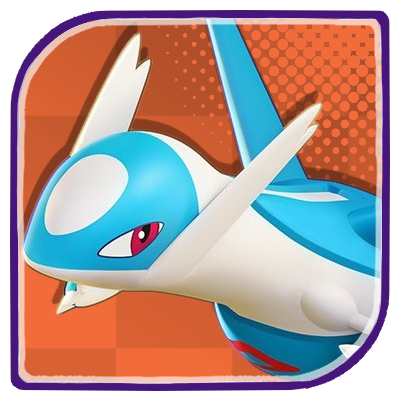
Latios
|
|
Any |
| Damage Dealer with Infinite Growth Potential | ||
| Latios is a damage dealer with an infinite growth potential, making it a huge threat in the late game. Its high damage comes from Draco Meteor or Dragon Pulse's damage-stacking effect. Latios can also stun targets and apply debuffs on them to help set up fights for its team. Additionally, it has a unique feature that allows it to quickly fly over to an allied Latias anywhere on the map. | ||
|
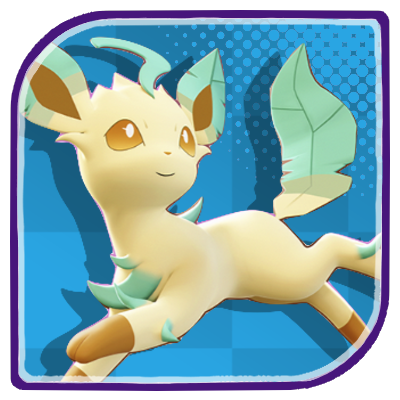
Leafeon
|
|
Any |
| Power of the Sun | ||
| Leafeon is one of the best Pokemon in the game right now. It is also a quintessential Speedster. It can traverse the map quickly thanks to its pair of dash moves and the movement speed it gets from Chlorophyll, making it a great jungler Pokemon. Its most notable asset is its high burst damage potential, which is a trademark trait for assassins. On top of those two, since it's an eeveelution, it also has great scaling. | ||
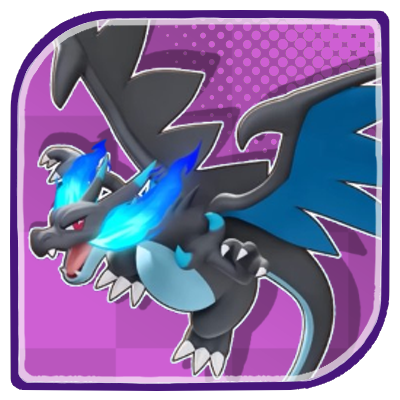
|
Mega Charizard X
|
|
Any |
| Strongest Mega Evolution | ||
| Mega Charizard X is argubly the best mega evolution in the game. Its damage output via its moves and attacks makes it extremely deadly in a match. | ||
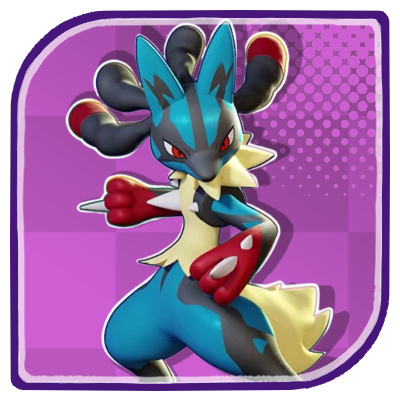
|
Mega Lucario
|
|
Any |
| A Far Better Lucario | ||
| The modifications of Mega Lucario's ability and moves makes it significantly better than the regular Lucario despite only having one moveset. The damage output the Pokemon can dish out when it successfully hits its combo is truly devastating. | ||
|
Mimikyu
|
|
Top/Bot |
| Ghostly Grazer | ||
| Mimikyu is an odd and deceptive All-Rounder. Although it has a tiny stature and strange appearance, which is atypical for an All-Rounder, the Pokemon is surprisingly lethal. Its strength comes from the various mechanics its moves and ability have, giving it some degree of advantage over other Pokemon. It's also well balanced and doesn't have any obvious weaknesses that would be considered as a deal breaker. | ||
|
Miraidon
|
|
Any |
| Strong as Thunder, Swift as Lightning | ||
| Miraidon is a powerful Attacker that can be flexible in its gameplay depending on the moveset it learns. It can take the typical Attacker role if it learns Charge Beam, or lean more towards a Speedster rool if it learns Electro Drift. Either way, it excels as a primary damage dealer for the team. Although the Pokemon requires a high skill ceiling to play effectively, its impact in games makes it all worth it. | ||
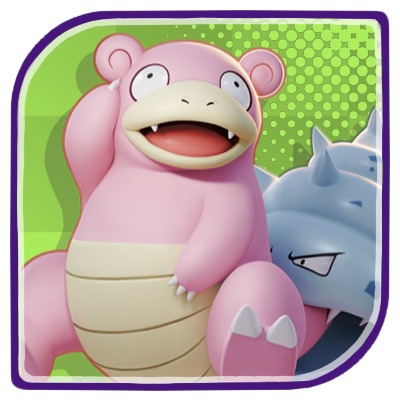
|
Slowbro
|
|
Top |
| Strong Single-Target Disabler | ||
| Slowbro's ability to remove opponents from the fight with Telekinesis and high durability make it a great Defender to have during battle. Its tackiness, coupled with crowd control moves, allows it to disrupt enemy synergies while being able to shrug off damage using Amnesia. In terms of offense, however, Slowbro lacks a proper way to fight back and deal damage. | ||
|
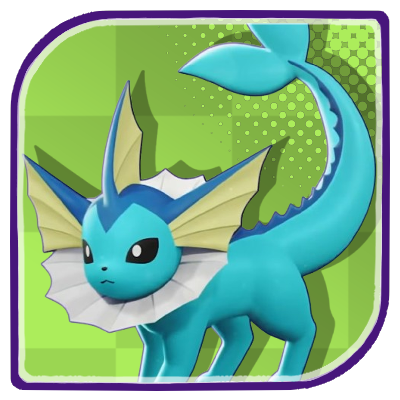
Vaporeon
|
|
Top/Bottom |
| Great Mix of Crowd Control and Support | ||
| Vaporeon excels in leading its team to a teamfight, providing strong crowd control and a bit of healing. Most of its moves stun and shove opponents, which are powerful effects in winning teamfights. However, it can be more flexible in its gameplay if it learns Aqua Ring, giving the Pokemon a strong AoE healing. | ||
|
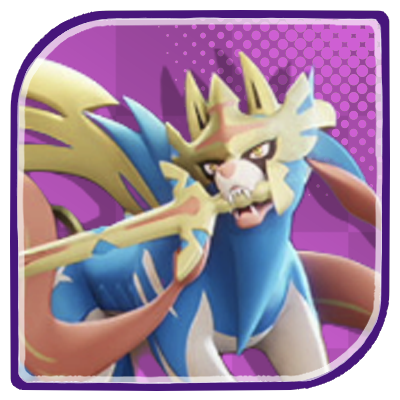
Zacian
|
|
Jungle |
| The Legendary Sword | ||
| Zacian is a combination strength, durability, and speed. It can boost its own moves thanks to its ability, Intrepid Sword, increasing their damage and triggering additional effects. It's also quite agile for an All-Rounder thanks to its arsenal of Dash moves. However, it biggest drawback is the fact that it can only equip two (2) Held items since one slot is already reserved for its unique item, Rusted Sword. What's worse is that the item does not give stat bonuses nor have any passive effects, making it practically useless. This limits possible builds for the Pokemon, which could make it even stronger. | ||
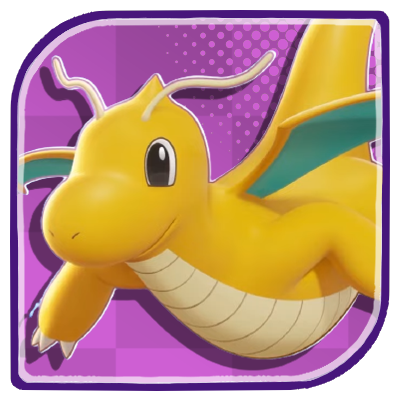
|
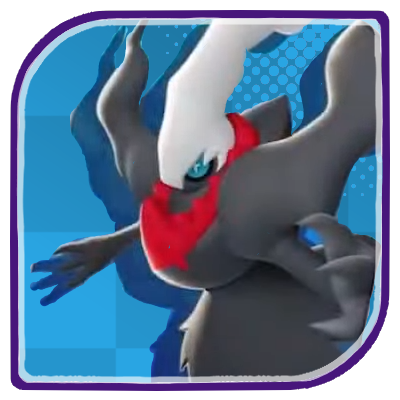
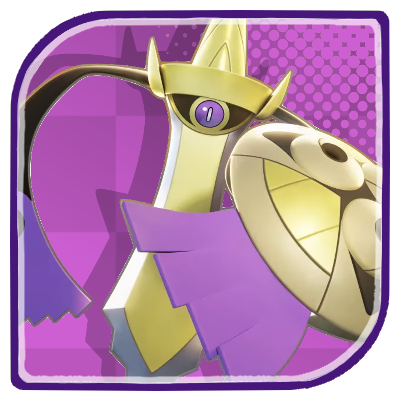
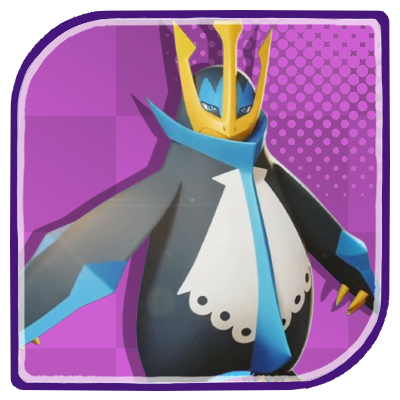
Zapdos
|
|
Any |
| Devastating But Fragile | ||
| Zapdos excels in teamfights thanks to its range and damage. However, positioning is crucial to the Pokemon's gameplay since its lack of mobility and durability makes it an easy target for cunning Pokemon. | ||
S Tier
| Pokemon | Tier | Best Lane |
|---|---|---|
|
Alolan Ninetales
|
|
Top |
| Good Mix of Support and Damage | ||
| Alolan Ninetales is a versitile Pokemon that has a good mix of support and damage. Its Aurora Veil allows it to deal decent damage via attacks and provide some support for its allies at the same time, having also a bit of mobility as a bonus. Its other moves and Unite Move can deal high burst damage while freezing enemies in place, especially when used together in quick succession. However, its power tends to stagnate in the late-game, making it hard for Alolan to keep up and deal its intended damage. | ||
|
Armarouge
|
|
Any |
| Psykablaster | ||
| Armarouge is a great teamfight Attacker and a reliable damage dealer. Its kit deals area damage and can stun or debuff opponents. It's also particularly strong against Sp. Atk.-based Pokemon thanks to its ability, Flash Fire. However, it has low durability and puts itself in a vulnerable position whenever it uses Armor Cannon or Fire Spin. | ||
|
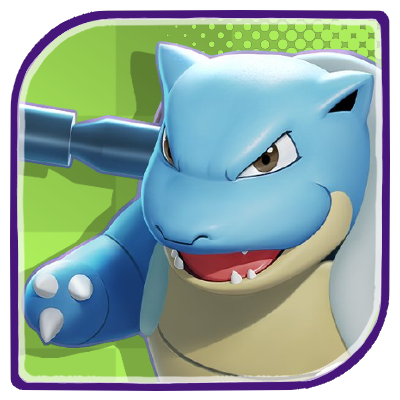
Blastoise
|
|
Top/Jungle |
| Spin to Win | ||
| Blastoise offers damage and crowd control while tanking damage. Compared to other Defenders, Blastoise has the advantage of being a ranged Pokemon. It can deal massive damage using the Rapid Spin and Water Spout combo, or displace enemies with Surf and Hydro Pump. But it's most notable for throwing enemies in a huge area into the air using Hydro Typhoon, making it great at teamfights. However, its drawback is its slow scaling, reaching its power spike only starting at level 9. | ||
|
Blaziken
|
|
Any |
| Blazing Brawler | ||
| Blaziken is a great example of a brawler. Its core gameplay revolves around performing a variety of combos by switching between its movesets using its Unite Move. It can also sustain itself and deal additional damage thanks to its ability, Blaze. However, its combo-heavy gameplay makes the Pokemon difficult to master and play to its full potential, and it does make the Pokemon prone to disables whenever it engages. | ||
|
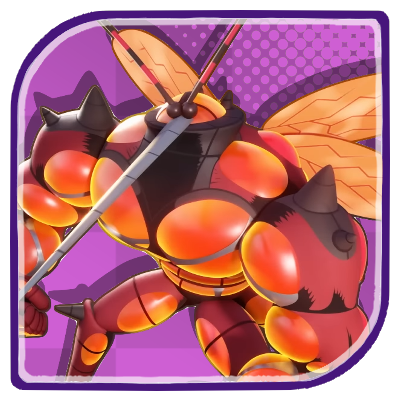
Buzzwole
|
|
Jungle / Bot |
| Peak Performance | ||
| Buzzwole is one of the best All-Rounders with disabling moves that can displace and isolate opponents. Moves like Superpower and Smack Down allows it to have an edge during brawls, together with its innate HP recovery attacks and Beast Boost bonuses. Although its move range and aiming could better, you will find that Buzzwole can pin down and deal high amounts of damage with ease if you manage to do your combos correctly. | ||
|
Ceruledge
|
|
Any |
| The Phantom Blade | ||
| Ceruledge is a brawler that has a few tricks to give it an edge in battle. It can weaken opponents' Defenses or completely ignore them and their shields to deal true damage. It can buff itself and deal increased damage to become more effective at trading blows with opponents. Its Unite Move can stun multiple opponents quickly and deal tons of damage, making it extremely potent in teamfights. However, the Pokemon does require high skill to be effective in battles. | ||
|
Clefable
|
|
Top / Bot |
| The Power of the Moon | ||
| Clefable is a powerful support Pokemon that help teams claim victory with its healing and hindering prowess. Moves like Moonlight and Draining Kiss offers enough variation for you to realize Clefable's gameplay. Moreover, its hindering moves offer enough disruption for Although, its damage output and move cooldowns could be better, players who can adjust their playstyle to fit the support archetype will find great value in this Pokemon! | ||
|
Comfey
|
|
Top/Bot |
| Pocket Supporter | ||
| Comfey offers a good mix of offensive and defensive assistance and has a unique way of supporting its allies. It attaches itself to an ally and becomes immune to damage. While attached, it can use its moves to heal and shield its ally or disable and damage its opponents. However, due to its unique gameplay, the Pokemon relies too heavily on how good its ally is, which could undermine its potential. | ||
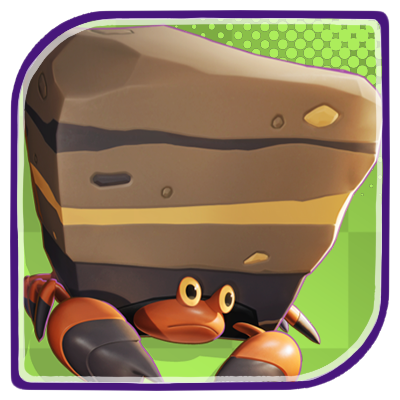
|
Crustle
|
|
Top/Bot |
| A Walking Fortress | ||
| Crustle is a versatile Defender that can trade its defense for more attack power. Its ability to disrupt lanes with Rock Tomb or plow through the enemy with Shell Smash allows it to adapt to situations that demands a change in playstyle. Unfortunately, its flexibility means that it is not as effective as damage dealer or a tank. | ||
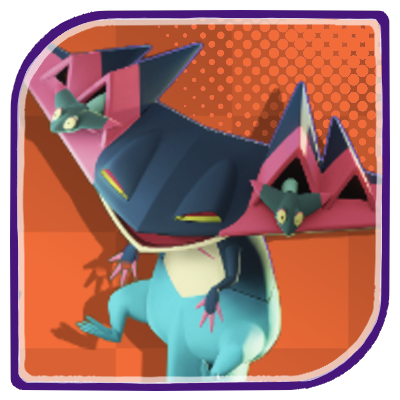
|
Dragapult
|
|
Jungle |
| Creeping Dragon | ||
| Dragapult is a ranged damage dealer that relies on fast attack speed to dish out damage quickly and take out its targets. It can also deal area damage with its Boosted Attack, which is a unique attack mechanic. It has stealth capabilities and can increase its damage output with each knockout thanks to Phantom Force. Its best asset is its unique charged-based Unite Move, allowing for some new and interesting interactions with items like Energy Amplifier. | ||
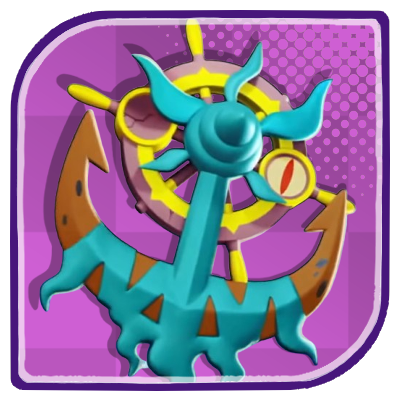
|
Dhelmise
|
|
Top/Bot |
| A Crowd Control Menace | ||
| Dhelmise excels in setting up teamfights thanks to its many crowd control moves. Its most notable move is Anchor Shot, which allows the Pokemon to hook opponents towards Dhelmise. This makes it incredibly easier to set up knockouts for its allies and can be crucial in certain situations. Another notable move is Whirlpool. It's a simple area move, but due to its special mechanics, it can turn into a devastating crowd control move. | ||
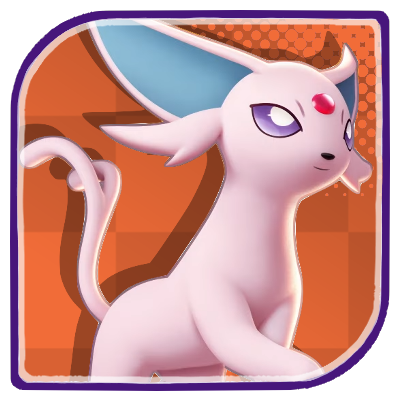
|
Espeon
|
|
Bot |
| Psychic One-Shots | ||
| Espeon's kit provides anyone who uses it with a reliable mix of burst damage and tenacity. Thanks to its unique passive Magic Bounce, Espeon can negate a hit that will otherwise cause hindrances. It is also fairly easy and straight forward to use so anyone can pick it up! However, its lack of mobility moves and limited playstyle hinders it from being an effective Attacker. | ||
|
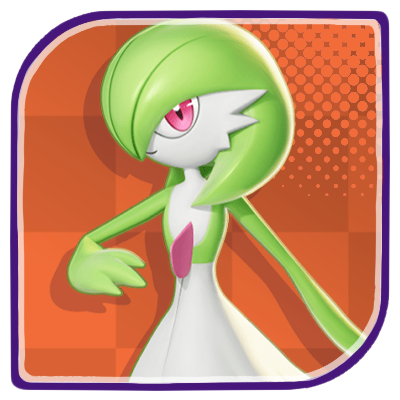
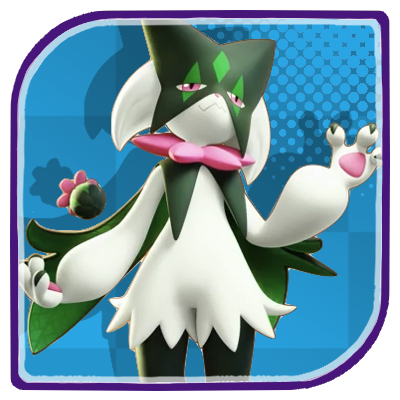
Gardevoir
|
|
Top |
| Burst Damage Supreme | ||
| Gardevoir can deal high burst damage and provide disables with from a long range. It has argubly the best crowd control Unite Move in the game, making it extremely deadly in teamfights. Moreover, its ability to refresh its moves instantly when they hit eliminates the need to wait for cooldowns, allowing it to provide constant area damage. Its only drawback is its fragility and lack of mobility, something that more mobile Pokemon can exploit. | ||
|
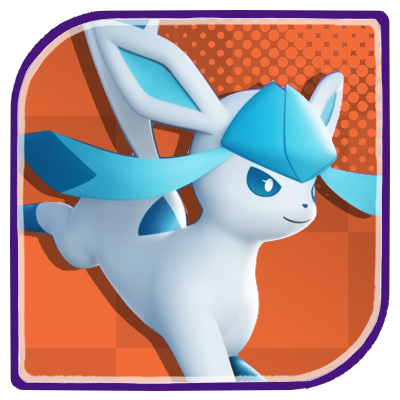
Glaceon
|
|
Bot |
| Frost Bite | ||
| Glaceon is a powerful Attacker capable of gunning down its targets with a barrage of ice missiles. Its kit is highly synergistic as you deal massive amounts of damage when you take advantage of its ice crystal mechanic. Moreover, its ability to block and negate crowd control moves with Snow Cloak gives the Pokemon high survivability for an Attacker. | ||
|
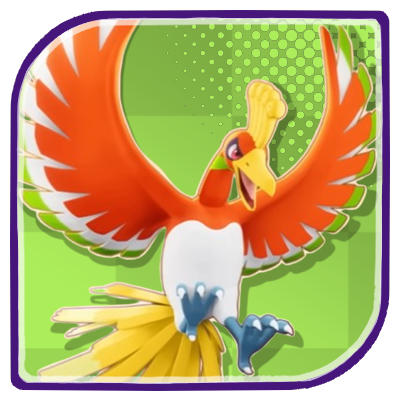
Ho-oh
|
|
Top/Bot |
| The Guardian of the Skies | ||
| Ho-Oh is a powerful and versatile Pokemon. It's strong right from the start while still having decent scaling in the late game. Its kit consists of effects and mechanics that give the Pokemon its versatility. But what sets Ho-Oh apart from other Pokemon is its ability to revive allies during fights via its Unite Move, Rekindling Flame, which is a game-changing mechanic. This makes the Pokemon an extremely valuable pick. | ||
|
Hoopa
|
|
Top / Bot |
| Unbound Power | ||
| Hoopa boasts a great kit that can greatly alter the playing field for its teammates. Its utility is top notch and opens up more strategic plays that can push the meta forward. Hoopa also boosts your team's offensive capabilities a great deal especially with taking objectives and controlling both lanes at the same time through the use of its warping mechanic. | ||
|
Meowscarada
|
|
Jungle |
| Ferocious Feline | ||
| Meowscarada is a textbook assassin. It relies on burst damage to take out its targets quickly, giving its team a numbers advantage during fights. It does have a special combination of mechanics that make it stand out among other assassins. While frail in stature, its damage potential certainly makes up for it. | ||
|
Meowth
|
|
Any |
| Cat Buglar | ||
| Meowth has high mobility and damage, and a unique gameplay. Its best feature comes from its passive. It gives the Pokemon the ability to steal battle items from opponents and wild Pokemon, allowing stylish plays during fights. It also enables the Pokemon to pick up coins that it creates, increasing its movement speed for a duration. Additionally, Meowth's damage is also noteworthy as it can hold its own against many damage dealers. | ||
|
Mew
|
|
Any |
| Mystical Dominance | ||
| Mew offers a unique way to play with its Move Reset mechanic. Here, you can essentially change the Pokemon's playstyle on the fly and adapt to any situation. Aside from being a great damage dealer, with its long ranged Solar Beam and easy to aim Electro Ball, you can turn Mew into a decent support Pokemon with its Coaching and Surf moves! Though its distinct mechanic requires a lot of button inputs and mastery to become effective, being able to utilize its strengths will often translate into a Pokemon that can run the game by itself. | ||
|
Pawmot
|
|
Any |
| Versatile All-Rounder with High Mobility | ||
| Pawmot's kit is a great mix of mobility and damage. It can easily set up its combo and burst down targets. Its moves also contains mechanics and effects, such as cooldown reduction, stun, and knockback, which are extremely useful in the meta. | ||
|
Pikachu
|
|
Top/Bot |
| High Control, High Damage | ||
| Pikachu is a powerhouse in all stages of the game due to its high damage output and stun capabilities. It's Unite Move's fast charge rate means that Pikachu can consistently get a surge in power whenever it needs to. | ||
|
Psyduck
|
|
Top/Bottom |
| A Mysterious Power | ||
| Psyduck is a offense-focused Supporter. It has a lot of crowd control in its kit, making it very disruptive during fights. It also has better durability compared to other Supporter in terms of HP and defenses that makes it a stand out pick. | ||
|
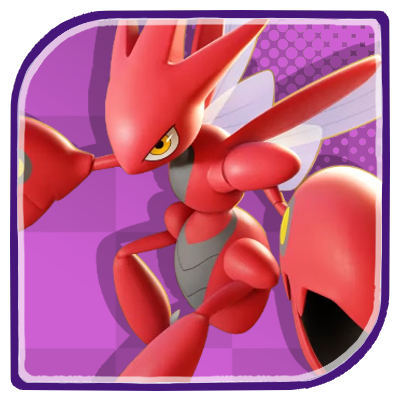
Scizor
|
|
Jungle |
| Slice and Punch! | ||
| Although Scizor is an All-Rounder, it can take the role of an Attacker or Speedster if it stays as Scyther, offering two distinct gameplays in one Pokemon. However, playing Scizor or Scyther requires dedication to their respective gameplay and build since there is no room for compromise if they are to be played effectively. In other words, you can't play Scyther effectively using Scizor's items and gameplay, and vice versa. | ||
|
Sirfetch'd
|
|
Any |
| Highly Technical but Rewarding | ||
| Sirfetch’d has reliable frontline durability, high burst potential, and unique parry mechanics that reward skillful execution. On one hand, it can anchor the frontline with Leaf Blade and Detect, parrying attacks, reducing damage, and providing crowd control that stabilizes teamfights. On the other, it can swtich to a burst assassin with Fury Cutter and Brutal Swing, dashing aggressively to eliminate priority targets and swing momentum instantly. | ||
|
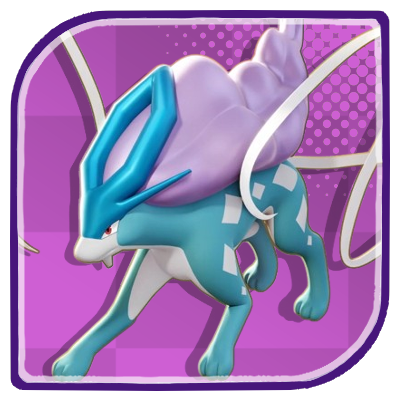
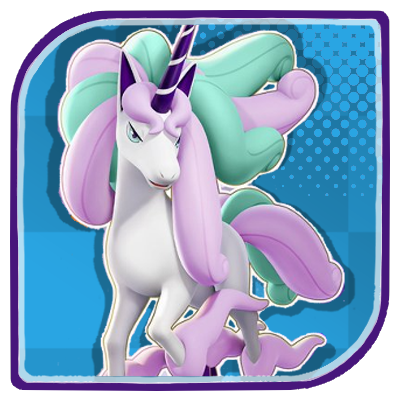
Suicune
|
|
Top/Bot |
| A Lethal All-Rounder | ||
| Suicune is a strong disabler and a lethal damage dealer. Its strength comes primarily from its passive. It gives the Pokemon the ability to freeze targets, generate a shield, and fill up its crystal gauge for performing boosted attacks whenever it hits enemies with its moves. But the passive's best feature is that it allows Suicune to instantly knock out frozen targets whose HP falls below a set percentage, giving the Pokemon its lethality. Furthermore, its unite move can be used even if the Pokemon is stunned and removes all status effects on it. The Pokemon does require some degree of skill to play effectively but is generally fairly easy to play. |
||
|
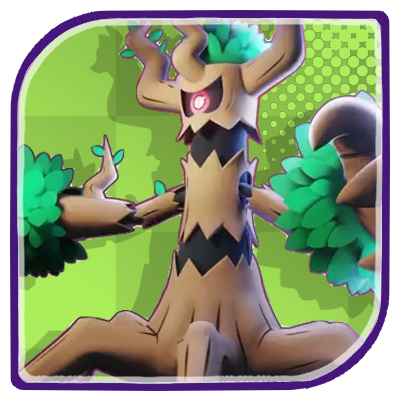
Trevenant
|
|
Top/Bot |
| The Undying Tree | ||
| Trevenant is a highly durable Pokemon that provides decent crowd control. Its ability to recover HP and deal damage at the same time makes it a a great frontliner, providing cover to its squishy allies. However, since its moves also deal damage to itself, it can easily be exploited by the enemy. | ||
|
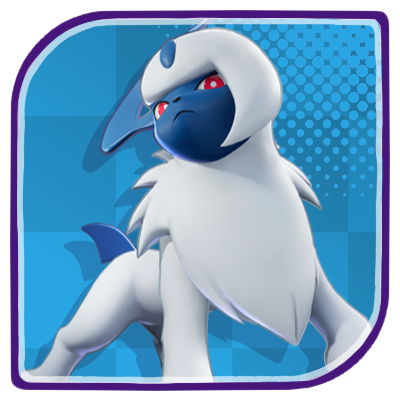
Umbreon
|
|
Top/Bot |
| Shield Thief | ||
| Umbreon is a multi-functional Defender. It can weaken, stun, and trap opponents and even use their stats against them. It can also aid its allies to keep them alive. Its most notable ability is stealing shields from opponents and using them for itself. It does all these while still being able to tank damage and heal itself. | ||
|
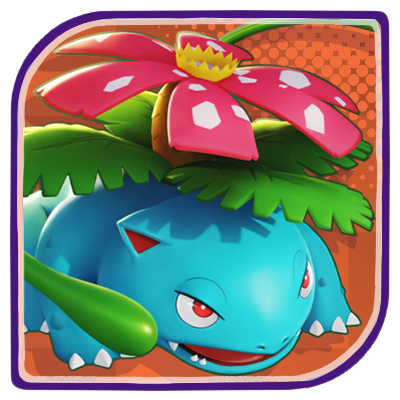
Venusaur
|
|
Top |
| Versatile Damage Dealer | ||
| Venusaur is still terrorizing the stadium with the HP-draining capability of Giga Drain and its cooldown reduction synergy with Petal Dance. What's more, it can be an effective sniper with the use of Solar Beam. Whether, you are facing enemies head on or from long range, Venusaur is a great Attacker for any team to have. | ||
|
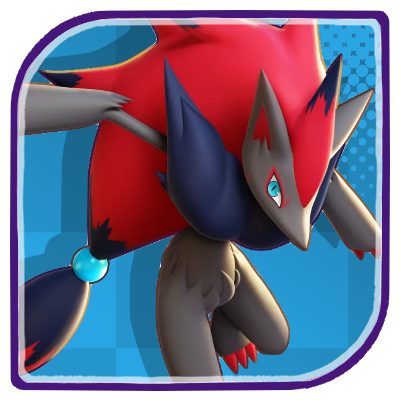
Zoroark
|
|
Jungle |
| The Master of Illusion | ||
| When it comes to deadly and satisfying combos, Zoroark is one of the best Speedsters for taking down opponents in quick succession. Its moveset is highly synergistic with one another and offers a lot of mobility. Moreover, its passive ability, Illusion, opens up new strategies on how you can approach fights. Although you will find yourself climbing a steep hill to master the Pokemon, getting used to its controls and playstyle will reward you with a strong Pokemon that can hold its own! | ||
A Tier
| Pokemon | Tier | Best Lane |
|---|---|---|
|
Absol
|
|
Jungle |
| The Executioner | ||
| Absol is one of the best physical damage dealers in the game. With the right build and good aim, Absol can decimate its opponents within seconds, thanks to its high critical hit rate. Additionally, its wide variety of dash moves like Midnight Slash makes it an elusive Pokemon to deal with. Although its early to mid-game capabilities are impressive, it struggles to be as effective during the late game when opponents are strong enough to fight back against Absol. Nonetheless, Absol is still a dependable single-target assassin for any team to have! | ||
|
Aegislash
|
|
Jungle |
| A Technical Sword to Wield | ||
| Aegislash is a great duelist Pokemon that can adapt to any combat encounter. It has the ability to alter its boosted attacks to deal massive damage or sustain itself with heals, which makes it viable for any lane it goes to. However, it could be a hard Pokemon to use because it relies on the formes mechanic to generate an advantage. That said, If you manage to master Aegislash's sword and shield playstyle, it is a force to be reckoned with. | ||
|
Alolan Raichu
|
|
Any |
| A Highly Mobile Attacker | ||
| Alolan Raichu is a strong, verstatile, and highly-mobile Attacker. It can become an attack-damage Attacker if it learns Stored Power and Psychic, forcing it to rely mostly on its attacks to dish out damage and knock out opponents, or act as a typical spell-casting Attacker if it learns Electro Ball and Thunderbolt or Psychic. Either way the Pokemon will have high offense. What sets Alolan Raichu apart from other Attackers is its high mobility, which comes from Surge Surfer, since Attackers tend to have a lack of mobility as one of their weaknesses. | ||
|
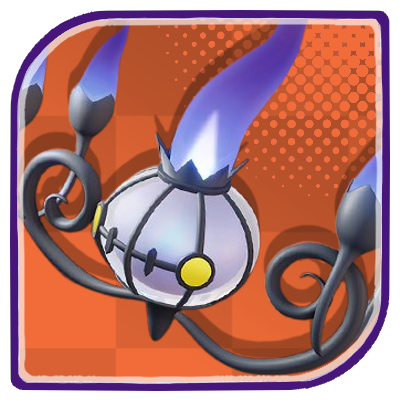
Chandelure
|
|
Top/Bot |
| Kindled Spirit | ||
| Chandelure is a great example of a glass cannon Pokemon. It excels in dealing burst and DoT (damage over time) damage. It can pierce through the enemy's Sp. Def. thanks to its Ability, Infiltration. It can also disable enemy moves using Imprison, which is a new type of disable in the game. However, its greatest setback is its extremely low durability and mobility, making it an enticing Pokemon to target down. | ||
|
Cinderace
|
|
Top/Bot |
| The Ideal Ranged Damage Dealer | ||
| Cinderace is the ideal late-game carry Pokemon thanks to its rapid attack speed and critical-hits. It can also take out objectives like Drednaw or Zapdos quickly by itself. However, it's fragile and requires a lot of time before it can start carrying its team, which is something that the enemy can take advantage. | ||
|
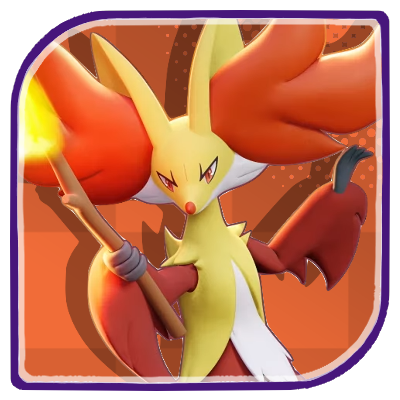
Delphox
|
|
Top/Jungle |
| Blazing Power | ||
| Delphox is a versatile Attacker that can let out tons of damage while being able to support the team with its arsenal of disables. Moves like Mystical Fire and Fire Spin offer a variety of playstyles that can make mastering the Pokemon worthwhile. Fanciful Fireworks, in particular, is the ultimate debuff move that can have a massive impact on team fights. | ||
|
Dodrio
|
|
Jungle |
| A True Speedster | ||
| Dodrio fits the Speedster mold perfectly due to its fast-paced, roaming gameplay. You will find its Sprint mechanic to be a powerful tool in realizing the Pokemon's strengths. While its kit doesn't stray from the typical high-mobility and burst damage Speedster trait, its best played as a solo scorer that puts pressure on enemies and keep them at their toes to defend their goals. However, it isfragile and requires high skill, gatekeeping the players that can use it effectively. | ||
|
Eldegoss
|
|
Bot |
| Shields and Heals Everywhere | ||
| Thanks to its ranged attacks, Eldegoss' moveset provides both support and offense that can significantly impact a team fight if left uncontested. Moves like Pollen Puff and Leaf Tornado increase the Pokemon's usability. However, you may find the Pokemon's hindrance moves lackluster, especially when better alternatives are present. Overall, Eldegoss' gameplay is straightforward and effective enough that it can still be a great Supporter for any team to have. | ||
|
Empoleon
|
|
Any |
| Well-Rounded Brawler | ||
| Empoleon excels in close combat but can also provide setups for its allies during teamfights. Aqua Jet turns Empoleon into a dedicated brawler thanks to its attack speed buff and Sp. Def. reduction effect. Couple Aqua Jet with Whirlpool and the Pokemon can sustain itself while fighting. On the other hand, Metal Claw and Hydro Cannon gives Empoleon a great pair of crowd control moves, which are effective for setting up fights. | ||
|
Galarian Rapidash
|
|
Any |
| Damage Dealer with Exceptional Mobility | ||
| Galarian Rapidash is a strong damage dealer with exceptional mobility and a nifty passive, and it only requires a moderate skill level to play effectively. Its Dazzling Gleam, Fairy Wind, Smart Strike, and Triad Blitz can deal high amounts of burst damage, especially when chained together in a combo, allowing it to quickly knock out opponents. It can also build up absurd amounts of movement speed and become almost uncatchable when it uses Agility. However, the Pokemon's best features are its ability to generate a shield and gain resistance from hindrances via it is passive ability, and its gauge that allows it to deal more damage. Futhermore, its hit-and-run gameplay is generally easy to execute but does rely heavily on triggering Pastel Veil's effect and increasing its movement speed in order to maximize its safety and damage, giving it some degree of difficulty. |
||
|
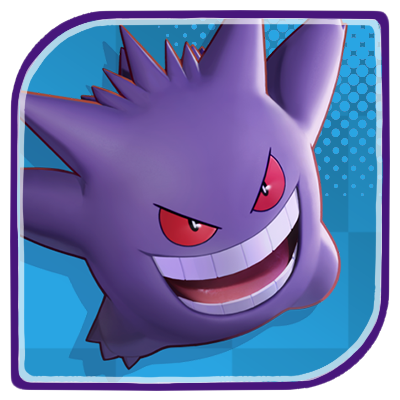
Gengar
|
|
Jungle |
| Your Worst Nightmare | ||
| Gengar's ability to silently strike unsuspecting enemies makes it a great assassin that can sustain itself with heals as it moves hit. It relies on applying debuffs then unleashing relentless damage upon its target in mere seconds with its Sludge Bomb to Hex combo. However, its effectiveness falls drastically during the late game where team fights are abundant. Gengar will have a hard time maneuvering around the chaos as it looks for targets to pick off. | ||
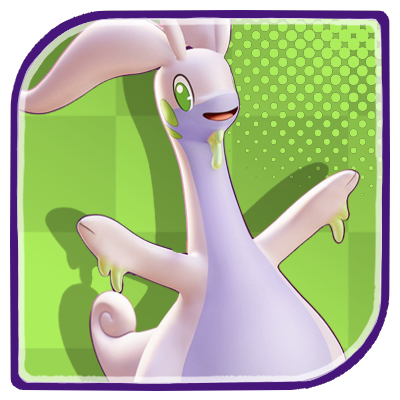
|
Goodra
|
|
Top / Bot |
| The Gooey Dragon | ||
| Goodra is a frontliner that excels in prolonged fights. It can either make itself more durable while weakening its opponents using Muddy Water or deal burst damage while healing itself with Dragon Pulse. Moreover, it can constantly slow its opponents whenever it's attack, uses Acid Spray or Power Whip, and perform a Boosted Attack. However, its downside is its slow scaling. It needs to reach level 8 first to unlock its second primary move, which restricts its potential in the early game. | ||
|
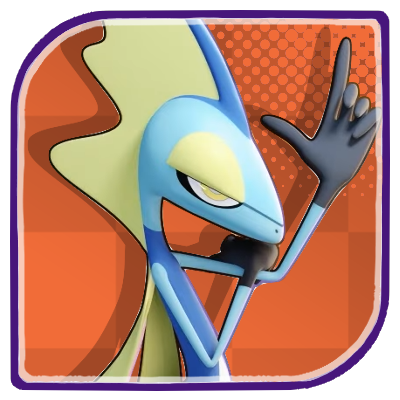
Greninja
|
|
Jungle |
| An Illusive Assassin | ||
| Greninja is an effecient Attacker that has a speedster-like playstyle with its arsenal of highly mobile dash moves and insane burst potential. It is illusive, versatile, and hits hard, making it an effective assassin. However, its fragility requires a lot of effort in the early game to reach its potential. | ||
|
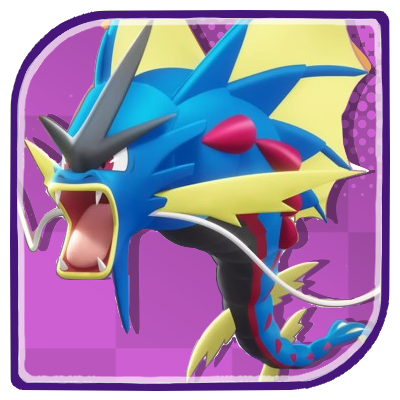
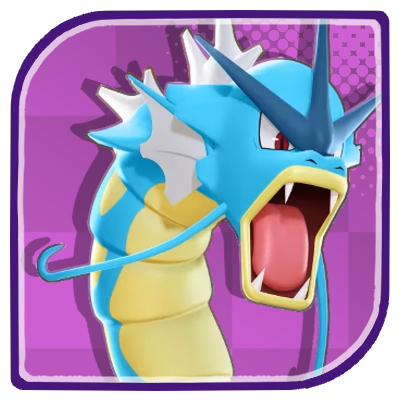
Gyarados
|
|
Top / Bot |
| Seething Serpent | ||
| Gyarados has great potential but comes with a huge caveat. Unlike other Pokemon, Gyarados doesn't evolve just by leveling up and instead needs to fill up its effort gauge to do so. And if it can't evolve, it can't learn its primary moveset, and its stats remain at a minimum. This huge obstacle makes Gyarados' performance quite unpredictable since its gameplay solely relies on how fast it can fill up its effort gauge. | ||
|
Inteleon
|
|
Bot/Jungle |
| Slick Shooter | ||
| Inteleon is a slick Attacker. It uses camouflage and critical-hits to burst down enemies. It can either get close to targets and pick them off one by one or burst opponents down in a single shot from afar. Although it has low durability and takes time to get strong, its damage output in the late game becomes notable. | ||
|
Lapras
|
|
Top/Bot |
| An Eerie Threat | ||
| Lapras is a great mix of damage and durability. It can deal tons of damage via Water Pulse or Perish Song while prolonging its life during fights by healing itself with its Boosted Attacks and shielding itself using Bubble Beam. Its downside is its low mobility. This affects its gameplay since it needs to get close to enemies first to deal damage. | ||
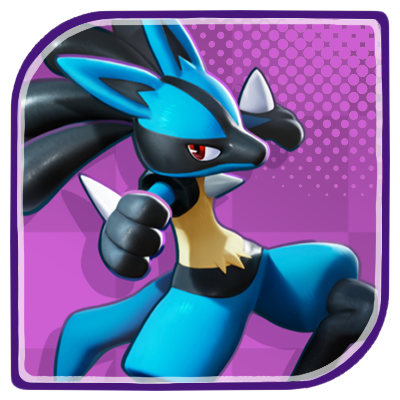
|
Lucario
|
|
Top |
| Speedy, Tanky, and Powerful! | ||
| Lucario is a perfect balance of speed, durability, and power. It performs far better in the early game compared to most Pokemon thanks to its initial moveset's effectiveness and usefulness, and it scales nicely as the game progresses into the late game. It's also great at 1-on-1 duels as well as big teamfights. | ||
|
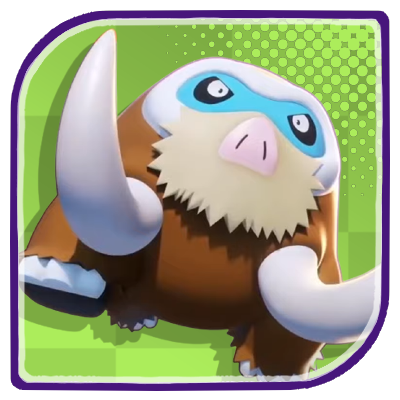
Mamoswine
|
|
Top/Bot |
| Crowd Control for Days | ||
| Mamoswine is the one of the best disabler Pokemon in the game. With so many crowd control moves, it can stomp its way through defenses and open up opportunities for its team to push. Additionally, its sturdy nature allows it to initiate and stay in fights much longer. However, while it can dish out hindrances, you will have to be able to land them to get the most out of it. This means being able to time High Horsepower attacks at the right time as missing with your moves can lead to bad plays. | ||
|
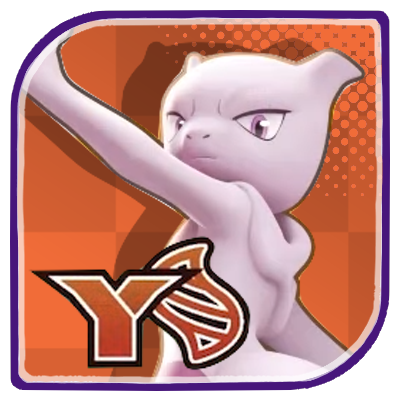
Mega Mewtwo X
|
|
Any |
| Pinnacle of Physical Strength | ||
| Mega Mewtwo X is a great example of an All-Rounder. It has a great balance of damage, durability, and mobility via its stats and moves. Its best feature is its ability to increase its Attack, Defense, and Sp. Def. stats simply by attacking opponents, which also allows it to Mega evolve and reach its full strength. It doesn't have any glaring weaknesses other than its reliance on increasing its stats. | ||
|
Mega Mewtwo Y
|
|
Any |
| Pinnacle of Psychic Power | ||
| Mega Mewtwo Y is a powerful ranged Attacker with a well balanced kit. It can increase its damage and attack speed simply by attacking opponents, and can become even stronger when it Mega evolves. Its moves is a great mix of damage, mobility, and utility, giving it incredible flexibility in battle. | ||
|
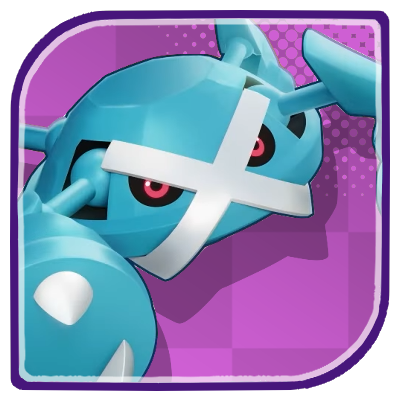
Metagross
|
|
Top/Bot |
| Sentient Steel | ||
| Metagross is a solid frontline All-Rounder. It can tank and dish out a lot of damage thanks to its shield-generating moves. It's also incredibly mobile, giving it the option to push the offense or retreat safely. Its one downside, however, is that its effectiveness as a frontliner heavily relies on hitting opponents with its moves, since it doesn't generate any shields if they hit no targets. Nevertheless, Metagross' versatility makes it a great pick in any team composition and can even play as a All-Rounder/Defender hybrid. | ||
|
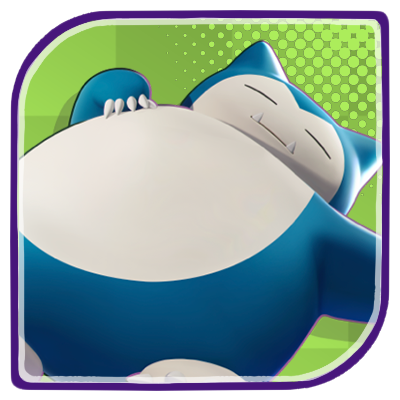
Snorlax
|
|
Top |
| The Collosal Bear | ||
| Snorlax is an extremely durable Pokemon thanks to its high defenses and massive HP. It's effective from beginning to end since it does not need to evolve. It can act as a traditional tank, soaking damage for its team, and providing crowd control using Heavy Slam, and Block or Yawn. It can also become an unorthodox damage dealer using Flail. Unfortunately, it lacks anything unique to offer that other Defenders have and can do better. | ||
|
Sylveon
|
|
Top/Bot |
| A Mobile Turret | ||
| Sylveon has a perfect mix of offensive and defensive moves that incentivize aggressive plays. It can enhance its moves with Calm Mind and continuously deal damage to an enemy. Additionally, Sylveon can sustain itself by recovering HP from multiple Draining Kiss hits. However, its damaging moves need to be properly set up to reach its full potential. This drawback pulls it back from being a hard-hitting Attacker. | ||
|
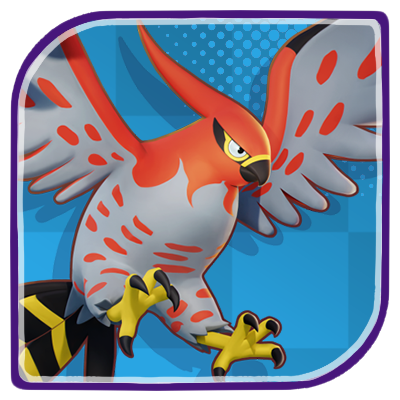
Talonflame
|
|
Jungle |
| Long Distance Burst or Extreme Elusiveness | ||
| Talonflame is highly mobile Pokemon that can deal high burst damage. It specializes at diving targets head-on from a long range, then knocking it down quickly before they can react. It's notorious for sniping boss Pokemon like Zapdos out of nowhere and stealing it from the enemy. It can also use its mobility moves to traverse the map to score goals when the enemies are not looking. But its gameplay is also its weakness since it's fragile and dives recklessly into fights, making it an easy target to knock out, especially when it misses its moves. | ||
|
Tinkaton
|
|
Top / Bot |
| Solid as Steel | ||
| Tinkaton excels in combat whether it's teamfights or 1v1 scenarios. Its moveset gives it versatility in terms of playstyle. It can focus more on teamfights with its strong area moves or take more of a brawler type using its buffs. Its best feature is its ability to become stronger as it fights opponents thanks to its passive, Mold Breaker, giving it a strong late game. | ||
|
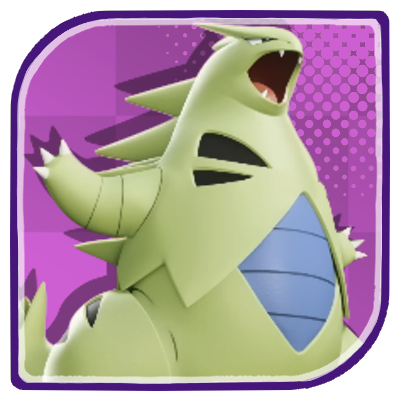
Tyranitar
|
|
Jungle / Bot |
| The Earth Shaker | ||
| With its high defenses and consistent AoE damage synergy with Sand Stream, Tyranitar is the ideal front-line Pokemon that can help teams push lanes and dominate team fights. It is a dependable Pokemon that can excel at brawls thanks to moves like Ancient Power or Sand Tomb, which can increase its survivability while also pressuring the enemy. However, it received a massive nerf to its damage potential since it now can't deal critical-hits during Tyrannical Rampage which was one of the move's notable effects. | ||
|
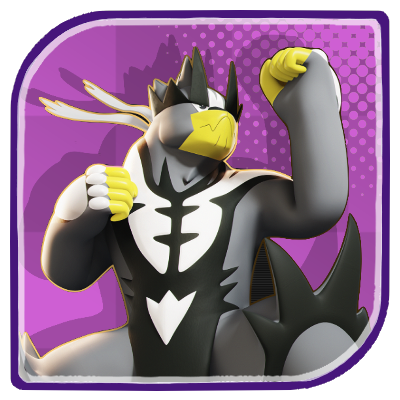
Urshifu
|
|
Jungle |
| Master of Forms | ||
| Urshifu excels in big fights due to the damage it can deal with its combos regardless of which style it uses. Single Strike Style Urshifu offers massive area damage in a single move thanks to Wicked Blow but does require a decent setup to execute properly. On the other hand, Rapid Strike Style Urshifu provides less damage but is faster to execute since Urshifu's Boosted Attacks reduce its move cooldowns, allowing for continuous combos. Whichever style you prefer, Urshifu is definitely a solid All-Rounder pick for any team. However, its unique two-style gameplay is also what holds it back. Since Urshifu's moveset is fixed to whether it learns Wicked Blow or Surging Strikes, it leaves you no room for experimentation, which limits the Pokemon's potential. | ||
|
Wigglytuff
|
|
Bot |
| Disables, Damage, and Tankiness. | ||
| Wigglytuff is a great combination of durability, utility, and support thanks to its moves. It has the best defensive teamfight ability in the game, Starlight Recital. It can also deal decent damage thanks to Rollout and Double Slap. Its drawback, however, is its long cooldown Unite Move, limiting its usage to key moments throughout the game. | ||
|
Zeraora
|
|
Jungle |
| Electrifying Speedster | ||
| Zeraora's arsenal of highly mobile moves makes it a tough Pokemon to fight. This makes it a great Speedster for ganking opponents. However, its all or nothing moveset means that missing targets will spell doom most of the time. | ||
B Tier
| Pokemon | Tier | Best Lane |
|---|---|---|
|
Azumarill
|
|
Jungle |
| Critical Machine | ||
| Azumarill's one-on-one prowess is unmatched thanks to its ability to deal constant critical strikes with Huge Power. This enables Azumarill to scale fast in the early game, especially when it starts in the Jungle. However, its unique mechanic that makes it powerful also hinders Azumarill from dealing maximum damage in the late game where team fights are a constant event. This contradiction prevents it from taking top spots in our Tier List. | ||
|
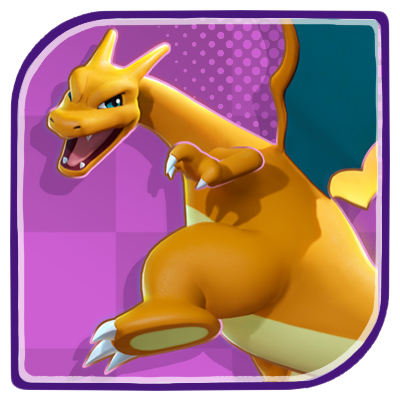
Charizard
|
|
Bot |
| Fire Hazard | ||
| Charizard is a powerful bruiser thanks to its arsenal of moves that allow it to shift its playstyle to counter the enemy team. It has a unique mechanic where you can attack or use moves while moving, allowing you to reposition Charizard when engaging in a brawl. What holds it back is the weak early game that necessitates it to reach higher levels before it can pop off. Moreover, it is susceptible to being disabled outside of its unite move. Still, Charizard can dominate games if you managed to hit the right beats and get powerful as the game goes on. | ||
|
Cramorant
|
|
Top / Bot |
| Gattling Beatdown | ||
| Cramorant is a decent Attacker that can deal high amounts of damage if left uncontested. Its premiere move, Dive, gives the Pokemon a distinct playstyle that can carry games if used correctly. Additionally, its Unite Move, Gatling Gulp Missile, is still powerful when deployed in the right area. | ||
|
Decidueye
|
|
Jungle/Bot |
| Astonishingly Dangerous | ||
| Decidueye is an offensive powerhouse that can easily carry the game when left uncontested. It is capable of taking objectives head-on with its flurry of boosted attacks that can constantly crit. Moreover, it can pick off its targets from afar with a hard-hitting Spirit Shackle. Unfortunately, Decidueye lacks any proper mobility moves that can help it get out of dangerous situations cornered, especially against Pokemon that can teleport, dash, or even jump away from danger. | ||
|
Dragonite
|
|
Jungle/Bot |
| Eternal Outrage | ||
| Dragonite is currently the only ranged All-Rounder in the game, giving it some advantage. It can either offer high burst damage via Hyper Beam, or become a traditional melee All-Rounder with Outrage. It's best known for its semi-global presence thanks to its Unite Move, Draco Impact, allowing it to traverse the map quickly to help in teamfights or score goals. Unfortunately, it's held back by its scaling since it can only have access to its main damage move at level 8. | ||
|
Duraludon
|
|
Bot |
| Massive Offense | ||
| Duraludon offers high burst damage as well as decent utility. Its standard attacks also hit hard, allowing it to become a traditional attack damage carry for its team, especially when given a level advantage. Its passive, Heavy Metal, prevents it from being thrown or shoved once, which is something that other Attackers don't have. However, like most Attackers, it's extremely fragile and lacks mobility, making it an easy target for Pokemon that can dive it directly. | ||
|
Falinks
|
|
Any |
| Banded for Battle | ||
| Falinks is an exceptionally-complex yet high-impact Pokemon. Its gameplay changes depending on whether it learns No Retreat or Beat Up, and can further branch out depdending on whether it learns Megahorn or Iron Head, allowing the Pokemon to take on unique and various roles. However, its complexity and strength does come with a high degree of skill. | ||
|
Machamp
|
|
Jungle |
| Submission! | ||
| Machamp's buffs and immunities allow it to rampage through the battlefield without the fear of getting disabled. Its high-offense moves make it a scary Pokemon to go against, especially in a 1v1 duel. However, it requires a near-perfect early game to dominate the game, otherwise, it'll just be a meaty target. | ||
|
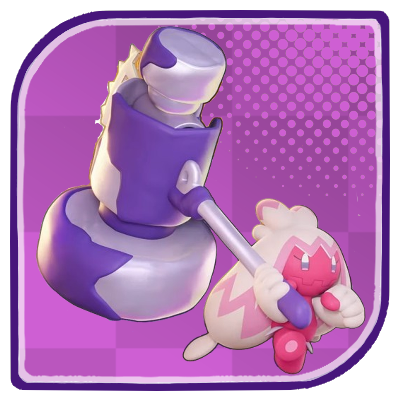
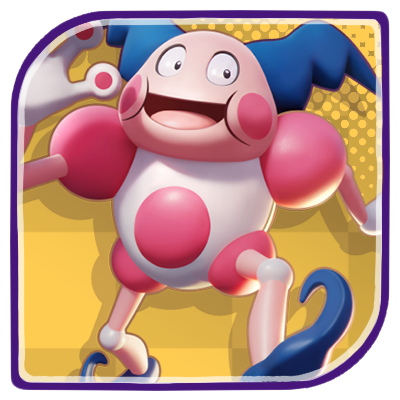
Mr. Mime
|
|
Bot |
| Knows All the Tricks! | ||
| Mr. Mime was a top pick during the early days of Pokemon UNITE. But as new Pokemon and updates arrive, Mr. Mime went on a decline from there and was pushed aside. However, the rework to Mr. Mime revitalized the Pokemon while staying true to its original gameplay and style. The improvements to its moves opened new ways to use them and new strategies for the Pokemon as a whole, skyrockting Mr. Mime to the top of the tier list and taking its well-deserved place in the meta. | ||
|
Sableye
|
|
Top / Bot |
| Inflict Chaos | ||
| Sableye brings a unique twist to the Supporter formula. It can turn invisible thanks to its passive ability, Prankster, which opens up a lot of new ways to support your team and strategies that involve sneaking. Additionally, Sableye is the first Supporter Pokemon to have an Attack stat, which allows you to take advantage of aggressive Held Items that can turn the Pokemon into a hard-hitting damage dealer. Although its moveset does not offer the typical heals and shields a normal Supporter has, you will find their utility to be useful for giving vision and on top of the stuns and slows the Pokemon can inflict. | ||
|
Tsareena
|
|
Jungle |
| All Hail the Queen | ||
| Tsareena's high sustain and survivability via Trop Kick and Stomp makes it incredibly hard to fight against. It also deals significant area damage repeatedly thanks to the effects of Queenly Majesty, which can be easily spammed for consistent pressure. Moreover, its Queen Ascendant is one of the best single target disables in the game, locking targets down while dealing heavy damage. | ||
C Tier
| Pokemon | Tier | Best Lane |
|---|---|---|
|
Garchomp
|
|
Jungle |
| Attack Heavyweight | ||
| Garchomp is a great offensive All-Rounder that can dish out insane damage when it gets to keep attacking. Moves like Dragon Claw and Stomp are great initiating moves that can pressure you targets. Its ability to power its way through brawls and objectives with its hard-hitting boosted attacks. While it is capable of dealing insane amounts of damage, its low defenses and lack of proper ways to fight back during the early game make it susceptible to getting bullied, which can stifle its growth towards higher levels. | ||
|
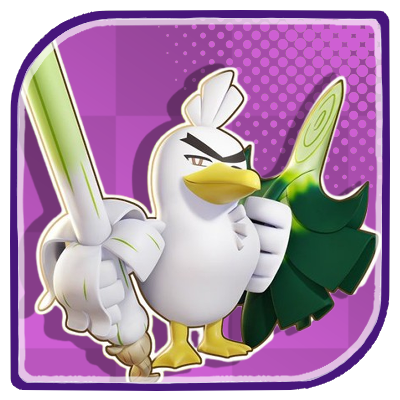
Greedent
|
|
Jungle |
| The Trickiest of Defenders | ||
| Greedent is a specialist at creating chaos on the map by dragging the enemy team's attention to itself in the hopes of bringing it down. It is an extremely slippery and tough Pokemon to fight against thanks to Covet and its ability to constantly recover HP via its Berries. It can also deal decent burst damage using Belch, or slow targets with Bullet Seed, increasing their effeciency when Berry Belly Flop is used. However, its complex mechanics demands special skill and understanding from players, which may not be suitable for everybody. | ||
Panic Parade Tier List
We're currently evaluating other Pokemon for Panic Parade. Please check back for updates!
Panic Parade Guide: Tier List and How to Play
Lane Tier Lists
Top Lane Tier List
Top Lane Guide: How to Play Top
Jungle Tier List
Jungle Guide and Best Junglers
Bottom Lane Tier List
Bottom Lane Guide: How to Play Bot
Role Tier Lists
Attacker Tier List
This list evaluates the Pokemon depending on its effectiveness of being an Attacker: big damage, insane DPS, and over-all capability to carry.
Attacker Tier List Evaluations
Speedster Tier List
This list evaluates the Pokemon based on its capability to be a Speedster: overall capability to score, huge map presence, and initiate ganks effectively.
Speedster Tier List Evaluations
All-Rounder Tier List
This list evaluates Pokemon based on its effectiveness to be an All-Rounder: duel with other Pokemon, be in the front line to deal and soak damage, as well as the overall capability to carry the game.
All-Rounder Tier List Evaluations
Defender Tier List
This list evaluates Pokemon based on their capability to be a Defender: able to protect goals effectively, soak up damage in the frontlines, and overall capability to initiate clashes.
Defender Tier List Evaluations
Supporter Tier List
This list evaluates Pokemon based on their capability to be a Supporter: provide healing and shielding on allies, buff their attacks and/or defenses, as well as their effectiveness to provide crowd control with moves.
Supporter Tier List Evaluations
Tier List Criteria
Full Criteria
| Criteria | |||
|---|---|---|---|
| Power Level | Team Impact | Ease-of-Use | Rank Usage |
Each of these factors determine the Pokemon's place within the tier list. Read on to learn what they refer to exactly:
- Power Level: Determines how strong a Pokemon is in theory (when its potential is realized; optimized itemization and playstyle).
- Team Impact: Determines how instrumental a Pokemon is from a team's perspective. What does the Pokemon bring to the table and how effective is this to achieve victory?
- Ease-Of-Use: When two things perform at roughly the same power level, the one that's easier to use is always better. We always have to consider the amount of effort it takes to play certain Pokemon into account.
- Rank Usage: We kept a close eye on a Pokemon's performance in high rank matches to get a better glimpse at its overall potential in certain high-level match ups and scenarios.
Pokemon UNITE Related Guides

Character and Item Tier Lists
| Pokemon UNITE Main Tier Lists | |
|---|---|
 Pokemon Tier List Pokemon Tier List |
 Free Character Tier List Free Character Tier List |
 Battle Items Tier List Battle Items Tier List |
 Held Items Tier List Held Items Tier List |
 Low-Elo Tier List Low-Elo Tier List |
 Solo-Queue Tier List Solo-Queue Tier List |
Role Tier Lists
| Pokemon UNITE Tier Lists per Role | |
|---|---|
 Attacker Tier List Attacker Tier List |
 Speedster Tier List Speedster Tier List |
 All-Rounder Tier List All-Rounder Tier List |
 Defender Tier List Defender Tier List |
 Supporter Tier List Supporter Tier List |
|
Comment
Oh, wow. This tier list is based purely on these dumb@$$holes' opinions.
Author
Pokemon UNITE Tier List (March 2026)
Rankings
Gaming News


![Monster Hunter Stories 3 Review [First Impressions] | Simply Rejuvenating](https://img.game8.co/4438641/2a31b7702bd70e78ec8efd24661dacda.jpeg/thumb)
Popular Games

Genshin Impact Walkthrough & Guides Wiki
Umamusume: Pretty Derby Walkthrough & Guides Wiki
Pokemon Pokopia Walkthrough & Guides Wiki
Honkai: Star Rail Walkthrough & Guides Wiki
Monster Hunter Stories 3: Twisted Reflection Walkthrough & Guides Wiki
Arknights: Endfield Walkthrough & Guides Wiki
Wuthering Waves Walkthrough & Guides Wiki
Zenless Zone Zero Walkthrough & Guides Wiki
Pokemon TCG Pocket (PTCGP) Strategies & Guides Wiki
Monster Hunter Wilds Walkthrough & Guides Wiki


Recommended Games
Diablo 4: Vessel of Hatred Walkthrough & Guides Wiki
Cyberpunk 2077: Ultimate Edition Walkthrough & Guides Wiki
Fire Emblem Heroes (FEH) Walkthrough & Guides Wiki
Yu-Gi-Oh! Master Duel Walkthrough & Guides Wiki
Super Smash Bros. Ultimate Walkthrough & Guides Wiki
Pokemon Brilliant Diamond and Shining Pearl (BDSP) Walkthrough & Guides Wiki
Elden Ring Shadow of the Erdtree Walkthrough & Guides Wiki
Monster Hunter World Walkthrough & Guides Wiki
The Legend of Zelda: Tears of the Kingdom Walkthrough & Guides Wiki
Persona 3 Reload Walkthrough & Guides Wiki


All rights reserved
©2021 Pokémon. ©1995–2021 Nintendo / Creatures Inc. / GAME FREAK inc.
©2021 Tencent.
The copyrights of videos of games used in our content and other intellectual property rights belong to the provider of the game.
The contents we provide on this site were created personally by members of the Game8 editorial department.
We refuse the right to reuse or repost content taken without our permission such as data or images to other sites.
Bro how is garchomp still C tier!? The buffs made him so op! And owl is in B tier despite the buffs!? Bro... F*** this tier list!