Azumarill Guide: Builds and Best Items
☆ Upcoming: Articuno | Meganium | Typhlosion | Feraligatr
★ Latest News: Zapdos | Moltres | Version 1.22.1.5
☆ Popular Pages: Upcoming Pokemon | Tier List
★ Current Seasons: Ranked S34 | Battle Pass S39
☆ Join Game8's Pokemon Discord Server!
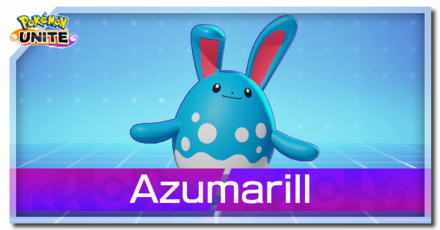
The best guide on how to play Azumarill in Pokemon UNITE for Nintendo Switch and Mobile. Check here for the best builds, Held and Battle items, movesets, as well as the latest nerfs, buffs, counters, matchups, and more!
| Azumarill Pokemon Pages | |
|---|---|
 Azumarill Release Date Azumarill Release Date |
 Azumarill Builds Azumarill Builds |
List of Contents
Azumarill Latest Nerfs & Buffs (11/1)
| Azumarill Changes (November 1) | |
|---|---|
| Stat Buff | • Special Defense increased from 64-320 to 80-399 (Lv.1-15). |
|
Whirlpool |
• Cooldown decreased from 10s to 9s. |
|
Belly Bash |
• Shield reduced from 5% of max HP to 6.5%. |
Azumarill Stat Buff
| Lvl | Sp. Def. |
|---|---|
| 5 | 119 → 147 (+23.5%) |
| 10 | 185 → 230 (+24.3%) |
| 15 | 319 → 399 (+25.1%) |
Stat Updates
| 1.5.1.6 | Azumarill stats were increase. |
|---|---|
| 1.6.1.2 | HP increased. |
| 1.7.1.7 | Evolution level changed to level 4. |
| 1.16.2.8 | Special Defense increased from 64-320 to 80-399 (Lv.1-15). |
Huge Power
| 1.10.1.3 | Critical Hit multiplier increased from 150% to 170%. |
|---|
Bubble
| 1.5.1.2 | Effect bugfix. |
|---|---|
| 1.6.1.2 | Damage increased from 172 per bubble to 198 per bubble. |
Whirlpool
| 1.5.1.2 | Damage bugfix. |
|---|---|
| 1.7.1.7 | Level learned changed to level 4. Whirlpool +: Level learned changed to level 10. |
| 1.14.1.5 | Cooldown reduced from 11s to 10s. Whirlpool +: Cooldown reduced from 9s to 8s. |
| 1.16.2.8 | Cooldown decreased from 10s to 9s. |
Aqua Tail
| 1.5.1.2 | Faster Normal Attacks. Wider Range. Furthest Range Hit Increases Damage and Heals HP |
|---|---|
| 1.5.1.6 | Damage increased. |
| 1.6.1.2 | Damage increased from 596 to 696 (+17%). HP recovery increased. Cooldown reduced from 9.5s to 8s. |
| 1.7.1.7 | Level learned changed to level 4. Cooldown decreased from 8s to 7s (-1s). Aqua Tail +: Level learned changed to level 10. Cooldown reduction increased. |
Play Rough
| 1.5.1.6 | Damage increased from 549 to 717 (+31%). |
|---|---|
| 1.6.1.2 | Cooldown reduced from 6.5s to 5s. |
| 1.7.1.7 | Level learned changed to level 6. Damage increased from 717 (239 per hit) to 885 (295 per hit) (+23%). Play Rough +: Level learned changed to level 12. |
Water Pulse
| 1.7.1.7 | Level learned changed to level 6. Water Pulse +: Level learned changed to level 12. |
|---|---|
| 1.8.1.4 | Cooldown increased from 4s to 5s. (+1s). Damaged reduced by about 10%. |
Belly Bash
| 1.7.1.7 | Level learned changed to level 8. |
|---|---|
| 1.14.1.5 | Changed so that only Pokemon from the opponent's team are specified. |
| 1.16.2.8 | Shield reduced from 5% of max HP to 6.5%. |
Azumarill Basic Info
| Azumarill | ||
|---|---|---|
 |
Role: All-Rounder Attack Type: Melee Damage Type: Physical Difficulty: Novice |
|
| "A well-balanced All-Rounder that excels on isolating enemies to deal massive critical damage." | ||
Azumarill Best Lanes

|

|

|
Tips & Strategies for Every Lane
Strengths and Weaknesses
| Strengths | Weaknesses |
|---|---|
| ✔︎ Strong in 1-vs-1 fights thanks to Huge Power. ✔︎ Can quickly secure objectives solo. ✔︎ Fast UNITE move recharge rate. |
✖︎ No reliable mobility moves. ✖︎ Very weak against crowd control (no unstoppable moves). ✖︎ Weak in teamfights, especially during Rayquaza flips |
Best Builds for Azumarill
| Azumarill Builds | |
|---|---|
| - | |
Aqua Tail Build
Aqua Tail Build

|
Moveset | Held Items | |||
|---|---|---|---|---|---|
| Battle Item | |||||
| Stats from Items (Lv. 40) | Recommended Lane | ||||
|
Attack: +38.5 Defense: +35 Sp. Def: +35 HP: +235 |
|
||||
| Emblem Color Combination | Target Emblem Stats | ||||
|
|
Positive Stats: • HP • Attack Free Negative Stats: • Sp. Atk • Defense • Sp. Def • Critical-Hit Rate |
||||
| Note: The emblem color and stats here are suggestions only. The builds are still viable even without the suggested emblems. |
|||||
Aqua Tail Build Explanation
| Build Explanation |
|---|
| This build is centered on dealing high burst damage using Aqua Tail. Azumarill will use Water Pulse as its complimentary move for some mobility and additional damage. |
| · Muscle Band improves Azumarill's attacks via increased damage and attack speed, which also works with Aqua Tail. · Scope Lens increases Azumarill's critical-hit damage, which mainly comes from Huge Power. · Energy Amplifier provides Azumarill a massive damage boost whenever it uses Belly Bash. · Accel Bracer can be a replacement for Energy Amplifier for more flat damage. · X Speed improves Azumarill's overall mobility, allowing it to stay on top of its targets, especially while attacking with Aqua Tail. · Alternatively, Eject Button can also work just as fine for the build. · The build's Boost Emblem loadout should consist of 6 Brown emblems for maximum damage and 6 White emblems for additional HP. · This can be achieved by equipping at least two (2) Emblems that are both Brown and White. · Equip Emblems that increase Attack, or HP to balance out Azumarill's offense and defense. · Sp. Atk., Sp. Def, Defense, and Critical-Hit Rate can be freely traded for any of the other stats. |
Aqua Tail Build Damage Test
| Items (Level 30) |
Aqua Tail (Critical-hit) (Total Dmg.) (@ Lvl 15) |
Water Pulse (Critical-hit) (@ Lvl 15) |
|---|---|---|
| Muscle Band + Scope Lens + Energy Amplifier (Includes effect) |
9104 | 1639 |
Since the build is centered on Aqua Tail, equipping items that will maximize its damage is the ideal item combination.
As the results show, Muscle Band, Scope Lens, and Energy Amplifier will produce the highest Aqua Tail damage. However, Azumarill does need to use its Unite Move first to maximize its damage.
These damage tests are conducted using the Training Dummy in Practice Mode.
| Items (Level 30) | Aqua Tail (Critical-hit) (Total Dmg.) (@ Lvl 15) | Water Pulse (Critical-hit) (@ Lvl 15) |
|---|---|---|
| Muscle Band + Scope Lens + Razor Claw (Includes effect) | 7411 | 1173 |
| Muscle Band + Scope Lens + Attack Weight (6 Stacks) | 7927 | 1292 |
| Muscle Band + Scope Lens + Weakness Policy (4 stacks) | 7748 | 1264 |
| Muscle Band + Scope Lens + Energy Amplifier (Includes effect) | 9104 | 1639 |
| Muscle Band + Razor Claw (Includes effect) + Attack Weight (6 Stacks) | 7122 | 1229 |
| Muscle Band + Razor Claw (Includes effect) + Weakness Policy (4 stacks) | 6986 | 1207 |
| Muscle Band + Razor Claw (Includes effect) + Energy Amplifier (Includes effect) | 8179 | 1558 |
| Muscle Band + Attack Weight (6 Stacks) + Weakness Policy (4 stacks) | 7383 | 1331 |
| Muscle Band + Attack Weight (6 Stacks) + Energy Amplifier (Includes effect) | 8465 | 1692 |
| Muscle Band + Weakness Policy (4 stacks) + Energy Amplifier (Includes effect) | 8458 | 1690 |
| Scope Lens + Razor Claw (Includes effect) + Attack Weight (6 Stacks) | 7150 | 1292 |
| Scope Lens + Razor Claw (Includes effect) + Weakness Policy (4 stacks) | 6962 | 1264 |
| Scope Lens + Razor Claw (Includes effect) + Energy Amplifier (Includes effect) | 8414 | 1639 |
| Scope Lens + Attack Weight (6 Stacks) + Weakness Policy (4 stacks) | 7543 | 1397 |
| Scope Lens + Attack Weight (6 Stacks) + Energy Amplifier (Includes effect) | 8889 | 1783 |
| Scope Lens + Weakness Policy (4 stacks) + Energy Amplifier (Includes effect) | 8853 | 1776 |
| Razor Claw (Includes effect) + Attack Weight (6 Stacks) + Weakness Policy (6 stacks) | 6648 | 1331 |
| Razor Claw (Includes effect) + Attack Weight (6 Stacks) + Energy Amplifier (Includes effect) | 7830 | 1692 |
| Razor Claw (Includes effect) + Weakness Policy (4 stacks) + Energy Amplifier (Includes effect) | 7822 | 1690 |
| Attack Weight (6 stacks) + Weakness Policy (4 stacks) + Energy Amplifier (Includes effect) | 8151 | 1840 |
The tests above does not use any Emblems yet so it will scale higher if equipped.
Whirlpool Build
| Whirlpool Build | Moveset | Held Items | |||
|---|---|---|---|---|---|
| Battle Item | |||||
| Stats from Items (Lv. 40) | Recommended Lane | ||||
|
Attack: +17.5 Critical-Hit Rate: +7.0% Critical-Hit Damage: +14% Attack Speed: +8.70% Cooldown: -5.20% Unite Move Charge Rate: +7% |
|
||||
| Emblem Color Combination | Target Emblem Stats | ||||
|
|
Positive Stats: • HP • Attack Free Negative Stats: • Sp. Atk • Defense • Sp. Def • Critical-Hit Rate |
||||
| Note: The emblem color and stats here are suggestions only. The builds are still viable even without the suggested emblems. |
|||||
Whirlpool Build Explanation
| Build Explanation |
|---|
| This is a more defensive build that revolves around survivability using the healing from Whirlpool. Play Rough will act as the complimentary move for Azumarill, allowing it to stay on top of targets while Whirlpool is active. However, Water Pulse can also work with the build. |
| · Attack Weight gives Azumarill a large Attack boost, increasing its overall damage output and improving Whirlpool's healing. · Weakness Policy goes well with the build's survivability gameplay, increasing Azumarill's damage as it takes hits. It also provides the Pokemon with a decent amount of Attack and HP. · Focus Band improves Azumarill's durability through increased defenses and gives it an additional source of healing. · Accel Bracer can be a replacement for Weakness Policy for more flat damage. · X Speed improves Azumarill's overall mobility, allowing it to stay on top of its targets, especially while Whirlpool is active. · Alternatively, Potion can work nicely with the build, giving Azumarill one more source of healing. · The build's Boost Emblem loadout should consist of 6 Brown emblems for maximum damage and 6 White emblems for additional HP. · This can be achieved by equipping at least two (2) Emblems that are both Brown and White. · Equip Emblems that increase Attack, or HP to balance out Azumarill's offense and defense. · Sp. Atk., Sp. Def, Defense, and Critical-Hit Rate can be freely traded for any of the other stats. |
Whirlpool Build Damage and Healing Test
| Items (Level 30) |
Whirlpool (Dmg. Per Hit) (Critical-Hit) (@ Lvl 15) |
Whirlpool (Heal Per Hit)(@ Lvl 15) |
|---|---|---|
| Attack Weight (6 stacks) + Weakness Policy (4 stacks) |
515 | 196 |
Since the build is centered on survival via Whirlpool, equipping items that will maximize its damage and healing is the ideal item combination. Focus Band is a core item for the build, leaving two (2) items left for consideration.
As the results show, Weakness Policy and a fully-stacked Attack Weight will yield the best outcome for the build. The item combination generated the highest results for Whirlpool damage and healing. However, Azumarill does need to fully stack Attack Weight first and maintain Weakness Policy stacks to maximize the damage and healing from Whirlpool.
These damage and healing tests are conducted using the Training Dummy in Practice Mode.
| Items (Level 30) | Whirlpool (Dmg. Per Hit) (Critical-Hit) (@ Lvl 15) | Whirlpool (Heal Per Hit)(@ Lvl 15) |
|---|---|---|
| Muscle Band + Scope Lens | 453 | 159 |
| Muscle Band + Razor Claw | 431 | 162 |
| Muscle Band + Attack Weight (6 stacks) | 419 | 160 |
| Muscle Band + Weakness Policy (4 stacks) | 465 | 176 |
| Scope Lens + Razor Claw | 453 | 159 |
| Scope Lens + Attack Weight (6 stacks) | 500 | 177 |
| Scope Lens + Weakness Policy (4 stacks) | 489 | 172 |
| Razor Claw + Attack Weight (6 stacks) | 476 | 180 |
| Razor Claw + Weakness Policy (4 stacks) | 465 | 176 |
| Attack Weight (6 stacks) + Weakness Policy (4 stacks) | **515* | 196 |
The tests above does not use any Emblems yet so it will scale higher if equipped.
Azumarill Best Items & Moveset
Best Held Items
| Item | Explanation |
|---|---|
 Attack Weight Attack Weight
|
Attack Weight boosts Azumarill's two main sources of damage, critical-hits and moves, especially when fully stacked. |
 Buddy Barrier Buddy Barrier
|
Buddy Barrier also gives a decent HP boost. But its best feature is its synergy with Azumarill's Unite Move, giving extra protection through a shield. |
 Energy Amplifier Energy Amplifier
|
Energy Amplifier increases Azumarill's damage output through lower cooldowns, faster Unite Move recharge rate, and a percentage-based damage increase when using its Unite Move. |
 Focus Band Focus Band
|
Focus Band increases Azumarill's static defenses and grants a survivability tool, making up for its underwhelming durability. |
 Scope Lens Scope Lens
|
Scope Lens is well-suited for Azuamrill's passive ability, increasing each critical-hit it makes. |
 Muscle Band Muscle Band
|
Muscle Band also works well with Azumarill's passive ability thanks to the attack speed increase. |
 Weakness Policy Weakness Policy
|
Weakness Policy rewards Azumarill with increased damage when it dives into battle, especially when Whirlpool is active. |
 Accel Bracer Accel Bracer
|
Accel Bracer provides Azumarill with more Attack as it knocks out opponents, which works well with the Pokemon's critical hits. |
Best Battle Items
| Item | Explanation |
|---|---|
 Full Heal Full Heal
|
Full Heal ensures Azumarill's safety against disables, allowing it to keep dealing damage during fights. |
 Eject Button Eject Button
|
Eject Button is a reliable repositioning tool great for initiating fights. |
 X Speed X Speed
|
X Speed makes up for Azumarill's low mobility. It's best used to stick to targets when using Whirlpool. |
 X Attack X Attack
|
X Attack works well with Azumarill's passive since it increases its damage and attack speed. |
Best Moveset
| Move | Explanation |
|---|---|
 Water Pulse Water Pulse
|
Water Pulse gives Azumarill some range and mobility. It can punish opponents who are close together during teamfights. |
 Aqua Tail Aqua Tail
|
Aqua Tail gives Azumarill a low-cooldown and high burst damage tool that's effective against single or multiple targets. It also heals Azumarill for a decent amount. |
This moveset allows Azumarill to quickly knock out targets during teamfights, which has proven to be the most effective way to win games in general. Aqua Tail deals massive damage in an area while also healing Azumarill. Water Pulse allows Azumarill to punish opponents that are close together during clashes and gives some mobility to the Pokemon.
Aqua Tail and Whirlpool are Azumarill's primary damage moves. Both deal damage in an area and heal the Pokemon but have pros and cons.
Aqua Tail is a great burst-damage move and gives Azumarill some range. It also ignores a target's Defense stat and penetrates through shields, making great for teamfights and defending goal zones against shielded opponents. However, Azumarill does need to keep its distance while attacking to trigger all other effects of Aqua Tail. It also slows down Azumarill while attacking, putting the Pokemon in potential danger.
Whirlpool gives Azumarill both offense and defense in one simple move. The move also allows Azumarill to freely move around, use other moves and items, and perform other tasks while the move is active. However, its area of effect is quite narrow, forcing Azumarill to stay at melee range for Whirlpool to deal damage.
On the other hand, Water Pulse and Play Rough are Azumrill's complimentary moves. Each move gives some form of utility and helps in setting up its other moves.
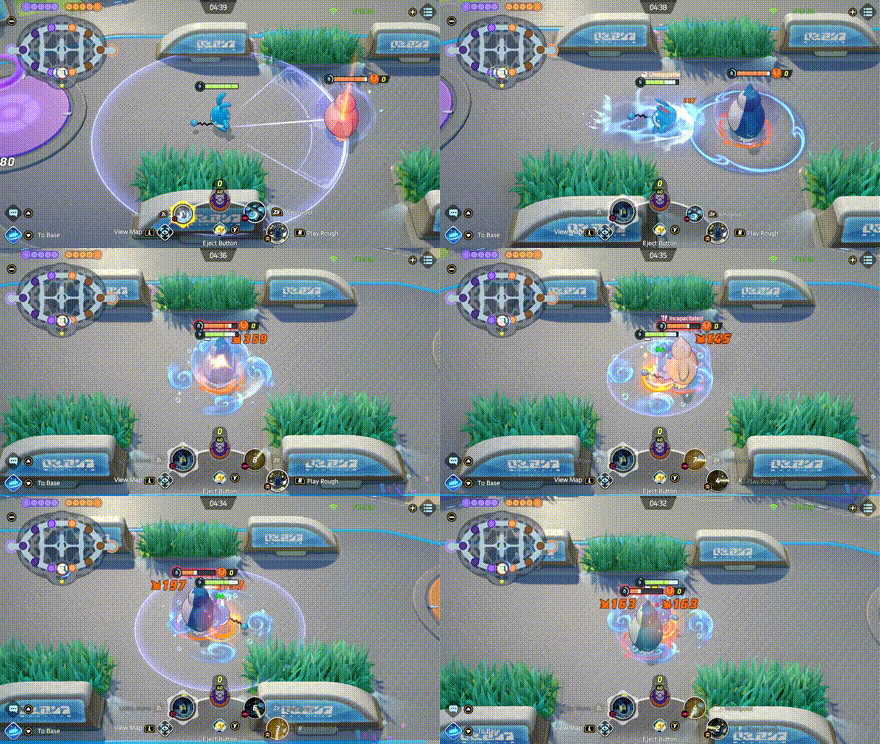
Water Pulse is both a damage and mobility move, and is great for teamfights. When used, Azumarill rolls towards a direction while shooting a water projectile. This water projectile can bounce multiple times between enemies, dealing damage and slowing them. It pairs well with either Aqua Tail or Whirlpool.
Play Rough is great for chasing targets and staying on top of them. It increases Azumarill's movement speed and allows the Pokemon to lunge at a target, dealing damage and stunning it. However, due to how it works, it only works best with Whirlpool.
What Moveset Do You Think is Best for Azumarill?
Let us know why in the comments!
Previous Poll Results
How to Play Azumarill
| Jump to Section | |
|---|---|
Play Around Huge Power
Azumarill's gameplay mainly revolves around its passive ability, Huge Power where it can constantly deal high amounts of damage because of critical hits. However, the passive ability only triggers whenever you deal damage to only one enemy. If Azumarill hits two or more enemies at once with a Standard attack or a move, the passive ability will not trigger.
Target Wild Pokemon One-by-One
When farming for EXP, try to focus on a single target, rather than dealing damage to all of them. However, securing grouped Wild Pokemon spawns like the Altaria and Swablus in the middle of the lanes can be a bit tricky. Given that Azumarill's moves like Whirlpool and Aqua Tail can hit multiple targets, it is best to get their aggression and pull the Wild Pokemon towards you while you attack them individually. This will ensure a faster farming time while also preventing your opponents from getting the last hit.
Take the Jungle
Thanks to a great initial moveset, Azumarill is a great candidate for the jungler role. Because Wild Pokemon spawns in the central area are not clumped together, Azumarill can farm them without much effort. And, because taking the jungler role will guarantee level 5, Azumarill benefits from the extra EXP as it can learn its first move upgrade earlier.
Jungle Guide and Best Junglers
Rush Through Objectives
Because of Azumarill's high damage output towards single targets, securing objectives, even while solo, won't be a challenge. Although, it is still recommended to have at least one ally with you to either increase the damage output or defend the area.
Objectives Guide (Remoat Island): When to Target Bosses
Be Mindful of Enemy Numbers
When dealing damage to a target, Huge Power checks whether the attack will land on one or multiple targets. The ability's activation is dependent on the number of targets present as the attack hits, not their proximity to each other. Therefore, you can still trigger the passive ability even if multiple targets are close together, as long as the attack you deal only hits a single target.
Since melee Pokemon can hit multiple targets with their Standard Attacks, it is best to keep your positioning in mind as you let out attacks. The same is true for using moves like Aqua Tail or Play Rough which can deal damage to multiple Pokemon.
Single Out Opponents
Ideally, you should direct your focus on opponents who are out of position or greedy opponents who are overextending. Azumarill is strong enough to take on most Pokemon in a one-on-one duel.
Avoid Getting Caught in the Middle of Clashes
Fighting in the middle of clashes where a lot of opponents are present means that you may not get the full amount of damage possible. It is best to play defensively first and only act when there is an opportunity for you to focus on a single target. Moreover, try to focus down on enemy Attackers behind the lines or Speedsters who is out of position. Nonetheless, you must steer clear away from the chaos and focus on taking down stragglers.
Don't Fight Near Wild Pokemon
Whether you are on the chase or looking to gank, you must engage an opponent clear of Wild Pokemon spawns. Attacking an opponent near a Wild Pokemon camp may cause your moves to hit multiple targets, which will not trigger critical hits. It is best to focus on defeating the Wild Pokemon first so you can fight the opponent properly. One way to help your target is to tune your Attack Controls and assign a button for attacking opponents and Wild Pokemon.
Targeting and Aim Assist: How to Aim Well
Extend Your Reach with Play Rough
Play Rough gives Azumarill extra mobility so it can set up its melee moves. You will only have to get enough range between you and the target to make Azumarill lunge toward its location, allowing you to catch up and get the full value for your Whirlpool or Aqua Tail activation.
Play Rough: Azumarill Move Effect and Cooldown
Initiate with Belly Bash
Use Belly Bash to single out enemies or charge at enemies that are isolated from their team. The damage from the move should be enough to give you an advantage when they decide to fight back.
Belly Bash: Azumarill Move Effect and Cooldown
Take Note of HP Before Using
It is important to note, however, that Azumarill will receive damage before it jumps towards the designated area. Azumarill is still susceptible to getting knocked down, so keep Azumarill's HP in mind before you face the enemy head-on.
Running a Buddy Barrier may help prevent damage loss since it grants you extra shields every time you activate your unite move. It also increases your survivability as you engage with enemies after using your unite move.
Follow Up with Aqua Tail
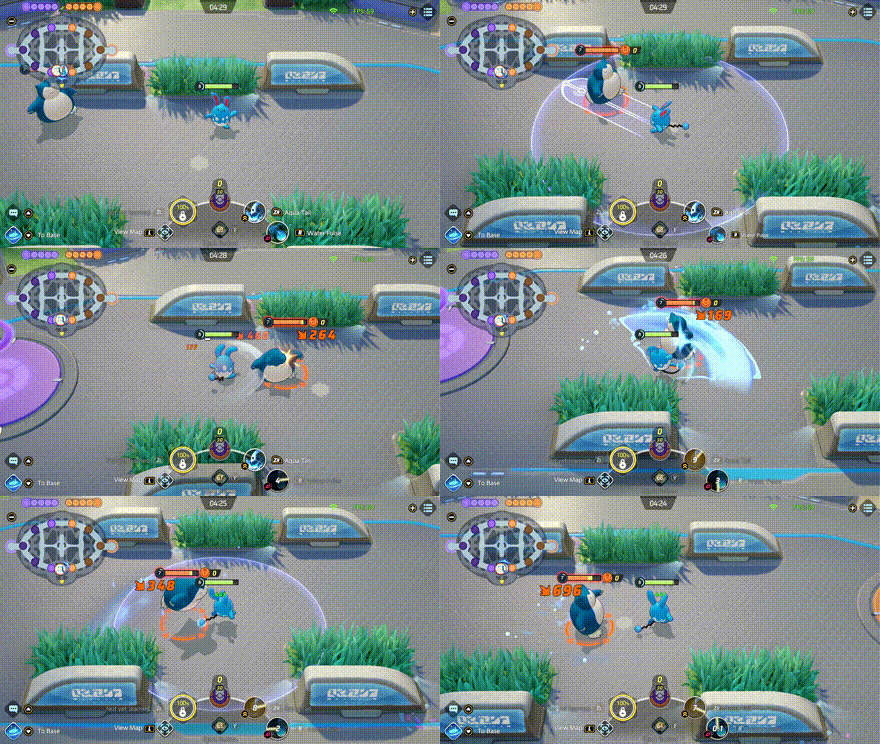
After initiating Belly Bash, following up with Aqua Tail lets Azumarill deal damage and recover HP as long as the move hits enemies or mob Pokemon within its reach. This is a great way to overwhelm enemies and stall them from securing objectives.
When these two moves are partnered with Water Pulse, Azumarill gains decent mobility and can slow down enemies that it hits.This move also lets Azumarill simply roll away when the situation gets dangerous.
Progression and Leveling Guide
Top and Bottom Guide
Level 1 to 4
- Quickly clear out the Bunnelbies in the lane.
- Keep farming wild Pokemon in the lane to reach level 4 and learn your first move.
- At bottom lane, prioritize taking Indeedees for more exp.
Level 6 to 9
- Keep hunting Wild Pokemon to gain more EXP from farming Altaria and Swablus.
- Once you reach level 6, learn your second move.
- Help allies secure Regice, Registeel, or Regirock when it spawns, otherwise secure Regieleki.
- Upon reaching level 8, learn your Unite Move.
Level 10+
- Stick with allies to hunt targets, secure objectives, and push lanes.
- Reach at least level 12 or max level if possible before or when Groudon spawns for a fully-upgraded moveset.
- Make sure that your Unite Move is available when Groudon spawns.
- Help teammates win a teamfight and secure Groudon.
Jungle Guide
Level 1 to 5
- Quickly defeat Xatu
- Clear the first wave of jungle camps and reach level 4 to learn your first move.
- Help the top lane first or whatever lane needs help the most by securing Altaria and Swablus, getting knockouts, and scoring points.
Level 6 to 9
- Clear the second wave of jungle camps and reach at least level 6 to learn your second move.
- Secure Regidrago in the center to get more EXP.
- Help the bottom lane by securing Altaria and Swablus, getting kills, and scoring points.
- If possible, reach level 8 and learn your Unite Move before or when Regice, Registeel, or Regirock spawns.
- Help allies secure Regice, Registeel, or Regirock, with Registeel being the highest priority since it gives a damage buff to the party.
Level 10+
- Stick with allies to hunt targets, secure objectives, and push lanes.
- Reach at least level 12 or max level if possible before or when Groudon spawns for a fully-upgraded moveset.
- Make sure that your Unite Move is available when Groudon spawns.
- Help teammates win a teamfight and secure Groudon.
Azumarill Combos
Initiator Combo
| Initiator Combo | |
|---|---|
Play Rough
►
Whirlpool
►
Standard Attack
|
|
| Activate your Play Rough then attack your target so you can get close to it. Upon hit, activate Whirlpool and encircle the target to deal the most damage. Follow it up with Standard Attacks to further pressure the target or knock them down completely. | |
Mobility Combo
| Mobility Combo | |
|---|---|
Standard Attack
+
Water Pulse
►
Aqua Tail
►
Standard Attack
~ |
|
| Start by pressing your Standard Attack button once. However, do not let the animation play. Instead, cancel it with Water Pulse to make Azumarill roll. After that, activate Aqua Tail and proceed to use Standard Attacks with the bonus from Aqua Tail. | |
Ultimate Combo
This set of combos utilizes Azumarill's Unite Move, Belly Bash, to close the gap between you and a target while also starting the combo strong.
Whirlpool Variation
| Ultimate Whirlpool Combo | |
|---|---|
| Start by jumping towards the target with Belly Bash. After landing, immediately activate Whirlpool. At this point, the opponent may counter with a move of their own. You can then activate Play Rough to deal burst damage. After that, proceed to bombard the target with your Standard Attacks. | |
Aqua Tail Variation
| Ultimate Aqua Tail Combo | |
|---|---|
| Start by jumping towards the target with Belly Bash. After landing, immediately activate Aqua Tail. Thanks to the increase in attack speed, you can quickly burst the target with three Standard Attacks with the bonus from Aqua Tail. Finish the combo by activating Play Rough. | |
Matchups & Counters for Azumarill
Azumarill Matchups
| Matchup Notes | ||
|---|---|---|
| 1. The chart is based on our own experience playing Azumarill. 2. Pokemon within each tier are unordered 3. Any Pokemon not shown here are still under investigation. |
||
Hard Counter with Crowd Control and Burst Damage
Even though Azumarill is an All-Rounder Pokemon, it is relatively squishy compared to other Pokemon in the same role. Moreover, Azumarill lacks proper mobility and unstoppable moves that can help it reposition or retreat. Although Azumarill can run down opponents with Huge Power, its dependence on fighting single targets and getting support from allies makes it easy to disrupt.
Best Counters
| Pokemon | Explanation |
|---|---|
 Trevenant Trevenant
|
Rating: ★★★★★ • Can easily disrupt Azumarill's attacks using Horn Leech, Wood Hammer, and Phantom Forest. • Has high durability and sustainability that allows it to tank a lot of Azumarill's damage. |
 Buzzwole Buzzwole
|
Rating: ★★★★ • Can toss around Azumarill and disrupt its attacks using Smack Down, Superpower or Leech Life. |
 Leafeon Leafeon
|
Rating: ★★★★ • Can easily burst down Azumarill using Leaf Blade, Solar Blade or Razor Leaf, and Emerald Two-Step. • Has superior movement speed thanks to Chlorophyll that makes it hard for Azumarill to hit it. |
Even Matchups
The best way for Azumarill to get the upper hand against these Pokemon is to force them to go 1v1 with Azumarill so its Huge Power can trigger.
Use Belly Bash
| Ranged, Fragile Pokemon with High Damage |
|---|
| How to Beat |
|
• These Pokemon prefer to keep their distance from opponents when fighting. They also have high damage potential that can be dangerous for Azumarill. However, they are fragile and can get knocked out by Azumarill fast. • Use Belly Bash to get close to them and quickly chip away their HP, then finish them off with Aqua Tail or Whirlpool. • Use Play Rough or Water Pulse to stay on top of them. |
Utilize Aqua Tail or Whirlpool's Healing Effect
| All-Rounders |
|---|
| How to Beat |
|
• Much like Azumarill, these Pokemon excel in close combat and rely mostly on their attacks or combos to deal damage. They are also durable enough to tank Azumarill's damage. • Utilize Aqua Tail or Whirlpool's healing effect to survive longer in fights while also dealing a ton of damage. • Use Play Rough or Water Pulse for additional damage. • As a last resort, use Belly Bash to win the fight. |
Utilize Their Numbers
| Supporters |
|---|
| How to Beat |
|
• These Pokemon usually stick with their allies and rarely venture alone, making Huge Power almost impossible to trigger. Although they themselves pose no threat to Azumarill, their support capabilities makes them valuable during fights. • Take advantage of them being in close proximity to each other by using Water Pulse to force them to scatter, then take them out first using Aqua Tail or Whirlpool, and Belly Bash. |
Group Up with Allies
| Highly Durable Pokemon |
|---|
| How to Beat |
|
• These Pokemon are extremely durable, making it difficult for Azumarill to take them down alone. With that, it's best to group up with allies to bring them down with the help of Azumarill. • Use Aqua Tail or Whirlpool to quickly deplete their HP and help allies bring them down. • Use Water Pulse or Play Rough to stay on top of them. |
Easy Matchups for Azumarill
Easy matchups are Pokemon that cannot stave off Azumarill with their offense. As long as Azumarill does not get disabled or debuffed, it will be able to push through these Pokemon without much resistance.
Use Belly Bash
| Ranged, Fragile Pokemon with High Damage |
|---|
| How to Beat |
|
• These Pokemon prefer to keep their distance from opponents when fighting. They also have high damage potential that can be dangerous for Azumarill. However, they are fragile and can get knocked out by Azumarill fast. • Use Belly Bash to get close to them and quickly chip away their HP, then finish them off with Aqua Tail or Whirlpool. • Use Play Rough or Water Pulse to stay on top of them. |
Utilize Their Numbers
| Supporters |
|---|
| How to Beat |
|
• These Pokemon usually stick with their allies and rarely venture alone, making Huge Power almost impossible to trigger. Although they themselves pose no threat to Azumarill, their support capabilities makes them valuable during fights. • Take advantage of them being in close proximity to each other by using Water Pulse to force them to scatter, then take them out first using Aqua Tail or Whirlpool, and Belly Bash. |
Best Teammates for Azumarill
| Pokemon | Explanation |
|---|---|
 Pikachu Pikachu
 Venusaur Venusaur
|
Aggressive Stallers |
| These Pokemon have powerful burst attacks and are capable of stunning enemies from a safe distance, allowing Azumarill to concentrate on dealing damage. | |
 Mr. Mime Mr. Mime
 Sableye Sableye
|
Stuns and Debuffs |
| These Pokemon have means of inflicting debuffs and shutting down targets with their moves. This allows Azumarill to catch up and take enemies down easier when pushing lanes. | |
 Snorlax Snorlax
 Trevenant Trevenant
|
Tanky Disablers |
| These Pokemon can lead the charge, soak up damage, and help Azumarill setup its attacks with their disabling moves during a lane push or securing objectives. | |
 Absol Absol
 Zoroark Zoroark
|
High Burst Damagers |
| These Pokemon help contribute damage through pinning down enemies with combos and burst attacks. While it's still recommended to go with either a Defender or Supporter ally, Speedsters are a huge help when trying to dominate lanes as early as possible. | |
 Machamp Machamp
 Tsareena Tsareena
|
Hard-hitting Initiators |
| These Pokemon are very dependable allies as they have means to buff or sustain themselves. Whether it's securing objectives or pushing lanes, Machamp and Tsareena are built to initiate clashes, stun enemies, and create openings for their teammates. |
Looking for teammates to synergize with you? Head over to our Friend Request Board to find other trainers to join you in your grind or just to hang out with!
Azumarill Moves
Move Slot 1 (R)
 Tackle Tackle
(Lv. 1 or 3) |
Move Type: Dash Damage Type: Physical Cooldown: 6s Starting Damage: 207 Final Damage: 300 |
|---|---|
| Has the user charge forward, dealing damage to any opposing Pokémon it hits and leaving them unable to act for a short time. | |
 Play Rough Play Rough
(Lv. 6) Upgrade Lv. 12 |
Move Type: Buff Damage Type: Physical Cooldown: 5s Starting Damage: 483 Damage per attack: 161, Number of attacks: 3 Final Damage: 885 Damage per attack: 295 , Number of attacks: 3 |
|
Increases the user's movement speed for a short time and changes the user's next basic attack. When the user performs its next basic attack, it lunges at one opposing Pokémon in range and delivers repeated blows, dealing damage to that Pokémon and leaving it unable to act for a short time.
Upgrade: Further increases the user's movement speed when this move is used, and also reduces this move's cooldown. |
|
 Water Pulse Water Pulse
(Lv. 6) Upgrade Lv. 12 |
Move Type: Ranged Damage Type: Physical Cooldown: 5s Starting Damage: 336 Damage per bounce: 336, Number of bounces: 3 Final Damage: 619 Damage per bounce: 619, Number of bounces: 5 |
|
Has the user shoot a pulsing blast of water in front of itself. When the blast of water hits an opposing Pokémon, it decreases that Pokémon's movement speed and deals damage to all opposing Pokémon in an area of effect around the Pokémon it hit. The blast of water then automatically bounces to another target if one is available. Including the first target, the blast of water can bounce between up to three targets consecutively, and each hit behaves in the same way as the first. While the blast of water is traveling, the user can perform a short rolling dash in a designated direction.
Upgrade: Increases the maximum number of targets that the blast of water can bounce between by two. |
|
Move Slot 2 (ZR)
 Bubble Bubble
(Lv. 1 or 3) |
Move Type: Area Damage Type: Physical Cooldown: 5s Starting Damage: 172 Damage per bubble: 172, Number of bubbles: 5 Final Damage: 198 Damage per bubble: 198, Number of bubbles: 5 |
|---|---|
| Has the user spray bubbles in a cone, dealing damage to opposing Pokémon in the area of effect and decreasing their movement speed for a short time. The user can move around while using this move. | |
 Whirlpool Whirlpool
(Lv. 4) Upgrade Lv. 10 |
Move Type: Area Damage Type: Physical Cooldown: 9s Starting Damage: 1408 Damage per hit: 128 Final Damage: 2928 Damage per hit: 244 |
|
For a short time, four small whirlpools appear that swirl around the user as it moves. If a whirlpool hits an opposing Pokémon, the whirlpool deals damage to it and restores the user's HP. If a whirlpool hits a Pokémon on the opposing team, an increased amount of HP is restored to the user.
Upgrade: Reduces this move's cooldown and increases the amount of HP it restores to the user. |
|
 Aqua Tail Aqua Tail
(Lv. 4) Upgrade Lv. 10 |
Move Type: Buff Damage Type: Physical Cooldown: 7s Starting Damage: 1300 First attack damage: 181 (Short range) / 325 (Long range), Second attack damage: 181 (Short range) / 325 (Long range), Final attack damage: 362 (Short range) / 650 (Long range) Final Damage: 2784 First attack damage: 391 (Short range) / 696 (Long range), Second attack damage: 391 (Short range) / 696 (Long range), Final attack damage: 792 (Short range) / 1392 (Long range) |
|
Increases the speed and area of effect of the user's next three basic attacks. If these basic attacks hit from a distance, they also deal increased damage, restore the user's HP, and can ignore the Defense stat and shield effects of opposing Pokémon they hit.
Upgrade: After the user activates this move, its next three basic attacks will also reduce the cooldown of all of its moves when they hit an opposing Pokémon from a distance. |
|
Unite Moves (ZL)
 Belly Bash Belly Bash
(Lv. 8) |
Move Type: Sure Hit Damage Type: Physical Cooldown: 88s Starting Damage: 721 Final Damage: 1024 |
|---|---|
| Has the user pound its belly three times, granting it a shield. With each pound, the user loses HP in exchange for increased Attack. The user can move while pounding its belly. Afterward, the user targets an opposing Pokémon then charges at that Pokémon, dealing damage to and throwing all opposing Pokémon it hits while charging. | |
Standard Attack
|
|
Becomes a boosted attack with every third attack, dealing increased damage to opposing Pokémon within a cone area of effect in front of the user. |
|---|
Ability (Passive)
 Huge Power Huge Power
|
All Evolution Stages
When this Pokemon hits only a single opposing Pokemon with a basic attack, a move, or its Unite Move, the hit is always a critical hit. However, when this Pokemon hits two or more opposing Pokémon at once with a basic attack, a move, or its Unite Move, the hits are never critical hits. |
|---|
Azumarill Stats & Evolutions
Azumarill Evolutions
| 1st Evolution | Final Evolution |
|---|---|
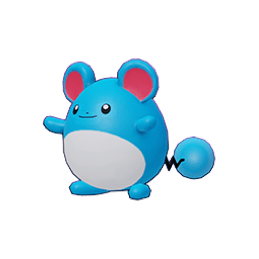 Marill Marill(Lv. 1) |
 Azumarill Azumarill(Lv. 4) |
Azumarill Stats
| Level | HP | Defense | Special Defense | Attack Damage |
|---|---|---|---|---|
| 1 | 3250 | 80 | 80 | 125 |
| 2 | 3352 | 87 | 87 | 132 |
| 3 | 3469 | 95 | 95 | 141 |
| 4 | 3604 | 104 | 136 | 151 |
| 5 | 4219 | 147 | 147 | 196 |
| 6 | 4398 | 159 | 159 | 209 |
| 7 | 4603 | 173 | 173 | 224 |
| 8 | 4839 | 189 | 189 | 241 |
| 9 | 5111 | 208 | 208 | 261 |
| 10 | 5424 | 230 | 230 | 284 |
| 11 | 5784 | 255 | 255 | 310 |
| 12 | 6198 | 284 | 284 | 340 |
| 13 | 6674 | 317 | 317 | 375 |
| 14 | 7221 | 355 | 355 | 415 |
| 15 | 7850 | 399 | 399 | 461 |
Attack Damage is the damage of the Basic Attack as tested against the Training Dummy.
Azumarill In-Game Stat Listings
| Offense | Endurance | Mobility | Scoring | Support |
|---|---|---|---|---|

|

|

|

|

|
Azumarill Skins (Holowear)
| Holowear | |
|---|---|
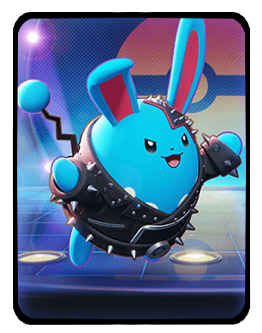 Punk Style Punk Style
Zirco Trading:
|
 Wanderer Style Wanderer Style
Event:
Season 10 Battle Pass |
 Holiday Style Holiday Style
Zirco Trading:
|
 Pastel Style Pastel Style
Event:
UNITE Club Membership |
 Space Style Space Style
Zirco Trading:
|
 Tea Party Style Tea Party Style
Event:
Season 32 Battle Pass |
Azumarill Character Spotlight
Azumarill Achievements
Aqua Tail Achievement
| Aqua Tail | |
|---|---|
| Pokemon | Move |
 Azumarill Azumarill
|
|
| Mission: In a single battle, after using Aqua Tail or Aqua Tail+, hit Pokemon from the opposing team from a distance with boosted basic attacks 15 or more times (5/10/20 battles) |
|
| Medals & Points | Rewards |
|
|
|
|
|
|
|
|
|
List of All-Rounder Pokemon Achievements
Pokemon UNITE Related Guides

All Pokemon Guides and Builds
Upcoming Pokemon
 Articuno Articuno(TBA) |
 Meganium Meganium(TBA) |
 Typhlosion Typhlosion(TBA) |
 Feraligatr Feraligatr(TBA) |
Mega Evolutions
| Mega Evolved Pokemon | ||
|---|---|---|
 Mega Charizard X Mega Charizard X |
 Mega Charizard Y Mega Charizard Y |
 Mega Gyarados Mega Gyarados |
 Mega Lucario Mega Lucario |
 Mega Mewtwo X Mega Mewtwo X |
 Mega Mewtwo Y Mega Mewtwo Y |
Pokemon by Role
| All Pokemon Roles | |||||
|---|---|---|---|---|---|
 Attackers Attackers |
 All-Rounders All-Rounders |
 Defenders Defenders |
|||
 Speedsters Speedsters |
 Supporters Supporters |
||||
Pokemon by Characteristics
| Attack Type | |
|---|---|
 Melee Pokemon Melee Pokemon |
 Ranged Pokemon Ranged Pokemon |
 Physical Pokemon Physical Pokemon |
 Special Pokemon Special Pokemon |
| Stat Rankings | |
 HP Ranking HP Ranking |
 Defense Ranking Defense Ranking |
 Sp. Def. Ranking Sp. Def. Ranking |
 Basic Attack Ranking Basic Attack Ranking |
Comment
Belly Bash • Shield reduced from 5% of max HP to 6.5%. Reduced is bad word here, right?
Author
Azumarill Guide: Builds and Best Items
Rankings
Gaming News
Popular Games

Genshin Impact Walkthrough & Guides Wiki

Umamusume: Pretty Derby Walkthrough & Guides Wiki

Pokemon Pokopia Walkthrough & Guides Wiki

Honkai: Star Rail Walkthrough & Guides Wiki

Monster Hunter Stories 3: Twisted Reflection Walkthrough & Guides Wiki

Arknights: Endfield Walkthrough & Guides Wiki

Wuthering Waves Walkthrough & Guides Wiki

Zenless Zone Zero Walkthrough & Guides Wiki

Pokemon TCG Pocket (PTCGP) Strategies & Guides Wiki

Monster Hunter Wilds Walkthrough & Guides Wiki
Recommended Games

Diablo 4: Vessel of Hatred Walkthrough & Guides Wiki

Cyberpunk 2077: Ultimate Edition Walkthrough & Guides Wiki

Fire Emblem Heroes (FEH) Walkthrough & Guides Wiki

Yu-Gi-Oh! Master Duel Walkthrough & Guides Wiki

Super Smash Bros. Ultimate Walkthrough & Guides Wiki

Pokemon Brilliant Diamond and Shining Pearl (BDSP) Walkthrough & Guides Wiki

Elden Ring Shadow of the Erdtree Walkthrough & Guides Wiki

Monster Hunter World Walkthrough & Guides Wiki

The Legend of Zelda: Tears of the Kingdom Walkthrough & Guides Wiki

Persona 3 Reload Walkthrough & Guides Wiki
All rights reserved
©2021 Pokémon. ©1995–2021 Nintendo / Creatures Inc. / GAME FREAK inc.
©2021 Tencent.
The copyrights of videos of games used in our content and other intellectual property rights belong to the provider of the game.
The contents we provide on this site were created personally by members of the Game8 editorial department.
We refuse the right to reuse or repost content taken without our permission such as data or images to other sites.

 Aegislash
 Alcremie
 Alolan Ninetales
 Alolan Raichu
 Armarouge
 Blastoise
 Blaziken
 Blissey
 Ceruledge
 Chandelure
 Charizard
 Cinderace
 Clefable
 Comfey
 Cramorant
 Crustle
 Darkrai
 Decidueye
 Delphox
 Dhelmise
 Dodrio
 Dragapult
 Dragonite
 Duraludon
 Eldegoss
 Empoleon
 Espeon
 Falinks
 Galarian Rapidash
 Garchomp
 Gardevoir
 Gengar
 Glaceon
 Goodra
 Greedent
 Greninja
 Gyarados
 Ho-oh
Ho-oh Hoopa
Hoopa Inteleon
 Lapras
 Latias
 Latios
 Lucario
 Mamoswine
 Meowscarada
 Meowth
 Metagross
 Mew
Mew Mimikyu
 Miraidon
 Moltres
 Pawmot
 Psyduck
 Scizor
 Sirfetch'd
 Slowbro
 Suicune
 Sylveon
 Talonflame
 Tinkaton
 Tyranitar
 Umbreon
 Urshifu
 Vaporeon
 Wigglytuff
 Zacian
 Zapdos
 Zeraora


![The Liar Princess and the Blind Prince Review [PC] | Lovely to Look at but Tedious to Play](https://img.game8.co/4442586/8d95f5faf05780f1765ce7e0938bd825.jpeg/show)
![The Seven Deadly Sins: Origin [First Impressions] | A Promising Start](https://img.game8.co/4440581/584e0bfb87908f12c4eab6e846eb1afd.png/thumb)
![The Liar Princess and the Blind Prince Review [PC] | Lovely to Look at but Tedious to Play](https://img.game8.co/4442586/8d95f5faf05780f1765ce7e0938bd825.jpeg/thumb)
![Marathon Cryo Archive Map Teased as [REDACTED] on Selection Screen](https://img.game8.co/4442236/6357203e58172f6de57f1991e7c39b22.png/thumb)


*annihilate