Ho-oh Guide: Best Builds and Moveset
☆ Upcoming: Articuno | Meganium | Typhlosion | Feraligatr
★ Latest News: Zapdos | Moltres | Version 1.22.1.5
☆ Popular Pages: Upcoming Pokemon | Tier List
★ Current Seasons: Ranked S34 | Battle Pass S39
☆ Join Game8's Pokemon Discord Server!
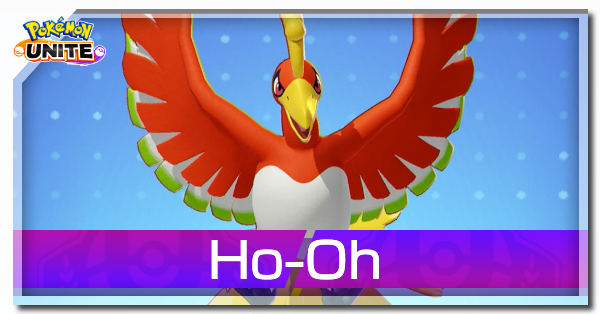
The best guide on how to play Ho-oh in Pokemon UNITE for Nintendo Switch and Mobile. Check here for the best builds, Held and Battle items, movesets, as well as the latest nerfs, buffs, counters, matchups, and more!
| Ho-Oh Pages | |
|---|---|
 Release Date Release Date |
 Builds & Guide Builds & Guide |
List of Contents
Ho-oh Latest Nerfs & Buffs (12/25)
| Ho-oh Changes | |
|---|---|
|
Sacred Fire |
• Attack buff increased from 15% to 25%. |
|
Fire Spin |
• Shield effect increased by 10%. • Percentage of damage taken by allies inside the vortex increased from 50% to 60%. |
|
Sky Attack + |
• Recovery amount increased by 10%. |
Stat Updates
| 1.17.2.10 | Defense increased from 90-480 to 90-540 (Lvl. 1-15). Sp. Def. increased from 70-385 to 70-420 (Lvl. 1-15). |
|---|
Regenerator
| 1.16.1.2 | HP recovery every 2 seconds decreased from 0.4% of max HP to 0.3%. Out of combat HP recovery every 2 seconds decreased from 4% of max HP to 3%. |
|---|
Safeguard
| 1.20.1.2 | Cooldown increased from 5s to 6s. |
|---|
Tailwind
| 1.16.1.2 | Damage reduced by 20%. |
|---|---|
| 1.20.1.2 | Damage decreased by 15%. |
Fire Spin
| 1.16.1.2 | Cooldown increased from 8s to 8.5s. |
|---|---|
| 1.16.2.8 | Damage decreased by 15%. Shield decreased by 15%. Cooldown increased from 8.5s to 9s. |
| 1.17.2.10 | Shield increased by 20%. |
| 1.19.2.6 | Damage decreased by 10%. Added effect: The emitted heat wave now makes opponents unable to act. |
| 1.19.2.8 | Damage reduced by 10%. |
| 1.21.1.7 | Shield effect increased by 10%. Percentage of damage taken by allies inside the vortex increased from 50% to 60%. |
Flamethrower
| 1.17.2.10 | HP recovery increased by 20%. |
|---|---|
| 1.20.1.2 | Damage decreased by approx. 17%. |
Sky Attack
| 1.16.1.2 | Cooldown increased from 7s to 8.5s. |
|---|---|
| 1.16.2.8 | Cooldown increased from 8.5s to 9s. |
| 1.21.1.7 | Sky Attack +: Recovery amount increased by 10%. |
Sacred Fire
| 1.16.1.2 | Cooldown increased from 7s to 8s. |
|---|---|
| 1.19.2.6 | Fly changed to Sacred Fire. Cooldown increased from 8s to 12s. |
| 1.19.2.8 | Damage reduced by 30%. Attack increase on self reduced from 30% to 15%. Attack decrease on opponents reduced from 15% to 10%. Sacred Fire+: Attack decrease on opponents reduced from 30% to 20%. |
| 1.19.2.11 | Range reduced from 8.5m to 7m. Area of effect reduced from 3m to 2.5m. Flight duration reduced from 8s to 6s. |
| 1.21.1.7 | Attack buff increased from 15% to 25%. |
Rekindling Flame
| 1.15.1.3 | Radius where feathers fall when allies are KO'd increased from 25m to 35m from Ho-Oh. HP when allies are revive increased from 50% of max HP to 60% of max HP. Adjusted required Aeos Energy for reviving allies. Required Unite Move gauge increased by 11%. |
|---|---|
| 1.16.1.2 | Allied Pokémon will now leave a feather mark after learning the move. |
| 1.16.2.8 | Energy needed increased by 20%. |
| 1.21.1.2 | Required energy decreased from 120,000 to 100,000 (~17% decreased). |
Ho-oh Basic Info
| Ho-oh | ||
|---|---|---|
 |
Role: Defender Attack Type: Ranged Damage Type: Physical Difficulty: Novice |
|
| "Soar the skies, set the battlefield ablaze, and save fallen allies with this legendary phoenix!" | ||
Ho-oh Best Lanes

|

|

|
Tips & Strategies for Every Lane
Ho-Oh Price and Cost
 UNITE License: Ho-Oh UNITE License: Ho-Oh |
|---|
As of August 11, 2024, Ho-Oh is now purchasable for 15,000 Aeos Coins or 840 Aeos Gems! This comes about three weeks after Ho-Oh was first released and was only obtainable through the Divine Forest Challenge event.
Strengths and Weaknesses
| Strengths | Weaknesses |
|---|---|
|
✔︎ High durability and survivability ✔︎ Versatile ✔︎ Can revive fallen allies ✔︎ Strong DPS and burst damage |
✖︎ Unite move consumes Aeos energy |
Best Builds for Ho-oh
| Ho-Oh Builds | |
|---|---|
Sacred-Flamethrower Build
Sacred-Flamethrower Build

|
Moveset | Held Items | |||
|---|---|---|---|---|---|
| Battle Item | |||||
| Stats from Items (Lv. 40) | Recommended Lane | ||||
|
Attack: +49 Defense: +35 Sp. Def: +35 |
|
||||
| Emblem Color Combination | Target Emblem Stats | ||||
|
|
Positive Stats: • HP • Attack Free Negative Stats: • Sp. Atk • Movement Speed • Critical-Hit Rate |
||||
| Note: The emblem color and stats here are suggestions only. The builds are still viable even without the suggested emblems. |
|||||
Sacred-Flamethrower Build Explanation
This build revolves around using Sacred Fire to give Ho-Oh unobstructed pathing and increased damage, and burning down targets with Flamethrower. The key to this build is moving around during Sacred Fire while burning targets with Flamethrower.
- Attack Weight provides Ho-Oh with a large Attack boost, increasing its overall damage output, particularly for Flamethrower.
- Curse Bangle gives Ho-Oh more damage for both its moves and attacks. The item's effect also work well with Ho-Oh's DPS moves.
- Focus Band improves Ho-Oh's durability and survivability via increased defenses and healing.
- Aeos Cookie can be a replacement for Focus Band, trading damage for more HP.
- Resonant Guard can also be a replacement for Focus Band for better support and teamfight.
- Potion gives Ho-Oh a low-cooldown healing tool to prolong its life during fights.
- The build's Boost Emblem loadout should consist of 6 Brown Emblems for more damage and 6 White Emblems additional HP. This can be achieved by having at least two (2) Emblems that are both Brown and White.
- Equip Emblems that improve Attack or HP to further boost Ho-Oh's damage output or durability.
- Sp. Atk., Critical-Hit Rate, and Movement Speed can be freely traded for the other stats.
Sky-Spin Build
| Sky-Spin Build | Moveset | Held Items | |||
|---|---|---|---|---|---|
| Battle Item | |||||
| Stats from Items (Lv. 40) | Recommended Lane | ||||
|
Attack: +38.5 Defense: +35 Sp. Def: +35 HP: +235 |
|
||||
| Emblem Color Combination | Target Emblem Stats | ||||
|
|
Positive Stats: • HP • Attack Free Negative Stats: • Sp. Atk • Movement Speed • Critical-Hit Rate |
||||
| Note: The emblem color and stats here are suggestions only. The builds are still viable even without the suggested emblems. |
|||||
Sky-Spin Build Explanation
This build is centered on dealing area damage using Sky Attack and Fire Spin. The key to this build is using Sky Attack first to set up for Fire Spin.
- Attack Weight provides Ho-Oh with a large Attack boost, increasing its overall damage output.
- Weakness Policy works well with Fire Spin, increasing Ho-Oh's damage as it takes damage during the move.
- Focus Band improves Ho-Oh's durability and survivability via increased defenses and healing.
- Aeos Cookie can be a replacement for Focus Band for more HP.
- Eject Button gives Ho-Oh another repositioning tool on top of Sky Attack to help set up Fire Spin.
- Potion can also work with the build to allow Ho-Oh to stay longer in fights.
- The build's Boost Emblem loadout should consist of 6 Brown Emblems for more damage and 6 White Emblems additional HP. This can be achieved by having at least two (2) Emblems that are both Brown and White.
- Equip Emblems that improve Attack or HP to further boost Ho-Oh's damage output or durability.
- Sp. Atk., Critical-Hit Rate, and Movement Speed can be freely traded for the other stats.
Sky-Spin Build Damage Test
| Items (Level 30) |
Flamethrower (Damage) (@ Lvl 15) Flamethrower (Burn) (@ Lvl 15) |
Fly (Landing) (@ Lvl 15) |
|---|---|---|
| Attack Weight (6 stacks) + Weakness Policy (4 stacks) + Focus Band |
1580 138 |
399 1999 |
Since the build is centered on Sky Attack and Fire Spin, equipping items that will maximize their damage is the ideal item combination. Focus Band is a staple item for the build, leaving only two items slots for consideration.
As the results show, Attack Weight, Weakness Policy, and Focus Band will generate the best results for the build.
As for alternatives, replacing Focus Band with Aeos Cookie would be the ideal choice. Since there's already Attack Weight in the build, having Aeos Cookie also equipped allows Ho-Oh to simultaneously increase its HP and Attack stats whenever it scores. Moreover, since Ho-Oh is a Defender, having more HP suits the Pokemon's role perfectly.
These damage tests are conducted using the Training Dummy in Practice Mode.
| Note: The numbers in bold are the highest result for a specific test. |
| Items (Level 30) | Sky Attack (Damage) (@ Lvl 15) Sky Attack (Burn) (@ Lvl 15) | Fire Spin (Damage) (@ Lvl 15) Fire Spin (Explosion) (@ Lvl 15) |
|---|---|---|
| Muscle Band + Curse Bangle + Focus Band | 1394 113 | 325 1627 |
| Muscle Band + Weakness Policy (4 stacks) + Focus Band | 1454 121 | 349 1747 |
| Muscle Band + Attack Weight (6 stacks) + Focus Band | 1493 127 | 365 1825 |
| Curse Bangle + Weakness Policy (4 stacks) + Focus Band | 1469 123 | 355 1777 |
| Curse Bangle + Attack Weight (6 stacks) + Focus Band | 1507 128 | 370 1852 |
| Attack Weight (6 stacks) + Weakness Policy (4 stacks) + Focus Band | 1580 138 | 399 1999 |
The tests above does not use any Emblems yet so it will scale higher if equipped.
Tank-Support Build
| Tank-Support Build | Moveset | Held Items | |||
|---|---|---|---|---|---|
| Battle Item | |||||
| Stats from Items (Lv. 40) | Recommended Lane | ||||
|
Defense: +35 Sp. Def: +35 Movement Speed: +175 HP: +805 HP Recovery: +21 |
|
||||
| Emblem Color Combination | Target Emblem Stats | ||||
|
|
Positive Stats: • HP • Attack Free Negative Stats: • Sp. Atk • Movement Speed • Critical-Hit Rate |
||||
| Note: The emblem color and stats here are suggestions only. The builds are still viable even without the suggested emblems. |
|||||
Tank-Support Build Explanation
This build utilizes Ho-Oh's innate high durability and support potential via items. By default, Sky Attack and Fire Spin will be its moveset since the Pokemon will focus on tanking hits in the frontlines. However, any move combination will do for the build.
- Exp. Share is a staple support item, allowing Ho-Oh and its lane partner to level up faster. It also gives a decent amount of HP and movement speed.
- Resonant Guard grants Ho-Oh the ability to generate shields for itself and its allies whenever it deals damage, which suits the Pokemon's Defender role.
- Focus Band improves Ho-Oh's durability and survivability via increased defenses and healing.
- Potion gives Ho-Oh a low-cooldown healing tool to stay longer in fights.
- The build's Boost Emblem loadout should consist of 6 Brown Emblems for more damage and 6 White Emblems additional HP. This can be achieved by having at least two (2) Emblems that are both Brown and White.
- Equip Emblems that improve Attack or HP to further boost Ho-Oh's damage output or durability.
- Sp. Atk., Critical-Hit Rate, and Movement Speed can be freely traded for the other stats.
Ho-oh Best Items & Moveset
Best Held Items
| Item | Explanation |
|---|---|
 Exp. Share Exp. Share
|
Exp. Share is a great item for Ho-Oh if it takes more of a support role. It gives a decent amount of HP and movement speed, and makes leveling up in the early game faster. |
 Attack Weight Attack Weight
|
Attack Weight provides Ho-Oh with a large Attack stat boost, increasing its overall damage output. |
 Aeos Cookie Aeos Cookie
|
Aeos Cookie gives Ho-Oh a large amount of HP, allowing it to tank more damage. |
 Focus Band Focus Band
|
Focus Band improves Ho-Oh's durability and survivability via increased defenses and a passive healing mechanic. |
 Muscle Band Muscle Band
|
Muscle Band works well with Ho-Oh's attacks, especially during Fly. |
 Weakness Policy Weakness Policy
|
Weakness Policy has great synergy with Ho-Oh's moves and high durability, increasing its Attack stat as it takes damage. It also gives a nice amount of HP. |
 Curse Bangle Curse Bangle
|
Curse Bangle gives Ho-Oh a decent amount of Attack stat, and its effect works well with the Pokemon's DPS moves. |
 Resonant Guard Resonant Guard
|
Resonant Guard suits Ho-Oh's gameplay, allowing the Pokemon to generate shields for itself and its allies whenever it deals damage. |
Best Battle Items
| Item | Explanation |
|---|---|
 Eject Button Eject Button
|
Eject Button gives Ho-Oh a repositioning tool, especially to set up Fire Spin. |
 Potion Potion
|
Potion gives Ho-Oh a consistent source of healing during fights, allowing it to stay alive longer. |
Best Moveset
| Move | Explanation |
|---|---|
 Sacred Fire Sacred Fire
|
Sacred Fire gives Ho-Oh a decent ranged damage tool, and it's flying mechanic gives unobstructed pathing, increased movement speed and Attack. |
 Flamethrower Flamethrower
|
Flamethrower gives Ho-Oh a strong DPS move that's great for knocking out opponents and farming wild Pokemon. |
This moveset equips Ho-Oh with a well-balanced and versatile kit. Sacred Fire effects and mechanics gives Ho-Oh various options during fights. It can used offensively and defensively depending on the situation. Flamethrower gives Ho-Oh a strong DPS move that can be used in tandem with Sacred Fire.
Which Moveset Do You Think is Best for Ho-Oh?
Let us know why in the comments!
How to Play Ho-oh
- Utilize Ho-Oh's Initial Moveset in the Early Game
- Take Advantage of Regenerator
- Utilize Boosted Attacks
- Poke Opponents with Sacred Fire
- Use Flamethrower While Flying
- Disrupt Fights or Zone Out Opponents with Sky Attack
- Get a Good Position First Before Using Fire Spin
- Revive Key Allies Using Rekindling Flame
Utilize Ho-Oh's Initial Moveset in the Early Game
Ho-Oh has a strong initial moveset. Utilize it to dominate a lane in the early game.
Safeguard gives Ho-Oh a shield that reduces the damage of the next incoming attack. When the shield mitigates damage, it also increases Ho-Oh's movement speed for a short time. Use the move to minimize the damage Ho-Oh takes or to escape.
Tailwind deals a ton of damage in a line, and leaves a whirlwind behind that increases the movement speed of any ally that moves in the same direction as the whirlwind and slows opponents that moves against it. Use this to harass opponents in the lane, secure wild Pokemon, or make an escape.
| Related Pages | |
|---|---|
 Safeguard Safeguard |
 Tailwind Tailwind |
Take Advantage of Regenerator
Ho-Oh's ability, Regenerator, allows it to gradually recover HP when it doesn't take damage from opponents for a set amount of time. Instead of teleporting back to base, just stay away from opponents until the healing effect triggers, especially in the early game.
Regenerator: Ho-Oh Passive Effect and Cooldown
Utilize Boosted Attacks
Ho-Oh's Boosted Attacks has the Pokemon breathe fire in an arc in front of it, dealing increased damage to enemies within that arc and healing Ho-Oh. When multiple enemies are hit by the Boosted Attack, the healing increases. Use the effects of Ho-Oh's Boosted Attacks to punish opponents while also keeping Ho-Oh alive during fights.
Poke Opponents with Sacred Fire
Sacred Fire has decent range and damage, making it a great tool for dealing damage from range without the need to fully engage in a fight.
Sacred Fire: Ho-Oh Move Effect and Cooldown
Be Strategic While Flying
Sacref Fire's flying effect and mechanic allows it to be used for various purposes during fights. It can be used as a mobility tool, such as escaping, traversing the map faster, or repositioning. It can also be used offensively thanks to the increased Attack effect. Read the situation and decide the best way to use the flying mechanic.
Use Flamethrower While Flying
When using Flamethrower and Sacred Fire, it's best to Flamethower while flying since Sacred Fire gives Ho-Oh increased movement speed and Attack, and unobstructed pathing. Moreover, Ho-Oh can move around while using Flamethrower, which when combined with Sacred Fire's unobstructed pathing allows the Pokemon to freely circle around targets.
Flamethrower: Ho-Oh Move Effect and Cooldown
Disrupt Fights or Zone Out Opponents with Sky Attack
Sky Attack has Ho-Oh charge forward, then return to its initial position, dealing damage to enemies in its path and leaving a trail of flames on the ground that slows and burns them. Use Sky Attack to dive into fights and disrupt it, forcing opponents to scatter and break their formation.
The move can also be used to zone out opponents from areas, especially near objectives.
Sky Attack: Ho-Oh Move Effect and Cooldown
Get a Good Position First Before Using Fire Spin
Fire Spin deals damage around Ho-Oh. However, the Pokemon's movement speed is severely reduced, making it hard to stay close to targets. It's best to get a good position first, preferably at melee range of targets, before using Fire Spin.
Using Fly, Sky Attack, or Eject Button to get into position is a great way to set up Fire Spin.
Fire Spin: Ho-Oh Move Effect and Cooldown
Protect Allies
A portion of the damage that allies take while they're inside Fire Spin's area will be redirected towards Ho-Oh instead. Utilize this mechanic to mitigate the damage that allies take.
Revive Key Allies Using Rekindling Flame
Rekindling Flame is a unique and extremely powerful support move. It can potentially revive Ho-Oh's entire team, giving them essentially two lives during fights. However, it's best to prioritize reviving the team's strongest Pokemon when they get knocked out since they will be key to winning teamfights. You don't have to wait for all allied Pokemon to get knocked out before using Rekindling Flame. Once a key ally falls, don't hesitate to use the move.
Moreover, remember that only allies that are within the move's area of effect will be revived, so keep this in mind when planning to revive allies.
Rekindling Flame: Ho-Oh Move Effect and Cooldown
Be Aware of Ho-Oh's Aeos Energy
| Pokemon Revived | Aeos Energy |
|---|---|
| 1 | 0-8 |
| 2 | 9-16 |
| 3 | 17-24 |
| 4 | 25-50 |
It's important to note that all of Ho-Oh's aeos energy will be consumed when Rekindling Flame is used. The number of allies that can be revived depends on how much aeos energy Ho-Oh currently has. Ideally, it's best for Ho-Oh to have max aeos energy just to ensure that all allies have a chance to be revived when they get knocked out.
Ho-oh Progression and Leveling Guide
Top and Bottom Guide
Level 1 to 5
- Quickly clear out the Bunnelbies in the lane.
- Keep farming wild Pokemon in the lane to reach level 5 and learn your first move.
- At bottom lane, prioritize taking Indeedees for more exp.
Level 6 to 9
- Keep hunting Wild Pokemon to gain more EXP from farming Altaria and Swablus.
- Once you reach level 7, learn your second move.
- Help allies secure Regice, Registeel, or Regirock when it spawns, otherwise secure Regieleki.
- Upon reaching level 9, learn your Unite Move.
Level 10+
- Stick with allies to hunt targets, secure objectives, and push lanes.
- Reach at least level 13 or max level if possible before or when Groudon spawns for a fully-upgraded moveset.
- Make sure that your Unite Move is available when Groudon spawns.
- Help teammates win a teamfight and secure Groudon.
Ho-oh Combos
Sky Scorcher Combo
| Sky Scorcher Combo | |
|---|---|
| This is a simple combo. Just use Sacred Fire first, then burn targets down using Flamethrower. You can also utilize the three boosted attacks while flying before landing for more damage. | |
Phoenix Dive
| Phoenix Dive Combo | |
|---|---|
| Start the combo by using Sky Attack. Upon reaching the target's position, use Fire Spin immediately to cancel Sky Attack. | |
Matchups & Counters for Ho-oh
Ho-Oh Matchups
| Matchup Notes | ||
|---|---|---|
| 1. The chart is based on our own experience playing Ho-oh. 2. Pokemon within each tier are unordered 3. Any Pokemon not shown here are still under investigation. |
||
Hard Couner with Disables
The only way to directly counter Ho-Oh is to constantly disable it during fights, preventing it from using its moves and attacks properly.
Best Counters
| Pokemon | Explanation |
|---|---|
 Trevenant Trevenant
|
Rating: ★★★★★ • Can constantly disable Ho-Oh using Wood Hammer and/or Horn Leech. • Can reflect Ho-Oh's damage back to it with Pain Split and has enough durability to withstand the Pokemon's damage. • Can make Ho-Oh more vulnerable to attacks using Phantom Forest. |
 Mr. Mime Mr. Mime
|
Rating: ★★★★ • Can constantly disable Ho-Oh using any of its moves. • Can prevent Ho-Oh's Regenerator from triggering by tethering to it with Power Swap. |
 Alolan Ninetales Alolan Ninetales
|
Rating: ★★★ • Can freeze Ho-Oh and deal considerable damage using Blizzard and Avalanche. |
Even Matchups
Taking advantage of Ho-Oh's high durability and move mechanics will help it get the upper hand against these Pokemon.
Close the Gap
| Ranged, Fragile Pokemon with High Damage |
|---|
| How to Beat |
|
• These Pokemon prefer to keep their distance from opponents when fighting. They also have high damage potential that can be dangerous for Ho-Oh. However, they are fragile and can get knocked out by Ho-Oh fast. • Quickly close the gap with Fly or Sky Attack, then follow up with Flamethrower or Fire Spin and attacks to bring them down. |
Take Advantage of Move Mechanics and High Durability
| All-Rounders |
|---|
| How to Beat |
|
• These Pokemon excel in close combat and rely mostly on their attacks or combos to deal damage. They are also durable enough to tank Ho-Oh's damage. Winning against them is a matter of taking advantage of Ho-Oh's move effects and mechanics, and its high durability. • Use Fly to circle around them while burning them with Flamethrower. • Use Fire Spin when they get close to punish them. • Use Sky Attack to burn an area and force them to reposition. |
Tank Their Burst Damage and Retaliate
| High-mobility Pokemon with Burst Damage |
|---|
| How to Beat |
|
• These Pokemon are incredibly agile and deal high burst damage. However, Ho-Oh's high durability allows it to simply tank their damage and retaliate. • Use Fire Spin or Flamethrower and/or Sky Attack when they dive in to punish them. • Use Fly to dodge their attacks and recover HP. |
Utilize Their Numbers
| Supporters |
|---|
| How to Beat |
|
• These Pokemon usually stick with their allies and rarely venture alone. Although they themselves pose no threat to Ho-Oh, their support capabilities makes them valuable during fights. • Use Sky Attack and/or Fire Spin to force them to scatter. • Use Fly's effects and mechanics to bombard them with attacks. |
Group Up with Allies
| Highly Durable Pokemon |
|---|
| How to Beat |
|
• Much like Ho-Oh, these Pokemon are extremely durable, making it hard for the Pokemon to take them out alone. With that, it's best to group up with allies to bring them down with the help of Ho-Oh. • Use Sky Attack and/or Fire Spin to slow them and burn them. • Use Fly to circle around them while burning them with Flamethrower. |
Easy Matchups
These Pokemon can easily fall to any of Ho-Oh's moves.
Close the Gap
| Ranged, Fragile Pokemon with High Damage |
|---|
| How to Beat |
|
• These Pokemon prefer to keep their distance from opponents when fighting. They also have high damage potential that can be dangerous for Ho-Oh. However, they are fragile and can get knocked out by Ho-Oh fast. • Quickly close the gap with Fly or Sky Attack, then follow up with Flamethrower or Fire Spin and attacks to bring them down. |
Take Them Out First
| Supporters |
|---|
| How to Beat |
|
• These Pokemon usually stick with their allies and rarely venture alone. Although they themselves pose no threat to Ho-Oh, their support capabilities makes them valuable during fights. • It's best to take them out first using any combination of moves and attacks. |
Best Teammates for Ho-oh
| Pokemon | Explanation |
|---|---|
 Venusaur Venusaur
 Slowbro Slowbro
 Ceruledge Ceruledge
|
Damage Dealers |
| Pokemon that can deal a lot of damage can benefit from Ho-Oh's presence during fights. Ho-Oh can tank damage for them while they dish out damage. Moreover, they are the ideal Pokemon to revive during fights using Rekindling Flame. | |
 Pikachu Pikachu
 Slowbro Slowbro
 Suicune Suicune
|
Strong Disablers |
| Pokemon with strong disabling moves make it easier for Ho-Oh to set up and hit its moves. | |
 Comfey Comfey
 Blissey Blissey
 Clefable Clefable
|
Healers |
| Healing moves like Soft-Boiled and Moonlight can prolong Ho-Oh's life during fights even more. |
Looking for teammates to synergize with you? Head over to our Friend Request Board to find other trainers to join you in your grind or just to hang out with!
Ho-Oh Moves
Move Slot 1 (R)
 Tailwind Tailwind
(Lv. 1 or 3) |
Move Type: Ranged Damage Type: Physical Cooldown: 6s Starting Damage: 498 Final Damage: 529 |
|---|---|
| Has the user whip up a whirlwind in the designated direction, dealing damage to the opposing Pokemon it hits. The whirlwind then remains on the field for a short time. Ally Pokemon moving in the same direction as the whirlwind have their movement speed increased, while opposing Pokemon moving against the whirlwind have their movement speed decreased. | |
 Flamethrower Flamethrower
(Lv. 5) Upgrade Lv. 13 |
Move Type: Ranged Damage Type: Physical Cooldown: 6s Starting Damage: 2692 Damage per instance: 127, Burn damage: 60 Final Damage: 5236 Damage per instance: 209, Burn damage: 96 |
|
Has the user blow flames in the designated direction, dealing damage to opposing Pokemon it hits. This move's cooldown increases the longer the user blows flames. If the user hits Pokemon from the opposing team with this move, the user recovers HP. If the user continues to hit opposing Pokemon with this move, the Pokemon are burned, decreasing their movement speed. When the burned Pokemon moves, it will leave behind scorched ground will also be burned, decreasing their movement speed.
Upgrade: Increases the length of time the user can continue to blow flames and reduces this move's cooldown. |
|
 Sky Attack Sky Attack
(Lv. 5) Upgrade Lv. 13 |
Move Type: Dash Damage Type: Physical Cooldown: 9s Starting Damage: 882 Collision damage: 882, Burn damage: 70 Final Damage: 1336 Collision damage: 1336, Burn damage: 106 |
|
Has the user spread its wings and charge, then return to its original position, dealing damage to opposing Pokemon it hits and burning the ground along its flight path for a short time. Burning ground deals damage to opposing Pokemon and applies a slowing effect. When this move is used again, or if another move is used mid-charge, the user stops in place.
Upgrade: Also gradually restores the user's HP while the user is on burning ground. |
|
Move Slot 2 (ZR)
 Safeguard Safeguard
(Lv. 1 or 3) |
Move Type: Buff Damage Type: Physical Cooldown: 6s Starting Damage: N/A Final Damage: N/A |
|---|---|
| Has the user create a protective field that reduces damage taken from the next attack. When this field reduces damage from an attack, the user's movement speed is increased for a short time. | |
 Sacred Fire Sacred Fire
(Lv. 7) Upgrade Lv. 11 |
Move Type: Dash Damage Type: Physical Cooldown: 12s Starting Damage: 731 Initial damage: 299, Burn damage: 72 x 6 Final Damage: 1053 Initial damage: 421, Burn damage: 107 x 6 |
|
Has the user shoot mystical fire of great intensity at the designated area, dealing damage to opposing Pokémon it hits, leaving them burned and unable to act.For a short time, the user flies high into the air, allowing it to move freely over walls and increasing its movement speed and Attack.After this move is used, the user’s next three basic attacks become boosted attacks.If this move is used again while the user is flying, the user lands on the ground.
Upgrade: Further decreases the Attack of opposing Pokemon left burned. |
|
 Fire Spin Fire Spin
(Lv. 7) Upgrade Lv. 11 |
Move Type: Buff Damage Type: Physical Cooldown: 9s Starting Damage: 1531 Damage per instance: 139, Explosion damage: 697 Final Damage: 2297 Damage per instance: 209, Explosion damage: 1043 |
|
Has the user generate a blazing vortex around itself, dealing damage and applying a slowing effect to opposing Pokemon it hits. The user redirects a portion of damage taken by ally Pokemon inside the vortex to itself. At the start of this move, the user receives a shield effect. This move ends if the user loses this shield. While the user is still shielded, if a set amount of time passes or if this move is used again, the user releases a heat wave around itself that deals damage to oppsing Pokemon. The more damage the user takes while the shield effect is active, the more damage this heat wave deals.
Upgrade: Automatically release a heat wave when the user's shield is lost. |
|
Unite Moves (ZL)
 Rekindling Flame Rekindling Flame
(Lv. 9) |
Move Type: Buff Damage Type: Physical Cooldown: Starting Damage: N/A Final Damage: N/A |
|---|---|
| When a nearby ally Pokemon is knocked out, a feather is left in its place for a short time. This move has the user spread its wings wide and consume all of the Aeos energy it has to revive knocked-out ally Pokemon, returning them to battle at their respective feathers. The more Aeos energy that's consumed, the move ally Pokemon are revived. | |
Standard Attack
|
|
Becomes a boosted attack with every third attack, shooting out a sweeping flame that deals increased damage and restores the user's HP. When the user hits multiple Pokemon with a boosted attack, the amount of HP restored is increased. |
|---|
Ability (Passive)
 Regenerator Regenerator
|
If the Pokemon doesn't take damage from Pokemon on the opposing team for a set amount of time, it will gradually recover HP. |
|---|
Ho-oh Stats & Evolutions
Ho-oh Evolutions
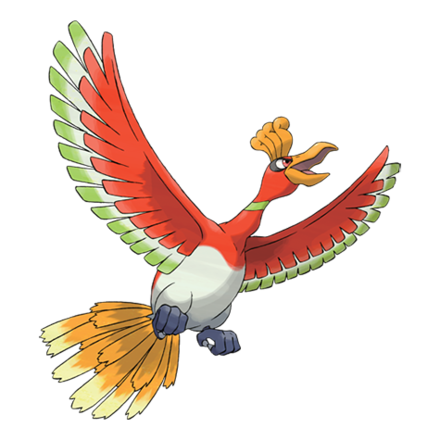 Ho-oh Ho-ohThis Pokemon does not evolve. |
Ho-oh Stats
| Level | HP | Defense | Special Defense | Attack Damage |
|---|---|---|---|---|
| 1 | 3400 | 90 | 70 | 170 |
| 2 | 3631 | 106 | 82 | 177 |
| 3 | 3886 | 124 | 96 | 185 |
| 4 | 4166 | 143 | 111 | 194 |
| 5 | 4473 | 164 | 128 | 204 |
| 6 | 4812 | 187 | 146 | 215 |
| 7 | 5184 | 213 | 166 | 227 |
| 8 | 5594 | 241 | 188 | 240 |
| 9 | 6046 | 272 | 212 | 255 |
| 10 | 6544 | 307 | 239 | 271 |
| 11 | 7093 | 345 | 269 | 289 |
| 12 | 7697 | 387 | 302 | 309 |
| 13 | 8362 | 433 | 338 | 330 |
| 14 | 9094 | 484 | 377 | 354 |
| 15 | 9900 | 540 | 420 | 380 |
Attack Damage is the damage of the Basic Attack as tested against the Training Dummy.
Ho-oh In-Game Stat Listings
| Offense | Endurance | Mobility | Scoring | Support |
|---|---|---|---|---|

|

|

|

|

|
Ho-oh Skins (Holowear)
| Holowear | |
|---|---|
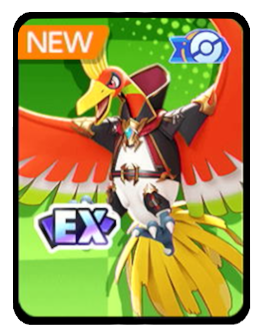 Dark Lord Style Dark Lord Style
Zirco Trading:
|
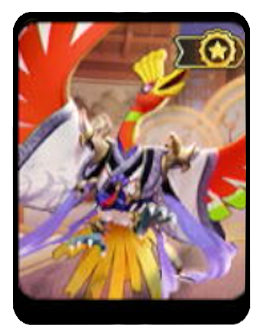 Fairy-Tale Style Fairy-Tale Style
Event:
Season 30 Battle Pass |
Ho-oh Achievements
Rekindling Flame Achievement
| Rekindling Flame | |
|---|---|
| Pokemon | Move |
 Ho-oh Ho-oh
|
|
| Mission: Use a Unite Move to revive ally Pokemon (60/80/100 times total) |
|
| Medals & Points | Rewards |
|
|
|
|
|
|
|
|
|
List of Defender Pokemon Achievements
Pokemon UNITE Related Guides

All Pokemon Guides and Builds
Upcoming Pokemon
 Articuno Articuno(TBA) |
 Meganium Meganium(TBA) |
 Typhlosion Typhlosion(TBA) |
 Feraligatr Feraligatr(TBA) |
Mega Evolutions
| Mega Evolved Pokemon | ||
|---|---|---|
 Mega Charizard X Mega Charizard X |
 Mega Charizard Y Mega Charizard Y |
 Mega Gyarados Mega Gyarados |
 Mega Lucario Mega Lucario |
 Mega Mewtwo X Mega Mewtwo X |
 Mega Mewtwo Y Mega Mewtwo Y |
Pokemon by Role
| All Pokemon Roles | |||||
|---|---|---|---|---|---|
 Attackers Attackers |
 All-Rounders All-Rounders |
 Defenders Defenders |
|||
 Speedsters Speedsters |
 Supporters Supporters |
||||
Pokemon by Characteristics
| Attack Type | |
|---|---|
 Melee Pokemon Melee Pokemon |
 Ranged Pokemon Ranged Pokemon |
 Physical Pokemon Physical Pokemon |
 Special Pokemon Special Pokemon |
| Stat Rankings | |
 HP Ranking HP Ranking |
 Defense Ranking Defense Ranking |
 Sp. Def. Ranking Sp. Def. Ranking |
 Basic Attack Ranking Basic Attack Ranking |
Author
Ho-oh Guide: Best Builds and Moveset
Rankings
Gaming News
Popular Games

Genshin Impact Walkthrough & Guides Wiki

Umamusume: Pretty Derby Walkthrough & Guides Wiki

Pokemon Pokopia Walkthrough & Guides Wiki

Honkai: Star Rail Walkthrough & Guides Wiki

Monster Hunter Stories 3: Twisted Reflection Walkthrough & Guides Wiki

Arknights: Endfield Walkthrough & Guides Wiki

Wuthering Waves Walkthrough & Guides Wiki

Zenless Zone Zero Walkthrough & Guides Wiki

Pokemon TCG Pocket (PTCGP) Strategies & Guides Wiki

Monster Hunter Wilds Walkthrough & Guides Wiki
Recommended Games

Diablo 4: Vessel of Hatred Walkthrough & Guides Wiki

Cyberpunk 2077: Ultimate Edition Walkthrough & Guides Wiki

Fire Emblem Heroes (FEH) Walkthrough & Guides Wiki

Yu-Gi-Oh! Master Duel Walkthrough & Guides Wiki

Super Smash Bros. Ultimate Walkthrough & Guides Wiki

Pokemon Brilliant Diamond and Shining Pearl (BDSP) Walkthrough & Guides Wiki

Elden Ring Shadow of the Erdtree Walkthrough & Guides Wiki

Monster Hunter World Walkthrough & Guides Wiki

The Legend of Zelda: Tears of the Kingdom Walkthrough & Guides Wiki

Persona 3 Reload Walkthrough & Guides Wiki
All rights reserved
©2021 Pokémon. ©1995–2021 Nintendo / Creatures Inc. / GAME FREAK inc.
©2021 Tencent.
The copyrights of videos of games used in our content and other intellectual property rights belong to the provider of the game.
The contents we provide on this site were created personally by members of the Game8 editorial department.
We refuse the right to reuse or repost content taken without our permission such as data or images to other sites.
 Absol
Absol Aegislash
 Alcremie
 Alolan Raichu
 Armarouge
 Azumarill
 Blastoise
 Blaziken
 Buzzwole
 Chandelure
 Charizard
 Cinderace
 Cramorant
 Crustle
 Darkrai
 Decidueye
 Delphox
 Dhelmise
 Dodrio
 Dragapult
 Dragonite
 Duraludon
 Eldegoss
 Empoleon
 Espeon
 Falinks
 Galarian Rapidash
 Garchomp
 Gardevoir
 Gengar
 Glaceon
 Goodra
 Greedent
 Greninja
 Gyarados
 Hoopa
Hoopa Inteleon
 Lapras
 Latias
 Latios
 Leafeon
 Lucario
 Machamp
 Mamoswine
 Meowscarada
 Meowth
 Metagross
 Mew
Mew Mimikyu
 Miraidon
 Moltres
 Pawmot
 Psyduck
 Sableye
 Scizor
 Sirfetch'd
 Snorlax
 Sylveon
 Talonflame
 Tinkaton
 Tsareena
 Tyranitar
 Umbreon
 Urshifu
 Vaporeon
 Wigglytuff
 Zacian
 Zapdos
 Zeraora
 Zoroark


![Monster Hunter Stories 3 Review [First Impressions] | Simply Rejuvenating](https://img.game8.co/4438641/2a31b7702bd70e78ec8efd24661dacda.jpeg/show)
![The Liar Princess and the Blind Prince Review [PC] | Lovely to Look at but Tedious to Play](https://img.game8.co/4442586/8d95f5faf05780f1765ce7e0938bd825.jpeg/thumb)
![Marathon Cryo Archive Map Teased as [REDACTED] on Selection Screen](https://img.game8.co/4442236/6357203e58172f6de57f1991e7c39b22.png/thumb)


Evite comprar ho-ho se não tiver umas 30000 moedas aeos pois ele é muito forte é provavelmente sera nerfado em pouco tempo