Inteleon Guide: Best Builds and Moveset
☆ Upcoming: Articuno | Meganium | Typhlosion | Feraligatr
★ Latest News: Zapdos | Moltres | Version 1.22.1.5
☆ Popular Pages: Upcoming Pokemon | Tier List
★ Current Seasons: Ranked S34 | Battle Pass S39
☆ Join Game8's Pokemon Discord Server!
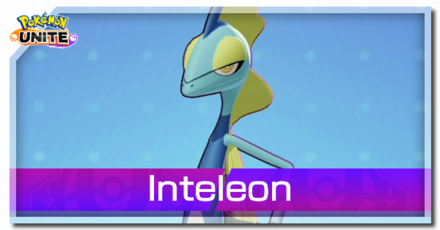
The best guide on how to play Inteleon in Pokemon UNITE for Nintendo Switch and Mobile. Check here for Inteleon best build, its price, cost, and role, Held and Battle items, moveset and skills, as well as the latest nerfs, buffs, counters, matchups, and more!
| Inteleon Pages | |
|---|---|
 Inteleon Release Date Inteleon Release Date |
 Inteleon Builds Inteleon Builds |
List of Contents
Inteleon Latest Nerfs & Buffs (12/25)
| Inteleon Changes | |
|---|---|
|
Acrobatics |
• Cooldown reduced from 7s to 6s. |
|
Liquidation |
• Movement speed penalty reduced from 60% to 40%. • Damage increased by 5%. |
Stat Updates
| 1.13.1.2 | Sp. Atk. reduced: 100~950 → 100~900 (Level 1~15). |
|---|---|
| 1.17.1.2 | Defense increased from 35-170 to 35-225 (Lvl. 1-15). Special Defense increased from 25-140 to 25-225 (Lvl. 1-15). |
| 1.20.1.2 | HP increased from 3200–6300 to 3200–6550. Defense increased from 35–225 to 35–260. Sp. Def. increased 25–225 to 25–260 |
Standard Attack
| 1.17.1.6 | Damage increased by 12%. |
|---|
Sniper
| 1.19.2.6 | Reduced max critical counters before evolving: Sobble: from 3 to 1. Drizzile: from 3 to 2. Inteleon: No change. |
|---|
Snipe Shot
| 1.14.1.4 | Damage reduced by 10% to 7% (Level 5 to 15) |
|---|---|
| 1.17.1.6 | Damage increased by 10%. |
| 1.17.2.10 | Damage increased by 10%. |
| 1.19.1.2 | The camera now zooms out while aiming, making it easier to track the battlefield while sniping. |
| 1.19.2.6 | Damage decreased by 5%. |
| 1.20.1.2 | Time until a charge is recovered reduced from 7.5s to 7s. |
Fell Stinger
| 1.11.1.3 | Range increased from 7m to 10m. (+3m). Increased charges from 1 to 2. |
|---|---|
| 1.17.1.2 | Cooldown decrease from 7s to 6.5s. |
| 1.19.2.6 | Changed to be able to interrupt movement with a strong hindrance effect. |
Liquidation
| 1.12.1.3 | Fixed a bug where the move doesn't get interrupted after getting hit by a hindrance move. |
|---|---|
| 1.13.1.2 | Damage reduced by 20%. |
| 1.15.1.7 | Damage increased by 12%. |
| 1.17.1.6 | Damage increased by 12%. |
| 1.17.2.10 | Damage increased by 6%. Cooldown decreased from 6.5s to 6s. |
| 1.21.1.7 | Movement speed penalty reduced from 60% to 40%. Damage increased by 5%. |
Water Gun
| 1.13.1.2 | Damage reduced by 15%. |
|---|
Acrobatics
| 1.17.1.2 | Cooldown decrease from 8s to 7.5s. |
|---|---|
| 1.19.2.6 | Damage increased by 15%. Cooldown reduction for Liquidation changed from 2s to 40% of cooldown (about 2.4s). |
| 1.20.1.2 | Cooldown reduced from 7.5s to 7s. |
| 1.21.1.7 | Cooldown reduced from 7s to 6s. |
Inteleon Basic Info
| Inteleon | ||
|---|---|---|
 |
Role: Attacker Attack Type: Ranged Damage Type: Special Difficulty: Intermediate |
|
| "Spy on your opponents and snipe them with this slick shooter!" | ||
Inteleon Best Lanes

|

|

|
Tips & Strategies for Every Lane
Inteleon Price and Cost
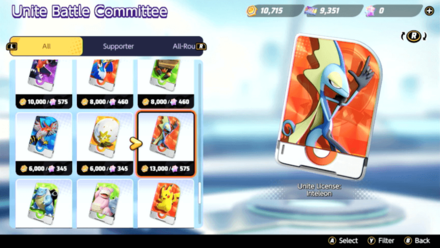
 UNITE License: Inteleon UNITE License: Inteleon |
|---|
As of July 11, 2023, Inteleon is now purchasable for 13,000 Aeos Coins or 575 Aeos Gems! This comes one week after Inteleon was first released and was only available to purchase with Aeos Gems.
Strengths and Weaknesses
| Strengths | Weaknesses |
|---|---|
|
✔︎ Can camouflage and become untargettable ✔︎ Can guarantee critical-hits ✔︎ Strong late-game damage potential |
✖︎ Very Low Durability ✖︎ High skill ceiling ✖︎ Slow movement speed |
Best Builds for Inteleon
| Inteleon Builds | |
|---|---|
| - | |
Snipe Shot Build
Snipe Shot Build

|
Moveset | Held Items | |||
|---|---|---|---|---|---|
| Battle Item | |||||
| Stats from Items (Lv. 40) | Recommended Lane | ||||
|
Sp. Atk: +123 HP: +245 |
|
||||
| Emblem Color Combination | Target Emblem Stats | ||||
|
|
Positive Stats: • Sp. Atk Free Negative Stats: • Attack • Critical-Hit Rate |
||||
| Note: The emblem color and stats here are suggestions only. The builds are still viable even without the suggested emblems. |
|||||
Snipe Shot Build Explanation
This build utilizes Snipe Shot's long range and high damage to burst opponents from a long range. The key to this build is using Fell Stinger to reposition towards walls and exploiting Snipe's camouflage mechanic to safely set up Snipe Shot.
- Wise Glasses gives Inteleon a high Sp. Atk. stat boost thanks to its percentage bonus.
- Slick Spoon adds more Sp. Atk. stat and allows Inteleon to ignore a portion of its target's Sp. Def.,resulting to more damage dealt.
- Choice Specs gives Inteleon more Sp. Atk. stat and increases the minimum damage of its moves, particularly Snipe Shot.
- However, Sp. Atk. Specs or Drive Lens can be a replacement for Choice Specs, giving Inteleon a large amount of Sp. Atk. for better damage overall.
- Eject Button gives Inteleon another repositioning tool on top of Fell Stinger.
- The build's Boost Emblem loadout should consist of 6 Green Emblems for more damage and 7 Black Emblems for some cooldown reduction. This can be achieved by equipping at least three (3) Emblems that are both Green and Black.
- Equip Emblems that improve Sp. Atk. to further increase Snipe Shot's damage output.
- Attack and Critical-hit Rate can be freely traded for the other stats.
Snipe Shot Build Damage Test
| Items (@Lvl 30) |
Snipe Shot (Ciritcal) (@ Lvl 15) |
Standard Attack (Base) (@ Lvl 15) Standard Attack (Critical) (@ Lvl 15) |
|---|---|---|
| Wise Glasses + Choice Specs + Slick Spoon |
2868 | 373 933 |
Since the build mainly uses Snipe Shot as Inteleon's primary damage source, equipping items that will maximize its damage is the ideal item combination.
Out of all the item combinations, Wise Glasses, Choice Specs, and Slick Spoon will suit Inteleon's gameplay for the build. Although it did not produce the best results, it gives consistent damage boost without the need for extra tasks like stacking, which can be hard for Inteleon, especially in the early game.
As for alternatives, replacing Wise Glasses with Sp. Atk. Specs would be the best option. The item combination scored the highest results in the Snipe Shot damage test while maintaining high Standard Attack damage results. However, it does require Inteleon to fully stack Sp. Atk. Specs first to maximize the damage.
These damage tests are conducted in Practice Mode with Goodra as the Training Partner. The Pokemon is set to level 15 and has no items equipped. The results are calculated by substracting the Training Partner's max HP and its HP after taking damage.
| Note: The numbers in bold are the highest result for a specific test. |
| Items (@Lvl 30) | Snipe Shot (Ciritcal) (@ Lvl 15) | Standard Attack (Base) (@ Lvl 15) Standard Attack (Critical) (@ Lvl 15) |
|---|---|---|
| Wise Glasses + Choice Specs + Slick Spoon | 2868 | 373 933 |
| Wise Glasses + Choice Specs + Sp. Atk. Specs (6 Stacks) | 2915 | 349 872 |
| Wise Glasses + Choice Specs + Scope Lens | 2792 | 319 878 |
| Wise Glasses + Slick Spoon + Sp. Atk. Specs (6 Stacks) | 2861 | 375 939 |
| Wise Glasses + Slick Spoon + Scope Lens | 2755 | 343 942 |
| Wise Glasses + Sp. Atk. Specs (6 Stacks) + Scope Lens | 2682 | 339 933 |
| Choice Specs + Slick Spoon + Sp. Atk. Specs (6 Stacks) | 3016 | 357 892 |
| Choice Specs + Slick Spoon + Scope Lens | 2891 | 326 897 |
| Choice Specs + Sp. Atk. Specs (6 Stacks) + Scope Lens | 2818 | 322 887 |
| Slick Spoon + Sp. Atk. Specs (6 Stacks) + Scope Lens | 2781 | 346 951 |
The tests above does not use any Emblems yet so it will scale higher if equipped.
Liquidation Build
| Liquidation Build | Moveset | Held Items | |||
|---|---|---|---|---|---|
| Battle Item | |||||
| Stats from Items (Lv. 40) | Recommended Lane | ||||
|
Sp. Atk: +123 HP: +245 |
|
||||
| Emblem Color Combination | Target Emblem Stats | ||||
|
|
Positive Stats: • Sp. Atk Free Negative Stats: • Attack • Critical-Hit Rate |
||||
| Note: The emblem color and stats here are suggestions only. The builds are still viable even without the suggested emblems. |
|||||
Liquidation Build Explanation
This build is centered on bursting a target down using Liquidation, Acrobatics, and attacks. The key to this build is utilizing the synergy between the two moves to reposition and ensure that Liquidation will deal critical-hits.
- Wise Glasses provides Inteleon with a large Sp. Atk. boost thanks to its percentage bonus effect.
- Choice Specs gives Inteleon more Sp. Atk. stat and increases the minimum damage of its moves, particularly Liquidation.
- Slick Spoon further boosts Inteleon's Sp. Atk. stat and allows it to ignore a portion of its target's Sp. Def.,resulting to more damage dealt.
- Drive Lens can be a replacement for Choice Specs, giving Inteleon a large amount of Sp. Atk. for better damage overall.
- Eject Button gives another repositioning tool for offensive and defensive use on top of Acrobatics.
- The build's Boost Emblem loadout should consist of 6 Green Emblems for more damage and 6 White Emblems additional HP. This can be achieved by equipping at least two (2) Emblems that are both Green and White.
- Equip Emblems that improve Sp. Atk. to further increase Inteleon's damage output.
- Attack and Critical-hit Rate can be freely traded for the other stats.
Liquidation Build Damage Test
| Items (@Lvl 30) |
Liquidation (Ciritcal) (@ Lvl 15) |
Standard Attack (Base) (@ Lvl 15) Standard Attack (Critical) (@ Lvl 15) |
Wise Glasses + Choice Specs + Slick Spoon |
2785 | 354 884 |
|---|
Since the build is centered on Liquidation and Standard Attacks, equipping items that maximize their damage is the ideal item combination.
Out of all the item combinations, Wise Glasses, Choice Specs, and Slick Spoon will produce the best outcome for the build. It generated decent results for Liquidation and Standard Attacks, but the item combination doesn't require Inteleon to perform extra tasks like stacking an item or using a move to maximize its damage.
As for alternatives, replacing Wise Glasses with Energy Amplifier would be the best option. It produced the best result for Liquidation with a decent Standard Attack score. However, it does require Inteleon to activate its Unite Move first to gain the maximum damage bonus.
These damage tests are conducted in Practice Mode with Goodra as the Training Partner. The Pokemon is set to level 15 and has no items equipped. The results are calculated by substracting the Training Partner's max HP and its HP after taking damage.
| Note: The numbers in bold are the highest result for a specific test. |
| Items (@Lvl 30) | Liquidation (Ciritcal) (@ Lvl 15) | Standard Attack (Base) (@ Lvl 15) Standard Attack (Critical) (@ Lvl 15) |
|---|---|---|
| Wise Glasses + Choice Specs + Slick Spoon | 2785 | 354 884 |
| Wise Glasses + Choice Specs + Sp. Atk. Specs (6 Stacks) | 2738 | 349 872 |
| Wise Glasses + Choice Specs + Scope Lens | 2625 | 319 878 |
| Wise Glasses + Choice Specs + Energy Amplifier (Includes Effect) | 2999 | - 964 |
| Wise Glasses + Slick Spoon + Sp. Atk. Specs (6 Stacks) | 2640 | 375 939 |
| Wise Glasses + Slick Spoon + Scope Lens | 2550 | 343 942 |
| Wise Glasses + Slick Spoon + Energy Amplifier (Includes Effect) | 2890 | - 1038 |
| Wise Glasses + Sp. Atk. Specs (6 Stacks) + Scope Lens | 2505 | 339 933 |
| Wise Glasses + Sp. Atk. Specs (6 Stacks) + Energy Amplifier (Includes Effect) | 2850 | 410 1027 |
| Wise Glasses + Scope Lens + Energy Amplifier (Includes Effect) | 2750 | - 1032 |
| Choice Specs + Slick Spoon + Sp. Atk. Specs (6 Stacks) | 2797 | 357 892 |
| Choice Specs + Slick Spoon + Scope Lens | 2694 | 326 897 |
| Choice Specs + Slick Spoon + Energy Amplifier (Includes Effect) | 3079 | - 986 |
| Choice Specs + Sp. Atk. Specs (6 Stacks) + Scope Lens | 2648 | 322 887 |
| Choice Specs + Sp. Atk. Specs (6 Stacks) + Energy Amplifier (Includes Effect) | 3023 | - 974 |
| Choice Specs + Scope Lens + Energy Amplifier (Includes Effect) | 2886 | - 983 |
| Slick Spoon + Sp. Atk. Specs (6 Stacks) + Scope Lens | 2585 | 346 951 |
| Slick Spoon + Sp. Atk. Specs (6 Stacks) + Energy Amplifier (Includes Effect) | 2930 | - 1049 |
| Slick Spoon + Scope Lens + Energy Amplifier (Includes Effect) | 2825 | - 1053 |
| Sp. Atk. Specs (6 Stacks) + Scope Lens + Energy Amplifier (Includes Effect) | 2770 | - 1042 |
The tests above does not use any Emblems yet so it will scale higher if equipped.
Inteleon Best Items & Moveset
Best Held Items
| Item | Explanation |
|---|---|
 Sp. Atk. Specs Sp. Atk. Specs
|
Sp. Atk. Specs grants Inteleon a large Sp. Atk. boost, especially when it's fully stacked. |
 Energy Amplifier Energy Amplifier
|
Energy Amplifier gives Inteleon a significant damage boost whenever it uses Azure Spy Vision. It also increases the move's recharge rate. |
 Wise Glasses Wise Glasses
|
Wise Glasses provides Inteleon with a large Sp. Atk. boost thanks to its additional percentage bonus effect. |
 Choice Specs Choice Specs
|
Choice Specs gives Inteleon a decent amount of Sp. Atk. and increases its minimum move damage. |
 Slick Spoon Slick Spoon
|
Slick Spoon supplies Inteleon with a nice amount of Sp. Atk. and allows it to ignore a portion of an opponent's Sp. Def. |
 Drive Lens Drive Lens
|
Drive Lens gives Inteleon more damage as it knocks out opponents, which works well with the Pokemon's gameplay. |
Best Battle Items
| Item | Explanation |
|---|---|
 Eject Button Eject Button
|
Eject Button gives Inteleon more mobility on top of its dash moves for offensive and defensive use. |
 X Speed X Speed
|
X Speed allows Inteleon to move faster as it traverses the map, especially when moving from wall to wall to keep its camouflage active. |
Best Moveset
| Move | Explanation |
|---|---|
 Fell Stinger Fell Stinger
|
Fell Stinger gives Inteleon the mobility it needs for setting up and using Snipe Shot. |
 Snipe Shot Snipe Shot
|
Snipe Shot allows Inteleon to burst opponents from an extremely long range, making it safe from enemy attacks. |
With the nerf to Liquidation, this moveset has become a better choice for Inteleon in terms of damage. Snipe Shot deals a ton of damage and has an extremely long range, allowing Inteleon to assassinate opponents from a safe distance. Fell Stinger gives Inteleon the mobility it needs to stay near walls and remain camoflauged, especially when setting up Snipe Shot.
Liquidation and Snipe Shot are Inteleon's primary damage move but have distinct gameplay requirements with pros and cons. When choosing Liquidation, Inteleon needs to be more active in hunting down targets one by one since it can only hit one target and has a short range. However, the move doesn't require any special setup other than getting into range, giving Inteleon more freedom to move around and use its attacks.
As for Snipe Shot, Inteleon needs to utilize Sniper's camouflage mechanic more since the move can be used without breaking camouflage. Inteleon also has to stay at the backlines to maximize the move's damage, requiring the Pokemon to reposition constantly. The move's downside is its tedious setup, limiting Inteleon's mobility significantly.
On the other hand, Acrobatics and Fell Stinger act as complimentary moves. Acrobatics is best paired with Liquidation due to the maneuverability it gives. Since Liquidation requires inteleon to be more active, having a repositioning tool that doesn't require hitting a target or wall to move objectively works better with Liquidation. It also just improves Inteleon's overall mobility.
Fell Stinger is practically better suited for Snipe Shot due to how it works. Since the move quickly drags Inteleon to a wall when it hits one, it allows the Pokemon to trigger Sniper's camouflage mechanic and set up Snipe Shot properly. Its cooldown is also reduced everytime it hits a wall, allowing Inteleon to constantly reposition when needed.
Which Moveset Do You Think is Best for Inteleon?
Let us know why in the comments!
How to Play Inteleon
| Jump to Section | |
|---|---|
Reach Level 7 Quickly
Inteleon doesn't have much to offer in the early game due to its low durability and mobility. It only becomes a threat once it reaches level 7 and learns Liquidation or Snipe Shot since it's the Pokemon's primary damage tool. With that, it's best to play safe early on and reach level 7 as fast as possible to allow Inteleon to make an impact.
Utilize Water Gun
Water Gun's base damage is quite average. However, if Inteleon has a critical-hit stack via Sniper, the move becomes an extremely powerful burst-type move that's useful for securing knockouts and wild Pokemon. Make sure to have one stack of critical-hit from Sniper before using Water Gun to maximize its damage output.
Water Gun: Inteleon Move Effect and Cooldown
Mark an Enemy with Tearful Look
Using Tearful Look marks an enemy and decreases the target's Attack and Sp. Attack while increasing Sobble's movement speed for a specific amount of time. Due to the effects of this move, enemy Pokemon gets damaged more if Inteleon has acquired critical-hit stacks prior to attacking. Pull off a combo attack with Tearful Look and Water Gun as you go to take down enemies much faster!
Tearful Look: Inteleon Move Effect and Cooldown
Understand and Utilize Sniper's Mechanics
Inteleon's gameplay largely revolves around its ability, Sniper. It's what makes the Pokemon unique and strong. Understanding how it works and utilizing its effects and mechanics are key to playing Inteleon effectively.
Sniper: Inteleon Passive Effect and Cooldown
Sniper's Critical Hit Multiplier is x2.5
| Snipe Shot Damage (No Crit @ Lv 15) |
Snipe Shot Damage (Crit @ Lv 15) |
Multiplier |
|---|---|---|
| 656 | 1640 | x2.5 |
Based on our findings, Sniper's critical-hit multiplier is x2.5 the normal damage, which is 0.5 more than the usual x2 critical-hit multiplier. Although it's quite a small difference in paper, the damage Inteleon can actually deal in games is absurd, especially once items are equipped.
Go Near Walls to Camoflauge and Gain Critical-Hit Stacks
When Inteleon is near walls for a certain amount of time, it camoflauges and gains one critical-hit stack. While camoflauged, Inteleon can't be targeted with moves and attacks. However, Inteleon can still get hit, and if it gets hit, its camoflague breaks, making the Pokemon targetable once again.
Futhermore, as long as Inteleon stays near walls, it will continually gain critical-hit stacks.
Use Acrobatics or Fell Stinger to Gain Critical-Hit Stacks
Inteleon can also use Acrobatics or Fell Stinger to gain critical-hit stacks, but they differ in how they work.
Acrobatics will always give Inteleon at least one critical-hit stack when it's used. If it hits an enemy or a wall while gliding, Inteleon gains another stack.
On the other hand, Fell Stinger has to hit a wall or enemy for Inteleon to gain critical-hit stacks. However, if it does hit a wall or enemy, Inteleon gains two (2) stacks instantly.
Manage Critical-Hit Stacks Wisely
Managing Inteleon's critical-hit counter wisely plays a significant role in the Pokemon's performance in games. Generally, deciding whether to consume a stack using a move or attack will depend on Inteleon's move choice.
If Inteleon learns Liquidation, moves and attacks share roughly the same priority when consuming critical-hit stacks. This is mainly due to Inteleon's gameplay when it's using Liquidation.
If Inteleon learns Snipe Shot, the move takes the higher priority over attacks as it deals far more damage than the Pokemon's attacks in a single shot.
| Note: These are just basic pointers for managing the critical-hit counter. It will ultimately depend on the situation at hand. |
Kite Opponents with Liquidation
If Inteleon learns Liquidation, its gameplay will be kiting opponents with ranged attacks and moves. The Pokemon needs to stay behind more durable allies, particularly All-Rounders and Defenders, as it blasts opponents with attacks and moves.
Liquidation: Inteleon Move Effect and Cooldown
Best Paired with Acrobatics
Although Fell Stinger can also work with Liquidation, Acrobatics has a mechanic that is exclusively for the move, making it the better move to pair with Liquidation. Moreover, since Inteleon needs to be a bit agile during fights when it's using Liquidation, Acrobatics offer exactly that. It also doesn't require hitting anything for Inteleon to gain a critical-hit stack.
Acrobatics: Inteleon Move Effect and Cooldown
Burst Targets from Afar with Snipe Shot
If Inteleon learns Snipe Shot, its gameplay will be bursting targets from an extremely long range. Unlike with Liquidation, Inteleon needs to be a bit far from the actual fight since Snipe Shot has a really long range but requires charging. Futhermore, it's best to stay near walls so Inteleon can be camoflauged and can continually gain critical-hit stacks while using Snipe Shot.
| Note: From the opponents' perspective, there will be a thin red line whenever Inteleon is charging Snipe Shot. Following this line leads Inteleon's location, so make sure to release the move once it's charge as not to give away Inteleon's location. |
Snipe Shot: Inteleon Move Effect and Cooldown
Best Paired with Fell Stinger
Since Inteleon will mostly stay near walls when it's using Snipe Shot, Fell Stinger is the ideal move to pair with it. Fell Stinger enables Inteleon to quickly move toward a wall and gain two (2) critical-hit stacks instantly, allowing it to easily set up Snipe Shot.
Snipe Shot: Inteleon Move Effect and Cooldown
Keep Attacking and Using Moves During Azure Spy Vision
Once activated, Azure Spy Vision doubles Inteleon's critical-hit rate, continually gives it one (1) critical-hit stack per roughly a second, and enables the Pokemon to see opponents that are invisible or hiding in grass. The simplest way to utilize Azure Spy Vision is just to keep attack and using moves while it's active.
Azure Spy Vision: Inteleon UNITE Move Effect and Cooldown
Inteleon Progression and Leveling Guide
Top and Bottom Guide
Level 1 to 5
- Quickly clear out the Bunnelbies in the lane.
- Keep farming wild Pokemon in the lane to reach level 5 and learn your first move.
- At bottom lane, prioritize taking Indeedees for more exp.
Level 6 to 9
- Clear the second wave of jungle camps and reach at least level 7 and learn your second move.
- Keep hunting Wild Pokemon to gain more EXP from farming Altaria and Swablus.
- Help allies secure Regice, Registeel, or Regirock when it spawns, otherwise secure Regieleki.
- Upon reaching level 9, learn your Unite Move.
Level 10+
- Stick with allies to hunt targets, secure objectives, and push lanes.
- Reach at least level 13 if possible before or when Groudon spawns for a fully-upgraded moveset.
- Make sure that Eon Blast is available when Groudon spawns.
- Help teammates win a teamfight and secure Groudon.
Inteleon Combos
Main Combos
These combos are ways to set up Liquidation and Snipe Shot. They rely mostly on Sniper's camouflage and critical counter mechanics to be used properly.
Gunslinger Combo
| Gunslinger Combo | |
|---|---|
|
|
|
Standard Attack
(Critical-Hit) ►
Liquidation
►
Acrobatics
►
Standard Attack
(Critical-Hit) ~ |
|
| With at least 2 critical counter, start the combo with a normal attack, which is guaranteed to be a critical-hit, then follow up with Liquidation. While firing Liquidation, immediately use Acrobatics towards the target, then reposition in the desired spot. After landing, keep attacking the target until the entire critical counter is consumed or the target is knocked out. This combo can also be used while Azure Spy Vision is active to gain vision on targets with invisibility. |
|
Deadeye Combo
| Deadeye Combo | |
|---|---|
|
|
|
Fell Stinger
►
Snipe Shot
(Critical-Hit) ~ |
|
| Start the combo by quickly moving near a wall using Fell Stinger, which will trigger Sniper's camouflage and critical counter mechanic, then immediately start charging Snipe Shot while aiming for the target. This combo is best used when the target is too far from Inteleon's Standard Attack range but already has low HP. |
|
Matchups & Counters for Inteleon
Inteleon Matchups
| Matchup Notes | ||
|---|---|---|
| 1. The chart is based on our own experience playing Inteleon. 2. Pokemon within each tier are unordered 3. Any Pokemon not shown here are still under investigation. |
||
Hard Counter Burst Damage
Just like its fellow ranged attackers, Ineteleon has a durability problem. Although equipped with camouflage, dash moves, and mid-range abilities, its low health makes it immediately fold burst damage.
Best Counters
| Pokemon | Explanation |
|---|---|
 Zacian Zacian
|
Rating: ★★★★★ • Can quickly burst down Inteleon with Sacred Sword or Metal Claw and Sovereign Sword even when it's camoflauged. |
 Talonflame Talonflame
|
Rating: ★★★★★ • Can snipe Inteleon from afar using Brave Bird or approach it safely and burst it down with Fly even while it's camoflauged. • Can displace Inteleon using Flame Sweep. |
 Leafeon Leafeon
|
Rating: ★★★★★ • Can quickly burst down Inteleon using Solar Blade or Razor Leaf, which can damage the Pokemon when it's camoflauged, and Emerald Two-Step |
Even Matchups
Inteleon has innately high critical damage and mobility options. Utilizing Inteleon's passive ability Sniper to deal critical damage and camouflage through wallls, then hunting targets down with its bursty attacks will help Inteleon win against these Pokemon.
Strike First
| Ranged, Fragile Pokemon with High Damage |
|---|
| How to Beat |
| • Much like Inteleon, these Pokemon prefer to keep their distance from opponents when fighting. They also have high damage potential that can be dangerous for Inteleon. Winning against them is just a matter of striking first. • When using Snipe Shot, find a good spot to set up the move first, preferably near a wall and/or grass areas, then just keep blasting them from range. Use Fell Stinger to reposition if needed. • When using Liquidation, get close enough for the move's range and just fire away. Use Acrobatics while firing Liquidation to avoid damage and reposition when needed. • Alterntively, just use Azure Spy Vision and burst them down with ranged attacks. |
Kite Them
| All-Rounders |
|---|
| How to Beat |
| • These Pokemon excel in close combat and rely mostly on their attacks or move to deal damage. However, Inteleon can easily kite them with its hard-hitting critical-hits. • When using Snipe Shot, find a good spot to set up the move first, preferably near a wall and/or grass areas, then just keep blasting them from range. Use Fell Stinger to reposition if needed. • When using Liquidation, get close enough for the move's range and just fire away. Use Acrobatics while firing Liquidation to reposition and keep a safe distance. • Alterntively, just use Azure Spy Vision and kite them with ranged attacks. |
Shred Through Their Durability
| Highly Durable Pokemon |
|---|
| How to Beat |
|
• Although these Pokemon are extremely durable, Inteleon's critical-hits can still shred through their defenses and bring them down. • When using Snipe Shot, find a good spot to set up the move first, preferably near a wall and/or grass areas, then just keep blasting them from range. Use Fell Stinger to reposition if needed. • When using Liquidation, get close enough for the move's range and just fire away. Use Acrobatics while firing Liquidation to reposition and keep a safe distance. • Alterntively, just use Azure Spy Vision and kite them with ranged attacks. |
Easy Matchups
Utilize Inteleon's bursty combos and critical hits to knock these Pokemon out quickly.
Strike First
| Ranged, Fragile Pokemon with High Damage |
|---|
| How to Beat |
| • Much like Inteleon, these Pokemon prefer to keep their distance from opponents when fighting. They also have high damage potential that can be dangerous for Inteleon. Winning against them is just a matter of striking first. • When using Snipe Shot, find a good spot to set up the move first, preferably near a wall and/or grass areas, then just keep blasting them from range. Use Fell Stinger to reposition if needed. • When using Liquidation, get close enough for the move's range and just fire away. Use Acrobatics while firing Liquidation to avoid damage and reposition when needed. • Alterntively, just use Azure Spy Vision and burst them down with ranged attacks. |
Kite Them
| All-Rounders |
|---|
| How to Beat |
| • These Pokemon excel in close combat and rely mostly on their attacks or move to deal damage. However, Inteleon can easily kite them with its hard-hitting critical-hits. • When using Snipe Shot, find a good spot to set up the move first, preferably near a wall and/or grass areas, then just keep blasting them from range. Use Fell Stinger to reposition if needed. • When using Liquidation, get close enough for the move's range and just fire away. Use Acrobatics while firing Liquidation to reposition and keep a safe distance. • Alterntively, just use Azure Spy Vision and kite them with ranged attacks. |
Take Them Down First
| Supporters |
|---|
| How to Beat |
| • These Pokemon usually stick with their allies and rarely venture alone. Although they themselves pose no threat to Inteleon, their support capabilities makes them valuable during fights. • It's best to take them out first using Inteleon's critical-hits via its moves and attacks. |
Shred Through Their Durability
| Highly Durable Pokemon |
|---|
| How to Beat |
|
• Although these Pokemon are extremely durable, Inteleon's critical-hits can still shred through their defenses and bring them down. • When using Snipe Shot, find a good spot to set up the move first, preferably near a wall and/or grass areas, then just keep blasting them from range. Use Fell Stinger to reposition if needed. • When using Liquidation, get close enough for the move's range and just fire away. Use Acrobatics while firing Liquidation to reposition and keep a safe distance. • Alterntively, just use Azure Spy Vision and kite them with ranged attacks. |
Best Teammates for Inteleon
| Pokemon | Explanation |
|---|---|
 Crustle Crustle
 Slowbro Slowbro
|
Pokemon with Strong Disables |
| Inteleon works well with allies that are equipped with disabling and hindrance abilities, since this gives Inteleon more time to position itself and burst enemies down from a safe distance. These ally Pokemon can disable, stall, and stun enemies for a short period of time. | |
 Chandelure Chandelure
 Greninja Greninja
 Leafeon Leafeon
|
Pokemon with High Burst Damage |
| Inteleon is equipped with movesets that lets it utilize its critical damage, so having allies that have high burst damage definitely helps overwhelm enemy Pokemon easily. These ally Pokemon are equipped with powerful attacks that they can unleash from a safe distance and help Inteleon in pushing lanes and dominating goal zones. | |
 Lucario Lucario
 Urshifu Urshifu
|
Aggressive Frontliners |
| Besides Attacker allies, Inteleon can also use a helping hand from its All-Rounder allies. These ally Pokemon are equipped with hard-hitting combos that can soak up damage, overwhelm enemies with a few hits, and possibly stun or disable them from setting up their attacks. | |
 Blissey Blissey
 Eldegoss Eldegoss
|
Dedicated Supporters |
| While Inteleon specializes in supporting its teammates from the backlines, it needs Supporter allies that can buff, heal, or shield Inteleon on the go, especially when pushing lanes and swiftly securing objectives. |
Looking for teammates to synergize with you? Head over to our Friend Request Board to find other trainers to join you in your grind or just to hang out with!
Inteleon Moves
Move Slot 1 (R)
 Water Gun Water Gun
(Lv. 1 or 3) |
Move Type: Ranged Damage Type: Special Cooldown: 7.5s Starting Damage: 363 Damage per instance: 121, Damage per instance (Critical-hit): 302, Number of instances: 3 Final Damage: 510 Damage per instance: 170, Damage per instance (Critical-hit): 425, Number of instances: 3 |
|---|---|
| Has the user squirt water, dealing damage to oppsing Pokemon it hits. This move has a set chance of becoming a critical hit. | |
 Snipe Shot Snipe Shot
(Lv. 7) Upgrade Lv. 13 |
Move Type: Ranged Damage Type: Special Cooldown: 1.5s Starting Damage: 390 Maximum damage: 785, Minimum damage: 390, Maximum damage (Critical-hit): 1962, Minimum damage (Critical-hit): 975 Final Damage: 750 Maximum damage: 1510, Minimum damage: 750, Maximum damage (Critical-hit): 3775, Minimum damage (Critical-hit): 1875 |
|
Has the user aim in the designated direction for a set amount of time and then fire a water projectile, dealing damge to opposing Pokemon it hits while partially ignoring their Sp. Def. The farther away the user is from the opposing Pokemon it hits, the more damge this move does. This move has a set chance of becoming a critical hit. A maximum of three (3) uses can be kept in reserve for this move.
Upgrade: Decreases the time it takes to store a use of this move. |
|
 Liquidation Liquidation
(Lv. 7) Upgrade Lv. 13 |
Move Type: Sure Hit Damage Type: Special Cooldown: 6s Starting Damage: 876 Damage breakdown (Base): (102 x 5) + (122 x 3), Damage breakdown (Critical-hit): (255 x 5) + (306 x 3), Number of projectiles: 8 Final Damage: 2145 Damage breakdown (Base): (195 x 5) + (234 x 5), Damage breakdown (Critical-hit): (487 x 5) + (584 x 5), Number of projectiles: 10 |
|
Has the user continually fire water projectiles from both hands, dealing damage to the designated opposing Pokemon it hits. If this move hits 5 times within a short period of time. damage the opposing Pokemon takes from the user's attacks will be increased for a short time. This move has a set chance of becoming a critical hit. This move can be used while moving via Acrobatics.
Upgrade: Increases the number of water projectiles fired. |
|
Move Slot 2 (ZR)
 Tearful Look Tearful Look
(Lv. 1 or 3) |
Move Type: Debuff Damage Type: Status Cooldown: 8s Starting Damage: N/A Final Damage: N/A |
|---|---|
| Decreases the Attack and Sp. Atk. of the designated opposing Pokemon, and increases the user's movement speed for a short time. | |
 Fell Stinger Fell Stinger
(Lv. 5) Upgrade Lv. 11 |
Move Type: Dash Damage Type: Special Cooldown: 6.5s Starting Damage: 347 Final Damage: 837 |
|
Has the user fire a sharp stinger in the designated direction, dealing damage to opposing Pokemon it hits. If the stinger hit a wall, the user moves to the point the stinger hit, and this move's cooldown is reduced. If the stinger hits an opposing Pokemon or a wall, the user gains one critical counter.
Upgrade: Reduces this move's cooldown. |
|
 Acrobatics Acrobatics
(Lv. 5) Upgrade Lv. 11 |
Move Type: Dash Damage Type: Special Cooldown: 6s Starting Damage: 329 Final Damage: 842 |
|
Has the user glide in the designated direction, and if the user hits an opposing Pokemon or wall, it can glide in a designated direction again. If the user hits an opposing Pokemon while gliding, the user deals damage to it and decreases its movement speed. Every time this move is used, the user gains one critical counter. This move can also be used while attacking with Liquidation.
Upgrade: Increases the first glide's travel distance. |
|
Unite Moves (ZL)
 Azure Spy Vision Azure Spy Vision
(Lv. 9) |
Move Type: Buff Damage Type: Status Cooldown: 110s Starting Damage: N/A Final Damage: N/A |
|---|---|
| For a short time, enables the user to see nearby Pokemon that are in stealth or hiding in tall grass. Also doubles the user's critical-hit rate, and the user gains one critical counter whenever a set amount of time passes. | |
Standard Attack
|
|
Becomes a boosted attack with every third attack, dealing increased damage with an increased critical-hit rate. |
|---|
Ability (Passive)
 Sniper Sniper
|
All Evolution Stages
The Pokemon deals increased damage to opposing Pokemon when it lands a critical hit. When the Pokemon is near a wall, it becomes camouflaged and opposing Pokemon are unable to target it. The Pokemon gains one critical counter whenever a set amount of time passes while camouflaged (up to a maximum of 3 counters). When a critical counter is consumed, the Pokemon's next basic atack or move that has a set chance of becoming a cirtical hit is guaranteed to be a critical hit. |
|---|
Inteleon Stats & Evolutions
Inteleon Evolutions
| 1st Evolution | 2nd Evolution | Final Evolution |
|---|---|---|
 Sobble Sobble(Lv. 1) |
 Drizzile Drizzile(Lv. 5) |
 Inteleon Inteleon(Lv. 7) |
Inteleon Stats
| Level | HP | Defense | Special Defense | Attack Damage |
|---|---|---|---|---|
| 1 | 3200 | 35 | 25 | 138 |
| 2 | 3248 | 38 | 28 | 147 |
| 3 | 3305 | 42 | 32 | 158 |
| 4 | 3374 | 47 | 37 | 170 |
| 5 | 3625 | 64 | 55 | 203 |
| 6 | 3725 | 71 | 62 | 218 |
| 7 | 4180 | 101 | 94 | 275 |
| 8 | 4324 | 111 | 104 | 295 |
| 9 | 4496 | 122 | 116 | 319 |
| 10 | 4703 | 136 | 131 | 347 |
| 11 | 4951 | 153 | 148 | 379 |
| 12 | 5249 | 173 | 173 | 417 |
| 13 | 5606 | 197 | 197 | 462 |
| 14 | 6035 | 226 | 226 | 516 |
| 15 | 6550 | 260 | 260 | 579 |
Attack Damage is the damage of the Basic Attack as tested against the Training Dummy.
Inteleon In-Game Stat Listings
| Offense | Endurance | Mobility | Scoring | Support |
|---|---|---|---|---|

|

|

|

|

|
Inteleon Skins (Holowear)
| Holowear | |
|---|---|
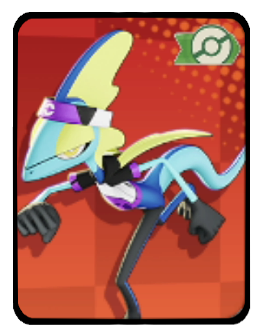 Purple UNITE Style Purple UNITE Style
Zirco Trading:
|
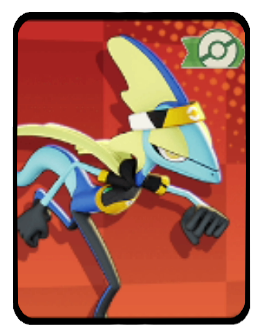 Orange UNITE Style Orange UNITE Style
Zirco Trading:
|
 Marching Band Style Marching Band Style
Zirco Trading:
|
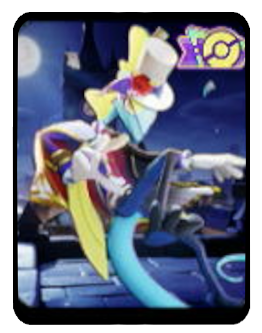 Phantom Thief Style Phantom Thief Style
Event:
Season 19 Battle Pass |
Inteleon Character Spotlight
Inteleon Achievements
Snipe Shot Achievement
| Snipe Shot | |
|---|---|
| Pokemon | Move |
 Inteleon Inteleon
|
|
| Mission: Knock out Pokemon from the opposing team with Snipe Shot or Snipe Shot+ (40/80/160 times total) |
|
| Medals & Points | Rewards |
|
|
|
|
|
|
|
|
|
List of Attacker Pokemon Achievements
Pokemon UNITE Related Guides

All Pokemon Guides and Builds
Upcoming Pokemon
 Articuno Articuno(TBA) |
 Meganium Meganium(TBA) |
 Typhlosion Typhlosion(TBA) |
 Feraligatr Feraligatr(TBA) |
Mega Evolutions
| Mega Evolved Pokemon | ||
|---|---|---|
 Mega Charizard X Mega Charizard X |
 Mega Charizard Y Mega Charizard Y |
 Mega Gyarados Mega Gyarados |
 Mega Lucario Mega Lucario |
 Mega Mewtwo X Mega Mewtwo X |
 Mega Mewtwo Y Mega Mewtwo Y |
Pokemon by Role
| All Pokemon Roles | |||||
|---|---|---|---|---|---|
 Attackers Attackers |
 All-Rounders All-Rounders |
 Defenders Defenders |
|||
 Speedsters Speedsters |
 Supporters Supporters |
||||
Pokemon by Characteristics
| Attack Type | |
|---|---|
 Melee Pokemon Melee Pokemon |
 Ranged Pokemon Ranged Pokemon |
 Physical Pokemon Physical Pokemon |
 Special Pokemon Special Pokemon |
| Stat Rankings | |
 HP Ranking HP Ranking |
 Defense Ranking Defense Ranking |
 Sp. Def. Ranking Sp. Def. Ranking |
 Basic Attack Ranking Basic Attack Ranking |
Comment
yeah, plus when you are using acrobatics and Liquidation, you can use acrobatics to move around or jump over walls, which is good when vs melee Pokémon
Author
Inteleon Guide: Best Builds and Moveset
Rankings
Gaming News
Popular Games

Genshin Impact Walkthrough & Guides Wiki

Umamusume: Pretty Derby Walkthrough & Guides Wiki

Pokemon Pokopia Walkthrough & Guides Wiki

Honkai: Star Rail Walkthrough & Guides Wiki

Monster Hunter Stories 3: Twisted Reflection Walkthrough & Guides Wiki

Arknights: Endfield Walkthrough & Guides Wiki

Wuthering Waves Walkthrough & Guides Wiki

Zenless Zone Zero Walkthrough & Guides Wiki

Pokemon TCG Pocket (PTCGP) Strategies & Guides Wiki

Monster Hunter Wilds Walkthrough & Guides Wiki
Recommended Games

Diablo 4: Vessel of Hatred Walkthrough & Guides Wiki

Cyberpunk 2077: Ultimate Edition Walkthrough & Guides Wiki

Fire Emblem Heroes (FEH) Walkthrough & Guides Wiki

Yu-Gi-Oh! Master Duel Walkthrough & Guides Wiki

Super Smash Bros. Ultimate Walkthrough & Guides Wiki

Pokemon Brilliant Diamond and Shining Pearl (BDSP) Walkthrough & Guides Wiki

Elden Ring Shadow of the Erdtree Walkthrough & Guides Wiki

Monster Hunter World Walkthrough & Guides Wiki

The Legend of Zelda: Tears of the Kingdom Walkthrough & Guides Wiki

Persona 3 Reload Walkthrough & Guides Wiki
All rights reserved
©2021 Pokémon. ©1995–2021 Nintendo / Creatures Inc. / GAME FREAK inc.
©2021 Tencent.
The copyrights of videos of games used in our content and other intellectual property rights belong to the provider of the game.
The contents we provide on this site were created personally by members of the Game8 editorial department.
We refuse the right to reuse or repost content taken without our permission such as data or images to other sites.
 Absol
Absol Aegislash
 Alcremie
 Alolan Ninetales
 Alolan Raichu
 Armarouge
 Azumarill
 Blastoise
 Blaziken
 Buzzwole
 Ceruledge
 Charizard
 Cinderace
 Clefable
 Comfey
 Cramorant
 Darkrai
 Decidueye
 Delphox
 Dhelmise
 Dodrio
 Dragapult
 Dragonite
 Duraludon
 Empoleon
 Espeon
 Falinks
 Galarian Rapidash
 Garchomp
 Gardevoir
 Gengar
 Glaceon
 Goodra
 Greedent
 Gyarados
 Ho-oh
Ho-oh Hoopa
Hoopa Lapras
 Latias
 Latios
 Machamp
 Mamoswine
 Meowscarada
 Meowth
 Metagross
 Mew
Mew Mimikyu
 Miraidon
 Moltres
 Mr. Mime
 Pawmot
 Pikachu
 Psyduck
 Sableye
 Scizor
 Sirfetch'd
 Snorlax
 Suicune
 Sylveon
 Tinkaton
 Trevenant
 Tsareena
 Tyranitar
 Umbreon
 Vaporeon
 Venusaur
 Wigglytuff
 Zapdos
 Zeraora
 Zoroark


![Monster Hunter Stories 3 Review [First Impressions] | Simply Rejuvenating](https://img.game8.co/4438641/2a31b7702bd70e78ec8efd24661dacda.jpeg/show)
![Marathon Cryo Archive Map Teased as [REDACTED] on Selection Screen](https://img.game8.co/4442236/6357203e58172f6de57f1991e7c39b22.png/thumb)


As an inteleon main I also find this kinda unfair, decidueye should be completely invisible when in tall grass or there should be treed on the map where he can hide, and if you hit the tree there is a 70% chance of hitting him.