Sableye Guide: Best Builds and Moveset
☆ Upcoming: Articuno | Meganium | Typhlosion | Feraligatr
★ Latest News: Zapdos | Moltres | Version 1.22.1.5
☆ Popular Pages: Upcoming Pokemon | Tier List
★ Current Seasons: Ranked S34 | Battle Pass S39
☆ Join Game8's Pokemon Discord Server!
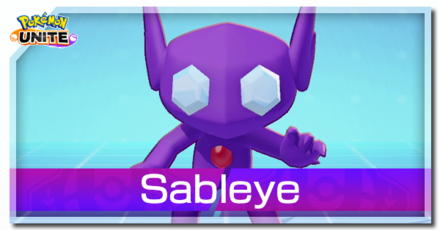
The best guide on how to play Sableye in Pokemon UNITE for Nintendo Switch and Mobile. Check here for the best builds, Held and Battle items, movesets, as well as the latest nerfs, buffs, counters, matchups, and more!
| Sableye Pokemon Pages | |
|---|---|
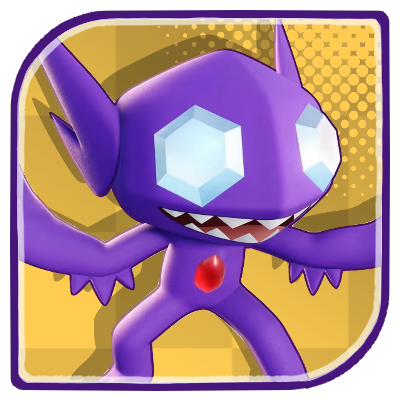
 Sableye Release Date Sableye Release Date |
 Sableye Guide Sableye Guide |
List of Contents
Latest Nerfs and Buffs (5/12)
| Sableye Changes (December 5) | |||
|---|---|---|---|
|
Shadow Sneak |
• Cooldown decrease from 13s to 12s. | ||
Stat Updates
| 1.10.1.3 | HP decreased from 3300~7900 to 3000~6900 (Level 1 - 15). |
|---|
Standard Attack
| 1.10.1.3 | Attack decreased from 140~365 to 110~300 (Level 1 - 15). |
|---|
Prankster
| 1.8.1.2 | Movement speed increase applied to Sableye has been reduced. Sableye now exits stealth faster. |
|---|
Knock Off
| 1.9.1.5 | Cooldown went up from 7.5s to 8.5s and the hindrance effect is reduced by 20%. |
|---|---|
| 1.10.1.3 | Damage reduced by 15%. |
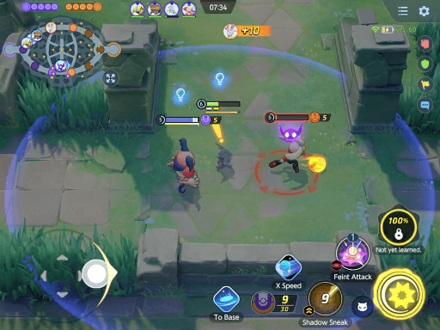
Shadow Sneak
| 1.8.1.2 | Additional damage dealt by boosted attacks while in stealth is reduced. Cooldown increased from 11s to 13s.(+2s) Damage decreased. |
|---|---|
| 1.8.1.6 | Time to stealth after using a move increased from 0.75s to 1.5s. (+0.75s) Can no longer enter stealth if Sabeleye is incapacitated before entering stealth. |
| 1.8.1.7 | Fixed a bug where additional damage was dealt after using this move. |
| 1.17.1.2 | Cooldown decrease from 13s to 12s. |
Confuse Ray
| 1.8.1.2 | Cooldown increased from 7s to 8s. (1s) |
|---|---|
| 1.8.1.4 | Cooldown increased from 8s to 10s. (+2s) |
| 1.9.1.5 | Stun effect on opponents reduced from 2.5s to 2s. |
Feint Attack
| 1.8.1.2 | Damage increased from 1864 to 2052. (+10%) |
|---|
Sableye Basic Info
| Sableye | ||
|---|---|---|
 |
Tier Rating:
Role: Supporter Attack Type: Melee Damage Type: Physical Difficulty: Intermediate |
|
| "Strike fear into the hearts of your foes with this sinister Pokemon!" | ||
Sableye Best Lanes

|

|

|
Tips & Strategies for Every Lane
Sableye Cost and Price

|
|
As of November 23, 2022, Sableye is now purchasable for 12,000 Aeos Coins or 575 Aeos Gems! This comes one week after Sableye was first released and was only available to purchase with Aeos Gems.
Strengths and Weaknesses
| Strengths | Weaknesses |
|---|---|
|
✔︎ Has very disruptive moves. ✔︎ Very stealthy and has high mobility thanks to Shadow Sneak. |
✖︎ Only mobile during stealth mode. ✖︎ For a Support Pokemon, does not have moves that can heal or shield allies. ✖︎ Does not offer much damage. |
Best Builds for Sableye
| Sableye Builds | |
|---|---|
Hindrance Build
Hindrance Build

|
Moveset | Held Items | |||
|---|---|---|---|---|---|
| Battle Item | |||||
| Stats from Items (Lv. 40) | Recommended Lane | ||||
|
Attack: +49 Movement Speed: +350 HP: +280 |
|
||||
| Emblem Color Combination | Target Emblem Stats | ||||
|
|
Positive Stats: • HP • Attack Free Negative Stats: • Sp. Atk • Defense • Sp. Def |
||||
| Note: The emblem color and stats here are suggestions only. The builds are still viable even without the suggested emblems. |
|||||
Hindrance Build Explanation
This build centers on ganking and locking down opponents using Knock Off and Confuse Ray. It also deals decent burst damage against isolated targets.
- Exp. Share increases Sableye's movement speed and HP. It also makes leveling up faster, especially when Sableye roams the map.
- Float Stone improves Sableye's movement speed further and also gives it some damage.
- Attack Weight provides Sableye with a large Attack stat boost, increasing its overall damage.
- Resonant Guard can be a replacement for Exp. Share or Float Stone to give Sableye more HP and become more productive during teamfights via the item's shielding effect.
- X Speed gives Sableye more mobility.
- The build's Boost Emblem loadout should consist of 6 Brown Emblems for extra damage and 6 White Emblems for more survivability. This can be achieved by equipping at least two (2) Emblems that are Brown and White.
- Equip Emblems that improve Attack or HP for a balanced build.
- Sp. Atk., Sp. Def., and Defense can be freely traded for any of the other stats.
Scouting Build
| Scouting Build | Moveset | Held Items | |||
|---|---|---|---|---|---|
| Battle Item | |||||
| Stats from Items (Lv. 40) | Recommended Lane | ||||
|
Attack: +56 Movement Speed: +350 HP: +280 |
|
||||
| Emblem Color Combination | Target Emblem Stats | ||||
|
|
Positive Stats: • Attack • Movement Speed Free Negative Stats: • Sp. Atk • Defense • Sp. Def |
||||
| Note: The emblem color and stats here are suggestions only. The builds are still viable even without the suggested emblems. |
|||||
Scouting Build Explanation
This is a support build centered on scouting for the team using the stealth from Shadow Sneak and the vision mechanic from Feint Attack. It can also deal decent damage thanks to Shadow Sneak's Boosted Attack bonus damage.
- Float Stone is the core item for the build, giving Sableye the mobility to quickly roam the map and scout for enemies.
- Exp. Share ensures that Sableye and its lane partner level up as fast as possible. It also gives a large movement speed boost for additional mobility.
- Curse Bangle works well with Feint Attack, allowing Sableye to reduce opponents' HP recovery when they get hit by Feint Attack.
- X Speed gives Sableye more mobility for roaming around and also escaping opponents.
- The build's Boost Emblem loadout should consist of 6 Brown Emblems for extra damage and 6 White Emblems for more survivability. This can be achieved by equipping at least two (2) Emblems that are Brown and White.
- Equip Emblems that improve Attack or Movement Speed for damage or mobility.
- Sp. Atk., Sp. Def., and Defense can be freely traded for any of the other stats.
Scouting Build Speed and Damage Test
| Items (Level 30) |
Estimated Time (@ Lvl 15) |
|---|---|
| Float Stone + Exp. Share |
7s |
Since the build revolves around scouting and giving vision for the team, equipping items that increases Sableye's movement speed is the ideal item combination.
As the results show, having Float Stone and Exp. Share will give Sableye the highest movement speed possible when out of combat. Even if having Float Stone only will still produce more or less the same result, the boosted experience gain from Exp. Share is crucial in the early game.
The speed test is measured by how fast Sableye can travel from the of top jungle entrance to the bottom jungle.
| Note: The numbers in bold are the highest result for a specific test. |
| Items (Level 30) | Estimated Time (@ Lvl 15) |
|---|---|
| No Items | 9s |
| Float Stone (Out of Combat) | 7s |
| Exp. Share | 8s |
| Float Stone (Out of Combat) + Exp. Share | 7s |
The tests above does not use any Emblems yet so it will scale higher if equipped.
Scoring Build
| Scoring Build | Moveset | Held Items | |||
|---|---|---|---|---|---|
| Battle Item | |||||
| Stats from Items (Lv. 40) | Recommended Lane | ||||
|
Attack: +49 Movement Speed: +175 HP: +525 |
|
||||
| Emblem Color Combination | Target Emblem Stats | ||||
|
|
Positive Stats: • Attack • Movement Speed Free Negative Stats: • Sp. Atk • Defense • Sp. Def |
||||
| Note: The emblem color and stats here are suggestions only. The builds are still viable even without the suggested emblems. |
|||||
 Score Shield
Scoring Build Explanation
This build utilizes the stealth from Shadow Sneak and Prankster to aggressively score throughout the game. Confuse Ray gives Sableye some crowd control to use during fights or a way to escape after scoring a goal.
- Attack Weight is the best score-based item for the build, giving Sableye a large damage boost.
- Float Stone allows Sableye to quickly roam around the map to score points while also providing a nice amount of damage.
- Score Shield ensures that Sableye will be able to score safely and successfully. It also gives a decent amount of HP.
- Goal-Getter allows Sableye to quickly score points, especially when it's maxed out. The shield from Score Shield coupled with Goal-Getter's scoring speed increase makes it extremely difficult for opponents to prevent Sabeleye from scoring.
- The build's Boost Emblem loadout should consist of 6 Brown Emblems for extra damage and 6 White Emblems for more survivability. This can be achieved by equipping at least two (2) Emblems that are Brown and White.
- Equip Emblems that improve Attack or Movement Speed for damage or mobility.
- Sp. Atk., Sp. Def., and Defense can be freely traded for any of the other stats.
Scoring Build Speed and Damage Test
| Items (Level 30) |
Estimated Time (@ Lvl 15) |
Shadow Sneak (Boosted Attack) (@ Lvl 15) Confuse Ray (@ Lvl 15) |
|---|---|---|
| Float Stone | 7s | - |
| Attack Weight (6 Stacks) |
- | 1736 1052 |
Since the build focuses on scoring, equipping items that increase Sableye's movement speed and help it score more efficiently is the ideal item combination.
As the result show, even having Float Stone only will give Sableye just as much movement speed when out of combat as also having Exp. Share. Moreover, since Shadow Sneak will be mainly used for stealth, which leaves Confuse Ray as Sableye's primary damage move, equipping Attack Weight instead of Muscle Band will be better for Sableye.
The speed test is measured by how fast Sableye can travel from the of top jungle entrance to the bottom jungle. The damage test is conducted using the Training Dummy in Practice Mode.
| Note: The numbers in bold are the highest result for a specific test. |
| Items (Level 30) | Estimated Time (@ Lvl 15) |
|---|---|
| No Items | 9s |
| Float Stone (Out of Combat) | 7s |
| Exp. Share | 8s |
| Float Stone (Out of Combat) + Exp. Share | 7s |
| Items (Level 30) | Shadow Sneak (Boosted Attack) (@ Lvl 15) | Confuse Ray (@ Lvl 15) |
|---|---|---|
| Muscle Band | 1899 | 973 |
| Razor Claw (Includes Effect) | 1728 | 973 |
| Attack Weight (6 Stacks) | 1736 | 1052 |
The tests above does not use any Emblems yet so it will scale higher if equipped.
Sableye Best Items & Moveset
Best Held Items
| Item | Explanation |
|---|---|
 Exp. Share Exp. Share
|
Since Sableye's focused on aiding its teammates by slowing down its enemies, Exp. Share allows Sableye to passively gain exp and get its movesets early on. |
 Attack Weight Attack Weight
|
Significantly raises Sableye's Standard Attack damage with each stack, and lets Sableye deal more damage when attacking enemies from behind. |
 Aeos Cookie Aeos Cookie
|
Significantly increases Sableye's HP for each stack. It can be a great supplement item for strategies that involve stealth scoring. |
 Float Stone Float Stone
|
Raises Sableye's Movement Speed and allows it to traverse around the map faster outside of combat. |
 Curse Bangle Curse Bangle
|
Curse Bangle works well with Sableye's Feint Attack, allowing the Pokemon to affect multiple opponents with the item's HP regeneration reduction. |
 Resonant Guard Resonant Guard
|
Resonant Guard gives Sableye a decent amount of HP and HP regeneration. It also makes Sableye more productive during teamfights thanks to the item's shield effect. |
Best Battle Items
| Item | Explanation |
|---|---|
 Goal-Getter Goal-Getter
|
Goal-Getter works great with Sableye's stealthy gameplay. It allows the Pokemon to quickly score points, especially when maxed out. |
 Eject Button Eject Button
|
Eject Button provides Sableye a quick and easy way to disengage from fights when its position is compromised. |
 X Speed X Speed
|
X Speed provides Sableye more mobility and also gives immunity from slows as a bonus. |
Best Moveset
| Move | Explanation |
|---|---|
 Knock Off Knock Off
|
Knock Off is a great crowd control move that also deals decent damage. It can prevent opponents from scoring by removing the amount of Aeos Energy they carry. |
 Confuse Ray Confuse Ray
|
Confuse Ray is a strong single-target disable that useful against hard hitters. Although it is not a stun, it does make the target uncontrollable for a short duration. |
With the changes made to Shadow Sneak and Prankster, Sableye can't rely too much on stealth anymore and has to adjust its gameplay to make up for it. Switching to Knock Off and Confuse Ray does exactly that. This moveset turns Sableye into a full-on disabler that has stealth capabilities, redefining its annoying playstyle. It also makes Sableye more effective during teamfights since it can lock down opponents for a considerable amount of time.
However, Sableye can still utilize Shadow Sneak to scout for enemies and bypass opponents to score points. Pairing the move with Feint Attack makes Sableye a unique supporter, providing a large vision advantage for its team.
Which Moveset Do You Think is Best for Sableye?
Let us know your thoughts in the comments!
How to Play Sableye
| Jump to Section | |
|---|---|
Utilize Sableye's Stealth Abilities
Sableye's effectiveness in combat relies on your ability in providing support for your allies by utilizing its stealthy abilities to either score as much as you can or bait opponents for your team to take advantage of, all while invisible with Prankster. While Sableye does not reveal itself immediately when seen by an enemy, it is still better to stay out of your opponent's sights and aim to flank of score as stealthily as when you can, especially if you have score-related Held Items equipped. You may also use this move to get easy hits then escape and hide inside the tall grass while the enemy is slowed down.
Prankster: Sableye Passive Effect and Cooldown
Pressure Targets with Boosted Attacks
Sableye's boosted attack meter automatically fills up every time the Pokemon enters stealth mode. This allows you to get extra damage in before engaging opponents. To get the most damage, make sure to attack unsuspecting targets, activate your moves, and run away from combat to enter stealth mode again.
Disrupt The Opponent's Early Game
Sableye's early game looks to focus on making it difficult for the opponents to get good positioning and early advantage. While you may choose to play passively and help your teammates farm for EXP early on, Sableye's initial moveset is destructive enough that it can potentially stifle an opponent's early game.
Steal Aeos Energy From Opponents
Thief is a unique damage move that has Sableye steal Aeos Energy from opponents. It is particularly effective for preventing opponents that have score-related items equipped like Attack Weight or Sp. Atk. Specs get early bonuses. Aside from this interaction, the move is turns into a quick and easy stun move, if the target is not carrying Aeos Energy.
Thief: Sableye Move Effect and Cooldown
Slow Down Opponents with Astonish
Astonish is a slow move that can affect multiple opponents at once. Combined with the invisibility you get with Prankster, you can position yourself behind targets to get the maximum stun effect and open them up for an easy knockdown.
Astonish: Sableye Move Effect and Cooldown
Pick Damage Move Based on Playstyle
When it comes to choosing a damaging move upgrade, Sableye can continue its passive gameplay and sacrifice damage for more utility. Both moves are capable of dealing damage and inflicting slow, however, they offer different playstyles that will determine how Sableye should act when its support is needed in battle.
Get More Mobility with Shadow Sneak
Shadow Sneak buffs Sableye's movement speed outside of battle and lets it instantly turn invisible while traversing the map. It also lets Sableye deal boosted damage when it hits an enemy while in stealth. Take note, however, going for this move means that you plan to be in Stealth mode most of the time, scout the area for opponents, farm the Wild Pokemon, or aim to score points.
Shadow Sneak: Sableye Move Effect and Cooldown
Chase Down Enemies with Knock Off
Knock Off is a dash move that lets Sableye inflict slows and stuns on enemies when it hits. This is perfect if you plan to play aggressively and assist your teammates to secure objectives. Take note, however, that Sableye's health and movement speed out of combat is not that great and you need to be beside your allies in order to stay safe for most of the fight.
When sticking with allies during a clash, Sableye can stun enemies for a few seconds with Knock Off. Positioning yourself behind an enemy is risky, so make sure that you're with an ally at all times when positioning and attempting to attack an enemy from behind, or wait for them to retreat before giving chase.
Knock Off: Sableye Move Effect and Cooldown
Disrupt Enemies with Your Hindrance Move
When Sableye reaches level 6, you will get access to its unique hindrance moveset. Both moves are vastly different as they have different gameplay strategies at their core. Picking the move that fits your playstyle allows you to take full advantage of its effects.
Lure Opponents with Feint Attack
Feint Attack has Sableye throw fake Aeos Energy at the designated area and damage opponents that touches them. You can essentially use this move as a straight-up ranged move that you constantly throw at the enemy position. However, its strength lies in how you use the move to trick opponents into picking the fake Aeos Energy. A good spot to throw the fake Aeos Energy would be near allied goals as enemies can mistake it for the real thing and immediately pick it up only to get pranked with damage and slow instead. This will make opponents that are adamant on stacking score related Held Item bonuses think twice.
Feint Attack: Sableye Move Effect and Cooldown
Disorient Opponents with Confuse Ray
Sableye can take control away from the opposing player when it hits opponents with a Confuse Ray. While in a confused state, the Pokemon will start continuously attacking other Pokemon in the following order of priority: first, their ally Pokemon; then, wild Pokemon; last, Pokemon on the user's team. The move can potentially cause havoc, especially when used during crucial team fights. A good strategy is to utilize Sableye's stealth ability and position it near the target for a better shot. You can use Confuse Ray on Attackers or All-Rounders to get the most damage possible. Otherwise, you can use the move to disrupt the positioning of Defenders and make them lose the front line.
Confuse Ray: Sableye Move Effect and Cooldown
Where to Place Fake Aeos Energy
Theia Sky Ruins is a wide and spacious area with plenty of strategic locations. With the use of Feint Attack, Sableye can drop fake Aeos Energy at specific spots as a useful spying tool and help provide sight for the team to take advantage.
Inside Tall Grass
It is best to use Feint Attack on places where enemies usually traverse to, and the number one place would be the Tall Grass scattered around the map. Placing fake aeos energy here provides vision to Sableye and its teammates, revealing hiding enemies that are looking to gank.
Near Wild Pokemon Camps
Placing fake aeos energy near Enemy camps should also be a priority since you're letting your junglers know if there are opponents farming for exp or if it's free to take. A good spot for this is at the middle of the map where the highly contested Altaria and Swablu spawns are located.
Stun Enemies with Chaos Glower During Clashes
Chaos Glower is a great team fight move that disrupts enemies with confusion and stuns. This move is best used when all enemies are present and are in a spot that can be hit with a cone attack. As a bonus, if opponents are hit with the move while facing Sableye, they will lose control and begin recalling back to base. However, the effect will cancel if they get hit during the recall but still get a decent stun. Combine the move with the hindrance effects of Confuse Ray, and you can watch your enemies tear each other apart and lead your team to victory.
Chaos Glower: Sableye Move Effect and Cooldown
Sableye Progression and Leveling Guide
Top and Bottom Guide
Level 1 to 4
- Quickly clear out the Bunnelbies in the lane.
- Keep farming wild Pokemon in the lane to reach level 4 and learn your first move.
- At bottom lane, prioritize taking Indeedees for more exp.
Level 5 to 8
- Keep hunting Wild Pokemon to gain more EXP from farming Altaria and Swablus.
- Once you reach level 6, learn your second move.
- Help allies secure Regice, Registeel, or Regirock when it spawns, otherwise secure Regieleki.
- Upon reaching level 8, learn your Unite Move.
Level 9+
- Stick with allies to hunt targets, secure objectives, and push lanes.
- Reach at least level 12 or max level if possible before or when Groudon spawns for a fully-upgraded moveset.
- Make sure that your Unite Move is available when Groudon spawns.
- Help teammates win a teamfight and secure Groudon.
Sableye Combos
Chaos Glower Combos
This set of combos provide ways to set up Chaos Glower for maximum effect.
Sneaky Surprise
| Sneaky Surprise | |
|---|---|
| This is a simple setup for Phantom Ambush to catch enemies by surprise. You can use this on a single target or on groups of enemies. First, use Shadow Sneak to get into a good position, preferably at a point where most of your enemies are facing, then use Chaos Glower to stun them. Finish the combo with Feint Attack, and follow up with a Boosted Attack. | |
3-Way Lock Down
| 3-Way Lock Down | |
|---|---|
| This combo can lock down opponents for a long time with three different status effects. Using the stealth from Prankster, get a good position to use Chaos Glower and freeze enemies in place, preferably at a point where most of your enemies are facing. While they're returning to base, use Knock Off to trigger the stun. Finally, pick a target to use Confuse Ray on, prolonging its lock down for a little longer. | |
Matchups & Counters for Sableye
Sableye Matchups
| Matchup Notes | ||
|---|---|---|
| 1. The chart is based on our own experience playing Sableye. 2. Pokemon within each tier are unordered 3. Any Pokemon not shown here are still under investigation. |
||
Hard Counter with Disables and Damage Burst
While Sableye is equipped to be a quick, stealthy, slow inflicting supporter, it has low HP and Defense. Enemies that have quick damage bursts, ranged attacks, and disabling moves can take down Sableye easily.
Hard Counters
| Pokemon | Explanation |
|---|---|
 Inteleon Inteleon
|
Rating: ★★★★★ • Can see and attack Sableye even while in stealth using Azure Spy Vision. • Can quickly burst down Sableye using Snipe Shot or Liquidation and critical-hit attacks. |
 Umbreon Umbreon
|
Rating: ★★★★★ • Can trap Sableye using Mean Look, allowing it and its allies to break Sableye's stealth. • Can still damage Sableye even while in stealth using Snarl and Moonlight Prance. |
 Leafeon Leafeon
|
Rating: ★★★★ • Can quickly burst down Sableye once it shows itself using Leaf Blade or Aerial Ace, Razor Leaf or Solar Blade, and Emerald Two-Step. |
Even Matchups for Sableye
Although Sableye has offensive moves, its damage is not enough for it to become a threat to these Pokemon. Most of the damage will always come from its allies with Sableye providing support. However, its stealth and moves can be a nuisance for these Pokemon.
Disrupt Their Attacks or Combos
| All-Rounders |
|---|
| How to Beat |
|
• These Pokemon excel in close combat and rely mostly on their attacks or combos to deal damage. They are also durable enough to tank Sableye's damage. However, they are susceptible to getting disabled during fights. • Use Knock Off and Confuse Ray to disrupt their attacks or combos. • Avoid going toe to toe with them when they're not disabled. • Let allies take care of bringing them down. |
Take Them Out First
| Supporters |
|---|
|
|
| How to Beat |
|
• Much like Sableye, these Pokemon usually stick with their allies and rarely venture alone. Although they themselves pose no threat to Sableye, their support capabilities makes them valuable during fights. • Take them out first by disabling them using Knock Off and Confuse Ray. • When possible, force them to teleport back to base using Chaos Glower, but make sure they won't get hit by allies. |
Keep Disabling Them
| Highly Durable Pokemon |
|---|
| How to Beat |
|
• These Pokemon are extremely durable, making it difficult for Sableye and its allies to take them down fast. • Utilize the stealth to stay on top of them and keep disabling them using Knock Off and Confuse Ray while Sableye's allies take them down. |
Easy Matchups for Sableye
Although these Pokemon can certainly take out Sableye easily, its stealth, mobility, and arsenal of disabling moves gives the Pokemon a greater chance in winning against them.
Utilize Stealth
| Ranged, Fragile Pokemon with High Damage |
|---|
|
|
| How to Beat |
|
• These Pokemon prefer to keep their distance from opponents when fighting. They also have high damage potential that can be dangerous for Sableye. However, Sableye can easily get close to them thanks to its stealth. • Utilize the stealth to approach them away from their line of fire, then disable them using Knock Off and Confuse. • Alternatively, Sableye can force them to teleport back to base or finish them off using Chaos Glower. |
Best Teammates for Sableye
| Pokemon | Explanation |
|---|---|
 Slowbro Slowbro
 Snorlax Snorlax
 Wigglytuff Wigglytuff
|
Plenty of Crowd Control |
| Having these sturdy Pokemon can help absorb most of the damage during team fights, letting Sableye maneuver freely while in stealth mode. Moreover, these Pokemon can provide hard crowd control that shuts down targets, allowing Sableye to double down on its slow moves and contribute damage if it needs to. | |
 Decidueye Decidueye
 Gardevoir Gardevoir
 Venusaur Venusaur
|
Snipers |
| These Pokemon have strong, range moves that can decimate a target in seconds. Sable eye can use its stealth abilities or Feint Attack to keep opponents visible for them as they line up their shots. Moreover, Sableye's stuns and slows can make targetting for these Pokemon easier. | |
 Absol Absol
 Gengar Gengar
|
Extra Burst |
| Speedsters will greatly benefit from the extra sight Sableye gives, allowing them to plan ahead and set up ganks effectively. Sableye can also keep opponents in place with its stuns and slows for easier burst opportunities. | |
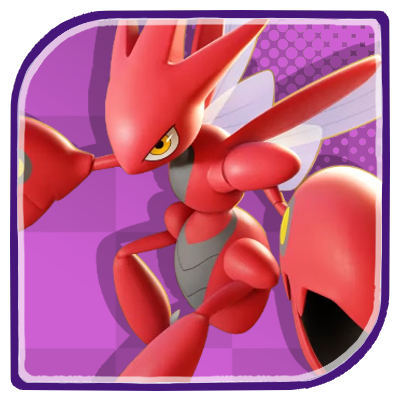 Scizor Scizor
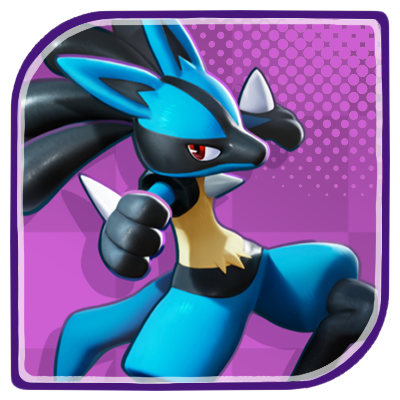 Lucario Lucario
 Tsareena Tsareena
|
More Punches to Land |
| Having Sableye's arsenal of slows and stuns increases the lethality of combos All-Rounders can dish out. It will help these Pokemon perform their combos properly without a hassle. |
Sableye Moves
Move Slot 1 (R)
 Thief Thief
(Lv. 1 or 3) |
Move Type: Dash Damage Type: Physical Cooldown: 7.5s Starting Damage: 239 Final Damage: 257 |
|---|---|
| Has the user dash in the designated direction, dealing damage to any opposing Pokemon it hits and decreasing their movement speed for a short time. If this move hits Pokemon from the opposing team, it steals a small amount of their Aeos energy. If those Pokemon do not have any Aeos energy, they will be left unable to act for a short time. | |
|
Knock Off
(Lv. 4) |
Move Type: Hindrance Damage Type: Physical Cooldown: 8.5s Starting Damage: 993 Damage per attack: 331, Number of attacks: 3 Final Damage: 1476 Damage per attack: 492, Number of attacks: 3 |
|
Has the user move in the designated direction and then back again while attacking around itself, dealing damage to opposing Pokemon hit by the attacks and leaving them unable to act for a short time. For a short time afterward, this move can be used again. If it is, the user attacks in front of itself with its claws, dealing damage to opposing Pokemon it hits and shoving them. When either the first or second stage of this move hits opposing Pokemon, those Pokemon will drop some of their collected Aeos energy, and for a short time, they'll be unable to pick up Aeos energy. When either stage of this move hits opposing Pokemon that do not have Aeos energy, those Pokemon will be left unable to act- and for a longer duration. While using this move, the user receives reduced damage.
Upgrade: For a short time after this move is used, the next time the user picks up Aeos energy, the user recovers HP and has its movement speed increased. |
|
 Shadow Sneak Shadow Sneak
(Lv. 4) |
Move Type: Buff Damage Type: Status Cooldown: 12s Starting Damage: N/A Final Damage: N/A |
|
For a short time, increases the user's movement speed and has it enter stealth. While this move is active, the user's next boosted basic attack deals additional damage. While this move is active, if the user exits stealth and a hindrance has not left it unable to act, it will be able to enter stealth again.
Upgrade: Increases the duration of this move's effects. While this move is active and the user is in stealth, it will also gradually recover HP. |
|
Move Slot 2 (ZR)
 Astonish Astonish
(Lv. 1 or 3) |
Move Type: Area Damage Type: Special Cooldown: 9s Starting Damage: 439 Front damage: 439, Backside damage: 570 Final Damage: 508 Front damage: 439, Backside damage: 570 |
|---|---|
| Has the user attack in a cone in front of itself, dealing damage to opposing Pokemon and decreasing their movement speed for a short time. If this move hits opposing Pokemon from behind, it deals increased damage and a greater decrease in movement speed. | |
 Feint Attack Feint Attack
(Lv. 6) |
Move Type: Area Damage Type: Special Cooldown: 1s Starting Damage: 1251 Damage per instance: 139, Number of instances: 9 Final Damage: 1863 Damage per instance: 207, Number of instances: 9 |
|
Has the user throw dummy Aeos energy to a designated location. While dummy Aeos energy remains at a location, that location and the area around it will be visible to the user. Dummy Aeos energy can remain up to five locations at a time. If an opposing Pokemon picks up dummy Aeos energy, that energy explodes, dealing damage over time to that Pokemon and decreasing its movement speed for a short time. A maximum of three uses can be kept in reserve for this move.
Upgrade: If an opposing Pokemon is knocked out while taking damage over time from this move, it will drop more Aeos energy than it normally would. |
|
|
Confuse Ray
(Lv. 6) |
Move Type: Hindrance Damage Type: Special Cooldown: 10s Starting Damage: 668 Final Damage: 933 |
|
Has the user fire a sinister ray in the designated direction, dealing damage to opposing Pokemon it hits. If this move hits Pokemon from the opposing team, it also leaves them confused. While confused, Pokemon continuously attack nearby Pokemon with basic attacks. Confused Pokemon will target nearby Pokemon in the following order of priority: first, their ally Pokemon; then, wild Pokemon; last, Pokemon on the user's team.
Upgrade: Also increases the movement speed and basic attack speed of Pokemon from the opposing team while this move has left them confused. |
|
Unite Moves (ZL)
 Chaos Glower Chaos Glower
(Lv. 8) |
Move Type: Hindrance Damage Type: Special Cooldown: 99s Starting Damage: 1222 Final Damage: 1566 |
|---|---|
| Has the user shoot light from both of its eyes, dealing damage to opposing Pokemon in an area of effect in front of itself. Pokemon from the opposing team hit by this move who are facing the user freeze in place and start involuntarily preparing to return to base. If they take damage before returning to base, they remain where they are and are left unable to act for a short time. Opposing Pokemon hit by this move who are not facing the user have their movement speed decreased for a short time. | |
Standard Attack
|
|
Becomes a boosted attack with every third attack, dealing damage to opposing Pokemon it hits and decreasing their movement speed for a short time. If the user is in stealth when it hits an opposing Pokemon with a boosted attack, it will deal damage and apply a fear effect. Opposing Pokemon affected by fear will be forced to move away from the user. When the user enters stealth, it will be able to use the boosted attack immediately. |
|---|
Ability (Passive)
 Prankster Prankster
|
When the Pokemon with this Ability is outside the visual range of Pokemon from the opposing team, it enters stealth and its movement speed increases. When the Pokemon with this Ability enters the visual range of a Pokemon from the opposing team, it does not immediately become visible but instead remains in stealth for a short time. The Pokemon with this Ability exits stealth when it attacks. |
|---|
Sableye Stats & Evolutions
Sableye Evolutions
 Sableye SableyeThis Pokemon does not evolve. |
Sableye Stats
| Level | HP | Defense | Special Defense | Attack Damage |
|---|---|---|---|---|
| 1 | 3000 | 40 | 30 | 110 |
| 2 | 3139 | 46 | 34 | 117 |
| 3 | 3292 | 52 | 39 | 124 |
| 4 | 3460 | 59 | 44 | 132 |
| 5 | 3644 | 67 | 50 | 141 |
| 6 | 3847 | 75 | 56 | 151 |
| 7 | 4070 | 84 | 63 | 162 |
| 8 | 4316 | 94 | 71 | 174 |
| 9 | 4587 | 105 | 79 | 187 |
| 10 | 4886 | 117 | 88 | 202 |
| 11 | 5216 | 131 | 98 | 218 |
| 12 | 5578 | 146 | 109 | 236 |
| 13 | 5977 | 162 | 121 | 255 |
| 14 | 6416 | 180 | 135 | 276 |
| 15 | 6900 | 200 | 150 | 300 |
Attack Damage is the damage of the Basic Attack as tested against the Training Dummy.
Sableye In-Game Stat Listings
| Offense | Endurance | Mobility | Scoring | Support |
|---|---|---|---|---|

|

|
|

|
|
Sableye Skins (Holowear)
| Holowear | |
|---|---|
 Noble Style Noble Style
Zirco Trading:
|
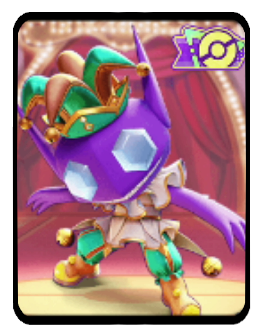 Performer Style Performer Style
Zirco Trading:
|
 Noble Style (Green) Noble Style (Green)
Zirco Trading:
|
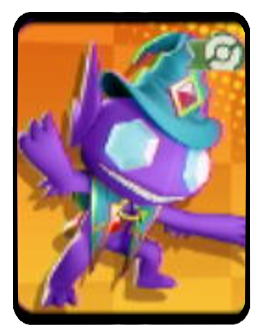 Dark Magician Style Dark Magician Style
Event:
Season 20 Battle Pass |
Sableye Character Spotlight
Sableye Achievements
Shadow Sneak Achievement
| Shadow Sneak | |
|---|---|
| Pokemon | Move |
|
Sableye
|
|
| Mission: In a single battle, while in stealth after using Shadow Sneak or Shadow Sneak+, hit Pokemon from the opposing team with a boosted attack 20 or more times (5/10/20 battles total) |
|
| Medals & Points | Rewards |
|
|
|
|
|
|
|
|
|
List of Supporter Pokemon Achievements
Pokemon UNITE Related Guides

All Pokemon Guides and Builds
 Aegislash
 Alcremie
 Alolan Ninetales
 Alolan Raichu
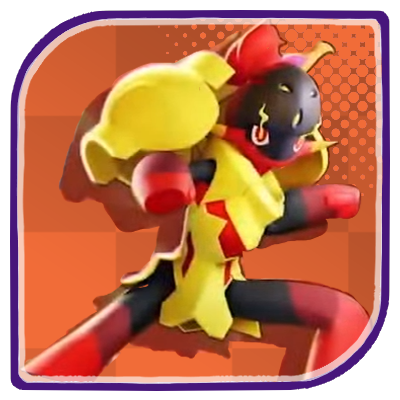 Armarouge
 Azumarill
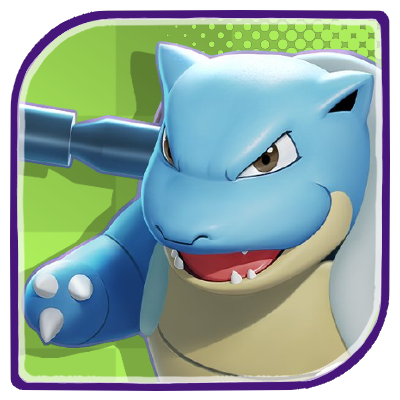 Blastoise
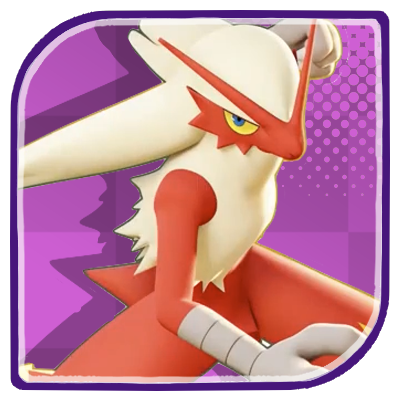 Blaziken
 Blissey
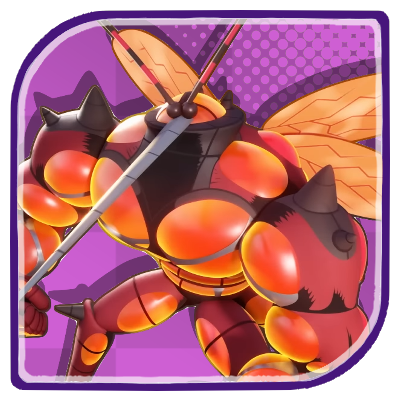 Buzzwole
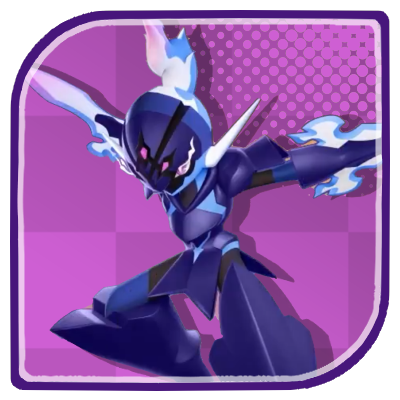 Ceruledge
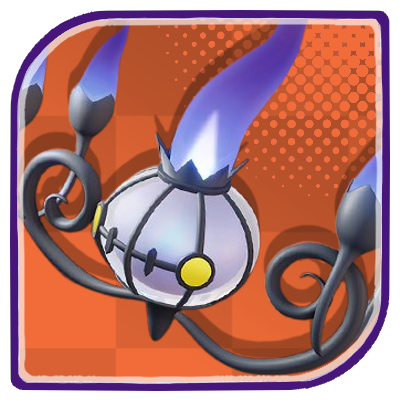 Chandelure
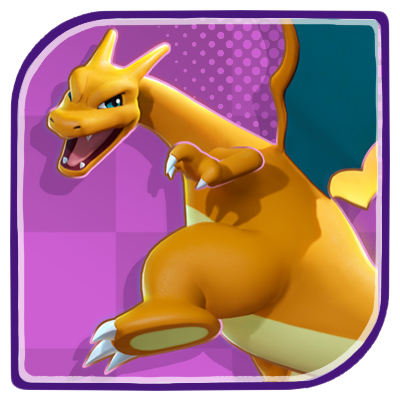 Charizard
 Cinderace
 Clefable
 Comfey
 Cramorant
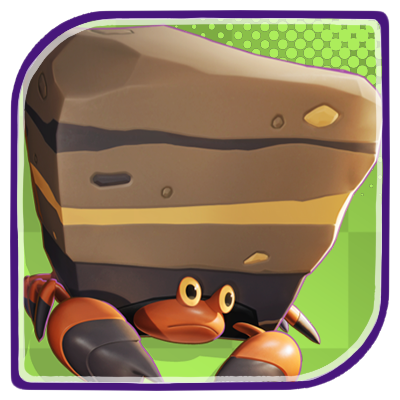 Crustle
 Darkrai
 Delphox
 Dhelmise
 Dodrio
 Dragapult
 Dragonite
 Duraludon
 Eldegoss
 Empoleon
 Espeon
 Falinks
 Galarian Rapidash
 Garchomp
 Glaceon
 Goodra
 Greedent
 Greninja
 Gyarados
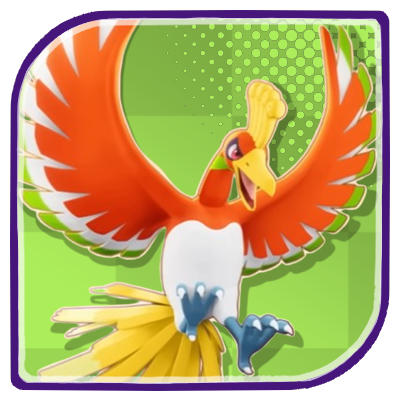 Ho-oh
Ho-oh Hoopa
Hoopa Lapras
 Latias
 Latios
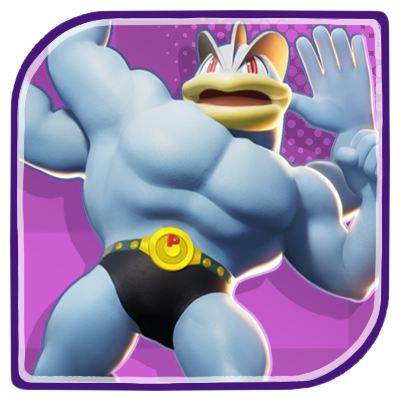 Machamp
 Mamoswine
 Meowscarada
 Meowth
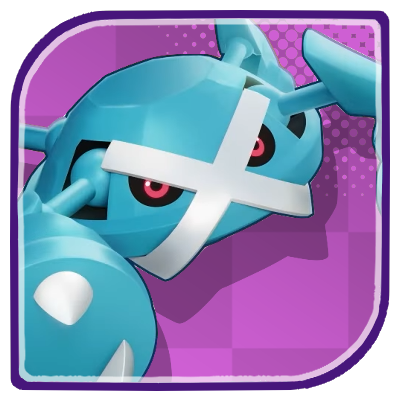 Metagross
 Mew
Mew Mimikyu
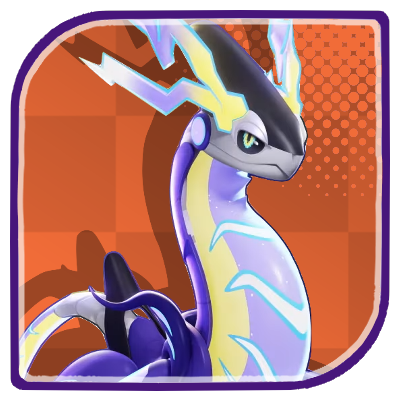 Miraidon
 Moltres
 Mr. Mime
 Pawmot
 Pikachu
 Psyduck
 Sirfetch'd
 Suicune
 Sylveon
 Talonflame
 Tinkaton
 Trevenant
 Tyranitar
 Urshifu
 Vaporeon
 Zacian
 Zapdos
 Zeraora
 Zoroark
Upcoming Pokemon
 Articuno Articuno(TBA) |
 Meganium Meganium(TBA) |
 Typhlosion Typhlosion(TBA) |
 Feraligatr Feraligatr(TBA) |
Mega Evolutions
| Mega Evolved Pokemon | ||
|---|---|---|
 Mega Charizard X Mega Charizard X |
 Mega Charizard Y Mega Charizard Y |
 Mega Gyarados Mega Gyarados |
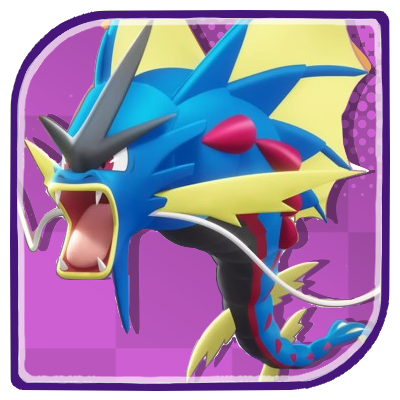
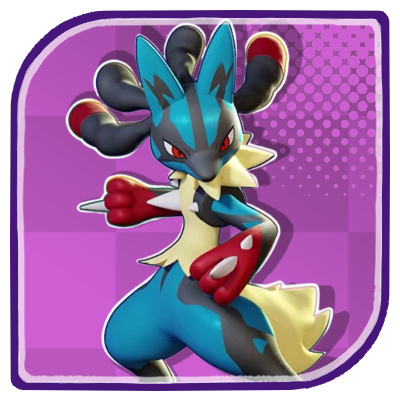 Mega Lucario Mega Lucario |
 Mega Mewtwo X Mega Mewtwo X |
 Mega Mewtwo Y Mega Mewtwo Y |
Pokemon by Role
| All Pokemon Roles | |||||
|---|---|---|---|---|---|
 Attackers Attackers |
 All-Rounders All-Rounders |
 Defenders Defenders |
|||
 Speedsters Speedsters |
 Supporters Supporters |
||||
Pokemon by Characteristics
| Attack Type | |
|---|---|
 Melee Pokemon Melee Pokemon |
 Ranged Pokemon Ranged Pokemon |
 Physical Pokemon Physical Pokemon |
 Special Pokemon Special Pokemon |
| Stat Rankings | |
 HP Ranking HP Ranking |
 Defense Ranking Defense Ranking |
 Sp. Def. Ranking Sp. Def. Ranking |
 Basic Attack Ranking Basic Attack Ranking |
Comment
I don’t care if he’s a throw pick, I love this silly guy
Author

Sableye Guide: Best Builds and Moveset
Rankings
- We could not find the message board you were looking for.

Gaming News

![The Liar Princess and the Blind Prince Review [PC] | Lovely to Look at but Tedious to Play](https://img.game8.co/4442586/8d95f5faf05780f1765ce7e0938bd825.jpeg/show)
![The Seven Deadly Sins: Origin [First Impressions] | A Promising Start](https://img.game8.co/4440581/584e0bfb87908f12c4eab6e846eb1afd.png/thumb)
![The Liar Princess and the Blind Prince Review [PC] | Lovely to Look at but Tedious to Play](https://img.game8.co/4442586/8d95f5faf05780f1765ce7e0938bd825.jpeg/thumb)
![Marathon Cryo Archive Map Teased as [REDACTED] on Selection Screen](https://img.game8.co/4442236/6357203e58172f6de57f1991e7c39b22.png/thumb)
Popular Games

Genshin Impact Walkthrough & Guides Wiki
Umamusume: Pretty Derby Walkthrough & Guides Wiki
Pokemon Pokopia Walkthrough & Guides Wiki
Honkai: Star Rail Walkthrough & Guides Wiki
Monster Hunter Stories 3: Twisted Reflection Walkthrough & Guides Wiki
Arknights: Endfield Walkthrough & Guides Wiki
Wuthering Waves Walkthrough & Guides Wiki
Zenless Zone Zero Walkthrough & Guides Wiki
Pokemon TCG Pocket (PTCGP) Strategies & Guides Wiki
Monster Hunter Wilds Walkthrough & Guides Wiki


Recommended Games
Diablo 4: Vessel of Hatred Walkthrough & Guides Wiki
Cyberpunk 2077: Ultimate Edition Walkthrough & Guides Wiki
Fire Emblem Heroes (FEH) Walkthrough & Guides Wiki
Yu-Gi-Oh! Master Duel Walkthrough & Guides Wiki
Super Smash Bros. Ultimate Walkthrough & Guides Wiki
Pokemon Brilliant Diamond and Shining Pearl (BDSP) Walkthrough & Guides Wiki
Elden Ring Shadow of the Erdtree Walkthrough & Guides Wiki
Monster Hunter World Walkthrough & Guides Wiki
The Legend of Zelda: Tears of the Kingdom Walkthrough & Guides Wiki
Persona 3 Reload Walkthrough & Guides Wiki


All rights reserved
©2021 Pokémon. ©1995–2021 Nintendo / Creatures Inc. / GAME FREAK inc.
©2021 Tencent.
The copyrights of videos of games used in our content and other intellectual property rights belong to the provider of the game.
The contents we provide on this site were created personally by members of the Game8 editorial department.
We refuse the right to reuse or repost content taken without our permission such as data or images to other sites.
Do I think he's good, no. Do I think he's funny, yes, use float stone and a lot of speed to get to the enemy jungle, steal their exp with astonish which has just enough range to do this. Also, if you don't encounter a random unite move, it can hold its own surprisingly well when defending its goal, you will probably lose the way of attrition but you can hold them off for a while. Also, the unite move if you hit the opponent from behind it forces them back to base if they aren't attacked.