Pikachu Guide: Builds and Best Items
☆ Upcoming: Articuno | Meganium | Typhlosion | Feraligatr
★ Latest News: Zapdos | Moltres | Version 1.22.1.5
☆ Popular Pages: Upcoming Pokemon | Tier List
★ Current Seasons: Ranked S34 | Battle Pass S39
☆ Join Game8's Pokemon Discord Server!

The best guide on how to play Pikachu in Pokemon UNITE for Nintendo Switch and Mobile. Check here for the best builds, Held and Battle items, movesets, as well as the latest nerfs, buffs, counters, matchups, and more!
| Pika Party Related Links | |
|---|---|
 Pika Party Quick Battle Event Pika Party Quick Battle Event |
 Pika Party Challenge Missions Pika Party Challenge Missions |
 Pikachu Guide: Builds and Best Items Pikachu Guide: Builds and Best Items |
|
List of Contents
Pikachu Latest Nerfs & Buffs (10/23)
| Pikachu Changes | |
|---|---|
|
Electro Ball |
• Damage decreased by 8% - 0%. |
Stat Updates
| 1.5.2.7 | HP recovery increased |
|---|---|
| 1.16.1.2 | The visuals of Pikachu’s moves have been updated. |
| 1.18.1.4 | Defense increased from 35-175 to 35-240 (Lv.1–15). Sp. Defense 27-135 to 27-200 (Lv.1–15). |
Thunder
| 1.2.1.8 | Damage dealt increased from 2947 to 3290 (+11.6) |
|---|---|
| 1.2.1.11 | Fixed a bug that Thunder might not be activated when you quickly activate Volt Tackle ►Thunder ► Standard Attack in this order. |
| 1.12.1.2 | Damage increased by 10%. Waiting time is reduced from 8 to 7.5 seconds. |
| 1.15.1.2 | Cooldown decreased from 7.5s to 7s. |
| 1.16.2.8 | Damage decreased by 5%. |
Volt Tackle
| 1.3.1.7 | Damage increased from 1480 to 1575 (+6%) |
|---|---|
| 1.2.1.8 | Damage dealt increased from 1015 to 1480 (+46%). |
| 1.14.1.2 | Damage increased by 20%. |
| 1.16.1.2 | Cooldown decreased from 10s to 9s. Pikachu's movement speed is now increased for a short duration after using the move. |
| 1.18.1.4 | Movement speed increase after landing changed from 30% for 2s to 60%, decreases by 10% every 0.5s (minimum 30%). |
| 1.19.1.2 | Damage decreased by 10%. |
Thunder Shock
| 1.3.1.7 | Damage increased from 481 to 519 (+8%) |
|---|
Thunderstorm
| 1.3.1.7 | Unite Move charge rate increased. Charge time decreased from ~139s → ~88s (-45%). |
|---|---|
| 1.16.1.2 | Number of targets struck by subsequent lightning bolts increased from 1 to 2. |
| 1.16.2.8 | Damage decreased by 8%. |
Thunderbolt
| 1.12.1.2 | Cooldown reduced from 8 to 7.5 seconds. |
|---|---|
| 1.15.1.2 | Cooldown decreased from 7.5s to 7s. |
Electro Ball
| 1.14.1.2 | Extra damage increased from 4% of Reduced HP to 6% of Reduced HP. Electro Ball+: Extra damage increased from 5% of Reduced HP to 8% of Reduced HP. |
|---|---|
| 1.16.2.8 | Damage decreased by 5%. Cooldown increased from 5s to 5.5s. |
| 1.20.3.10 | Damage decreased by 8% - 0%. |
Pikachu Basic Info
| Pikachu | ||
|---|---|---|
 |
Role: Attacker Attack Type: Ranged Damage Type: Special Difficulty: Novice |
|
| "Pikachu is a Pokémon that excels at attacking opponents from far away with electricity. Sometimes the attacks even leave opposing Pokémon paralyzed!" | ||
Pikachu Best Lanes

|

|

|
Tips & Strategies for Every Lane
Pikachu Strengths and Weaknesses
| Strengths | Weaknesses |
|---|---|
| ✔︎ Fast Unite Move recharge rate. ✔︎ Good mix of strong AoE and single-target moves ✔︎ Long cast range |
✖︎ Very Fragile. ✖︎ Has no mobility moves. |
Best Builds for Pikachu
| Pikachu Builds | |
|---|---|
| - | |
AOE Build
AOE Build

|
Moveset | Held Items | |||
|---|---|---|---|---|---|
| Battle Item | |||||
| Stats from Items (Lv. 40) | Recommended Lane | ||||
|
Sp. Atk: +123 HP: +245 |
|
||||
| Emblem Color Combination | Target Emblem Stats | ||||
|
|
Positive Stats: • Sp. Atk Free Negative Stats: • Attack • Defense • Sp. Def • Critical-Hit Rate |
||||
| Note: The emblem color and stats here are suggestions only. The builds are still viable even without the suggested emblems. |
|||||
AOE Build Explanation
This build revolves around bombarding enemies with Thunderbolt and Thunder from the backlines.
- Wise Glasses provides Pikachu a large Sp. Atk. stat boost thanks to its percentage bonus.
- Choice Specs gives Pikachu more Sp. Atk. stat and increases its minimum move damage.
- Slick Spoon further adds more Sp. Atk. stat and grants Pikachu Sp. Def. penetration for its moves. It also gives a decent amount of HP for some durability.
- Eject Button gives Pikachu a reliable reposition tool to keep its distance from enemies.
- X Speed can also work with the build for the same purpose.
- The build's Boost Emblem loadout should consist of 7 Black Emblems for some move cooldown reduction and 6 Green Emblem to maximize its damage. This can be achieved by equipping at least three (3) Emblems that are both Black and Green.
- Equip Emblems that improve Sp. Atk. to further improve Pikachu's move damage.
- Attack, Critical-Hit Rate, Sp. Def., and Defense can be freely traded for the other stats.
AOE Build Damage Test
| Items (@Lvl 30) |
Thunderbolt (@ Lvl 15) |
Thunder (@ Lvl 15) |
|---|---|---|
| Wise Glasses + Chioce Specs (Includes effect) + Slick Spoon |
1187 | 2611 |
Since the build is centered on Thunder and Thunderbolt, equipping items that will maximize their damage is the ideal item combination.
Out of all the item combinations, Wise Glasses, Choice Specs, and Slick Spoon will be the best for the build. The item combination generated only slightly lower results compared to the highest one, but it doesn't require Pikachu to stack an item to attain the maximum damage.
These damage tests are conducted in Practice Mode with Goodra as the Training Partner. The Pokemon is set to level 15 and has no items equipped. The results are taken by substracting the Pokemon's max HP and its HP after taking damage.
| Note: The numbers in bold are the highest result for a specific test. |
| Items (@Lvl 30) | Thunderbolt (@ Lvl 15) | Thunder (@ Lvl 15) |
|---|---|---|
| Wise Glasses + Chioce Specs (Includes effect) + Slick Spoon | 1187 | 2611 |
| Wise Glasses + Chioce Specs (Includes effect) + Sp. Atk. Specs (6 Stacks) | 1131 | 2478 |
| Wise Glasses + Slick Spoon + Sp. Atk. Specs (6 Stacks) | 910 | 2387 |
| Chioce Specs (Includes effect) + Slick Spoon + Sp. Atk. Specs (6 Stacks) | 1192 | 2620 |
The tests above does not use any Emblems yet so it will scale higher if equipped.
Single-Target Build
| Single-Target Build | Moveset | Held Items | |||
|---|---|---|---|---|---|
| Battle Item | |||||
| Stats from Items (Lv. 40) | Recommended Lane | ||||
|
Sp. Atk: +79 HP: +245 Cooldown: -5.20% Unite Move Charge Rate: +7% |
|
||||
| Emblem Color Combination | Target Emblem Stats | ||||
|
|
Positive Stats: • Sp. Atk Free Negative Stats: • Attack • Defense • Sp. Def • Critical-Hit Rate |
||||
| Note: The emblem color and stats here are suggestions only. The builds are still viable even without the suggested emblems. |
|||||
Single-Target Build Explanation
This build is centered on bursting down targets with Volt Tackle and Electro Ball, particularly key targets.
- Choice Specs gives Pikachu more Sp. Atk. stat and increases its minimum move damage.
- Slick Spoon further adds more Sp. Atk. stat and grants Pikachu Sp. Def. penetration for its moves. It also gives a decent amount of HP for some durability.
- Energy Amplifier gives Pikachu a large damage boost whenever it uses Thunderstorm, improving its burst capabilities.
- Eject Button gives Pikachu a reliable reposition tool to chase or escape enemies.
- X Speed can also work with the build for the same purpose.
- The build's Boost Emblem loadout should consist of 7 Black Emblems for some move cooldown reduction and 6 Green Emblem to maximize its damage. This can be achieved by equipping at least three (3) Emblems that are both Black and Green.
- Equip Emblems that improve Sp. Atk. to further improve Pikachu's move damage.
- Attack, Critical-Hit Rate, Sp. Def., and Defense can be freely traded for the other stats.
Single-Target Build Damage Test
| Items (@Lvl 30) |
Volt Tackle (@ Lvl 15) |
Electro Ball (@ Lvl 15) |
|---|---|---|
| Choice Specs (Includes Effect) + Slick Spoon + Energy Amplifier (Includes effect) |
1520 | 1709 |
Since the build is centered on bursting down targets with Volt Switch and Electro Ball, equipping items that will maximize their damage output is the ideal item combination.
As the results show, Choice Specs, Slick Spoon, and Energy Amplifier will yield the best outcome for the build. However, Pikachu needs to activate Thunderstorm first to attain the maximum damage possible.
These damage tests are conducted in Practice Mode with Goodra as the Training Partner. The Pokemon is set to level 15 and has no items equipped. The results are taken by substracting the Pokemon's max HP and its HP after taking damage.
| Note: The numbers in bold are the highest result for a specific test. |
| Items (@Lvl 30) | Volt Tackle (@ Lvl 15) | Electro Ball (@ Lvl 15) |
|---|---|---|
| Wise Glasses + Chioce Specs (Includes effect) + Slick Spoon | 1328 | 1494 |
| Wise Glasses + Chioce Specs (Includes effect) + Sp. Atk. Specs (6 Stacks) | 1314 | 1471 |
| Wise Glasses + Chioce Specs (Includes effect) + Energy Amplifier (Includes effect) | 1438 | 1614 |
| Wise Glasses + Slick Spoon + Sp. Atk. Specs (6 Stacks) | 1055 | 1227 |
| Wise Glasses + Slick Spoon + Energy Amplifier (Includes effect) | 1120 | 1448 |
| Choice Specs (Includes effect) + Slick Spoon + Sp. Atk. Specs (6 Stacks) | 1335 | 1499 |
| Choice Specs (Includes Effect) + Slick Spoon + Energy Amplifier (Includes effect) | 1520 | 1709 |
| Slick Spoon + Sp. Atk. Specs (6 Stacks) + Energy Amplifier (Includes effect) | 1215 | 1454 |
The tests above does not use any Emblems yet so it will scale higher if equipped.
Pikachu Best Items & Moveset
Best Held Items
| Item | Explanation |
|---|---|
 Buddy Barrier Buddy Barrier
|
Buddy Barrier provides additional HP for Pikachu, allowing the Pokemon to have extra durability in battle. IT also synergizes well with the Thunderstorm as it gives extra shields when getting aggressive. |
 Energy Amplifier Energy Amplifier
|
Energy Amplifier further decreases Pikachu's already low cooldown time. It synergizes well with Thunderstorm as it increases the move's AoE damage significantly. |
 Wise Glasses Wise Glasses
|
Wise Glasses provides a straight boost to Piakchu's Sp. Attack stat. This further increases the Pokemon's overall damage output. |
 Shell Bell Shell Bell
|
Shell Bell's cooldown reduction and healing effects makes Pikachu's moves more valuable and effective. Although it gives less Sp. Atk. stat compared to others, it's a decent item nonetheless. |
 Choice Specs Choice Specs
|
Choice Specs functions similarly to Wise Glasses since both give the same flat Sp. Atk. boost, increasing its burst potential. |
 Slick Spoon Slick Spoon
|
Slick Spoon improves Pikachu's damage output by ignoring a portion of its target's Sp. Def. stat, especially against high durability Pokemon. It also provides increased Sp. Atk. and HP, which are essential to the Pokemon. |
Best Battle Items
| Item | Explanation |
|---|---|
 Eject Button Eject Button
|
Eject Button provides Pikachu with an escape tool when things get awry and a chase tool to catch enemies. |
 X Speed X Speed
|
X Speed allows Pikachu to maneuver around the battlefield with extra movement speed. It also gives Pikachu immunity from slows for a duration. |
Best Moveset
| Move | Explanation |
|---|---|
 Thunderbolt Thunderbolt
|
Thunderbolt is essential for winning team battles since it locks down enemies in an area with a long stun. |
 Thunder Thunder
|
Thunder deals tons of area damage that is perfect for teamfights. It also has great synergy with Thunderbolt. |
This moveset makes Pikachu into a long-ranged, artillery caster that is perfect for teamfights. Thunderbolt is a simple area disabling move, which also deals decent damage. It's useful for setting up Pikachu's other moves and its allies' own moves. Thunder deals damage tons of damage in an area, which goes well with Thunderbolt.
Thunder and Electro Ball are Pikachu's primary damage move. Both deal tons of damage but have different targetting mechanics.
Thunder is an area move that summons multiple thunder strikes within the designated area. It deals massive damage but may require some setup since enemies can simple walk away from the area. It's also great for zoning out opponents from certain positions like Goal Zones.
Electro Ball is a single-target move that is great for bursting down or poking targets. Although it only hits one target, it does deal damage to enemies around the main target.
Thunderbolt and Volt Tackle are Pikachu's complimentary and disabling moves.
Thunderbolt stuns enemies within an area and can be used on the ground. It's great during teamfights where opponents are close to each other, allowing Pikachu to setup plays for its allies.
Volt Tackle only stuns a single target but deals more damage compared to Thunderbolt. It's great for isolating and bursting down key targets during or before teamfights.
Although selecting move combinations is ultimately up to player preference, pairing certain moves allows for specialization. For more of a backline caster, Thunder and Thunderbolt is the best move combination. To focus more on single-target assassination, Electro Ball and Volt Tackle is the ideal combination.
Which Moveset Do You Think is Best For Pikachu?
Let us know why in the comments!
Previous Poll Result
How to Play Pikachu
| Jump to Section | |
|---|---|
Get Aggressive in the Early Game

Pikachu has one of the best early-game kits because of its stuns and quick damage. While it is still recommended to focus on farming Wild Pokemon during the early game before engaging the enemy, Pikachu is a dependable Attacker that can get easy knockouts.
Set up Knockdowns with Electroweb
Electroweb immobilizes a single target for a decent amount of time. It is best used for trapping opponents that overextends in lane, especially when they are far from their goal zone. Since the move also deals damage when it lands on an opponent, it will be easier for Pikachu to knock them down once isolated, especially if there is an ally that can follow up.
Alternatively, Pikachu can also use Electroweb defensively by stopping the opponent in place while you pursued.
Electroweb: Pikachu Move Effect and Cooldown
Steal Wild Pokemon with Thunder Shock
Thunder Shock offers a decent amount of early-game damage. Since the move is a sure-hit, Pikachu will be able to activate it easily without the need for much aiming. Use it to pressure opponents or steal Wild Pokemon spawns to deny EXP from the enemy team.
Thunder Shock: Pikachu Move Effect and Cooldown
Pick Damage Move Based on Enemy Composition
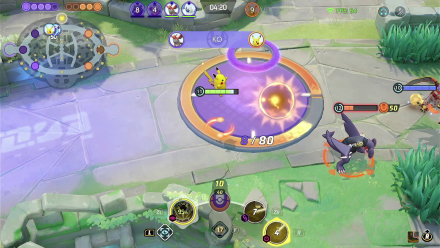
Once Pikachu reaches level 4, it will get to choose its damage move. While both choices are great in dealing high amounts of damage, the choice of Thunder or Electro Ball should be made based on the composition of the enemy team.
Learn Thunder for Sturdy Opponents
Thunder deals continuous damage within an affected area. It is best suited for team fights when the enemy is grouped closely together. It's also great for discouraging opponents from approaching a certain area.
Thunder: Pikachu Move Effect and Cooldown
Learn Electro Ball for Mobile Opponents
Electro Ball is a sure hit move that is easy to use. It is great for fighting highly mobile enemies like Speedsters or All-Rounders with dash moves. Moreover, it has a short cooldown, allowing Pikachu to frequently pressure your target with attacks.
Electro Ball: Pikachu Move Effect and Cooldown
Get More Value Out of Stuns
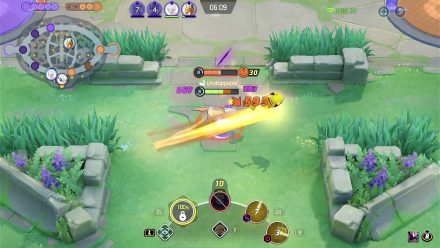
Pikachu has a strong arsenal of long-ranged stun moves that also packs a punch. Both moves have the same effect of stuns but differ in how they are controlled. One move may be best to pick depending on your desired playstyle.
Shut Down Single Targets with Volt Tackle
Volt Tackle deals damage to a single target while locking them down in place for a short time. If you time it right, you can also disrupt and cancel enemy moves as they activate them. However, it's important to be careful when using this move since Pikachu will charge towards the target's position, opening Pikachu for a counterattack.
Volt Tackle: Pikachu Move Effect and Cooldown
Stun Multiple Opponents with Thunderbolt
Unlike Volt Tackle, Thunderbolt deals area damage and stuns opponents in the area. A well-placed Thunderbolt will incapacitate opponents long enough for allies to bombard them with attacks. Use this to hold enemies in place to defeat them in one go or simply deal damage AoE damage at long range.
Thunderbolt: Pikachu Move Effect and Cooldown
Attack Safely from Range
Since Pikachu's attack and cast range are quite long, it can easily kite and poke enemies safely at the edge of the attack range, before stunning them and finishing them off with an Electro Ball or Thunder. Using Battle Items like Eject Button or X Speed can be used to allow Pikachu to keep a safe distance from opponents.
Turn Up the Aggression with Thunderstorm
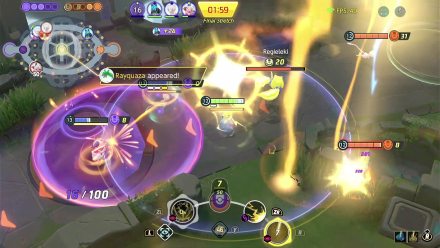
Thunderstorm's charge rate is relatively fast, allowing Pikachu to use it more freely and frequently. Pkiachu can improve it further by equipping Energy Amplifier with the bonus of dealing more damage for a short duration after using it.
Once Pikachu activates Thunderstorm, it's best to turn up the aggression and quickly follow up with other moves, allowing Pikachu to deal tons of burst damage in a short time.
Alternatively, Thunderstorm can also be used as an escape mechanism for Pikachu when the need arises. Activating the Unite move will give Pikachu a window of invulnerability to escape, as well as shoot lightning bolts at nearby enemies. No matter the situation, it is best to save the Unite move for intense fights.
Thunderstorm: Pikachu Move Effect and Cooldown
Progression and Leveling Guide
Top and Bottom Guide
Level 1 to 4
- Quickly clear out the Bunnelbies in the lane.
- Keep farming wild Pokemon in the lane to reach level 4 and learn your first move.
- At bottom lane, prioritize taking Indeedees for more exp.
Level 5 to 8
- Keep hunting Wild Pokemon to gain more EXP from farming Altaria and Swablus.
- Once you reach level 6, learn your second move.
- Help allies secure Regice, Registeel, or Regirock when it spawns, otherwise secure Regieleki.
- Upon reaching level 9, learn your Unite Move.
Level 9+
- Stick with allies to hunt targets, secure objectives, and push lanes.
- Reach at least level 13 or max level if possible before or when Groudon spawns for a fully-upgraded moveset.
- Make sure that your Unite Move is available when Groudon spawns.
- Help teammates win a teamfight and secure Groudon.
Pikachu Combos
Trap and Zap Combo
| Trap and Zap Combo | |
|---|---|
Electroweb
►
Thunder Shock
►
Standard Attack
Standard Attack
|
|
| This is Pikachu's early game combo that is great for setting up easy knock downs. When you are being chased down or you are in pursuit of an enemy, incapacitate them with Electroweb. Follow it up with Thunder Shock and Standard Attacks. | |
Double Thunder Hit Combo
| Double Thunder Hit Combo | |
|---|---|
Thunderbolt
►
Thunder
►
Standard Attack
Standard Attack
|
|
| This combo focuses on stunning multiple enemies and dealing AoE tick damage using Thunder. Stun enemies with Thunderbolt, which makes sure that enemies will receive the full tick damage of Thunder. This enables Pikachu to be really efficient during clashes and setup kills for teammates at long range. | |
Tackle Burst Combo
| Tackle Burst Combo | |
|---|---|
 |
|
Electro Ball
►
Volt Tackle
►
Standard Attack
Standard Attack
|
|
| This is a quick, sure-hit burst combo. Use Volt Tackle to stun the target. When Pikachu lands, it will be at an exact range for Electro Ball, which you will use. Then, begin retreating away while still using Standard Attacks when you can. | |
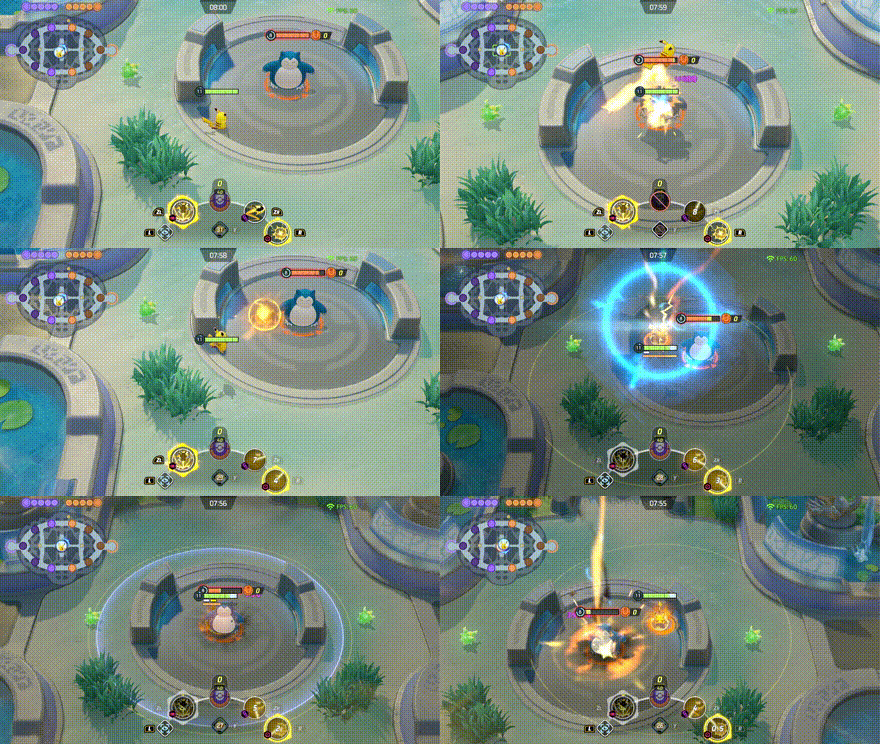
Tackle Burst Combo
| Tackle Burst Combo | |
|---|---|
 |
|
| This combo utilizes the Tackle Burst combo, but adds Pikachu's Unite Move as a finisher. Use Volt Tackle to stun the target. When Pikachu lands, fire an Electro Ball, then quickly activate Thunderstorm and wreak havoc. | |
Matchups and Counters for Pikachu
Pikachu Matchups
| Matchup Notes | ||
|---|---|---|
| 1. The chart is based on our own experience playing Pikachu. 2. Pokemon within each tier are unordered 3. Any Pokemon not shown here are still under investigation. |
||
Hard Counter With Burst Damage and/or Mobility
Pikachu deals heavy damage from afar but lacks durability and any escape moves. Pokemon that can quickly get close to Pikachu and burst it down are the ideal counters against the Pokemon.
Best Counters
| Pokemon | Explanation |
|---|---|
 Talonflame Talonflame
|
Rating: ★★★★★ • Can directly dive Pikachu and burst it down with Brave Bird or Fly. • Can stay on top of Pikachu using Aerial Ace or Flame Charge. • Can shove Pikachu out of position using Flame Sweep. |
 Lucario Lucario
|
Rating: ★★★★ • Can quickly get close to Pikachu and dodge its disables with Quick Attack, Extreme Speed or Power-Up Punch, and Bone Rush. • Can disrupt Pikachu's moves with its boosted attack • Can protect itself from Pikachu's burst damage with Steadfast. |
 Blastoise Blastoise
|
Rating: ★★★ • Can approach Pikachu while ignoring its disables using Surf. • Can deal burst damage and displace Pikachu using Hydro Pump. • Can knock out Pikachu completely with a single Rapid Spin-Water Spout combo. |
Even Matchups for Pikachu
Keeping a safe distance from opponents while disabling and bursting them down from range is the best way for Pikachu to get the upper hand against these Pokemon.
Strike First
| Ranged, Fragile Pokemon with High Damage |
|---|
| How to Beat |
|
• Much like Pikachu, these Pokemon prefer to keep their distance from opponents when fighting. They also have high damage potential that can knock out Pikachu quickly. However, they are fragile and can get knocked out by Pikachu fast. Winning against these Pokemon is all a matter of striking first. • Use Thunderbolt or Volt Tackle to stun them, then follow up with Thunder or Electro Ball to deplete their HP. • As a last resort, go in with Thunderstorm after stunning them and following up with Thunder or Electro Ball to ensure a knockout. |
Kite Them with Moves
| All-Rounders |
|---|
| How to Beat |
|
• These Pokemon excel in close combat and rely mostly on their attacks or combos to deal damage. They are also durable enough to tank Pikachu's damage. However, they have to come close first to attack, making them susceptible to getting kited. • Disable them using Thunderbolt or Volt Tackle, then follow up with Thunder or Electro Ball to discourage them from approaching. • When they manage to get close, use Thunderstorm to quickly burst them down. |
Utilize Their Numbers
| Supporters |
|---|
| How to Beat |
|
• These Pokemon usually stick with their allies and rarely venture alone. Although they themselves pose no threat to Pikachu, their support capabilities makes them valuable during fights. • Take advantage of them being in close proximity to each other by using Thunderbolt to stun them, then following up with Thunder or Electro Ball to deal burst damage. • Alternatively, use Thunderstorm after stunning and bursting them with Pikachu's moves to finish them off. |
Group Up with Allies
| Highly Durable Pokemon |
|---|
| How to Beat |
|
• These Pokemon are extremely durable, making it hard for Pikachu to take them out alone. With that, it's best to group up with allies to bring them down with the help of Pikachu. • Keep them disabled using Thunderbolt or Volt Tackle, then follow up with Thunder or Electro Ball to deleplete their HP. |
Easy Matchups for Pikachu
Easy matchups are Pokemon that are susceptible to Pikachu's disables and burst damage.
Utilize Their Numbers
| Supporters |
|---|
| How to Beat |
|
• These Pokemon usually stick with their allies and rarely venture alone. Although they themselves pose no threat to Pikachu, their support capabilities makes them valuable during fights. • Take advantage of them being in close proximity to each other by using Thunderbolt to stun them, then following up with Thunder or Electro Ball to deal burst damage. • Alternatively, use Thunderstorm after stunning and bursting them with Pikachu's moves to finish them off. |
Use Volt Tackle and Electro Ball
| High-mobility Pokemon with Burst Damage |
|---|
| How to Beat |
|
• These Pokemon are incredibly agile and deal high burst damage. However, they have to come close to Pikachu first to deal damage, putting them in range of Pikachu's moves. • It's best to use Volt Tackle and Electro Ball against them since their sure-hit moves, making it easier for Pikachu to disable and burst them down. • Alternatively, use Thunderstorm after stunning and bursting them with Pikachu's moves to finish them off. |
Best Teammates for Pikachu
| Pokemon | Explanation |
|---|---|
 Mew Mew
 Venusaur Venusaur
|
Easy enemy takedowns |
| These Pokemon have powerful burst attacks and are capable of stunning enemies from a safe distance, allowing Pikachu to concentrate on dealing damage. | |
 Mr. Mime Mr. Mime
 Sableye Sableye
|
Stuns and Debuffs |
| These Pokemon have means of inflicting debuffs and shutting down targets with their moves. This allows Pikachu to catch up and take enemies down easier when pushing lanes. | |
 Slowbro Slowbro
 Snorlax Snorlax
|
Tanky Disablers |
| These Pokemon can lead the charge and help Pikachu setup its attacks with their disabling moves during a lane push or when securing objectives. | |
 Absol Absol
 Zoroark Zoroark
|
High Burst Damagers |
| These Pokemon help contribute damage through pinning down enemies with combos and burst attacks. While it's still recommended to go with either a Defender or Supporter ally, Speedsters are a huge help when trying to dominate lanes as early as possible. | |
 Machamp Machamp
 Urshifu Urshifu
|
Hard-hitting Initiators |
| These Pokemon are very dependable allies as they have means to buff or sustain themselves. Whether it's securing objectives or pushing lanes, Machamp and Urshifu are built to initiate clashes, stun enemies, and create openings for their teammates. |
Looking for teammates to synergize with you? Head over to our Friend Request Board to find other trainers to join you in your grind or just to hang out with!
Pikachu Moves and Ability
Move Slot 1 (R)
 Thunder Shock Thunder Shock
(Lv. 1 or 3) |
Move Type: Sure Hit Damage Type: Special Cooldown: 5s Starting Damage: 427 Final Damage: 519 |
|---|---|
| Fires electricity at a target area, damaging and stunning enemy Pokemon. | |
 Thunder Thunder
(Lv. 4) Upgrade Lv. 11 |
Move Type: Area Damage Type: Special Cooldown: 7s Starting Damage: 1325 Damage per thunderbolt: 265, Number of thunderbolts: 5 Final Damage: 3409 Damage per thunderbolt: 487, Number of thunderbolts: 7 |
|
Drops wicked thunderbolts, dealing damage to opposing Pokemon in the area of effect.
Upgrade: Increases the number of attacks for this move. |
|
 Electro Ball Electro Ball
(Lv. 4) Upgrade Lv. 11 |
Move Type: Sure Hit Damage Type: Special Cooldown: 5.5s Starting Damage: 652 Extra damage includes 6% of Missing HP Final Damage: 1827 Extra damage includes 8% of Missing HP |
|
Hurls an electric orb, dealing damage to opposing Pokemon in the area of effect and leaving them paralyzed for a short time. This move's damage increases the lower the opposing Pokemon's HP is.
Upgrade: Increases damage dealth by this move. |
|
Move Slot 2 (ZR)
 Electroweb Electroweb
(Lv. 1 or 3) |
Move Type: Hindrance Damage Type: Special Cooldown: 9s Starting Damage: 368 Final Damage: 465 |
|---|---|
| Attacks and captures opposing Pokemon using an electric net. leaving them unable to move. | |
 Thunderbolt Thunderbolt
(Lv. 6) Upgrade Lv. 13 |
Move Type: Hindrance Damage Type: Special Cooldown: 7s Starting Damage: 683 Final Damage: 1358 |
|
Attacks with a strong electric blast, dealing damage to opposing Pokemon in the area of effect and leaving them unable to act.
Upgrade: Increases damage dealt by this move. |
|
 Volt Tackle Volt Tackle
(Lv. 6) Upgrade Lv. 13 |
Move Type: Hindrance Damage Type: Special Cooldown: 9s Starting Damage: 1005 Damage per instance: 201, Number of instances: 5 Final Damage: 1675 Damage per instance: 335, Number of instances: 5 |
|
Has the user electrify itself and charge ahead, throwing opposing Pokemon. For a short time after the user lands, the user's movement speed is increased.
Upgrade: Reduces this move's cooldown |
|
Unite Moves (ZL)
 Thunderstorm Thunderstorm
(Lv. 9) |
Move Type: Area Damage Type: Special Cooldown: 88s Starting Damage: 2840 Damage per lightning: 710, Number of lightning: 4 Final Damage: 4024 Damage per lightning: 1006, Number of lightning: 4 |
|---|---|
| Attacks the opposing team's Pokemon near the user with tremendous bolts of lightning, then attacks two Pokemon from the opposing team near the user multiple times with lightning. | |
Standard Attack
|
|
Becomes a boosted attack with every third attack, dealing increased damage. This boosted attack also stuns opposing Pokemon for a short time when it hits. |
|---|
Ability (Passive)
 Static Static
|
All Evolution Stages
Paralyzes all opponents near the Pokemon for a short time when the Pokemon receives damage. The Ability goes on cooldown after it's triggered. |
|---|
Pikachu Stats and Evolutions
Pikachu Evolutions
 Pikachu PikachuThis Pokemon does not evolve. |
Pikachu Stats
| Level | HP | Defense | Special Defense | Attack Damage |
|---|---|---|---|---|
| 1 | 3292 | 35 | 27 | 134 |
| 2 | 3399 | 42 | 33 | 140 |
| 3 | 3517 | 50 | 40 | 146 |
| 4 | 3646 | 59 | 47 | 153 |
| 5 | 3788 | 69 | 55 | 160 |
| 6 | 3945 | 80 | 64 | 168 |
| 7 | 4117 | 92 | 74 | 177 |
| 8 | 4307 | 105 | 85 | 187 |
| 9 | 4516 | 119 | 97 | 198 |
| 10 | 4747 | 135 | 110 | 210 |
| 11 | 5001 | 152 | 125 | 223 |
| 12 | 5280 | 171 | 141 | 237 |
| 13 | 5588 | 192 | 159 | 253 |
| 14 | 5927 | 215 | 179 | 271 |
| 15 | 6300 | 240 | 200 | 290 |
Attack Damage is the damage of the Basic Attack as tested against the Training Dummy.
Pikachu In-Game Stat Listings
| Offense | Endurance | Mobility | Scoring | Support |
|---|---|---|---|---|

|

|

|

|

|
Pikachu Skins (Holowear)
| Holowear | |
|---|---|
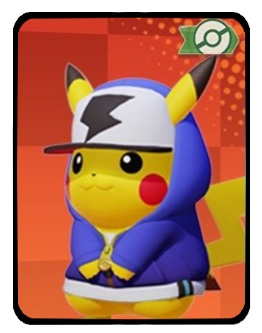 Hip-hop Style Hip-hop Style
Event:
Season 1 Battle Pass |
 Fashionable Style Fashionable Style
Zirco Trading:
|
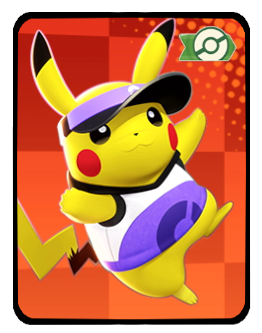 Purple Unite Style Purple Unite Style
|
 Orange Unite Style Orange Unite Style
|
 Festival Style Festival Style
|
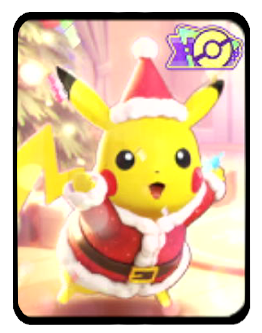 Holiday Style Holiday Style
Zirco Trading:
|
 Concert Style Concert Style
Event:
Season 4 Battle Pass |
 Cook Style Cook Style
Zirco Trading:
|
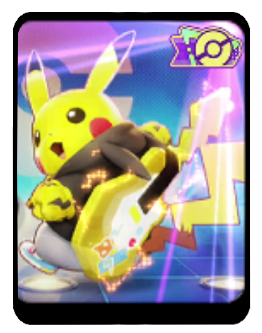 Band Style Band Style
Event:
Season 9 Battle Pass |
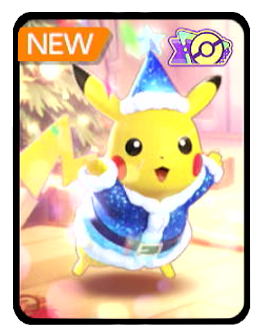 Holiday Style (Blue) Holiday Style (Blue)
Zirco Trading:
|
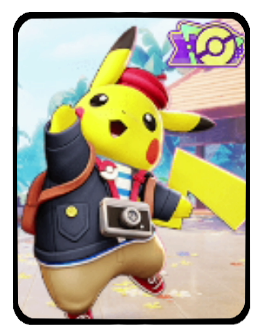 Tourist Style Tourist Style
Zirco Trading:
|
|
Pikachu Character Spotlight
Pikachu Achievements
Electro Ball Achievement
| Electro Ball | |
|---|---|
| Pokemon | Move |
 Pikachu Pikachu
|
|
| Mission: In a single battle, knock out Pokemon from the opposing team with Electro Ball or Electro Ball+ a total of 2 or more times (5/10/20 battles total) |
|
| Medals & Points | Rewards |
|
|
|
|
|
|
|
|
|
List of Attacker Pokemon Achievements
Pokemon UNITE Related Guides

All Pokemon Guides and Builds
Upcoming Pokemon
 Articuno Articuno(TBA) |
 Meganium Meganium(TBA) |
 Typhlosion Typhlosion(TBA) |
 Feraligatr Feraligatr(TBA) |
Mega Evolutions
| Mega Evolved Pokemon | ||
|---|---|---|
 Mega Charizard X Mega Charizard X |
 Mega Charizard Y Mega Charizard Y |
 Mega Gyarados Mega Gyarados |
 Mega Lucario Mega Lucario |
 Mega Mewtwo X Mega Mewtwo X |
 Mega Mewtwo Y Mega Mewtwo Y |
Pokemon by Role
| All Pokemon Roles | |||||
|---|---|---|---|---|---|
 Attackers Attackers |
 All-Rounders All-Rounders |
 Defenders Defenders |
|||
 Speedsters Speedsters |
 Supporters Supporters |
||||
Pokemon by Characteristics
| Attack Type | |
|---|---|
 Melee Pokemon Melee Pokemon |
 Ranged Pokemon Ranged Pokemon |
 Physical Pokemon Physical Pokemon |
 Special Pokemon Special Pokemon |
| Stat Rankings | |
 HP Ranking HP Ranking |
 Defense Ranking Defense Ranking |
 Sp. Def. Ranking Sp. Def. Ranking |
 Basic Attack Ranking Basic Attack Ranking |
Author
Pikachu Guide: Builds and Best Items
Rankings
Gaming News
Popular Games

Genshin Impact Walkthrough & Guides Wiki

Umamusume: Pretty Derby Walkthrough & Guides Wiki

Pokemon Pokopia Walkthrough & Guides Wiki

Honkai: Star Rail Walkthrough & Guides Wiki

Monster Hunter Stories 3: Twisted Reflection Walkthrough & Guides Wiki

Arknights: Endfield Walkthrough & Guides Wiki

Wuthering Waves Walkthrough & Guides Wiki

Zenless Zone Zero Walkthrough & Guides Wiki

Pokemon TCG Pocket (PTCGP) Strategies & Guides Wiki

Monster Hunter Wilds Walkthrough & Guides Wiki
Recommended Games

Diablo 4: Vessel of Hatred Walkthrough & Guides Wiki

Cyberpunk 2077: Ultimate Edition Walkthrough & Guides Wiki

Fire Emblem Heroes (FEH) Walkthrough & Guides Wiki

Yu-Gi-Oh! Master Duel Walkthrough & Guides Wiki

Super Smash Bros. Ultimate Walkthrough & Guides Wiki

Pokemon Brilliant Diamond and Shining Pearl (BDSP) Walkthrough & Guides Wiki

Elden Ring Shadow of the Erdtree Walkthrough & Guides Wiki

Monster Hunter World Walkthrough & Guides Wiki

The Legend of Zelda: Tears of the Kingdom Walkthrough & Guides Wiki

Persona 3 Reload Walkthrough & Guides Wiki
All rights reserved
©2021 Pokémon. ©1995–2021 Nintendo / Creatures Inc. / GAME FREAK inc.
©2021 Tencent.
The copyrights of videos of games used in our content and other intellectual property rights belong to the provider of the game.
The contents we provide on this site were created personally by members of the Game8 editorial department.
We refuse the right to reuse or repost content taken without our permission such as data or images to other sites.


 Aegislash
 Alcremie
 Alolan Ninetales
 Alolan Raichu
 Armarouge
 Azumarill
 Blaziken
 Blissey
 Buzzwole
 Ceruledge
 Chandelure
 Charizard
 Cinderace
 Clefable
 Comfey
 Cramorant
 Crustle
 Darkrai
 Decidueye
 Delphox
 Dhelmise
 Dodrio
 Dragapult
 Dragonite
 Duraludon
 Eldegoss
 Empoleon
 Espeon
 Falinks
 Galarian Rapidash
 Garchomp
 Gardevoir
 Gengar
 Glaceon
 Goodra
 Greedent
 Greninja
 Gyarados
 Ho-oh
Ho-oh Hoopa
Hoopa Inteleon
 Lapras
 Latias
 Latios
 Leafeon
 Mamoswine
 Meowscarada
 Meowth
 Metagross
 Mimikyu
 Miraidon
 Moltres
 Pawmot
 Psyduck
 Scizor
 Sirfetch'd
 Suicune
 Sylveon
 Tinkaton
 Trevenant
 Tsareena
 Tyranitar
 Umbreon
 Vaporeon
 Wigglytuff
 Zacian
 Zapdos
 Zeraora


![Monster Hunter Stories 3 Review [First Impressions] | Simply Rejuvenating](https://img.game8.co/4438641/2a31b7702bd70e78ec8efd24661dacda.jpeg/thumb)


High damage+ stunning the two things pikachu is GOATed at