Buzzwole Guide: Builds and Best Items
☆ Upcoming: Articuno | Meganium | Typhlosion | Feraligatr
★ Latest News: Zapdos | Moltres | Version 1.22.1.5
☆ Popular Pages: Upcoming Pokemon | Tier List
★ Current Seasons: Ranked S34 | Battle Pass S39
☆ Join Game8's Pokemon Discord Server!
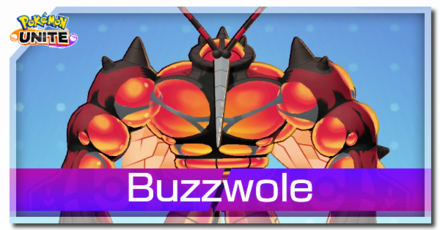
The best guide on how to play Buzzwole in Pokemon UNITE for Nintendo Switch and Mobile. Check here for the best builds, Held and Battle items, movesets, as well as the latest nerfs, buffs, counters, matchups, and more!
| Buzzwole Pokemon Pages | |
|---|---|
 Buzzwole Release Date Buzzwole Release Date |
 Buzzwole Builds Buzzwole Builds |
List of Contents
Buzzwole Latest Nerfs & Buffs (4/24)
| Buzzwole Changes | |
|---|---|
|
Beast Boost |
• Gauge depletion delay increased from 5s to 10s. |
|
Standard Attack |
• Boosted Attack Healing increased by 30%.. |
|
Leech Life |
• Now grants hindrance resistance. |
|
Lunge |
• Cooldown reduced from 7.5s to 6.5s. |
Stat Updates
| 1.7.1.7 | Attack stat increased. |
|---|---|
| 1.10.1.3 | Defense increased from 468 to 500. Special Defense increased from 329 to 380. |
Beast Boost
| 1.8.1.4 | Now increases the muscle gauge when dealing damage to wild Pokemon. |
|---|---|
| 1.18.2.6 | Gauge depletion delay increased from 5s to 10s. |
Lunge
| 1.8.1.4 | Increased recharge time for one charge from 6s to 7.5 sec. (+1.5s) |
|---|---|
| 1.17.1.2 | Attack reduction duration increased from 2s to 2.5s. |
| 1.18.2.6 | Cooldown reduced from 7.5s to 6.5s. |
Pokemon Changes
| 1.7.1.7 | Attack stat increased. |
|---|---|
| 1.10.1.3 | Defense increased from 468 to 500. Special Defense increased from 329 to 380. |
Mega Punch
| 1.7.1.7 | Damage increased from 357 to 449 (+26%). |
|---|
Fell Stinger
| 1.7.1.7 | Damage increased from 632 to 679 (+7%) |
|---|
Leech Life
| 1.7.1.2 | Cooldown decreased from 9s to 8s (-1s). Damage dealt increased: No gauge: 1770 to 1990 (+12%) Full gauge: 3573 to 4015 (+12%). |
|---|---|
| 1.7.1.7 | Damage increased from 1990 to 2170 (+9%). |
| 1.10.1.3 | HP recovery amount increased from 50% to 75% of damage dealt. |
| 1.16.1.2 | Cooldown decreased from 8s to 7s. HP recovery decreased by about 37% to 25%. |
| 1.18.2.6 | Now grants hindrance resistance. |
Smack Down
| 1.7.1.2 | Damage dealt increased: Punch: 395 to 442 Landing: 790 to 884. Range increased. Muscle gauge increment increased from 1 to 2, then 2 to 3 once upgraded. |
|---|---|
| 1.7.1.7 | Damage increased from 1326 to 1548 (+17%). |
| 1.14.1.5 | Muscle gauge amount increased in 1st and 2nd stage reduced from 2 to 1. Bugfix. Smack Down +: Muscle gauge amount increased in 2nd stage reduced from 3 to 2. |
| 1.16.1.2 | Cooldown decreased from 7.5s to 6.5s. |
| 1.17.1.2 | Area damage increased by 20%. |
| 1.17.1.6 | Cooldown decreased from 6.5s to 6s. |
Superpower
| 1.10.1.3 | Base shield value increased from 8% to 12% of max HP. Additional shield provided increased from 1.5% to 2% of maximum HP multiplied by muscle game amount. |
|---|---|
| 1.14.1.5 | Cooldown increased from 7.5s to 8.5s. Cooldown reduction changed from full reset to 3s. |
| 1.17.1.6 | Base shield increased from 12% to 20% of Max HP. Cooldown decreased from 8.5s to 8s. |
Buzzwole Basic Info
| Buzzwole | ||
|---|---|---|
 |
Role: All-Rounder Attack Type: Melee Damage Type: Physical Difficulty: Intermediate |
|
| "Flex on the competition with this bodacious Melee All-Rounder that’s all the buzz on Aeos Island." | ||
Buzzwole Best Lanes

|

|

|
Tips & Strategies for Every Lane
Strengths and Weaknesses
| Strengths | Weaknesses |
|---|---|
| ✔︎ Great scaling. ✔︎ Powerful combos. Can incapacitate and displace enemies. ✔︎ Has constant HP recovery with Boosted Attacks. |
✖︎ Moves have short range. ✖︎ Set ups get easily countered with unstoppable status effect. |
Best Builds for Buzzwole
| Buzzwole Builds | |
|---|---|
| - | |
Leech Life Build
Leech Life Build

|
Moveset | Held Items | |||
|---|---|---|---|---|---|
| Battle Item | |||||
| Stats from Items (Lv. 40) | Recommended Lane | ||||
|
Attack: +35 Defense: +35 Sp. Def: +35 Attack Speed: +8.70% Cooldown: -3.50% |
|
||||
| Emblem Color Combination | Target Emblem Stats | ||||
|
|
Positive Stats: • HP • Attack Free Negative Stats: • Sp. Atk • Defense • Sp. Def |
||||
| Note: The emblem color and stats here are suggestions only. The builds are still viable even without the suggested emblems. |
|||||
Leech Life Build Explanation
This build utilizes Smack Down to set up Leech Life, dealing damage to a target while healing Buzzwole for a large amount.
- Muscle Band improves Buzzwole's attacks via increased damage and attack speed.
- Accel Bracer provides Buzzwole with a large Attack stat boost each time it defeats an opponent or gets an assist, which works well with its frontline gameplay.
- Focus Band grants Buzzwole more durability and survivability in the form of HP recovery.
- Eject Button gives Buzzwole another mobility tool on top of Lunge.
- Vanguard Bell can also be a replacement for Focus Band, allowing Buzzwole to restore HP when it hits opponents with its disabling moves.
- X Speed can also work just as fine for the same purpose.
- The build's Boost Emblem loadout should consist of 6 Brown Emblems for more damage and 6 White Emblems additional HP. This can be achieved by equipping at least two (2) Emblems that are Brown and White.
- Equip Emblems that improve Attack or HP to balance out Buzzwole's offense and defense.
- Sp. Atk., Sp. Def., and Defense can be freely traded for the other stats.
Superpower Build
| Superpower Build | Moveset | Held Items | |||
|---|---|---|---|---|---|
| Battle Item | |||||
| Stats from Items (Lv. 40) | Recommended Lane | ||||
|
Attack: +38.5 Defense: +35 Sp. Def: +35 HP: +235 |
|
||||
| Emblem Color Combination | Target Emblem Stats | ||||
|
|
Positive Stats: • HP • Attack Free Negative Stats: • Sp. Atk • Defense • Sp. Def |
||||
| Note: The emblem color and stats here are suggestions only. The builds are still viable even without the suggested emblems. |
|||||
Superpower Build Explanation
This build is centered on grabbing and bursting down targets with Smack Down and Superpower. It also utilizes Superpower's cooldown reset when its upgraded.
- Attack Weight provides Buzzwole a large damage boost, particularly when it's fully stacked.
- Weakness Policy synergizes well with Buzzwole's frontline gameplay, increasing its Attack stat as it takes damage. It also grants more HP and damage.
- Focus Band makes Buzzwole more durable and gives it more survivability.
- Muscle Band and Rapid-Fire Scarf can be a replacement for Attack Weight and Weakness Policy, or Weakness Policy and Focus Band, improving Buzzwole's attacks through increased damage and attack speed.
- Vanguard Bell can also be a replacement for Focus Band, allowing Buzzwole to restore HP when it hits opponents with its disabling moves.
- Eject Button gives Buzzwole a quick repositioning tool to get close to its targets.
- The build's Boost Emblem loadout should consist of 6 Brown Emblems for more damage and 6 White Emblems additional HP. This can be achieved by equipping at least two (2) Emblems that are Brown and White.
- Equip Emblems that improve Attack or HP to balance out Buzzwole's offense and defense.
- Sp. Atk., Sp. Def., and Defense can be freely traded for the other stats.
Buzzwole Best Items & Moveset
Best Held Items
| Item | Explanation |
|---|---|
 Attack Weight Attack Weight
|
Attack Weight gives a massive damage boost to Buzzwole, especially to its moves. |
 Focus Band Focus Band
|
Focus Band strengthens Buzzwole's static defenses and gives it a survivability tool. |
 Muscle Band Muscle Band
|
Muscle Band gives Buzzwole damage and attack speed, strengthening its attack damage and allowing it to fill up its Muscle Gauge faster. |
 Weakness Policy Weakness Policy
|
Weakness Policy is well-suited for Buzzwole since it needs to get close to its target to perform its combos, increasing its damage output as it takes damage. |
 Rapid-Fire Scarf Rapid-Fire Scarf
|
Rapid-Fire Scarf allows Buzzwole to quickly build up its Muscle Gauge and heal up via its attacks. |
 Accel Bracer Accel Bracer
|
Accel Bracer provides Buzzwole with a large Attack boost whenever it knocks out an opponent or gets an assist, which works well with its frontline gameplay. |
 Vanguard Bell Vanguard Bell
|
Vanguard Bell provides Trevenant with a decent amount of HP and the ability to restore its HP when it hits opponents with its hindrances, like Superpower and Smack Down. |
Best Battle Items
| Item | Explanation |
|---|---|
 Eject Button Eject Button
|
Eject Button allows Buzzwole to quickly get into position to perform its combos. |
 X Speed X Speed
|
X Speed improves Buzzwole's overall mobility, which is useful in various situations. |
Best Moveset
| Move | Explanation |
|---|---|
 Smack Down Smack Down
|
Smack Down allows Buzzwole to isolate and knock back targets towards a particular direction. |
 Leech Life Leech Life
|
Leech Life is a great lock down move that also heals Buzzwole. |
This moveset prolongs Buzzwole's life during fights while also allowing it to set up for its team.
Leech Life disables and damages the target while also healing Buzzwole, allowing the Pokemon to sustain itself for a long time throughout fights. Smack Down acts as a complimentary move to Leech Life as it's used to set up the move as well as for Buzzwole's allies.
Which Moveset Do You Think Is Best For Buzzwole?
Let us know your thoughts in the comments!
Previous Poll Results
How to Play Buzwole
| Jump to Section | |
|---|---|
Understand the Muscle Gauge Mechanic
Buzzwole's Muscle Gauge is central to its gameplay. Knowing how it works and its effects are crucial to fully utilize Buzzwole's kit and strength. Since one moveset fills up the Muscle Gauge while the other consumes it, it is best to use the moves that fill up the Muscle Gauge first, then follow up with the other move.
Fill Up the Muscle Gauge with Moves
| Trigger | Increment |
|---|---|
|
|
Each time a basic attack hits an opposing Pokemon, the muscle gauge charges by one (1) increment. |
|
|
If this move hits Pokemon from the opposing team, the user's muscle gauge increases by one (1) increment for each one that was hit. |
|
|
If this move hits Pokemon from the opposing team, the user's muscle gauge increases by one (1) increment for each one that was hit |
|
|
If this move deals damage to Pokemon on the opposing team, the user's muscle gauge increases by one (1) increment for each one that was hit. |
Perform attacks and use the moves listed above to quickly fill up the Muscle Gauge. When your Muscle Gauge is full, your attacks become stronger.
Moves that Consume the Muscle Gauge
| Trigger | Effect |
|---|---|
|
|
This move deals more damage the more muscle gauge increments are consumed. |
|
|
The number of hits and the amount of damage dealt per hit increases the more muscle gauge increments are consumed. |
|
|
The damage dealt by this move and the shield effect it grants increases the more muscle gauge increments are consumed. Once upgraded, this move's cooldown resets each time the Muscle Gauge fills up. |
The moves listed above consumes all the Muscle Gauge when used. Their effects and damage increase based on how much of the Muscle Gauge was consumed. Given this, it's best to fill up the Muscle Gauge entirely first before using any of these moves to maximize their damage and effects.
Leave Opponents Open with Disabling Moves
Buzzwole's whole kit revolves around isolating targets and engaging in brawls. Before you do your combos, however, be sure to take advantage of Buzzwole's disabling moves first to get a better shot of landing your attacks.
Reposition Opponents with Superpower
Superpower allows you to displace one enemy and put them in a disadvantageous position. It is a great way to isolate single targets for you and your allies to pick them off easily. Since you will be body slamming opponents in a specified direction, it is best to pick up targets and slam them away from their goal zones to make it harder for them to fight back.
Superpower: Buzzwole Move Effect and Cooldown
Incapacitate Slippery Targets with Leech Life
Using Leech Life on a target will pin them down for a short time, enough for your allies to follow up with their attacks. Buzzwole will also be able to recover a decent amount of HP while the move is active. Use the move to shut down other All-Rounders or trap highly mobile Speedsters so that your team can take them out of the fight quickly.
One thing to note is that opponents incapacitated by Leech Life can break free from the move using an Eject Button. Since this interaction acts as a direct counter to the move, it is best to take note of opponents who are running the Battle Item during the initial loading screen before the match starts.
Leech Life: Buzzwole Move Effect and Cooldown
Actively Seek Out Opponents
Buzzwole's passive, Beast Boost, increases its movement speed and attack speed each time it defeats or assists in defeating an opposing Pokemon. Staying active throughout the game either by hunting targets or sticking with your allies is the best way to maximize its passive.
Use Unite Move as a Finisher
Buzzwole is invulnerable for a short time while airborne during Ultra Swole Slam. Coupled that with area of effect damage, then you got yourself a strong Unite Move that can tank multiple opponents. Moreover, Ultra Swole Slam will seek out an opponent with the lowest HP, making it great for landing the last hit without getting interrupted and synergizing with Beast Boost.
Ultra Swole Slam: Buzzwole Move Effect and Cooldown
Position Properly
Since Buzzwole needs to get close to its target first to perform its combos, you need to position properly before initiating. This is especially true when you're using Smack Down. You can use Eject Button to help you get a better position.
Superpower Persists Through Unstoppable Status Effect
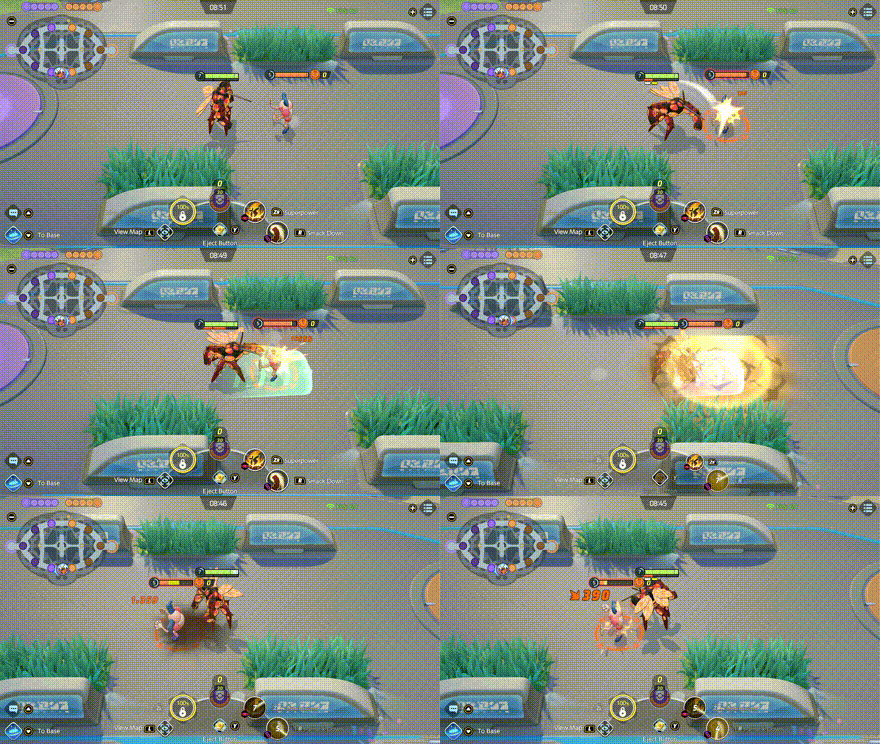
If you use Superpower on targets that have the Unstoppable status effect, you can still cause damage even if you can't lift them. This is because the move's animation continues even when your target has immunity, dealing damage as a result.
Moreover, this interaction also happens against Boss Pokemon like Regieleki and Rayquaza.
Given this, the move isn't entirely useless against Pokemon that can gain immunities.
Superpower: Buzzwole Move Effect and Cooldown
Buzzwole Progression and Leveling Guide
Top and Bottom Guide
Level 1 to 5
- Quickly clear out the Bunnelbies in the lane.
- Keep farming wild Pokemon in the lane to reach level 5 and learn your first move.
- At bottom lane, prioritize taking Indeedees for more exp.
Level 6 to 9
- Keep hunting Wild Pokemon to gain more EXP from farming Altaria and Swablus.
- Once you reach level 7, learn your second move.
- Help allies secure Regice, Registeel, or Regirock when it spawns, otherwise secure Regieleki.
- Upon reaching level 9, learn your Unite Move.
Level 10+
- Stick with allies to hunt targets, secure objectives, and push lanes.
- Reach at least level 13 or max level if possible before or when Groudon spawns for a fully-upgraded moveset.
- Make sure that your Unite Move is available when Groudon spawns.
- Help teammates win a teamfight and secure Groudon.
Buzzwole Combos
Initiator Combos
This set of combos utilizes Lunge or Smack Down to fill up the Muscle Gauge and enhance Superpower's damage and its displacing capabilities.
Lunge Initiator Combo
| Lunge Initiator Combo | |
|---|---|
 |
|
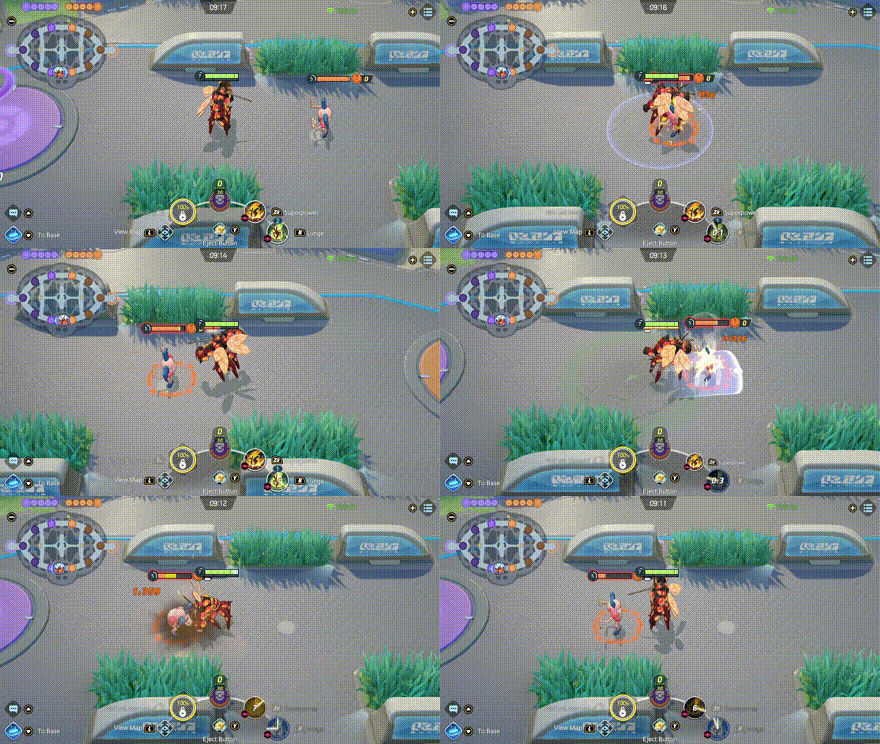
| Start the combo with Lunge and follow up with three Standard Attacks, then use Lunge again to fill up your Muscle Gauge. End the combo with Superpower while also displacing the target away from their team. | |
Upgraded Lunge Initiator Combo
| Showdown Initiator Combo | |
|---|---|
 |
|
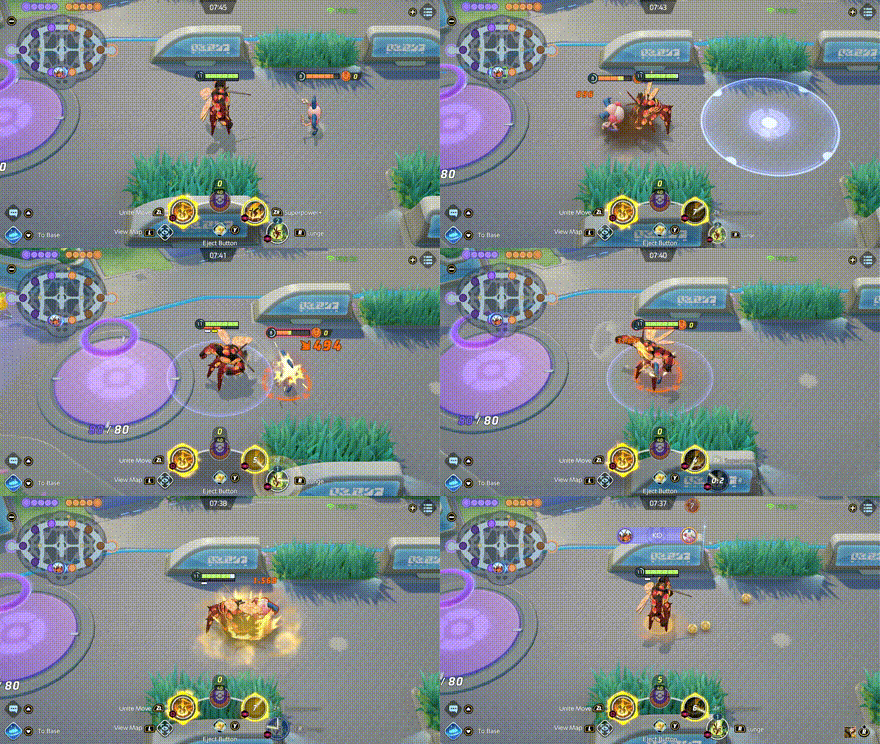
| This combo utilizes Superpower +'s cooldown reset mechanic. Start the combo with Superpower, then immediately use Lunge to start filling up the Muscle Gauge. Follow up with three Standard attacks and a second Lunge to get the full amount of Muscle Gauge. Once Superpower's cooldown resets, use it again to end the combo. | |
Super Smack Down Combo
| Super Smack Down Combo | |
|---|---|
| |
|
| Start the combo with three Standard Attacks. Use Smack Down to punch the target upwards, then once again to slam it to the ground and fill up the Muscle Gauge. End the combo with Superpower, carrying the target away from their team. | |
Upgraded Super Smack Down Combo
| Upgraded Super Smack Down Combo | |
|---|---|
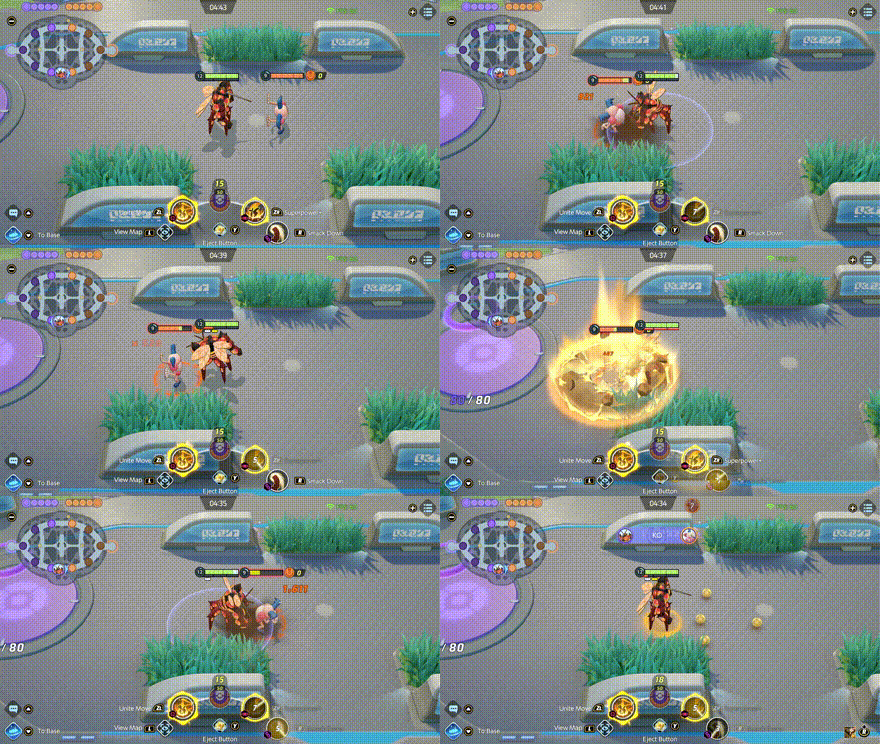 |
|
Superpower
(Only if upgraded) ►
Smack Down
(Punch) ►
Smack Down
(Slam) ►
Standard Attack
x3 ►
Superpower
|
|
| This combo utilizes Superpower +'s cooldown reset mechanic. Start the combo with Superpower, and follow up with three standard attacks. Then, use Smack Down to punch the target upwards, then once again to slam it to the ground and fill up the Muscle Gauge. Once Superpower's cooldown resets, use it again to end the combo. | |
Hyper Life Steal Combo
| Hyper Life Steal Combo | |
|---|---|
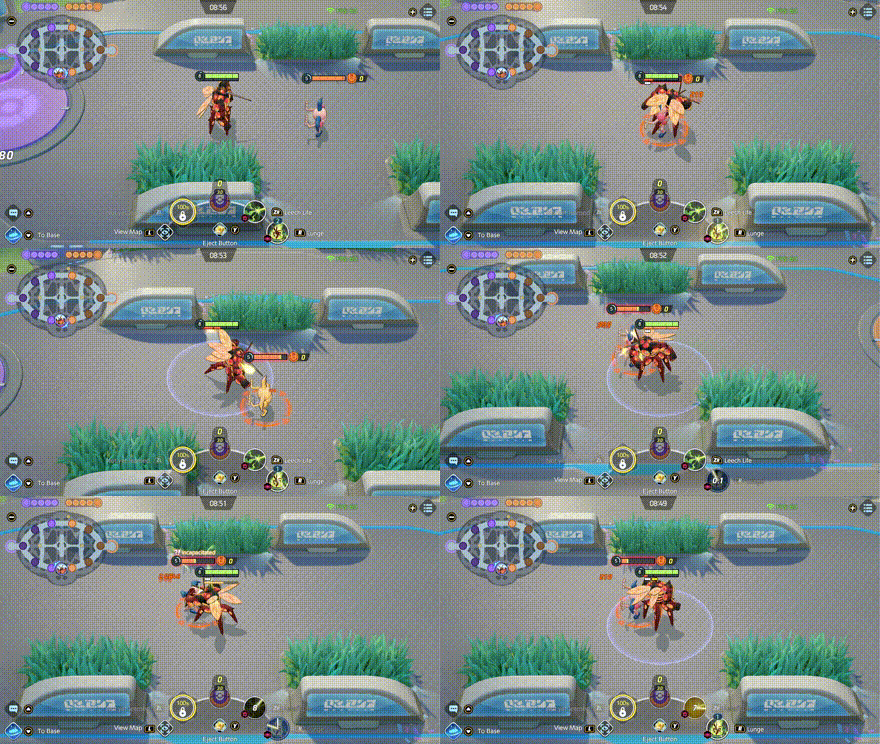 |
|
| This is similar to the Lunge tInitiator Combo but uses Leech Life as a finisher instead. Start by using Lunge at your target and follow up with three Standard Attacks. Then, use Lunge again to fill up the Muscle Gauge. Once the Muscle Gauge is full, end the combo with Leech Life. | |
Ultimate Power Slam Combo
| Ultimate Power Slam Combo | |
|---|---|
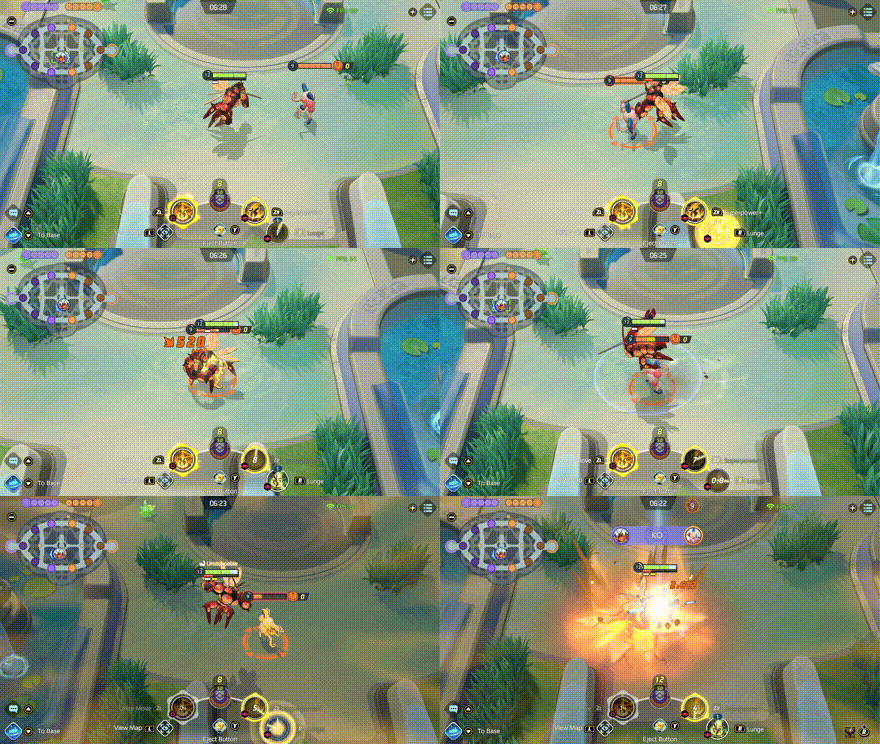 |
|
| This is a combo great for team fights as it deals AoE damage across an area. Start by seeking a target and using Lunge to get close to them. Then, deal damage to them with Standard Attacks at least three (3) times to full up Buzzwole's Muscle Gauge. Once filled use Superpower, followed by another Lunge to deal even more damage. Finish the combo by activating Ultra Swole Slam. Here, Buzzwole will locate the nearest opponent with the lowest amount of HP. | |
Matchups & Counters for Buzzwole
Buzzwole Matchups
| Matchup Notes | ||
|---|---|---|
| 1. The chart is based on our own experience playing Buzzwole. 2. Pokemon within each tier are unordered 3. Any Pokemon not shown here are still under investigation. |
||
Hard Counter with Kiting and Disables
Since Buzzwole needs to get to melee range to perform its combos, Pokemon that can disable or kite it from range stops it from doing any damage.
Best Counters
| Pokemon | Explanation |
|---|---|
 Cinderace Cinderace
|
Rating: ★★★★★ • Can kite Buzzwole with its rapid ranged attacks. • Can stun and reposition using Blaze Kick. • Can evade Buzzwole's combos with Feint. |
 Snorlax Snorlax
|
Rating: ★★★★★ • Can disrupt Buzzwole's combos using Block, Yawn, and Heavy Slam. • Can tank Buzzwole's damage. • Can gain immunity from Buzzwole's moves and heal HP using Power Nap. |
 Wigglytuff Wigglytuff
|
Rating: ★★★★ • Can disrupt Buzzwole's combos using Sing, Dazzling Gleam, and Cute Charm • Can negate Buzzwole's damage using Starlight Recital. |
Even Matchups
Buzzwole can get the upper hand against these Pokemon as long as it can find a way to set up its combos and beat them down.
Close the Gap
| Ranged, Fragile Pokemon with High Damage |
|---|
| How to Beat |
|
• These Pokemon prefer to keep their distance from opponents when fighting. They also have high damage potential that can be dangerous for Buzzwole. However, they can easily fall to Buzzwole's combos if it manages to get close to them. • When using Smack Down, it's best to use Eject Button to quickly get close to them and use the move. Once they get hit by Smack Down, always remember to follow up with Superpower or Leech Life to finish them off. • When using Lunge, use it to close the gap, then follow up with Superpower or Leech Life to finish them off. • If they still manage to survive, just use Ultra Swole Slam to finish them off. |
Strike First
| All-Rounders |
|---|
| How to Beat |
|
• Much like Buzzwole, these Pokemon excel in close combat and rely mostly on their attacks or combos to deal damage. They are also durable enough to tank Buzzwole's damage. However, they do need to go toe to toe with Falinks to defeat it, making them perfect targets for Buzzwole's combos. Winning against them is a matter of being able to perform a combo first. • When using Smack Down, time the move when they get close enough, then follow up with Superpower or Leech Life. • When using Lunge, utilize the move's Attack reduction to weaken their damage (if they're an Attack-type Pokemon), then follow up with Superpower or Leech Life. It's also good to incorporate a few attacks in the combo to take advantage of Lunge's atack speed increase. • As a last resort, use Ultra Swole Slam to finish them off. |
Catch Them When They Initiate
| High-mobility Pokemon with Burst Damage |
|---|
| How to Beat |
|
• These Pokemon are incredibly agile and deal high burst damage. However, they still need to get close to Buzzwole to take it down, putting them in range for the Pokemon's combos. Winning against them is a matter of catching them with Buzzwole's combos when they initiate. • When using Smack Down, just make sure to hit them when they dive in to stop their momentum, then immediately follow up with Superpower or Leech Life. • When using Lunge, either use one charge to dodge their moves when they initiate, then use another to get close to them, and finish them off with Superpower or Leech Life. • If they still manage to survive, just use Ultra Swole Slam to finish them off. |
Gourp Up with Allies
| Highly Durable Pokemon |
|---|
| How to Beat |
|
• These Pokemon are extremely durable, making it difficult for Buzzwole to take them down alone. With that, it's best to group up with allies to bring them down with the help of Buzzwole. • Use Smack Down to stun them or Lunge to stay on top of them, then follow up with Superpower or Leech Life to keep them disabled and deplete their HP. |
Easy Matchups for Buzzwole
These Pokemon are easy matchups for Buzzwole either because they have little to no means of escaping Buzzwole's combos or are too fragile to survive it.
Close the Gap
| Ranged, Fragile Pokemon with High Damage |
|---|
| How to Beat |
|
• These Pokemon prefer to keep their distance from opponents when fighting. They also have high damage potential that can be dangerous for Buzzwole. However, they can easily fall to Buzzwole's combos if it manages to get close to them. • When using Smack Down, it's best to use Eject Button to quickly get close to them and use the move. Once they get hit by Smack Down, always remember to follow up with Superpower or Leech Life to finish them off. • When using Lunge, use it to close the gap, then follow up with Superpower or Leech Life to finish them off. • If they still manage to survive, just use Ultra Swole Slam to finish them off. |
Strike First
| All-Rounders |
|---|
| How to Beat |
|
• Much like Buzzwole, these Pokemon excel in close combat and rely mostly on their attacks or combos to deal damage. They are also durable enough to tank Buzzwole's damage. However, they do need to go toe to toe with Falinks to defeat it, making them perfect targets for Buzzwole's combos. Winning against them is a matter of being able to perform a combo first. • When using Smack Down, time the move when they get close enough, then follow up with Superpower or Leech Life. • When using Lunge, utilize the move's Attack reduction to weaken their damage (if they're an Attack-type Pokemon), then follow up with Superpower or Leech Life. It's also good to incorporate a few attacks in the combo to take advantage of Lunge's atack speed increase. • As a last resort, use Ultra Swole Slam to finish them off. |
Catch Them When They Initiate
| High-mobility Pokemon with Burst Damage |
|---|
| How to Beat |
|
• These Pokemon are incredibly agile and deal high burst damage. However, they still need to get close to Buzzwole to take it down, putting them in range for the Pokemon's combos. Winning against them is a matter of catching them with Buzzwole's combos when they initiate. • When using Smack Down, just make sure to hit them when they dive in to stop their momentum, then immediately follow up with Superpower or Leech Life. • When using Lunge, either use one charge to dodge their moves when they initiate, then use another to get close to them, and finish them off with Superpower or Leech Life. • If they still manage to survive, just use Ultra Swole Slam to finish them off. |
Take Them Out First
| Supporters |
|---|
| How to Beat |
|
• These Pokemon usually stick with their allies and rarely venture alone. Although they themselves pose no threat to Buzzwole, their support capabilities makes them valuable during fights. • It's best to take them out first using Smack Down or Lunge and Superpower or Leech Life to remove their team's support. • If they still manage to survive, just use Ultra Swole Slam to finish them off. |
Group Up with Allies
| Highly Durable Pokemon |
|---|
| How to Beat |
|
• These Pokemon are extremely durable, making it difficult for Buzzwole to take them down alone. With that, it's best to group up with allies to bring them down with the help of Buzzwole. • Use Smack Down to stun them or Lunge to stay on top of them, then follow up with Superpower or Leech Life to keep them disabled and deplete their HP. |
Best Teammates for Buzzwole
| Pokemon | Explanation |
|---|---|
 Gardevoir Gardevoir
 Pikachu Pikachu
|
High Damaging Snipers |
| These Pokemon are mobile and have powerful burst attacks that are capable of disrupting enemies. When partnered up with these Pokemon, Buzzwole can easily take down enemies and push lanes. | |
 Mr. Mime Mr. Mime
 Sableye Sableye
|
Stuns and Debuffs |
| These Pokemon have the means of inflicting debuffs and shutting down targets with their moves. This helps Buzzwole dominate the lane quickly and have enough time to steal enemy camps. | |
 Slowbro Slowbro
 Snorlax Snorlax
|
Tanky Disablers |
| These Pokemon can lead the charge, soak up damage, and help Buzzwole setup its attacks thanks to their disabling moves. | |
 Gengar Gengar
 Zoroark Zoroark
|
High Burst Damagers |
| These Pokemon help contribute damage through pinning down enemies with combos and burst attacks. While it's still recommended to go with either a Defender or Supporter ally, Speedsters are a huge help when trying to dominate lanes as early as possible. | |
 Machamp Machamp
 Tsareena Tsareena
|
Hard-hitting Initiators |
| These Pokemon are very dependable allies as they have means to buff or sustain themselves. Whether it's securing objectives or pushing lanes, Machamp and Tsareena are built to initiate clashes, stun enemies, and create openings for their teammates. |
Buzzwole Moves
Move Slot 1 (R)
 Mega Punch Mega Punch
(Lv. 1 or 3) |
Move Type: Area Damage Type: Physical Cooldown: 5s Starting Damage: 363 Final Damage: 449 |
|---|---|
| Has the user move in the designated direction before slamming the ground with a powerful punch. The shock from the punch deals damage to opposing Pokemon in the area of effect. If this move hits Pokemon from the opposing team, the user's muscle gauge increases by 1 increment for each one that was hit. | |
 Lunge Lunge
(Lv. 7) Upgrade Lv. 13 |
Move Type: Area Damage Type: Physical Cooldown: 6.5s Starting Damage: 405 Damage per charge: 405, Number of charges: 2 Final Damage: 636 Damage per charge: 636, Number of charges: 2 |
|
Has the user lunge in the designated direction, dealing damage to opposing Pokemon and decreasing their Attack for a short time. If this move hits Pokemon from the opposing team, the user's muscle gauge increases by 1 increment for each one that was hit. After this move is used, the user's basic attack speed increases for a short time. A maximum of 2 uses can be kept in reserve for this move.
Upgrade: Whenever this move hits Pokemon from the opposing team, the user's Attack increases for a short time. The more Pokemon from the opposing team are hit, the more the user's Attack increases. |
|
 Smack Down Smack Down
(Lv. 7) Upgrade Lv. 13 |
Move Type: Hindrance, Dash Damage Type: Physical Cooldown: 6s Starting Damage: 1158 Punch damage: 340, Slam damage: 818 Final Damage: 1755 Punch damage: 516, Slam damage: 1239 |
|
Has the user deliver an uppercut punch to an opposing Pokemon in the designated direction, dealing damage to it and throwing it into the air. While the thrown Pokemon is airborne, the user can use this move again to perform a follow-up attack that smacks that Pokemon down to the ground, dealing damage to all opposing Pokemon in an area of effect centered on the point of impact. If this move deals damage to Pokemon on the opposing team, the user's muscle gauge increases by 2 increment for each one that was hit.
Upgrade: Widens the area of effect in which damage is dealt when the opposing Pokemon targeted by this move hits the ground. Also, the user's muscle gauge will now increase by 3 increments for each Pokemon on the opposing team that takes damage form this move. |
|
Move Slot 2 (ZR)
 Fell Stinger Fell Stinger
(Lv. 1 or 3) |
Move Type: Melee Damage Type: Physical Cooldown: 8s Starting Damage: 593 Damage with full Gauge: 1037 Final Damage: 679 Damage with full Gauge: 1188 |
|---|---|
| Consumes the entire muscle gauge and has the user deal damage to an opposing Pokemon in the designated direction. This move deals more damage the more muscle gauge increments are consumed. If this move knocks out an opposing Pokemon, the user recovers HP. | |
 Leech Life Leech Life
(Lv. 5) Upgrade Lv. 11 |
Move Type: Melee Damage Type: Physical Cooldown: 7s Starting Damage: 1184 Damage per instance: 296, HP healed per instance: 58% of damage dealt, Number of instances: 4, Damage with full Muscle Gauge: 2254, Damage per instance with full Muscle Gauge: 322, Number of instance with full Muscle Gauge: 7 Final Damage: 2170 Base damage: 505, HP healed per instance: 125% of damage dealt, Damage increase per instance: 25, Number of instances: 4, Damage with full Muscle Gauge: 4379, Base damage with full Muscle Gauge: 550, Number of instance with full Muscle Gauge: 7 |
|
Has the user grab and restrain an opposing Pokemon in the designated direction, dealing damage over time while restoring the user's HP. When this move is used, it consumes the user's entire muscle gauge. The number of hits and the amount of damage dealt per hit increases the more muscle gauge increments are consumed. This move ends if the user becomes unable to act for any reason or if the restrained Pokemon escapes by using an Eject Button or through some other means.
Upgrade: Also causes each instance of damage dealt by this move to be stronger than the last. |
|
 Superpower Superpower
(Lv. 5) Upgrade Lv. 11 |
Move Type: Area Damage Type: Physical Cooldown: 8s Starting Damage: 1140 Grab damage: 262, Slam damage: 878, Damage with full Muscle Gauge: 1994, Grab damage with full Muscle Gauge: 458, Slam damage with full Muscle Gauge: 1536 Final Damage: 1945 Grab damage: 444, Slam damage: 1501, Damage with full Muscle Gauge: 3403, Grab damage with full Muscle Gauge: 777, Slam damage with full Muscle Gauge: 2626 |
|
Consumes the entire muscle gauge and has the user run in the designated direction and grab an opposing Pokemon. The user then slams the opposing Pokemon down on the ground at full strength, dealing damage to opposing Pokemon in the area of effect. The damage dealt by this move and the shield effect it grants increases the more muscle gauge increments are consumed.
Upgrade: Resets the cooldown of this move when the user's muscle gauge reaches its maximum. |
|
Unite Moves (ZL)
 Ultra Swole Slam Ultra Swole Slam
(Lv. 9) |
Move Type: Sure Hit Damage Type: Physical Cooldown: 112s Starting Damage: 2122 First attack damage: 849, Final attack damage: 1273 Final Damage: 3070 First attack damage: 1228, Final attack damage: 1842 |
|---|---|
| Has the user fly at high speed, dealing damage to all opposing Pokemon in the area of effect. Afterward, the user targets the opposing Pokemon with the lowest percentage of HP among those hit and charges down at it from the sky, dealing damage once again for that Pokemon. | |
Standard Attack
|
|
Each time a basic attack a Pokemon on the opposing team, the muscle gauge charges by 1 increment. Becomes a boosted attack with every third attack, throwing two consecutive punches while restoring the user's HP. |
|---|
Ability (Passive)
 Beast Boost Beast Boost
|
When this Pokemon knocks out or assists in knocking out a Pokemon from the opposing team, its movement speed and basic attack speed increase for a short time. Also, each time this Pokemon hits opposing Pokemon with basic attacks or certain moves, its muscle gauge charges. Conversely, when the Pokemon is not in combat, the muscle gauge depletes by 1 muscle gauge increments whenever a set amount of time passes. Up to 6 muscle gauge increments can be stored. |
|---|
Buzzwole Stats & Evolutions
Buzzwole Evolutions
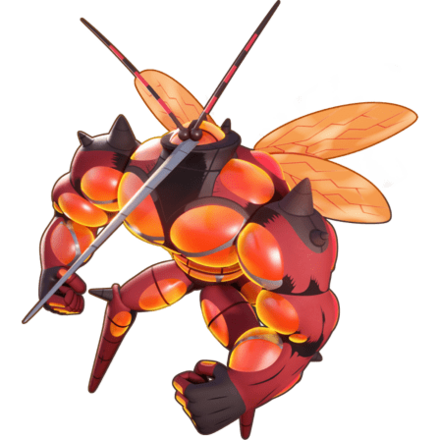 Buzzwole BuzzwoleThis Pokemon does not evolve. |
Buzzwole Stats
| Level | HP | Defense | Special Defense | Attack Damage |
|---|---|---|---|---|
| 1 | 3250 | 120 | 80 | 155 |
| 2 | 3412 | 134 | 91 | 166 |
| 3 | 3590 | 149 | 103 | 178 |
| 4 | 3786 | 165 | 116 | 191 |
| 5 | 4001 | 183 | 130 | 205 |
| 6 | 4238 | 203 | 146 | 220 |
| 7 | 4499 | 225 | 163 | 237 |
| 8 | 4786 | 249 | 182 | 256 |
| 9 | 5103 | 275 | 203 | 277 |
| 10 | 5452 | 304 | 226 | 300 |
| 11 | 5836 | 336 | 251 | 325 |
| 12 | 6259 | 371 | 279 | 352 |
| 13 | 6724 | 410 | 309 | 382 |
| 14 | 7236 | 453 | 343 | 415 |
| 15 | 7800 | 500 | 380 | 452 |
Attack Damage is the damage of the Basic Attack as tested against the Training Dummy.
Buzzwole In-Game Stat Listings
| Offense | Endurance | Mobility | Scoring | Support |
|---|---|---|---|---|

|

|

|

|

|
Buzzwole Skins (Holowear)
| Holowear | |
|---|---|
 Tuxedo Style Tuxedo Style
Zirco Trading:
|
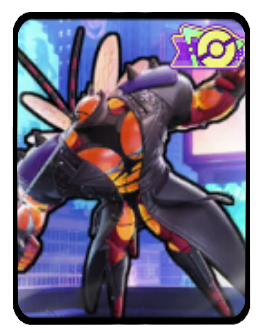 Dark Hero Style Dark Hero Style
Event:
Season 13 Battle Pass |
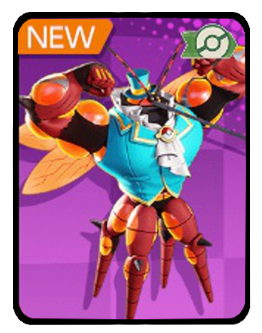 Tuxedo Style (Blue-Green) Tuxedo Style (Blue-Green)
Zirco Trading:
|
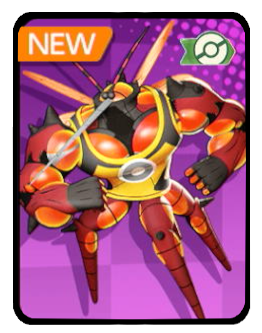 Orange UNITE Style Orange UNITE Style
Zirco Trading:
|
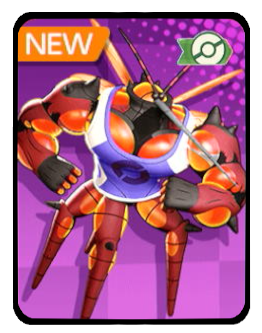 Purple UNITE Style Purple UNITE Style
Zirco Trading:
|
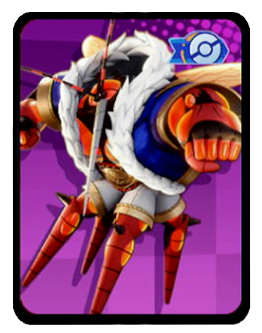 Champion Style Champion Style
Zirco Trading:
|
Buzzwole Character Spotlight
Buzzwole Achievements
Leech Life Achievement
| Leech Life | |
|---|---|
| Pokemon | Move |
 Buzzwole Buzzwole
|
|
| Mission: In a single battle, hit 5 or more Pokemon from the opposing team with Leech Life or Leech Life+ while the muscle gauge is charged to 6. (5/10/20 battles total) |
|
| Medals & Points | Rewards |
|
|
|
|
|
|
|
|
|
List of All-Rounder Pokemon Achievements
Pokemon UNITE Related Guides

All Pokemon Guides and Builds
Upcoming Pokemon
 Articuno Articuno(TBA) |
 Meganium Meganium(TBA) |
 Typhlosion Typhlosion(TBA) |
 Feraligatr Feraligatr(TBA) |
Mega Evolutions
| Mega Evolved Pokemon | ||
|---|---|---|
 Mega Charizard X Mega Charizard X |
 Mega Charizard Y Mega Charizard Y |
 Mega Gyarados Mega Gyarados |
 Mega Lucario Mega Lucario |
 Mega Mewtwo X Mega Mewtwo X |
 Mega Mewtwo Y Mega Mewtwo Y |
Pokemon by Role
| All Pokemon Roles | |||||
|---|---|---|---|---|---|
 Attackers Attackers |
 All-Rounders All-Rounders |
 Defenders Defenders |
|||
 Speedsters Speedsters |
 Supporters Supporters |
||||
Pokemon by Characteristics
| Attack Type | |
|---|---|
 Melee Pokemon Melee Pokemon |
 Ranged Pokemon Ranged Pokemon |
 Physical Pokemon Physical Pokemon |
 Special Pokemon Special Pokemon |
| Stat Rankings | |
 HP Ranking HP Ranking |
 Defense Ranking Defense Ranking |
 Sp. Def. Ranking Sp. Def. Ranking |
 Basic Attack Ranking Basic Attack Ranking |
Comment
Leech Life and Smackdown is an insane combo
Author
Buzzwole Guide: Builds and Best Items
Rankings
- We could not find the message board you were looking for.
Gaming News
Popular Games

Genshin Impact Walkthrough & Guides Wiki

Umamusume: Pretty Derby Walkthrough & Guides Wiki

Pokemon Pokopia Walkthrough & Guides Wiki

Honkai: Star Rail Walkthrough & Guides Wiki

Monster Hunter Stories 3: Twisted Reflection Walkthrough & Guides Wiki

Arknights: Endfield Walkthrough & Guides Wiki

Wuthering Waves Walkthrough & Guides Wiki

Zenless Zone Zero Walkthrough & Guides Wiki

Pokemon TCG Pocket (PTCGP) Strategies & Guides Wiki

Monster Hunter Wilds Walkthrough & Guides Wiki
Recommended Games

Diablo 4: Vessel of Hatred Walkthrough & Guides Wiki

Cyberpunk 2077: Ultimate Edition Walkthrough & Guides Wiki

Fire Emblem Heroes (FEH) Walkthrough & Guides Wiki

Yu-Gi-Oh! Master Duel Walkthrough & Guides Wiki

Super Smash Bros. Ultimate Walkthrough & Guides Wiki

Pokemon Brilliant Diamond and Shining Pearl (BDSP) Walkthrough & Guides Wiki

Elden Ring Shadow of the Erdtree Walkthrough & Guides Wiki

Monster Hunter World Walkthrough & Guides Wiki

The Legend of Zelda: Tears of the Kingdom Walkthrough & Guides Wiki

Persona 3 Reload Walkthrough & Guides Wiki
All rights reserved
©2021 Pokémon. ©1995–2021 Nintendo / Creatures Inc. / GAME FREAK inc.
©2021 Tencent.
The copyrights of videos of games used in our content and other intellectual property rights belong to the provider of the game.
The contents we provide on this site were created personally by members of the Game8 editorial department.
We refuse the right to reuse or repost content taken without our permission such as data or images to other sites.
 Absol
Absol Aegislash
 Alcremie
 Alolan Ninetales
 Alolan Raichu
 Armarouge
 Azumarill
 Blastoise
 Blaziken
 Blissey
 Ceruledge
 Chandelure
 Charizard
 Clefable
 Comfey
 Cramorant
 Crustle
 Darkrai
 Decidueye
 Delphox
 Dhelmise
 Dodrio
 Dragapult
 Dragonite
 Duraludon
 Eldegoss
 Empoleon
 Espeon
 Falinks
 Galarian Rapidash
 Garchomp
 Glaceon
 Goodra
 Greedent
 Greninja
 Gyarados
 Ho-oh
Ho-oh Hoopa
Hoopa Inteleon
 Lapras
 Latias
 Latios
 Leafeon
 Lucario
 Mamoswine
 Meowscarada
 Meowth
 Metagross
 Mew
Mew Mimikyu
 Miraidon
 Moltres
 Pawmot
 Psyduck
 Scizor
 Sirfetch'd
 Suicune
 Sylveon
 Talonflame
 Tinkaton
 Trevenant
 Tyranitar
 Umbreon
 Urshifu
 Vaporeon
 Venusaur
 Zacian
 Zapdos
 Zeraora


![The Liar Princess and the Blind Prince Review [PC] | Lovely to Look at but Tedious to Play](https://img.game8.co/4442586/8d95f5faf05780f1765ce7e0938bd825.jpeg/thumb)
![Marathon Cryo Archive Map Teased as [REDACTED] on Selection Screen](https://img.game8.co/4442236/6357203e58172f6de57f1991e7c39b22.png/thumb)


Leech life and Smack down has the "stun"!