This survey will take about 1 minute.
Your answers will help us to improve our website.
Pokemon Legends: Z-A
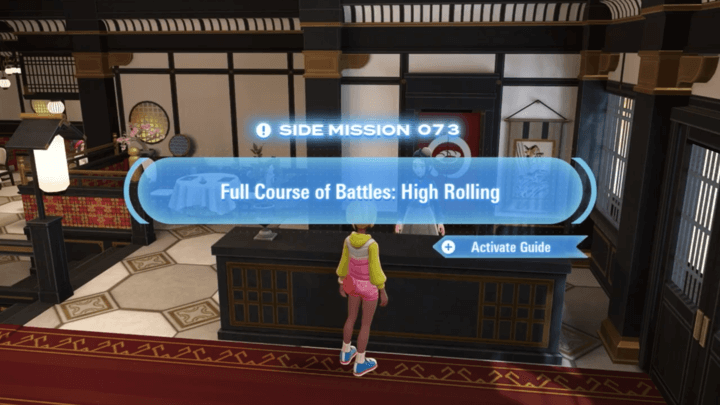
Full Course of Battles: High Rolling Walkthrough (Side Mission 73)
★ New Mystery Gift: Portal for Mega Garchomp Z!
☆ Mega Dimension DLC & Version 2.0.1 released!
★ See the Returning Pokemon & New DLC Megas.
☆ Pokemon HOME Connectivity on April 2!
★ Interactive Map: Screws, TMs, Mint Shops
☆ Find your desired Pokemon at the Trading Board.

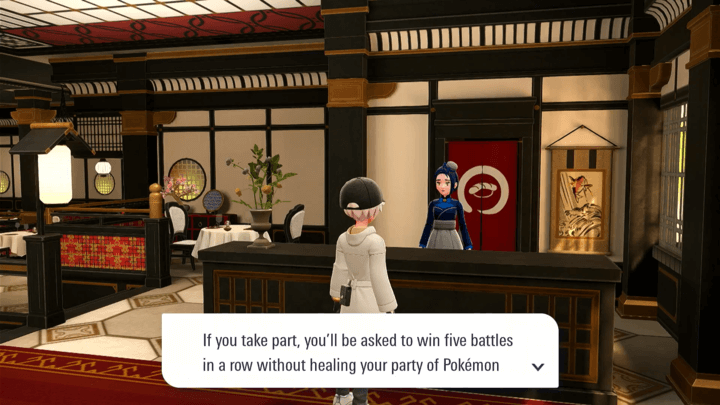
Full Course of Battles: High Rolling is a Side Mission from the Sushi High Roller Restaurant Staff in Pokemon Legends: Z-A. Read on for a walkthrough on how to complete Full Course of Battles: High Rolling, how to unlock it, and its rewards!
| ◀ Previous Mission | Next Mission ▶ | Find My Galarian Stunfisk! | Delibird Gets in a Flap |
|---|
List of Contents
How to Unlock Full Course of Battles: High Rolling
Unlock Main Mission 24
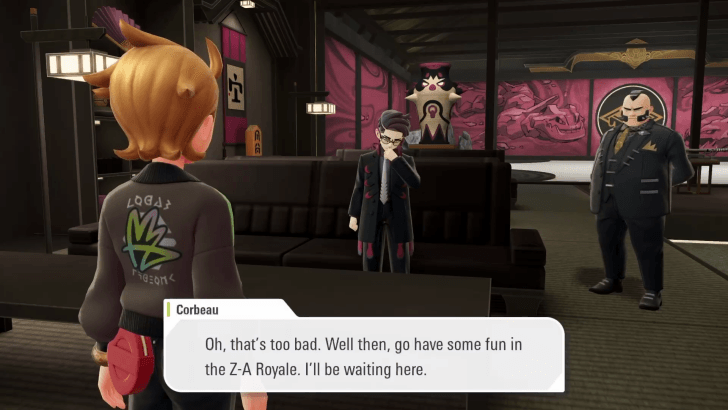
To accept this Side Mission, you will need to unlock Main Mission 24 first. To do this, you must clear Main Missions 21, 22, and 23 first, and talk with Corbeau.
Complete Story Walkthrough
Accept Mission From Restaurant Staff
| Restaurant Staff Location | |
|---|---|
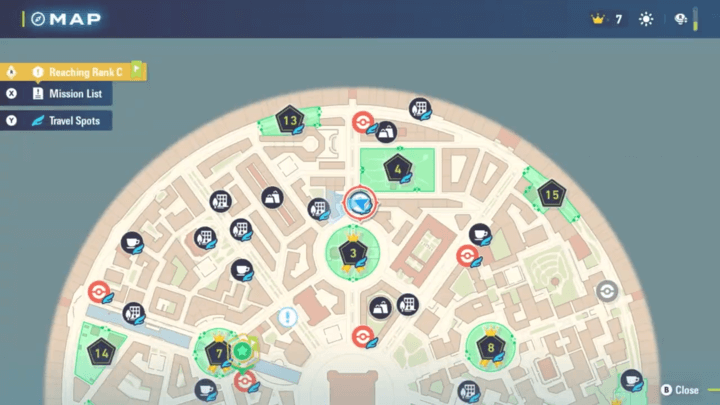 Rouge District Map |
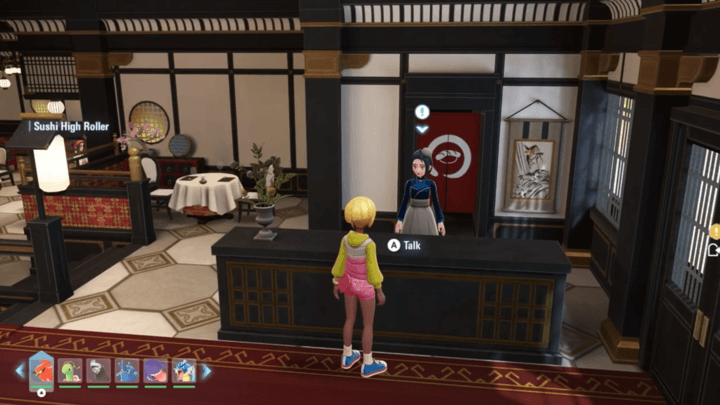 Inside Sushi High Roller |
You can accept this quest from the restaurant staff that's sitting behind the front desk of Sushi High Roller.
Full Course of Battles: High Rolling Walkthrough
- Prepare a Team of Level 50+ Pokemon
- Face Off Against Bug-Types
- Face Off Against Electric-Types
- Face Off Against Steel-Types
- Face Off Against Ghost-Types
- Face Off Against Eeveelutions
Prepare a Team of Level 50+ Pokemon
| Sample Team | ||
|---|---|---|
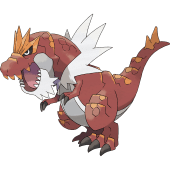 Tyrantrum Tyrantrum

|
 Excadrill Excadrill

|
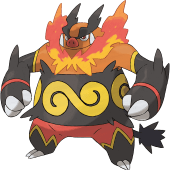 Emboar Emboar

|
 Ampharos Ampharos

|
 Umbreon Umbreon

|
 Gardevoir Gardevoir
Wish Support |
During this mission, you will face 5 trainers, who have a diverse range of Pokemon. Specifically, you'll be fighting against Flying, Rock, Bug-type, Electric-type, Steel-type, Ghost-type, and Eeveelution teams, who are all at Level 50.
Keep in mind that the battles will be 1 vs.3, so it is good to have moves that can damage multiple Pokemon.
It's recommended that you prepare a team that can resist the aforementioned Pokemon types and hit them back for super effective damage in return. Also, your Pokemon will ideally want to be at least around the Level 50-55 range so that their stats lines aren't below your opponents'.
Best Pokemon Tier List for the Story
Cannot Heal With Items or In-Between Battles
As a note, you cannot use items during these fights and your team won't be healed in between battles. Because of this, it's recommended that your Pokemon bring moves that can heal, especially Wish since it can be used to heal anyone on your team.
Wish Effect and Pokemon That Learn It
Face Off Against Bug-Types
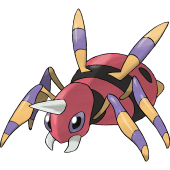 Ariados Ariados
|
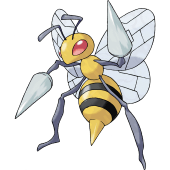 Beedrill Beedrill
|
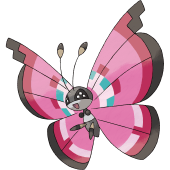 Vivillon Vivillon
|
The first fight in this gauntlet will have you face three Bug-type Pokemon. It is recommended to use Rock-type moves for this fight as they are 4x effective against Beedrill and Vivillon.
Face Off Against Electric-Types
 Raichu Raichu
|
 Emolga Emolga
|
 Dedenne Dedenne
|
You will face three Electric-type Pokemon in the second battle. Ground-types are good to use for their type advantage and immunity. However, be sure that your Pokemon has a Rock-type move to deal with Emolga.
List of All Ground Type Pokemon
Face Off Against Steel-Types
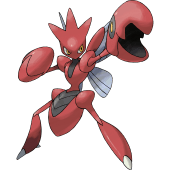 Scizor Scizor
|
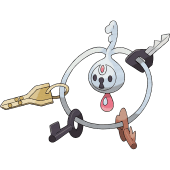 Klefki Klefki
|
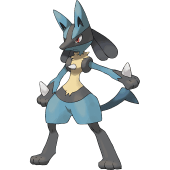 Lucario Lucario
|
The next battle will have you face three Steel-type Pokemon. Fire-types are ideal to use due to their 4x effectiveness against Scizor.
Face Off Against Ghost-Types
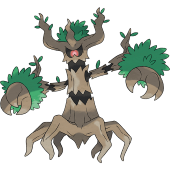 Trevenant Trevenant
|
 Gourgeist (Average) Gourgeist (Average)
|
 Chandelure Chandelure
|
You will need to battle three Ghost-types on the fourth round. You may use Dark-type Pokemon for their type effectiveness.
Face Off Against Eeveelutions
 Vaporeon Vaporeon
|
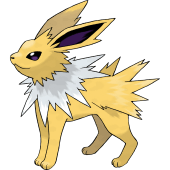 Jolteon Jolteon
|
 Flareon Flareon
|
The last battle is trickier as you cannot counter all three of the Pokemon with a shared weakness. You may opt to KO Vaporeon with an Electric-type Pokemon first. Afterwards, you can use a Ground-type to take care of both Jolteon and Flareon.
List of All Electric Type Pokemon
Full Course of Battles: High Rolling Rewards
Qualot, Grepa, and Kelpsy Berries
| Full Course of Battles: High Rolling Rewards |
|---|
|
・ ₽1,500 ・
・
・
|
The restaurant staff will give you 10 Qualot Berries, 10 Grepa Berries, 10 Kelpsy Berries, and 1500 Pokemon Dollars upon clearing this Side Mission.
The berries given to you can lower a Pokemon's Defense, Special Defense, and Attack EVs respectively. They also increase the Pokemon's friendship.
Restaurant Rematch Battles
 |
|
| Sushi High Roller Rematches | |
|---|---|
| Cost | ₽30,000 |
| Rewards | ・ Big Nugget x2 ・ Seed of Mastery x1 |
After completing this quest, you can revisit Sushi High Roller for a rematch as many times as you want. However, it will cost you ₽30,000 to do this.
The rewards for the rematch battles are 2 Big Nuggets and a Seed of Mastery. 2 Big Nuggets cost ₽40,000, which means you will be making a profit of ₽10,000 for every rematch you win.
Full Course of Battles: High Rolling Side Mission Details
Side Mission 73 Overview
| Full Course of Battles: High Rolling (#73) | |
|---|---|
 |
|
| Given By | Restaurant Staff |
| Location | Sushi High Roller, Rouge District |
| Description | Have an exciting experience with spectacular Pokemon battles that only Sushi High Roller can offer! Don't go healing your Pokemon in the middle of things, though! |
Previous and Next Missions
| ◀ Previous Mission | Next Mission ▶ | Find My Galarian Stunfisk! | Delibird Gets in a Flap |
|---|
Restaurant Battle Missions
| Full Course of Battles | |
|---|---|
| One Star | Two Stars |
| High Rolling | Three Stars |
Pokemon Legends: Z-A Related Guides

All Side Missions
Author

Full Course of Battles: High Rolling Walkthrough (Side Mission 73)
Please participate in our site
improvement survey
04/2026
improvement survey
04/2026
Would you assist in
improving Game8's site?
improving Game8's site?

×
We are listening to our users' valuable opinions and discussing how to act on them.
The information collected through this survey will be used for the purpose of improving our services. In addition, the information will only be disclosed a part of a statistic in a format that will not allow identification of personal information.
Begin Survey
Not Now
×
Please rate each item regarding Game8.co's Advertisements.
Amount of Ads
Very Dissatisfied
Somewhat Dissatisfied
Fine
Somewhat Satisfied
Highly Satisfied
Placement of Ads
Timing of Ad Display
Ad Loading Speed
Safeness of Ads
Content of Ads
×
Please rate each item regarding Game8.co's Quality of Articles.
Amount of information
Very Dissatisfied
Somewhat Dissatisfied
Fine
Somewhat Satisfied
Highly Satisfied
Frequency of updates
Speed of new information
Accuracy of articles
Understandibility of articles
Readability of sentences
×
Please rate each item regarding Game8.co's Usability of the Site.
Ease of finding information
Very Dissatisfied
Somewhat Dissatisfied
Fine
Somewhat Satisfied
Highly Satisfied
Loading Speed
Use of Color
Font Size
Visibility of Images
Easy to Understand Layout
×
Please rate each item regarding Game8.co's Message Boards, Comments.
Ease of Writing
Very Dissatisfied
Somewhat Dissatisfied
Fine
Somewhat Satisfied
Highly Satisfied
Readability
Ease in Finding Information
Comment Quality
Comment Quantity
Admin Response
×
Please rate each item regarding Game8.co's Site's new design.
Please rate our site's new design
Very Dissatisfied
Somewhat Dissatisfied
Fine
Somewhat Satisfied
Highly Satisfied
Do you think that the website's design change makes the site easier to use?
Has the new design made it easier for you to find information on the site?
Has the new design improved the overall visual appeal of the site?
How would you rate your overall satisfaction with the new design of the site?
×
How likely are you to recommend Game8 to someone you know?
Very Unlikely
0
1
2
3
4
5
6
7
8
9
10
Very Likely
If you have other opinions regarding potential improvement to the website, please share them with us. We would appreciate your honest opinion.
Note: This is a free response section, so you can proceed without entering anything.
Note: Please be sure not to enter any kind of personal information into your response.
Note: Please be sure not to enter any kind of personal information into your response.
×
Thank You
×
Thank you for participating in our survey! Your answers will help us to improve the quality of our website and services.
We hope you continue to make use of Game8.
We hope you continue to make use of Game8.
Close
Rankings

Gaming News


![Forza Horizon 6 Review [Preview] | Beautiful Roads With a Whole Lot of Oversteer](https://img.game8.co/4460981/a7254c24945c43fbdf6ad9bea52b5ce9.png/thumb)
![Borderlands Mobile Review [Playtest] | The Same Borderlands Made Easy](https://img.game8.co/4465500/aac0c880a39ec5cd46073e49d18f3ed5.png/thumb)
Popular Games

Genshin Impact Walkthrough & Guides Wiki
Crimson Desert Walkthrough & Guides Wiki
Umamusume: Pretty Derby Walkthrough & Guides Wiki
Honkai: Star Rail Walkthrough & Guides Wiki
Monster Hunter Stories 3: Twisted Reflection Walkthrough & Guides Wiki
Wuthering Waves Walkthrough & Guides Wiki
The Seven Deadly Sins: Origin Walkthrough & Guides Wiki
Pokemon TCG Pocket (PTCGP) Strategies & Guides Wiki
Pokemon Pokopia Walkthrough & Guides Wiki
Zenless Zone Zero Walkthrough & Guides Wiki


Recommended Games
Fire Emblem Heroes (FEH) Walkthrough & Guides Wiki
Pokemon Brilliant Diamond and Shining Pearl (BDSP) Walkthrough & Guides Wiki
Super Smash Bros. Ultimate Walkthrough & Guides Wiki
Diablo 4: Vessel of Hatred Walkthrough & Guides Wiki
Cyberpunk 2077: Ultimate Edition Walkthrough & Guides Wiki
Yu-Gi-Oh! Master Duel Walkthrough & Guides Wiki
Elden Ring Shadow of the Erdtree Walkthrough & Guides Wiki
Monster Hunter World Walkthrough & Guides Wiki
The Legend of Zelda: Tears of the Kingdom Walkthrough & Guides Wiki
Persona 3 Reload Walkthrough & Guides Wiki


All rights reserved
©2025 Pokémon. ©1995-2019 Nintendo/Creatures Inc. /GAME FREAK inc.
The copyrights of videos of games used in our content and other intellectual property rights belong to the provider of the game.
The contents we provide on this site were created personally by members of the Game8 editorial department.
We refuse the right to reuse or repost content taken without our permission such as data or images to other sites.
The sushi restaurant doesn’t count towards the 1000 trainer wins, I thinks it’s because no trainer is actually present in the battle.