This survey will take about 1 minute.
Your answers will help us to improve our website.
Path of Exile 2 (PoE 2)
PoE 2 0.4 Monk Build - Flicker Strike Invoker
Latest: 0.5.0 Release Date
☆ Fate of the Vaal ▶︎ The Last of the Druids
┗ Bonded Mods | 0.4 Mystery Box
★ Druid: Class Overview | Builds
☆ NEW: Disciple of Varashta Ascendancy!
★ Best Class | Best Builds | Leveling Builds
This is a Flicker Strike Invoker Monk endgame build for mapping in Path of Exile 2 (PoE 2)'s The Last of the Druids Update. Check out the Flicker Strike Invoker Monk endgame build, including its gear, socketables, skills, and playstyle!
List of Contents
Flicker Strike Invoker Build Summary
FGKorbyn21's Flicker Strike Invoker Build
This is a Flicker Strike Invoker build for 0.4.0 created by FGKorbyn21. The video linked above shows a full rundown, explanation, and demonstration of the build.
Interact with FGKorbyn21 and his community through his Discord and Youtube. For more builds and content, interact with him live through his streams on Twitch.
Flicker Strike Invoker Monk Build
 Flicker Strike Invoker |
 Falling Thunder Infuses your Quarter staff with electrical energies, then slams the ground to deal damage in a large cone in front of you. Consumes your Power Charges to fire Lightning Projectiles forwards from the impact.
 Herald of Ice While active, Shattering an enemy with an Attack Hit will cause an icy explosion that deals Attack damage to surrounding enemies.
 Herald of Thunder While active, killing Shocked enemies with Attack damage, will cause subsequent Attack hits to release lightning bolts which deals Attack damage to all surrounding enemies.
 Charged Staff Consume all Power Charges to infuse your Quarterstaff with electricity, adding Lightning damage and a Lightning shockwave to your Quarterstaff Attacks. Reusing this skill while the Buff is active adds to the Buff's duration and damage.
 Mantra of Destruction Build Combo by successfully striking enemies with other skills. After reaching maximum Combo, use this skill to Empower your next Quarterstaff attack, causing it to deal Chaos damage. Each kill with the Empowered attack grants Purple Flame of Chayula for a duration.
 Whirling Assault Advance while hitting enemies around you with a series of spinning strikes.
 Flicker Strike Teleport to an enemy and Strike them. Consumes Power Charges to perform additional teleporting strikes on nearby enemies.
 Cast on Critical While active, gains energy when you Critically Hit enemies and triggers socketed spells on reaching maximum energy.
|
|
|
|
This Flicker Strike Invoker build focuses on constantly generating Power Charges with Profane Ritual or Mantra of Destruction to keep executing Flicker Strike or Falling Thunder.
| Date | Changes |
|---|---|
| 01-06-2025 | Created Flicker Strike Invoker build page for endgame. |
Flicker Strike Invoker Equipment
| Gear | Modifiers |
|---|---|
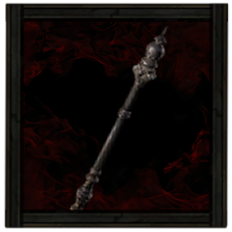 Sinister Quarterstaff Sinister Quarterstaff Sinister Quarterstaff Stats:
Damage - 55-91 Critical Chance - 12.00% Attacks Per Second - 1.40 Requirements: Level - 67 Dexterity - 104 Intelligence - 41 (Weapon) |
・Gain % of Damage as Extra Cold Damage
・+ to Level of All Attack/Melee Skills ・+ Critical Hit Chance ・+ Critical Hit Damage ・Increased Elemental Damage with Attacks ・Increased Attack Speed |
 Ancestral Tiara Ancestral Tiara Ancestral Tiara Stats:
Energy Shield - 109 Requirements: Level - 80 Intelligence - 115 (Helm) |
・Increased Energy Shield
・Increased Evasion Rating ・Elemental Resistances ・Increased Rarity of Items Found |
 Sleek Jacket Sleek Jacket Sleek Jacket Stats:
Evasion - 268 Energy Shield - 101 Requirements: Level - 65 Dexterity - 67 Intelligence - 67 (Body Armor) |
・Increased Energy Shield
・Increased Evasion Rating ・Elemental Resistances ・Increased Maximum Life |
 Vaal Wraps Vaal Wraps Vaal Wraps Stats:
Evasion - 73 Energy Shield - 28 Requirements: Level - 75 Dexterity - 52 Intelligence - 52 (Gloves) |
・+ to Level of All Melee Skills
・Increased Attack Speed ・Leech % of Physical Attack Damage as Mana ・Increased Flat Damage ・Elemental Resistances |
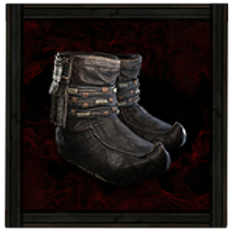 Quickslip Shoes Quickslip Shoes Quickslip Shoes Stats:
Evasion - 110 Energy Shield - 42 Requirements: Level - 75 Dexterity - 56 Intelligence - 56 (Boots) |
・Gain Deflection Rating Equal to % of Evasion Rating
・Increased Movement Speed ・Increased Energy Shield and Evasion ・Increased Rarity of Items Found ・Increased Attributes |
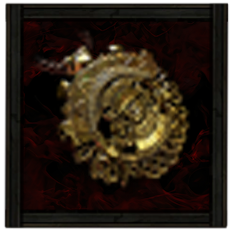 Gold Amulet Gold Amulet Gold Amulet Requirements:
Level - 35 Implicit:12-20% increased Rarity of Items found (Amulet) |
・Increased Evasion Rating
・Increased Energy Shield ・+ to Level of All Melee Skills ・Elemental Resistances ・Increased Rarity of Items Found |
 Unset Ring Unset Ring Unset Ring Requirements:
Level - 44 Implicit:Grants 1 additional Skill Slot (Ring 1) |
・Increased Evasion Rating
・Increased Energy Shield ・+ to Level of All Melee Skills ・Elemental Resistances ・Increased Rarity of Items Found |
|
Unset Ring Unset Ring Requirements:
Level - 44 Implicit:Grants 1 additional Skill Slot (Ring 2) |
・Increased Flat Damage (Lightning)
・Increased Lightning Damage ・Increased Attributes ・Elemental Resistances ・Increased Rarity of Items Found |
 Ultimate Life Flask Ultimate Life Flask Ultimate Life Flask Stats:
Flask Type - Life Recovered Life - 920 Charge Per Use - 10 Total Charges - 75 Duration - 3 sec. (Life Flask) |
・Increased Charges
・Recovery Applied Instantly |
 Ultimate Mana Flask Ultimate Mana Flask Ultimate Mana Flask Stats:
Flask Type - Mana Recovered Mana - 310 Charge Per Use - 10 Total Charges - 75 Duration - 3 sec. (Mana Flask) |
・Increased Charges
・Recovery Applied Instantly |
Weapons
For your Quarterstaff, aim to get a Sinister Quarterstaff as this has the highest base Critical Hit Chance. Aim to get as much Cold Damage as possible to further improve the damage provided by Herald of Ice and Armour Explosion.
Make sure to have Critical Hit Chance and increased level to all melee or attack skills to maximize your damage. Lastly, get the Leech % of Physical Attack Damage as Mana modifier to support Oisin's Oath Lineage Gem.
List of Weapons
Armor and Accessories
Focus on getting as much Energy Shield and Evasion Rating as possible on all of your armour pieces to gain more Spirit from the Lead me through Grace Ascendancy Node. From there, make sure to balance out your elemental resistances or attributes.
For your gloves, you can prioritize getting increased level of melee skills and attack speed to boost your DPS. Lastly, make sure to get Movement Speed, Deflection, and Elemental Resistances to round out your build.
| List of Armors | List of Accessories |
Runes and Soul Cores
| Equipment | Sockets |
|---|---|
| Weapon | |
| Armor |
For your quarterstaff, Farrul's Rune of the Hunt and Fenumus' Rune of Agony provide more Chaos Damage, which is needed to make sure you proc Armour Explosion for Herald of Ice. For your gloves, Idol of Sirrius can help provide even more attack speed
For your helmet, Jiquani's Thesis provides a lot of valuable stats such as Mana and Energy Recharge Rate. However, this is very expensive, so make sure to use it on a helmet you are unlikely to replace!
| List of Runes | List of Soul Cores |
Belts and Charms
| Belt Modifiers | |||||
|---|---|---|---|---|---|
 Shavronne's Satchel Fine Belt Shavronne's Satchel Fine Belt Shavronne's Satchel Fine Belt Requirements:
Level - 62 Implicit:1-3 Charm slots;Flasks gain 0.17 charges per Second Fixed Modifiers: ・ 20-30% reduced Flask Life Recovery rate ・ +20-30 to Intelligence ・ 20-30% increased Flask Charges gained ・ Life Recovery from Flasks also applies to Energy Shield |
・Flasks gain Charges per second
・Has 3 Charm Slots ・Reduced Life Flask Recovery Rate ・+ Intelligence ・Increased Flask Charges Gained ・Life Recovery from flasks also applies to Energy Shield |
||||
| Charm Options | |||||
 Stone Charm Stone Charm
|
 Rite of Passage Golden Charm Rite of Passage Golden Charm
|
 Dousing Charm Dousing Charm
|
|||
The Shavronne's Satchel unique belt synergizes well with the Chaos Inoculation node to constantly keep your Energy Shield up.
For your charms, the Stone Charm is useful for avoiding stuns, which can leave you vulnerable to taking fatal damage. Dousing Charm is crucial for dealing with Ignite damage, which is especially powerful in the current league.
Lastly, the Rite of Passage unique charm provides buffs that can benefit you greatly.
| List of Belts | List of Charms |
Flicker Strike Invoker Skills
All Active and Persistent Skills
| Skill | Support Gems |
|---|---|
|
Whirling Assault Whirling Assault Advance while hitting enemies around you with a series of spinning strikes.
|
Practiced Combo Supports Strike skills. Supported skills have a chance to build additional Combo on hit. Cannot support skills used by minions.
Rage III Supports Melee Attacks, causing them to grant Rage on Hit. Supported Skills have signficantly higher Attack speed while you are not at maximum Rage.
Pinpoint Critical Supports any skill that Hits Enemies, causing it to Critically Hit more often but deal less damage with Critical Hits
Magnified Area II Supports any skill with an area of effect, making it larger at the cost of damage.
Oisin's Oath Supports Skills which Hit enemies, causing their Mana Leech to recover based on Elemental damage instead of Physical damage.
|
|
Falling Thunder Falling Thunder Infuses your Quarter staff with electrical energies, then slams the ground to deal damage in a large cone in front of you. Consumes your Power Charges to fire Lightning Projectiles forwards from the impact.
|
Elemental Armament II Supports Attacks, causing them to deal more Elemental damage.
Nova Projectiles I Supports Projectile Skills, making them fire extra Projectiles in a circle, at the cost of Damage. Does not support Skills which rain down Projectiles from above.
Ricochet II Supports any Skill which creates Projectiles, giving those Projectiles a chance to Chain when impacting terrain.
Pinpoint Critical Supports any skill that Hits Enemies, causing it to Critically Hit more often but deal less damage with Critical Hits
Ice Bite II Supports Attacks and Warcries you use yourself. Freezing an enemy with supported skills infuses all of your Attacks with Cold damage for a short time.
|
|
Flicker Strike Flicker Strike Teleport to an enemy and Strike them. Consumes Power Charges to perform additional teleporting strikes on nearby enemies.
|
Blindside Support Skills whoch can cause Damaging Hits. Supported Skills are more likely to Critically Hit Blinded Enemies, and deal more Damage with Critical Hits against Blinded Enemies, but cannot themselves inflict Blind.
Concentrated Area Supports any skill with an area of effect, causing that area to be smaller but any area damage it deals to be higher.
Close Combat II Supports Attacks, causing them to deal more damage to enemies based on how close they are to you.
Perpetual Charge Supports skills that consume Power, Frenzy, or Endurance Charges on use, giving them a chance not to remove each Charge while still gaining the benefits of Consuming them.
Hit and Run Supports Attack Skills you use yourself which do not have already have some Condition for use. Supported Skills can only be used after you have moved a certain distance, but have massively increased Skill Speed. Cannot support Skills which have a Cooldown or that are Triggered.
|
|
Charged Staff Charged Staff Consume all Power Charges to infuse your Quarterstaff with electricity, adding Lightning damage and a Lightning shockwave to your Quarterstaff Attacks. Reusing this skill while the Buff is active adds to the Buff's duration and damage.
|
Prolonged Duration II Supports any skill that has a duration, making that duration longer.
Innervate Supports attacks you use yourself. Killing a Shocked enemy with supported skills infuses all of your attacks with Lightning damage for a short time.
Culling Strike II Supports Attack skills, causing them to Cull Rare and Unique enemies on hit, and increasing the threshhold at which they will Cull Enemies.
Blind II Supports any skill that Hits enemies, causing them to Blind on Hit with increased effect.
Embitter Supports Skills which can Damage Enemies with Hits, causing all sources of Damage Gained to instead be treated as Damage Gained as extra Cold for Supported Skills
|
|
Mantra of Destruction Mantra of Destruction Build Combo by successfully striking enemies with other skills. After reaching maximum Combo, use this skill to Empower your next Quarterstaff attack, causing it to deal Chaos damage. Each kill with the Empowered attack grants Purple Flame of Chayula for a duration.
|
Chaos Mastery Supports Chaos skills, granting them an additional level.
Prolonged Duration II Supports any skill that has a duration, making that duration longer.
Charge Profusion II Supports skills that can generate Charges, giving them a chance to generate an additional Charge when they do so, as well as a chance to generate an additional Charge of a random type.
Ailith's Chimes Supports Skills which can expend Combo. On expending Combo with Supported Skills, you have a chance to gain Power Charges based on the amount of Combo expended.
Delayed Gratification Supports Skills which require some Condition to be met for use. Supported Skills can be used an additional time after their Condition has been met, but meeting that Condition is harder.
|
|
Cast on Critical Cast on Critical While active, gains energy when you Critically Hit enemies and triggers socketed spells on reaching maximum energy.
|
Profane Ritual Marks a Corpse with a profane rune, dealing Chaos damage over time to nearby enemies. When the ritual is complete the corpse is consumed and you gain a power charge.
Charge Profusion II Supports skills that can generate Charges, giving them a chance to generate an additional Charge when they do so, as well as a chance to generate an additional Charge of a random type.
Overabundance I Supports skills which can have a Limited number of effects active at once, increasing that Limit at the cost of their duration. Only applies to restrictions that use the word “Limit”.
Boundless Energy II Supports Meta Skills. Supported Skills generate Energy significantly faster.
Energy Retention Supports Meta skills. Supported skills gain a chance to partially refund a portion of energy cost when triggering or invoking other skills.
|
|
Herald of Ice Herald of Ice While active, Shattering an enemy with an Attack Hit will cause an icy explosion that deals Attack damage to surrounding enemies.
|
Uul-Netol's Embrace Supports Skills that can cause Damaging Hits, granting extra Chaos damage and causing Chaos damage to Break Armour.
Uruk's Smelting Supports any skill, causing Armour Break it inflicts to be stronger. Fully Breaking Armour with Supported Skills permanently increases the Physical Damage taken by those affected, up to a cap.
Armour Explosion Supports attacks, causing them to trigger a Fiery explosion when they Fully Break an enemy's Armour.
Chaos Attunement Supports Attacks, causing them to Gain Chaos Damage but deal less Damage of other types.
Magnified Area II Supports any skill with an area of effect, making it larger at the cost of damage.
|
|
Herald of Thunder Herald of Thunder While active, killing Shocked enemies with Attack damage, will cause subsequent Attack hits to release lightning bolts which deals Attack damage to all surrounding enemies.
|
Magnified Area II Supports any skill with an area of effect, making it larger at the cost of damage.
Elemental Armament II Supports Attacks, causing them to deal more Elemental damage.
Elemental Focus Supports any skill that hits enemies, causing it to deal more Elemental Damage but be unable to inflict Elemental Ailments.
Pinpoint Critical Supports any skill that Hits Enemies, causing it to Critically Hit more often but deal less damage with Critical Hits
Dialla's Desire Supports any Skill which has levels, increasing the level and Quality, while reducing the cost and Reservation.
|
 Wind Dancer Wind Dancer Wind Dancer Grants a buff that gives you more Evasion per stage. Being Hit by a Melee Attack while you have this buff consumes all stages to damage and Knock Back enemies around you.
|
Magnified Area II Supports any skill with an area of effect, making it larger at the cost of damage.
Close Combat II Supports Attacks, causing them to deal more damage to enemies based on how close they are to you.
Blind II Supports any skill that Hits enemies, causing them to Blind on Hit with increased effect.
Maim Supports Attacks causing them to Maim enemies.
Elemental Focus Supports any skill that hits enemies, causing it to deal more Elemental Damage but be unable to inflict Elemental Ailments.
|
 Herald of Ash Herald of Ash Herald of Ash While active, enemies you sufficiently Overkill with attacks will cause an explosion that ignites nearby enemies based on the Overkill damage dealt.
|
Magnified Area II Supports any skill with an area of effect, making it larger at the cost of damage.
Fire Mastery Supports Fire skills, granting them an additional level.
|
 Elemental Conflux Elemental Conflux Elemental Conflux Tap into a current of raw and unpredictable Elemental Power, causing you to deal greatly more damage of a randomly chosen Element. The Element affected changes frequently, though the same Element can be affected multiple times in succession.
|
Lightning Mastery Supports Lightning skills, granting them an additional level.
|
A unique mechanic that this build uses revolves around using the Uul-Netol's Embrace lineage gem to allow Herald of Ice to break armour and deal more damage with Armour Explosion.
Whirling Assault will be your go-to skill when mapping, as you will start generating Power Charges. From there, you aim to proc Profane Ritual or Mantra of Destruction to keep generating Power Charges. With your Power Charges, you can keep using Flicker Strike and Falling Thunder to deal big damage.
Herald of Thunder and Herald of Ash help with more AoE and improve clear speed. Lastly, Wind Dancer is useful as an additional layer of defense to avoid getting overwhelmed by enemies.
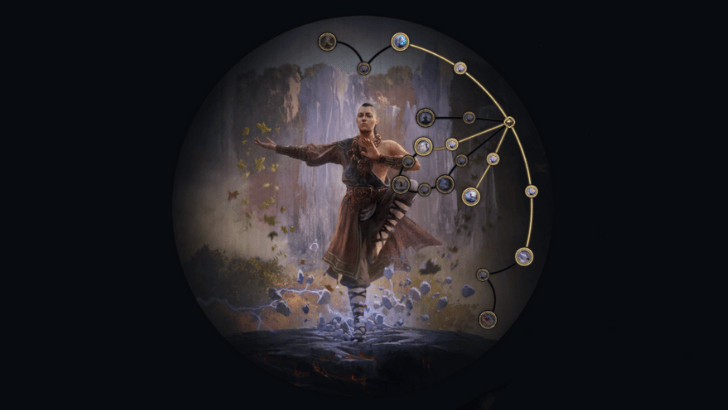
Flicker Strike Invoker Passive Tree
Passive Tree Progression
| Ascendency Passive Nodes |
|---|
 |
| Passive Nodes |
| Screenshot and video taken from Path of Building |
※ Legend: Red = Weapon Set I | Green = Weapon Set II
For damage, this build focuses on nodes related to Power Charges to maintain the use of Flicker Strike and Falling Thunder. You also aim to build as much Critical Hit Chance as possible specifically for Profane Ritual, which gives even more Power Charges.
Invest into nodes such as Blinding Strike and Dizzying Hits to build up Blind and Daze, which further increases your overall damage. The Fabled Stag node in particular is useful for Flicker Strike since it provides a chance to not consume Power Charges.
For survivability, you aim to build Energy Shield, Evasion, and Deflection with nodes such as Subterfuge Mask and Enhanced Reflexes. Chaos Inoculation makes you immune to Chaos damage and synergizes well with your belt, Shavronne's Satchel, to maintain your Energy Shield.
Passive Skill Tree Guide and List of Passives
Jewels
Note: The modifiers listed are arranged according to priority.
 Heart of the Well Diamond Heart of the Well Diamond
|
・Gain % of Damage as Extra Cold Damage
・Gain % of Damage as Extra Chaos Damage ・Increased Mana Cost Efficiency |
|---|---|
 Time-Lost Sapphire Time-Lost Sapphire
|
・Notable Passive Skills in Radius also grant increased Critical Hit Chance
・Notable Passive Skills in Radius also grant increased Critical Damage Bonus ・Passive Skills in Radius grant increased Energy Shield/ Global Defences |
 Megalomaniac Diamond Megalomaniac Diamond
|
・Defensive Node such as Pocket Sand or The Wild Cat
・Offensive Node such as Overwhelming Strike or Sundering |
The Heart of the Well Diamond can provide extra Cold and Chaos damage, which is a huge damage buff. Time-Lost Sapphire with increased Critical Hit Chance and Damage Bonus can be slotted near Stupefy, providing even more bonuses.
Lastly, Megalomaniac Diamond is especially valuable since it can provide your preferred offensive or defensive nodes to help balance out whatever you are missing.
Flicker Strike Invoker Playstyle and Skill Rotation
Mobbing Rotation
For mobbing, focus on generating Power Charges with Profane Ritual to activate Flicker Strike or Falling Thunder. The rotation is as follows:
- Engage enemy packs with Whirling Assault to generate Power Charges.
- Use Flicker Strike to dash around and kill enemies.
- Use Whirling Assault again to generate Power Charges.
- Use Flicker Strike or Falling Thunder depending on your preference to defeat enemy packs.
Bossing Rotation
For bossing, you will still rely on generating Power Charges with Mantra of Destruction to use Flicker Strike and Charged Staff. The rotation is as follows:
- Engage the boss with Whirling Assault to build up your combo.
- Consume your combo with Mantra of Destruction to gain Power Charges.
- Boost your attacks with Charged Staff.
- Build up combo again with Whirling Assault.
- Use Mantra of Destruction again to gain Power Charges.
- Burst down bosses with Flicker Strike.
Path of Exile 2 Related Guides

0.4 Best Endgame Builds
| Rank | Build |
|---|---|
 |
|
 |
|
 |
|
 |
0.4 Leveling Builds
All Build Guides
| List of Builds by Class | |||||||||||
|---|---|---|---|---|---|---|---|---|---|---|---|
 Huntress Huntress |
 Mercenary Mercenary |
 Monk Monk |
|||||||||
 Witch Witch |
 Sorceress Sorceress |
 Warrior Warrior |
|||||||||
 Ranger Ranger |
 Druid Druid |
- | |||||||||
| Other Build Guides | 0.3 Leveling Builds | How to Make a Good Build | |||||||||
Comment
Author

PoE 2 0.4 Monk Build - Flicker Strike Invoker
Please participate in our site
improvement survey
03/2026
improvement survey
03/2026
Would you assist in
improving Game8's site?
improving Game8's site?

×
We are listening to our users' valuable opinions and discussing how to act on them.
The information collected through this survey will be used for the purpose of improving our services. In addition, the information will only be disclosed a part of a statistic in a format that will not allow identification of personal information.
Begin Survey
Not Now
×
Please rate each item regarding Game8.co's Advertisements.
Amount of Ads
Very Dissatisfied
Somewhat Dissatisfied
Fine
Somewhat Satisfied
Highly Satisfied
Placement of Ads
Timing of Ad Display
Ad Loading Speed
Safeness of Ads
Content of Ads
×
Please rate each item regarding Game8.co's Quality of Articles.
Amount of information
Very Dissatisfied
Somewhat Dissatisfied
Fine
Somewhat Satisfied
Highly Satisfied
Frequency of updates
Speed of new information
Accuracy of articles
Understandibility of articles
Readability of sentences
×
Please rate each item regarding Game8.co's Usability of the Site.
Ease of finding information
Very Dissatisfied
Somewhat Dissatisfied
Fine
Somewhat Satisfied
Highly Satisfied
Loading Speed
Use of Color
Font Size
Visibility of Images
Easy to Understand Layout
×
Please rate each item regarding Game8.co's Message Boards, Comments.
Ease of Writing
Very Dissatisfied
Somewhat Dissatisfied
Fine
Somewhat Satisfied
Highly Satisfied
Readability
Ease in Finding Information
Comment Quality
Comment Quantity
Admin Response
×
Please rate each item regarding Game8.co's Site's new design.
Please rate our site's new design
Very Dissatisfied
Somewhat Dissatisfied
Fine
Somewhat Satisfied
Highly Satisfied
Do you think that the website's design change makes the site easier to use?
Has the new design made it easier for you to find information on the site?
Has the new design improved the overall visual appeal of the site?
How would you rate your overall satisfaction with the new design of the site?
×
How likely are you to recommend Game8 to someone you know?
Very Unlikely
0
1
2
3
4
5
6
7
8
9
10
Very Likely
If you have other opinions regarding potential improvement to the website, please share them with us. We would appreciate your honest opinion.
Note: This is a free response section, so you can proceed without entering anything.
Note: Please be sure not to enter any kind of personal information into your response.
Note: Please be sure not to enter any kind of personal information into your response.
×
Thank You
×
Thank you for participating in our survey! Your answers will help us to improve the quality of our website and services.
We hope you continue to make use of Game8.
We hope you continue to make use of Game8.
Close
Rankings
- We could not find the message board you were looking for.
Gaming News


![Marathon Review [First Impressions] | Playing The Long Game](https://img.game8.co/4435736/b9b1ec1e9219416dfc2599f85295d6ef.png/thumb)


Popular Games

Genshin Impact Walkthrough & Guides Wiki
Honkai: Star Rail Walkthrough & Guides Wiki
Umamusume: Pretty Derby Walkthrough & Guides Wiki
Pokemon Pokopia Walkthrough & Guides Wiki
Resident Evil Requiem (RE9) Walkthrough & Guides Wiki
Monster Hunter Wilds Walkthrough & Guides Wiki
Wuthering Waves Walkthrough & Guides Wiki
Arknights: Endfield Walkthrough & Guides Wiki
Pokemon FireRed and LeafGreen (FRLG) Walkthrough & Guides Wiki
Pokemon TCG Pocket (PTCGP) Strategies & Guides Wiki


Recommended Games
Fire Emblem Heroes (FEH) Walkthrough & Guides Wiki
Diablo 4: Vessel of Hatred Walkthrough & Guides Wiki
Yu-Gi-Oh! Master Duel Walkthrough & Guides Wiki
Super Smash Bros. Ultimate Walkthrough & Guides Wiki
Pokemon Brilliant Diamond and Shining Pearl (BDSP) Walkthrough & Guides Wiki
Elden Ring Shadow of the Erdtree Walkthrough & Guides Wiki
Monster Hunter World Walkthrough & Guides Wiki
The Legend of Zelda: Tears of the Kingdom Walkthrough & Guides Wiki
Persona 3 Reload Walkthrough & Guides Wiki
Cyberpunk 2077: Ultimate Edition Walkthrough & Guides Wiki


All rights reserved
© 2010 - 2024 Grinding Gear Games
The copyrights of videos of games used in our content and other intellectual property rights belong to the provider of the game.
The contents we provide on this site were created personally by members of the Game8 editorial department.
We refuse the right to reuse or repost content taken without our permission such as data or images to other sites.