This survey will take about 1 minute.
Your answers will help us to improve our website.
Path of Exile 2 (PoE 2)
Vaal Temple Guide
Latest: 0.5.0 Release Date
☆ Fate of the Vaal ▶︎ The Last of the Druids
┗ Bonded Mods | 0.4 Mystery Box
★ Druid: Class Overview | Builds
☆ NEW: Disciple of Varashta Ascendancy!
★ Best Class | Best Builds | Leveling Builds
The Vaal Temple, or Atziri's Temple, is the latest league mechanic in Path of Exile 2 (PoE 2). Learn more about Vaal Temple, its mechanics, and different rooms with this guide!
List of Contents
Best Vaal Temple Setups
Snaking Temple Rooms
| Snaking Patterns |
|---|
| Armory > Garrison > Spymaster > Garrison > Armory |
| Armory > Commander > Garrison > Commander > Garrison > Armory |
| Armory > Alchemy Lab > Thaumaturge > Alchemy Lab > Armory |
Snaking refers to connecting individual rooms together in one long chain to avoid destabilzaing multiple rooms. This allows you to use the Medallion that prevents the final room from destabalizing, protecting the whole chain from getting destroyed.
This technique requires a lot of set up to get going, however, having a Temple full of rooms that each increase the difficulty and rewards of the monsters inside is on the most lucrative ways to use the Vaal Temple.
Rushing Atziri Fights
If setting up a full temple is not to your liking, it may still be good idea to try and build it in a way to fight it's final boss, Atziri, the Red Queen, every now and then between mapping.
An effective way to do this is always keep a path that goes straight from the entrance of the Temple to the Atziri's boss chamber. Additionally, you want paths that go either side of the Temple to easily access the Architect fight.
How to Set Up the Temple
Use the Prelude Maps to Easily Find Energized Crystals
Lower‑level characters can repeatedly spawn in a campaign areas to search for nearby Energized Crystals to use the Temple Console. This is an efficient way for characters to start setting up their Temple without burning through a lot of Waystones.
Note that this only works for characters within 10 levels above the area you're trying to fish for Energized Crystals. We recommend The Blackwood and the Holten Estate in the Prelude for this strategy.
Use Higher-Tier Waystones
Playing maps with higher‑tier Waystones offers a chance to obtain two Energized Crystals from a single encounter, with a rare possibility of receiving three. This makes running Tier 15 Waystones efficient for stacking up on Energized Crystals to consecutive Temple runs.
Use Light Radius Gear
If your goal is only to locate Energized Crystal encounters in either endgame or campaign areas, stacking the Light Radius stat can be very helpful. Increased Light Radius expands the terrain revealed on your minimap, making it easier to spot points-of-interest, such as the Vaal Crystal encounters from a distance. The maximum bonus you can reach is 150% increased Light Radius at a time.
How to Reset the Vaal Temple
Defeat Atziri or the Architect to Destabilize the Temple
The most effective way to reset your Temple and start fresh is by repeatedly placing paths toward the Architect and defeating him. Doing so triggers a major destabilization, which removes a significant number of the rooms you have already placed.
Defeating Atziri also causes a major destabilization. It's advisable to do this once you have the Royal Access Chamber placed in the Temple Console.
Use a New Character
If you are dissatisfied with your current Temple setup and plan to create a new character, starting fresh will automatically reset Temple progress for that character. This approach provides a clean slate and is best suited for players who are already planning to level a new character or who can progress through the campaign quickly enough that it becomes more efficient than repeatedly fighting the Architect.
Vaal Temple Mechanics
|
|
Clear 6 Beacons for One Temple Run
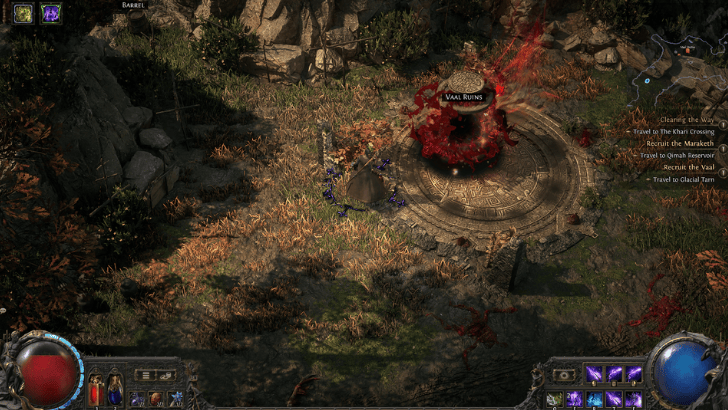
Before you can go through Temples, you will need to activate 6 Vaal Beacons that are scattered throughout Wraeclast. Fortunately, there are Vaal Beacons in every area as you progress through the campaign.
Once you unlock 6 beacons, you will gain access to the Vaal Ruins.
Place Rooms and Paths Each Run
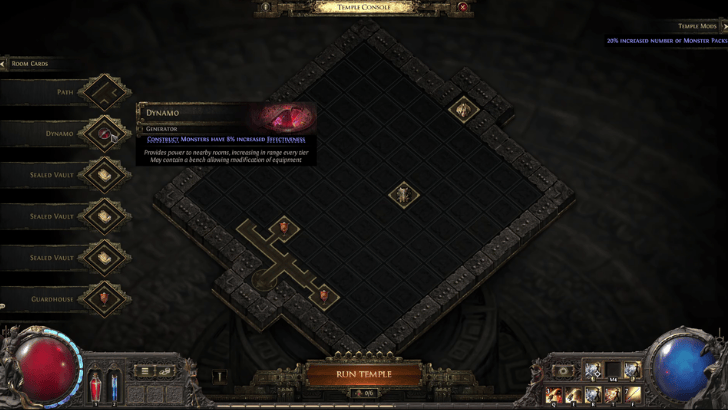
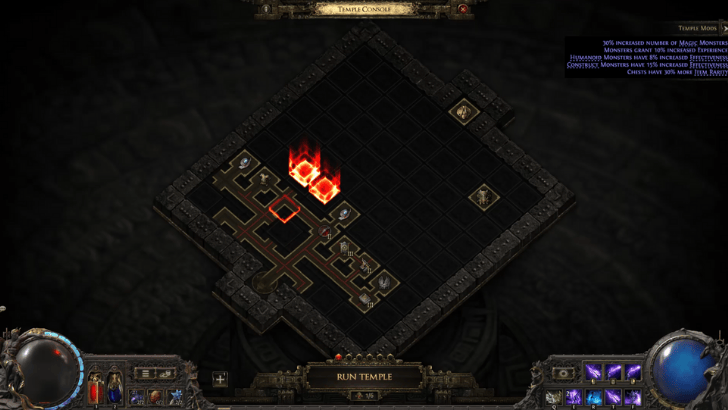
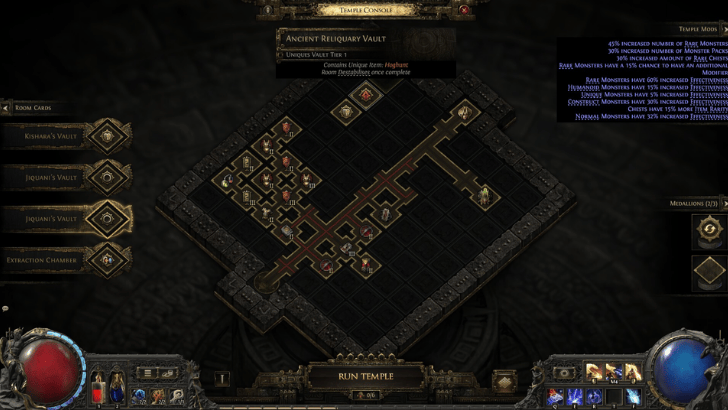
Once you enter the Vaal Ruins and interact with the Temple Console, you will be given 6 random room and path tiles to place. This allows you to customize the Temple's layout for you to go through. Use the paths to connect the rooms however you can.
Placing certain rooms next to each other can grant additional effects. Stacking more effects for you run will grant you better rewards upon completing it. Once you are satisfied with the layout, select the Run Temple button and go through your creation!
The Temple Destabilizes After Each Run
Once you complete all the rooms, you can create a portal back to the Vaal Ruins. Upon interacting with the Temple Console again, you must press End Temple to start building up to a new run.
Ending the temple will cause some of the rooms to destabilize and will be permanently removed from your setup.
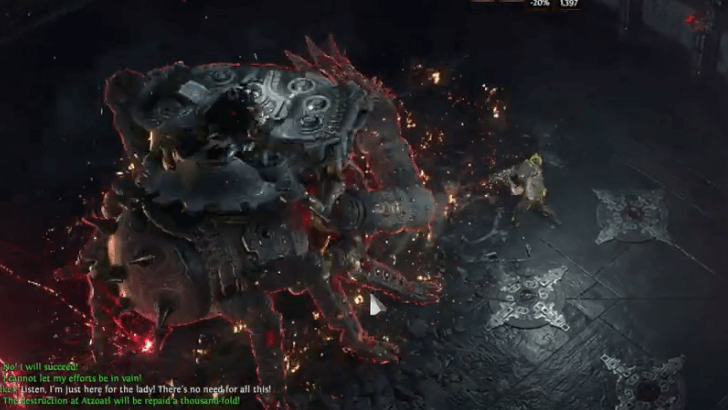
Defeat the Architect
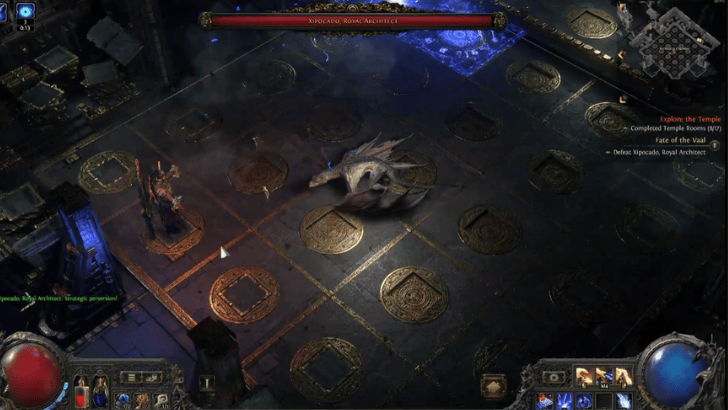
Build your way towards the Architect's Chamber on the opposite side of the Temple Console, where you must fight and defeat Xipocado, Royal Architect. Defeating Xipocado and ending the Temple will cause it to destabilize, removing a lot more rooms.
Place 3 Reward Rooms
After defeating The Architect, interact with the Temple Console again to gain an assortment of special room tiles to choose from. These exclusive rooms can grant unique and valuable rewards.
Defeat Atziri
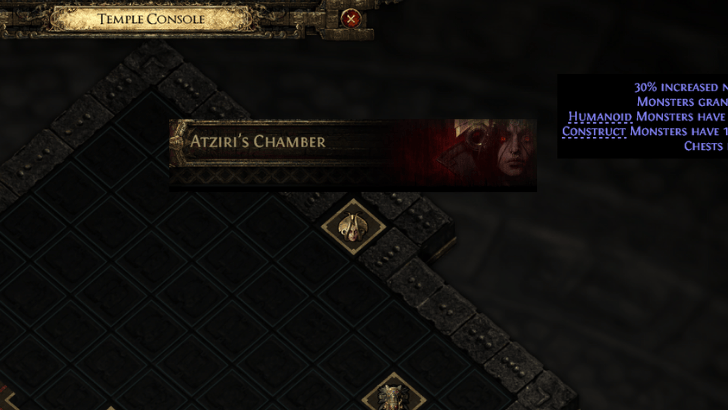
Lastly, you will need to defeat Atziri in Vaal Chambers, found at the opposite end of the Temple Console. She is this league's final boss, and only players Level 75 and above may access this room.
Defeating Atziri and ending the Temple will cause it to destabilize, removing a lot more rooms.
Vaal Temple List of Rooms
 Attention! Attention! |
This section is still under construction. More details will be added here soon! Sign in and select  under the page's title to be notified of any updates! under the page's title to be notified of any updates! |
|---|
List of Base Rooms
| Room | Description |
|---|---|
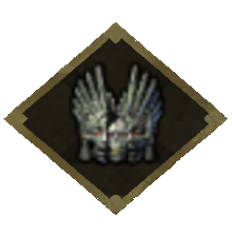
 Commander's Chamber Commander's Chamber |
・Rare Monsters have 8% increased Effectiveness Effectiveness Monster Effectiveness provides more monster life, experience granted, and quantity of items dropped.
・Has a higher chance of Uromoti's Medallion, increases with tier ・May contain a bench allowing modification of equipment |
 Sealed Vault Sealed Vault |
・Contains many chests
・Room Destabilizes once the central Vault is opened |
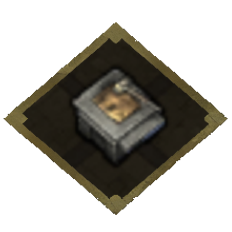 Bronzeworks Bronzeworks |
・Chests have 8% more Item Rarity
・Contains Masterwork Forge Masterwork Forge Improves the quality of a Martial Weapon, Caster Weapon, or Armour above 20% with a chance of Corrupting it. to improve equipment quality
・Tier 3 allows further improvement of equipment quality above 20% |
 Workshop Workshop |
・Tier 3 has a high chance of Quipolatl's Medallion
・May contain a bench allowing modification of equipment |
 Dynamo Dynamo |
・Construct Monsters have 8% increased Effectiveness Effectiveness Monster Effectiveness provides more monster life, experience granted, and quantity of items dropped.
・May contain a bench allowing modification of equipment |
 Thaumaturge's Laboratory Thaumaturge's Laboratory |
・Contains Gemcutting Workbench Gemcutting Workbench Sets a Skill Gem to have 3 Support Gem Sockets
・Tier 3 allows further Corruption of Gems |
 Guardhouse Guardhouse |
・10% increased number of Monsters Packs
・May contain a bench allowing modification of equipment ・May contain Regal Workbench Regal Workbench Upgrades a Magic Equipment to a Rare item, adding 1 Modifier |
 Depot Depot |
・Humanoid Monsters have 8% increased Effectiveness Effectiveness Monster Effectiveness provides more monster life, experience granted, and quantity of items dropped.
・Contains Equipment |
List of Rooms in the Past
| Room | Description |
|---|---|
 Prosthetic Research Prosthetic Research |
・Monsters grant 5% increased Experience |
 Chamber of Souls Chamber of Souls |
・8% increased Rarity of Items dropped by Monsters
・Tier 3 allows Soul Core Corruption |
 Spymaster's Study Spymaster's Study |
・Has a higher chance of Juatalotli's Medallion, increases with tier
・Can assassinate other Spymasters to level up |
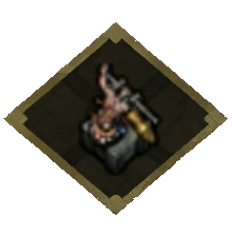
 Surgeon's Ward Surgeon's Ward |
・Unique Monsters have 5% increased Effectiveness Effectiveness Monster Effectiveness provides more monster life, experience granted, and quantity of items dropped.
・Tier 3 allows Limb Modification |
 Corruption Chamber Corruption Chamber |
・Rare Monsters have an 8% chance to have an additional modifier
・Contains a device to Corrupt Items ・Tier 3 allows further Corruption of Equipment |
List of Xipocado's Console Rooms
| Room | Description |
|---|---|
 Ancient Reliquary Vault Ancient Reliquary Vault |
・Contains Unique Item
・Room Destabilises once complete |
 Kishara's Vault Kishara's Vault |
・Contains a large stash of Currency
・Room Destabilises once complete |
| Kishara's Vault |
・Contains a large stash of Currency
・Room Destabilises once complete |
 Jiquani's Vault Jiquani's Vault |
・Contains a random High Level Rune
・Room Destabilises once complete |
 Extraction Chamber Extraction Chamber |
・Contains a Device to Salvage Socketed Augments at the cost of destroying the equipment.
・Room Destabilises once complete |
Best Atziri Temple Rooms
Sacrificial Chamber
The Sacrificial Chamber contains the most valuable Incursion Currency, the Vaal Cultivation Orb. This specific currency is particularly valuable due to it being able to further modify Corrupted Vaal Uniques.
Corruption Chamber
The Corruption Chamber contains a device that can further modify Corrupted Equipment. Though using the device is a huge gamble since it can destroy the equipment, the potential reward can be incredibly valuable.
Thaumaturge
Thaumaturge rooms, when upgraded to Tier 3, contains a device that can further modify a Corrupted Skill Gem. This is a great way to potentially get a 6-socket or +1 level skill gem!
Spymaster
Spymaster rooms are valuable due to its chance to drop Juatalotli's Medallion, which prevents rooms destabilization from removing important rooms. Make sure to upgrade this room since it increases the chances of dropping Juatalotli's Medallion.
Golem Works
Upgrading Golem Works to tier 3 will provide a high chance for Quipolatl's Medallion to drop. This medallion upgrades the tier of a room, which takes out the RNG of getting specific rooms for upgrading.
How to Unlock Vaal Temple
Activate 6 Ancient Beacons
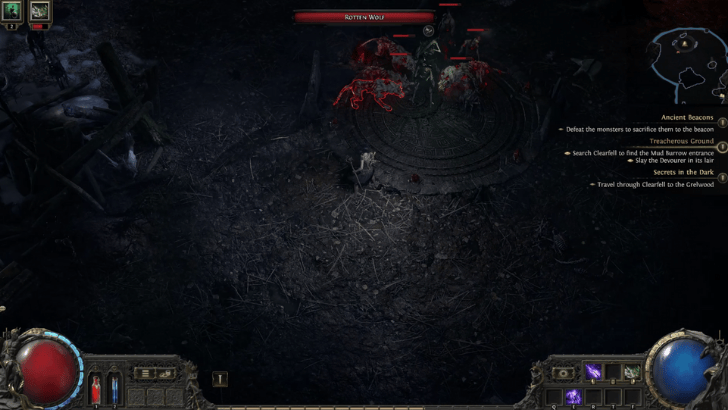
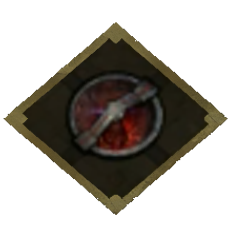
When you start a fresh account under the new league, Fate of the Vaal, you will encounter Ancient Beacons all throughout Wraeclast. These beacons can be characterized by a circular structure with red stones and intricate markings.
To activate these beacons, you must defeat all nearby enemies and then step onto the beacon. Once you activate 6 Ancient Beacons, a portal to the Vaal Ruins will open, where you can find Vaal Temple.
Ancient Beacons Quest Walkthrough
Complete Act 3 For More Rooms
Upon finishing Act 3, Doryani will join you on your quest and gain the ability to travel back in time to unlock Vaal Temple in its prime. Thus, you gain access to past-exclusive rooms, which can contain valuable loot.
Path of Exile 2 Related Guides

League Guide and List of All Leagues
List of Leagues
| Fate of the Vaal | Rise of the Abyssal Guide |
| Dawn of the Hunt Guide | - |
Game Mode Guides
| What is Solo Self-Found (SSF)? | - |
Rise of the Abyssal Guides
| Well of Souls Guide | - |
Fate of the Vaal Guides
| Atziri's Temple Guide | - |
Comment
Author

Please participate in our site
improvement survey
03/2026
improvement survey
03/2026
Would you assist in
improving Game8's site?
improving Game8's site?

×
We are listening to our users' valuable opinions and discussing how to act on them.
The information collected through this survey will be used for the purpose of improving our services. In addition, the information will only be disclosed a part of a statistic in a format that will not allow identification of personal information.
Begin Survey
Not Now
×
Please rate each item regarding Game8.co's Advertisements.
Amount of Ads
Very Dissatisfied
Somewhat Dissatisfied
Fine
Somewhat Satisfied
Highly Satisfied
Placement of Ads
Timing of Ad Display
Ad Loading Speed
Safeness of Ads
Content of Ads
×
Please rate each item regarding Game8.co's Quality of Articles.
Amount of information
Very Dissatisfied
Somewhat Dissatisfied
Fine
Somewhat Satisfied
Highly Satisfied
Frequency of updates
Speed of new information
Accuracy of articles
Understandibility of articles
Readability of sentences
×
Please rate each item regarding Game8.co's Usability of the Site.
Ease of finding information
Very Dissatisfied
Somewhat Dissatisfied
Fine
Somewhat Satisfied
Highly Satisfied
Loading Speed
Use of Color
Font Size
Visibility of Images
Easy to Understand Layout
×
Please rate each item regarding Game8.co's Message Boards, Comments.
Ease of Writing
Very Dissatisfied
Somewhat Dissatisfied
Fine
Somewhat Satisfied
Highly Satisfied
Readability
Ease in Finding Information
Comment Quality
Comment Quantity
Admin Response
×
Please rate each item regarding Game8.co's Site's new design.
Please rate our site's new design
Very Dissatisfied
Somewhat Dissatisfied
Fine
Somewhat Satisfied
Highly Satisfied
Do you think that the website's design change makes the site easier to use?
Has the new design made it easier for you to find information on the site?
Has the new design improved the overall visual appeal of the site?
How would you rate your overall satisfaction with the new design of the site?
×
How likely are you to recommend Game8 to someone you know?
Very Unlikely
0
1
2
3
4
5
6
7
8
9
10
Very Likely
If you have other opinions regarding potential improvement to the website, please share them with us. We would appreciate your honest opinion.
Note: This is a free response section, so you can proceed without entering anything.
Note: Please be sure not to enter any kind of personal information into your response.
Note: Please be sure not to enter any kind of personal information into your response.
×
Thank You
×
Thank you for participating in our survey! Your answers will help us to improve the quality of our website and services.
We hope you continue to make use of Game8.
We hope you continue to make use of Game8.
Close
Rankings
- We could not find the message board you were looking for.
Gaming News


![Marathon Review [First Impressions] | Playing The Long Game](https://img.game8.co/4435736/b9b1ec1e9219416dfc2599f85295d6ef.png/thumb)


Popular Games

Genshin Impact Walkthrough & Guides Wiki
Honkai: Star Rail Walkthrough & Guides Wiki
Umamusume: Pretty Derby Walkthrough & Guides Wiki
Pokemon Pokopia Walkthrough & Guides Wiki
Resident Evil Requiem (RE9) Walkthrough & Guides Wiki
Monster Hunter Wilds Walkthrough & Guides Wiki
Wuthering Waves Walkthrough & Guides Wiki
Arknights: Endfield Walkthrough & Guides Wiki
Pokemon FireRed and LeafGreen (FRLG) Walkthrough & Guides Wiki
Pokemon TCG Pocket (PTCGP) Strategies & Guides Wiki


Recommended Games
Fire Emblem Heroes (FEH) Walkthrough & Guides Wiki
Diablo 4: Vessel of Hatred Walkthrough & Guides Wiki
Yu-Gi-Oh! Master Duel Walkthrough & Guides Wiki
Super Smash Bros. Ultimate Walkthrough & Guides Wiki
Pokemon Brilliant Diamond and Shining Pearl (BDSP) Walkthrough & Guides Wiki
Elden Ring Shadow of the Erdtree Walkthrough & Guides Wiki
Monster Hunter World Walkthrough & Guides Wiki
The Legend of Zelda: Tears of the Kingdom Walkthrough & Guides Wiki
Persona 3 Reload Walkthrough & Guides Wiki
Cyberpunk 2077: Ultimate Edition Walkthrough & Guides Wiki


All rights reserved
© 2010 - 2024 Grinding Gear Games
The copyrights of videos of games used in our content and other intellectual property rights belong to the provider of the game.
The contents we provide on this site were created personally by members of the Game8 editorial department.
We refuse the right to reuse or repost content taken without our permission such as data or images to other sites.