This survey will take about 1 minute.
Your answers will help us to improve our website.
Path of Exile 2 (PoE 2)
PoE 2 0.2 Ranger Build - Bleed Bow Deadeye
Latest: 0.5.0 Release Date
☆ Fate of the Vaal ▶︎ The Last of the Druids
┗ Bonded Mods | 0.4 Mystery Box
★ Druid: Class Overview | Builds
☆ NEW: Disciple of Varashta Ascendancy!
★ Best Class | Best Builds | Leveling Builds
This is a Bleed Bow Deadeye Ranger build for Mapping in Path of Exile 2 (PoE 2)'s Dawn of the Hunt Update. Check out the Bleed Bow Deadeye Ranger build, including its gear, socketables, skills, and playstyle!
 Attention! Attention! |
This build was last updated for patch 0.2.1 and may be outdated for the recent patches. For more up-to-date builds, please refer to our list of latest builds! |
|---|
List of Contents
Bleed Bow Deadeye Summary
JayTX's Bleed Bow Deadeye Build
This Bleed Bow Deadeye Build is from JayTX's YouTube guide. The video includes details on how to gear up to get the build online. Be sure to check more of JayTX's Path of Exile 2 and ARPG content by subscribing to his Youtube and Twitch, and visit his Discord to ask any questions you have about the build!
Bleed Bow Deadeye Build
| Build Setup | |
|---|---|
 Bleed Bow Deadeye Bleed Bow Deadeye
|
 Ghost Dance Periodically Gain Ghost Shrouds. If you are Hit while you have a Ghost Shroud, it is immediately consumed to recover Energy Shield based on your Evasion.
 Barrage Ready a volley of arrows or spears, Empowering your next Bow or Projectile Spear Attack to repeat multiple times. Consumes your Frenzy Charges on use to add additional repeats.
 Snipe Channel to charge up your bow before releasing a powerful shot. Releasing the moment you fully charge causes the arrow to explode on impact for a guaranteed Critical Hit.
 Sniper's Mark Marks a target. The next Critical Hit the target receives consumes the Mark to deal extra damage and grant you a Frenzy Charge.
 Spiral Volley Loads your Bow with a volley of enchanted arrows and fires them in a circle as you spin forward, firing directly at targets if possible. Consumes Frenzy Charges to cause the arrows to deal more damage and Chain to other targets. Each target can only be Hit once.
 Wind Dancer Grants a buff that gives you more Evasion per stage. Being Hit by a Melee Attack while you have this buff consumes all stages to damage and Knock Back enemies around you.
 Bloodhound's Mark Mark a target, making them suffer Heavy Stun build up from Blood Loss. If they suffer enough Blood Loss while Marked, the Mark is consumed and they will release an explosion of blood when killed or Heavy Stunned.The duration doesn't tick while the target is suffering Blood Loss.
 Herald of Blood While active, killing an enemy with Blood Loss will cause a bloody explosion that deals Physical Attack damage to surrounding enemies based off the life of the exploded enemy, destroying their Corpse in the process. The explosion also has a chance to aggravate Bleeding.
|
|
|
|
This Deadeye build revolves around using Bleeds alongside Spiral Volley to clear any enemies on screen and use Snipe to burst down bosses. The build works by amplifying the damage of Spiral Volley and Snipe through various support skills, and passive upgrades.
Bleed Bow Deadeye Equipment
| Equipment | |||||||||||||||
|---|---|---|---|---|---|---|---|---|---|---|---|---|---|---|---|
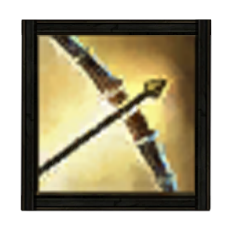
 Warmonger Bow Warmonger Bow Stats: Damage - 56-84 Critical Chance - 5% Attacks Per Second - 1.20 Requirements: Level - 77 Dexterity - 212 Modifiers: ・Added Physical Damage ・Increased Elemental Damage ・Increased Physical Damage ・Level to All Melee Skills ・Added Critical Hit Damage Bonus ・Added Critical Hit Chance Weapon |
 Wicker Tiara Wicker Tiara Stats: Energy Shield - 28 Requirements: Level - 10 Intelligence - 20 Modifiers: ・increased Maximum Energy Shield ・Added Maximum Energy Shield ・Increased Energy Shield ・Increased Rarity of Items Found ・Fire Resistance ・Added Stun Threshold ・Increased Critical Hit Chance Helmet |
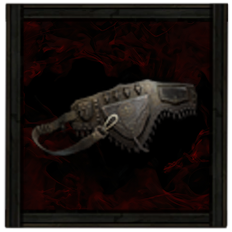
 Serrated Quiver Serrated Quiver Requirements: Level - 44 Implicit: ・Attack have % chance to cause Bleeding Modifiers: ・Added Physical Damage ・Increased Elemental Damage ・Increased Physical Damage ・Level to All Melee Skills ・Added Critical Hit Damage Bonus ・Added Critical Hit Chance Offhand |
|||||||||||||
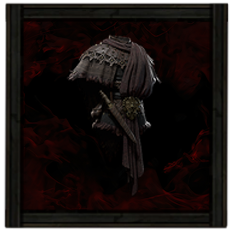 Falconer's Jacket Falconer's Jacket Stats: Evasion - 223 Energy Shield - 84 Requirements: Level - 75 Dexterity - 86 Intelligence - 86 Modifiers: ・increased Evasion and Energy Shield ・Added Maximum Energy Shield ・Added Evasion Rating ・Added Maximum Energy Shield ・Lightning Resistance ・Fire Resistance ・Intelligence Body Armour |
|||||||||||||||
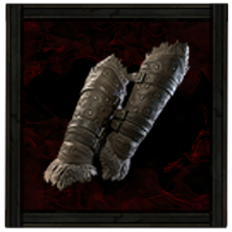 Firm Bracers Firm Bracers Stats: Evasion - 26 Requirements: Level - 11 Dexterity - 19 Modifiers: ・Added Maximum Energy Shield ・Increased Energy Shield ・Added Lightning Damage to Attacks ・Added Critical Hit Damage Bonus ・Dexterity Gloves |
 Fine Belt Fine Belt Requirements: Level - 62 Implicit: ・Flasks Gain Charges Per Second Modifier: ・Added Maximum Mana ・Cold Resistance ・Fire Resistancea ・Lightning Resistance Belt |
 Silk Slippers Silk Slippers Stats: Energy Shield - 34 Requirements: Level - 27 Intelligence - 47 Modifiers: ・Increased Movement Speed ・Increased Maximum Energy Shield ・Added Maximum Energy Shield ・Increased Rarity of Items Found ・Lightning Resistance ・Fire Resistance Boots |
|||||||||||||
 Olroth's Resolve Ultimate Life Flask Olroth's Resolve Ultimate Life Flask Stats: Flask Type - Life Recovered Life - 920 Charge Per Use - 17 Total Charges - 75 Duration - 3 sec. Implicit: ・Instant Recovery ・Increased Charges per Use ・Excess Life Recovery added as Guard for 10 seconds Health Flask |
 Breach Ring Breach Ring Requirements: Level - 40 Implicit: ・Maximum Quality is 40% Modifier: ・Added Lightning Damage to Attacks ・Increased Lightning Damage ・Added Maximum Mana ・Lightning Resistance ・Cold Resistance ・Increased Rarity of Items Found Ring 1 |
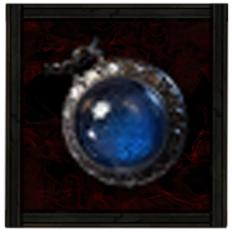 Azure Amulet Azure Amulet Requirements: None Implicit: ・Increased Mana Regeneration Rate Modifier: ・Increased Maximum Energy Shield ・Added Maximum Energy Shield ・Increased Maximum Mana ・Increased Critical Hit Chance ・Increased Critical Hit Damage Bonus ・Increased Mana Regeneration Rate Amulet |
Breach Ring Requirements: Level - 40 Implicit: ・Maximum Quality is 40% Modifier: ・Added Lightning Damage to Attacks ・Increased Lightning Damage ・Added Maximum Mana ・Cold Resistance ・Fire Resistance ・Increased Mana Regeneration Rate Ring 2 |
 Melting Maelstrom Ultimate Mana Flask Melting Maelstrom Ultimate Mana Flask Stats: Flask Type - Mana Recovered Mana - 310 Charge Per Use - 10 Total Charges - 75 Duration - 3 sec. Implicit: ・Effect is not removed when Unreseved mana is Filled ・Increased Duration ・Every 3 seconds during Effect, deal 50% of Mana spent in those seconds as Chaos Damage to Enemies within 3 meters ・Deals 25% of current Mana as Chaos Damage to you when Effect ends Mana Flask |
|||||||||||
Weapons
For this build, you don't need a specific Bow to pull it off, you just need a Bow with high Physical Damage as these are the most important modifiers from which Spiral Volley and Snipe pulls damage from. Do note that Serrated Quiver is a must for Bleed.
Armor
For the armor, you'll want to stack Evasion Rating and Energy Shield as much as possible to further increase your survivability via Subterfuge Mask and Spectral Ward For your gloves, it's best to have Physical Damage modifiers to increase the build's DPS.
Although not required, Ryslatha's Coil is an excellent unique for the belt slot, increasing overall maximum physical damage. Try to get one with the maximum physical damage roll with the least minimum physical attack reduction penalty.
Accessories
Rings
It's best to obtain rings with Physical modifiers to further increase the damage of Spiral Volley and Snipe. Secondary stats for the rings should be Elemental Resistances, Maixmum Life, Evasion Rating, and Energy Shield for survivability .
Amulet
Use Amulets that grant Spirit so you can cover the spirit cost of the persistent skills used. Though you can obtain amulets with DPS modifiers, it's highly recommended to go for survivability modifiers like Elemental Resistance, and increases to Energy Shield or Evasion Rating.
You'll also want to Annoint Bloodletting for more bleed damage.
Runes and Soul Cores
| Equipment | Sockets |
|---|---|
| Weapon | |
| Armor |
You'll want Iron Runes in your weapon to increase the Physical Damage for Spiral Volley and Snipe.
For your Armor, you'll have to adjust the runes depending on your lowest elemental resistance. Ideally, you should have most elemental resistances covered by your armor modifiers so you can stack on Iron Runes to increase Energy Shield.
| All Runes and Soul Cores | |
|---|---|
| List of Runes | List of Soul Cores |
Charms
 Antidote Charm Antidote Charm  Thawing Charm Thawing Charm |
・Increased Duration
・Increased Charges ・Gain Charges Per Second |
|---|
Antidote and Thawing Charms are the best charms to use for the build as they allow you to become immune to Poison and Freeze, respectively. This makes mapping much easier, as Poison and Freeze are by far one of the dangerous ailments in the game.
Bleed Bow Deadeye Skills
| Skill | Support Gems |
|---|---|
 Bow Shot Bow Shot Bow Shot |
Multishot II Supports Projectile skills, making them fire extra Projectiles. Also lowers Attack and Cast speed of supported skills, as well as lessening their damage.
Rapid Attacks II Supports Attacks, causing them to Attack faster.
Rupture Supports skills that Hit Enemies. Supported skills Aggravate Bleeding on Hitting Heavily Stunned Enemies.
Ricochet II Supports any Skill which creates Projectiles, giving those Projectiles a chance to Chain when impacting terrain.
|
|
Spiral Volley Spiral Volley Loads your Bow with a volley of enchanted arrows and fires them in a circle as you spin forward, firing directly at targets if possible. Consumes Frenzy Charges to cause the arrows to deal more damage and Chain to other targets. Each target can only be Hit once.
|
Armour Demolisher II Supports any skill, causing Armour Break it inflicts to be stronger.
Break Endurance Supports any skill that hits enemies, giving it a chance to gain an Endurance Charge when it fully breaks an enemy's armour.
Armour Break II Supports Skills that Hit Enemies, causing those Hits to Break Armour based on a portion of Physical Damage dealt. On Fully Breaking Armour with Supported Skills, you have a chance to gain an Endurance Charge.
Close Combat II Supports Attacks, causing them to deal more damage to enemies based on how close they are to you.
|
|
Snipe Snipe Channel to charge up your bow before releasing a powerful shot. Releasing the moment you fully charge causes the arrow to explode on impact for a guaranteed Critical Hit.
|
Concentrated Area Supports any skill with an area of effect, causing that area to be smaller but any area damage it deals to be higher.
Window of Opportunity II Supports Channelling skills that have special effects if released with Perfect Timing, causing them to deal much more damage and grant Perfect Deflection if released with Perfect Timing but reducing the Perfect Timing window.
Brutality II Supports any skill that deals damage, boosting its physical damage at the expense of all other damage types.
Heft Supports Skills which deal damage, increasing the maximum Physical Damage of their Hits.
Overextend Supports Attack Skills you use yourself. Supported Skills deal more Damage with Critical Hits, but Critically Hitting an Enemy with them will Daze you for a short time.
|
|
Barrage Barrage Ready a volley of arrows or spears, Empowering your next Bow or Projectile Spear Attack to repeat multiple times. Consumes your Frenzy Charges on use to add additional repeats.
|
Premeditation Supports skills that can Empower skills other than themselves, causing skills they Empower to deal more damage.
Cooldown Recovery II Supports skills with Cooldowns, increasing the rate at which those Cooldowns Recover. Cannot modify the skills of minions.
Second Wind II Supports skills with cooldowns, giving them extra uses of that cooldown. Cannot support instant or triggered skills, or modify the skills of minions.
|
|
Ghost Dance Ghost Dance Periodically Gain Ghost Shrouds. If you are Hit while you have a Ghost Shroud, it is immediately consumed to recover Energy Shield based on your Evasion.
|
Precision II Supports Persistent Buff Skills, causing you to gain increased Accuracy while the skill is active.
Compressed Duration II Supports any skill that has a duration, making that duration shorter.
|
|
Herald of Blood Herald of Blood While active, killing an enemy with Blood Loss will cause a bloody explosion that deals Physical Attack damage to surrounding enemies based off the life of the exploded enemy, destroying their Corpse in the process. The explosion also has a chance to aggravate Bleeding.
|
Overreach Supports Attack Skills which deal Damage in an Area. Supported Skills have significantly increased Area of Effect, but are less Accurate against nearby targets.
Magnified Area II Supports any skill with an area of effect, making it larger at the cost of damage.
Concentrated Area Supports any skill with an area of effect, causing that area to be smaller but any area damage it deals to be higher.
|
|
Bloodhound's Mark Bloodhound's Mark Mark a target, making them suffer Heavy Stun build up from Blood Loss. If they suffer enough Blood Loss while Marked, the Mark is consumed and they will release an explosion of blood when killed or Heavy Stunned.The duration doesn't tick while the target is suffering Blood Loss.
|
Mark for Death Supports Mark Skills. Enemies affected by Supported Marks will have their Armour Broken by Physical Damage they take.
|
|
Wind Dancer Wind Dancer Grants a buff that gives you more Evasion per stage. Being Hit by a Melee Attack while you have this buff consumes all stages to damage and Knock Back enemies around you.
|
Blind II Supports any skill that Hits enemies, causing them to Blind on Hit with increased effect.
|
|
Sniper's Mark Sniper's Mark Marks a target. The next Critical Hit the target receives consumes the Mark to deal extra damage and grant you a Frenzy Charge.
|
- |
Spiral Volley and Snipe are the bread and butter skills you need for this build, you just have to juice it up with the various support gems listed above to achieve a one-shot-clear effect.
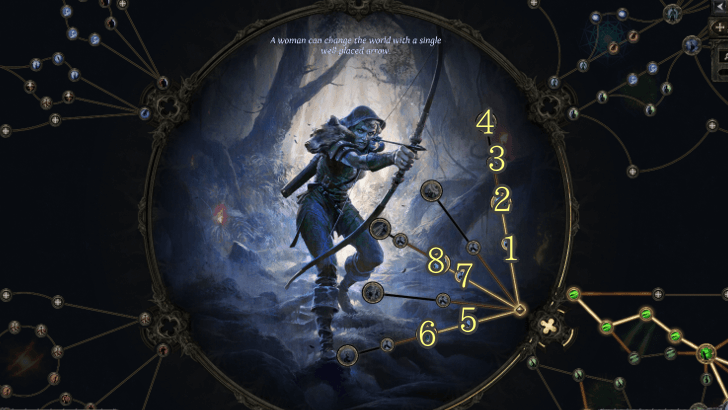
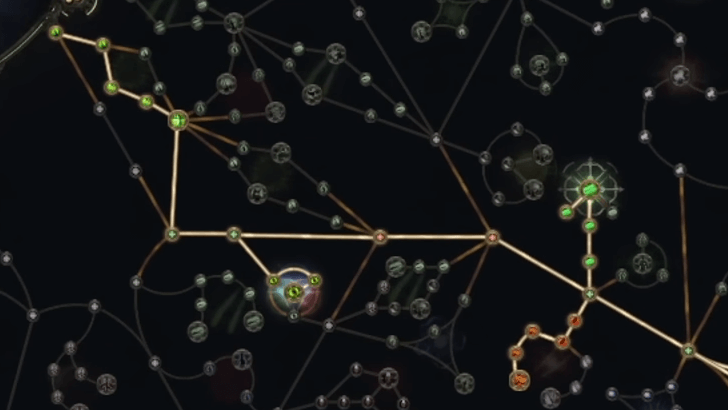
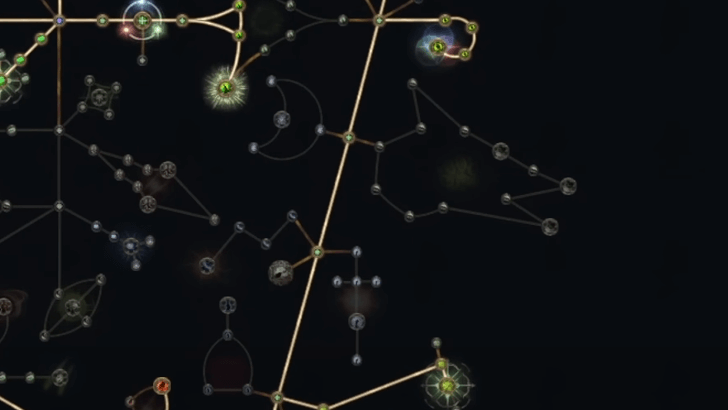
Bleed Bow Deadeye Passive Tree
Passive Tree Progression
| Ascendancy Passive | |||
|---|---|---|---|
 Thrilling Chase and Gathering Winds |
|||
| Passive Nodes | |||
| 1. | 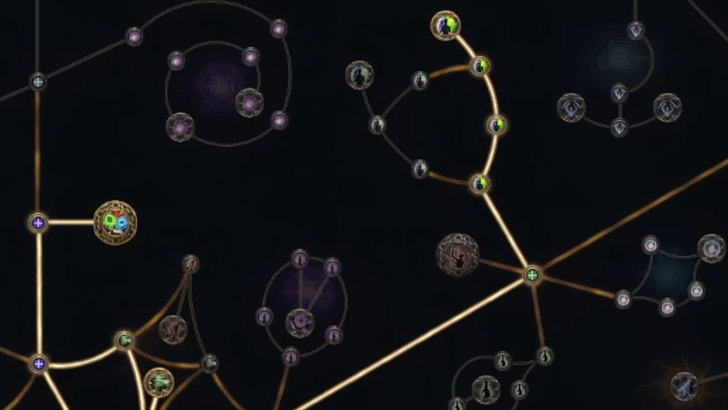 Resonance and Stylebender |
2. |  Savagery and Mastered Fletching |
| 3. | 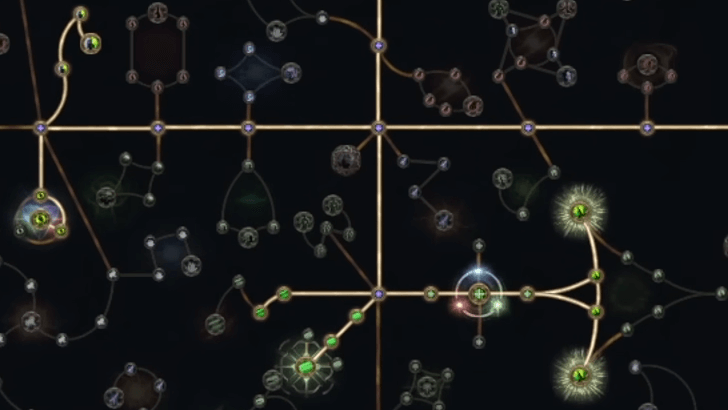 Wrapped Quiver, Frenetic, Proficiency |
4. |  Fervour and Feathered Fletching |
| 5. | 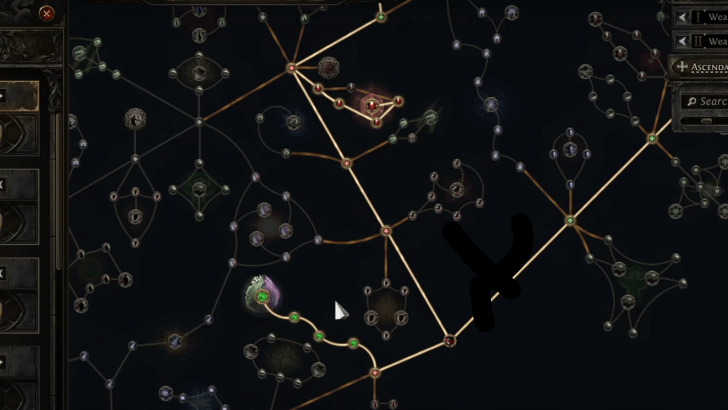 Deterioration and Perfectly Placed Knife |
6. | - |
Since the build is centered around Frenzy Charges, Resonance is a must for this build to work, allowing us to convert the Endurance Charges we get from Spiral Volley into Frenzy Charges.
Subterfuge Mask is used to convert the Energy Shield we get from our Helmet, While Spectral Ward is used to conver the Evasion we get from Body Armour into Energy Shield for increased survivability.
The rest of our passives are used to complement our offensive skills, such as Deterioration, Stand and Deliver, and Perfectly Placed Knife. These passives increase the damage we deal with the Bleed mechanic, as well as our chances to inflict it via Master Fletching and other ailment nodes.
Passive Skill Tree Guide and List of Passives
Bleed Bow Deadeye Playstyle
Skill Rotations
※ Press on what type you are fighting for a more detailed explanation on the playstyle and skill rotation.
| Type | Skill Rotation |
|---|---|
| Mobbing | Spiral Volley Loads your Bow with a volley of enchanted arrows and fires them in a circle as you spin forward, firing directly at targets if possible. Consumes Frenzy Charges to cause the arrows to deal more damage and Chain to other targets. Each target can only be Hit once.
|
| Bossing | Sniper's Mark Marks a target. The next Critical Hit the target receives consumes the Mark to deal extra damage and grant you a Frenzy Charge.
▶
Snipe Channel to charge up your bow before releasing a powerful shot. Releasing the moment you fully charge causes the arrow to explode on impact for a guaranteed Critical Hit.
|
Mobbing
Once the build is set up properly, all you have to do is run Spiral Volley into a room full of mobs and automatically generate Frenzy Charges with the Break Endurance support gem.
Bossing
Use Sniper's Mark to create a Frenzy Charge, followed shortly by Snipe to use it. Repeat as needed. Don't forget to unallocate the Resonance passive during boss fights, or the Frenzy Charge you get from Sniper's Mark will be converted into Power Charges!
Path of Exile 2 (PoE 2) Related Guides

0.4 Best Endgame Builds
| Rank | Build |
|---|---|
 |
|
 |
|
 |
|
 |
0.4 Leveling Builds
All Build Guides
| List of Builds by Class | |||||||||||
|---|---|---|---|---|---|---|---|---|---|---|---|
 Huntress Huntress |
 Mercenary Mercenary |
 Monk Monk |
|||||||||
 Witch Witch |
 Sorceress Sorceress |
 Warrior Warrior |
|||||||||
 Ranger Ranger |
 Druid Druid |
- | |||||||||
| Other Build Guides | 0.3 Leveling Builds | How to Make a Good Build | |||||||||
Ranger Leveling Builds
UP |
Herald of Thunder While active, killing Shocked enemies with Attack damage, will cause subsequent Attack hits to release lightning bolts which deals Attack damage to all surrounding enemies.
Barrage Ready a volley of arrows or spears, Empowering your next Bow or Projectile Spear Attack to repeat multiple times. Consumes your Frenzy Charges on use to add additional repeats.
Lightning Arrow Fires a charged arrow at the target. On hitting an enemy or wall, the arrow will fire Chaining Lightning beams at nearby enemies.
Lightning Rod Fire an arrow that drops from above, creating a Lightning burst. The arrow remains in the ground, and any Chaining Lightning beams can Chain to it. When Chained to, the arrows release another Lightning burst.
Stormcaller Arrow Fires an arrow that embeds where it lands for a short duration. At the end of the duration, a Lightning bolt strikes the arrow, disintegrating it and damaging enemies with a high chance to Shock.
Focus: Burst Damage, Lightning, Fast Clear |
Ranger Endgame Builds
UP |
Poisonburst Arrow Fires a virulent arrow that creates a burst of Poison on hit, affecting all enemies in an area.
Vine Arrow Fire an arrow into the air that lands after a short delay, causing a plant to spring up at the impact location. The plants sprouts vines that latch onto nearby enemies, Slowing their movement speed and dealing Chaos Damage over time. The plant can be Poisoned, causing it to deal more damage.
Ghost Dance Periodically Gain Ghost Shrouds. If you are Hit while you have a Ghost Shroud, it is immediately consumed to recover Energy Shield based on your Evasion.
Plague Bearer Stores all Poison Damage you deal. Using the Plague Nova skill unleashes the stored Poison.
Toxic Growth Leap into the air and fire a volley of arrows which cause toxic pustules to sprout from the ground on impact. The pustules explode after a delay and can be Poisoned, causing them to explode faster and more violently.
Wind Dancer Grants a buff that gives you more Evasion per stage. Being Hit by a Melee Attack while you have this buff consumes all stages to damage and Knock Back enemies around you.
Despair Curses all targets in an area after a short delay, lowering their Chaos Resistance.
Shield Charge Channel to charge in the target direction. You will crash into enemies on your path, stopping your charge and dealing damage to enemies in an area, and extra damage to the enemies you collided with. While charging, your Shield is raised and you will Block all incoming Blockable hits.
Toxic Domain Create an area of Toxic Bloom on the ground around you. While in the Bloom, you have increased Skill costs, Regenerate Life, and your Projectile Attacks attach a Toxic Pustule, which can be Poisoned. Pustules will Detonate after a duration or when enough Poison has been applied, dealing more damage based on the stored Poison damage and applying Poison in an area around it.
Focus: Mapping, Bossing, DoT, Poison, Chaos Damage |
Explosive Grenade Fires a bouncing Grenade that unleashes a devastating fiery blast when its fuse expires.
Flash Grenade Fires a bouncing Grenade that unleashes a Blinding, Stunning explosion when its fuse expires. This explosion can Blind both Allies and Enemies.
Gas Grenade Fires a bouncing Grenade that causes a burst of Poison gas when its fuse expires, damaging enemies and leaving behind a growing Poison cloud. Burning effects or Detonator skills will cause the cloud to explode in a fiery blast.
Wind Dancer Grants a buff that gives you more Evasion per stage. Being Hit by a Melee Attack while you have this buff consumes all stages to damage and Knock Back enemies around you.
Oil Grenade Fires a bouncing Grenade that bursts in a spray of Oil when the fuse expires or when it impacts an Enemy, dealing minimal damage but covering the ground and nearby enemies in Oil. Oil created this way can be Ignited by Detonator Skills or Ignited Ground.
Voltaic Grenade Fires a bouncing Grenade that discharges an Electrocuting Lightning blasts when its fuse expires
Focus: AoE, Grenades, Burst |
|
Conductivity Curses all targets in an area after a short delay, lowering their Lightning Resistance.
Grim Feast Feeds on corpses to bolster your Energy Shield. While active, enemies and Reviving Minions that die in your Presence have a chance to drop Grim Remnants. Picking up a Grim Remnant grants you Energy Shield which can Overflow maximum Energy Shield.
Herald of Ice While active, Shattering an enemy with an Attack Hit will cause an icy explosion that deals Attack damage to surrounding enemies.
Herald of Thunder While active, killing Shocked enemies with Attack damage, will cause subsequent Attack hits to release lightning bolts which deals Attack damage to all surrounding enemies.
Bonestorm Channel to conjure a swarm of bone spikes in the air, then release to fire at the enemies and explode. Shrapnel Impales enemies Hit, causing subsequent Attack Hits against those targets to deal Extra Damage. Consumes your Power Charge to cause much larger explosions.
Cast on Shock While active, gains Energy when you Shock enemies and triggers socketed spells on reaching maximum Energy.
Lightning Arrow Fires a charged arrow at the target. On hitting an enemy or wall, the arrow will fire Chaining Lightning beams at nearby enemies.
Lightning Rod Fire an arrow that drops from above, creating a Lightning burst. The arrow remains in the ground, and any Chaining Lightning beams can Chain to it. When Chained to, the arrows release another Lightning burst.
Magnetic Salvo Aims skyward and fires energy missiles at lingering arrows or bolts created by other Lightning Attacks in front of you. The missiles explode if they land close to a lingering bolt or arrow, dealing more damage in a larger area but destroying that bolt or arrow in the process.
Wind Dancer Grants a buff that gives you more Evasion per stage. Being Hit by a Melee Attack while you have this buff consumes all stages to damage and Knock Back enemies around you.
Focus: Burst Damage, Lightning, Energy Shield |
|
Hypothermia Curses all targets in an area after a short delay, lowering their Cold Resistance.
Lightning Warp Teleports you inside the target's body, causing it to violently explode. Highlights enemies that can be culled, and can only be used on these enemies or Ball Lightning projectiles. The target is destroyed, and the explosion deals Lightning Damage to surrounding enemies and creates Shocked Ground.
Ball Lightning Fires a slow-moving projectile that repeatedly shoots bolts of lightning at nearby enemies.
Eye of Winter Fires a single Eye Projectile which does not hit enemies. The Eye constantly releases damaging shard Projectiles in a spiral as it flies, plus an extra burst of Shards at the end of its flight. If the Eye passes over an Elemental ground surface, it will take on that surface effect, applying it to nearby enemies and causing shards to deal more damage of the corresponding type.
Ghost Dance Periodically Gain Ghost Shrouds. If you are Hit while you have a Ghost Shroud, it is immediately consumed to recover Energy Shield based on your Evasion.
Grim Feast Feeds on corpses to bolster your Energy Shield. While active, enemies and Reviving Minions that die in your Presence have a chance to drop Grim Remnants. Picking up a Grim Remnant grants you Energy Shield which can Overflow maximum Energy Shield.
Herald of Ice While active, Shattering an enemy with an Attack Hit will cause an icy explosion that deals Attack damage to surrounding enemies.
Herald of Thunder While active, killing Shocked enemies with Attack damage, will cause subsequent Attack hits to release lightning bolts which deals Attack damage to all surrounding enemies.
Wind Dancer Grants a buff that gives you more Evasion per stage. Being Hit by a Melee Attack while you have this buff consumes all stages to damage and Knock Back enemies around you.
Cast on Freeze While active, gains Energy when you Freeze enemies and triggers socketed spells on reaching maximum Energy.
Blink Replaces your dodge roll with a short-cooldown Spell that allows you to tunnel through space, instantly reappearing a medium distance away.
Alchemist's Boon While active, grants you Flask Charges passively and causes Life and Mana recovery from your Flasks to also apply to Allies in your presence.
Shattering Concoction X Added Cold Damage;+7% to Critical Hit Chance;Consumes 5 Charges from your Mana Flask;Inflicts Cold Exposure on Hit;Explosion radius is 1.5 metres
Focus: Burst Damage, Cold, Concoction |
|
Herald of Ice While active, Shattering an enemy with an Attack Hit will cause an icy explosion that deals Attack damage to surrounding enemies.
Combat Frenzy While active, grants you a Frenzy Charge when you Freeze, Electrocute, or Pin an enemy. This can only occur once every few seconds.
Wind Dancer Grants a buff that gives you more Evasion per stage. Being Hit by a Melee Attack while you have this buff consumes all stages to damage and Knock Back enemies around you.
Cast on Critical While active, gains energy when you Critically Hit enemies and triggers socketed spells on reaching maximum energy.
Disengage Jump back as you rupture the earth in front of you with spearpoints, damaging enemies. Consumes the Parried Debuff on Hitting enemies to release a shockwave and grant you a Frenzy Charge. This skill can be used while using other skills, and causes Strikes and Projectiles to miss you while jumping. This skill cannot be Ancestrally Boosted.
Glacial Lance Throw a single lance that leaves icy fragments in its wake. The fragments Chill nearby enemies. Consumes a Frenzy Charge if possible to cause the ice fragments created by the first Projectile to explode outwards after a short duration, peppering enemies with shrapnel.
Focus: Mobbing, Single Target, DPS, AoE, Bossing |
|
Ghost Dance Periodically Gain Ghost Shrouds. If you are Hit while you have a Ghost Shroud, it is immediately consumed to recover Energy Shield based on your Evasion.
Barrage Ready a volley of arrows or spears, Empowering your next Bow or Projectile Spear Attack to repeat multiple times. Consumes your Frenzy Charges on use to add additional repeats.
Snipe Channel to charge up your bow before releasing a powerful shot. Releasing the moment you fully charge causes the arrow to explode on impact for a guaranteed Critical Hit.
Sniper's Mark Marks a target. The next Critical Hit the target receives consumes the Mark to deal extra damage and grant you a Frenzy Charge.
Spiral Volley Loads your Bow with a volley of enchanted arrows and fires them in a circle as you spin forward, firing directly at targets if possible. Consumes Frenzy Charges to cause the arrows to deal more damage and Chain to other targets. Each target can only be Hit once.
Wind Dancer Grants a buff that gives you more Evasion per stage. Being Hit by a Melee Attack while you have this buff consumes all stages to damage and Knock Back enemies around you.
Bloodhound's Mark Mark a target, making them suffer Heavy Stun build up from Blood Loss. If they suffer enough Blood Loss while Marked, the Mark is consumed and they will release an explosion of blood when killed or Heavy Stunned.The duration doesn't tick while the target is suffering Blood Loss.
Herald of Blood While active, killing an enemy with Blood Loss will cause a bloody explosion that deals Physical Attack damage to surrounding enemies based off the life of the exploded enemy, destroying their Corpse in the process. The explosion also has a chance to aggravate Bleeding.
Focus: Bleed, Burst, Charges |
|
NEW |
Herald of Thunder While active, killing Shocked enemies with Attack damage, will cause subsequent Attack hits to release lightning bolts which deals Attack damage to all surrounding enemies.
Lightning Arrow Fires a charged arrow at the target. On hitting an enemy or wall, the arrow will fire Chaining Lightning beams at nearby enemies.
Lightning Rod Fire an arrow that drops from above, creating a Lightning burst. The arrow remains in the ground, and any Chaining Lightning beams can Chain to it. When Chained to, the arrows release another Lightning burst.
Electrocuting Arrow Leap forward into the air and fire downward. Hitting an enemy will attach an Electrocuting Rod to them, causing all incoming Lightning damage to build up Electrocution. This rod is removed when the enemy is next Electrocuted.
Voltaic Mark Marks a target, making them more susceptible to being Shocked. When the Marked target dies, a Lightning nova erupts from their corpse. This nova does not use your Weapon Damage, and instead uses its own base Attack Damage.
Wind Dancer Grants a buff that gives you more Evasion per stage. Being Hit by a Melee Attack while you have this buff consumes all stages to damage and Knock Back enemies around you.
Rhoa Mount Harnesses a Companion Rhoa that you can ride. While you're mounted on the Rhoa, you can only use Bow, thrown Spear and Mark Skills, you run at full speed when attackin, and Hits against you cause Heavy Stun buildup. While you aren't mounted, the Rhoa attacks your enemies alongside you with its beak, but can be damaged.
Focus: Lightning, Burst, Mobile, Mobbing, Bossing |
Ranger Class and Ascendancy Guides
| Base Class | |
|---|---|
| Ascendancies | |
Author

PoE 2 0.2 Ranger Build - Bleed Bow Deadeye
Please participate in our site
improvement survey
04/2026
improvement survey
04/2026
Would you assist in
improving Game8's site?
improving Game8's site?

×
We are listening to our users' valuable opinions and discussing how to act on them.
The information collected through this survey will be used for the purpose of improving our services. In addition, the information will only be disclosed a part of a statistic in a format that will not allow identification of personal information.
Begin Survey
Not Now
×
Please rate each item regarding Game8.co's Advertisements.
Amount of Ads
Very Dissatisfied
Somewhat Dissatisfied
Fine
Somewhat Satisfied
Highly Satisfied
Placement of Ads
Timing of Ad Display
Ad Loading Speed
Safeness of Ads
Content of Ads
×
Please rate each item regarding Game8.co's Quality of Articles.
Amount of information
Very Dissatisfied
Somewhat Dissatisfied
Fine
Somewhat Satisfied
Highly Satisfied
Frequency of updates
Speed of new information
Accuracy of articles
Understandibility of articles
Readability of sentences
×
Please rate each item regarding Game8.co's Usability of the Site.
Ease of finding information
Very Dissatisfied
Somewhat Dissatisfied
Fine
Somewhat Satisfied
Highly Satisfied
Loading Speed
Use of Color
Font Size
Visibility of Images
Easy to Understand Layout
×
Please rate each item regarding Game8.co's Message Boards, Comments.
Ease of Writing
Very Dissatisfied
Somewhat Dissatisfied
Fine
Somewhat Satisfied
Highly Satisfied
Readability
Ease in Finding Information
Comment Quality
Comment Quantity
Admin Response
×
Please rate each item regarding Game8.co's Site's new design.
Please rate our site's new design
Very Dissatisfied
Somewhat Dissatisfied
Fine
Somewhat Satisfied
Highly Satisfied
Do you think that the website's design change makes the site easier to use?
Has the new design made it easier for you to find information on the site?
Has the new design improved the overall visual appeal of the site?
How would you rate your overall satisfaction with the new design of the site?
×
How likely are you to recommend Game8 to someone you know?
Very Unlikely
0
1
2
3
4
5
6
7
8
9
10
Very Likely
If you have other opinions regarding potential improvement to the website, please share them with us. We would appreciate your honest opinion.
Note: This is a free response section, so you can proceed without entering anything.
Note: Please be sure not to enter any kind of personal information into your response.
Note: Please be sure not to enter any kind of personal information into your response.
×
Thank You
×
Thank you for participating in our survey! Your answers will help us to improve the quality of our website and services.
We hope you continue to make use of Game8.
We hope you continue to make use of Game8.
Close
Rankings
- We could not find the message board you were looking for.

Gaming News

![Forza Horizon 6 Review [Preview] | Beautiful Roads With a Whole Lot of Oversteer](https://img.game8.co/4460981/a7254c24945c43fbdf6ad9bea52b5ce9.png/show)


![Forza Horizon 6 Review [Preview] | Beautiful Roads With a Whole Lot of Oversteer](https://img.game8.co/4460981/a7254c24945c43fbdf6ad9bea52b5ce9.png/thumb)
Popular Games

Genshin Impact Walkthrough & Guides Wiki
Crimson Desert Walkthrough & Guides Wiki
Umamusume: Pretty Derby Walkthrough & Guides Wiki
Honkai: Star Rail Walkthrough & Guides Wiki
Monster Hunter Stories 3: Twisted Reflection Walkthrough & Guides Wiki
Wuthering Waves Walkthrough & Guides Wiki
The Seven Deadly Sins: Origin Walkthrough & Guides Wiki
Pokemon TCG Pocket (PTCGP) Strategies & Guides Wiki
Pokemon Pokopia Walkthrough & Guides Wiki
Zenless Zone Zero Walkthrough & Guides Wiki


Recommended Games
Monster Hunter World Walkthrough & Guides Wiki
Fire Emblem Heroes (FEH) Walkthrough & Guides Wiki
Pokemon Brilliant Diamond and Shining Pearl (BDSP) Walkthrough & Guides Wiki
Super Smash Bros. Ultimate Walkthrough & Guides Wiki
Diablo 4: Vessel of Hatred Walkthrough & Guides Wiki
Cyberpunk 2077: Ultimate Edition Walkthrough & Guides Wiki
Yu-Gi-Oh! Master Duel Walkthrough & Guides Wiki
Elden Ring Shadow of the Erdtree Walkthrough & Guides Wiki
The Legend of Zelda: Tears of the Kingdom Walkthrough & Guides Wiki
Persona 3 Reload Walkthrough & Guides Wiki


All rights reserved
© 2010 - 2024 Grinding Gear Games
The copyrights of videos of games used in our content and other intellectual property rights belong to the provider of the game.
The contents we provide on this site were created personally by members of the Game8 editorial department.
We refuse the right to reuse or repost content taken without our permission such as data or images to other sites.
Можно полную ветку скинуть, а то непонятно как до куда добраться