PoE 2 0.4 Druid Leveling Build - Frost Wolf
Latest: 0.5.0 Release Date
☆ Fate of the Vaal ▶︎ The Last of the Druids
┗ Bonded Mods | 0.4 Mystery Box
★ Druid: Class Overview | Builds
☆ NEW: Disciple of Varashta Ascendancy!
★ Best Class | Best Builds | Leveling Builds
This is a Druid leveling build that focuses on Cold damage using the Werewolf transformation in Path of Exile 2 (PoE 2)'s The Last of the Druids Update. Check out this Druid leveling build, including its progression, equipment, socketables, skills, playstyle, and recommended builds!
 Attention! Attention! |
This 0.4.0 leveling build is only up until Interludes and ends at Level 65. If you want to see a build for mapping and Atlas, check out our Endgame Builds! |
|---|
Frost Wolf Druid Build Summary
LazyExile's Frost Wolf Druid League Starter Build
This Frost Wolf Druid League Starter is based on a build by LazyExile over at LazyExile (Youtube). The video includes details on how to gear up to get the build online. Check out LazyExile's YouTube and Twitch channel for more Path of Exile 2 content and ask questions about the build!
Druid Leveling Build Overview
This Druid leveling build is designed around freezing enemies by dealing Cold damage and shattering them through the use of Lunar Assault and your Shred combo. Make sure to use Pounce to mark your target so you can prime them for freeze and cast Cross Slash after your Shred combos to maximize your damage output.
| Date | Changes Made |
|---|---|
| 12/15/2025 | ・Frost Wolf Druid Build Created for Act 4. |
| 12/14/2025 | ・Frost Wolf Druid Build Created for Act 2 and 3. |
| 12/13/2025 | ・Frost Wolf Druid Build Created for Act 1. |
Frost Wolf Druid Equipment
※ The affixes shown below are arranged based on descending priority.
| Gear | Affixes |
|---|---|
 Vicious Talisman Vicious Talisman Vicious Talisman Stats:
Damage - 43-71 Critical Chance - 8% Attacks Per Second - 1.25 Requirements: Level - 40 Strength - 47 Intelligence - 34 (Weapon Set 1)  Gelid Staff Gelid Staff Gelid Staff Stats:
Requirements: None (Weapon Set 2) |
・Increased Physical Damage
・Add Physical Damage ・Increased Attack Speed ・Gain Life per Enemy Killed ・Increased Spell Damage ・Increased Cold Damage ・Maximum Mana ・Gain Mana per Enemy Killed |
 Spiritbone Crown Spiritbone Crown Spiritbone Crown Stats:
Armor - 99 Energy Shield - 35 Requirements: Level - 46 Strength - 37 Intelligence - 37 |
・Increased Armor
・Maximum Energy Shield ・Intelligence ・Life Regeneration per Second |
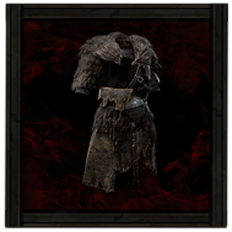 Bearskin Mantle Bearskin Mantle Bearskin Mantle Stats:
Armor - 156 Energy Shield - 56 Requirements: Level - 48 Strength - 43 Intelligence - 43 |
・Increased Armor and Energy Shield
・Armor ・Maximum Energy Shield ・Maximum Life ・Any Elemental Resistance |
 Aged Cuffs Aged Cuffs Aged Cuffs Stats:
Armor - 22 Energy Shield - 9 Requirements: Level - 16 Strength - 13 Intelligence - 13 |
・Add Physical Damage to Attacks
・Level of All Melee Skills ・Increased Attack Speed ・Increased Rarity of Items Found |
 Straw Sandals Straw Sandals Straw Sandals Stats:
Energy Shield - 14 Requirements: None |
・Increased Movement Speed
・Maximum Life ・Increased Rarity of Items |
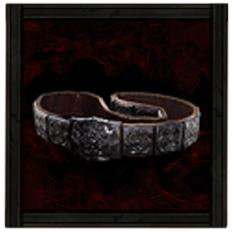 Plate Belt Plate Belt Plate Belt Requirements:
Level - 24 Implicit:+100-140 to Armour |
・Armor
・Maximum Life ・Increased Flask Life Recovery Rate ・Chaos Resistance ・Reduced Flask Charges Used |
 Stellar Amulet Stellar Amulet Stellar Amulet Requirements:
Level - 24 Implicit:+5-7 to all Attributes |
・Accuracy Rating
・Increased Armor ・Spirit ・Dexterity ・Any Elemental Resistance |
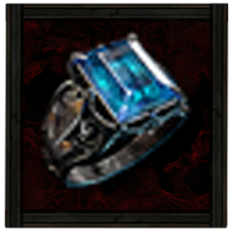 Sapphire Ring Sapphire Ring Sapphire Ring Requirements:
Level - 12 Implicit:+20-30% to Cold Resistance |
・Maximum Lifee
・Add Physical Damage to Attacks ・Strength ・All Elemental Resistances |
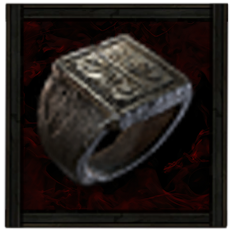 Iron Ring Iron Ring Iron Ring Requirements:
None Implicit:Adds 1 to 4 Physical Damage to Attacks |
・Add Physical Damage to Attacks
・Evasion Rating ・Dexterity ・Fire Resistance |
 Ultimate Life Flask Ultimate Life Flask Ultimate Life Flask Stats:
Flask Type - Life Recovered Life - 920 Charge Per Use - 10 Total Charges - 75 Duration - 3 sec. |
・Gain Charges per Second
・% of Recovery Applied Instantly |
 Ultimate Mana Flask Ultimate Mana Flask Ultimate Mana Flask Stats:
Flask Type - Mana Recovered Mana - 310 Charge Per Use - 10 Total Charges - 75 Duration - 3 sec. |
・Increased Charges
・Increased Amount Recovered |
Weapons
Try to get a solid Vicious Talisman with additional modifiers that increase Physical and Cold Damage, and Level of Melee Skills to further maximize your damage output as you progress.
Make sure to keep updating your Talisman with the highest based damage possible while you progress through later Acts to prevent any damage fall offs.
Armor and Accessories
The Druid's main survivability revolves around heavy use of Energy Shields and Armor, so prioritize armor pieces that provide both Armor and Energy Shields as you progress. Take note to always prioritize boots with higher Movement Speed modifiers as this can help you traverse the early acts faster and also make evading enemy attacks easier.
As for your Accessories, equip a Stellar Amulet to help you meet the Attribute requirements of your Support Gems. Sapphire Ring will help reach the Elemental Resistance cap, while Iron Ring will maximize your damage output for faster clear times.
| List of Rings | List of Amulets |
| List of Armors | |
Belts and Charms
| Belt Modifiers | |||||
|---|---|---|---|---|---|
 Plate Belt Plate Belt Plate Belt Requirements:
Level - 24 Implicit:+100-140 to Armour |
・Armor
・Maximum Life ・Increased Flask Life Recovery Rate ・Chaos Resistance ・Reduced Flask Charges Used |
||||
| Charm Options | |||||
 Golden Charm Golden Charm Golden Charm Stats:
Flask Type - Charm Charge Per Use - 80 Total Charges - 80 Duration - 1 sec. |
 Stone Charm Stone Charm Stone Charm Stats:
Flask Type - Charm Charge Per Use - 20 Total Charges - 40 Duration - 3 sec. |
 Arakaali's Gift Antidote Charm Arakaali's Gift Antidote Charm Arakaali's Gift Antidote Charm Stats:
Flask Type - Charm Charge Per Use - 20 Total Charges - 40 Duration - 3 sec. |
|||
Equip a Plate Belt to increase Armor for better survivability and more Elemental Damage as you progress through the Acts. As for your Charms, make sure to equip a Golden Charm to help you find better gear as you progress and a Stone Charm with the Increased Charges modifier to help counteract enemy stuns. Arakaali's Gift will help you survive in the late game by providing heals whenever you get Poisoned.
| List of Belts | List of Charms |
Runes and Soul Cores
| Equipment | Sockets |
|---|---|
| Weapon | |
| Armor |
We recommend slotting in Iron Runes on your weapon to help maximize your damage output across all your skills. As for your Armor runes, equip an Iron Rune on your body armor to increase your Armor and Energy Shields and an Elemental Rune of your choosing to help reach the Elemental Resistance cap.
| List of Runes | List of Soul Cores |
Frost Wolf Druid Skills
All Active and Persistent Skills
※ The Support Gems' priority are arranged in a descending order. The first one being the most important and the last being the least crucial.
| Skill | Support Gems |
|---|---|
 Shred Shred Shred |
Rapid Attacks II Supports Attacks, causing them to Attack faster.
Long Fuse II Supports Skills which have a Detonation Time, causing those Skills to have much higher Detonation Time and detonation damage.
Rage II Supports Melee Attacks, causing them to grant Rage on Hit.
Crescendo I Supports Strikes that perform a Final Strike at the end of a combination of attacks, allowing you to use the Final Strike twice in succession.
|
 Lunar Assault Lunar Assault Lunar Assault Shapeshift into a Werewolf and swipe with your claws, projecting an arc of moonlight and ice forward in a crescent.
|
Rapid Attacks II Supports Attacks, causing them to Attack faster.
Ice Bite II Supports Attacks and Warcries you use yourself. Freezing an enemy with supported skills infuses all of your Attacks with Cold damage for a short time.
Deep Freeze Supports any skill that hits enemies, causing Freeze it inflicts to last longer.
Ancestral Call II Supports Strikes you use yourself, providing a powerful Ancestral Boost every few seconds. Cannot Support Channelled Skills and does not modify Skills used by Minions.
|
 Pounce Pounce Pounce Shapeshift into a Werewolf and leap to a target location, damaging enemies in an area around where you land. Predator's Mark will be Triggered targetting the highest Rarity enemie Hit, or if a Mark gem is socketed into this Skill, that Mark will be Triggered instead. Using this skill allows any Wolf Minions you have to leap immediately.
|
Eternal Mark Supports Mark Skills, causing them to not be Consumed the first time they are Activated.
Freezing Mark Marks a target, making them more susceptible to being Frozen. When a Marked target dies, a Cold nova erupts from their corpse. this nova does not use your Weapon Damage, and instead uses its own Base Attack damage.
Mark for Death Supports Mark Skills. Enemies affected by Supported Marks will have their Armour Broken by Physical Damage they take.
Mark of Siphoning Supports Marks Skills, causing enemies they Mark to Leech Mana to you when you Hit them with Attacks.
|
 Frost Bomb Frost Bomb Frost Bomb Creates a pulsing Orb of Frost. Each pulse inflicts Cold Exposure on nearby Enemies. When the Orb's duration ends, it explodes, dealing Cold damage to surrounding Enemies.
|
Spell Cascade Supports Spells that affect an area around you or a target location, causing those spells to also target additional areas on either side of the target area, along a randomly chosen axis. Cannot support Channelling skills or Remote skills.
|
 Thunderstorm Thunderstorm Thunderstorm Conjure a thunderstorm which causes lightning strikes and torrential rain in an area. Enemies in the area are Drenched, causing them to become Shocked or Frozen more easily. Plants in the area become Overgrown.
|
Prolonged Duration II Supports any skill that has a duration, making that duration longer.
Magnified Area II Supports any skill with an area of effect, making it larger at the cost of damage.
|
 Cross Slash Cross Slash Cross Slash Shapeshift into a Werewolf and leap backwards as you gouge the ground with both claws. Hitting a Marked enemy with both gouges will Activate the Mark and cause an additional shockwave. Ice Fragments will be pulled into the location where the gouges cross and explode immediately. This skill can be used while using other skills to interrupt them.
|
Magnified Area II Supports any skill with an area of effect, making it larger at the cost of damage.
Execute I Supports any skill that hits enemies, causing it to deal more damage against enemies on low life.
Heavy Swing Supports Melee Attacks, boosting their Physical damage at the cost of Attack Speed.
Rageforged I Supports any damaging skill that you use or trigger yourself, causing it to consume Rage to deal more damage. If you don't have enough Rage to consume, the damage bonus will not apply.
|
 Lunar Blessing Lunar Blessing Lunar Blessing Shapeshift into a Werewolf and offer your Rage to the moon to receive a blessing, gaining bonus Cold damage, Attack speed and movement speed for yourself and any Wolf Minions you have from Wolf Pack or Predator's Mark. Spends all Rage to extend the Buff's duration. While the Buff is active, your WerewolfAttacks call down Moonbeams on Hit.
|
Cold Mastery Supports Cold skills, granting then an additional level.
Prolonged Duration I Supports any skill that has a duration, making that duration longer.
Cooldown Recovery II Supports skills with Cooldowns, increasing the rate at which those Cooldowns Recover. Cannot modify the skills of minions.
Second Wind III Supports skills with cooldowns, giving them extra uses of that cooldown and causing them to restore Life on use. Cannot support instant or triggered skills, or modify the skills of minions.
|
 Herald of Ice Herald of Ice Herald of Ice While active, Shattering an enemy with an Attack Hit will cause an icy explosion that deals Attack damage to surrounding enemies.
|
Magnified Area I Supports any skill with an area of effect, making it larger.
Cold Attunement Supports attacks, causing them to gain Cold Damage but deal less Fire and Lightning Damage.
Cold Mastery Supports Cold skills, granting then an additional level.
|
 Overwhelming Presence Overwhelming Presence Overwhelming Presence While active, enemies in your Presence are easier to Stun and inflict Elemental Ailments upon.
|
Precision I Supports Persistent Buff Skills, causing you to gain increased Accuracy while the skill is active.
|
This Frost Wolf Druid leveling build makes use of Lunar Assault to freeze enemies and spamming your Shred combo to trigger Ice Fragments for huge Cold damage against any type of enemy. Pounce will mark Elites and Bosses so you can prime them for freeze, while Cross Slash is your main burst damage skill you will use often between your Shred combos. Make sure to use Thunderstorm and Lunar Blessing often when going against Bosses so you can build up freeze faster while also inflicting Shock at the same time.
As for your Persistent Skills, we recommend equipping Herald of Ice as early as you can to proc AoE ice explosions on killing frozen enemies. Overwhelming Presence should also help with building up Freeze faster against nearby enemies.
Frost Wolf Druid Passive Tree
Passive Tree Progression

The leveling passive tree for the Frost Wolf Druid build focuses on increasing your damage output through Elemental and Attack Damage. Make your way to Primal Spirit for the increased Skill Speed and Critical Chance, and then head back to Bastion of the Forest for more Armor and to scale Elemental Damage with it. Get Personal Touch and Shifted Strikes as you progress for more Attack Damage.
Prioritize unlocking your Oracle ascendancy and get The Unseen Path so you can start using the new Passive nodes such as Comradery for flat damage and Hidden Forms for that extra damage while in Werewolf form. For your third and fourth Ascendancy point, we highly recommend getting Entwined Realites so can start getting Keystone passives that can allocate unconnected nearby nodes.
Lastly, make your way to Sigil of Ice and Cold Nature for more Cold damage, especially against Chilled enemies. Make sure to get Limitless Pursuit as well for the added movement speed to help you traverse and clear maps faster as you finish up the campaign. After that, start making your way to Spirit of the Bear for more damage and all the way to Blessing of the Moon for longer Freeze durations. Once you have slotted in the Ancestral Bond keystone passive, make to get these following nearby notable passives:
- Dimensional Weakspot
- Dangerous Blossom
- Stormcharged
- Spirit of the Wyvern
- Deadly Thorns
- Electrified Claw
- Endlessly Soaring
- Scales of the Wyvern
Passive Skill Tree Guide and List of Passives
Ascendancy Options
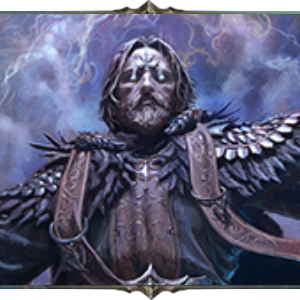 Oracle Oracle
|
• Unlocks useful Passive nodes for better Passive tree pathing. |
As of Patch 0.4, we recommend choosing the Oracle Ascendancy and obtaining The Unseen Path Ascendancy node to unlock the class specific passives for the build such as Comradery and Hidden Forms.
You have the option to transition to a different Ascendancy at a later stage of the game if you wish to switch to a different build once you reach the endgame.
Frost Wolf Druid Playstyle
Bossing Skill Rotation
When against Elites and Bosses, you will adopt a melee playstyle that mainly uses Lunar Assault to buildup freeze and Shred with Cross Slash to finish them off. The rotation is as follows:
- Activate Lunar Blessing for the bonus Cold damage.
- Use Thunderstorm for better freeze buildup.
- Cast Frost Bomb to inflict Elemental Exposure for more Cold damage.
- Use Pounce to apply Mark for the increased damage.
- Spam Lunar Assault until 90% Freeze buildup.
- Use Thunderstorm again to refresh the duration and finish up with another Lunar Assault to freeze them.
- Spam the full combo of Shred to create Ice Fragments.
- Cast Cross Slash after the Shred final attack for huge damage.
- Rinse and repeat.
Mobbing Skill Rotation
For mobbing and general use, you will revolve around spamming Pounce and Lunar Assault to deal AoE damage and fast clear mobs. The rotation is as follows:
- Use Pounce to close gaps and Mark an enemy for summoning Wolf minions.
- Keep casting Lunar Assault until you freeze the mobs.
- Spam Shred to finish them off and deal good damage.
- Rinse and repeat.
Build Progression
| Jump to an Act! | |||||
|---|---|---|---|---|---|
| Act 1 | Act 2 | Act 3 | |||
| Act 4 | Interludes | ||||
Act 1 Progression
To progress through Act 1 and beat Count Geonor using the Frost Wolf Druid leveling build, follow these steps:
| # | Steps |
|---|---|
| 1 | After beating the
|
| 2 | Head for the Mysterious Campsite at Clearfell to get an extra Level 1
|
| 3 | |
| 4 | Defeat
|
| 5 | Find and defeat Areagne, The Forgotten Witch to slot in the
Support Gem on your
Note: Make sure to loot the Witch Hut to get Medium Flasks. |
| 6 | Defeat
|
| 7 | Progress to The Grim Tangle and defeat
|
| 8 | Look for the Haunted Treasure Inside the Tomb of the Consort and defeat the rare enemy to acquire a Level 1 Uncut Support Gem and slot in
Note: Once you find a Level 3 Uncut Skill Gem, use it to equip |
| 9 | Defeat
|
| 10 | Search and complete your first Ritual in the same area to get a Level 4 Uncut Skill Gem and use this to upgrade your
|
| 11 | Start looking for the Dryadic Ritual in the same area to get an extra Level 1 Uncut Support Gem (to be used later).
|
| 12 | Defeat the
|
| 13 | Complete The Lost Lute at the Ogham Farmlands to obtain a
|
| 14 | Search for the Crop Circle in the same area to defeat
|
| 15 | Proceed to Ogham Village and defeat
Note: Use the Uncut Skill Gem to get |
| 16 | Search and defeat the
|
| 17 | Continue and defeat
Note: Make sure you have Medium Flasks since this boss fight has 2 Phases so you will be spending a good amount of time learning and surviving the mechanics. |
Act 2 Progression
To progress through Act 2 and beat Jamanra, the Abomination using the Frost Wolf Druid leveling build, follow these steps:
| # | Steps |
|---|---|
| 1 | Complete the Earning Passage quest for an
|
| 2 | Defeat
|
| 3 | Clear Mobs in Keth until you get the
|
| 4 | Defeat
|
| 5 | Clear the Galleria Location for a random Jewel. |
| 6 | Open the Guarded Sarcophagus for an
|
| 7 | Three Elemental Offering Ring choices: Ruby Ring, Sapphire Ring, and Topaz Ring for flame, cold, and lightning resistance respectively. It is recommended to choose the Topaz Ring to prepare for
|
| 8 | Clear The City of Seven Waters for an Uncut Support Gem 2. You can use this to get
|
| 9 | Destroy the Effigy located in the Shrine of Bones for an
|
| 10 | Clear Mobs in The Bone Pits until you get the
|
| 11 | Complete A Theft of Ivory quest for an
|
| 12 | Place both Relics in the Valley of Titans to complete the Ancient Vows quest. Choose the Sun Clan Relic for more Charm charges gained.
|
| 13 | Complete A Crown of Stone quest for an
|
| 14 | Complete the Tradition's Toll quest to get a
|
| 15 | Clear the Forgotten Corpses Location for a
|
| 16 | Activate the Sisters of Garukhan in Deshar to get a permanent 10% Lightning Resistance. |
Act 3 Progression
To progress through Act 3 and beat Doryani using the Frost Wolf Druid leveling build, follow these steps:
| # | Step by Step Guide to Act 3 Leveling |
|---|---|
| 1 | |
| 2 |
Loot the basket found in the Orok Campfire at Sandswept Marsh to get a
Note: Use this on your Lunar Assault and use your extra Uncut Support Gem to slot in |
| 3 | |
| 4 |
Complete The Slithering Dead to get the Venom Draught of the Veil for provide you with increased Elemental Ailment Threshold. |
| 5 |
Look for the Jungle Grave and interact with the Ravaged Corpse to summon Servi and get a rare Belt. We recommend taking Rawhide Belt for better survivability. |
| 6 |
Defeat
|
| 7 |
Submit the Tribal Vengeance to get a charm. Choose the Antidote Charm for increased defenses against Poison. |
| 8 |
Defeat
|
| 9 |
Use the Paquate's Mechanism to Corrupt gear. We suggest corrupting the
|
| 10 |
Obtain an
|
| 11 | |
| 12 |
Ascendancy: By this time, you can complete the Trial of Chaos to get your third and fourth Ascendancy Point.
┣
|
| 13 |
Use the
|
Act 4 Progression
To progress through Act 4 and beat Tavakai using the Frost Wolf Druid build, follow these steps:
| # | Steps |
|---|---|
| 1 |
Get Shark's Fin in Whakapanu Island and submit it to Kaimana in the Tavakai's Ship to get an
|
| 2 |
Defeat
|
| 3 |
Find the Barnacle before the Beckoning Clam event to get
|
| 4 |
Get the Humming Pearl from the Beckoning Clam and exchange it for a
|
| 5 |
Find the Chapel Key and interact with the Goddess of Justice to get the +30% increased Life Regeneration from your flasks. |
| 6 |
Complete Dark Mists to gain a
|
| 7 |
Get a
|
| 8 | Defeat
|
| 9 |
Release the Beast from its pen in the Isle of Kin and defeat it to gain
|
| 10 | Complete the Trial of the Ancestors and pass the Ngamahu's Test to get the +5 Strength reward. |
| 11 |
Ring the Morning and Evening Bell in Arastas to Receive 3
Note: You can use these to either craft a weapon, or trade for some good equipment! |
| 12 |
Get a random Greater Rune in the Meeting House at Ngakanu. |
Interludes Progression
To progress through Interludes and set yourself up for mapping using the Frost Wolf Druid build, follow these steps:
| # | Steps |
|---|---|
| 1 |
Get a Level 13
|
| 2 |
Buy Greater Runes from the Ferryman in Holten. |
| 3 |
Defeat
|
| 4 | |
| 5 |
Get the Molten One's Gift in Skullmaw Stairway to get a +5% to your Maximum Life. |
| 6 |
Slot in both
|
| 7 |
Defeat
Note: If you were able to suceed, it is recommended to refund Entwined Realities to get The Lesser Harm and Forced Outcome. |
| 8 |
Activate one out of Seven Pillars in Qimah based on what you need, you can change this any time. It is generally recommended to get Movement Speed. |
| 9 |
Fill the two Sacred Wells in Qimah Reservoir to get 1
Note: You can use these to either craft a weapon, or trade for solid equipment! |
| 10 |
Interact with the Ancient Monument in Ashen Forest for a Level 14
|
| 11 |
Defeat
|
| 12 |
Defeat
|
| 13 |
Get a free Unique Equipment of your choice from a randomized table from Elder Madox in Kriar Peaks. |
| 14 |
After finishing all three regions, talk to The Hooded One in Kingsmarch to gain another
|
Path of Exile 2 (PoE 2) Related Guides

0.4 Best Endgame Builds
| Rank | Build |
|---|---|
 |
|
 |
|
 |
|
 |
0.4 Leveling Builds
NEW |
NEW |
NEW |
NEW |
NEW |
NEW |
NEW |
NEW |
NEW |
NEW |
- | - |
All Build Guides
| List of Builds by Class | |||||||||||
|---|---|---|---|---|---|---|---|---|---|---|---|
 Huntress Huntress |
 Mercenary Mercenary |
 Monk Monk |
|||||||||
 Witch Witch |
 Sorceress Sorceress |
 Warrior Warrior |
|||||||||
 Ranger Ranger |
 Druid Druid |
- | |||||||||
| Other Build Guides | 0.3 Leveling Builds | How to Make a Good Build | |||||||||
Druid Leveling Builds
NEW |
Herald of Thunder While active, killing Shocked enemies with Attack damage, will cause subsequent Attack hits to release lightning bolts which deals Attack damage to all surrounding enemies.
Lingering Illusion Creates a short-lived illusory copy of yourself whenever you dodge roll. The copy can be damaged by enemies, and copies that are destroyed by an enemy will grant you a Power Charge.
Elemental Weakness Curse all targets in an area after a short delay, lowering their Elemental Resistances.
Oil Barrage Shapeshift into a Wyvern and spit Oil at enemies, creating Oil Ground where the Projectiles land. Consumes Power Charges if possible to instead Channel a sustained barrage of electrified Oil that does not create Oil Ground. Projectiles are fired in sequence, allowing multiple Projectiles to Hit the same target.
Thunderstorm Conjure a thunderstorm which causes lightning strikes and torrential rain in an area. Enemies in the area are Drenched, causing them to become Shocked or Frozen more easily. Plants in the area become Overgrown.
Barkskin While active, taking Hit damage from enemies to your Energy Shield causes you to gain Armour for a short duration. Armour gained from multiple Hits can stack. The total Armour gained from this Skill cannot exceed the Item Armour on your Equipped Armour Items.
Focus: Dragon, Lightning, Shock |
UP |
Herald of Ash While active, enemies you sufficiently Overkill with attacks will cause an explosion that ignites nearby enemies based on the Overkill damage dealt.
Furious Slam Shapeshift into a Bear and Slam the ground with great force, causing a pair of shockwaves. Can spend Rage to create larger shockwaves that leave behind Jagged Ground.
Volcano Uplift a volcano from the earth, damaging enemies standing on it and releasing a spray of molten Projectiles. While the volcano persists, Slamming it will cause another Projectile spray. Channelling this Skill for longer makes the initial eruption more violent, but does not affect subsequent Projectile sprays.
Fury of the Mountain Shapeshift into a Bear and repeatedly pound the ground, creating Molten Fissures that travel randomly in a wide arc in front of you.
Focus: Bear, Fire, Slam |
NEW |
Frost Bomb Creates a pulsing Orb of Frost. Each pulse inflicts Cold Exposure on nearby Enemies. When the Orb's duration ends, it explodes, dealing Cold damage to surrounding Enemies.
Herald of Ice While active, Shattering an enemy with an Attack Hit will cause an icy explosion that deals Attack damage to surrounding enemies.
Overwhelming Presence While active, enemies in your Presence are easier to Stun and inflict Elemental Ailments upon.
Lunar Assault Shapeshift into a Werewolf and swipe with your claws, projecting an arc of moonlight and ice forward in a crescent.
Lunar Blessing Shapeshift into a Werewolf and offer your Rage to the moon to receive a blessing, gaining bonus Cold damage, Attack speed and movement speed for yourself and any Wolf Minions you have from Wolf Pack or Predator's Mark. Spends all Rage to extend the Buff's duration. While the Buff is active, your WerewolfAttacks call down Moonbeams on Hit.
Cross Slash Shapeshift into a Werewolf and leap backwards as you gouge the ground with both claws. Hitting a Marked enemy with both gouges will Activate the Mark and cause an additional shockwave. Ice Fragments will be pulled into the location where the gouges cross and explode immediately. This skill can be used while using other skills to interrupt them.
Thunderstorm Conjure a thunderstorm which causes lightning strikes and torrential rain in an area. Enemies in the area are Drenched, causing them to become Shocked or Frozen more easily. Plants in the area become Overgrown.
Pounce Shapeshift into a Werewolf and leap to a target location, damaging enemies in an area around where you land. Predator's Mark will be Triggered targetting the highest Rarity enemie Hit, or if a Mark gem is socketed into this Skill, that Mark will be Triggered instead. Using this skill allows any Wolf Minions you have to leap immediately.
Focus: Wolf, Cold, Crowd Control |
Druid Class and Ascendancy Guides
| Base Class | |
|---|---|
| Ascendancies | |
Comment
Author
PoE 2 0.4 Druid Leveling Build - Frost Wolf
improvement survey
03/2026
improving Game8's site?

Your answers will help us to improve our website.
Note: Please be sure not to enter any kind of personal information into your response.

We hope you continue to make use of Game8.
Rankings
- We could not find the message board you were looking for.
Gaming News
Popular Games

Genshin Impact Walkthrough & Guides Wiki

Honkai: Star Rail Walkthrough & Guides Wiki

Umamusume: Pretty Derby Walkthrough & Guides Wiki

Pokemon Pokopia Walkthrough & Guides Wiki

Resident Evil Requiem (RE9) Walkthrough & Guides Wiki

Monster Hunter Wilds Walkthrough & Guides Wiki

Wuthering Waves Walkthrough & Guides Wiki

Arknights: Endfield Walkthrough & Guides Wiki

Pokemon FireRed and LeafGreen (FRLG) Walkthrough & Guides Wiki

Pokemon TCG Pocket (PTCGP) Strategies & Guides Wiki
Recommended Games

Fire Emblem Heroes (FEH) Walkthrough & Guides Wiki

Diablo 4: Vessel of Hatred Walkthrough & Guides Wiki

Yu-Gi-Oh! Master Duel Walkthrough & Guides Wiki

Super Smash Bros. Ultimate Walkthrough & Guides Wiki

Pokemon Brilliant Diamond and Shining Pearl (BDSP) Walkthrough & Guides Wiki

Elden Ring Shadow of the Erdtree Walkthrough & Guides Wiki

Monster Hunter World Walkthrough & Guides Wiki

The Legend of Zelda: Tears of the Kingdom Walkthrough & Guides Wiki

Persona 3 Reload Walkthrough & Guides Wiki

Cyberpunk 2077: Ultimate Edition Walkthrough & Guides Wiki
All rights reserved
© 2010 - 2024 Grinding Gear Games
The copyrights of videos of games used in our content and other intellectual property rights belong to the provider of the game.
The contents we provide on this site were created personally by members of the Game8 editorial department.
We refuse the right to reuse or repost content taken without our permission such as data or images to other sites.
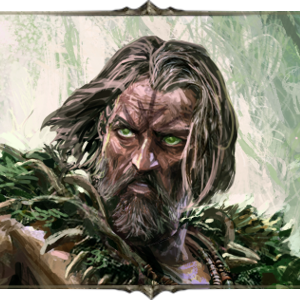 Frost Wolf Druid


![Marathon Review [First Impressions] | Playing The Long Game](https://img.game8.co/4435736/b9b1ec1e9219416dfc2599f85295d6ef.png/thumb)


