This survey will take about 1 minute.
Your answers will help us to improve our website.
Path of Exile 2 (PoE 2)
PoE 2 0.4 Sorceress Build - Navira's Fracturing Disciple of Varashta
Latest: 0.5.0 Release Date
☆ Fate of the Vaal ▶︎ The Last of the Druids
┗ Bonded Mods | 0.4 Mystery Box
★ Druid: Class Overview | Builds
☆ NEW: Disciple of Varashta Ascendancy!
★ Best Class | Best Builds | Leveling Builds

This is a Navira's Fracturing Sorceress endgame build for mapping in Path of Exile 2 (PoE 2)'s The Last of the Druids Update. Check out the Navira's Fracturing Sorceress endgame build, including its gear, socketables, skills, and playstyle!
 Attention! Attention! |
This endgame build starts from 65+ levels. If you want to see a build for leveling, check out our Leveling Builds! |
|---|
List of Contents
Navira's Fracturing Disciple of Varashta Build Summary
Camaroni's Navira's Fracturing Disciple of Varashta Build
This Navira's Fracturing Disciple of Varashta build is based on CamaroniNCheez's (Youtube) take on the new ascendancy of the Sorceress: the Disciple of Disciple of Varashta! The video includes details on how the build is set up and how the build came to be. Check out CamaroniNCheez's YouTube channel for more Path of Exile 2 content and ask questions about the build!
Navira's Fracturing Disciple of Varashta Build
| Build Setup | |
|---|---|
 Disciple of Varashta Navira's Fracturing Build |
 Ruzhan, the Blazing Sword Ruzhan deals 10% more damage for each damaging skill you've used recently;Attacks with Ruzhan's Zealotry when you use a damaging skill with a 4 second cooldown, inflicting enemies stuck with exposure
 Navira, the Last Mirage Triggers navira's calming when commanded to Use a skill, granting nearby allies 67% increased;Mana regeneration for 4 seconds
 Kelari, the Tainted Sands Inflicts critical weakness on hit;50% increased critical damage bonus
 Frost Bomb Creates a pulsing Orb of Frost. Each pulse inflicts Cold Exposure on nearby Enemies. When the Orb's duration ends, it explodes, dealing Cold damage to surrounding Enemies.
 Ice Nova A nova of ice expands from you, Knocking Back enemies based on how close they are to you. Casting Ice Nova targeting near a Frostbolt Projectile will cause it to originate from the Frostbolt insead of you, and cause more Freeze buildup.
 Snap Shatters the frost on a Frozen enemy, Consuming the freese to deal a large amount of Cold Damage to enemies caught in the blast. Can also be cast on a Frostbolt to cause it to explode immediately. Any Frozen enemies hit by the Frostbolt's explosion will be dealt Cold Snap's damage and have their freeze consumed.
 Blasphemy Turns socketed Curse skills into vile Auras, applying their effects to all nearby enemies.
 Barkskin While active, taking Hit damage from enemies to your Energy Shield causes you to gain Armour for a short duration. Armour gained from multiple Hits can stack. The total Armour gained from this Skill cannot exceed the Item Armour on your Equipped Armour Items.
 Discipline Emits an Aura that grants Allies in your Presence additional Total Energy Shield. The Aura does not affect you.
 Spellslinger While active, gains Energy when you cast Spells. Using the Invocation once sufficient Energy is gathered will consume the Energy to trigger socketed Spells, and can trigger them multiple times if it has enough Energy.
|
|
|
|
The Disciple of Varashta build by CamaroniNCheez slows down packs of enemies and inflicts them with curses before nuking the screen with Navira's Fracturing. The concept is scaling up the damage of Navira's Fracturing with Minion stats to burst down foes standing in the massive Chilled Grounds, which are supported by Curses and Infusions.
If you are looking to start with this build, it is recommended to follow our Cold Infusion Sorceress leveling build which follows the journey from Act 1 to Interludes!
| Date | Changes |
|---|---|
| 12-22-2025 | Created Navira's Fracturing build for endgame. |
Navira's Fracturing Disciple of Varashta Equipment
| Gear | Affixes |
|---|---|
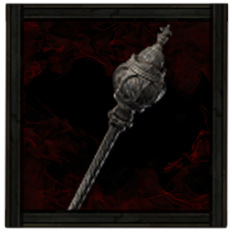 Stoic Sceptre Stoic Sceptre Stoic Sceptre Stats:
Spirit - 100 Requirements: Level - 6 Intelligence - 12 (Weapon 1) 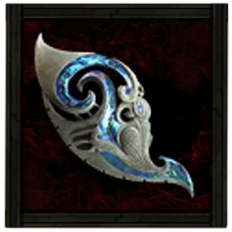 Tasalian Focus Tasalian Focus Tasalian Focus Stats:
Energy Shield - 85 Requirements: Level - 80 Intelligence - 115 (Offhand 1) |
・Grants
・+% increased Spirit
・Allies in your Presence deal +% increased Damage ・Allies in your Presence have +% increased Critical Hit Chance ・Allies in your Presence have +% increased Critical Damage Bonus ・+ to Level of all Minion Skills ・+ to Maximum Mana ・+ to Level of all Minion Skills ・+% increased Energy Shield ・+ to Maximum Energy Shield ・+% faster start of Energy Shield Recharge ・+ to Any Elemental Resistance |
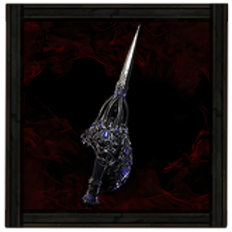 Dueling Wand Dueling Wand Dueling Wand Stats:
Requirements: Level - 65 Intelligence - 103 (Weapon 2) Tasalian Focus Tasalian Focus Stats:
Energy Shield - 85 Requirements: Level - 80 Intelligence - 115 (Offhand 2) |
・Grants
・+% Gain % of Damage as Extra Cold Damage
・+ to Maximum Mana ・Gain % of Damage as Extra Lightning Damage ・+ to Level of all Cold Spell Skills ・+% increased Critical Spell Damage Bonus ・+% increased Cast Speed ・+% increased Energy Shield ・+ to Maximum Energy Shield ・+% increased Mana Regeneration Rate ・+ to Any Elemental Resistance ・ + to Chaos Resistance |
 Ancestral Tiara Ancestral Tiara Ancestral Tiara Stats:
Energy Shield - 109 Requirements: Level - 80 Intelligence - 115 |
・+ to maximum Energy Shield
・+% increased Energy Shield ・+ to maximum Mana ・+% Chaos Resistance ・+ to Level of all Minion Skills ・+ to Any Elemental Resistance |
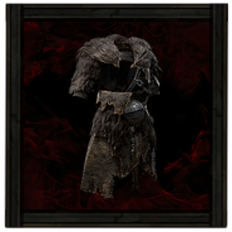 Wolfskin Mantle Wolfskin Mantle Wolfskin Mantle Stats:
Armor - 294 Energy Shield - 101 Requirements: Level - 65 Strength - 67 Intelligence - 67 |
・+ to Armour
・+% Increased Armour and Energy Shield ・+ to Maximum Energy Shield ・+ to Maximum Life ・+% to Any Elemental Resistance ・+% of Armour also Applies to Elemental Damage ・Life Regeneration per Second |
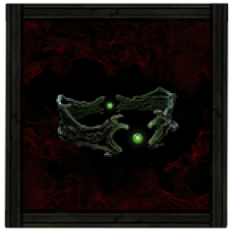
 The Prisoner's Manacles Diviner Cuffs The Prisoner's Manacles Diviner Cuffs The Prisoner's Manacles Diviner Cuffs Stats:
Armor - 49 Energy Shield - 18 Requirements: Level - 46 Strength - 32 Intelligence - 32 Fixed Modifiers: ・ 200-300% increased Armour and Energy Shield ・ +100 to maximum Life ・ 100% increased Attribute Requirements ・ +20-40% to Lightning Resistance ・ 15-30 Life Regeneration per second ・ Debuffs you inflict have 20-30% increased Slow Magnitude ・ Cannot Immobilise enemies |
・200-300% increased Armour and Energy Shield
・+100 to maximum Life ・100% increased Attribute Requirements ・+20-40% to Lightning Resistance ・15-30 Life Regeneration per second ・Debuffs you inflict have 20-30% increased Slow Magnitude ・Cannot Immobilise enemies |
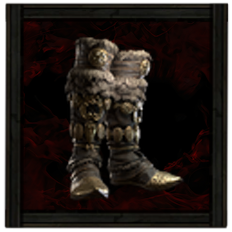 Apostle Leggings Apostle Leggings Apostle Leggings Stats:
Armor - 110 Energy Shield - 38 Requirements: Level - 70 Strength - 51 Intelligence - 51 |
・ +% increased Movement Speed
・+% increased Armour and Energy Shield ・+ to Armour ・+ to Maximum Energy Shield ・+% of Armour also Applies to Elemental Damage ・+% to any Elemental Resistance |
 Stellar Amulet Stellar Amulet Stellar Amulet Requirements:
Level - 24 Implicit:+5-7 to all Attributes |
・+ to Maximum Life
・+% Increased Armour ・+ to all Attributes ・+% Increased Maximum Energy Shield ・+ to Level of all Minion Skills ・+ to Any Elemental Resistance |
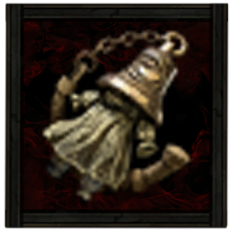
 Darkness Enthroned Darkness Enthroned Darkness Enthroned Requirements:
Level - 62 Implicit:Has 1–3 Charm Slot;Flasks gain 0.17 charges per Second Fixed Modifiers: ・ This item gains bonuses from Socketed Item as though it was a Random socketable equipment type ・ +50-100% increased effect of Socketed Items ・ Has 2 Rune Sockets |
・This item gains bonuses from Socketed Item as though it was a Helmet
・+50-100% increased effect of Socketed Items ・Has 2 Hidden Rune Sockets |
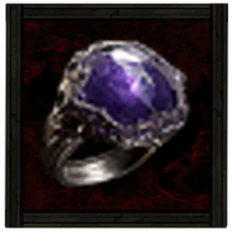 Amethyst Ring Amethyst Ring Amethyst Ring Requirements:
Level - 20 Implicit:+7-13% to Chaos Resistance |
・Minions deal % Increased Damage if you've Hit Recently
・Add to Lightning Damage to Attacks ・+% increased Rarity of Items Found ・+% to all Elemental Resistances ・+ to Maximum Life ・+% to Chaos Resistance |
|
Amethyst Ring Amethyst Ring Requirements:
Level - 20 Implicit:+7-13% to Chaos Resistance |
・Minions deal % Increased Damage if you've Hit Recently
・Add to Lightning Damage to Attacks ・+% increased Rarity of Items Found ・+% to all Elemental Resistances ・+ to Maximum Life ・+% to Chaos Resistance |
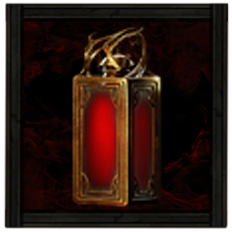 Ultimate Life Flask Ultimate Life Flask Ultimate Life Flask Stats:
Flask Type - Life Recovered Life - 920 Charge Per Use - 10 Total Charges - 75 Duration - 3 sec. |
・+% increased Amount Recovered
・+% increased Charges |
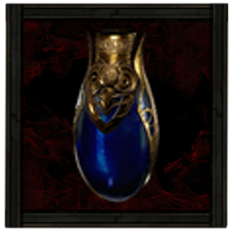 Ultimate Mana Flask Ultimate Mana Flask Ultimate Mana Flask Stats:
Flask Type - Mana Recovered Mana - 310 Charge Per Use - 10 Total Charges - 75 Duration - 3 sec. |
・+% increased Recovery Rate
・+% increased Charges |
Weapons
Given that the skills the build uses scale off different stats, it is required to have two weapon sets to set up the build's damage:
For your weapon set one, the primary goal is to increase the lethality of your Djinn's commands. Get a Stoic Sceptre for Discipline, which gives you and your Djinns more Energy Shield. After that, try to get modifiers that increase Minion Damage, Critical Hit Chance/Damage Bonus, and Minion Skill Levels, as all your commands will be scaling off these stats and not yours in particular.
However, the build still needs improvements to the characters to set up its Curses and Cold Spells. To do that, get a Dueling Wand as your base for weapon set two, and then try to get modifiers that Cold Damage, Critical Spell Damage, Cast Speed, and Level of all Cold Spell Skills.
Both of these will use different Tasalian Talismans. The main difference is that the (1) talisman for weapon set one should focus on getting Levels to Minion Skills, while (2) weapon set two requires additional Cold Damage. Both should focus on Energy Shield and Resistances to help with the build's defenses.
Armor and Accessories
This build's main survivability stats revolve around both Armour and Energy Shield, so stack up as much equipment that provides these to lay the groundwork of this build's defenses. Furthermore, it is always the best practice to obtain Maximum Life and cap out on all of the elemental resistances. Armour is also needed so the bonus from Applies to Elemental Damage is worthwhile.
The build itself does not heavily rely on stats to survive, but more on skill interactions like Slow Magnitude and Chill to keep it running. With how the build is set up, enemies are slowed to the point where it feels like they are stunned, and that is because of The Prisoner's Manacles' unique effect, where the debuffs you inflict have increased Slow Magnitude.
As for your Accessories, obtain a Stellar Amulet with Additional Levels to Minion Skills, and Amethyst Rings to cap out your Chaos Resistance. The priority desecrated modifier here would be to get the Minion deal Increased Damage if you've Hit Recently as you will actively be hitting enemies in between your Djinn Commands. Lastly, get Maximum Life and some Elemental Resistances for additional survivability.
| List of Armors | List of Accessories |
Runes, Soul Cores, and Idols
| Equipment | Sockets |
|---|---|
| Weapon Set 1 | Sceptre:
Talisman:
|
| Weapon Set 2 | Sceptre:
Talisman:
|
| Armor | |
| Darkness Enthroned |
Weapon Set 1 should have Xipocado's Soul Core of Dominion as it generally increases the damage your Djinns will have. Weapon Set 2 then should be slotted with a Greater Glacial Rune to increase the damage of your Cold Spells. Both Talismans should have Greater Iron Runes to further improve the Energy Shield they give.
As for the Armor, slot in Greater Iron and Elemental Runes to further increase the defenses of the build while also helping cap out the Elemental Resistance. Darkness Enthroned then should increase the potency of Curses and Exposure by doubling the effects of Idol of Egrin and Stag Idol respectively.
| All Runes | All Soul Cores | All Idols |
Belts and Charms
| Belt Modifiers | |||||
|---|---|---|---|---|---|
|
Darkness Enthroned Darkness Enthroned Requirements:
Level - 62 Implicit:Has 1–3 Charm Slot;Flasks gain 0.17 charges per Second Fixed Modifiers: ・ This item gains bonuses from Socketed Item as though it was a Random socketable equipment type ・ +50-100% increased effect of Socketed Items ・ Has 2 Rune Sockets |
・This item gains bonuses from Socketed Item as though it was a (Random socketable equipment type)
・+50-100% increased effect of Socketed Items ・Has 2 Hidden Rune Sockets |
||||
| Charm Options | |||||
 Stone Charm Stone Charm
|
 Thawing Charm Thawing Charm
|
 Staunching Charm Staunching Charm
|
|||
Darkness Enthroned, with the Helmet as its alloted equipment type, strengthens the build's ability to deal more damage by increasing the potency of Curses and Exposure through the slotted Runes. If you do not have Darkness Enthroned, equip any belt with high Armour or Energy Shield as a base and solid modifiers with Attributes or Resistances.
As for your Charms, make sure to equip a Stone and Thawing Charms to make you immune to most immobilization debuffs. Lastly, a Staunching Charm should add that extra bit of protection against Bleeding. As for modifiers, it is recommended to get Recover Life when Used for added survivability!
| List of Belts | List of Charms |
Navira's Fracturing Disciple of Varashta Skills
All Active and Persistent Skills
| Skill | Support Gems |
|---|---|
|
Kelari, the Tainted Sands Kelari, the Tainted Sands Inflicts critical weakness on hit;50% increased critical damage bonus
|
Bidding III Supports Minion Skills. Supported Minions have significantly increased Cooldown Recovery Rate with Command Skills.
Magnified Area II Supports any skill with an area of effect, making it larger at the cost of damage.
Brutality III Supports any skill that deals damage, boosting its physical damage at the expense of all other damage types, as well as giving Hits from that skill a chance to ignore Physical Damage reduction.
Minion Mastery Supports Minion skills, granting them an additional level.
|
|
Ruzhan, the Blazing Sword Ruzhan, the Blazing Sword Ruzhan deals 10% more damage for each damaging skill you've used recently;Attacks with Ruzhan's Zealotry when you use a damaging skill with a 4 second cooldown, inflicting enemies stuck with exposure
|
Potent Exposure Supports Skills which apply Exposure to Enemies, increasing the effect of applied Exposure.
Fire Mastery Supports Fire skills, granting them an additional level.
Prolonged Duration II Supports any skill that has a duration, making that duration longer.
Hulking Minions Supports Skills which summon Persistent Minions. Supported Mininos are larger, have more Life, and deal more Damage, but cost significantly more Spirit.
|
|
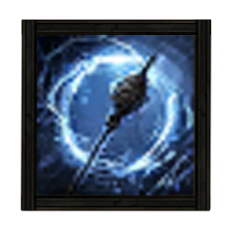
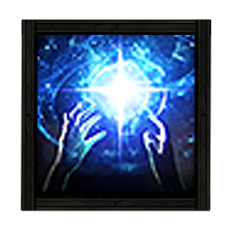
Navira, the Last Mirage Navira, the Last Mirage Triggers navira's calming when commanded to Use a skill, granting nearby allies 67% increased;Mana regeneration for 4 seconds
|
Bidding II Supports Minion Skills. Supported Minions deal more damage and have increased Cooldown Recovery Rate with Command Skills.
Hulking Minions Supports Skills which summon Persistent Minions. Supported Mininos are larger, have more Life, and deal more Damage, but cost significantly more Spirit.
Cold Mastery Supports Cold skills, granting then an additional level.
Concentrated Area Supports any skill with an area of effect, causing that area to be smaller but any area damage it deals to be higher.
|
|
Discipline Discipline |
Upwelling II Supports Persistent Buff Skills, causing your Minions to deal increased Damage while you are not on full Mana while the Supported Skill is active.
|
|
Snap Snap Shatters the frost on a Frozen enemy, Consuming the freese to deal a large amount of Cold Damage to enemies caught in the blast. Can also be cast on a Frostbolt to cause it to explode immediately. Any Frozen enemies hit by the Frostbolt's explosion will be dealt Cold Snap's damage and have their freeze consumed.
|
Magnified Area I Supports any skill with an area of effect, making it larger.
Harmonic Remnants II Supports Skills which create Remnants, allowing those Remnants to be collected from further away, with a chance to create an additional Remnant.
Elemental Focus Supports any skill that hits enemies, causing it to deal more Elemental Damage but be unable to inflict Elemental Ailments.
|
|
Ice Nova Ice Nova A nova of ice expands from you, Knocking Back enemies based on how close they are to you. Casting Ice Nova targeting near a Frostbolt Projectile will cause it to originate from the Frostbolt insead of you, and cause more Freeze buildup.
|
Encroaching Ground Supports Skills that create Ground Surfaces, causing those Surfaces to grow over time, up to a limit.
Cold Mastery Supports Cold skills, granting then an additional level.
Rapid Casting II Supports Spells, causing them to cast faster.
|
|
Blasphemy Blasphemy Turns socketed Curse skills into vile Auras, applying their effects to all nearby enemies.
|
Heightened Curse Supports curse skills, magnifying their power.
Temporal Chains Curses all enemies in an area, Slowing them and making other effects on them expire more slowly.
Elemental Weakness Curse all targets in an area after a short delay, lowering their Elemental Resistances.
Magnified Area II Supports any skill with an area of effect, making it larger at the cost of damage.
|
|
Frost Bomb Frost Bomb Creates a pulsing Orb of Frost. Each pulse inflicts Cold Exposure on nearby Enemies. When the Orb's duration ends, it explodes, dealing Cold damage to surrounding Enemies.
|
Potent Exposure Supports Skills which apply Exposure to Enemies, increasing the effect of applied Exposure.
Spell Cascade Supports Spells that affect an area around you or a target location, causing those spells to also target additional areas on either side of the target area, along a randomly chosen axis. Cannot support Channelling skills or Remote skills.
Overabundance II Supports skills which can have a Limited number of effects active at once, increasing that Limit at the cost of their duration. Only applies to restrictions that use the word "Limit".
Short Fuse I Supports skills which Detonate after some amount of time has elapsed, shortening the time before Detonation.
Prolonged Duration II Supports any skill that has a duration, making that duration longer.
|
|
Barkskin Barkskin While active, taking Hit damage from enemies to your Energy Shield causes you to gain Armour for a short duration. Armour gained from multiple Hits can stack. The total Armour gained from this Skill cannot exceed the Item Armour on your Equipped Armour Items.
|
Prolonged Duration II Supports any skill that has a duration, making that duration longer.
Upwelling I Supports Persistent Buff Skills, causing your Minions to deal increased Damage while you are not on full Mana while the Supported Skill is active.
|
This build revolves around the use of Djinn Command and Cold Spell skills to make up for most of its kit, each with their own role and synergy:
- Navira, the Last Mirage - Your primary Djinn, Navira is mainly used to cast Navira's Fracturing on Chilled Grounds as the build's source of burst damage.
- Kelari, the Tainted Sands - Mainly used to Inflict critical weakness for additional burst.
- Ruzhan, the Blazing Sword - Used as an additional means of inflicting exposure, which the build can reach up to 200% alongside the other means of exposure.
- Snap - Used as an additional source of Cold Infusion by consuming Freeze and a means of burst.
- Ice Nova - This will be your primary source of exposure and Chilled Ground after getting infusions from Snap. Mostly a setup to Navira's Fracturing.
- Frost Bomb - Most of the Exposure and Cold Infusions comes from this skill, especially with Spell Cascade covering alot of ground.
Apart from the main kit, Camaroni included other support skills that massively increase both the build's damage potential and survivability:
- Discipline - Provides additional Energy Shield to you and your Djinns.
- Blasphemy - Slotted in with Temporal Chains to further increase Slows and Elemental Weakness to further apply Exposure.
- Barkskin - Converts all the damage you take to your Energy Shield to Armour. Used alongside Sacred Rituals for a massive increase to defenses.
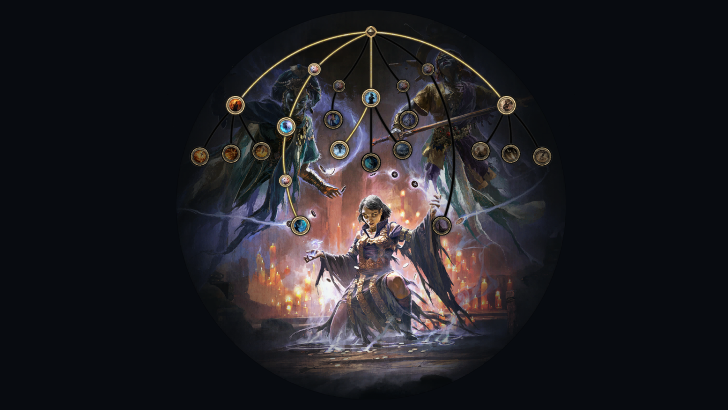
Navira's Fracturing Disciple of Varashta Passive Tree
Passive Tree Progression
| Ascendancy |
|---|
 The Fourth Teaching and Sacred Rituals The Fourth Teaching and Sacred Rituals |
| Passive Tree |
| Video taken from Path of Building. |
Most of the damage of this build can be gained through the proper gear, so Camaroni designed the passive tree to focus on stacking defenses and slow magnitude, essentially making the build easier to pilot and reliable to use in the endgame while still allowing you to deal absurd amounts of damage.
The notable passives that this build focuses on are the following keywords: Energy Shield, Slow Magnitude, and Curse Magnitude nodes. Make sure to configure the Weapon Set 1 and 2 as each set focuses on a different group of stats. Weapon Set 1 focuses more on Minion Damage and Critical Hit Chance, and Weapon Set 2 tries to cover more on Orb Skills, Chill, Exposure, and Elemental Damage.
On the other hand, the Ascendancy passive nodes for this build get all of the Djinn Baryas, fulfilling the needs of the build in terms of defense. The Djinn Baryas make up most of your offense and are the cornerstone of this build. The Fourth Teaching and Sacred Rituals synergize perfectly with this build's main defense, wherein it allows Energy Shield to recharge more quickly and be included in the calculation for Physical Damage Reduction of Armour.
Passive Skill Tree Guide and List of Passives
Jewels
Note: The modifiers listed are arranged according to priority.
| |
・+% Increase Maximum Energy Shield
・Minions have % increased Critical Hit Chance ・Minions have % increased Critical Damage Bonus ・% Increased Freeze Buildup ・% Increased Area Effect of Curses ・% Increased Energy Shield Recharge Rate ・Gain additional Ailment Threshold equal to % of Maximum Energy Shield |
|---|
This build prioritizes the survivability aspect, so the number one priority for Sapphire Jewels is more Energy Shield. However, attempt to get Sapphire Jewels that have modifiers to Minion Critical Hit Chance and Minion Critical Damage Bonus. Some alternatives but less desirable modifiers are Freeze Buildup, Curse Area Effect, and Ailment Threshold!
Navira's Fracturing Disciple of Varashta Playstyle and Skill Rotation
Mobbing Rotation
The mobbing rotation for this build is centered around a comfortable playstyle and slowing groups of enemies with Chill and Slow Magnitude. The rotation is as follows:
- Cast Frost Bomb to gain both Cold Infusions and inflict Exposure on enemies.
- Cast Ice Nova to create a screen-wide Chilled Ground.
- Use Kelari, the Tainted Sands to inflict Critical Weakness.
- Use Navira's Fracturing to consume the Chilled Ground and clear all enemies inside it.
Bossing Rotation
If you want to fully min-max the damage this build deals, using all the Djinns is required to bring out its best. The rotation is as follows:
- Use Kelari, the Tainted Sands to inflict Critical Weakness.
- Use Ruzhan, the Blazing Sword to inflict Exposure.
- Cast Frost Bomb to gain both Cold Infusions and inflict Exposure on enemies. You can optionally use Snap if the boss is Frozen for more Cold Infusion
- Cast Ice Nova to create a screen-wide Chilled Ground.
- Use Navira's Fracturing to consume the Chilled Ground and clear all enemies inside it.
Path of Exile 2 Related Guides

0.4 Best Endgame Builds
| Rank | Build |
|---|---|
 |
|
 |
|
 |
|
 |
0.4 Leveling Builds
All Build Guides
| List of Builds by Class | |||||||||||
|---|---|---|---|---|---|---|---|---|---|---|---|
 Huntress Huntress |
 Mercenary Mercenary |
 Monk Monk |
|||||||||
 Witch Witch |
 Sorceress Sorceress |
 Warrior Warrior |
|||||||||
 Ranger Ranger |
 Druid Druid |
- | |||||||||
| Other Build Guides | 0.3 Leveling Builds | How to Make a Good Build | |||||||||
Sorceress Leveling Builds
Arctic Armour Conjures an icy barrier that gains stages overtime. While the barrier has stages, Melee Attacks that hit you will remove a stage to cause a burst of ice that deals Cold Spell damage to the attacker.
Spark Launches a spray of sparking projectiles that travel erratically along the ground until they hit an enemy or expire.
Flame Wall Creates a wall of fire in front of the character, which ignites everything within its area. Any projectiles fired through the wall by you and allies deal added fire damage and inflict ignite on hit.
Orb of Storms Creates an Orb of electricity that fires Chaining Lightning bolts at nearby enemies.
Conductivity Curses all targets in an area after a short delay, lowering their Lightning Resistance.
Mana Tempest Creates a storm of arcane energies that Empowers your Mana-costing Spells while you remain inside it. Maintaining the Storm constantly drains your Mana, and each spell you cast causes it to drain faster. The storm will dissipate when you exit it or run out of mana.
Lightning Warp Teleports you inside the target's body, causing it to violently explode. Highlights enemies that can be culled, and can only be used on these enemies or Ball Lightning projectiles. The target is destroyed, and the explosion deals Lightning Damage to surrounding enemies and creates Shocked Ground.
Mana Remnants Conjures surging lightning to restore your Mana. While active, Shocked enemies you kill have a chance to spawn a Mana Remnant, and Critically Hitting a Shocked target spawns a Mana Remnant every few seconds. Picking up a Mana Remnant grants you Mana which can Overflow maximum Mana.
Focus: Mobbing, AoE, Lightning, Fast Clear |
|
Flame Wall Creates a wall of fire in front of the character, which ignites everything within its area. Any projectiles fired through the wall by you and allies deal added fire damage and inflict ignite on hit.
Snap Shatters the frost on a Frozen enemy, Consuming the freese to deal a large amount of Cold Damage to enemies caught in the blast. Can also be cast on a Frostbolt to cause it to explode immediately. Any Frozen enemies hit by the Frostbolt's explosion will be dealt Cold Snap's damage and have their freeze consumed.
Fireball Launches a large ball of Fire which explodes on impact, creating a nova of smaller firebolts.
Raging Spirits While active, your Fire Spells will also summon Raging Spirits, which are short-lived flaming skulls that rush at nearby enemies and rapidly Attack them. Enemies will not directly engage these Minions, and can pass through them.
Living Bomb Plant a seed of Fire inside an enemy. Dealing enough damage to the enemy, or killing it outright, causes the seed to explode, dealing damage in an area and leaving behind a Fire Infusion Remnant.
Focus: AoE, Mobbing |
|
NEW |
Frost Bomb Creates a pulsing Orb of Frost. Each pulse inflicts Cold Exposure on nearby Enemies. When the Orb's duration ends, it explodes, dealing Cold damage to surrounding Enemies.
Flame Wall Creates a wall of fire in front of the character, which ignites everything within its area. Any projectiles fired through the wall by you and allies deal added fire damage and inflict ignite on hit.
Ice Nova A nova of ice expands from you, Knocking Back enemies based on how close they are to you. Casting Ice Nova targeting near a Frostbolt Projectile will cause it to originate from the Frostbolt insead of you, and cause more Freeze buildup.
Orb of Storms Creates an Orb of electricity that fires Chaining Lightning bolts at nearby enemies.
Snap Shatters the frost on a Frozen enemy, Consuming the freese to deal a large amount of Cold Damage to enemies caught in the blast. Can also be cast on a Frostbolt to cause it to explode immediately. Any Frozen enemies hit by the Frostbolt's explosion will be dealt Cold Snap's damage and have their freeze consumed.
Frost Darts Conjures a number of Icy Projectiles that launch towards a target. Projectiles that Hit a Chilled or Frozen target create chunks of ice that deal additional damage on impacting the ground. Consumes a Cold Infusion if possible to cause each Projectile to lodge into the enemy then explode.
Focus: Elements, Cold, AoE, Infusions |
Sorceress Endgame Builds
Flame Wall Creates a wall of fire in front of the character, which ignites everything within its area. Any projectiles fired through the wall by you and allies deal added fire damage and inflict ignite on hit.
Solar Orb Creates a fiery Orb that periodically releases fiery pulses. Enemies that are very close to the Orb are Ignited.
Flammability Curses all targets in an area after a short delay, lowering their Fire Resistance.
Fireball Launches a large ball of Fire which explodes on impact, creating a nova of smaller firebolts.
Focus: DoT, Mobbing |
|
Frost Bomb Creates a pulsing Orb of Frost. Each pulse inflicts Cold Exposure on nearby Enemies. When the Orb's duration ends, it explodes, dealing Cold damage to surrounding Enemies.
Frostbolt Fires a slow-moving projectile that leaves a wake of Chilled Ground, deals Cold Damage and explodes on colliding with terrain.
Hypothermia Curses all targets in an area after a short delay, lowering their Cold Resistance.
Frost Wall Creates a Wall of Ice Crystals which holds back enemies. The Crystals explode if sufficiently damaged, orif pushed hard enough, damaging nearby enemies..
Lightning Warp Teleports you inside the target's body, causing it to violently explode. Highlights enemies that can be culled, and can only be used on these enemies or Ball Lightning projectiles. The target is destroyed, and the explosion deals Lightning Damage to surrounding enemies and creates Shocked Ground.
Comet Calls down a mass of ice from the sky, dealing high damage at the targeted location. Targeting close to you will cause you to jump back as you cast.
Cast on Freeze While active, gains Energy when you Freeze enemies and triggers socketed spells on reaching maximum Energy.
Blink Replaces your dodge roll with a short-cooldown Spell that allows you to tunnel through space, instantly reappearing a medium distance away.
Focus: Burst Damage, Crowd Control |
|
Spark Launches a spray of sparking projectiles that travel erratically along the ground until they hit an enemy or expire.
Flame Wall Creates a wall of fire in front of the character, which ignites everything within its area. Any projectiles fired through the wall by you and allies deal added fire damage and inflict ignite on hit.
Orb of Storms Creates an Orb of electricity that fires Chaining Lightning bolts at nearby enemies.
Conductivity Curses all targets in an area after a short delay, lowering their Lightning Resistance.
Lightning Warp Teleports you inside the target's body, causing it to violently explode. Highlights enemies that can be culled, and can only be used on these enemies or Ball Lightning projectiles. The target is destroyed, and the explosion deals Lightning Damage to surrounding enemies and creates Shocked Ground.
Mana Remnants Conjures surging lightning to restore your Mana. While active, Shocked enemies you kill have a chance to spawn a Mana Remnant, and Critically Hitting a Shocked target spawns a Mana Remnant every few seconds. Picking up a Mana Remnant grants you Mana which can Overflow maximum Mana.
Archmage While Active, causes your Non-Channelling Spells to cost additional mana and deal extra lightning damage, both based on your maximum mana.
Focus: Mobbing, AoE, Lightning, Fast Clear |
|
Frost Bomb Creates a pulsing Orb of Frost. Each pulse inflicts Cold Exposure on nearby Enemies. When the Orb's duration ends, it explodes, dealing Cold damage to surrounding Enemies.
Flame Wall Creates a wall of fire in front of the character, which ignites everything within its area. Any projectiles fired through the wall by you and allies deal added fire damage and inflict ignite on hit.
Ice Nova A nova of ice expands from you, Knocking Back enemies based on how close they are to you. Casting Ice Nova targeting near a Frostbolt Projectile will cause it to originate from the Frostbolt insead of you, and cause more Freeze buildup.
Snap Shatters the frost on a Frozen enemy, Consuming the freese to deal a large amount of Cold Damage to enemies caught in the blast. Can also be cast on a Frostbolt to cause it to explode immediately. Any Frozen enemies hit by the Frostbolt's explosion will be dealt Cold Snap's damage and have their freeze consumed.
Comet Calls down a mass of ice from the sky, dealing high damage at the targeted location. Targeting close to you will cause you to jump back as you cast.
Cast on Elemental Ailment While active, gains Energy when you Freeze, Shock, or Ignite enemies, and triggers socketed spells on reaching Maximum Energy.
Siphon Elements While active, has a chance to create an Infusion Remnant when you Freeze, Shock, or Ignite a target.
Frost Darts Conjures a number of Icy Projectiles that launch towards a target. Projectiles that Hit a Chilled or Frozen target create chunks of ice that deal additional damage on impacting the ground. Consumes a Cold Infusion if possible to cause each Projectile to lodge into the enemy then explode.
Elemental Weakness Curse all targets in an area after a short delay, lowering their Elemental Resistances.
Temporal Rift This Spell's Cast Speed cannot be modified;Maximum 16 afterimages;Creates an afterimage every 0.25 seconds
Focus: Crowd Control, Burst Damage, Cold |
|
Arc An arc of Lightning stretches from the caster to a targeted enemy and Chains on to other nearby enemies. Shocked enemies Hit release damaging pulses.
Frost Bomb Creates a pulsing Orb of Frost. Each pulse inflicts Cold Exposure on nearby Enemies. When the Orb's duration ends, it explodes, dealing Cold damage to surrounding Enemies.
Orb of Storms Creates an Orb of electricity that fires Chaining Lightning bolts at nearby enemies.
Blink Replaces your dodge roll with a short-cooldown Spell that allows you to tunnel through space, instantly reappearing a medium distance away.
Archmage While Active, causes your Non-Channelling Spells to cost additional mana and deal extra lightning damage, both based on your maximum mana.
Cast on Elemental Ailment While active, gains Energy when you Freeze, Shock, or Ignite enemies, and triggers socketed spells on reaching Maximum Energy.
Siphon Elements While active, has a chance to create an Infusion Remnant when you Freeze, Shock, or Ignite a target.
Elemental Weakness Curse all targets in an area after a short delay, lowering their Elemental Resistances.
Focus: Lightning, Cast on Elemental Ailment, Mobbing |
|
Frost Bomb Creates a pulsing Orb of Frost. Each pulse inflicts Cold Exposure on nearby Enemies. When the Orb's duration ends, it explodes, dealing Cold damage to surrounding Enemies.
Ember Fusillade Conjures a blazing Ember that hovers around you. After a short duration, the Ember launches at the enemy, dealing fire damage in an area on impact. Recasting the spess resets the duration for all active Embers. Multiple Embers fired in the same Fusillade will attempt to target different enemies.
Orb of Storms Creates an Orb of electricity that fires Chaining Lightning bolts at nearby enemies.
Ball Lightning Fires a slow-moving projectile that repeatedly shoots bolts of lightning at nearby enemies.
Trinity Become attuned to all Elements building up Fire, Cold, and Lightning Resonance based off the highest Elemental Damage type dealt by your Attack Hits. Your Elemental Damage with Attacks is greatly enhanced the more Resonance of any type you have.
Siphon Elements While active, has a chance to create an Infusion Remnant when you Freeze, Shock, or Ignite a target.
Frost Darts Conjures a number of Icy Projectiles that launch towards a target. Projectiles that Hit a Chilled or Frozen target create chunks of ice that deal additional damage on impacting the ground. Consumes a Cold Infusion if possible to cause each Projectile to lodge into the enemy then explode.
Elemental Weakness Curse all targets in an area after a short delay, lowering their Elemental Resistances.
Living Bomb Plant a seed of Fire inside an enemy. Dealing enough damage to the enemy, or killing it outright, causes the seed to explode, dealing damage in an area and leaving behind a Fire Infusion Remnant.
Elemental Storm Cannot deal Critical Hits;Deals Damage every 0.25 seconds;Storm radius is 1.8 metres;Storm duration is 5 seconds;Enemies inside the storm are Hindered
Focus: Elements, Shock, Chill, Ignite |
Sorceress Class and Ascendancy Guides
| Base Class | ||
|---|---|---|
| Ascendancies | ||
Comment
Author

PoE 2 0.4 Sorceress Build - Navira's Fracturing Disciple of Varashta
Please participate in our site
improvement survey
03/2026
improvement survey
03/2026
Would you assist in
improving Game8's site?
improving Game8's site?

×
We are listening to our users' valuable opinions and discussing how to act on them.
The information collected through this survey will be used for the purpose of improving our services. In addition, the information will only be disclosed a part of a statistic in a format that will not allow identification of personal information.
Begin Survey
Not Now
×
Please rate each item regarding Game8.co's Advertisements.
Amount of Ads
Very Dissatisfied
Somewhat Dissatisfied
Fine
Somewhat Satisfied
Highly Satisfied
Placement of Ads
Timing of Ad Display
Ad Loading Speed
Safeness of Ads
Content of Ads
×
Please rate each item regarding Game8.co's Quality of Articles.
Amount of information
Very Dissatisfied
Somewhat Dissatisfied
Fine
Somewhat Satisfied
Highly Satisfied
Frequency of updates
Speed of new information
Accuracy of articles
Understandibility of articles
Readability of sentences
×
Please rate each item regarding Game8.co's Usability of the Site.
Ease of finding information
Very Dissatisfied
Somewhat Dissatisfied
Fine
Somewhat Satisfied
Highly Satisfied
Loading Speed
Use of Color
Font Size
Visibility of Images
Easy to Understand Layout
×
Please rate each item regarding Game8.co's Message Boards, Comments.
Ease of Writing
Very Dissatisfied
Somewhat Dissatisfied
Fine
Somewhat Satisfied
Highly Satisfied
Readability
Ease in Finding Information
Comment Quality
Comment Quantity
Admin Response
×
Please rate each item regarding Game8.co's Site's new design.
Please rate our site's new design
Very Dissatisfied
Somewhat Dissatisfied
Fine
Somewhat Satisfied
Highly Satisfied
Do you think that the website's design change makes the site easier to use?
Has the new design made it easier for you to find information on the site?
Has the new design improved the overall visual appeal of the site?
How would you rate your overall satisfaction with the new design of the site?
×
How likely are you to recommend Game8 to someone you know?
Very Unlikely
0
1
2
3
4
5
6
7
8
9
10
Very Likely
If you have other opinions regarding potential improvement to the website, please share them with us. We would appreciate your honest opinion.
Note: This is a free response section, so you can proceed without entering anything.
Note: Please be sure not to enter any kind of personal information into your response.
Note: Please be sure not to enter any kind of personal information into your response.
×
Thank You
×
Thank you for participating in our survey! Your answers will help us to improve the quality of our website and services.
We hope you continue to make use of Game8.
We hope you continue to make use of Game8.
Close
Rankings
- We could not find the message board you were looking for.

Gaming News


![Monster Hunter Stories 3 Review [First Impressions] | Simply Rejuvenating](https://img.game8.co/4438641/2a31b7702bd70e78ec8efd24661dacda.jpeg/thumb)
Popular Games

Genshin Impact Walkthrough & Guides Wiki
Honkai: Star Rail Walkthrough & Guides Wiki
Umamusume: Pretty Derby Walkthrough & Guides Wiki
Pokemon Pokopia Walkthrough & Guides Wiki
Resident Evil Requiem (RE9) Walkthrough & Guides Wiki
Monster Hunter Wilds Walkthrough & Guides Wiki
Wuthering Waves Walkthrough & Guides Wiki
Arknights: Endfield Walkthrough & Guides Wiki
Pokemon FireRed and LeafGreen (FRLG) Walkthrough & Guides Wiki
Pokemon TCG Pocket (PTCGP) Strategies & Guides Wiki


Recommended Games
Diablo 4: Vessel of Hatred Walkthrough & Guides Wiki
Cyberpunk 2077: Ultimate Edition Walkthrough & Guides Wiki
Fire Emblem Heroes (FEH) Walkthrough & Guides Wiki
Yu-Gi-Oh! Master Duel Walkthrough & Guides Wiki
Super Smash Bros. Ultimate Walkthrough & Guides Wiki
Pokemon Brilliant Diamond and Shining Pearl (BDSP) Walkthrough & Guides Wiki
Elden Ring Shadow of the Erdtree Walkthrough & Guides Wiki
Monster Hunter World Walkthrough & Guides Wiki
The Legend of Zelda: Tears of the Kingdom Walkthrough & Guides Wiki
Persona 3 Reload Walkthrough & Guides Wiki


All rights reserved
© 2010 - 2024 Grinding Gear Games
The copyrights of videos of games used in our content and other intellectual property rights belong to the provider of the game.
The contents we provide on this site were created personally by members of the Game8 editorial department.
We refuse the right to reuse or repost content taken without our permission such as data or images to other sites.