PoE 2 0.4 Witch Build - Comet Rain Infernalist
Latest: 0.5.0 Release Date
☆ Fate of the Vaal ▶︎ The Last of the Druids
┗ Bonded Mods | 0.4 Mystery Box
★ Druid: Class Overview | Builds
☆ NEW: Disciple of Varashta Ascendancy!
★ Best Class | Best Builds | Leveling Builds
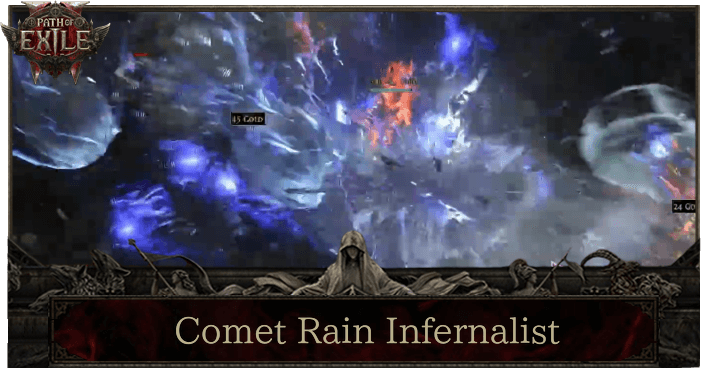
This is a Comet Rain Infernalist build for endgame in Path of Exile 2 (PoE 2)'s The Last of the Druids Update. Check out the Comet Rain Infernalist build, including its gear, socketables, skills, and playstyle!
 Attention! Attention! |
This endgame build starts from 94+ levels. If you want to see a build for leveling, check out our Leveling Builds! |
|---|
List of Contents
Comet Rain Infernalist Build Summary
HungryBootsGaming's Comet Rain Infernalist Build
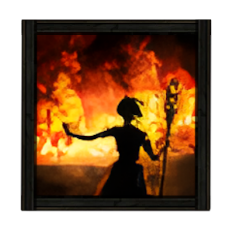
This endgame build for Demon Form Infernalist Witch is crafted by HungryBoots, showcased in a detailed guide over at HungryBootsGaming (Youtube).
The video breaks down the build step-by-step, covering everything from skills, gear, and passives to dominate the endgame!
You can also check out HungryBoots Discord Server for even more Path of Exile 2 content and detailed build discussion!
Comet Rain Infernalist Build
| Build Setup | |
|---|---|
 Comet Rain Infernalist Comet Rain Infernalist |
 Demon Form (12–25)% increased Cast Speed while in Demon Form;+(3–6) to Level of all Spell Skills while in Demon Form;Lose 0.5% of Life per second per Demonflame;Deal (7–18)% increased Spell damage per Demonflame
 Frost Bomb Creates a pulsing Orb of Frost. Each pulse inflicts Cold Exposure on nearby Enemies. When the Orb's duration ends, it explodes, dealing Cold damage to surrounding Enemies.
 Lightning Warp Teleports you inside the target's body, causing it to violently explode. Highlights enemies that can be culled, and can only be used on these enemies or Ball Lightning projectiles. The target is destroyed, and the explosion deals Lightning Damage to surrounding enemies and creates Shocked Ground.
 Elemental Invocation While active, gains energy when you Freeze, Shock, or Ignite an enemy. Using the invocation once sufficient energy is gathered will consume the energy to trigger socketed Spells, and can trigger them multiple times if it has enough energy.
 Cast on Elemental Ailment While active, gains Energy when you Freeze, Shock, or Ignite enemies, and triggers socketed spells on reaching Maximum Energy.
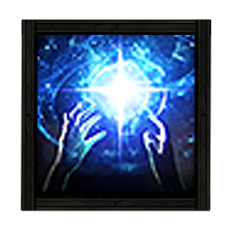
 Elemental Weakness Curse all targets in an area after a short delay, lowering their Elemental Resistances.
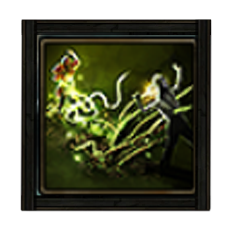 Entangle Conjures a rootbound fissure that crawls forward, damaging enemies in its path. While the fissure persists, vines lash out from it and attach to nearby enemeis, damaging and Slowing them.
|
|
|
|
This Comet Infernalist build relies on a Life on Recoup loop to sustain Demon Form and on a Cast on Elemental Ailment gem to trigger elemental-infused skills for automated spell casting.
As this build utilizes Demon Form, the build can continue to scale all the way up to the end game, as it can sustain Demon Flame stacks thanks to our sources of life recoup.
| Date | Changes Made |
|---|---|
| 01/12/25 | ・ Build Revamped for Patch 0.4. ・Updated Equipment Section ・ Updated Skills and Added Arc and Fireball Variants ・Updated Passive Tree ・Updated Skill Rotations |
| 04/15/25 | ・ Build Created |
Build FAQs
| Build Notes |
|---|
Understanding the Build Foundation
At its core, the build relies on Lightning Warp and Spellslinger to generate energy to trigger Cast on Elemental Ailment, allowing for repeated casting of the gem you socket into it.
This means that you can use different versions of the build by changing the skill you socket into Cast on Elemental Ailment and still retain its core function.
Map Modifiers to Avoid
The build sustains its spell casts by using a Life Recoup loop which can be started with Lightning Warp even before engaging in combat. This loop can be cast repeatedly to trigger Life Recoup and offset the life loss from Pyromantic Pact and Demon Flame.
As such, it is important to avoid Waystone modifiers that penalize the recovery of life and energy shield, as well as resistances, if possible, as they can interfere with our life recoup loop and render our casts unsustainable.
Calculating Life Recoup
To get an idea of how many stats you need to correctly sustain a life recoup loop, use the calculator provided by Hungryboots to determine if your current stats allow you to sustain the loop.
You can try running with less recovery by pausing between Thunder Warp casts before engaging enemies to activate your keystone passives, such as Pliable Flesh. That said, the calculator should give you a good idea of whether your current gear can comfortably handle the loop.
For an in-depth explanation on how to use the Life Recoup Calculator, you can refer to Hungryboots' explanation in this video (External Link to Youtube Video).
External Link to Life Recoup Calculator
Comet Rain Infernalist Equipment
※ The affixes shown below are arranged based on descending priority.
| Gear | Affixes |
|---|---|
 Dueling Wand Dueling Wand Dueling Wand Stats:
Requirements: Level - 65 Intelligence - 103 (Weapon Set 1) |
・+ Level of All Spell Skills
・% Increased Spell Damage ・Gain % of Damage as Extra Elemental Damage ・% Increased Cast Speed |
 Arrayed Focus Arrayed Focus Arrayed Focus Stats:
Energy Shield - 45 Requirements: Level - 54 Intelligence - 77 (Offhand Set 1) |
・+ Maximum Energy Shield
・% Increased Energy Shield ・Gain % of Damage as Extra Elemental Damage ・% Increased Cast Speed |
 Chiming Staff Chiming Staff Chiming Staff Stats:
Requirements: Level - 25 Intelligence - 41 (Weapon Set 2) |
・ +Level to All Spells
・Increased Cast Speed |
 Ancestral Tiara Ancestral Tiara Ancestral Tiara Stats:
Energy Shield - 109 Requirements: Level - 80 Intelligence - 115 |
・% Damage Taken Recouped as Life
・+ Maximum Energy Shield ・+ Maximum Life ・Elemental Resistance ・% of Elemental Damage Recouped as Energy Shield |
 Sacrosanctum Corvus Mantle Sacrosanctum Corvus Mantle Sacrosanctum Corvus Mantle Stats:
Armor - 245 Energy Shield - 84 Requirements: Level - 68 Strength - 67 Intelligence - 67 Implicit : +20-30 to Spirit Fixed Modifiers: ・ 80-120% increased Armour and Energy Shield ・ +20-30 to Strength ・ +20-30 to Intelligence ・ +17-23% to Chaos Resistance ・ 5-10% of Damage taken Recouped as Life ・ Damage taken Recouped as Life is also Recouped as Energy Shield |
・% of Damage Taken Recouped as LIfe
・Increased Armor and Energy Shield ・Chaos Resistance ・Strength ・Intelligence ・Spirit ・Damage taken Recouped as Life is also Recouped as Energy Shield |
 Sirenscale Gloves Sirenscale Gloves Sirenscale Gloves Stats:
Energy Shield - 54 Requirements: Level - 80 Intelligence - 101 |
・Maximum Energy Shield
・% increased Energy Shield ・Maximum Life ・Any Elemental Resistance |
 Sekhema Sandals Sekhema Sandals Sekhema Sandals Stats:
Energy Shield - 82 Requirements: Level - 80 Intelligence - 108 |
・Increased Movement Speed
・% Increased Armor, Evasion and Energy Shield ・Maximum Energy Shield ・Increased Energy Shield ・Elemental Resistance |
 Stellar Amulet Stellar Amulet Stellar Amulet Requirements:
Level - 24 Implicit:+5-7 to all Attributes |
Annointment: Lasting Trauma ・+ Level to All Spell Skills ・+ Spirit ・+ Maximum Energy Shield ・Increased Cast Speed ・Any Elemental Resistance ・Maximum Life ・% Damage Taken recouped as Energy Shield |
 Call of the Brotherhood Topaz Ring Call of the Brotherhood Topaz Ring Call of the Brotherhood Topaz Ring Requirements:
Level - 32 Implicit:+20-30% to Lightning Resistance Fixed Modifiers: ・ +10-20 to Intelligence ・ 25-35% increased Mana Regeneration Rate ・ 20-30% increased Freeze Buildup ・ 100% of Lightning Damage Converted to Cold Damage |
・+% to Lightning Resistance
・+ to Intelligence ・% increased Mana Regeneration Rate ・% increased Freeze Buildup ・% of Lightning Damage Converted to Cold Damage |
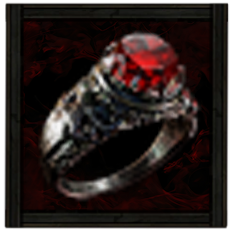 Ruby Ring Ruby Ring Ruby Ring Requirements:
Level - 8 Implicit:+20-30% to Fire Resistance |
・Fire Resistance
・+ All Elemental Resistances ・Increased Cast Speed |
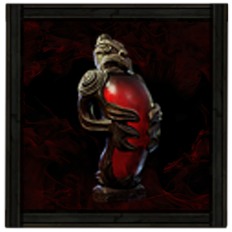 Blood of the Warrior Gargantuan Life Flask Blood of the Warrior Gargantuan Life Flask Blood of the Warrior Gargantuan Life Flask Stats:
Flask Type - Life Recovered Life - 710 Charge Per Use - 10 Total Charges - 75 Duration - 5 sec. |
・90% Less Life Recovered
・Effect is not Removed when Unreserved Life is Filled ・% of Damage Taken during effect Recouped as Life ・Gain Rage when Hit by an Enemy during effect ・No Inherent loss of Rage during effect ・Increased Duration |
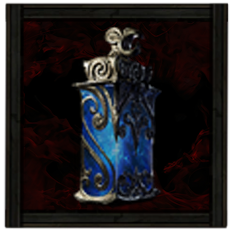 Lavianga's Spirits Gargantuan Mana Flask Lavianga's Spirits Gargantuan Mana Flask Lavianga's Spirits Gargantuan Mana Flask Stats:
Flask Type - Mana Recovered Mana - 185 Charge Per Use - 10 Total Charges - 75 Duration - 2 sec. |
・Recovers Mana Every 2 Seconds
・This Flask cannot be Used But Applies its Effect Constantly; % Reduced Amount Recovered |
Weapons
We will get a dueling wand for Spellslinger to generate more energy. We will prioritize the Level to All Spells modifier rather than a specific element because this allows for flexible builds, letting you swap your skill gems without altering your gear.
If you're set on using just a single skill setup to cut costs, you can choose to use one with a specific element.
Chiming Staff will solely be used for the Sigil of Power buff, so getting too many modifiers, apart from spell levels and cast speed, isn't necessary.
Armor and Accessories
We take as much as life and energy shield recoup on our gear as much as we can, as they are essential to make the build function, and allow our recoup loop to get going.
Naturally, capping out our resistance is just as important, most notably our fire resistance, as we rely on it more than other resistances due to Pyromantic Pact triggers.
Since this build relies heavily on life recoup, we will take the unique chest piece, Sacrosanctum, for additional life recoup and bonus energy shield recoup.
| List of Accessories | List of Armors |
Runes and Soul Cores
| Equipment | Sockets |
|---|---|
| Weapon | |
| Armor |
We will use Thane Girt's Rune of Wildness to increase the number of projectiles in our Ball Lightning, allowing us to generate more energy for casting on elemental ailments.
The Soul Core of Puhuarte is used to reach the Fire resistance cap as quickly as possible, and can be paired with Greater Iron Runes to increase survivability once resistances are capped. You may utilzie other elemental runes instead of Soul Core of Tacati, depending on the elemental rolls on your gear.
Lastly, we will use Estazunti's Soul Core of Convalescence and socket it into our helmet for increased life recovery.
| List of Runes | List of Soul Cores |
Belts and Charms
| Belt Modifiers | |||||
|---|---|---|---|---|---|
 Mail Belt Mail Belt
|
・% of FIre Damage Recouped as Life
・% To all Elemental Resistances ・3 Charm Slots ・Maximum Life |
||||
| Charm Options | |||||
 Antidote Charm Antidote Charm
|
 Staunching Charm Staunching Charm
|
 Nascent Hope Thawing Charm Nascent Hope Thawing Charm
|
|||
Our life recoup loup will allows us to sustain multiple spell casts, but it will cost our life total to fluctuate wildly as Pyromantic Pact on running out of mana, which can be quickly be regenerated by our life recoup.
This leaves us vulnerable to bleeding and poison because their damage bypasses Energy Shield. To counteract this, we will take the Antidote and Staunching charms, which will prevent us from taking poison and bleeding damage. This will allow us to continue our cast loops without endangering ourselves.
Lastly, we will use a Thawing Charm to avoid freezing and maintain mobility during runs.
| List of Belts | List of Charms |
Comet Rain Infernalist Skills
All Active and Persistent Skills
※ The Support Gems' priority are arranged in a descending order. The first one being the most important and the last being the least crucial.
| Skill | Support Gems |
|---|---|
| Demon Form Demon Form (12–25)% increased Cast Speed while in Demon Form;+(3–6) to Level of all Spell Skills while in Demon Form;Lose 0.5% of Life per second per Demonflame;Deal (7–18)% increased Spell damage per Demonflame | Second Wind III Supports skills with cooldowns, giving them extra uses of that cooldown and causing them to restore Life on use. Cannot support instant or triggered skills, or modify the skills of minions. Cooldown Recovery II Supports skills with Cooldowns, increasing the rate at which those Cooldowns Recover. Cannot modify the skills of minions. |
| Sigil of Power Sigil of Power | Magnified Area II Supports any skill with an area of effect, making it larger at the cost of damage. Prolonged Duration II Supports any skill that has a duration, making that duration longer. Rapid Casting III Supports Spells, causing them to cast faster for each different Spell you've cast Recently. |
| Spellslinger Spellslinger | Ball Lightning Fires a slow-moving projectile that repeatedly shoots bolts of lightning at nearby enemies. Multishot II Supports Projectile skills, making them fire extra Projectiles. Also lowers Attack and Cast speed of supported skills, as well as lessening their damage. Boundless Energy II Supports Meta Skills. Supported Skills generate Energy significantly faster. Energy Retention Supports Meta skills. Supported skills gain a chance to partially refund a portion of energy cost when triggering or invoking other skills. Vilenta's Propulsion Supports Spell Skills that fire Projectiles, causing increases and reductions to cast speed to also apply to Projectile speed. |
| Lightning Warp Lightning Warp Teleports you inside the target's body, causing it to violently explode. Highlights enemies that can be culled, and can only be used on these enemies or Ball Lightning projectiles. The target is destroyed, and the explosion deals Lightning Damage to surrounding enemies and creates Shocked Ground. | Unleash Supports Spells you cast yourself, making their effect reoccur when cast. Cannot support Channelling Skills or Skills with a Cooldown. Magnified Area II Supports any skill with an area of effect, making it larger at the cost of damage. Freeze Supports any skill that hits enemies, makit it more effective at Freezing enemies. Rapid Casting II Supports Spells, causing them to cast faster. Shock Conduction II Supports any skill that Hits enemies, giving it a chance to also Shock nearby enemies when you Shock an enemy. Always Shocks enemies which are Drenched. |
| Elemental Invocation Elemental Invocation While active, gains energy when you Freeze, Shock, or Ignite an enemy. Using the invocation once sufficient energy is gathered will consume the energy to trigger socketed Spells, and can trigger them multiple times if it has enough energy. | Capacitor Supports skills which Trigger other skills. Supported skills have significantly higher Maximum Energy. Comet Calls down a mass of ice from the sky, dealing high damage at the targeted location. Targeting close to you will cause you to jump back as you cast. Spell Cascade Supports Spells that affect an area around you or a target location, causing those spells to also target additional areas on either side of the target area, along a randomly chosen axis. Cannot support Channelling skills or Remote skills. Atalui's Bloodletting Supports any Skill, turning a portion of its Mana cost into a Life cost. Does not support Skills which reserve Spirit. Supported Skills Gain a portion of their Life cost as extra Physical Damage. Energy Retention Supports Meta skills. Supported skills gain a chance to partially refund a portion of energy cost when triggering or invoking other skills. |
| Elemental Weakness Elemental Weakness Curse all targets in an area after a short delay, lowering their Elemental Resistances. | Heightened Curse Supports curse skills, magnifying their power. Ritualistic Curse Supports Curse skills, causing them to cover a larger area but take longer to curse enemies Magnified Area II Supports any skill with an area of effect, making it larger at the cost of damage. Overabundance II Supports skills which can have a Limited number of effects active at once, increasing that Limit at the cost of their duration. Only applies to restrictions that use the word "Limit". Rapid Casting III Supports Spells, causing them to cast faster for each different Spell you've cast Recently. |
| Frost Bomb Frost Bomb Creates a pulsing Orb of Frost. Each pulse inflicts Cold Exposure on nearby Enemies. When the Orb's duration ends, it explodes, dealing Cold damage to surrounding Enemies. | Potent Exposure Supports Skills which apply Exposure to Enemies, increasing the effect of applied Exposure. Spell Echo Supports Spells that affect an area around you or a target location. Supported Spells echo, causing their effects to happen again after a short delay. Cannot support Channelling skills or Remote skills. Overabundance II Supports skills which can have a Limited number of effects active at once, increasing that Limit at the cost of their duration. Only applies to restrictions that use the word "Limit". Long Fuse II Supports Skills which have a Detonation Time, causing those Skills to have much higher Detonation Time and detonation damage. Rapid Casting III Supports Spells, causing them to cast faster for each different Spell you've cast Recently. |
| Cast on Elemental Ailment Cast on Elemental Ailment While active, gains Energy when you Freeze, Shock, or Ignite enemies, and triggers socketed spells on reaching Maximum Energy. | Living Bomb Plant a seed of Fire inside an enemy. Dealing enough damage to the enemy, or killing it outright, causes the seed to explode, dealing damage in an area and leaving behind a Fire Infusion Remnant. Comet Calls down a mass of ice from the sky, dealing high damage at the targeted location. Targeting close to you will cause you to jump back as you cast. Spell Cascade Supports Spells that affect an area around you or a target location, causing those spells to also target additional areas on either side of the target area, along a randomly chosen axis. Cannot support Channelling skills or Remote skills. Lifetap Supports any skill, turning a portion of its Mana cost into a Life cost. Does not support skills which reserve spirit. Rapid Casting III Supports Spells, causing them to cast faster for each different Spell you've cast Recently. |
| Entangle Entangle Conjures a rootbound fissure that crawls forward, damaging enemies in its path. While the fissure persists, vines lash out from it and attach to nearby enemeis, damaging and Slowing them. | Unleash Supports Spells you cast yourself, making their effect reoccur when cast. Cannot support Channelling Skills or Skills with a Cooldown. Magnified Area II Supports any skill with an area of effect, making it larger at the cost of damage. Kaom's Madness Supports Melee Attacks which create fissures in the ground, causing them to create many additional fissures at the cost of damage, attack speed, and area of effect. Shock Conduction II Supports any skill that Hits enemies, giving it a chance to also Shock nearby enemies when you Shock an enemy. Always Shocks enemies which are Drenched. Rapid Casting III Supports Spells, causing them to cast faster for each different Spell you've cast Recently. |
 Overwhelming Presence Overwhelming Presence Overwhelming Presence While active, enemies in your Presence are easier to Stun and inflict Elemental Ailments upon. | - |
| Skill | Support Gems |
|---|---|
| Demon Form Demon Form (12–25)% increased Cast Speed while in Demon Form;+(3–6) to Level of all Spell Skills while in Demon Form;Lose 0.5% of Life per second per Demonflame;Deal (7–18)% increased Spell damage per Demonflame | Second Wind III Supports skills with cooldowns, giving them extra uses of that cooldown and causing them to restore Life on use. Cannot support instant or triggered skills, or modify the skills of minions. |
| Sigil of Power Sigil of Power | Magnified Area II Supports any skill with an area of effect, making it larger at the cost of damage. Prolonged Duration II Supports any skill that has a duration, making that duration longer. |
| Spellslinger Spellslinger | Ball Lightning Fires a slow-moving projectile that repeatedly shoots bolts of lightning at nearby enemies. Multishot II Supports Projectile skills, making them fire extra Projectiles. Also lowers Attack and Cast speed of supported skills, as well as lessening their damage. Boundless Energy II Supports Meta Skills. Supported Skills generate Energy significantly faster. Energy Retention Supports Meta skills. Supported skills gain a chance to partially refund a portion of energy cost when triggering or invoking other skills. Vilenta's Propulsion Supports Spell Skills that fire Projectiles, causing increases and reductions to cast speed to also apply to Projectile speed. |
| Lightning Warp Lightning Warp Teleports you inside the target's body, causing it to violently explode. Highlights enemies that can be culled, and can only be used on these enemies or Ball Lightning projectiles. The target is destroyed, and the explosion deals Lightning Damage to surrounding enemies and creates Shocked Ground. | Unleash Supports Spells you cast yourself, making their effect reoccur when cast. Cannot support Channelling Skills or Skills with a Cooldown. Magnified Area II Supports any skill with an area of effect, making it larger at the cost of damage. Rising Tempest Supports Skills which deal Damage, raising Elemental Damage dealt for each Skill used Recently of a different Elemental type. Cannot support Minion Skills Shock Supports any skill that hits enemies, making it more likely to Shock. Ignite III Supports any skill that Hits enemies, making it more likely to Ignite and causing inflicted Ignites to deal their damage more quickly. |
 Flame Wall Flame Wall Flame Wall Creates a wall of fire in front of the character, which ignites everything within its area. Any projectiles fired through the wall by you and allies deal added fire damage and inflict ignite on hit. | Fortress II Supports skills that create walls in a line, causing them to be created in a circle instead but deal less Hit damage and have lowered Area of Effect. Spell Cascade Supports Spells that affect an area around you or a target location, causing those spells to also target additional areas on either side of the target area, along a randomly chosen axis. Cannot support Channelling skills or Remote skills. Fire Mastery Supports Fire skills, granting them an additional level. Compressed Duration II Supports any skill that has a duration, making that duration shorter. |
| Elemental Weakness Elemental Weakness Curse all targets in an area after a short delay, lowering their Elemental Resistances. | Heightened Curse Supports curse skills, magnifying their power. Ritualistic Curse Supports Curse skills, causing them to cover a larger area but take longer to curse enemies Magnified Area II Supports any skill with an area of effect, making it larger at the cost of damage. Cursed Ground Supports Curse skills. supported skills no longer have an activation delay, instead creating areas which Curse enemies so long as they are within them. |
| Frost Bomb Frost Bomb Creates a pulsing Orb of Frost. Each pulse inflicts Cold Exposure on nearby Enemies. When the Orb's duration ends, it explodes, dealing Cold damage to surrounding Enemies. | Rapid Casting III Supports Spells, causing them to cast faster for each different Spell you've cast Recently. Spell Echo Supports Spells that affect an area around you or a target location. Supported Spells echo, causing their effects to happen again after a short delay. Cannot support Channelling skills or Remote skills. Overabundance II Supports skills which can have a Limited number of effects active at once, increasing that Limit at the cost of their duration. Only applies to restrictions that use the word "Limit". |
| Elemental Invocation Elemental Invocation While active, gains energy when you Freeze, Shock, or Ignite an enemy. Using the invocation once sufficient energy is gathered will consume the energy to trigger socketed Spells, and can trigger them multiple times if it has enough energy. | Arc An arc of Lightning stretches from the caster to a targeted enemy and Chains on to other nearby enemies. Shocked enemies Hit release damaging pulses. Ricochet II Supports any Skill which creates Projectiles, giving those Projectiles a chance to Chain when impacting terrain. Lifetap Supports any skill, turning a portion of its Mana cost into a Life cost. Does not support skills which reserve spirit. Energy Retention Supports Meta skills. Supported skills gain a chance to partially refund a portion of energy cost when triggering or invoking other skills. |
| Cast on Elemental Ailment Cast on Elemental Ailment While active, gains Energy when you Freeze, Shock, or Ignite enemies, and triggers socketed spells on reaching Maximum Energy. | Arc An arc of Lightning stretches from the caster to a targeted enemy and Chains on to other nearby enemies. Shocked enemies Hit release damaging pulses. Sione's Temper Supports Projectile Spells. Supported Spells have an increasingly higher chance to fire many additional Projectiles in a circle, resetting when they do. Atalui's Bloodletting Supports any Skill, turning a portion of its Mana cost into a Life cost. Does not support Skills which reserve Spirit. Supported Skills Gain a portion of their Life cost as extra Physical Damage. Ricochet II Supports any Skill which creates Projectiles, giving those Projectiles a chance to Chain when impacting terrain. Energy Retention Supports Meta skills. Supported skills gain a chance to partially refund a portion of energy cost when triggering or invoking other skills. |
| Skill | Support Gems |
|---|---|
| Demon Form Demon Form (12–25)% increased Cast Speed while in Demon Form;+(3–6) to Level of all Spell Skills while in Demon Form;Lose 0.5% of Life per second per Demonflame;Deal (7–18)% increased Spell damage per Demonflame | Second Wind III Supports skills with cooldowns, giving them extra uses of that cooldown and causing them to restore Life on use. Cannot support instant or triggered skills, or modify the skills of minions. |
| Sigil of Power Sigil of Power | Magnified Area II Supports any skill with an area of effect, making it larger at the cost of damage. Prolonged Duration II Supports any skill that has a duration, making that duration longer. |
| Spellslinger Spellslinger | Ball Lightning Fires a slow-moving projectile that repeatedly shoots bolts of lightning at nearby enemies. Multishot II Supports Projectile skills, making them fire extra Projectiles. Also lowers Attack and Cast speed of supported skills, as well as lessening their damage. Boundless Energy II Supports Meta Skills. Supported Skills generate Energy significantly faster. Energy Retention Supports Meta skills. Supported skills gain a chance to partially refund a portion of energy cost when triggering or invoking other skills. Vilenta's Propulsion Supports Spell Skills that fire Projectiles, causing increases and reductions to cast speed to also apply to Projectile speed. |
| Lightning Warp Lightning Warp Teleports you inside the target's body, causing it to violently explode. Highlights enemies that can be culled, and can only be used on these enemies or Ball Lightning projectiles. The target is destroyed, and the explosion deals Lightning Damage to surrounding enemies and creates Shocked Ground. | Unleash Supports Spells you cast yourself, making their effect reoccur when cast. Cannot support Channelling Skills or Skills with a Cooldown. Magnified Area II Supports any skill with an area of effect, making it larger at the cost of damage. Rising Tempest Supports Skills which deal Damage, raising Elemental Damage dealt for each Skill used Recently of a different Elemental type. Cannot support Minion Skills Shock Supports any skill that hits enemies, making it more likely to Shock. Ignite III Supports any skill that Hits enemies, making it more likely to Ignite and causing inflicted Ignites to deal their damage more quickly. |
| Flame Wall Flame Wall Creates a wall of fire in front of the character, which ignites everything within its area. Any projectiles fired through the wall by you and allies deal added fire damage and inflict ignite on hit. | Fortress II Supports skills that create walls in a line, causing them to be created in a circle instead but deal less Hit damage and have lowered Area of Effect. Spell Cascade Supports Spells that affect an area around you or a target location, causing those spells to also target additional areas on either side of the target area, along a randomly chosen axis. Cannot support Channelling skills or Remote skills. Fire Mastery Supports Fire skills, granting them an additional level. Compressed Duration II Supports any skill that has a duration, making that duration shorter. |
| Elemental Weakness Elemental Weakness Curse all targets in an area after a short delay, lowering their Elemental Resistances. | Heightened Curse Supports curse skills, magnifying their power. Ritualistic Curse Supports Curse skills, causing them to cover a larger area but take longer to curse enemies Magnified Area II Supports any skill with an area of effect, making it larger at the cost of damage. Cursed Ground Supports Curse skills. supported skills no longer have an activation delay, instead creating areas which Curse enemies so long as they are within them. |
| Frost Bomb Frost Bomb Creates a pulsing Orb of Frost. Each pulse inflicts Cold Exposure on nearby Enemies. When the Orb's duration ends, it explodes, dealing Cold damage to surrounding Enemies. | Rapid Casting III Supports Spells, causing them to cast faster for each different Spell you've cast Recently. Spell Echo Supports Spells that affect an area around you or a target location. Supported Spells echo, causing their effects to happen again after a short delay. Cannot support Channelling skills or Remote skills. Overabundance II Supports skills which can have a Limited number of effects active at once, increasing that Limit at the cost of their duration. Only applies to restrictions that use the word "Limit". |
| Elemental Invocation Elemental Invocation While active, gains energy when you Freeze, Shock, or Ignite an enemy. Using the invocation once sufficient energy is gathered will consume the energy to trigger socketed Spells, and can trigger them multiple times if it has enough energy. | Fireball Launches a large ball of Fire which explodes on impact, creating a nova of smaller firebolts. Sione's Temper Supports Projectile Spells. Supported Spells have an increasingly higher chance to fire many additional Projectiles in a circle, resetting when they do. Atalui's Bloodletting Supports any Skill, turning a portion of its Mana cost into a Life cost. Does not support Skills which reserve Spirit. Supported Skills Gain a portion of their Life cost as extra Physical Damage. Ricochet II Supports any Skill which creates Projectiles, giving those Projectiles a chance to Chain when impacting terrain. Capacitor Supports skills which Trigger other skills. Supported skills have significantly higher Maximum Energy. |
| Cast on Elemental Ailment Cast on Elemental Ailment While active, gains Energy when you Freeze, Shock, or Ignite enemies, and triggers socketed spells on reaching Maximum Energy. | Fireball Launches a large ball of Fire which explodes on impact, creating a nova of smaller firebolts. Living Bomb Plant a seed of Fire inside an enemy. Dealing enough damage to the enemy, or killing it outright, causes the seed to explode, dealing damage in an area and leaving behind a Fire Infusion Remnant. Lifetap Supports any skill, turning a portion of its Mana cost into a Life cost. Does not support skills which reserve spirit. Energy Retention Supports Meta skills. Supported skills gain a chance to partially refund a portion of energy cost when triggering or invoking other skills. Boundless Energy II Supports Meta Skills. Supported Skills generate Energy significantly faster. |
Gem placement matters, so for the Comet variant, socket Living Bomb before Comet to ensure Comet activations are fire-infused.
This build revolves around triggering Cast on Elemental Ailment to trigger additional automated spell casts, and is designed in a way that you can freely change some of the support gems to use the skill that you want.
Spellslinger will strictly be used for energy generation and Lightning Warp triggers, so Ball Lightning and Multishot will be socketed here, as well as Boundless and Energy and Retention.
For other build variants that don't utilize Comet, Ricochet benefits this build a lot due to how often Cast on Elemental Ailment triggers, so it will be taken for variants that utilize skill projectiles.
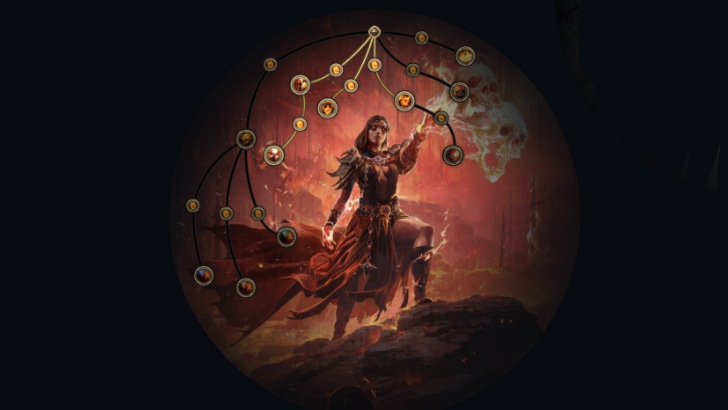
Comet Rain Infernalist Passive Tree
Passive Tree Progression
| Ascendancy Passive | |||
|---|---|---|---|
 |
|||
| Passive Nodes | |||
| Screenshots and Footage taken from Path of Building | |||
※ Legend: Red = Weapon Set I Green = Weapon Set 2
The build utilizes the Demon Form Ascendancy skill, so we will be taking Demonic Possession and Mastered Darkness to use Demon Form and remove the Demon Flame Stacks limit.
We will be taking utilizing elemental ailments to trigger our elemental spells for damage, so we will take passives such as Echoing Flames, Electric Amplification, and Stripped Defences.
We will be relying on Life Recoup to sustain Demon Form as well as our spell casts, so we will be taking key nodes such as Pliable Flesh, Loose Flesh, and Glazed Flesh.
Passive Skill Tree Guide and List of Passives
Jewels
Note: The modifiers listed are arranged according to priority.
 From Nothing Diamond From Nothing Diamond
|
Passives in Radius of Whispers of Doom Can Be Allocated Without Being Connected to Your Tree |
|---|---|
 Prism of Belief Diamond Prism of Belief Diamond
|
・+ Level of All Lightning Warp Skills |
 Controlled Metamorphosis Diamond Controlled Metamorphosis Diamond
|
・ Passives in Radius can be Allocated without being connected to your tree
・-19% to all Elemental Resistancess |
We will be utilizing three unique jewels to allocate additional passives without using too much points, so we will be using From Nothing and Controlled Metamorphosis in order to get passives such as Stormbreaker and Invocated Echoes.
Comet Rain Infernalist Playstyle
Mobbing Rotation
This will be your core rotation that will apply to all combat encounters, and what you will be utilizing for most encounters. Lightning Warp always requires a target in order for you to use it, so you can cast Lightning Warp in the direction of an enemy in order to start dealing damage.
- Cast Demon Form to start gaining stacks.
- Cast Ball Lightning in the direction of targets.
- Cast Lightning Warp on your Ball Lightning projectiles to trigger your cast on elemental ailment socketed spell.
Bossing Rotation
You will be utilizing your core rotation for bosses and tanky elites, with buffs and debuffs woven in for more damage.
- Cast Demon Form to start gaining stacks.
- Cast Sigil of Power for the buff.
- Use Elemental Weakness to lower enemy resistances.
- Use Entagle for additional Shock triggers.
- Cast Frost Bomb for the Elemental Exposure Debuff.
- Cast Ball Lightning in the direction of targets.
- Cast Lightning Warp on your Ball Lightning projectiles to trigger your cast on elemental ailment socketed spell.
Path of Exile 2 (PoE 2) Related Guides

0.4 Best Endgame Builds
| Rank | Build |
|---|---|
 |
|
 |
|
 |
|
 |
0.4 Leveling Builds
All Build Guides
| List of Builds by Class | |||||||||||
|---|---|---|---|---|---|---|---|---|---|---|---|
 Huntress Huntress |
 Mercenary Mercenary |
 Monk Monk |
|||||||||
 Witch Witch |
 Sorceress Sorceress |
 Warrior Warrior |
|||||||||
 Ranger Ranger |
 Druid Druid |
- | |||||||||
| Other Build Guides | 0.3 Leveling Builds | How to Make a Good Build | |||||||||
Witch Leveling Builds
Flame Wall Creates a wall of fire in front of the character, which ignites everything within its area. Any projectiles fired through the wall by you and allies deal added fire damage and inflict ignite on hit.
Flammability Curses all targets in an area after a short delay, lowering their Fire Resistance.
Raging Spirits While active, your Fire Spells will also summon Raging Spirits, which are short-lived flaming skulls that rush at nearby enemies and rapidly Attack them. Enemies will not directly engage these Minions, and can pass through them.
Skeletal Warrior Summons reviving Skeletal Warriors.
Pain Offering Impales a Skeleton on bone spike to send nearby Minions into a frenzy as long as the spike remains. The bone spike itself is a minion. If it dies, effect ends immediately.
Skeletal Cleric Summons Reviving Skeletal Clerics that heal other minions and revive fallen Skeletons.
Focus: Minions, Crowd Control, DoT |
|
UP |
Frost Bomb Creates a pulsing Orb of Frost. Each pulse inflicts Cold Exposure on nearby Enemies. When the Orb's duration ends, it explodes, dealing Cold damage to surrounding Enemies.
Contagion Afflicts a single enemy with a Debuff that deals Chaos Damage over time. If the enemy dies while affected by contagion, it and all other Chaos Damage over time Debuffs spread to other enemies and refresh their durations. Reanimating or detonating a corpse affected by contagion will cause the Minion or explosion to spread Contagion on hit.
Chaos Bolt Fires a burst of chaos energy at the target.
Skeletal Warrior Summons reviving Skeletal Warriors.
Unearth Raises spikes of bone from the earth in front of you. The bones of Corpses in the area are ripped out and reassembled into short-lived Bone Construct Minions that fight for you.
Essence Drain Fires a Projectile that applies a powerful Chaos damage over time debuff to enemy hits.
Despair Curses all targets in an area after a short delay, lowering their Chaos Resistance.
Dark Effigy Raises a Totem that bombards enemies afflicted by Chaos damage over time Debuffs.
Blasphemy Turns socketed Curse skills into vile Auras, applying their effects to all nearby enemies.
Withering Presence While active, periodically Withers enemies in your Presence.
Ravenous Swarm While active and enemies are present, swarms of insects emerge from your body to pursue nearby enemies. The Swarms are untargetable Minions that Attack and Poison enemies.
Focus: AoE, Chaos, DoT |
Witch Endgame Builds
Flame Wall Creates a wall of fire in front of the character, which ignites everything within its area. Any projectiles fired through the wall by you and allies deal added fire damage and inflict ignite on hit.
Raging Spirits While active, your Fire Spells will also summon Raging Spirits, which are short-lived flaming skulls that rush at nearby enemies and rapidly Attack them. Enemies will not directly engage these Minions, and can pass through them.
Skeletal Arsonist Activate to summon bomb-throwing, Reviving Skeletal Arsonists taht can detonate other minions on Command.
Pain Offering Impales a Skeleton on bone spike to send nearby Minions into a frenzy as long as the spike remains. The bone spike itself is a minion. If it dies, effect ends immediately.
Detonate Dead Causes a Corpse to violently explode, damaging surrounding enemies.
Vulnerability Curses all targets in an area after a short delay, making Hits against them ignore a portion of their Armour.
Skeletal Brute Summons hard-hitting, Reviving Skeletal Brutes that can Stun Primed enemies.
Skeletal Cleric Summons Reviving Skeletal Clerics that heal other minions and revive fallen Skeletons.
Focus: Minions, Crowd Control, DoT |
|
Bonestorm Channel to conjure a swarm of bone spikes in the air, then release to fire at the enemies and explode. Shrapnel Impales enemies Hit, causing subsequent Attack Hits against those targets to deal Extra Damage. Consumes your Power Charge to cause much larger explosions.
Vulnerability Curses all targets in an area after a short delay, making Hits against them ignore a portion of their Armour.
Bone Cage Raises a ring of bone spikes around you. The spikes are destroyed when enemies touch them, damaging and Pinning those enemies.
Blasphemy Turns socketed Curse skills into vile Auras, applying their effects to all nearby enemies.
Life Remnants 25% chance to spawn a Remnant on killing an enemy;Spawn a Remnant on Critically Hitting a target, no more than once every 2 seconds;Each Remnant grants X Life
Focus: High Single Target Damage |
|
Arctic Armour Conjures an icy barrier that gains stages overtime. While the barrier has stages, Melee Attacks that hit you will remove a stage to cause a burst of ice that deals Cold Spell damage to the attacker.
Ice Nova A nova of ice expands from you, Knocking Back enemies based on how close they are to you. Casting Ice Nova targeting near a Frostbolt Projectile will cause it to originate from the Frostbolt insead of you, and cause more Freeze buildup.
Solar Orb Creates a fiery Orb that periodically releases fiery pulses. Enemies that are very close to the Orb are Ignited.
Flammability Curses all targets in an area after a short delay, lowering their Fire Resistance.
Flameblast Channels to build destructive energy around you or a targeted Solar Orb. Releasing the energy causes a devastating explosion that is larger and more intense the longer you channelled for.
Grim Feast Feeds on corpses to bolster your Energy Shield. While active, enemies and Reviving Minions that die in your Presence have a chance to drop Grim Remnants. Picking up a Grim Remnant grants you Energy Shield which can Overflow maximum Energy Shield.
Focus: Fast Clear, AoE |
|
Frost Wall Creates a Wall of Ice Crystals which holds back enemies. The Crystals explode if sufficiently damaged, orif pushed hard enough, damaging nearby enemies..
Grim Feast Feeds on corpses to bolster your Energy Shield. While active, enemies and Reviving Minions that die in your Presence have a chance to drop Grim Remnants. Picking up a Grim Remnant grants you Energy Shield which can Overflow maximum Energy Shield.
Detonate Dead Causes a Corpse to violently explode, damaging surrounding enemies.
Vulnerability Curses all targets in an area after a short delay, making Hits against them ignore a portion of their Armour.
Skeletal Brute Summons hard-hitting, Reviving Skeletal Brutes that can Stun Primed enemies.
Skeletal Cleric Summons Reviving Skeletal Clerics that heal other minions and revive fallen Skeletons.
Soul Offering Impales a Skeleton on a bone spike, granting you a powerful Spell Damage Buff as long as the spike remains. Does not affect your minions. The bone spike itself is a Minion. If it dies, the effect ends immediately.
Sacrifice While active, your undead Reviving Minions can be used in place of Corpses by your skills, but your Minions Revive more slowly.
Focus: High Damage, Fast Clear, Minions |
|
Flame Wall Creates a wall of fire in front of the character, which ignites everything within its area. Any projectiles fired through the wall by you and allies deal added fire damage and inflict ignite on hit.
Skeletal Warrior Summons reviving Skeletal Warriors.
Skeletal Arsonist Activate to summon bomb-throwing, Reviving Skeletal Arsonists taht can detonate other minions on Command.
Raise Zombie Consumes a Corpse or Power Charge to create a short-lived zombie. Zombies created from Power Charges are empowered.
Pain Offering Impales a Skeleton on bone spike to send nearby Minions into a frenzy as long as the spike remains. The bone spike itself is a minion. If it dies, effect ends immediately.
Skeletal Cleric Summons Reviving Skeletal Clerics that heal other minions and revive fallen Skeletons.
Skeletal Frost Mage Summons reviving Skeletal Frost Mages that can be commanded to cast Icy Explosions
Profane Ritual Marks a Corpse with a profane rune, dealing Chaos damage over time to nearby enemies. When the ritual is complete the corpse is consumed and you gain a power charge.
Despair Curses all targets in an area after a short delay, lowering their Chaos Resistance.
Bone Offering Impales a Skeleton on a bone spike to shield your Minions while the spike remains. The shield absorbs all damage from the next hit each Minion takes, then explodes. The bone spike itself is a Minion, and shields itself. If it dies, shields on your other Minions disappear.
Focus: Minion, Chaos, AoE, Curse |
|
Frost Bomb Creates a pulsing Orb of Frost. Each pulse inflicts Cold Exposure on nearby Enemies. When the Orb's duration ends, it explodes, dealing Cold damage to surrounding Enemies.
Lightning Warp Teleports you inside the target's body, causing it to violently explode. Highlights enemies that can be culled, and can only be used on these enemies or Ball Lightning projectiles. The target is destroyed, and the explosion deals Lightning Damage to surrounding enemies and creates Shocked Ground.
Elemental Invocation While active, gains energy when you Freeze, Shock, or Ignite an enemy. Using the invocation once sufficient energy is gathered will consume the energy to trigger socketed Spells, and can trigger them multiple times if it has enough energy.
Cast on Elemental Ailment While active, gains Energy when you Freeze, Shock, or Ignite enemies, and triggers socketed spells on reaching Maximum Energy.
Elemental Weakness Curse all targets in an area after a short delay, lowering their Elemental Resistances.
Entangle Conjures a rootbound fissure that crawls forward, damaging enemies in its path. While the fissure persists, vines lash out from it and attach to nearby enemeis, damaging and Slowing them.
Demon Form (12–25)% increased Cast Speed while in Demon Form;+(3–6) to Level of all Spell Skills while in Demon Form;Lose 0.5% of Life per second per Demonflame;Deal (7–18)% increased Spell damage per Demonflame
Focus: AoE, Mobbing, Elemental Ailment, Demon Form |
|
Contagion Afflicts a single enemy with a Debuff that deals Chaos Damage over time. If the enemy dies while affected by contagion, it and all other Chaos Damage over time Debuffs spread to other enemies and refresh their durations. Reanimating or detonating a corpse affected by contagion will cause the Minion or explosion to spread Contagion on hit.
Essence Drain Fires a Projectile that applies a powerful Chaos damage over time debuff to enemy hits.
Bonestorm Channel to conjure a swarm of bone spikes in the air, then release to fire at the enemies and explode. Shrapnel Impales enemies Hit, causing subsequent Attack Hits against those targets to deal Extra Damage. Consumes your Power Charge to cause much larger explosions.
Despair Curses all targets in an area after a short delay, lowering their Chaos Resistance.
Dark Effigy Raises a Totem that bombards enemies afflicted by Chaos damage over time Debuffs.
Blasphemy Turns socketed Curse skills into vile Auras, applying their effects to all nearby enemies.
Withering Presence While active, periodically Withers enemies in your Presence.
Blink Replaces your dodge roll with a short-cooldown Spell that allows you to tunnel through space, instantly reappearing a medium distance away.
Convalescence While active, grants a skill that you can use to instantly begin Recharging Energy Shield and gain Buff for a duration that prevents Recharge being interrupted. The Buff is removed at maximum Energy Shield and the skill cannot be used while Energy Shield is full.
Focus: Chaos, AoE, Curse, Totem |
|
Spark Launches a spray of sparking projectiles that travel erratically along the ground until they hit an enemy or expire.
Orb of Storms Creates an Orb of electricity that fires Chaining Lightning bolts at nearby enemies.
Blink Replaces your dodge roll with a short-cooldown Spell that allows you to tunnel through space, instantly reappearing a medium distance away.
Cast on Critical While active, gains energy when you Critically Hit enemies and triggers socketed spells on reaching maximum energy.
Convalescence While active, grants a skill that you can use to instantly begin Recharging Energy Shield and gain Buff for a duration that prevents Recharge being interrupted. The Buff is removed at maximum Energy Shield and the skill cannot be used while Energy Shield is full.
Life Remnants 25% chance to spawn a Remnant on killing an enemy;Spawn a Remnant on Critically Hitting a target, no more than once every 2 seconds;Each Remnant grants X Life
Focus: Lightning, Critical Hit, Life Leech |
|
Orb of Storms Creates an Orb of electricity that fires Chaining Lightning bolts at nearby enemies.
Lightning Warp Teleports you inside the target's body, causing it to violently explode. Highlights enemies that can be culled, and can only be used on these enemies or Ball Lightning projectiles. The target is destroyed, and the explosion deals Lightning Damage to surrounding enemies and creates Shocked Ground.
Ball Lightning Fires a slow-moving projectile that repeatedly shoots bolts of lightning at nearby enemies.
Blasphemy Turns socketed Curse skills into vile Auras, applying their effects to all nearby enemies.
Cast on Critical While active, gains energy when you Critically Hit enemies and triggers socketed spells on reaching maximum energy.
Convalescence While active, grants a skill that you can use to instantly begin Recharging Energy Shield and gain Buff for a duration that prevents Recharge being interrupted. The Buff is removed at maximum Energy Shield and the skill cannot be used while Energy Shield is full.
Demon Form (12–25)% increased Cast Speed while in Demon Form;+(3–6) to Level of all Spell Skills while in Demon Form;Lose 0.5% of Life per second per Demonflame;Deal (7–18)% increased Spell damage per Demonflame
Focus: Lightning, AoE, Cast on Critical |
|
Ember Fusillade Conjures a blazing Ember that hovers around you. After a short duration, the Ember launches at the enemy, dealing fire damage in an area on impact. Recasting the spess resets the duration for all active Embers. Multiple Embers fired in the same Fusillade will attempt to target different enemies.
Fireball Launches a large ball of Fire which explodes on impact, creating a nova of smaller firebolts.
Despair Curses all targets in an area after a short delay, lowering their Chaos Resistance.
Withering Presence While active, periodically Withers enemies in your Presence.
Time of Need Invokes divine blessings, periodically healing you and removing Curses and Elemental Ailments from you.
Cast on Critical While active, gains energy when you Critically Hit enemies and triggers socketed spells on reaching maximum energy.
Convalescence While active, grants a skill that you can use to instantly begin Recharging Energy Shield and gain Buff for a duration that prevents Recharge being interrupted. The Buff is removed at maximum Energy Shield and the skill cannot be used while Energy Shield is full.
Siphon Elements While active, has a chance to create an Infusion Remnant when you Freeze, Shock, or Ignite a target.
Living Bomb Plant a seed of Fire inside an enemy. Dealing enough damage to the enemy, or killing it outright, causes the seed to explode, dealing damage in an area and leaving behind a Fire Infusion Remnant.
Life Remnants 25% chance to spawn a Remnant on killing an enemy;Spawn a Remnant on Critically Hitting a target, no more than once every 2 seconds;Each Remnant grants X Life
Focus: Chaos, Critical, Fire |
|
Frost Bomb Creates a pulsing Orb of Frost. Each pulse inflicts Cold Exposure on nearby Enemies. When the Orb's duration ends, it explodes, dealing Cold damage to surrounding Enemies.
Orb of Storms Creates an Orb of electricity that fires Chaining Lightning bolts at nearby enemies.
Bonestorm Channel to conjure a swarm of bone spikes in the air, then release to fire at the enemies and explode. Shrapnel Impales enemies Hit, causing subsequent Attack Hits against those targets to deal Extra Damage. Consumes your Power Charge to cause much larger explosions.
Vulnerability Curses all targets in an area after a short delay, making Hits against them ignore a portion of their Armour.
Bone Cage Raises a ring of bone spikes around you. The spikes are destroyed when enemies touch them, damaging and Pinning those enemies.
Cast on Critical While active, gains energy when you Critically Hit enemies and triggers socketed spells on reaching maximum energy.
Life Remnants 25% chance to spawn a Remnant on killing an enemy;Spawn a Remnant on Critically Hitting a target, no more than once every 2 seconds;Each Remnant grants X Life
Focus: Reap, Physical, Burst |
|
NEW |
Frost Bomb Creates a pulsing Orb of Frost. Each pulse inflicts Cold Exposure on nearby Enemies. When the Orb's duration ends, it explodes, dealing Cold damage to surrounding Enemies.
Spark Launches a spray of sparking projectiles that travel erratically along the ground until they hit an enemy or expire.
Frost Wall Creates a Wall of Ice Crystals which holds back enemies. The Crystals explode if sufficiently damaged, orif pushed hard enough, damaging nearby enemies..
Skeletal Cleric Summons Reviving Skeletal Clerics that heal other minions and revive fallen Skeletons.
Soul Offering Impales a Skeleton on a bone spike, granting you a powerful Spell Damage Buff as long as the spike remains. Does not affect your minions. The bone spike itself is a Minion. If it dies, the effect ends immediately.
Siphon Elements While active, has a chance to create an Infusion Remnant when you Freeze, Shock, or Ignite a target.
Elemental Weakness Curse all targets in an area after a short delay, lowering their Elemental Resistances.
Life Remnants 25% chance to spawn a Remnant on killing an enemy;Spawn a Remnant on Critically Hitting a target, no more than once every 2 seconds;Each Remnant grants X Life
Focus: Cold, FIre, CoC |
NEW |
Berserk While active, strengthens your Rage and grants you Life Leech based on your Rage, but causes you to lose Life while Raging.
Lunar Blessing Shapeshift into a Werewolf and offer your Rage to the moon to receive a blessing, gaining bonus Cold damage, Attack speed and movement speed for yourself and any Wolf Minions you have from Wolf Pack or Predator's Mark. Spends all Rage to extend the Buff's duration. While the Buff is active, your WerewolfAttacks call down Moonbeams on Hit.
Cross Slash Shapeshift into a Werewolf and leap backwards as you gouge the ground with both claws. Hitting a Marked enemy with both gouges will Activate the Mark and cause an additional shockwave. Ice Fragments will be pulled into the location where the gouges cross and explode immediately. This skill can be used while using other skills to interrupt them.
Ferocious Roar Shapeshift into a Bear and roar in defiance, immediately gaining Rage if there are enemies nearby and Empowering subsequent Attacks to Break Armour. Alternatively, socketing a human-form Warcry into this Skill triggers that Warcry instead, and augments its damage and area. This Skill's cooldown can be bypassed by expending an Endurance Charge.
Pounce Shapeshift into a Werewolf and leap to a target location, damaging enemies in an area around where you land. Predator's Mark will be Triggered targetting the highest Rarity enemie Hit, or if a Mark gem is socketed into this Skill, that Mark will be Triggered instead. Using this skill allows any Wolf Minions you have to leap immediately.
Wolf Pack Activate to summon a pack of Wolf Companions. The pack treated as a single Companion for effects that count or limit Companions, regardless XIV of the number of Wolves in the pack.
Focus: Minions, Wolf, Rage |
Witch Class and Ascendancy Guides
| Base Class | ||
|---|---|---|
| Ascendancies | ||
Author

PoE 2 0.4 Witch Build - Comet Rain Infernalist
Rankings
- We could not find the message board you were looking for.

Gaming News


![Star Savior Review [First Impressions] | Engaging, Entertaining, and Expensive](https://img.game8.co/4447603/8f500e9bf666bdb8adb1af478e9dfdbd.png/thumb)
![Death Stranding 2: On The Beach [PC] Review | A Port That Delivers](https://img.game8.co/4447392/15310a0c9aa1b6843bb713b2ea216930.jpeg/thumb)
Popular Games

Genshin Impact Walkthrough & Guides Wiki
Umamusume: Pretty Derby Walkthrough & Guides Wiki
Pokemon Pokopia Walkthrough & Guides Wiki
Honkai: Star Rail Walkthrough & Guides Wiki
Monster Hunter Stories 3: Twisted Reflection Walkthrough & Guides Wiki
Arknights: Endfield Walkthrough & Guides Wiki
Wuthering Waves Walkthrough & Guides Wiki
Zenless Zone Zero Walkthrough & Guides Wiki
Pokemon TCG Pocket (PTCGP) Strategies & Guides Wiki
Monster Hunter Wilds Walkthrough & Guides Wiki


Recommended Games
Fire Emblem Heroes (FEH) Walkthrough & Guides Wiki
Diablo 4: Vessel of Hatred Walkthrough & Guides Wiki
Cyberpunk 2077: Ultimate Edition Walkthrough & Guides Wiki
Yu-Gi-Oh! Master Duel Walkthrough & Guides Wiki
Super Smash Bros. Ultimate Walkthrough & Guides Wiki
Pokemon Brilliant Diamond and Shining Pearl (BDSP) Walkthrough & Guides Wiki
Elden Ring Shadow of the Erdtree Walkthrough & Guides Wiki
Monster Hunter World Walkthrough & Guides Wiki
The Legend of Zelda: Tears of the Kingdom Walkthrough & Guides Wiki
Persona 3 Reload Walkthrough & Guides Wiki


All rights reserved
© 2010 - 2024 Grinding Gear Games
The copyrights of videos of games used in our content and other intellectual property rights belong to the provider of the game.
The contents we provide on this site were created personally by members of the Game8 editorial department.
We refuse the right to reuse or repost content taken without our permission such as data or images to other sites.
How you putt two the same skill support concettated effect? I cant putt this in my build? And i cant putt martial tempo to flammabale