PoE 2 0.4 Warrior Build - Whirling Assault Titan
Latest: 0.5.0 Release Date
☆ Fate of the Vaal ▶︎ The Last of the Druids
┗ Bonded Mods | 0.4 Mystery Box
★ Druid: Class Overview | Builds
☆ NEW: Disciple of Varashta Ascendancy!
★ Best Class | Best Builds | Leveling Builds
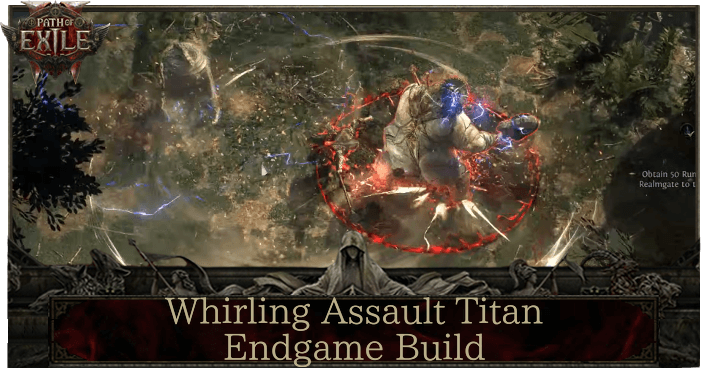
This is a Whirling Assault Titan Warrior endgame build for mapping in Path of Exile 2 (PoE 2)'s The Last of the Druids Update. Check out the Whirling Assault Titan Warrior endgame build, including its gear, socketables, skills, and playstyle!
List of Contents
Whirling Assault Titan Build Summary
ilnino-gaming's Whirling Assault Titan Build
This is a Whirling Assault Titan build for 0.4.0 created by ilnino-gaming. The video above features a full rundown, explanation, and demonstration of the build.
Make sure to check out ilnino-gaming's official Youtube Channel for more builds and content!
Whirling Assault Titan Warrior Build
The Whirling Assault Titan focuses on continuously executing Whirling Assault to deal high AoE Physical Damage. By using the Titan's natural affinity for stacking Armour, become a walking tank and easily clear enemy packs.
| Date | Changes |
|---|---|
| 01-07-2026 | Created Whirling Assault Titan build for endgame. |
Whirling Assault Titan Equipment
| Gear | Modifiers |
|---|---|
 Lunar Quarterstaff Lunar Quarterstaff Lunar Quarterstaff Stats:
Damage - 50-103 Critical Chance - 10% Attacks Per Second - 1.50 Requirements: Level - 72 Dexterity - 115 Intelligence - 46 (Weapon) |
・Increased Physical Damage
・+ to Level of All Attack Skills ・Gain % of Damage as Extra Physical Damage ・Increased Attack Speed |
 Paragon Greathelm Paragon Greathelm Paragon Greathelm Stats:
Armor - 292 Requirements: Level - 75 Strength - 107 (Helm) |
・Increased Armour
・Increased Maximum Life ・Elemental Resistances ・Armour also applies to Elemental Damage ・Increased Rarity of Items Found |
 Soldier Cuirass Soldier Cuirass Soldier Cuirass Stats:
Armor - 534 Requirements: Level - 65 Strength - 121 (Body Armor) |
・Armour also applies to Elemental Damage
・Increased Armour ・Hits Against You have Reduced Critical Damage Bonus ・Elemental Resistances |
 Massive Mitts Massive Mitts Massive Mitts Stats:
Armor - 158 Requirements: Level - 80 Strength - 101 (Gloves) |
・Armour also applies to Elemental Damage
・+ to All Melee Skills ・Dexterity ・Increased Maximum Life ・Increased Flat Damage |
 Vaal Greaves Vaal Greaves Vaal Greaves Stats:
Armor - 219 Requirements: Level - 75 Strength - 101 (Boots) |
・Increased Movement Speed
・Increased Armour ・Increased Maximum Life ・Armour also applies to Elemental Damage ・Increased Rarity of Items Found ・Elemental Resistances |
 Gold Amulet Gold Amulet Gold Amulet Requirements:
Level - 35 Implicit:12-20% increased Rarity of Items found (Amulet) |
・+ to Level of all Melee Skills
・Increased Rarity of Items Found ・Dexterity ・Increased Maximum Health |
 Ruby Ring Ruby Ring Ruby Ring Requirements:
Level - 8 Implicit:+20-30% to Fire Resistance (Ring 1) |
・Increased Flat Physical Damage
・Increased Rarity of Items Found ・Increased Maximum Life ・Elemental Resistances |
 Prismatic Ring Prismatic Ring Prismatic Ring Requirements:
Level - 35 Implicit:7-10% to all Elemental Resistances (Ring 2) |
・Leech Physical Attack Damage as Life
・Increased Flat Physical Damage ・Increased Rarity of Items Found ・Elemental Resistances ・Increased Maximum Life |
 Ultimate Life Flask Ultimate Life Flask Ultimate Life Flask Stats:
Flask Type - Life Recovered Life - 920 Charge Per Use - 10 Total Charges - 75 Duration - 3 sec. (Life Flask) |
・Increased Recovery Rate
・Recover Charges per Second |
 Ultimate Mana Flask Ultimate Mana Flask Ultimate Mana Flask Stats:
Flask Type - Mana Recovered Mana - 310 Charge Per Use - 10 Total Charges - 75 Duration - 3 sec. (Mana Flask) |
・Increased Recovery Rate
・Increased Charges Gained |
Weapons
This build specifically uses a Quarterstaff to spam your main damage source, Whirling Assault. Focus on getting as much Physical Damage as possible to maximize your DPS, then Attack Speed to continuously execute Whirling Assault.
List of Weapons
Armor and Accessories
The Armour applies to Elemental Damage modifier is a vital part of this build's survivability. The Titan class has access to numerous passive nodes related to Armour, making it easier to have high elemental resistances and physical damage mitigation.
Lastly, having the Hits against you have reduced Critical Damage Bonus also synergizes well with the Blade Catcher node, making enemy critical hits deal significantly less damage.
| List of Armors | List of Accessories |
Runes and Soul Cores
| Equipment | Sockets |
|---|---|
| Weapon | |
| Armor |
Slot in Greater Iron Runes on your Quarterstaff to increase your Physical Damage, which is your primary damage type. For your armour, you can use Soul Core of Tacati for Chaos Resistance since it is the most difficult resistance to cap out. Otherwise, feel free to use any of the other elemental resistance runes to balance out your stats.
| List of Runes | List of Soul Cores |
Belts and Charms
| Belt Modifiers | |||||
|---|---|---|---|---|---|
 Plate Belt Plate Belt Plate Belt Requirements:
Level - 24 Implicit:+100-140 to Armour |
・Increased Armour
・Increased Maximum Life ・Elemental Resistances |
||||
| Charm Options | |||||
 Silver Charm Silver Charm
|
 Thawing Charm Thawing Charm
|
 Stone Charm Stone Charm
|
|||
You only need a simple belt with as much Armour, Maximum Life, and Elemental Resistances as you can get. Make sure it can open all 3 Charm Slots because the charms mentioned above all help deal with enemy crown control.
The charms help mitigate Slows, Freeze, and Stun, which can all greatly hinder your movement and leave you vulnerable to fatal damage. Aim to get modifiers such as increased duration and increased charges for more consistent and reliable use of charms.
| List of Belts | List of Charms |
Whirling Assault Titan Skills
All Active and Persistent Skills
| Skill | Support Gems |
|---|---|
 Whirling Assault Whirling Assault Whirling Assault Advance while hitting enemies around you with a series of spinning strikes.
|
Heavy Swing Supports Melee Attacks, boosting their Physical damage at the cost of Attack Speed.
Rageforged II Supports any damaging skill that you use or trigger yourself, causing it to consume Rage to deal more damage, with a chance to skip consuming Rage while still benefitting as though it had. If you don't have enough Rage to consume, the damage bonus will not apply.
Lightning Attunement Supports attacks, causing them to gain Lightning Damage but deal less Cold and Fire Damage.
Uul-Netol's Embrace Supports Skills that can cause Damaging Hits, granting extra Chaos damage and causing Chaos damage to Break Armour.
Magnified Area II Supports any skill with an area of effect, making it larger at the cost of damage.
|
 Tempest Bell Tempest Bell Tempest Bell Build Combo by successfully Striking Enemies with other skills. After reaching maximum Combo, use this skill to cause the Bell on your staff to grow to massive size as you drop it on the ground. The Bell damages enemies on impact and can be Hit by your skills, creating a damaging shockwave. Elemental Ailments applied to the Bell cause its shockwaves to deal extra damage of the corresponding type, and Hits which would have caused Knockback increase the area of effect of the shockwaves.
|
Heavy Swing Supports Melee Attacks, boosting their Physical damage at the cost of Attack Speed.
Heft Supports Skills which deal damage, increasing the maximum Physical Damage of their Hits.
Rageforged II Supports any damaging skill that you use or trigger yourself, causing it to consume Rage to deal more damage, with a chance to skip consuming Rage while still benefitting as though it had. If you don't have enough Rage to consume, the damage bonus will not apply.
Cold Attunement Supports attacks, causing them to gain Cold Damage but deal less Fire and Lightning Damage.
Magnified Area II Supports any skill with an area of effect, making it larger at the cost of damage.
|
 Shattering Palm Shattering Palm Shattering Palm Dash to an enemy and strike them with an unarmed attack that manifests a wave of cold, coating nearby enemies in shards of Ice. Dealing enough damage to these enemies will shatter the shards, causing an icy explosion that deals Attack Damage. This skill always strikes with your bare fist, even if you have a quarterstaff equipped.
|
Ancestral Call II Supports Strikes you use yourself, providing a powerful Ancestral Boost every few seconds. Cannot Support Channelled Skills and does not modify Skills used by Minions.
Cold Attunement Supports attacks, causing them to gain Cold Damage but deal less Fire and Lightning Damage.
Cold Penetration Supports any skill that Hits enemies, making those Hits Penetrate enemy Cold resistance.
Rapid Attacks II Supports Attacks, causing them to Attack faster.
Magnified Area II Supports any skill with an area of effect, making it larger at the cost of damage.
|
 Eternal Rage Eternal Rage Eternal Rage While active, you constantly regenerate Rage.
|
Uhtred's Exodus Supports Skills which can gain levels, granting them many additional levels provided no other supports are used with the supported Skill. Does not support skills which do not have levels.
|
 Vaulting Impact Vaulting Impact Vaulting Impact Leaps forward and Slams the ground, sending out a Stunning shockwave that is especially potent against Dazed enemies.
|
Rapid Attacks III Supports Attacks, causing them to Attack faster at the cost of Damage.
|
This build focuses solely on boosting your damage with Whirling Assault. Eternal Rage provides consistent Rage generation for Whirling Assault to consume, dealing more damage. Additionally, Uul-Netol's Embrace has the unique ability to convert your Physical Damage to Chaos Damage and allows you to break Armour with Chaos Damage.
Tempest Bell is used as a secondary source of damage. Applying Elemental Ailments to the bell further increases its damage, which is why we slot in Lightning Attunement in Whirling Assault.
Lastly, Shattering Palm and Vaulting Impact are used mostly for movement, and are not as relevant to maximizing damage.
Whirling Assault Titan Passive Tree
Passive Tree Progression
| Ascendency Passive Nodes | |||
|---|---|---|---|
 |
|||
| Passive Nodes | |||
| Screenshot and video taken from Path of Building | |||
※ Legend: Red = Weapon Set I | Green = Weapon Set II
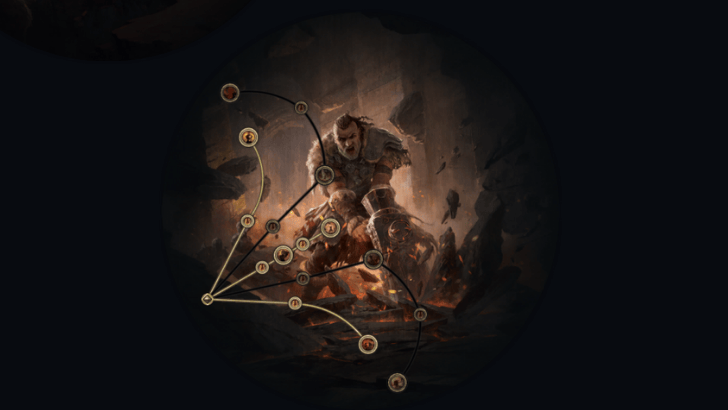
For damage, focus on alloting nodes that provide Critical Hit Chance/Damage Bonus, Stun Buildup, Atack Area Damage, and Attack Speed. This ensures that your Whirling Assault can reliably defeat or stun all enemies within your wide range.
For defense, invest into Armour nodes such as Sturdy Metal, Blade Catcher, and Made to Last. By stacking Armour and having it apply to Elemental Damage with armour modifiers, you can easily become extremely tanky.
Make sure to invest into Blood Magic since it is much easier to sustain your HP rather than mana to keep using Whirling Assault.
Passive Skill Tree Guide and List of Passives
Jewels
Note: The modifiers listed are arranged according to priority.
 Grand Spectrum Ruby Grand Spectrum Ruby
|
・Increased Maximum Life per socketed Grand Spectrum |
|---|---|
 Grand Spectrum Sapphire Grand Spectrum Sapphire
|
・Increased Elemental Resistances per socketed Grand Spectrum |
 Emerald Emerald
|
・Increased Critical Hit Chance
・Increased Damage with Quarterstaves |
The Grand Spectrum Ruby and Grand Spectrum Sapphire pushes you to use at least 3 Grand Spectrum Jewels to maximize their effects. If you have the max number of Grand Spectrum Jewels socketed, it can provide substantial Maximum Life and Elemental Resistances, improving your survivability.
You may also use Emeralds as additions to your Critical Hit Chance, Critical Damage Bonus, and generic damage boosts.
Whirling Assault Titan Playstyle and Skill Rotation
Mobbing and Bossing Rotation
Your skill rotation revolves around using Whirlwind Assault as your main source of damage The rotation is as follows:
- Engage incoming enemy packs with Whirling Assault.
- Place Tempest Bell for additional damage.
- Continue spamming Whirling Assault
- Use Shattering Palm to move to another enemy pack if needed.
- Use Vaulting Impact to jump over terrain if needed.
Path of Exile 2 Related Guides

0.4 Best Endgame Builds
| Rank | Build |
|---|---|
 |
|
 |
|
 |
|
 |
0.4 Leveling Builds
All Build Guides
| List of Builds by Class | |||||||||||
|---|---|---|---|---|---|---|---|---|---|---|---|
 Huntress Huntress |
 Mercenary Mercenary |
 Monk Monk |
|||||||||
 Witch Witch |
 Sorceress Sorceress |
 Warrior Warrior |
|||||||||
 Ranger Ranger |
 Druid Druid |
- | |||||||||
| Other Build Guides | 0.3 Leveling Builds | How to Make a Good Build | |||||||||
Comment
Author
PoE 2 0.4 Warrior Build - Whirling Assault Titan
improvement survey
03/2026
improving Game8's site?

Your answers will help us to improve our website.
Note: Please be sure not to enter any kind of personal information into your response.

We hope you continue to make use of Game8.
Rankings
Gaming News
Popular Games

Genshin Impact Walkthrough & Guides Wiki

Honkai: Star Rail Walkthrough & Guides Wiki

Umamusume: Pretty Derby Walkthrough & Guides Wiki

Pokemon Pokopia Walkthrough & Guides Wiki

Resident Evil Requiem (RE9) Walkthrough & Guides Wiki

Monster Hunter Wilds Walkthrough & Guides Wiki

Wuthering Waves Walkthrough & Guides Wiki

Arknights: Endfield Walkthrough & Guides Wiki

Pokemon FireRed and LeafGreen (FRLG) Walkthrough & Guides Wiki

Pokemon TCG Pocket (PTCGP) Strategies & Guides Wiki
Recommended Games

Fire Emblem Heroes (FEH) Walkthrough & Guides Wiki

Diablo 4: Vessel of Hatred Walkthrough & Guides Wiki

Yu-Gi-Oh! Master Duel Walkthrough & Guides Wiki

Super Smash Bros. Ultimate Walkthrough & Guides Wiki

Pokemon Brilliant Diamond and Shining Pearl (BDSP) Walkthrough & Guides Wiki

Elden Ring Shadow of the Erdtree Walkthrough & Guides Wiki

Monster Hunter World Walkthrough & Guides Wiki

The Legend of Zelda: Tears of the Kingdom Walkthrough & Guides Wiki

Persona 3 Reload Walkthrough & Guides Wiki

Cyberpunk 2077: Ultimate Edition Walkthrough & Guides Wiki
All rights reserved
© 2010 - 2024 Grinding Gear Games
The copyrights of videos of games used in our content and other intellectual property rights belong to the provider of the game.
The contents we provide on this site were created personally by members of the Game8 editorial department.
We refuse the right to reuse or repost content taken without our permission such as data or images to other sites.


![Marathon Review [First Impressions] | Playing The Long Game](https://img.game8.co/4435736/b9b1ec1e9219416dfc2599f85295d6ef.png/thumb)


