PoE 2 0.3 Mercenary Leveling Build - Lightning Shotgun
Latest: 0.5.0 Release Date
☆ Fate of the Vaal ▶︎ The Last of the Druids
┗ Bonded Mods | 0.4 Mystery Box
★ Druid: Class Overview | Builds
☆ NEW: Disciple of Varashta Ascendancy!
★ Best Class | Best Builds | Leveling Builds
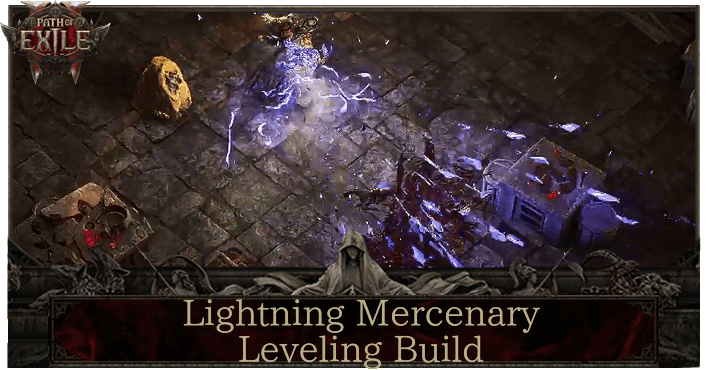
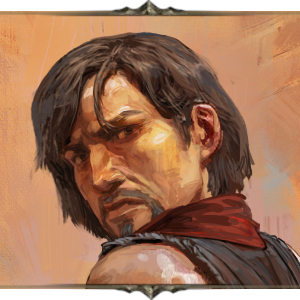
This is a leveling build for the Mercenary in Path of Exile 2 (PoE 2)'s The Third Edict update that uses Galvanic Shards to fast clear mobs and rush the campaign. Check out this Lightning Mercenary leveling build, including its progression, equipment, socketables, skills, recommended builds, and playstyle!
 Attention! Attention! |
The build is updated for Act 3 of Patch 0.3.0: The Third Edict. |
|---|
Lightning Mercenary Build Summary
Lightning Mercenary Leveling Build
This leveling build starts off with Fragmentation Rounds and seamlessly transitions into Galvanic Shards to fast clear mobs and eliminate elites easily. Just make sure to swap out your Wind Dancer for Herald of Thunder to maximize your DPS while progressing.
| Date | Changes Made |
|---|---|
| 08/31/2025 | ・ Build updated for Act 3. |
| 08/31/2025 | ・ Build updated for Act 2. |
| 08/30/2025 | ・ Build updated for Patch 0.3.0. |
| 04/05/2025 | ・ Leveling Build Act 1-3 Created. |
Build FAQs
| Build Notes |
|---|
|
|
Why Choose Galvanic Shards?
Galvanic Shards is one of the best Crossbow skills throughout the game simply due to the fast attack speed and larger clip size. Compared to its other variants such as Permafrost Bolts and Incendiary Shot, this skill provides the best damage output for both leveling and taking on endgame content.
Why Not Focus on Fragmentation Rounds?
One thing to take note for Fragmentation Rounds is the Bolts Pierce 2 Targets modifier it has. Since Pierce take precedence over other effects, this means that having Chain or Fork will not trigger until Pierce has been used to its full effect. This makes Fragmentation Rounds problematic against Bosses since it has to Pierce through 2 targets in order for other effects to trigger.
Lightning Mercenary Equipment
※ The affixes shown below are arranged based on descending priority.
| Gear | Affixes |
|---|---|
 Dyad Crossbow Dyad Crossbow Dyad Crossbow Stats:
Damage - 9-37 Critical Chance - 5.00% Attacks Per Second - 1.60 Reload Time - 1.10 Requirements: Level - 20 Strength - 22 Dexterity - 22 Implicit Skill: Loads an additional bolt |
・Increased Physical Damage
・Add Physical Damage ・Increased Elemental Damage ・Level to All Projectile Skills |
 Heavy Crown Heavy Crown Heavy Crown Stats:
Armor - 75 Energy Shield - 28 Requirements: Level - 33 Strength - 27 Intelligence - 27 |
・Armor
・Increased Armor and Energy Shield ・Maximum Life ・Any Elemental Resistance |
 Cloaked Mail Cloaked Mail Cloaked Mail Stats:
Armor - 95 Evasion - 83 Requirements: Level - 26 Strength - 25 Dexterity - 25 |
・Evasion Rating
・Increased Armor and Evasion ・Spirit ・Armor Also Applies to Elemental Damage ・Any Elemental Resistance |
 Tempered Mitts Tempered Mitts Tempered Mitts Stats:
Armor - 40 Requirements: Level - 16 Strength - 22 |
・Add Lightning Damage
・Increased Attack Speed ・Any Elemental Resistance |
 Stacked Sabatons Stacked Sabatons Stacked Sabatons Stats:
Armor - 56 Evasion - 50 Requirements: Level - 33 Strength - 26 Dexterity - 26 |
・Increased Movement Speed
・Increased Armor and Evasion ・Armor Also Applies to Elemental Damage ・Any Elemental Resistance |
 Rawhide Belt Rawhide Belt Rawhide Belt Requirements:
None Implicit:20-30% increased Life Recovery from Flasks |
・Flask Health Recovery Rate
・Flask Mana Recovery Rate ・Reduced Flask Charges Used ・Any Elemental Resistance |
 Stellar Amulet Stellar Amulet Stellar Amulet Requirements:
Level - 24 Implicit:+5-7 to all Attributes |
・Increased Armor
・All Attributes ・All Elemental Resistance |
 Iron Ring Iron Ring Iron Ring Requirements:
None Implicit:Adds 1 to 4 Physical Damage to Attacks |
・Increased Lightning Damage
・Add Lightning Damage ・All Attributes ・Any Elemental Resistance |
 Iron Ring Iron Ring Iron Ring Requirements:
None Implicit:Adds 1 to 4 Physical Damage to Attacks |
・Increased Lightning Damage
・Add Lightning Damage ・All Attributes ・Any Elemental Resistance |
 Colossal Life Flask Colossal Life Flask Colossal Life Flask Stats:
Flask Type - Life Recovered Life - 450 Charge Per Use - 10 Total Charges - 75 Duration - 4 sec. |
・Gain Charges per Second
・Increased Amount Recovered |
 Colossal Mana Flask Colossal Mana Flask Colossal Mana Flask Stats:
Flask Type - Mana Recovered Mana - 165 Charge Per Use - 10 Total Charges - 75 Duration - 2.5 sec. |
・Gain Charges per Second
・Increased Amount Recovered |
Weapons
During Act 1 you can choose to equip any crossbow you can obtain with the highest damage. Once you reach Act 2, aim for picking up a Dyad Crossbow to provide your Galvanic Shards with an additional bolt for maximum damage output before reloading. On Act 3, continue upgrading your Dyad Crossbow with higher modifiers to prevent any damage fall offs while progressing.
Armor
Focus on getting equipment that has Armor and Evasion Rating as these are stats that defensively benefit the Mercenary best. The most important stats to watch out for in the early game is Increased Movement Speed on your Boots for faster progress and a few Increased Rarity of Items Found on other Armors to help you pick up good equipment while you are progressing through the campaign.
Once you reach Act 3, focus on maximizing your Elemental Resistances and taking Attribute modifiers so you have better survivability against most of the bosses.
Accessories
As for Ring accessories, we recommend equipping Iron Rings to give you a small damage boost while you are leveling. Try to look for ones with the Increased Rarity of Items Found modifier in the early game since you will be progressing for quite awhile so might as well collect some materials and equipment along the way.
As for your Amulet, make sure to get an Amber Amulet to provide you with more Strength for survivability, paired with Maximum Mana and Increased Rarity of Items Found modifiers for maintaining your skill usage and helping with campaign progression.
Runes and Soul Cores
| Equipment | Sockets |
|---|---|
| Weapon | |
| Armor |
We recommend ignoring Runes until you reach Act 3, since you will be constantly switching gear. However, if you're stuck on a certain area and want to increase your damage output, you can slot in two Iron Runes on your Weapon to give you a 40% Physical Damage boost. As for your Armor Runes, slot in Body Runes for more health or Rebirth Runes for life regeneration if you are having trouble with survivability.
| All Runes and Soul Cores | |
|---|---|
| List of Runes | List of Soul Cores |
Charms
 Sapphire Charm Sapphire Charm |
・Increased Duration
・Increased Charges ・Gain Charges Per Second |
|---|---|
 Topaz Charm Topaz Charm |
・Increased Duration
・Increased Charges ・Gain Charges Per Second |
 Antidote Charm Antidote Charm |
・Increased Duration
・Increased Charges ・Gain Charges Per Second |
We recommend equipping the Sapphire Charm to help you combat the cold attacks of Count Geonor at the end of the Act 1. Just make sure to keep dodging his attacks since they can still take a chunk of your health even with the resistance Charm equipped.
For Act 2, your main problem would be Jamanra, the Risen King so make sure to equip the Topaz Charm to help mitigate his attacks. Lastly, equip an Antidote Charm when you reach Act 3 since a lot of the bosses in this Act can deal large amounts of poison damage.
Lightning Mercenary Skills
※ The Support Gems' priority are arranged in a descending order. The first one being the most important and the last being the least crucial.
| Skill | Support Gems |
|---|---|
 Galvanic Shards Galvanic Shards Galvanic Shards Loads your Crossbow with a clip of charged bolts that fragment in flight, releasing Chaining Lightning beams when they Hit enemies. Using this skill again reloads the clip.
|
Double Barrel II Supports Crossbow Ammunition Skills, causing them to load an extra bolt at the cost of reload speed.
Lightning Attunement Supports attacks, causing them to gain Lightning Damage but deal less Cold and Fire Damage.
Elemental Armament II Supports Attacks, causing them to deal more Elemental damage.
|
 Voltaic Grenade Voltaic Grenade Voltaic Grenade Fires a bouncing Grenade that discharges an Electrocuting Lightning blasts when its fuse expires
|
Multishot II Supports Projectile skills, making them fire extra Projectiles. Also lowers Attack and Cast speed of supported skills, as well as lessening their damage.
Short Fuse I Supports skills which Detonate after some amount of time has elapsed, shortening the time before Detonation.
Magnified Area I Supports any skill with an area of effect, making it larger.
|
 Shockburst Rounds Shockburst Rounds Shockburst Rounds Loads your Crossbow with a clip of charged bolts which releases damaging pulses upon hitting an enemy affected by a lightning ailment. Using this skill again reloads the clip.
|
Ammo Conservation I Supports Crossbow Ammunition Skills, granting a chance to not consume a Bolt when firing.
Lightning Attunement Supports attacks, causing them to gain Lightning Damage but deal less Cold and Fire Damage.
Rapid Attacks II Supports Attacks, causing them to Attack faster.
|
 Emergency Reload Emergency Reload Emergency Reload Instantly relaods your active Crossbow Ammunition and Empowers the loaded bolts to deal more damage.
|
Prolonged Duration I Supports any skill that has a duration, making that duration longer.
Cooldown Recovery I Supports skills with Cooldowns, increasing the rate at which those Cooldowns Recover. Cannot modify the skills of minions.
|
 Herald of Thunder Herald of Thunder Herald of Thunder While active, killing Shocked enemies with Attack damage, will cause subsequent Attack hits to release lightning bolts which deals Attack damage to all surrounding enemies.
|
Concentrated Area Supports any skill with an area of effect, causing that area to be smaller but any area damage it deals to be higher.
Elemental Focus Supports any skill that hits enemies, causing it to deal more Elemental Damage but be unable to inflict Elemental Ailments.
Deadly Herald Supports Herald Skills, making their triggered effectsn deal more damage at the expense of higher spirit cost.
|
 Wind Dancer Wind Dancer Wind Dancer Grants a buff that gives you more Evasion per stage. Being Hit by a Melee Attack while you have this buff consumes all stages to damage and Knock Back enemies around you.
|
Blind I Support any skill that Hits enemies, causing them to Blind on hit.
Maim Supports Attacks causing them to Maim enemies.
|
This Mercenary leveling build makes use of Fragmentation Rounds at the beginning and swaps to Galvanic Shards once you reach level 14. Your Voltaic Grenade will help with procing Eletrocution to stun your enemies and provide openings while Shockburst Rounds is a great single-target skill especially against Shocked enemies.
Wind Dancer will be your failsafe to help you escape tight situations when you get surrounded too much. Only equip Herald of Thunder only when you have swapped to Galvanic Shards as this will be a huge damage boost for this skill.
Do note that if you do not have the required Spirit to equip both Persistent skills, we highly recommend prioritizing Herald of Thunder for the additional Lightning Bolt procs with your Galvanic Shards.
Lightning Mercenary Passive Tree
Passive Tree Progression
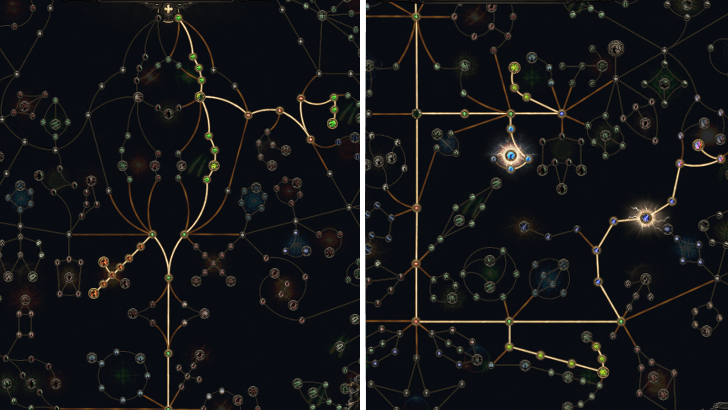
The leveling passive tree for the Mercenary focuses on providing more damage and reload speed to help you progress through the campaign faster. For your first few passives, make your way down to Remorseless and Ricochet for more projectile damage and head straight for Overwhelm to provide you with up to 40% more Damage since Crossbows are considered as Two-Handed.
Furthermore, take Rapid Reload for the increased reload speed and Doomsayer to further boost your Herald of Thunder procs. Make your way down into Reusable Ammunition for a chance to not consume a bolt after reloading, and immediately head for Flash Storm and Forces of Nature so your lightning damage can penetrate resistances.
Lastly, take Heavy Ammunition for the 40% Projectile damage to further boost the damage of your Galvanic Shards and Shockburst Rounds.
Passive Skill Tree Guide and List of Passives
Ascendancy Options
 Witchhunter Witchhunter
|
Provides good damage and utility while the Weapon Master notable was buffed. Great for returning players. |
As of Patch 0.3, we recommend choosing the Witchhunter Ascendancy as this seamlessly transitions the leveling build into a traditional Lightning Witchhunter build. Furthermore, the Weapon Master ascendacy node now provides you with 100 Weapon Set Skill Points which is great double-weapon builds.
You have the option to transition to a different Ascendancy at a later stage of the game if you wish to switch to a different build once you reach the endgame.
Build Progression
Act 1 Progression
| Jump to an Act! | ||
|---|---|---|
| Act 1 | Act 2 | Act 3 |
To progress through Act 1 and beat Count Geonor using the Lightning Mercenary leveling build, follow these steps:
| # | Step by Step Guide to Act 1 Leveling |
|---|---|
| 1 | Equip
|
| 2 | Head for the Mysterious Campsite at Clearfell to get an extra Level 1
|
| 3 | Defeat
|
| 4 | |
| 5 | Proceed to Grelwood and defeat
Note: Make sure to loot the Witch Hut to get Medium Flasks. |
| 6 | Defeat
|
| 7 | Progress to The Grim Tangle and defeat
|
| 8 | Look for the Haunted Treasure Inside the Tomb of the Consort and defeat the rare enemy to acquire a Level 1 Uncut Support Gem (To be used later). Note: Once you find a Level 3 Uncut Skill Gem, use it to equip |
| 9 | Defeat
|
| 10 | Search and complete your first Ritual in the same area to get a Level 4 Uncut Support Gem and use this to upgrade your Fragmentation Rounds.
|
| 11 | Start looking for the Dryadic Ritual in the same area to get an extra Level 1 Uncut Support Gem (To be used later).
|
| 12 | Enter Freythorn to defeat
|
| 13 | Complete The Lost Lute at the Ogham Farmlands to obtain a Book of Specialisation for more passive points.
|
| 14 | Search for the Crop Circle in the same area to defeat
|
| 15 | Proceed to Ogham Village and defeat
Note: Use the Uncut Skill Gem to get |
| 16 | Head for The Manor Ramparts and look for The Gallows to get a free Level 1 Uncut Support Gem (To be used later).
|
| 17 | Search and defeat the
|
| 18 | Continue and defeat
Note: Make sure you have Medium Flasks since this boss fight has 2 Phases so you will be spending a good amount of time learning and surviving the mechanics. |
Act 2 Progression
To progress through Act 2 and beat Jamanra, the Abomination using the Warrior leveling build, follow these steps:
| # | Steps |
|---|---|
| 1 | Complete the Earning Passage quest for an
|
| 2 | Defeat
Ascendancy: You can attempt to finish the Sekhema's Trial to get your first Ascendancy Skill: ┣
┗
┗ Tactician: Get the Spirit and A Solid Plan nodes to transition to one of our Tactician builds. |
| 3 | Clear Mobs in Keth until you get the
|
| 4 | Defeat
|
| 5 | Defeat
Note: Make sure to slot in this Jewel in your passive tree as you progress. |
| 6 | Open the Guarded Sarcophagus for an
|
| 7 | Three Elemental Offering Ring choices: Ruby Ring, Sapphire Ring, and Topaz Ring for flame, cold, and lightning resistance respectively. It is recommended to choose the Topaz Ring to prepare for
|
| 8 | Clear The City of Seven Waters for an
|
| 9 | Destroy the Effigy located in the Shrine of Bones for an Uncut Support Gem Level 2 (To be used later). Note: If you find an Uncut Skill Gem Level 7, use this to equip |
| 10 | Clear Mobs in The Bone Pits until you get the
|
| 11 | Complete A Theft of Ivory quest for an Uncut Support Gem Level 2 (To be used later).
|
| 12 | Place both Relics in the Valley of Titans to complete the Ancient Vows quest. Choose the Sun Clan Relic for more Mana Flask Recovery.
|
| 13 | Complete A Crown of Stone quest for an Uncut Support Gem Level 2 (To be used later).
|
| 14 | Complete the Tradition's Toll quest to get a
|
| 15 | Defeat the
|
Act 3 Progression
To progress through Act 3 and beat Doryani using the Lightning Mercenary leveling build, follow these steps:
| # | Step by Step Guide to Act 3 Leveling |
|---|---|
| 1 | |
| 2 |
Loot the basket found in the Orok Campfire at Sandswept Marsh to get a
Note: Use this on your Galvanic Shards and use your extra Uncut Support Gem to slot in |
| 3 | |
| 4 |
Complete The Slithering Dead to get the Venom Draught of Clarity to provide you with increased Mana Regeneration. |
| 5 |
Look for the Jungle Grave and interact with the Ravaged Corpse to summon Servi and get a rare Belt. We recommend taking Rawhide Belt for better survivability. |
| 6 |
Defeat
|
| 7 |
Submit the Tribal Vengeance to get a charm. Choose the Antidote Charm for increased defenses against Poison. |
| 8 |
Defeat
|
| 9 |
Use the Paquate's Mechanism to Corrupt gear. We suggest corrupting the
|
| 10 |
Obtain an
|
| 11 |
Offer the Mushrooms in Apex of Filth to obtain
Note: If you find an Uncut Skill Gem Level 11, use this to equip |
| 12 |
Ascendancy: By this time, you can complete the Trial of Chaos to get your third and fourth Ascendancy Point.
┣
┗
┗
|
| 13 |
Use the
Note: If you find an Uncut Support Gem Level 4 in the last Act 3 area, use this to slot in |
Lightning Mercenary Playstyle
Skill Rotation
For general use, you will adopt a Lightning Gunslinger playstyle that makes use of grenades between reloads. The rotation is as follows:
- Use Voltaic Grenades against elites and Bosses to proc Electrocution and stun them.
- Spam Galvanic Shards to clear large packs of mobs and proc Shock.
- Once you have inflicted Shock, start shooting Shockburst Rounds to proc the added pulse damage.
- Use Emergency Reload while shooting to instantly refill your ammo and prolong your Shockburst Rounds.
- Rinse and repeat.
Path of Exile 2 (PoE 2) Related Guides

0.4 Best Endgame Builds
| Rank | Build |
|---|---|
 |
|
 |
|
 |
|
 |
0.4 Leveling Builds
All Build Guides
| List of Builds by Class | |||||||||||
|---|---|---|---|---|---|---|---|---|---|---|---|
 Huntress Huntress |
 Mercenary Mercenary |
 Monk Monk |
|||||||||
 Witch Witch |
 Sorceress Sorceress |
 Warrior Warrior |
|||||||||
 Ranger Ranger |
 Druid Druid |
- | |||||||||
| Other Build Guides | 0.3 Leveling Builds | How to Make a Good Build | |||||||||
Mercenary Leveling Builds
Herald of Thunder While active, killing Shocked enemies with Attack damage, will cause subsequent Attack hits to release lightning bolts which deals Attack damage to all surrounding enemies.
Wind Dancer Grants a buff that gives you more Evasion per stage. Being Hit by a Melee Attack while you have this buff consumes all stages to damage and Knock Back enemies around you.
Voltaic Grenade Fires a bouncing Grenade that discharges an Electrocuting Lightning blasts when its fuse expires
Emergency Reload Instantly relaods your active Crossbow Ammunition and Empowers the loaded bolts to deal more damage.
Shockburst Rounds Loads your Crossbow with a clip of charged bolts which releases damaging pulses upon hitting an enemy affected by a lightning ailment. Using this skill again reloads the clip.
Galvanic Shards Loads your Crossbow with a clip of charged bolts that fragment in flight, releasing Chaining Lightning beams when they Hit enemies. Using this skill again reloads the clip.
Focus: AoE, Fast Clear, Lightning |
|
NEW |
Herald of Ash While active, enemies you sufficiently Overkill with attacks will cause an explosion that ignites nearby enemies based on the Overkill damage dealt.
Explosive Grenade Fires a bouncing Grenade that unleashes a devastating fiery blast when its fuse expires.
Flash Grenade Fires a bouncing Grenade that unleashes a Blinding, Stunning explosion when its fuse expires. This explosion can Blind both Allies and Enemies.
Gas Grenade Fires a bouncing Grenade that causes a burst of Poison gas when its fuse expires, damaging enemies and leaving behind a growing Poison cloud. Burning effects or Detonator skills will cause the cloud to explode in a fiery blast.
Wind Dancer Grants a buff that gives you more Evasion per stage. Being Hit by a Melee Attack while you have this buff consumes all stages to damage and Knock Back enemies around you.
Oil Grenade Fires a bouncing Grenade that bursts in a spray of Oil when the fuse expires or when it impacts an Enemy, dealing minimal damage but covering the ground and nearby enemies in Oil. Oil created this way can be Ignited by Detonator Skills or Ignited Ground.
Rapid Shot Loads your Crossbow with a large clip of heavily modified that cause Heat build up on your crossbow, before unleashing a stream of flaming bolts that gain Fire damage based on your Heat. Heat also grants bonus damage to Grenades you fire, but dissipates rapidly when not building up. Using this skill again reloads the clip.
Focus: AoE, Fire, Grenades, Burst Damage |
Mercenary Endgame Builds
Barrage Ready a volley of arrows or spears, Empowering your next Bow or Projectile Spear Attack to repeat multiple times. Consumes your Frenzy Charges on use to add additional repeats.
Snipe Channel to charge up your bow before releasing a powerful shot. Releasing the moment you fully charge causes the arrow to explode on impact for a guaranteed Critical Hit.
Sniper's Mark Marks a target. The next Critical Hit the target receives consumes the Mark to deal extra damage and grant you a Frenzy Charge.
Rain of Arrows Fire arrows into the air, causing them to rain from above. Consumes your Frenzy Charges to fire more arrows.
Spiral Volley Loads your Bow with a volley of enchanted arrows and fires them in a circle as you spin forward, firing directly at targets if possible. Consumes Frenzy Charges to cause the arrows to deal more damage and Chain to other targets. Each target can only be Hit once.
Combat Frenzy While active, grants you a Frenzy Charge when you Freeze, Electrocute, or Pin an enemy. This can only occur once every few seconds.
Wind Dancer Grants a buff that gives you more Evasion per stage. Being Hit by a Melee Attack while you have this buff consumes all stages to damage and Knock Back enemies around you.
Focus: DoT, Burst Damage, Bossing, Mobbing |
|
Herald of Ash While active, enemies you sufficiently Overkill with attacks will cause an explosion that ignites nearby enemies based on the Overkill damage dealt.
Gas Grenade Fires a bouncing Grenade that causes a burst of Poison gas when its fuse expires, damaging enemies and leaving behind a growing Poison cloud. Burning effects or Detonator skills will cause the cloud to explode in a fiery blast.
Wind Dancer Grants a buff that gives you more Evasion per stage. Being Hit by a Melee Attack while you have this buff consumes all stages to damage and Knock Back enemies around you.
Incendiary Shot Loads your Crossbow with flaming bolts that fragment in flight, damaging and igniting enemies on hit and in a small cone behind their final target.
Blasphemy Turns socketed Curse skills into vile Auras, applying their effects to all nearby enemies.
Oil Grenade Fires a bouncing Grenade that bursts in a spray of Oil when the fuse expires or when it impacts an Enemy, dealing minimal damage but covering the ground and nearby enemies in Oil. Oil created this way can be Ignited by Detonator Skills or Ignited Ground.
Explosive Shot Loads your Crossbow with flaming bolts that explode on impact. The explosion will cause any Grenades in its area of effect to also explode.
Focus: DoT, AoE, Mobbing |
|
Wind Dancer Grants a buff that gives you more Evasion per stage. Being Hit by a Melee Attack while you have this buff consumes all stages to damage and Knock Back enemies around you.
Fragmentation Rounds Loads your Crossbow with Piercing bolts that fragment in flight. Bolts that hit a frozen enemy consume the Freeze and cause an explosion of Shrapnel. Bolts that hit an Ice Crystal cause it to explode.
High Velocity Rounds Loads your Crossbow with Piercing bolts that can consume Fully Broken Armour on enemies to deal extra damage.
Herald of Plague While active, killing a Poisoned enemy spreads its Poison to other nearby enemies, and has a chance to also Hinder them.
Attrition While active, causes you to deal more Hit damage to Rare and Unique enemies the longer you've been fighting them, and gain Culling Strike against them once you've been fighting them for long enough.
Cast on Freeze While active, gains Energy when you Freeze enemies and triggers socketed spells on reaching maximum Energy.
Emergency Reload Instantly relaods your active Crossbow Ammunition and Empowers the loaded bolts to deal more damage.
Galvanic Shards Loads your Crossbow with a clip of charged bolts that fragment in flight, releasing Chaining Lightning beams when they Hit enemies. Using this skill again reloads the clip.
Withering Presence While active, periodically Withers enemies in your Presence.
Blink Replaces your dodge roll with a short-cooldown Spell that allows you to tunnel through space, instantly reappearing a medium distance away.
Focus: DoT, Crowd Control, Bossing |
|
Explosive Grenade Fires a bouncing Grenade that unleashes a devastating fiery blast when its fuse expires.
Flash Grenade Fires a bouncing Grenade that unleashes a Blinding, Stunning explosion when its fuse expires. This explosion can Blind both Allies and Enemies.
Gas Grenade Fires a bouncing Grenade that causes a burst of Poison gas when its fuse expires, damaging enemies and leaving behind a growing Poison cloud. Burning effects or Detonator skills will cause the cloud to explode in a fiery blast.
Wind Dancer Grants a buff that gives you more Evasion per stage. Being Hit by a Melee Attack while you have this buff consumes all stages to damage and Knock Back enemies around you.
Attrition While active, causes you to deal more Hit damage to Rare and Unique enemies the longer you've been fighting them, and gain Culling Strike against them once you've been fighting them for long enough.
Oil Grenade Fires a bouncing Grenade that bursts in a spray of Oil when the fuse expires or when it impacts an Enemy, dealing minimal damage but covering the ground and nearby enemies in Oil. Oil created this way can be Ignited by Detonator Skills or Ignited Ground.
Cluster Grenade Fires a bouncing Grenade That explodes when it's fuse expires, throwing out a nova of mini Grenades that explode when they come to a stop.
Focus: AoE, Burst Damage, Crowd Control |
|
Herald of Ash While active, enemies you sufficiently Overkill with attacks will cause an explosion that ignites nearby enemies based on the Overkill damage dealt.
Wind Dancer Grants a buff that gives you more Evasion per stage. Being Hit by a Melee Attack while you have this buff consumes all stages to damage and Knock Back enemies around you.
Armour Piercing Rounds Load your Crossbow with a clip of bolts that can be fired rapidly and Break enemy Armour. Using this skill again reloads the clip.
Oil Grenade Fires a bouncing Grenade that bursts in a spray of Oil when the fuse expires or when it impacts an Enemy, dealing minimal damage but covering the ground and nearby enemies in Oil. Oil created this way can be Ignited by Detonator Skills or Ignited Ground.
Ripwire Ballista Deploys a Balista Totem that fires Pinning bolts which Maim enemies.
Artillery Ballista Deploys a Ballista Totem that fires bolts skyward, to explode a short time after landing.
Siege Cascade Loads your Crossbow with enemy-seeking payloads which are fired into the air, dropping a bolt near every enemy in the target area. These bolts lodge in the ground and explode after a short delay .
Focus: Totem, Physical, Fire, Mobbing, Bossing |
|
Frost Bomb Creates a pulsing Orb of Frost. Each pulse inflicts Cold Exposure on nearby Enemies. When the Orb's duration ends, it explodes, dealing Cold damage to surrounding Enemies.
Wind Dancer Grants a buff that gives you more Evasion per stage. Being Hit by a Melee Attack while you have this buff consumes all stages to damage and Knock Back enemies around you.
Blasphemy Turns socketed Curse skills into vile Auras, applying their effects to all nearby enemies.
War Banner While active, killing enemies with attacks or standing near a Unique enemy generates Valour. using this skill consumes Valour to place an inspiring Banner with an Aura that grants you and nearby allies Attack damage and accuracy while Banner lasts. The Banner cannot gain Valour while placed, and you cannot place a Banner while you already have a Banner placed.
Defiance Banner While active, killing enemies with attacks or standing near a Unique enemy generates valour. Using this skill consumes its Valour to place an inspiring Banner with an Aura that grants you and your nearby allies Armour, Evasion, and Movement speed while the banner lasts. The Banner cannot gain Valour while placed, and you cannot place a Banner while you already have a Banner placed.
Dread Banner While active, killing enemies with Attacks or standing near a Unique enemy generates Valour. using this skill consumes its Valour to place an Inspiring Banner with an Aura that grants you and nearby allies Stun Threshold, Elemental Ailment Threshold, and Flask charges while the Banner lasts. The Banner cannot gain Valour while placed, and you cannot place a Banner while you already have a banner placed.
Tame Beast Conjure Azmeri wisps to engulf a Rare Beast for a duration, Hindering them. If you defeat the Beast while it is engulfed in wisps, it will be captured by this gem, transforming the gem to instead allow you to summon the Beast as a Reviving Companion.
Mirage Archer While active, dodge rolling will create a Mirage that uses socketed ranged Attacks for a short duration, then vanish. You cannot create another Mirage while one exists, or for a short time after one vanishes. Dodge rolling while you are unable to create a new Mirage will restart this timer.
Mortar Cannon Raise a cannon Ballista Totem which uses socketed Grenade Skills, with significantly improved Cooldown Recovery Rate.
Focus: Totem, Burst, Lightning, Mapping, Bossing |
|
Herald of Thunder While active, killing Shocked enemies with Attack damage, will cause subsequent Attack hits to release lightning bolts which deals Attack damage to all surrounding enemies.
Stormcaller Arrow Fires an arrow that embeds where it lands for a short duration. At the end of the duration, a Lightning bolt strikes the arrow, disintegrating it and damaging enemies with a high chance to Shock.
Voltaic Mark Marks a target, making them more susceptible to being Shocked. When the Marked target dies, a Lightning nova erupts from their corpse. This nova does not use your Weapon Damage, and instead uses its own base Attack Damage.
Wind Dancer Grants a buff that gives you more Evasion per stage. Being Hit by a Melee Attack while you have this buff consumes all stages to damage and Knock Back enemies around you.
Emergency Reload Instantly relaods your active Crossbow Ammunition and Empowers the loaded bolts to deal more damage.
Shockburst Rounds Loads your Crossbow with a clip of charged bolts which releases damaging pulses upon hitting an enemy affected by a lightning ailment. Using this skill again reloads the clip.
Galvanic Shards Loads your Crossbow with a clip of charged bolts that fragment in flight, releasing Chaining Lightning beams when they Hit enemies. Using this skill again reloads the clip.
Mortar Cannon Raise a cannon Ballista Totem which uses socketed Grenade Skills, with significantly improved Cooldown Recovery Rate.
Focus: Lightning, Burst, Attribute Stacking, Mobbing, Bossing |
|
Ghost Dance Periodically Gain Ghost Shrouds. If you are Hit while you have a Ghost Shroud, it is immediately consumed to recover Energy Shield based on your Evasion.
Herald of Thunder While active, killing Shocked enemies with Attack damage, will cause subsequent Attack hits to release lightning bolts which deals Attack damage to all surrounding enemies.
Wind Dancer Grants a buff that gives you more Evasion per stage. Being Hit by a Melee Attack while you have this buff consumes all stages to damage and Knock Back enemies around you.
Explosive Shot Loads your Crossbow with flaming bolts that explode on impact. The explosion will cause any Grenades in its area of effect to also explode.
Voltaic Grenade Fires a bouncing Grenade that discharges an Electrocuting Lightning blasts when its fuse expires
Emergency Reload Instantly relaods your active Crossbow Ammunition and Empowers the loaded bolts to deal more damage.
Shockburst Rounds Loads your Crossbow with a clip of charged bolts which releases damaging pulses upon hitting an enemy affected by a lightning ailment. Using this skill again reloads the clip.
Focus: Burst, Lightning, Mobbing, Bossing |
|
NEW |
Herald of Thunder While active, killing Shocked enemies with Attack damage, will cause subsequent Attack hits to release lightning bolts which deals Attack damage to all surrounding enemies.
Scavenged Plating Uses fragments of armour scavenged from enemies to bolster your own. Fully Breaking an enemy's Armour grants you a stack of Scavenged Plating for a duration, and you gain Armour and Thorns per stack.
Explosive Grenade Fires a bouncing Grenade that unleashes a devastating fiery blast when its fuse expires.
Blasphemy Turns socketed Curse skills into vile Auras, applying their effects to all nearby enemies.
Rapid Shot Loads your Crossbow with a large clip of heavily modified that cause Heat build up on your crossbow, before unleashing a stream of flaming bolts that gain Fire damage based on your Heat. Heat also grants bonus damage to Grenades you fire, but dissipates rapidly when not building up. Using this skill again reloads the clip.
Explosive Shot Loads your Crossbow with flaming bolts that explode on impact. The explosion will cause any Grenades in its area of effect to also explode.
Charge Regulation While active, you gain powerful Buffs based on your active Charges. However, maintaining the Buff consumes Charges every few seconds.
Mirage Archer While active, dodge rolling will create a Mirage that uses socketed ranged Attacks for a short duration, then vanish. You cannot create another Mirage while one exists, or for a short time after one vanishes. Dodge rolling while you are unable to create a new Mirage will restart this timer.
Mortar Cannon Raise a cannon Ballista Totem which uses socketed Grenade Skills, with significantly improved Cooldown Recovery Rate.
Focus: Armour Break, Lightning Damage, AoE, Burst Damage |
Mercenary Class and Ascendancy Guides
| Base Class | ||
|---|---|---|
| Ascendancies | ||
Comment
Author
PoE 2 0.3 Mercenary Leveling Build - Lightning Shotgun
improvement survey
04/2026
improving Game8's site?

Your answers will help us to improve our website.
Note: Please be sure not to enter any kind of personal information into your response.

We hope you continue to make use of Game8.
Rankings
- We could not find the message board you were looking for.
Gaming News
Popular Games

Genshin Impact Walkthrough & Guides Wiki

Crimson Desert Walkthrough & Guides Wiki

Umamusume: Pretty Derby Walkthrough & Guides Wiki

Honkai: Star Rail Walkthrough & Guides Wiki

Monster Hunter Stories 3: Twisted Reflection Walkthrough & Guides Wiki

Wuthering Waves Walkthrough & Guides Wiki

The Seven Deadly Sins: Origin Walkthrough & Guides Wiki

Pokemon TCG Pocket (PTCGP) Strategies & Guides Wiki

Pokemon Pokopia Walkthrough & Guides Wiki

Zenless Zone Zero Walkthrough & Guides Wiki
Recommended Games

Monster Hunter World Walkthrough & Guides Wiki

Fire Emblem Heroes (FEH) Walkthrough & Guides Wiki

Pokemon Brilliant Diamond and Shining Pearl (BDSP) Walkthrough & Guides Wiki

Super Smash Bros. Ultimate Walkthrough & Guides Wiki

Diablo 4: Vessel of Hatred Walkthrough & Guides Wiki

Cyberpunk 2077: Ultimate Edition Walkthrough & Guides Wiki

Yu-Gi-Oh! Master Duel Walkthrough & Guides Wiki

Elden Ring Shadow of the Erdtree Walkthrough & Guides Wiki

The Legend of Zelda: Tears of the Kingdom Walkthrough & Guides Wiki

Persona 3 Reload Walkthrough & Guides Wiki
All rights reserved
© 2010 - 2024 Grinding Gear Games
The copyrights of videos of games used in our content and other intellectual property rights belong to the provider of the game.
The contents we provide on this site were created personally by members of the Game8 editorial department.
We refuse the right to reuse or repost content taken without our permission such as data or images to other sites.
 under the page title to be notified of any updates!
 Lightning Mercenary Build


![Forza Horizon 6 Review [Preview] | Beautiful Roads With a Whole Lot of Oversteer](https://img.game8.co/4460981/a7254c24945c43fbdf6ad9bea52b5ce9.png/thumb)


