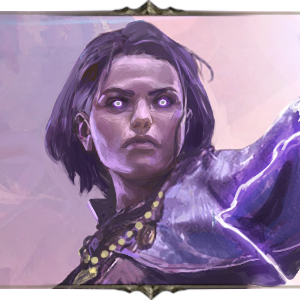
PoE 2 0.2 Spark Stormweaver Sorceress Build
Latest: 0.5.0 Release Date
☆ Fate of the Vaal ▶︎ The Last of the Druids
┗ Bonded Mods | 0.4 Mystery Box
★ Druid: Class Overview | Builds
☆ NEW: Disciple of Varashta Ascendancy!
★ Best Class | Best Builds | Leveling Builds
This is a Spark Stormweaver Sorceress build for Path of Exile 2 (PoE 2)'s Dawn of the Hunt Update. Check out this Spark Stormweaver Sorceress build, including its gear, socketables, skills, and playstyle!
 Attention! Attention! |
This build was last updated for patch 0.2.1 and may be outdated for the recent patches. For more up-to-date builds, please refer to our list of latest builds! |
|---|
List of Contents
Spark Stormweaver Build Summary
※ Please note this build is only up until Cruel Mode for the time being. Rest assured that this build will be updated soon!
Spark Stormweaver Build
| Build Setup | |
|---|---|
 Spark Stormweaver Build Spark Stormweaver Build |
 Spark Launches a spray of sparking projectiles that travel erratically along the ground until they hit an enemy or expire.
 Flame Wall Creates a wall of fire in front of the character, which ignites everything within its area. Any projectiles fired through the wall by you and allies deal added fire damage and inflict ignite on hit.
 Orb of Storms Creates an Orb of electricity that fires Chaining Lightning bolts at nearby enemies.
 Conductivity Curses all targets in an area after a short delay, lowering their Lightning Resistance.
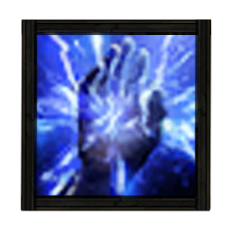
 Lightning Warp Teleports you inside the target's body, causing it to violently explode. Highlights enemies that can be culled, and can only be used on these enemies or Ball Lightning projectiles. The target is destroyed, and the explosion deals Lightning Damage to surrounding enemies and creates Shocked Ground.
 Mana Remnants Conjures surging lightning to restore your Mana. While active, Shocked enemies you kill have a chance to spawn a Mana Remnant, and Critically Hitting a Shocked target spawns a Mana Remnant every few seconds. Picking up a Mana Remnant grants you Mana which can Overflow maximum Mana.
 Archmage While Active, causes your Non-Channelling Spells to cost additional mana and deal extra lightning damage, both based on your maximum mana.
|
|
|
|
| Date | Changes Made |
|---|---|
| 04/06/2025 | ・ Spark Stormweaver Created. |
This Spark Stormweaver build is the enhanced version of the Spark Sorceress leveling that continues using Spark as its main damage tool. Flame Wall remains to support Spark along with huge damage upgrade with Archmage.
Even after getting hit by huge nerfs from patch 0.2.0, Spark and the synergy with its accompanying skills are still among the best builds to clear maps and melt bosses in the game.
Spark Stormweaver Equipment
| Equipment | |||||||||||||||
|---|---|---|---|---|---|---|---|---|---|---|---|---|---|---|---|
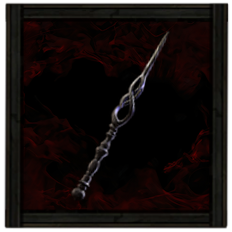 Siphoning Wand Siphoning Wand Stats: Requirements: Level - 11 Intelligence - 25 Modifiers: ・X% increased Spell Damage ・X% increased Lightning Damage ・X to Level of all Lightning Spell Skills ・X% increased Cast Speed ・Gain X Mana per Enemy Killed Weapon |
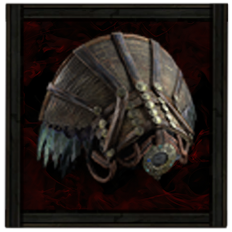 Feathered Tiara Feathered Tiara Stats: Energy Shield - 51 Requirements: Level - 33 Intelligence - 61 Modifiers: ・X to Maximum Mana ・Any Element Resistance ・Any Energy Shield Modifier ・X% increased Rarity of Items found Helmet |
 Crystal Focus Crystal Focus Stats: Energy Shield - 28 Requirements: Level - 26 Intelligence - 49 Modifiers: ・X% increased Lightning Damage ・X% increased Spell Damage ・Any Mana Modifiers ・X to Level of all Spell Skills ・X% increased Cast Speed Offhand Set 2 |
|||||||||||||
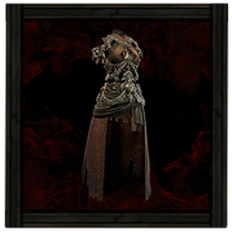 Keth Raiment Keth Raiment Stats: Energy Shield - 70 Requirements: Level - 28 Intelligence - 59 Modifiers: ・X to Spirit ・X to Maximum Life ・Any Element Resistance ・Any Energy Shield Modifier ・X to Intelligence Body Armour |
|||||||||||||||
 Intricate Gloves Intricate Gloves Stats: Energy Shield - 26 Requirements: Level - 33 Intelligence - 53 Modifiers: ・X% increased Rarity of Items found ・Gain X Mana per Enemy Killed ・Any Element Resistance ・Any Energy Shield Modifier Gloves |
 Utility Belt Utility Belt Requirements: Level - 55 Implicit: ・X% of Flask Recovery applied Instantly Modifier: ・X to Maximum Life ・X to Maximum Mana ・Any Element Resistance ・X% increased Flask Mana Recovery rate ・Any Charm Modifier Belt |
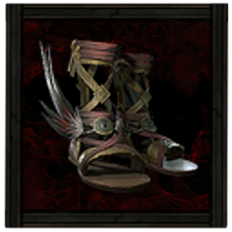 Feathered Sandals Feathered Sandals Stats: Energy Shield - 38 Requirements: Level - 33 Intelligence - 57 Modifiers: ・X% increased Movement Speed ・X% increased Rarity of Items Found ・X to Intelligence ・Any Element Resistance ・Any Energy Shield Modifier Boots |
|||||||||||||
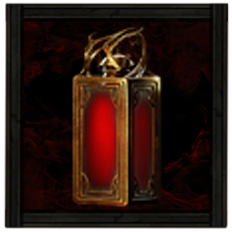 Ultimate Life Flask Ultimate Life Flask Stats: Flask Type - Life Recovered Life - 920 Charge Per Use - 10 Total Charges - 75 Duration - 3 sec. Modifier: ・X% increased Amount Recovered ・X% of Recovery applied Instantly Health Flask |
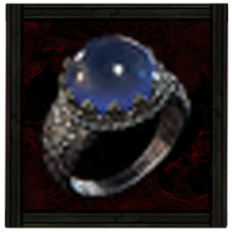 Lazuli Ring Lazuli Ring Requirements: None Implicit: ・X to Maximum Mana Modifier: ・+% Increased Rarity of Items Found ・X to Intelligence ・X% increased Lightning Damage ・X% increased Cast Speed ・Any Mana Modifier ・Any Element Resistance Ring 1 |
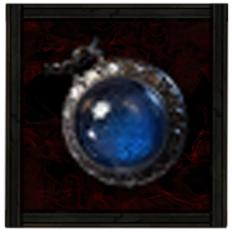 Azure Amulet Azure Amulet Requirements: None Implicit: ・X% increased Mana Regeneration Rate Modifier: ・+% Increased Rarity of Items Found ・X% of Damage taken Recouped as Mana ・X% increased Spell Damage ・X% increased Cast Speed ・Any Mana Modifier ・Any Element Resistance ・Any Energy Shield Modifier Amulet |
Lazuli Ring Requirements: None Implicit: ・X to Maximum Mana Modifier: ・+% Increased Rarity of Items Found ・X to Intelligence ・X% increased Lightning Damage ・X% increased Cast Speed ・Any Mana Modifier ・Any Element Resistance Ring 2 |
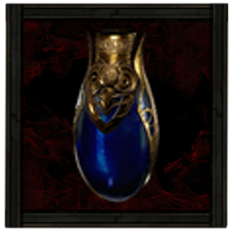 Ultimate Mana Flask Ultimate Mana Flask Stats: Flask Type - Mana Recovered Mana - 310 Charge Per Use - 10 Total Charges - 75 Duration - 3 sec. Modifier: ・X% increased Amount Recovered ・X% of Recovery applied Instantly Mana Flask |
|||||||||||
Weapons
It is still recommended to equip a Wand and a Focus instead of a Staff to maximize modifiers on both weapons. Prioritize getting damage, level, and cast speed modifiers to boost Spark's damage output. Keep an eye out for higher level wands and focus.
Armor
It is still recommended to prioritize Increased Rarity of Items Found on equipment to increase the chances of looting better items. Movement Speed is also highly important as this builds mobility is low and it would also speed up map exploration.
Elemental Resistances and Energy Shield modifiers are needed to build up survivability as Energy Shield will continuously be translated as Mana, effectively giving survivability with the Mind over Matter and Eldritch Battery passive nodes activated.
Accessories
Since Archmage will drain a lot of mana, Lazuli Ring and Azure Amulet are important to sustain it.
Prioritize getting any mana and Energy Shield modifiers along with Increased Rarity of Items Found to increase the chance of better loot to prepare for the endgame. Increasing damage and mana modifiers also improve Spark's offensive output.
Socketables
| |
・Increased Projectile Damage
・Increased Elemental Damage ・Increased Projectile Speed |
|---|
It is recommended to equip Emeralds as it can enhance the damage and speed of Spark projectiles, which is the main skill used in this build.
Runes and Soul Cores
| Equipment | Sockets |
|---|---|
| Weapon | |
| Armor |
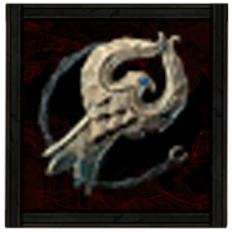
It is recommended to equip the Soul Core of Zalatl for both Weapons and Armor rune slots because the Spark Stormweaver build's mana is important to manage to maximize damage.
Soul Core of Xopec is a good alternative for Weapons as it increases Shock. For Armor, Iron Runes are also recommended to increase Energy Shield.
| All Runes and Soul Cores | |
|---|---|
| List of Runes | List of Soul Cores |
Charms
 Thawing Charm Thawing Charm |
・X% increased Duration
・X% increased Charges ・Recover X Life when Used |
|---|---|
 Sapphire Charm Sapphire Charm |
・X% increased Duration
・X% increased Charges ・Recover X Mana when Used |
 Grounding Charm Grounding Charm |
・X% increased Duration
・Gains X Charges per Second ・Recover X Life when Used |
Since Cruel Mode is a more difficult version of Acts 1 to 3, the Charms pretty much stay the same. Equip a Thawing Charm and Sapphire Charm when facing Count Geonor since it negates Freezing and offers Cold Resistance from his Chill attacks.
In Act 5 and Act 6, replace Thawing Charm with a Grounding Charm as it helps negate both Jamanra, the Abomination and Doryani's Shock from their attacks. Keep Sapphire Charm as it still helps against Chill attacks from Doryani in Act 6.
Spark Stormweaver Skills
※ The Support Gems' priority are arranged in a descending order. The first one being the most important and the last being the least crucial.
| Skill | Support Gems |
|---|---|
|
Spark Spark Launches a spray of sparking projectiles that travel erratically along the ground until they hit an enemy or expire.
|
Controlled Destruction Supports spells that hit enemies, boosting their damage but preventing them from dealing Critical hits.
Considered Casting Supports Spell skills that Hit Enemies, boosting Damage at the cost of Cast Speed.
|
|
Flame Wall Flame Wall Creates a wall of fire in front of the character, which ignites everything within its area. Any projectiles fired through the wall by you and allies deal added fire damage and inflict ignite on hit.
|
Spell Cascade Supports Spells that affect an area around you or a target location, causing those spells to also target additional areas on either side of the target area, along a randomly chosen axis. Cannot support Channelling skills or Remote skills.
Fire Mastery Supports Fire skills, granting them an additional level.
|
|
Orb of Storms Orb of Storms Creates an Orb of electricity that fires Chaining Lightning bolts at nearby enemies.
|
Font of Mana Supports skills which create stationary objects. Objects created by supported skills generate a Font of Mana, creating an Aura which grants Mana regeneration.
|
|
Conductivity Conductivity Curses all targets in an area after a short delay, lowering their Lightning Resistance.
|
Cursed Ground Supports Curse skills. supported skills no longer have an activation delay, instead creating areas which Curse enemies so long as they are within them.
Heightened Curse Supports curse skills, magnifying their power.
Hex Bloom Supports Curses spreading their effects when a Cursed enemy dies.
|
|
Lightning Warp Lightning Warp Teleports you inside the target's body, causing it to violently explode. Highlights enemies that can be culled, and can only be used on these enemies or Ball Lightning projectiles. The target is destroyed, and the explosion deals Lightning Damage to surrounding enemies and creates Shocked Ground.
|
Soul Drain Supports any skill that Hits enemies, causing you to recover Mana when it Culls an enemy.
Life Drain Supports any skill that Hits enemies, causing you to recover Life when it Culls an enemy
|
|
Archmage Archmage While Active, causes your Non-Channelling Spells to cost additional mana and deal extra lightning damage, both based on your maximum mana.
|
Lightning Mastery Supports Lightning skills, granting them an additional level.
|
Use Jeweller's Orbs or a Vaal Orb to increase Support Gem slots of Skills equipped. Note that Vaal Orbs corrupt Skill gems for a random chance to increase the slot.
We remove Mana Tempest and other buffs from the leveling build for the addition of Archmage as it greatly increases the damage output of Spark at the risk of a higher mana cost.
Flame Wall allows Spark to be imbued with fire, making the projectiles stronger. Orb of Storms becomes a mana regeneration totem with Font of Mana while Conductivity reduces enemy's elemental resistance. Lightning Warp is used to teleport around and cull mobs to avoid being trapped.
Spark Stormweaver Passive Tree

Passive Tree Progression
| Ascendancy Tree | |||
|---|---|---|---|
 |
|||
| Passive Nodes | |||
| 1. |  |
2. |  |
| 3. |  |
4. |  |
| 5. |  |
6. |  |
Full Sample Tree
Once Ascendancy has been achieved, focus on unlocking the Constant Gale and Force of Wind to gain Arcane Surge. Arcane Surge gives the Stormweaver a buff that increases Cast Speed and Mana Regenaration, which helps improve Spark.
After following the Spark Sorceress leveling build and progressing towards the later stages of the game, it is recommended to refund the early damage passive nodes from the leveling build to switch over mana and Energy Shield nodes as a priority. The damage that Spark does at this point will be great enough that the build will need all the survivability.
Activating the passive skill nodes Mind over Matter and Eldritch Battery essentially makes this build a tanky with enough mana, since damage is applied to mana and energy shield before it goes through HP.
Passive Skill Tree Guide and List of Passives
Spark Stormweaver Playstyle
Skill Rotations
※ Press on what type you are fighting for a more detailed explanation on the playstyle and skill rotation.
| Type | Skill Rotation |
|---|---|
| Mobbing | Conductivity Curses all targets in an area after a short delay, lowering their Lightning Resistance.
▶
Orb of Storms Creates an Orb of electricity that fires Chaining Lightning bolts at nearby enemies.
▶
Flame Wall Creates a wall of fire in front of the character, which ignites everything within its area. Any projectiles fired through the wall by you and allies deal added fire damage and inflict ignite on hit.
▶
Spark Launches a spray of sparking projectiles that travel erratically along the ground until they hit an enemy or expire.
▶
Lightning Warp Teleports you inside the target's body, causing it to violently explode. Highlights enemies that can be culled, and can only be used on these enemies or Ball Lightning projectiles. The target is destroyed, and the explosion deals Lightning Damage to surrounding enemies and creates Shocked Ground.
|
| Bossing | Conductivity Curses all targets in an area after a short delay, lowering their Lightning Resistance.
▶
Orb of Storms Creates an Orb of electricity that fires Chaining Lightning bolts at nearby enemies.
▶
Flame Wall Creates a wall of fire in front of the character, which ignites everything within its area. Any projectiles fired through the wall by you and allies deal added fire damage and inflict ignite on hit.
▶
Spark Launches a spray of sparking projectiles that travel erratically along the ground until they hit an enemy or expire.
|
Mobbing
The playstyle in this build will remain the same as in the leveling build. Remember to activate Archmage and use Spark your main damage skill.
Enhance its damage by combining it Orb of Storms, Conductivity and Flame Wall. Lightning Warp will mostly be used as a way to cull enemies and avoid being surrounded. The rotation is as follows:
- Use Conductivity to debuff enemies.
- Deploy an Orb of Storms to deal damage and sustain your mana.
- Use Flame Wall as often as possible to enchance Spark's damage output.
- Spam Spark.
- Use Lightning Warp to teleport around and instantly kill enemies once they are below HP threshold.
Bossing
The skill rotation is simply the same with mobbing minus the usage of Lightning Warp since you are mostly targeting the Boss.
- Deploy a Mana Tempest zone.
- Use Conductivity to debuff enemies.
- Use Orb of Storms for bosses to increase Shock buildup and deal constant damage. Stay near it to sustain mana.
- Use Flame Wall as often as possible to enchance Spark's damage output.
- Spam Spark.
Path of Exile 2 (PoE 2) Related Guides

0.4 Best Endgame Builds
| Rank | Build |
|---|---|
 |
|
 |
|
 |
|
 |
0.4 Leveling Builds
All Build Guides
| List of Builds by Class | |||||||||||
|---|---|---|---|---|---|---|---|---|---|---|---|
 Huntress Huntress |
 Mercenary Mercenary |
 Monk Monk |
|||||||||
 Witch Witch |
 Sorceress Sorceress |
 Warrior Warrior |
|||||||||
 Ranger Ranger |
 Druid Druid |
- | |||||||||
| Other Build Guides | 0.3 Leveling Builds | How to Make a Good Build | |||||||||
Sorceress Leveling Builds
Arctic Armour Conjures an icy barrier that gains stages overtime. While the barrier has stages, Melee Attacks that hit you will remove a stage to cause a burst of ice that deals Cold Spell damage to the attacker.
Spark Launches a spray of sparking projectiles that travel erratically along the ground until they hit an enemy or expire.
Flame Wall Creates a wall of fire in front of the character, which ignites everything within its area. Any projectiles fired through the wall by you and allies deal added fire damage and inflict ignite on hit.
Orb of Storms Creates an Orb of electricity that fires Chaining Lightning bolts at nearby enemies.
Conductivity Curses all targets in an area after a short delay, lowering their Lightning Resistance.
Mana Tempest Creates a storm of arcane energies that Empowers your Mana-costing Spells while you remain inside it. Maintaining the Storm constantly drains your Mana, and each spell you cast causes it to drain faster. The storm will dissipate when you exit it or run out of mana.
Lightning Warp Teleports you inside the target's body, causing it to violently explode. Highlights enemies that can be culled, and can only be used on these enemies or Ball Lightning projectiles. The target is destroyed, and the explosion deals Lightning Damage to surrounding enemies and creates Shocked Ground.
Mana Remnants Conjures surging lightning to restore your Mana. While active, Shocked enemies you kill have a chance to spawn a Mana Remnant, and Critically Hitting a Shocked target spawns a Mana Remnant every few seconds. Picking up a Mana Remnant grants you Mana which can Overflow maximum Mana.
Focus: Mobbing, AoE, Lightning, Fast Clear |
|
Flame Wall Creates a wall of fire in front of the character, which ignites everything within its area. Any projectiles fired through the wall by you and allies deal added fire damage and inflict ignite on hit.
Fireball Launches a large ball of Fire which explodes on impact, creating a nova of smaller firebolts.
Raging Spirits While active, your Fire Spells will also summon Raging Spirits, which are short-lived flaming skulls that rush at nearby enemies and rapidly Attack them. Enemies will not directly engage these Minions, and can pass through them.
Living Bomb
Snap
Focus: AoE, Mobbing |
Sorceress Endgame Builds
Flame Wall Creates a wall of fire in front of the character, which ignites everything within its area. Any projectiles fired through the wall by you and allies deal added fire damage and inflict ignite on hit.
Solar Orb Creates a fiery Orb that periodically releases fiery pulses. Enemies that are very close to the Orb are Ignited.
Flammability Curses all targets in an area after a short delay, lowering their Fire Resistance.
Fireball Launches a large ball of Fire which explodes on impact, creating a nova of smaller firebolts.
Focus: DoT, Mobbing |
|
Frost Bomb Creates a pulsing Orb of Frost. Each pulse inflicts Cold Exposure on nearby Enemies. When the Orb's duration ends, it explodes, dealing Cold damage to surrounding Enemies.
Frostbolt Fires a slow-moving projectile that leaves a wake of Chilled Ground, deals Cold Damage and explodes on colliding with terrain.
Hypothermia Curses all targets in an area after a short delay, lowering their Cold Resistance.
Frost Wall Creates a Wall of Ice Crystals which holds back enemies. The Crystals explode if sufficiently damaged, orif pushed hard enough, damaging nearby enemies..
Lightning Warp Teleports you inside the target's body, causing it to violently explode. Highlights enemies that can be culled, and can only be used on these enemies or Ball Lightning projectiles. The target is destroyed, and the explosion deals Lightning Damage to surrounding enemies and creates Shocked Ground.
Comet Calls down a mass of ice from the sky, dealing high damage at the targeted location. Targeting close to you will cause you to jump back as you cast.
Cast on Freeze While active, gains Energy when you Freeze enemies and triggers socketed spells on reaching maximum Energy.
Blink Replaces your dodge roll with a short-cooldown Spell that allows you to tunnel through space, instantly reappearing a medium distance away.
Focus: Burst Damage, Crowd Control |
|
Spark Launches a spray of sparking projectiles that travel erratically along the ground until they hit an enemy or expire.
Flame Wall Creates a wall of fire in front of the character, which ignites everything within its area. Any projectiles fired through the wall by you and allies deal added fire damage and inflict ignite on hit.
Orb of Storms Creates an Orb of electricity that fires Chaining Lightning bolts at nearby enemies.
Conductivity Curses all targets in an area after a short delay, lowering their Lightning Resistance.
Lightning Warp Teleports you inside the target's body, causing it to violently explode. Highlights enemies that can be culled, and can only be used on these enemies or Ball Lightning projectiles. The target is destroyed, and the explosion deals Lightning Damage to surrounding enemies and creates Shocked Ground.
Mana Remnants Conjures surging lightning to restore your Mana. While active, Shocked enemies you kill have a chance to spawn a Mana Remnant, and Critically Hitting a Shocked target spawns a Mana Remnant every few seconds. Picking up a Mana Remnant grants you Mana which can Overflow maximum Mana.
Archmage While Active, causes your Non-Channelling Spells to cost additional mana and deal extra lightning damage, both based on your maximum mana.
Focus: Mobbing, AoE, Lightning, Fast Clear |
|
Hypothermia Curses all targets in an area after a short delay, lowering their Cold Resistance.
Frost Wall Creates a Wall of Ice Crystals which holds back enemies. The Crystals explode if sufficiently damaged, orif pushed hard enough, damaging nearby enemies..
Comet Calls down a mass of ice from the sky, dealing high damage at the targeted location. Targeting close to you will cause you to jump back as you cast.
Eye of Winter Fires a single Eye Projectile which does not hit enemies. The Eye constantly releases damaging shard Projectiles in a spiral as it flies, plus an extra burst of Shards at the end of its flight. If the Eye passes over an Elemental ground surface, it will take on that surface effect, applying it to nearby enemies and causing shards to deal more damage of the corresponding type.
Blink Replaces your dodge roll with a short-cooldown Spell that allows you to tunnel through space, instantly reappearing a medium distance away.
Focus: Crowd Control, Burst Damage, Cold |
Sorceress Class and Ascendancy Guides
| Base Class | |
|---|---|
| Ascendancies | |
Comment
игра через нод Разум привыше матери, тоесть урон идет сначала в большое количество маны
Author

PoE 2 0.2 Spark Stormweaver Sorceress Build
Rankings
- We could not find the message board you were looking for.

Gaming News


Popular Games

Genshin Impact Walkthrough & Guides Wiki
Umamusume: Pretty Derby Walkthrough & Guides Wiki
Pokemon Pokopia Walkthrough & Guides Wiki
Honkai: Star Rail Walkthrough & Guides Wiki
Monster Hunter Stories 3: Twisted Reflection Walkthrough & Guides Wiki
Arknights: Endfield Walkthrough & Guides Wiki
Wuthering Waves Walkthrough & Guides Wiki
Zenless Zone Zero Walkthrough & Guides Wiki
Pokemon TCG Pocket (PTCGP) Strategies & Guides Wiki
Monster Hunter Wilds Walkthrough & Guides Wiki


Recommended Games
Fire Emblem Heroes (FEH) Walkthrough & Guides Wiki
Diablo 4: Vessel of Hatred Walkthrough & Guides Wiki
Cyberpunk 2077: Ultimate Edition Walkthrough & Guides Wiki
Yu-Gi-Oh! Master Duel Walkthrough & Guides Wiki
Super Smash Bros. Ultimate Walkthrough & Guides Wiki
Pokemon Brilliant Diamond and Shining Pearl (BDSP) Walkthrough & Guides Wiki
Elden Ring Shadow of the Erdtree Walkthrough & Guides Wiki
Monster Hunter World Walkthrough & Guides Wiki
The Legend of Zelda: Tears of the Kingdom Walkthrough & Guides Wiki
Persona 3 Reload Walkthrough & Guides Wiki


All rights reserved
© 2010 - 2024 Grinding Gear Games
The copyrights of videos of games used in our content and other intellectual property rights belong to the provider of the game.
The contents we provide on this site were created personally by members of the Game8 editorial department.
We refuse the right to reuse or repost content taken without our permission such as data or images to other sites.
That's why you need the unique item that turns the build into a tank, your damage goes to your mana first