PoE 2 0.4 Witch Leveling Build - Drain Contagion
Latest: 0.4.0d Hotfix 3 | Stash Tab Sale
☆ Fate of the Vaal ▶︎ The Last of the Druids
┗ Bonded Mods | 0.4 Mystery Box
★ Druid: Class Overview | Builds
☆ NEW: Disciple of Varashta Ascendancy!
★ Best Class | Best Builds | Leveling Builds

This is a Witch leveling build that focuses on dealing consistent Chaos Damage in Path of Exile 2 (PoE 2)'s The Last of the Druids Update. Check out this Drain Contagion Witch leveling build, including its progression, equipment, socketables, skills, recommended builds, and playstyle!
 Attention! Attention! |
This 0.4.0 leveling build is only up until Interludes and ends at Level 65. If you want to see a build for mapping and Atlas, check out our Endgame Builds! |
|---|
Drain Contagion Witch Build Summary
Leveling Build Overview
 Essence Drain Contagion Witch Essence Drain Contagion Witch |


 Contagion Afflicts a single enemy with a Debuff that deals Chaos Damage over time. If the enemy dies while affected by contagion, it and all other Chaos Damage over time Debuffs spread to other enemies and refresh their durations. Reanimating or detonating a corpse affected by contagion will cause the Minion or explosion to spread Contagion on hit.
 Unearth Raises spikes of bone from the earth in front of you. The bones of Corpses in the area are ripped out and reassembled into short-lived Bone Construct Minions that fight for you.
 Essence Drain Fires a Projectile that applies a powerful Chaos damage over time debuff to enemy hits.
 Dark Effigy Raises a Totem that bombards enemies afflicted by Chaos damage over time Debuffs.
 Withering Presence While active, periodically Withers enemies in your Presence.
|
|
|
|
This Witch leveling build focuses on dealing consistent Chaos damage. The build utilizes Essence Drain to hit enemies then Contagion to spread it to the rest of the enemy pack.
For survivability, this build relies mainly on minions to absorb damage and take aggro from enemies.
| Date | Changes Made |
|---|---|
| 12/14/25 | ・ Build adjusted for Patch 0.4.0. ・ Removed Ravenous Swarm and Frost Bomb. |
| 09/1/25 | Updated for Act III. ・Blasphemy and Despair Added ・Adjusted Equipment ・Added Support Gems ・Adjustments to Passive Tree ・Updated Skill Rotations |
| 08/31/25 | Updated for Act II. ・Withering Presence Added ・Adjusted Equipment ・Adjusted Skills and Support Gems ・Adjustment to Passive Tree ・Added Build Faqs Section |
| 08/30/25 | ・ Essence Drain Contagion Witch Build Created. |
Drain Contagion Witch Equipment
※ The affixes shown below are arranged based on descending priority.
| Gear | Affixes |
|---|---|
 Withered Wand Withered Wand Withered Wand Stats:
Requirements: None (Weapon Set 1) |
・Increased Spell Damage
・Increased Chaos Damage ・+ Level to All Chaos Spell Skills ・Gain Life per Enemy Killed ・Increased Cast Speed |
 Jingling Focus Jingling Focus Jingling Focus Stats:
Energy Shield - 43 Requirements: Level - 51 Intelligence - 73 (Offhand 1) |
・+ to Level of All Spell Skills
・Increased Energy Shield ・Increased Chaos Damage ・Faster Start of Energy Shield Recharge ・Elemental Resistance |
 Chiming Staff Chiming Staff Chiming Staff Stats:
Requirements: Level - 25 Intelligence - 41 (Weapon Set 2) |
・Increased Cast Speed
・+ Level to all Spell Skills ・Increased Mana Regeneration Rate |
 Wicker Tiara Wicker Tiara Wicker Tiara Stats:
Energy Shield - 28 Requirements: Level - 10 Intelligence - 17 |
・Increased Energy Shield
・Any Elemental Resistances ・Intelligence ・Increased Rarity of Items Found |
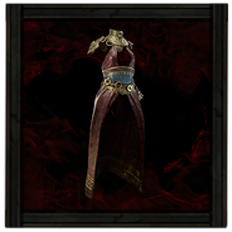 Altar Robe Altar Robe Altar Robe Stats:
Energy Shield - 89 Requirements: Level - 40 Intelligence - 65 |
・Increased Spirit
・Increased Energy Shield ・Increased Maximum Life ・Any Elemental Resistances |
 Jewelled Gloves Jewelled Gloves Jewelled Gloves Stats:
Energy Shield - 22 Requirements: Level - 26 Intelligence - 34 |
・Increased Energy Shield
・Increased Maximum Life ・Intelligence ・Any Elemental Resistances |
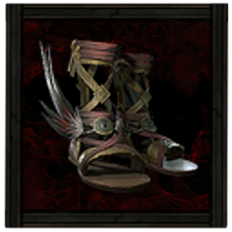 Feathered Sandals Feathered Sandals Feathered Sandals Stats:
Energy Shield - 38 Requirements: Level - 33 Intelligence - 45 |
・Increased Movement Speed
・Increased Energy Shield ・Intelligence ・Any Elemental Resistances |
 Lunar Amulet Lunar Amulet Lunar Amulet Requirements:
Level - 14 Implicit:+20-30 to maximum Energy Shield |
・Increased Spirit
・Increased Maximum Energy Shield ・Increased Mana ・Intelligence |
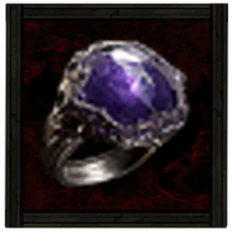 Amethyst Ring Amethyst Ring Amethyst Ring Requirements:
Level - 20 Implicit:+7-13% to Chaos Resistance |
・Increased Energy Shield
・Increased Spirit ・Increased Maximum Life ・Any Elemental Resistances |
|
Amethyst Ring Amethyst Ring Requirements:
Level - 20 Implicit:+7-13% to Chaos Resistance |
・Increased Energy Shield
・Increased Spirit ・Increased Maximum Life ・Any Elemental Resistances |
 Gargantuan Life Flask Gargantuan Life Flask Gargantuan Life Flask Stats:
Flask Type - Life Recovered Life - 710 Charge Per Use - 10 Total Charges - 75 Duration - 5 sec. |
・Gain Charges per Second
・Increased Recovery Rate |
 Gargantuan Mana Flask Gargantuan Mana Flask Gargantuan Mana Flask Stats:
Flask Type - Mana Recovered Mana - 185 Charge Per Use - 10 Total Charges - 75 Duration - 2 sec. |
・Gain Charges per Second
・Increased Recovery Rate |
Weapons
When you start out, use a Withered Wand since it lets you fire Chaos Bolts. This is a vital source of damage until you obtain Essence Drain with a Level 3 Skill Gem.
Use a Focus with a Energy Shield base on your offhand to summon as your major source of Energy Shield and Elemental Resistances.
For your 2nd weapon set, use a Chiming Staff specifically for the Sigil of Power skill, which provides a Spell Damage buff.
Armor and Accessories
Prioritize acquiring as much energy shield as you can while balancing out elemental resistances. Extra spirit is desirable as you will be need it for persistent skills that reduce enemy Chaos Resistance.
In general, you should use whatever Ring can help balance out your elemental resistances. For example, use Sapphire rings for cold resistance, which are necessary for dealing with the Act I boss, Count Geonor.
As you approach the end of Act III, you can stack up on Chaos Resistance, since this is the most difficult to obtain and can help deal with poison damage.
| List of Rings | List of Amulets |
| List of Armors | |
Belts and Charms
| Belt Modifiers | |||||
|---|---|---|---|---|---|
 Utility Belt Utility Belt Utility Belt Requirements:
Level - 55 Implicit:1-2 Charm slots;20% of Flask Recovery applied Instantly |
・Increased Maximum Mana
・Increased Recovery from Flasks ・Any Elemental Resistances |
||||
| Charm Options | |||||
 Sapphire Charm Sapphire Charm Sapphire Charm Stats:
Flask Type - Charm Charge Per Use - 20 Total Charges - 40 Duration - 4 sec. |
 Topaz Charm Topaz Charm Topaz Charm Stats:
Flask Type - Charm Charge Per Use - 20 Total Charges - 40 Duration - 4 sec. |
 Antidote Charm Antidote Charm Antidote Charm Stats:
Flask Type - Charm Charge Per Use - 20 Total Charges - 40 Duration - 3 sec. |
|||
Equip a Utility Belt to apply flask recovery instantly. As you progress through the Acts, you will encounter bosses that can practically one-shot you, so healing instantly can often save you.
For your Charms, make sure to equip either a Sapphire Charm to help you survive against Count Geonor in Act 1 or the Topaz Charm for Jamanra. You can also opt to use the Antidote Charm to help deal with poison damage.
| List of Belts | List of Charms |
Runes and Soul Cores
| Equipment | Sockets |
|---|---|
| Weapon | |
| Armor |
We recommend slotting an Iron Rune into your Wand to further increase your Spell damage. For your Armor, use whatever rune will help you balance out your Elemental Resistances.
| List of Runes | List of Soul Cores |
Drain Contagion Witch Skills
※ The Support Gems' priority are arranged in a descending order. The first one being the most important and the last being the least crucial.
| Skill | Support Gems |
|---|---|
|
Essence Drain Essence Drain Fires a Projectile that applies a powerful Chaos damage over time debuff to enemy hits.
|
Considered Casting Supports Spell skills that Hit Enemies, boosting Damage at the cost of Cast Speed.
Swift Affliction II Supports any skill that deals damage, causing it to deal more non-Ailment damage over time but have a shorter duration.
Chain I Supports Projectile skills and any other skills that Chain, causing them to Chain additional times.
|
|
Contagion Contagion Afflicts a single enemy with a Debuff that deals Chaos Damage over time. If the enemy dies while affected by contagion, it and all other Chaos Damage over time Debuffs spread to other enemies and refresh their durations. Reanimating or detonating a corpse affected by contagion will cause the Minion or explosion to spread Contagion on hit.
|
Swift Affliction II Supports any skill that deals damage, causing it to deal more non-Ailment damage over time but have a shorter duration.
Magnified Area II Supports any skill with an area of effect, making it larger at the cost of damage.
Unleash Supports Spells you cast yourself, making their effect reoccur when cast. Cannot support Channelling Skills or Skills with a Cooldown.
|
|
Dark Effigy Dark Effigy Raises a Totem that bombards enemies afflicted by Chaos damage over time Debuffs.
|
Urgent Totems I Supports skills which place Totems, causing those skills to place Totems much more quickly.
Overabundance II Supports skills which can have a Limited number of effects active at once, increasing that Limit at the cost of their duration. Only applies to restrictions that use the word "Limit".
Poison II Supports any skill that hits enemies, giving it a chance to Poison enemies.
|
|
Withering Presence Withering Presence While active, periodically Withers enemies in your Presence.
|
Upwelling I Supports Persistent Buff Skills, causing your Minions to deal increased Damage while you are not on full Mana while the Supported Skill is active.
Prolonged Duration II Supports any skill that has a duration, making that duration longer.
|
 Blasphemy Blasphemy Blasphemy Turns socketed Curse skills into vile Auras, applying their effects to all nearby enemies.
|
Despair Curses all targets in an area after a short delay, lowering their Chaos Resistance.
Magnified Area II Supports any skill with an area of effect, making it larger at the cost of damage.
Clarity I Supports Persistent Buff Skills, causing you to gain increased mana Regeneration while the skill is active.
|
 Sigil of Power Sigil of Power Sigil of Power |
Rapid Casting II Supports Spells, causing them to cast faster.
|
|
Unearth Unearth Raises spikes of bone from the earth in front of you. The bones of Corpses in the area are ripped out and reassembled into short-lived Bone Construct Minions that fight for you.
|
Prolonged Duration I Supports any skill that has a duration, making that duration longer.
|
This build focuses on applying damage over time debuffs over many enemies at once, while also summoning plenty of minions to tank damage for you. In the early stages of the game, you can rely on Unearth for mobbing.
As long as you can trigger the interaction of Essence Drain and Contagion, you can defeat mobs easily and from a safe distance. Dark Effigy is an imporant skill to obtain in Act 3 since this drastically increases your single-target damage.
Allocate your spirit for Withering Presence and Blasphemy to reduce enemy Chaos Resistance, therefore boosting our damage.
We will socket the Blasphemy skill gem with the Despair skill, transforming it into an Aura. This feature allows us to deploy the Despair curse without the need for manual casting, though it does incur an additional spirit cost. Blasphemy ensures the consistent application of the curse across enemies within range, which allows us to cast Dark Effigy more quickly after applying our other curses.
Drain Contagion Witch Passive Tree
Passive Tree Progression
This build focuses on boosting Chaos damage, Minion damage, and Spell damage. Fortunately, there are nodes for these stats that are relatively close to one another.
Build towards nodes such as Spiral into Insanity, Entropy, and Lingering Horror for increased Chaos damage and Raw Destruction for increased Spell damage.
You will also need to invest into nodes such as Pure Energy and Open Mind for more utility and survivability, such as Mana Regeneration and Energy Shield.
Though we use the Unearth Skill, there is no need to focus on minion damage since they are mostly meant to get aggro from enemies.
Passive Skill Tree Guide and List of Passives
Ascendancy Options
 Lich Lich
|
• Choose Eldritch Empowerment to increases damage done by spells without interrupting shield recharge. |
Since Energy Shields are a natural defensive option for the build, we recommend choosing the Lich Ascendancy and obtaining the Eldritch Empowerment Ascendancy node to increase your damage output.
You have the option to transition to a different Ascendancy if you wish to switch to a different build once you reach the endgame.
Drain Contagion Witch Playstyle
Mobbing Rotation
This will be your standard rotation for most encounters, with the variation being the number of corpses you can summon with Unearth after defeating enemy packs.
- Engage enemy packs with Essence Drain.
- Cast Contagion on low HP target.
- Cast Dark Effigy against tanky enemies.
- Keep spamming Essence Drain.
- Cast Unearth on corpses before proceeding to the next pack.
Bossing Rotation
For bossing, you can opt to pre-cast your Dark Effigy totems in safe spots in the arena, and proceeding as normal.
- Cast Essence Drain and Contagion.
- Cast Dark Effigy twice.
- Continue spamming Essence Drain and Contagion.
- Continue spawning Dark Effigy, ensuring they keep attacking the boss.
- Cast Unearth if the Boss has a mob phase that spawns useable corpses when slain.
- Cast Chaos Bolt if you're out of mana.
Build Progression
| Jump to an Act! | |||||
|---|---|---|---|---|---|
| Act 1 | Act 2 | Act 3 | |||
| Act 4 | Interludes | ||||
Act 1 Progression
To progress through Act 1 and beat Count Geonor using the Essence Drain Contagion Witch leveling build, follow these steps:
| # | Steps |
|---|---|
| 1 | Upon spawning, equip the
|
| 2 | Talk to Renly and enter Clearfell Encampment. Head for the Mysterious Campsite at Clearfell to get an extra Level 1
|
| 3 | |
| 4 | Defeat
|
| 5 | Find the Witch Hut in The Grelwood and defeat Areagne, Forgotten Witch to level up your
Note: Make sure to loot the Witch Hut to get Medium Flasks. |
| 6 | Defeat
|
| 7 | Progress to The Grim Tangle and defeat
|
| 8 | Look for the Haunted Treasure Inside the Tomb of the Consort and defeat the rare enemy to acquire a Level 1 Uncut Support Gem and slot in
|
| 9 | Defeat
|
| 10 | Search and complete your first Ritual in the same area to get a Level 4 Uncut Skill Gem and use this to upgrade your Essence Drain.
|
| 11 | Start looking for the Dryadic Ritual in the same area to get an extra Level 1 Uncut Support Gem (to be used later).
|
| 12 | Defeat the
|
| 13 | Complete The Lost Lute at the Ogham Farmlands to obtain a Book of Specialisation for more passive points.
|
| 14 | Search for the Crop Circle in the same area to defeat
|
| 15 | Proceed to Ogham Village and defeat
|
| 16 | As soon as you get another Lv.4 Uncut Skill Gem, upgrade
|
| 17 | Search and defeat the
|
| 18 | Continue and defeat
Note: Make sure you have Medium Flasks since this boss fight has 2 Phases so you will be spending a good amount of time learning and surviving the mechanics. |
Act 2 Progression
To progress through Act 2 and beat Jamanra, the Abomination using the Essence Drain Contagion Witch leveling build, follow these steps:
| # | Steps |
|---|---|
| 1 | |
| 2 | Defeat
Ascendancy: You can attempt to finish the Sekhema's Trial to get your first two Ascendancy Skills. |
| 3 | Clear Mobs in Keth until you get the
|
| 4 | Defeat
|
| 5 | Defeat
Note: Make sure to slot in this Jewel in your passive tree as you progress. |
| 6 | Open the Guarded Sarcophagus for an
|
| 7 | Three Elemental Offering Ring choices: Ruby Ring, Sapphire Ring, and Topaz Ring for flame, cold, and lightning resistance respectively. It is recommended to choose the Topaz Ring to prepare for
|
| 8 | Clear The City of Seven Waters for an Uncut Support Gem II.
|
| 9 | Destroy the Effigy located in the Shrine of Bones for an Uncut Support Gem Level 2.
|
| 10 | Clear Mobs in The Bone Pits until you get the
|
| 11 | Complete A Theft of Ivory quest for an Uncut Support Gem Level 2. You can use this for any missing support gems in the build.
|
| 12 | Place both Relics in the Valley of Titans to complete the Ancient Vows quest. Choose the Moon Clan Relic for the 30% Charm Effect Duration.
|
| 13 | Complete A Crown of Stone quest for an Uncut Support Gem Level 2. You can use this for any missing support gems in the build. |
| 14 | Complete the Tradition's Toll quest to get a
|
| 15 | Defeat the Forgotten Corpses for an additional
|
Act 3 Progression
To progress through Act 3 and beat Doryani using the Essence Drain Contagion Witch leveling build, follow these steps:
| # | Step by Step Guide to Act 3 Leveling |
|---|---|
| 1 | |
| 2 |
Loot the basket found in the Orok Campfire at Sandswept Marsh to get a
Note: Use this on your Dark Effigy and use your extra Uncut Support Gem to slot in |
| 3 | |
| 4 |
Complete The Slithering Dead to get the Venom Draught of the Veil for provide you with +30% Increased Elemental Ailment Threshold. |
| 5 |
Look for the Jungle Grave and interact with the Ravaged Corpse to summon Servi and get a rare Belt. We recommend taking Linen Belt for better mana management. |
| 6 |
Defeat
|
| 7 |
Submit the Tribal Vengeance to get a charm. Choose the Antidote Charm for increased defenses against Poison. |
| 8 |
Defeat
|
| 9 |
Use the Paquate's Mechanism to Corrupt gear. We suggest corrupting the
|
| 10 |
Obtain an
|
| 11 |
Ascendancy: By this time, you can complete the Trial of Chaos to get your third and fourth Ascendancy Point.
┗
|
| 12 |
Use the
|
Act 4 Progression
To progress through Act 4 and beat Tavakai using the Drain Contagion Witch build, follow these steps:
| # | Steps |
|---|---|
| 1 |
Get Shark's Fin in Whakapanu Island and submit it to Kaimana in the Tavakai's Ship to get a
|
| 2 | Defeat
|
| 3 |
Find the Barnacle before the Beckoning Clam event to get
|
| 4 |
Get the Humming Pearl from the Beckoning Clam and exchange it for a
|
| 5 |
Find the Chapel Key and interact with the Goddess of Justice and choose to get +30% life regeneration from flasks. |
| 6 |
Complete Dark Mists to gain a Book of Specialization and a
|
| 7 |
Get a
|
| 8 | Defeat
|
| 9 |
Release the Beast from its pen in the Isle of Kin and defeat it to gain
|
| 10 |
Complete the Trial of the Ancestors to obtain the following:
・See Navali's Rest to gain a random rune and 5% Increased Maximum Mana ・Pass Ngamahu's Test to get 5% Fire Resistance ・Pass Tawhoa's Test to get 5% Lightning Resistance ・Pass Tasalio's Test to get 5% Cold Resistance ・Gain 2 Weapon Specialization points by talking to The Mother. |
| 11 |
Ring the Morning and Evening Bell in Arastas to receive three
Note: You can use these to either craft a weapon, or trade for solid equipment! |
| 12 |
Get a random Greater Rune in the Meeting House. |
Interludes Progression
To progress through Interludes and set yourself up for mapping using the Lightning Wyvern Druid build, follow these steps:
| # | Steps |
|---|---|
| 1 | Get a Level 13
|
| 2 | Buy Greater Runes from the Ferryman in Holten. |
| 3 | Defeat
|
| 4 | |
| 5 | Get the Molten One's Gift in Skullmaw Stairway to get a +5% to your Maximum Life. |
| 6 |
Slot in both
|
| 7 |
Defeat
Note: If you were able to succeed, it is recommended to getting Sacred Flow and unequipping two of your charms to get 80 Spirit. This will enable you to activate all recommend Spirit Gems and their Support Gems. |
| 8 | Activate one out of Seven Pillars in Qimah based on what you need, you can change this any time. We recommend getting either Global Defences or Elemental Resistances for better survivability. |
| 9 |
Fill the two Sacred Wells in Qimah Reservoir to get 1
Note: You can use these to either craft a weapon, or trade for solid equipment! |
| 10 | Interact with the Ancient Monument in Ashen Forest for a Level 14
|
| 11 | Defeat
|
| 12 | Defeat
|
| 13 | Get a free Unique Equipment of your choice from a randomized table from Elder Madox in Kriar Peaks. |
| 14 | After finishing all three regions, talk to The Hooded One in Kingsmarch to gain another
|
Path of Exile 2 (PoE 2) Related Guides

0.4 Best Endgame Builds
| Rank | Build |
|---|---|
 |
|
 |
|
 |
|
 |
0.4 Leveling Builds
NEW |
NEW |
NEW |
NEW |
NEW |
NEW |
NEW |
NEW |
NEW |
NEW |
- | - |
All Build Guides
| List of Builds by Class | |||||||||||
|---|---|---|---|---|---|---|---|---|---|---|---|
 Huntress Huntress |
 Mercenary Mercenary |
 Monk Monk |
|||||||||
 Witch Witch |
 Sorceress Sorceress |
 Warrior Warrior |
|||||||||
 Ranger Ranger |
 Druid Druid |
- | |||||||||
| Other Build Guides | 0.3 Leveling Builds | How to Make a Good Build | |||||||||
Witch Leveling Builds
Flame Wall Creates a wall of fire in front of the character, which ignites everything within its area. Any projectiles fired through the wall by you and allies deal added fire damage and inflict ignite on hit.
Flammability Curses all targets in an area after a short delay, lowering their Fire Resistance.
Raging Spirits While active, your Fire Spells will also summon Raging Spirits, which are short-lived flaming skulls that rush at nearby enemies and rapidly Attack them. Enemies will not directly engage these Minions, and can pass through them.
Skeletal Warrior Summons reviving Skeletal Warriors.
Pain Offering Impales a Skeleton on bone spike to send nearby Minions into a frenzy as long as the spike remains. The bone spike itself is a minion. If it dies, effect ends immediately.
Skeletal Cleric Summons Reviving Skeletal Clerics that heal other minions and revive fallen Skeletons.
Focus: Minions, Crowd Control, DoT |
|
UP |
Frost Bomb Creates a pulsing Orb of Frost. Each pulse inflicts Cold Exposure on nearby Enemies. When the Orb's duration ends, it explodes, dealing Cold damage to surrounding Enemies.
Contagion Afflicts a single enemy with a Debuff that deals Chaos Damage over time. If the enemy dies while affected by contagion, it and all other Chaos Damage over time Debuffs spread to other enemies and refresh their durations. Reanimating or detonating a corpse affected by contagion will cause the Minion or explosion to spread Contagion on hit.
Chaos Bolt Fires a burst of chaos energy at the target.
Skeletal Warrior Summons reviving Skeletal Warriors.
Unearth Raises spikes of bone from the earth in front of you. The bones of Corpses in the area are ripped out and reassembled into short-lived Bone Construct Minions that fight for you.
Essence Drain Fires a Projectile that applies a powerful Chaos damage over time debuff to enemy hits.
Despair Curses all targets in an area after a short delay, lowering their Chaos Resistance.
Dark Effigy Raises a Totem that bombards enemies afflicted by Chaos damage over time Debuffs.
Blasphemy Turns socketed Curse skills into vile Auras, applying their effects to all nearby enemies.
Withering Presence While active, periodically Withers enemies in your Presence.
Ravenous Swarm While active and enemies are present, swarms of insects emerge from your body to pursue nearby enemies. The Swarms are untargetable Minions that Attack and Poison enemies.
Focus: AoE, Chaos, DoT |
Witch Endgame Builds
Flame Wall Creates a wall of fire in front of the character, which ignites everything within its area. Any projectiles fired through the wall by you and allies deal added fire damage and inflict ignite on hit.
Raging Spirits While active, your Fire Spells will also summon Raging Spirits, which are short-lived flaming skulls that rush at nearby enemies and rapidly Attack them. Enemies will not directly engage these Minions, and can pass through them.
Skeletal Arsonist Activate to summon bomb-throwing, Reviving Skeletal Arsonists taht can detonate other minions on Command.
Pain Offering Impales a Skeleton on bone spike to send nearby Minions into a frenzy as long as the spike remains. The bone spike itself is a minion. If it dies, effect ends immediately.
Detonate Dead Causes a Corpse to violently explode, damaging surrounding enemies.
Vulnerability Curses all targets in an area after a short delay, making Hits against them ignore a portion of their Armour.
Skeletal Brute Summons hard-hitting, Reviving Skeletal Brutes that can Stun Primed enemies.
Skeletal Cleric Summons Reviving Skeletal Clerics that heal other minions and revive fallen Skeletons.
Focus: Minions, Crowd Control, DoT |
|
Bonestorm Channel to conjure a swarm of bone spikes in the air, then release to fire at the enemies and explode. Shrapnel Impales enemies Hit, causing subsequent Attack Hits against those targets to deal Extra Damage. Consumes your Power Charge to cause much larger explosions.
Vulnerability Curses all targets in an area after a short delay, making Hits against them ignore a portion of their Armour.
Bone Cage Raises a ring of bone spikes around you. The spikes are destroyed when enemies touch them, damaging and Pinning those enemies.
Blasphemy Turns socketed Curse skills into vile Auras, applying their effects to all nearby enemies.
Life Remnants 25% chance to spawn a Remnant on killing an enemy;Spawn a Remnant on Critically Hitting a target, no more than once every 2 seconds;Each Remnant grants X Life
Focus: High Single Target Damage |
|
Arctic Armour Conjures an icy barrier that gains stages overtime. While the barrier has stages, Melee Attacks that hit you will remove a stage to cause a burst of ice that deals Cold Spell damage to the attacker.
Ice Nova A nova of ice expands from you, Knocking Back enemies based on how close they are to you. Casting Ice Nova targeting near a Frostbolt Projectile will cause it to originate from the Frostbolt insead of you, and cause more Freeze buildup.
Solar Orb Creates a fiery Orb that periodically releases fiery pulses. Enemies that are very close to the Orb are Ignited.
Flammability Curses all targets in an area after a short delay, lowering their Fire Resistance.
Flameblast Channels to build destructive energy around you or a targeted Solar Orb. Releasing the energy causes a devastating explosion that is larger and more intense the longer you channelled for.
Grim Feast Feeds on corpses to bolster your Energy Shield. While active, enemies and Reviving Minions that die in your Presence have a chance to drop Grim Remnants. Picking up a Grim Remnant grants you Energy Shield which can Overflow maximum Energy Shield.
Focus: Fast Clear, AoE |
|
Frost Wall Creates a Wall of Ice Crystals which holds back enemies. The Crystals explode if sufficiently damaged, orif pushed hard enough, damaging nearby enemies..
Grim Feast Feeds on corpses to bolster your Energy Shield. While active, enemies and Reviving Minions that die in your Presence have a chance to drop Grim Remnants. Picking up a Grim Remnant grants you Energy Shield which can Overflow maximum Energy Shield.
Detonate Dead Causes a Corpse to violently explode, damaging surrounding enemies.
Vulnerability Curses all targets in an area after a short delay, making Hits against them ignore a portion of their Armour.
Skeletal Brute Summons hard-hitting, Reviving Skeletal Brutes that can Stun Primed enemies.
Skeletal Cleric Summons Reviving Skeletal Clerics that heal other minions and revive fallen Skeletons.
Soul Offering Impales a Skeleton on a bone spike, granting you a powerful Spell Damage Buff as long as the spike remains. Does not affect your minions. The bone spike itself is a Minion. If it dies, the effect ends immediately.
Sacrifice While active, your undead Reviving Minions can be used in place of Corpses by your skills, but your Minions Revive more slowly.
Focus: High Damage, Fast Clear, Minions |
|
Flame Wall Creates a wall of fire in front of the character, which ignites everything within its area. Any projectiles fired through the wall by you and allies deal added fire damage and inflict ignite on hit.
Skeletal Warrior Summons reviving Skeletal Warriors.
Skeletal Arsonist Activate to summon bomb-throwing, Reviving Skeletal Arsonists taht can detonate other minions on Command.
Raise Zombie Consumes a Corpse or Power Charge to create a short-lived zombie. Zombies created from Power Charges are empowered.
Pain Offering Impales a Skeleton on bone spike to send nearby Minions into a frenzy as long as the spike remains. The bone spike itself is a minion. If it dies, effect ends immediately.
Skeletal Cleric Summons Reviving Skeletal Clerics that heal other minions and revive fallen Skeletons.
Skeletal Frost Mage Summons reviving Skeletal Frost Mages that can be commanded to cast Icy Explosions
Profane Ritual Marks a Corpse with a profane rune, dealing Chaos damage over time to nearby enemies. When the ritual is complete the corpse is consumed and you gain a power charge.
Despair Curses all targets in an area after a short delay, lowering their Chaos Resistance.
Bone Offering Impales a Skeleton on a bone spike to shield your Minions while the spike remains. The shield absorbs all damage from the next hit each Minion takes, then explodes. The bone spike itself is a Minion, and shields itself. If it dies, shields on your other Minions disappear.
Focus: Minion, Chaos, AoE, Curse |
|
Solar Orb Creates a fiery Orb that periodically releases fiery pulses. Enemies that are very close to the Orb are Ignited.
Flammability Curses all targets in an area after a short delay, lowering their Fire Resistance.
Comet Calls down a mass of ice from the sky, dealing high damage at the targeted location. Targeting close to you will cause you to jump back as you cast.
Contagion Afflicts a single enemy with a Debuff that deals Chaos Damage over time. If the enemy dies while affected by contagion, it and all other Chaos Damage over time Debuffs spread to other enemies and refresh their durations. Reanimating or detonating a corpse affected by contagion will cause the Minion or explosion to spread Contagion on hit.
Overwhelming Presence While active, enemies in your Presence are easier to Stun and inflict Elemental Ailments upon.
Cast on Ignite While active, gains Energy when you Ignite enemies and triggers socketed spells on reaching maximum Energy.
Alchemist's Boon While active, grants you Flask Charges passively and causes Life and Mana recovery from your Flasks to also apply to Allies in your presence.
Demon Form (12–25)% increased Cast Speed while in Demon Form;+(3–6) to Level of all Spell Skills while in Demon Form;Lose 0.5% of Life per second per Demonflame;Deal (7–18)% increased Spell damage per Demonflame
Focus: AoE, Mobbing, Freeze, Ignite |
|
Contagion Afflicts a single enemy with a Debuff that deals Chaos Damage over time. If the enemy dies while affected by contagion, it and all other Chaos Damage over time Debuffs spread to other enemies and refresh their durations. Reanimating or detonating a corpse affected by contagion will cause the Minion or explosion to spread Contagion on hit.
Essence Drain Fires a Projectile that applies a powerful Chaos damage over time debuff to enemy hits.
Bonestorm Channel to conjure a swarm of bone spikes in the air, then release to fire at the enemies and explode. Shrapnel Impales enemies Hit, causing subsequent Attack Hits against those targets to deal Extra Damage. Consumes your Power Charge to cause much larger explosions.
Despair Curses all targets in an area after a short delay, lowering their Chaos Resistance.
Dark Effigy Raises a Totem that bombards enemies afflicted by Chaos damage over time Debuffs.
Blasphemy Turns socketed Curse skills into vile Auras, applying their effects to all nearby enemies.
Withering Presence While active, periodically Withers enemies in your Presence.
Blink Replaces your dodge roll with a short-cooldown Spell that allows you to tunnel through space, instantly reappearing a medium distance away.
Convalescence While active, grants a skill that you can use to instantly begin Recharging Energy Shield and gain Buff for a duration that prevents Recharge being interrupted. The Buff is removed at maximum Energy Shield and the skill cannot be used while Energy Shield is full.
Focus: Chaos, AoE, Curse, Totem |
|
Spark Launches a spray of sparking projectiles that travel erratically along the ground until they hit an enemy or expire.
Orb of Storms Creates an Orb of electricity that fires Chaining Lightning bolts at nearby enemies.
Blink Replaces your dodge roll with a short-cooldown Spell that allows you to tunnel through space, instantly reappearing a medium distance away.
Cast on Critical While active, gains energy when you Critically Hit enemies and triggers socketed spells on reaching maximum energy.
Convalescence While active, grants a skill that you can use to instantly begin Recharging Energy Shield and gain Buff for a duration that prevents Recharge being interrupted. The Buff is removed at maximum Energy Shield and the skill cannot be used while Energy Shield is full.
Life Remnants 25% chance to spawn a Remnant on killing an enemy;Spawn a Remnant on Critically Hitting a target, no more than once every 2 seconds;Each Remnant grants X Life
Focus: Lightning, Critical Hit, Life Leech |
|
Orb of Storms Creates an Orb of electricity that fires Chaining Lightning bolts at nearby enemies.
Lightning Warp Teleports you inside the target's body, causing it to violently explode. Highlights enemies that can be culled, and can only be used on these enemies or Ball Lightning projectiles. The target is destroyed, and the explosion deals Lightning Damage to surrounding enemies and creates Shocked Ground.
Ball Lightning Fires a slow-moving projectile that repeatedly shoots bolts of lightning at nearby enemies.
Blasphemy Turns socketed Curse skills into vile Auras, applying their effects to all nearby enemies.
Cast on Critical While active, gains energy when you Critically Hit enemies and triggers socketed spells on reaching maximum energy.
Convalescence While active, grants a skill that you can use to instantly begin Recharging Energy Shield and gain Buff for a duration that prevents Recharge being interrupted. The Buff is removed at maximum Energy Shield and the skill cannot be used while Energy Shield is full.
Demon Form (12–25)% increased Cast Speed while in Demon Form;+(3–6) to Level of all Spell Skills while in Demon Form;Lose 0.5% of Life per second per Demonflame;Deal (7–18)% increased Spell damage per Demonflame
Focus: Lightning, AoE, Cast on Critical |
|
Ember Fusillade Conjures a blazing Ember that hovers around you. After a short duration, the Ember launches at the enemy, dealing fire damage in an area on impact. Recasting the spess resets the duration for all active Embers. Multiple Embers fired in the same Fusillade will attempt to target different enemies.
Fireball Launches a large ball of Fire which explodes on impact, creating a nova of smaller firebolts.
Despair Curses all targets in an area after a short delay, lowering their Chaos Resistance.
Withering Presence While active, periodically Withers enemies in your Presence.
Time of Need Invokes divine blessings, periodically healing you and removing Curses and Elemental Ailments from you.
Cast on Critical While active, gains energy when you Critically Hit enemies and triggers socketed spells on reaching maximum energy.
Convalescence While active, grants a skill that you can use to instantly begin Recharging Energy Shield and gain Buff for a duration that prevents Recharge being interrupted. The Buff is removed at maximum Energy Shield and the skill cannot be used while Energy Shield is full.
Siphon Elements While active, has a chance to create an Infusion Remnant when you Freeze, Shock, or Ignite a target.
Living Bomb Plant a seed of Fire inside an enemy. Dealing enough damage to the enemy, or killing it outright, causes the seed to explode, dealing damage in an area and leaving behind a Fire Infusion Remnant.
Life Remnants 25% chance to spawn a Remnant on killing an enemy;Spawn a Remnant on Critically Hitting a target, no more than once every 2 seconds;Each Remnant grants X Life
Focus: Chaos, Critical, Fire |
|
Frost Bomb Creates a pulsing Orb of Frost. Each pulse inflicts Cold Exposure on nearby Enemies. When the Orb's duration ends, it explodes, dealing Cold damage to surrounding Enemies.
Orb of Storms Creates an Orb of electricity that fires Chaining Lightning bolts at nearby enemies.
Bonestorm Channel to conjure a swarm of bone spikes in the air, then release to fire at the enemies and explode. Shrapnel Impales enemies Hit, causing subsequent Attack Hits against those targets to deal Extra Damage. Consumes your Power Charge to cause much larger explosions.
Vulnerability Curses all targets in an area after a short delay, making Hits against them ignore a portion of their Armour.
Bone Cage Raises a ring of bone spikes around you. The spikes are destroyed when enemies touch them, damaging and Pinning those enemies.
Cast on Critical While active, gains energy when you Critically Hit enemies and triggers socketed spells on reaching maximum energy.
Life Remnants 25% chance to spawn a Remnant on killing an enemy;Spawn a Remnant on Critically Hitting a target, no more than once every 2 seconds;Each Remnant grants X Life
Focus: Reap, Physical, Burst |
Witch Class and Ascendancy Guides
| Base Class | ||
|---|---|---|
| Ascendancies | ||
Comment
Author

PoE 2 0.4 Witch Leveling Build - Drain Contagion
Rankings
- We could not find the message board you were looking for.
Gaming News
![Neverness to Everness (NTE) Review [Beta Co-Ex Test] | Rolling the Dice on Something Special](https://img.game8.co/4414628/dd3192c8f1f074ea788451a11eb862a7.jpeg/show)


Popular Games

Genshin Impact Walkthrough & Guides Wiki
Honkai: Star Rail Walkthrough & Guides Wiki
Arknights: Endfield Walkthrough & Guides Wiki
Umamusume: Pretty Derby Walkthrough & Guides Wiki
Wuthering Waves Walkthrough & Guides Wiki
Pokemon TCG Pocket (PTCGP) Strategies & Guides Wiki
Abyss Walkthrough & Guides Wiki
Zenless Zone Zero Walkthrough & Guides Wiki
Digimon Story: Time Stranger Walkthrough & Guides Wiki
Clair Obscur: Expedition 33 Walkthrough & Guides Wiki


Recommended Games
Fire Emblem Heroes (FEH) Walkthrough & Guides Wiki
Pokemon Brilliant Diamond and Shining Pearl (BDSP) Walkthrough & Guides Wiki
Diablo 4: Vessel of Hatred Walkthrough & Guides Wiki
Super Smash Bros. Ultimate Walkthrough & Guides Wiki
Yu-Gi-Oh! Master Duel Walkthrough & Guides Wiki
Elden Ring Shadow of the Erdtree Walkthrough & Guides Wiki
Monster Hunter World Walkthrough & Guides Wiki
The Legend of Zelda: Tears of the Kingdom Walkthrough & Guides Wiki
Persona 3 Reload Walkthrough & Guides Wiki
Cyberpunk 2077: Ultimate Edition Walkthrough & Guides Wiki


All rights reserved
© 2010 - 2024 Grinding Gear Games
The copyrights of videos of games used in our content and other intellectual property rights belong to the provider of the game.
The contents we provide on this site were created personally by members of the Game8 editorial department.
We refuse the right to reuse or repost content taken without our permission such as data or images to other sites.