PoE 2 Gunslinger Gemling Legionnaire Mercenary Build
Latest: 0.5.0 Release Date
☆ Fate of the Vaal ▶︎ The Last of the Druids
┗ Bonded Mods | 0.4 Mystery Box
★ Druid: Class Overview | Builds
☆ NEW: Disciple of Varashta Ascendancy!
★ Best Class | Best Builds | Leveling Builds
This is an Ailment Gunslinger Gemling Legionnaire Mercenary endgame build for Path of Exile 2 (PoE 2). Check out the Ailment Gunslinger Gemling Legionnaire Mercenary endgame build, including its gear, socketables, skills, and playstyle!
 Attention! Attention! |
This build was last updated for patch 0.1.1g and may be outdated for the recent patches. For more up-to-date builds, please refer to our list of latest builds! |
|---|
List of Contents
Gunslinger Gemling Legionnaire Build Summary
LazyExile's Gunslinger Gemling Legionnaire Build
This Ailment Gunslinger build is based on a build by LazyExile over at LazyExile (Youtube). The video includes details on how to gear up to get the build online. Check out LazyExile's YouTube channel for more Path of Exile 2 content and ask questions about the build!
Gunslinger Gemling Legionnaire Build
※ Switch tabs to view build progression: Early Game (Acts 1-2), Mid-Game (Act 3 to Cruel Mode), Endgame (Atlas).
The Ailment Gunslinger Gemling Legionnaire build focuses on applying Poison and Bleeding ailments to deal consistent damage, while also Freezing and Armour Breaking your enemies for crowd control and dealing huge burst damage.
In the early game, you can use Permafrost Bolts as a substitute until you get Glacial Bolt which is a key skill for this build that will help you reach endgame.
Gunslinger Gemling Legionnaire Gear Setup
Equipment and Modifiers
※ Switch tabs to view build progression: Early Game (Acts 1-2), Mid-Game (Act 3 to Cruel Mode), Endgame (Atlas).
| Gear | Modifiers | |
|---|---|---|
| The Three Dragons (Helm) | ・Increased Evasion and Energy Shield ・All Elemental Resistances ・Fire Damage from Hits Contributes to Shock Chance instead of Ignite Chance and Magnitude ・Cold Damage from Hits Contributes to Ignite Chance and Magnitude instead of Chill Magnitude ・Lightning Damage from Hits Contributes to Freeze Buildup instead of Shock Chance | |
| Armor | ・Spirit ・Strength ・Armour and Evasion ・Any Elemental Resistance | |
| Gloves | ・Adds Physical Damage to Attacks ・Armour ・Strength ・Maximum Life ・Any Elemental Resistance | |
| Ryslatha's Coil (Belt) | ・Reduced Charm Charges used ・Maximum Life ・Flask Life Recovery rate ・Maximum Physical Attack Damage ・Minimum Physical Attack Damage | |
| Boots | ・Movement Speed ・Armour and Evasion ・Any Elemental Resistance | |
| Death Rush (Ring) | ・Accuracy Rating ・Evasion Rating ・Leech Physical Damage as Life ・Gain Onslaught on Kill | |
| Amulet | ・Spirit ・Strength ・Armour and Evasion ・Any Elemental Resistance | |
| Ring | ・Chaos Resistance ・Strength ・Any Elemental Resistance | |
| Dyad Crossbow | ・Loads an Additional Bolt ・Adds Physical Damage to Attacks ・Increased Physical Damage ・Accuracy Rating ・Strength ・Critical Hit Chance |
| Gear | Modifiers | |
|---|---|---|
| Helm | ・Armour and Evasion ・Rarity of Items Found ・Dexterity ・Reduced Attribute Requirements | |
| Armor | ・Spirit ・Cold Resistance ・Fire Resistance ・Lightning Resistance | |
| Gloves | ・Adds Physical Damage to Attacks ・Gain Mana per Enemy Killed | |
| Belt | ・Life Recovery from Flasks ・Armour ・Maximum Life ・Fire Resistance ・Lightning Resistance ・Charm Charges Gained | |
| Boots | ・Movement Speed ・Rarity of Items Found ・Reduced Attribute Requirements ・Stun Threshold | |
| Ring | ・Maximum Mana ・Evasion Rating ・Maximum Life ・Rarity of Items Found ・Lightning Resistance | |
| Amulet | ・Dexterity ・Spirit ・Lightning Resistance ・Mana Regeneration | |
| Ring | ・All Elemental Resistances ・Accuracy Rating ・Evasion Rating ・Rarity of Items Found ・Cold Resistance | |
| Crossbow | ・Increased Physical Damage ・Adds Physical Damage to Attacks ・Level of All Projectile Skills |
Weapons
For the Ailment Gunslinger Gemling Legionnaire build, the most important gear would be picking up Dyad Crossbows with Adds Physical Damage to Attacks and Increased Physical Damage as this will be your best way of increasing your damage as you progress through the campaign.
Armor and Accessories
In order to bring this build online, you would have to obtain The Three Dragons unique helm as this will convert your elemental Hits to contribute to other ailment chances, Death Rush unique ring to gain Onslaught on kill, and Ryslatha's Coil to max out your physical damage.
The rest of your equipment can vary but try to aim for at least 95 Spirit to equip all your Persistent skills and reach the 75% Resistance cap to improve your survivability. Make sure to always upgrade your weapon with ones that are between 10 levels from your level and the monster levels to avoid any damage fall-offs.
| All Armors and Accessories | |
|---|---|
| List of Armors | List of Accessories |
Socketables
Jewels
| |
・Increased Critical Hit Chance
・Increased Projectile Damage ・Global Physical Damage ・Chance to Inflict Ailment ・Increased Ailment Magnitude ・Increased Ailment Duration of Enemies |
|---|
For your jewels, focus on getting Emeralds that boost Critical Hit Chance and Ailment effects as this will help you maximize your damage and consistency.
Charms
 Amethyst Charm Amethyst Charm |
・Increased Duration
・Increased Charges ・Recover Life when Used |
|---|
The best charm to slot in would be the Amethyst Charm to help you reach the 75% resistance cap is this is key towards surviving higher tiers.
Gunslinger Gemling Legionnaire Skills and Passive Tree
Active Skills
※ Switch tabs to view build progression: Early Game (Acts 1-2), Mid-Game (Act 3 to Cruel Mode), Endgame (Atlas).
| Skill | Support Gems |
|---|---|
 Fragmentation Rounds Fragmentation Rounds | Poison II Supports any skill that hits enemies, giving it a chance to Poison enemies. Corrosion Supports any skill that hits enemies, causing Poison it applies to also break any armour. Cannot support skills that consume Fully Broken Armour. Deadly Poison II Supports any skill that Hits enemies, causing it to deal less damage but inflict more potent Poison. Heft Supports Skills which deal damage, increasing the maximum Physical Damage of their Hits. Efficiency II Supports any skill, making it cost less to use. Cannot support skills which reserve Spirit. |
 Galvanic Shards Galvanic Shards | Freeze Supports any skill that hits enemies, makit it more effective at Freezing enemies. Rapid Attacks II Supports Attacks, causing them to Attack faster. Fork Supports Projectile Skills, making their Projectiles Fork. Efficiency II Supports any skill, making it cost less to use. Cannot support skills which reserve Spirit. Ammo Conservation II Supports Crossbow Ammunition Skills, granting a chance to not consume a Bolt when firing. |
 Shockburst Rounds Shockburst Rounds | Concentrated Area Supports any skill with an area of effect, causing that area to be smaller but any area damage it deals to be higher. Fresh Clip II Supports Crossbow Skills, granting them more damage for each bolt reloaded by that Skill in the last 8 seconds. Heft Supports Skills which deal damage, increasing the maximum Physical Damage of their Hits. Lightning Attunement Supports attacks, causing them to gain Lightning Damage but deal less Cold and Fire Damage. Rapid Attacks II Supports Attacks, causing them to Attack faster. |
 Emergency Reload Emergency Reload | Premeditation Supports skills that can Empower skills other than themselves, causing skills they Empower to deal more damage. Cooldown Recovery II Supports skills with Cooldowns, increasing the rate at which those Cooldowns Recover. Cannot modify the skills of minions. Murderous Intent Supports skills that can Empower skills other than themselves, causing skills they Empower to Cull enemies. |
 Ball Lightning Ball Lightning | Projectile Acceleration II Supports Projectile skills, making those Projectiles travel faster, and granting them a chance to Pierce Enemies. Multishot II Supports Projectile skills, making them fire extra Projectiles. Also lowers Attack and Cast speed of supported skills, as well as lessening their damage. |
 Lightning Warp Lightning Warp | Overcharge Supports any skill that hits enemies, making its Shocks more effective but last for a shorter duration. Prolonged Duration II Supports any skill that has a duration, making that duration longer. Magnified Area II Supports any skill with an area of effect, making it larger at the cost of damage. Expanse Supports any skill that you use yourself, granting it significantly higher Area of Effect but causing it to gain a long cooldown. Cannot support skills which already have a cooldown. |
 Attrition Attrition | Precision II Supports Persistent Buff Skills, causing you to gain increased Accuracy while the skill is active. Vitality II Supports Persistent Buff Skills, causing you to gain Life Regeneration while the Skill is active. |
 Herald of Plague Herald of Plague | Vitality II Supports Persistent Buff Skills, causing you to gain Life Regeneration while the Skill is active. Clarity II Supports Persistent Buff Skills, causing you to gain increased Mana Regeneration while the Skill is active. |
 Blink Blink | Second Wind II Supports skills with cooldowns, giving them extra uses of that cooldown. Cannot support instant or triggered skills, or modify the skills of minions. Cooldown Recovery II Supports skills with Cooldowns, increasing the rate at which those Cooldowns Recover. Cannot modify the skills of minions. Rapid Casting II Supports Spells, causing them to cast faster. |
 Cast on Freeze Cast on Freeze | Contagion Afflicts a single enemy with a Debuff that deals Chaos Damage over time. If the enemy dies while affected by contagion, it and all other Chaos Damage over time Debuffs spread to other enemies and refresh their durations. Reanimating or detonating a corpse affected by contagion will cause the Minion or explosion to spread Contagion on hit. Magnified Area II Supports any skill with an area of effect, making it larger at the cost of damage. Swift Affliction II Supports any skill that deals damage, causing it to deal more non-Ailment damage over time but have a shorter duration. Drain Ailments Supported Spells that deal non-ailment damage over time, causing them to consume Ailments on enemies it applies damage over time Debuffs to in order to deal substantially more damage over time. Prolonged Duration II Supports any skill that has a duration, making that duration longer. |
 Wind Dancer Wind Dancer | Cannibalism II Supports Persistent Buff Skills, causing you to recover Life on kill while the skill is active. Blind II Supports any skill that Hits enemies, causing them to Blind on Hit with increased effect. |
 Overwhelming Presence Overwhelming Presence | - |
| Skill | Support Gems |
|---|---|
 Fragmentation Rounds Fragmentation Rounds | Poison I Supports any skill that hits enemies, giving it a chance to Poison enemies. Corrosion Supports any skill that hits enemies, causing Poison it applies to also break any armour. Cannot support skills that consume Fully Broken Armour. Heft Supports Skills which deal damage, increasing the maximum Physical Damage of their Hits. Deadly Poison I Supports any skill that Hits enemies, causing it to deal less damage but inflict more potent Poison. |
 Glacial Bolt Glacial Bolt | Freeze Supports any skill that hits enemies, makit it more effective at Freezing enemies. Cold Attunement Supports attacks, causing them to gain Cold Damage but deal less Fire and Lightning Damage. Ice Bite Supports attacks you use yourself. Freezing an enemy with supported skills infuses all of your attacks with Cold damage for a short time. |
 High Velocity Rounds High Velocity Rounds | Bleed I Supports any skill that hits enemies, giving it a chance to inflict Bleeding. Multishot I Supports Projectile skills, making them fire extra Projectiles. Also lowers Attack and Cast speed of supported skills, as well as lessening their damage. Brutality I Supports any skill that deals damage, boosting its physical damage at the expense of all other damage types. Deep Cuts I Supports any skill that Hits enemies, causing it to deal less damage but inflict more potent Bleeding. |
 Emergency Reload Emergency Reload | Premeditation Supports skills that can Empower skills other than themselves, causing skills they Empower to deal more damage. Efficiency I Supports any skill, making it cost less to use. Cannot support skills which reserve Spirit. |
 Herald of Plague Herald of Plague | Vitality I Supports Persistent Buff Skills, causing you to gain Life Regeneration while the skill is active. Clarity I Supports Persistent Buff Skills, causing you to gain increased mana Regeneration while the skill is active. |
 Wind Dancer Wind Dancer | Blind I Support any skill that Hits enemies, causing them to Blind on hit. Cannibalism I Supports Persistent Buff Skills, causing you to recover Life on kill while the skill is active. |
 Withering Presence Withering Presence | Chaos Mastery Supports Chaos skills, granting them an additional level. Prolonged Duration I Supports any skill that has a duration, making that duration longer. |
| Skill | Support Gems |
|---|---|
 Crossbow Shot Crossbow Shot | Lightning Attunement Supports attacks, causing them to gain Lightning Damage but deal less Cold and Fire Damage. Chain I Supports Projectile skills and any other skills that Chain, causing them to Chain additional times. |
 Fragmentation Rounds Fragmentation Rounds | Poison I Supports any skill that hits enemies, giving it a chance to Poison enemies. Corrosion Supports any skill that hits enemies, causing Poison it applies to also break any armour. Cannot support skills that consume Fully Broken Armour. |
 Permafrost Bolts Permafrost Bolts | Freeze Supports any skill that hits enemies, makit it more effective at Freezing enemies. Cold Attunement Supports attacks, causing them to gain Cold Damage but deal less Fire and Lightning Damage. |
 High Velocity Rounds High Velocity Rounds | Bleed I Supports any skill that hits enemies, giving it a chance to inflict Bleeding. Multishot I Supports Projectile skills, making them fire extra Projectiles. Also lowers Attack and Cast speed of supported skills, as well as lessening their damage. |
 Contagion Contagion | Rapid Casting I Supports spells, causing them to cast faster Magnified Area I Supports any skill with an area of effect, making it larger. |
 Wind Dancer Wind Dancer | Vitality I Supports Persistent Buff Skills, causing you to gain Life Regeneration while the skill is active. Clarity I Supports Persistent Buff Skills, causing you to gain increased mana Regeneration while the skill is active. |
In the early game before you get Glacial Bolt, we recommend using the same setup with Permafrost Bolts as a substitute for dealing Cold damage and applying Freeze.
As for your mid to endgame skill usage, Galvanic Shard replaces Glacial Bolt once you have The Three Dragons. If you do not have the unique helm yet, you can keep using Glacial Bolt until you do. High Velocity Rounds are used for dealing with bosses and rares but will be replaced with Shockburst Rounds once you reach endgame, while Emergency Reload will help manage your ammo and works in tandem with the previous skills.
For your Persistent skills, Cast on Freeze with Contagion is recommended especially with the nerf as it allows you to manage your mana better. Herald of Plague is good for spreading Poison with Fragmentation Rounds, while Wind Dancer will help boost your survivability and Overwhelming Presence can be optional in case you do not have enough spirit for it.
Passive Skill Tree
※ Switch tabs to view build progression: Early Game (Acts 1-2), Mid-Game (Act 3 to Cruel Mode), Endgame (Atlas).
| Ascendancy Tree | |||
|---|---|---|---|
 | |||
| Passive Nodes | |||
| 1. |  | 2. |  |
| 3. |  | 4. |  |
| 5. | 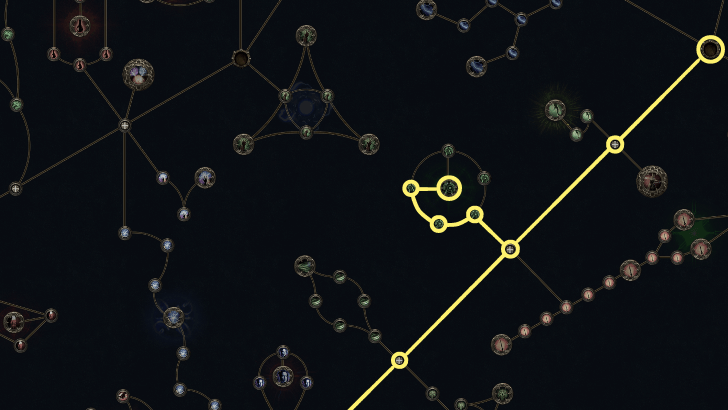 | 6. | 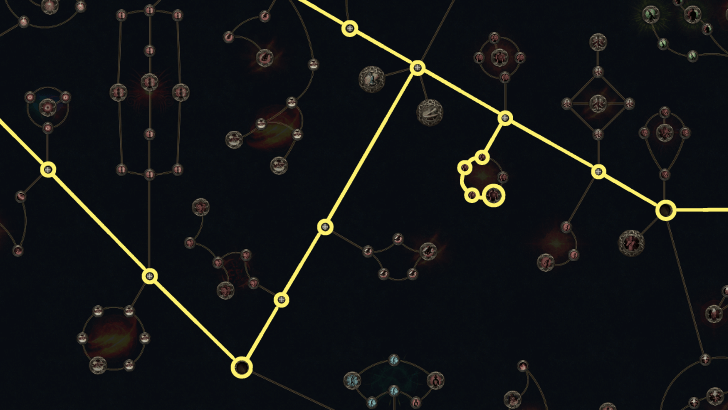 |
| 7. |  | 8. | - |
| Weapon Set 1 Nodes | |||
| 1. | 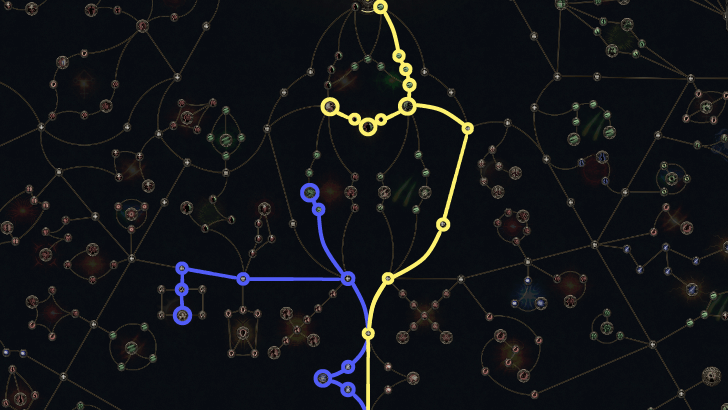 | 2. |  |
| 3. |  | 4. | 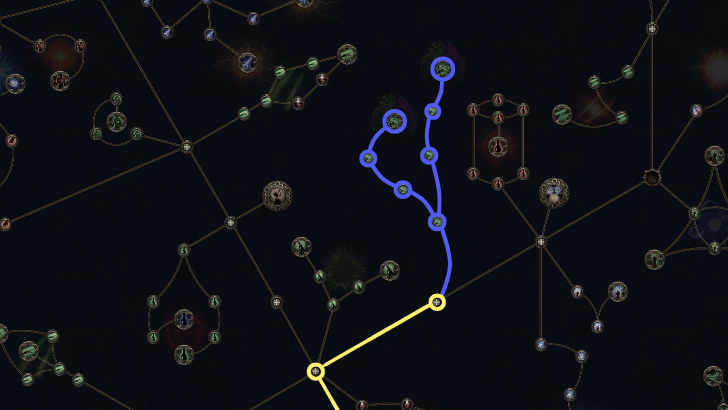 |
| Weapon Set 2 Nodes | |||
| 1. |  | 2. | 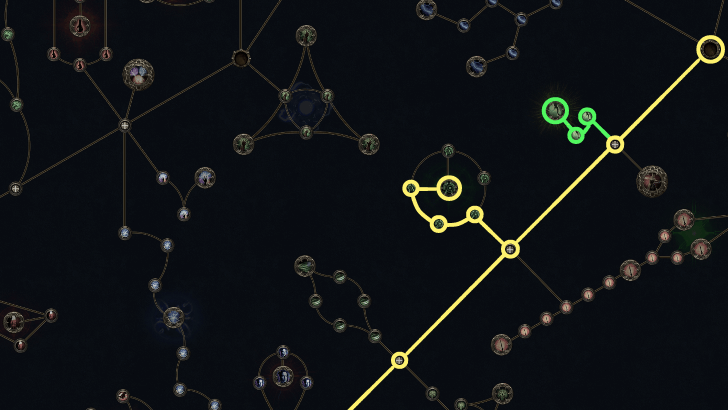 |
| Ascendancy Tree | |||
|---|---|---|---|
 | |||
| Passive Nodes | |||
| 1. |  | 2. |  |
| 3. |  | 4. | 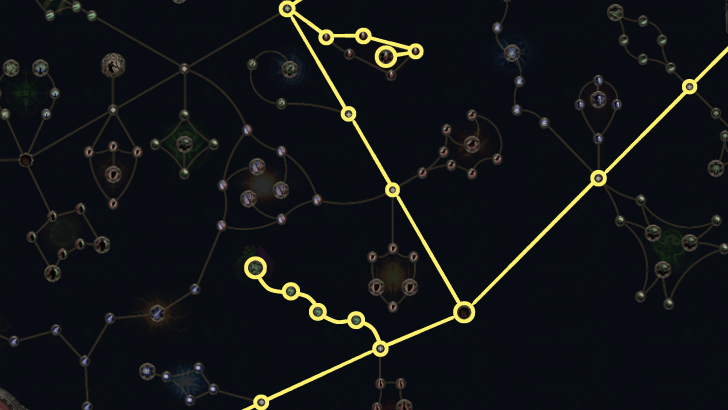 |
| 5. |  | 6. |  |
| 7. |  | 8. |  |
| Ascendancy Tree | |||
|---|---|---|---|
 | |||
| Passive Nodes | |||
| 1. |  | 2. |  |
For the Gemling Legionnaire ascendancy tree, take Adaptive Capability first to help meet your Gem attribute requirements and Enhanced Effectiveness to double your inherent stat bonuses for more survivability. Once you have more ascendancy points, proceed to Integrated Efficiency for more Skill slots and Gem Studded to allow you to equip 2 of the same support gems.
The rest of the passive tree for the Ailment Gunslinger Gemling Legionnaire build focuses on taking nodes with Ailments and Armour Break, while also stacking Strength attribute nodes and a few Dexterity ones to make it enough to equip your crossbow.
Passive Skill Tree Guide and List of Passives
Gunslinger Gemling Legionnaire Playstyle and Skill Rotation
Leveling Skill Rotation
The Ailment Gunslinger Gemling Legionnaire build for leveling revolves around freezing your opponents with Glacial Bolt and dealing burst damage with Fragmentation Rounds and High Velocity Rounds. The rotation is as follows:
Single-Target
- Use Glacial Bolt until they are Frozen and shoot 1-2 more bolts for extra damage.
- Consume Frozen with Fragmentation Rounds and keep shooting until you apply Armour Break.
- Consume Armour Break using High Velocity Rounds to trigger Bleeding.
- Go back to Step 2 (after 10 seconds go to Step 5)
- Every 10-15 seconds you can repeat step 1 once the diminishing effects after inflicting Frozen have reset.
AoE and Mob Clearing
- Glacier Bolt in front of mobs (no Freeze needed), then fire Fragmentation Rounds to shatter and freeze. Make sure to shoot at the feet when against larger enemies.
- Keep shooting with Fragmentation Rounds to spread poison.
- Switch to High Velocity Rounds and finish off the remaining enemies.
Endgame Skill Rotation
The Ailment Gunslinger Gemling Legionnaire build for endgame makes use of freezing your opponents with Galvanic Shard and finishing them off with Fragmentation Rounds and Shockburst Rounds. The rotation is as follows:
Single-Target
- Shoot with Galvanic Shard until you proc Freeze.
- Cast Ball Lightning towards the target and use Lightning Warp on the ball to teleport and unleash lightning damage on the ground.
- Fire Shockburst Rounds for huge damage and use Emergency Reload once you are out of ammo.
- If the target is frozen again, use Fragmentation Rounds to consume it.
- Rinse and repeat.
AoE and Mob Clearing
- Use Galvanic Shard to freeze mobs and proc Contagion with Cast on Freeze.
- Fire Fragmentation Rounds against Contagion-affected monsters to spread the poison.
- Cast Ball Lightning and Lightning Warp to apply lightning damage on the ground.
- Switch to Shockburst Rounds and finish off the remaining enemies.
Path of Exile 2 Related Guides

0.4 Best Endgame Builds
| Rank | Build |
|---|---|
 |
|
 |
|
 |
|
 |
0.4 Leveling Builds
All Build Guides
| List of Builds by Class | |||||||||||
|---|---|---|---|---|---|---|---|---|---|---|---|
 Huntress Huntress |
 Mercenary Mercenary |
 Monk Monk |
|||||||||
 Witch Witch |
 Sorceress Sorceress |
 Warrior Warrior |
|||||||||
 Ranger Ranger |
 Druid Druid |
- | |||||||||
| Other Build Guides | 0.3 Leveling Builds | How to Make a Good Build | |||||||||
Mercenary Builds
Barrage Ready a volley of arrows or spears, Empowering your next Bow or Projectile Spear Attack to repeat multiple times. Consumes your Frenzy Charges on use to add additional repeats.
Snipe Channel to charge up your bow before releasing a powerful shot. Releasing the moment you fully charge causes the arrow to explode on impact for a guaranteed Critical Hit.
Sniper's Mark Marks a target. The next Critical Hit the target receives consumes the Mark to deal extra damage and grant you a Frenzy Charge.
Rain of Arrows Fire arrows into the air, causing them to rain from above. Consumes your Frenzy Charges to fire more arrows.
Spiral Volley Loads your Bow with a volley of enchanted arrows and fires them in a circle as you spin forward, firing directly at targets if possible. Consumes Frenzy Charges to cause the arrows to deal more damage and Chain to other targets. Each target can only be Hit once.
Combat Frenzy While active, grants you a Frenzy Charge when you Freeze, Electrocute, or Pin an enemy. This can only occur once every few seconds.
Wind Dancer Grants a buff that gives you more Evasion per stage. Being Hit by a Melee Attack while you have this buff consumes all stages to damage and Knock Back enemies around you.
Focus: DoT, Burst Damage, Bossing, Mobbing |
|
Herald of Ash While active, enemies you sufficiently Overkill with attacks will cause an explosion that ignites nearby enemies based on the Overkill damage dealt.
Gas Grenade Fires a bouncing Grenade that causes a burst of Poison gas when its fuse expires, damaging enemies and leaving behind a growing Poison cloud. Burning effects or Detonator skills will cause the cloud to explode in a fiery blast.
Wind Dancer Grants a buff that gives you more Evasion per stage. Being Hit by a Melee Attack while you have this buff consumes all stages to damage and Knock Back enemies around you.
Incendiary Shot Loads your Crossbow with flaming bolts that fragment in flight, damaging and igniting enemies on hit and in a small cone behind their final target.
Blasphemy Turns socketed Curse skills into vile Auras, applying their effects to all nearby enemies.
Oil Grenade Fires a bouncing Grenade that bursts in a spray of Oil when the fuse expires or when it impacts an Enemy, dealing minimal damage but covering the ground and nearby enemies in Oil. Oil created this way can be Ignited by Detonator Skills or Ignited Ground.
Explosive Shot Loads your Crossbow with flaming bolts that explode on impact. The explosion will cause any Grenades in its area of effect to also explode.
Focus: DoT, AoE, Mobbing |
|
Wind Dancer Grants a buff that gives you more Evasion per stage. Being Hit by a Melee Attack while you have this buff consumes all stages to damage and Knock Back enemies around you.
Fragmentation Rounds Loads your Crossbow with Piercing bolts that fragment in flight. Bolts that hit a frozen enemy consume the Freeze and cause an explosion of Shrapnel. Bolts that hit an Ice Crystal cause it to explode.
High Velocity Rounds Loads your Crossbow with Piercing bolts that can consume Fully Broken Armour on enemies to deal extra damage.
Herald of Plague While active, killing a Poisoned enemy spreads its Poison to other nearby enemies, and has a chance to also Hinder them.
Attrition While active, causes you to deal more Hit damage to Rare and Unique enemies the longer you've been fighting them, and gain Culling Strike against them once you've been fighting them for long enough.
Cast on Freeze While active, gains Energy when you Freeze enemies and triggers socketed spells on reaching maximum Energy.
Emergency Reload Instantly relaods your active Crossbow Ammunition and Empowers the loaded bolts to deal more damage.
Galvanic Shards Loads your Crossbow with a clip of charged bolts that fragment in flight, releasing Chaining Lightning beams when they Hit enemies. Using this skill again reloads the clip.
Withering Presence While active, periodically Withers enemies in your Presence.
Blink Replaces your dodge roll with a short-cooldown Spell that allows you to tunnel through space, instantly reappearing a medium distance away.
Focus: DoT, Crowd Control, Bossing |
|
Explosive Grenade Fires a bouncing Grenade that unleashes a devastating fiery blast when its fuse expires.
Flash Grenade Fires a bouncing Grenade that unleashes a Blinding, Stunning explosion when its fuse expires. This explosion can Blind both Allies and Enemies.
Gas Grenade Fires a bouncing Grenade that causes a burst of Poison gas when its fuse expires, damaging enemies and leaving behind a growing Poison cloud. Burning effects or Detonator skills will cause the cloud to explode in a fiery blast.
Wind Dancer Grants a buff that gives you more Evasion per stage. Being Hit by a Melee Attack while you have this buff consumes all stages to damage and Knock Back enemies around you.
Attrition While active, causes you to deal more Hit damage to Rare and Unique enemies the longer you've been fighting them, and gain Culling Strike against them once you've been fighting them for long enough.
Oil Grenade Fires a bouncing Grenade that bursts in a spray of Oil when the fuse expires or when it impacts an Enemy, dealing minimal damage but covering the ground and nearby enemies in Oil. Oil created this way can be Ignited by Detonator Skills or Ignited Ground.
Cluster Grenade Fires a bouncing Grenade That explodes when it's fuse expires, throwing out a nova of mini Grenades that explode when they come to a stop.
Focus: AoE, Burst Damage, Crowd Control |
|
UP |
Herald of Thunder While active, killing Shocked enemies with Attack damage, will cause subsequent Attack hits to release lightning bolts which deals Attack damage to all surrounding enemies.
Wind Dancer Grants a buff that gives you more Evasion per stage. Being Hit by a Melee Attack while you have this buff consumes all stages to damage and Knock Back enemies around you.
Voltaic Grenade Fires a bouncing Grenade that discharges an Electrocuting Lightning blasts when its fuse expires
Emergency Reload Instantly relaods your active Crossbow Ammunition and Empowers the loaded bolts to deal more damage.
Shockburst Rounds Loads your Crossbow with a clip of charged bolts which releases damaging pulses upon hitting an enemy affected by a lightning ailment. Using this skill again reloads the clip.
Galvanic Shards Loads your Crossbow with a clip of charged bolts that fragment in flight, releasing Chaining Lightning beams when they Hit enemies. Using this skill again reloads the clip.
Focus: AoE, Fast Clear, Lightning |
Herald of Ash While active, enemies you sufficiently Overkill with attacks will cause an explosion that ignites nearby enemies based on the Overkill damage dealt.
Wind Dancer Grants a buff that gives you more Evasion per stage. Being Hit by a Melee Attack while you have this buff consumes all stages to damage and Knock Back enemies around you.
Armour Piercing Rounds Load your Crossbow with a clip of bolts that can be fired rapidly and Break enemy Armour. Using this skill again reloads the clip.
Oil Grenade Fires a bouncing Grenade that bursts in a spray of Oil when the fuse expires or when it impacts an Enemy, dealing minimal damage but covering the ground and nearby enemies in Oil. Oil created this way can be Ignited by Detonator Skills or Ignited Ground.
Ripwire Ballista Deploys a Balista Totem that fires Pinning bolts which Maim enemies.
Artillery Ballista Deploys a Ballista Totem that fires bolts skyward, to explode a short time after landing.
Siege Cascade Loads your Crossbow with enemy-seeking payloads which are fired into the air, dropping a bolt near every enemy in the target area. These bolts lodge in the ground and explode after a short delay .
Focus: Totem, Physical, Fire, Mobbing, Bossing |
|
NEW |
Frost Bomb Creates a pulsing Orb of Frost. Each pulse inflicts Cold Exposure on nearby Enemies. When the Orb's duration ends, it explodes, dealing Cold damage to surrounding Enemies.
Wind Dancer Grants a buff that gives you more Evasion per stage. Being Hit by a Melee Attack while you have this buff consumes all stages to damage and Knock Back enemies around you.
Blasphemy Turns socketed Curse skills into vile Auras, applying their effects to all nearby enemies.
War Banner While active, killing enemies with attacks or standing near a Unique enemy generates Valour. using this skill consumes Valour to place an inspiring Banner with an Aura that grants you and nearby allies Attack damage and accuracy while Banner lasts. The Banner cannot gain Valour while placed, and you cannot place a Banner while you already have a Banner placed.
Defiance Banner While active, killing enemies with attacks or standing near a Unique enemy generates valour. Using this skill consumes its Valour to place an inspiring Banner with an Aura that grants you and your nearby allies Armour, Evasion, and Movement speed while the banner lasts. The Banner cannot gain Valour while placed, and you cannot place a Banner while you already have a Banner placed.
Dread Banner While active, killing enemies with Attacks or standing near a Unique enemy generates Valour. using this skill consumes its Valour to place an Inspiring Banner with an Aura that grants you and nearby allies Stun Threshold, Elemental Ailment Threshold, and Flask charges while the Banner lasts. The Banner cannot gain Valour while placed, and you cannot place a Banner while you already have a banner placed.
Tame Beast Conjure Azmeri wisps to engulf a Rare Beast for a duration, Hindering them. If you defeat the Beast while it is engulfed in wisps, it will be captured by this gem, transforming the gem to instead allow you to summon the Beast as a Reviving Companion.
Mirage Archer While active, dodge rolling will create a Mirage that uses socketed ranged Attacks for a short duration, then vanish. You cannot create another Mirage while one exists, or for a short time after one vanishes. Dodge rolling while you are unable to create a new Mirage will restart this timer.
Mortar Cannon Raise a cannon Ballista Totem which uses socketed Grenade Skills, with significantly improved Cooldown Recovery Rate.
Focus: Totem, Burst, Lightning, Mapping, Bossing |
NEW |
Herald of Thunder While active, killing Shocked enemies with Attack damage, will cause subsequent Attack hits to release lightning bolts which deals Attack damage to all surrounding enemies.
Stormcaller Arrow Fires an arrow that embeds where it lands for a short duration. At the end of the duration, a Lightning bolt strikes the arrow, disintegrating it and damaging enemies with a high chance to Shock.
Voltaic Mark Marks a target, making them more susceptible to being Shocked. When the Marked target dies, a Lightning nova erupts from their corpse. This nova does not use your Weapon Damage, and instead uses its own base Attack Damage.
Wind Dancer Grants a buff that gives you more Evasion per stage. Being Hit by a Melee Attack while you have this buff consumes all stages to damage and Knock Back enemies around you.
Emergency Reload Instantly relaods your active Crossbow Ammunition and Empowers the loaded bolts to deal more damage.
Shockburst Rounds Loads your Crossbow with a clip of charged bolts which releases damaging pulses upon hitting an enemy affected by a lightning ailment. Using this skill again reloads the clip.
Galvanic Shards Loads your Crossbow with a clip of charged bolts that fragment in flight, releasing Chaining Lightning beams when they Hit enemies. Using this skill again reloads the clip.
Mortar Cannon Raise a cannon Ballista Totem which uses socketed Grenade Skills, with significantly improved Cooldown Recovery Rate.
Focus: Lightning, Burst, Attribute Stacking, Mobbing, Bossing |
Mercenary Class and Ascendancy Guides
| Base Class | |
|---|---|
| Ascendancies | |
Comment
Hi, thank you VERY much for this build, I love it, you got some information for what are the best jewel on this build?
Author
PoE 2 Gunslinger Gemling Legionnaire Mercenary Build
improvement survey
04/2026
improving Game8's site?

Your answers will help us to improve our website.
Note: Please be sure not to enter any kind of personal information into your response.

We hope you continue to make use of Game8.
Rankings
- We could not find the message board you were looking for.
Gaming News
Popular Games

Genshin Impact Walkthrough & Guides Wiki

Crimson Desert Walkthrough & Guides Wiki

Umamusume: Pretty Derby Walkthrough & Guides Wiki

Honkai: Star Rail Walkthrough & Guides Wiki

Monster Hunter Stories 3: Twisted Reflection Walkthrough & Guides Wiki

Wuthering Waves Walkthrough & Guides Wiki

The Seven Deadly Sins: Origin Walkthrough & Guides Wiki

Pokemon TCG Pocket (PTCGP) Strategies & Guides Wiki

Pokemon Pokopia Walkthrough & Guides Wiki

Zenless Zone Zero Walkthrough & Guides Wiki
Recommended Games

Monster Hunter World Walkthrough & Guides Wiki

Fire Emblem Heroes (FEH) Walkthrough & Guides Wiki

Pokemon Brilliant Diamond and Shining Pearl (BDSP) Walkthrough & Guides Wiki

Super Smash Bros. Ultimate Walkthrough & Guides Wiki

Diablo 4: Vessel of Hatred Walkthrough & Guides Wiki

Cyberpunk 2077: Ultimate Edition Walkthrough & Guides Wiki

Yu-Gi-Oh! Master Duel Walkthrough & Guides Wiki

Elden Ring Shadow of the Erdtree Walkthrough & Guides Wiki

The Legend of Zelda: Tears of the Kingdom Walkthrough & Guides Wiki

Persona 3 Reload Walkthrough & Guides Wiki
All rights reserved
© 2010 - 2024 Grinding Gear Games
The copyrights of videos of games used in our content and other intellectual property rights belong to the provider of the game.
The contents we provide on this site were created personally by members of the Game8 editorial department.
We refuse the right to reuse or repost content taken without our permission such as data or images to other sites.
 Gunslinger Gemling Legionnaire


![Forza Horizon 6 Review [Preview] | Beautiful Roads With a Whole Lot of Oversteer](https://img.game8.co/4460981/a7254c24945c43fbdf6ad9bea52b5ce9.png/thumb)


I have a question, I see you have this build also on Mobalytics. Are you going to update it to match this ? Just wondering , Also having trouble with bosses with this build The Shockburst rounds do not do enough dmg for fast killing, Seams to take to long. Any help would be great , Thank you