This survey will take about 1 minute.
Your answers will help us to improve our website.
Path of Exile 2 (PoE 2)
PoE 2 0.4 Druid Build - Frost Wolf Oracle
Latest: 0.5.0 Release Date
☆ Fate of the Vaal ▶︎ The Last of the Druids
┗ Bonded Mods | 0.4 Mystery Box
★ Druid: Class Overview | Builds
☆ NEW: Disciple of Varashta Ascendancy!
★ Best Class | Best Builds | Leveling Builds
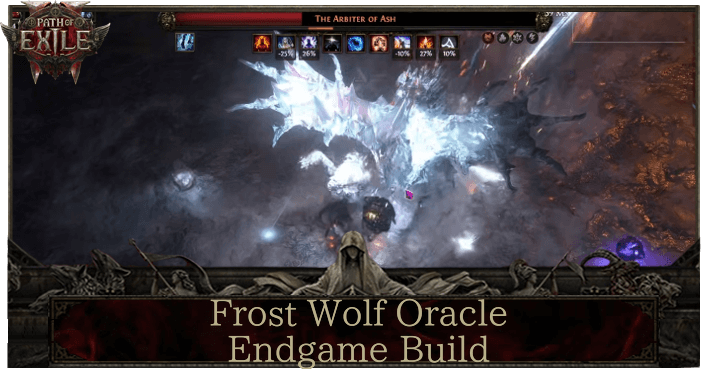
This is a Frost Wolf Oracle Druid endgame build for mapping in Path of Exile 2 (PoE 2)'s The Last of the Druids Update. Check out the Frost Wolf Oracle Druid endgame build, including its gear, socketables, skills, and playstyle!
 Attention! Attention! |
This 0.4.0 endgame build starts from Level 65 and above. If you want to see a build for leveling, check out our Leveling Builds! |
|---|
List of Contents
Frost Wolf Oracle Build Summary
LazyExile's Frost Wolf Oracle Build
Endgame Crit
Tanky Non-Crit
This Frost Wolf Oracle build is based on LazyExile's (Youtube) take on the Werewolf form of the new Druid class! The video includes details on how to gear up to get the build online. Check out LazyExile's YouTube channel for more Path of Exile 2 content and ask questions about the build!
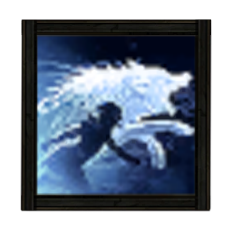
Frost Wolf Oracle Druid Build
| Build Setup | |
|---|---|
 Frost Wolf Oracle Build Frost Wolf Oracle Build |

 Herald of Ice While active, Shattering an enemy with an Attack Hit will cause an icy explosion that deals Attack damage to surrounding enemies.
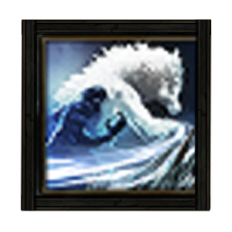 Lunar Assault Shapeshift into a Werewolf and swipe with your claws, projecting an arc of moonlight and ice forward in a crescent.
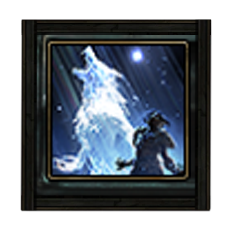 Lunar Blessing Shapeshift into a Werewolf and offer your Rage to the moon to receive a blessing, gaining bonus Cold damage, Attack speed and movement speed for yourself and any Wolf Minions you have from Wolf Pack or Predator's Mark. Spends all Rage to extend the Buff's duration. While the Buff is active, your WerewolfAttacks call down Moonbeams on Hit.
 Cross Slash Shapeshift into a Werewolf and leap backwards as you gouge the ground with both claws. Hitting a Marked enemy with both gouges will Activate the Mark and cause an additional shockwave. Ice Fragments will be pulled into the location where the gouges cross and explode immediately. This skill can be used while using other skills to interrupt them.
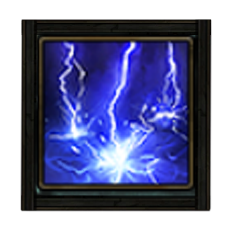 Thunderstorm Conjure a thunderstorm which causes lightning strikes and torrential rain in an area. Enemies in the area are Drenched, causing them to become Shocked or Frozen more easily. Plants in the area become Overgrown.
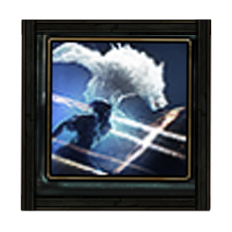
 Pounce Shapeshift into a Werewolf and leap to a target location, damaging enemies in an area around where you land. Predator's Mark will be Triggered targetting the highest Rarity enemie Hit, or if a Mark gem is socketed into this Skill, that Mark will be Triggered instead. Using this skill allows any Wolf Minions you have to leap immediately.
 Arctic Howl Shapeshift into a Werewolf and let out an icy howl that damages enemies and Freezes Primed enemies. If an enemy is Frozen or a Frozen enemy is Hit, this Skill Empowers your attacks with added Cold damage, causes Empowered Slams to create Chilled Ground, and grants your Allies added Cold damage. This Skill's cooldown can be bypassed by expending an Endurance Charge.
 Savage Fury While active, your Fury builds from Attacking enemies. Using this Skill releases your Fury to send you into a bestial frenzy, gaining damage and Onslaught but constantly losing life and forcing you into animal form. The frenzy ends immediately if you return to human form. You cannot fain Fury while in a frenzy.
|
|
|
|
The Frost Wolf Oracle build by LazyExile makes full use of the Werewolf form to freeze enemies in place and ripping them to shreds with its Attack skills while leeching life to retain survivability.
If you are looking to start with this build, it is recommended to follow LazyExile's leveling build which follows the journey from Act 1 to Interludes!
| Date | Changes |
|---|---|
| 12/18/2025 | Created Frost Wolf Oracle build. |
Frost Wolf Oracle Equipment
Endgame Crit
Tanky Non-Crit
| Gear | Affixes |
|---|---|
 Fungal Talisman Fungal Talisman Fungal Talisman Stats: Damage - 59-98 Critical Chance - 8% Attacks Per Second - 1.40 Requirements: Level - 78 Strength - 96 Intelligence - 70 (Weapon 1)  Omen Sceptre Omen Sceptre Omen Sceptre Stats: Requirements: Level - 16 Strength - 11 Intelligence - 22 (Offhand 1) | ・Add to Physical Damage ・+% Increased Physical Damage ・+% Increased Attack Speed ・Gain % of Damage as Extra Physical Damage ・+ to Level of all Attack Skills ・Gain Life per Enemy Killed ・Grants Skill: ・+% Increased Spirit |
 Withered Wand Withered Wand Withered Wand Stats: Requirements: None (Weapon 2) 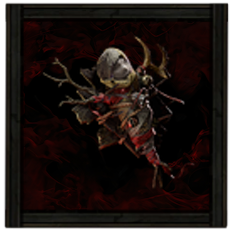 Effigy of Cruelty Antler Focus Effigy of Cruelty Antler Focus Effigy of Cruelty Antler Focus Stats: Energy Shield - 17 Requirements: Level - 10 Intelligence - 17 Fixed Modifiers: ・ +20-30 maximum Energy Shield ・ 60-80% increased Spell Damage ・ +10 to Intelligence ・ +7-13% to Chaos Resistance ・ Critical Hits with Spells apply 3-5 Stacks of Critical Weakness (Offhand 2) | ・+ to Intelligence ・+ to Maximum Mana ・+% increased Chaos Damage ・Cast Speed ・Gain % of Damage as Extra Fire Damage ・+20-30 maximum Energy Shield ・60-80% increased Spell Damage ・+10 to Intelligence ・+7-13% to Chaos Resistance ・Critical Hits with Spells apply 3-5 Stacks of Critical Weakness |
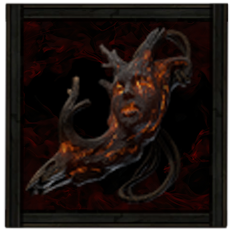
 Masked Greathelm Masked Greathelm Masked Greathelm Stats: Armor - 267 Requirements: Level - 70 Strength - 99 | ・+ Armour ・+% increased Armour ・+% Fire Resistance ・+% Lightning Resistance ・+% of Armour also applies to Elemental Damage ・Maximum Life |
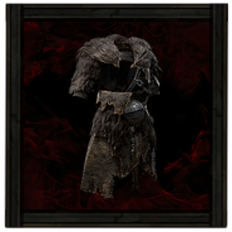 Wolfskin Mantle Wolfskin Mantle Wolfskin Mantle Stats: Armor - 294 Energy Shield - 101 Requirements: Level - 65 Strength - 67 Intelligence - 67 | ・+ to Armour ・+% Increased Armour ・+ to Maximum Energy Shield ・+ to Maximum Life ・+% to Fire Resistance ・+% to Cold Resistance ・+% to Chaos Resistance |
 Atziri's Acuity Moulded Mitts Atziri's Acuity Moulded Mitts Atziri's Acuity Moulded Mitts Stats: Armor - 68 Requirements: Level - 33 Strength - 42 Fixed Modifiers: ・ 80-100% increased Armour ・ 30-50% increased Critical Hit Chance ・ +20-30 to Intelligence ・ Leech from Critical Hits is instant | ・80-100% increased Armour ・30-50% increased Critical Hit Chance ・+20-30 to Intelligence ・Leech from Critical Hits is instant |
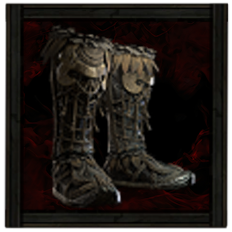
 Sekhema Sandals Sekhema Sandals Sekhema Sandals Stats: Energy Shield - 82 Requirements: Level - 80 Intelligence - 108 | ・ +% increased Movement Speed ・+ to Maximum Life ・+% increased Energy Shield ・+% to Fire Resistance ・+% to Cold Resistance ・+% to Lightning Resistance |
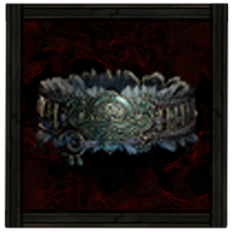
 Stellar Amulet Stellar Amulet Stellar Amulet Requirements: Level - 24 Implicit:+5-7 to all Attributes | ・Spirit ・+% Increased Armour ・+ to Fire Resistance ・+ to Lightning Resistance ・+ to Attribute ・+ to Accuracy Rating |
 Soul Tether Long Belt Soul Tether Long Belt Soul Tether Long Belt Requirements: Level - 20 Implicit:15-20% increased Charm Effect Duration Fixed Modifiers: ・ +40-60 to maximum Energy Shield ・ +20-30 to Intelligence ・ You lose 5% of Energy Shield per second ・ Excess Life Recovery from Leech is applied to Energy Shield | ・+40-60 to maximum Energy Shield ・+20-30 to Intelligence ・You lose 5% of Energy Shield per second ・Excess Life Recovery from Leech is applied to Energy Shield |
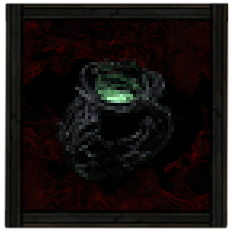
 Prismatic Ring Prismatic Ring Prismatic Ring Requirements: Level - 35 Implicit:7-10% to all Elemental Resistances | ・+% to all Elemental Resistances ・Add Physical Damage to Attacks ・Add Cold Damage to Attacks ・+ to Maximum Life ・Leech % of Physical Attack Damage as Life ・Any Elemental Resistance |
| Prismatic Ring Prismatic Ring Requirements: Level - 35 Implicit:7-10% to all Elemental Resistances | ・+% to all Elemental Resistances ・Add Physical Damage to Attacks ・Add Cold Damage to Attacks ・+ to Maximum Life ・Leech % of Physical Attack Damage as Life ・Any Elemental Resistance |
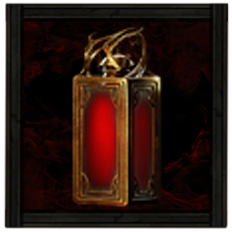 Ultimate Life Flask Ultimate Life Flask Ultimate Life Flask Stats: Flask Type - Life Recovered Life - 920 Charge Per Use - 10 Total Charges - 75 Duration - 3 sec. | ・Gain Charges per Second ・% of Recovery Applied Instantly |
| Ultimate Life Flask Ultimate Life Flask Stats: Flask Type - Life Recovered Life - 920 Charge Per Use - 10 Total Charges - 75 Duration - 3 sec. | ・Gain Charges per Second ・% of Recovery Applied Instantly |
| Gear | Affixes |
|---|---|
 Ashbark Talisman Ashbark Talisman Ashbark Talisman Stats: Damage - 50-105 Critical Chance - 8% Attacks Per Second - 1.20 Shock Damage - 21-45 Requirements: Level - 72 Strength - 94 Intelligence - 67 Implicit Skill: 50-80% Increased Flammability Magnitude (Weapon 1) 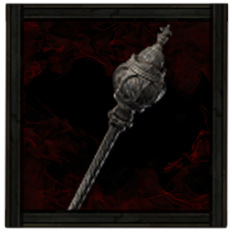 Stoic Sceptre Stoic Sceptre Stoic Sceptre Stats: Spirit - 100 Requirements: Level - 6 Intelligence - 12 (Offhand 1) | ・+% Increased Elemental Damage with Attacks ・+% Increased Attack Speed ・Gain Life per enemy killed ・Add to Physical Damage ・Adds Physical Damage ・+% Increased Spirit ・Allies in your Presence deal added Attack Damage |
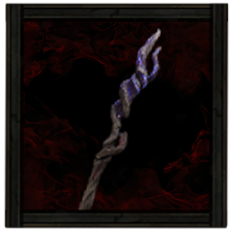 Voltaic Staff Voltaic Staff Voltaic Staff Stats: Requirements: None (Weapon 2) | ・Gain % of Damage as Extra Lightning Damage ・+ Level to All Lightning Spell Skills ・% Increased Spell Damage ・Cast Speed |
| Masked Greathelm Masked Greathelm Stats: Armor - 267 Requirements: Level - 70 Strength - 99 | ・+ to Armour ・+ to Energy Shield ・+% of Armour also applies to Elemental Damage ・Maximum Life ・Any Elemental Resistance |
| Wolfskin Mantle Wolfskin Mantle Stats: Armor - 294 Energy Shield - 101 Requirements: Level - 65 Strength - 67 Intelligence - 67 | ・+ Armour ・+% Increased Armour ・+% of Armour also applies to Elemental Damage ・Maximum Life ・Any Elemental Resistance ・Chaos Resistance |
 Gleaming Cuffs Gleaming Cuffs Gleaming Cuffs Stats: Armor - 80 Energy Shield - 25 Requirements: Level - 75 Strength - 52 Intelligence - 52 | ・+ Leech Physical Attack Damage as Life ・+ Armour ・+% Increased Armour ・+% of Armour also applies to Elemental Damage ・Maximum Life ・Any Elemental Resistance |
 Weaver Leggings Weaver Leggings Weaver Leggings Stats: Armor - 73 Energy Shield - 26 Requirements: Level - 45 Strength - 34 Intelligence - 34 | ・Increased Movement Speed ・+% Increased Armour ・Maximum Life ・Any Elemental Resistance |
| Stellar Amulet Stellar Amulet Requirements: Level - 24 Implicit:+5-7 to all Attributes | ・Spirit ・+% Increased Armour ・Any Elemental Resistances ・Any Attribute |
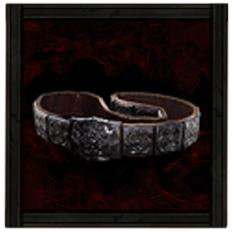 Plate Belt Plate Belt Plate Belt Requirements: Level - 24 Implicit:+100-140 to Armour | ・+ to Armour ・+% to Chaos Resistance ・Maximum Life ・Elemental Resistances ・+% to all Elemental Resistances |
 Grip of Kulemak Abyssal Signet Grip of Kulemak Abyssal Signet Grip of Kulemak Abyssal Signet Requirements: None Implicit:Inflict Abyssal Wasting on Hit Fixed Modifiers: ・ +20-30% Reduced Presence Area of Effect ・ +20-30% Reduced Light Radius | ・Recover % of your Maximum Life when an Enemy Dies in your Presence ・% of Life Leeched from Targets Affected by Abyssal Wasting is Instant ・Increased Chance to Inflict Ailments Against Enemies Affected by Abyssal Wasting ・% Increased Magnitude of Shock You Inflict |
| Prismatic Ring Prismatic Ring Requirements: Level - 35 Implicit:7-10% to all Elemental Resistances | ・Adds Physical Damage to Attacks ・Add Cold Damage to Attacks ・Maximum Life ・Elemental Resistances ・+% to all Elemental Resistances |
| Ultimate Life Flask Ultimate Life Flask Stats: Flask Type - Life Recovered Life - 920 Charge Per Use - 10 Total Charges - 75 Duration - 3 sec. | ・Gain Charges per Second ・% of Recovery Applied Instantly |
| Ultimate Life Flask Ultimate Life Flask Stats: Flask Type - Life Recovered Life - 920 Charge Per Use - 10 Total Charges - 75 Duration - 3 sec. | ・Gain Charges per Second ・% of Recovery Applied Instantly |
Weapons
Try to get a solid Fungal Talisman for its Attack Speed that solely focuses on Physical Damage modifiers as all your skills will be scaling off of it as the foundational stat.
Level of Attack Skills is also a huge DPS increase as the build revolves around attacks. Additionally, get at least 1.35 Attack Speed as your foundation as the build will feel much better overall. As you will take the Lord of the Wilds, the build will be able to slot in a Omen Sceptre not for its stats, but the persistent buff it gives you with Malice!
The primary reason we are going for any Wand with general modifiers in the second set is so that the build can cast spells while also slotting in the Effigy of Cruelty focus, which allows you to inflict Critical Weakness on spells that critically hit. The build itself will always critically hit due to Forced Outcome, so your spells consistently primes enemies with Critical Weakness.
Armor and Accessories
This build's main survivability stats revolves around both Armour and Energy Shield, so stack up as much equipment that provides these to lay the groundwork of this build's defenses. Furthermore, it is always the best practice to obtain Maximum Life and cap out on all of the elemental resistances. Additionally, the build is further strengthened with Life Recoup through Scarred Faith, and Energy Shield Leeching.
The concept of Life Leeching energy shields is done so by having the foulborn version of the Soul Tether belt, which is gained from the Atziri's Temple, to convert excess life recovery through leech apply to Energy Shields instead. Atziri's Acuity then makes it so that any critical hit leeches instantly, which the build does so consistently with Forced Outcome. This means that you will essentially be tapped out at all times unless you get one-shot by one massive attack.
As for your Accessories, obtain any rings with Physical Damage modifiers and Leech Physical Attack Damage to enable this build's safety net. As for auxiliary stats, try to obtain Maximum Life, Spirit, Armour, and Elemental Resistances.
To get two Health Flasks, you can do a trick by equipping the Waistgate Heavy Belt, slotting in the flask to your Mana Flask slot, and then removing the unique belt.
| All Armors | All Accessories | All Belts |
Runes, Soul Cores, and Idols
| Equipment | Sockets |
|---|---|
| Weapon | |
| Armor |
As the build mainly scales off of Physical Damage conversion, the equipped Talisman should be slotted with Greater Iron Runes to maximize damage.
Apart from the chest armor that is slotted with a Greater Iron Rune, all other equipment should be slotted with a Soul Core of Tacati to cap out your Chaos Resistance!
| All Runes | All Soul Cores | All Idols |
Charms
| Charm Options | |||||
|---|---|---|---|---|---|
 Nascent Hope Thawing Charm Nascent Hope Thawing Charm Nascent Hope Thawing Charm Stats:
Flask Type - Charm Charge Per Use - 40 Total Charges - 40 Duration - 3 sec. |
 Stone Charm Stone Charm Stone Charm Stats:
Flask Type - Charm Charge Per Use - 20 Total Charges - 40 Duration - 3 sec. |
 Golden Charm Golden Charm Golden Charm Stats:
Flask Type - Charm Charge Per Use - 80 Total Charges - 80 Duration - 1 sec. |
|||
This Frost Wolf Oracle build does not need any Charms to take on endgame and Pinnacle content in particular, but LazyExile mainly suggests taking the Nascent Hope Thawing Charm to build Charges while making you immune to freezes.
They also suggest that having both the Stone Charm and Golden Charm is supplemental, but really helpful when encountering the niche situation of being stunned or getting higher rarity items!
Frost Wolf Oracle Skills
※ The Support Gems' priority are arranged in a descending order. The first one being the most important and the last being the least crucial.
All Active and Persistent Skills
Endgame Crit
Tanky Non-Crit
| Skill | Support Gems |
|---|---|
| Shred Shred | Overextend Supports Attack Skills you use yourself. Supported Skills deal more Damage with Critical Hits, but Critically Hitting an Enemy with them will Daze you for a short time. Crescendo III Supports Strikes that perform a Final Strike at the end of a combination of attacks, causing the Final Strike to be Ancestrally Boosted. Rage III Supports Melee Attacks, causing them to grant Rage on Hit. Supported Skills have signficantly higher Attack speed while you are not at maximum Rage. Life Leech III Supports Attacks, causing their Physical damage to Leech Life and preventing Leech gained this way from being removed at full Life. Blindside Support Skills whoch can cause Damaging Hits. Supported Skills are more likely to Critically Hit Blinded Enemies, and deal more Damage with Critical Hits against Blinded Enemies, but cannot themselves inflict Blind. |
| Malice Malice | Prolonged Duration II Supports any skill that has a duration, making that duration longer. |
| Thunderstorm Thunderstorm Conjure a thunderstorm which causes lightning strikes and torrential rain in an area. Enemies in the area are Drenched, causing them to become Shocked or Frozen more easily. Plants in the area become Overgrown. (Weapon Set 2) | Prolonged Duration II Supports any skill that has a duration, making that duration longer. Blind II Supports any skill that Hits enemies, causing them to Blind on Hit with increased effect. Shock Conduction II Supports any skill that Hits enemies, giving it a chance to also Shock nearby enemies when you Shock an enemy. Always Shocks enemies which are Drenched. Lightning Exposure Supports any skill that hits enemies, causing it to deal less damage but inflict Lightning Exposure when it shocks and enemy. |
| Lunar Assault Lunar Assault Shapeshift into a Werewolf and swipe with your claws, projecting an arc of moonlight and ice forward in a crescent. | Rapid Attacks II Supports Attacks, causing them to Attack faster. Ice Bite II Supports Attacks and Warcries you use yourself. Freezing an enemy with supported skills infuses all of your Attacks with Cold damage for a short time. Deep Freeze Supports any skill that hits enemies, causing Freeze it inflicts to last longer. Mark of Siphoning Supports Marks Skills, causing enemies they Mark to Leech Mana to you when you Hit them with Attacks. |
| Cross Slash Cross Slash Shapeshift into a Werewolf and leap backwards as you gouge the ground with both claws. Hitting a Marked enemy with both gouges will Activate the Mark and cause an additional shockwave. Ice Fragments will be pulled into the location where the gouges cross and explode immediately. This skill can be used while using other skills to interrupt them. | Close Combat II Supports Attacks, causing them to deal more damage to enemies based on how close they are to you. Magnified Area II Supports any skill with an area of effect, making it larger at the cost of damage. Heavy Swing Supports Melee Attacks, boosting their Physical damage at the cost of Attack Speed. Rageforged II Supports any damaging skill that you use or trigger yourself, causing it to consume Rage to deal more damage, with a chance to skip consuming Rage while still benefitting as though it had. If you don't have enough Rage to consume, the damage bonus will not apply. |
| Lunar Blessing Lunar Blessing Shapeshift into a Werewolf and offer your Rage to the moon to receive a blessing, gaining bonus Cold damage, Attack speed and movement speed for yourself and any Wolf Minions you have from Wolf Pack or Predator's Mark. Spends all Rage to extend the Buff's duration. While the Buff is active, your WerewolfAttacks call down Moonbeams on Hit. | Second Wind III Supports skills with cooldowns, giving them extra uses of that cooldown and causing them to restore Life on use. Cannot support instant or triggered skills, or modify the skills of minions. Prolonged Duration II Supports any skill that has a duration, making that duration longer. Rage III Supports Melee Attacks, causing them to grant Rage on Hit. Supported Skills have signficantly higher Attack speed while you are not at maximum Rage. Rapid Attacks II Supports Attacks, causing them to Attack faster. Blind II Supports any skill that Hits enemies, causing them to Blind on Hit with increased effect. |
| Pounce Pounce Shapeshift into a Werewolf and leap to a target location, damaging enemies in an area around where you land. Predator's Mark will be Triggered targetting the highest Rarity enemie Hit, or if a Mark gem is socketed into this Skill, that Mark will be Triggered instead. Using this skill allows any Wolf Minions you have to leap immediately. | Eternal Mark Supports Mark Skills, causing them to not be Consumed the first time they are Activated. Freezing Mark Marks a target, making them more susceptible to being Frozen. When a Marked target dies, a Cold nova erupts from their corpse. this nova does not use your Weapon Damage, and instead uses its own Base Attack damage. Mark for Death Supports Mark Skills. Enemies affected by Supported Marks will have their Armour Broken by Physical Damage they take. Mark of Siphoning Supports Marks Skills, causing enemies they Mark to Leech Mana to you when you Hit them with Attacks. |
| Arctic Howl Arctic Howl Shapeshift into a Werewolf and let out an icy howl that damages enemies and Freezes Primed enemies. If an enemy is Frozen or a Frozen enemy is Hit, this Skill Empowers your attacks with added Cold damage, causes Empowered Slams to create Chilled Ground, and grants your Allies added Cold damage. This Skill's cooldown can be bypassed by expending an Endurance Charge. | Cooldown Recovery II Supports skills with Cooldowns, increasing the rate at which those Cooldowns Recover. Cannot modify the skills of minions. Raging Cry Supports Warcry skills, causing them to grant you Rage on use depending on counted monster Power. Brittle Armour Supports Skills which can Hit enemies. Hits with Supported Skills which BRITTLE ARMOUR Freeze enemies cause Physical damage against them to Break their Armour while they remain Frozen. |
| Savage Fury Savage Fury While active, your Fury builds from Attacking enemies. Using this Skill releases your Fury to send you into a bestial frenzy, gaining damage and Onslaught but constantly losing life and forcing you into animal form. The frenzy ends immediately if you return to human form. You cannot fain Fury while in a frenzy. (Weapon Set 2) | Prolonged Duration II Supports any skill that has a duration, making that duration longer. Efficiency II Supports any skill, making it cost less to use. Cannot support skills which reserve Spirit. |
| Herald of Ice Herald of Ice While active, Shattering an enemy with an Attack Hit will cause an icy explosion that deals Attack damage to surrounding enemies. (Weapon Set 1) | Magnified Area II Supports any skill with an area of effect, making it larger at the cost of damage. Elemental Armament II Supports Attacks, causing them to deal more Elemental damage. Cold Mastery Supports Cold skills, granting then an additional level. Lightning Exposure Supports any skill that hits enemies, causing it to deal less damage but inflict Lightning Exposure when it shocks and enemy. |
 Barkskin Barkskin Barkskin While active, taking Hit damage from enemies to your Energy Shield causes you to gain Armour for a short duration. Armour gained from multiple Hits can stack. The total Armour gained from this Skill cannot exceed the Item Armour on your Equipped Armour Items. (Weapon Set 1) | Prolonged Duration II Supports any skill that has a duration, making that duration longer. |
| Skill | Support Gems |
|---|---|
| Shred Shred | Rapid Attacks II Supports Attacks, causing them to Attack faster. Long Fuse II Supports Skills which have a Detonation Time, causing those Skills to have much higher Detonation Time and detonation damage. Rage II Supports Melee Attacks, causing them to grant Rage on Hit. Crescendo III Supports Strikes that perform a Final Strike at the end of a combination of attacks, causing the Final Strike to be Ancestrally Boosted. |
| Lunar Assault Lunar Assault Shapeshift into a Werewolf and swipe with your claws, projecting an arc of moonlight and ice forward in a crescent. | Rapid Attacks II Supports Attacks, causing them to Attack faster. Ice Bite II Supports Attacks and Warcries you use yourself. Freezing an enemy with supported skills infuses all of your Attacks with Cold damage for a short time. Deep Freeze Supports any skill that hits enemies, causing Freeze it inflicts to last longer. Ancestral Call II Supports Strikes you use yourself, providing a powerful Ancestral Boost every few seconds. Cannot Support Channelled Skills and does not modify Skills used by Minions. |
| Pounce Pounce Shapeshift into a Werewolf and leap to a target location, damaging enemies in an area around where you land. Predator's Mark will be Triggered targetting the highest Rarity enemie Hit, or if a Mark gem is socketed into this Skill, that Mark will be Triggered instead. Using this skill allows any Wolf Minions you have to leap immediately. | Eternal Mark Supports Mark Skills, causing them to not be Consumed the first time they are Activated. Freezing Mark Marks a target, making them more susceptible to being Frozen. When a Marked target dies, a Cold nova erupts from their corpse. this nova does not use your Weapon Damage, and instead uses its own Base Attack damage. Mark for Death Supports Mark Skills. Enemies affected by Supported Marks will have their Armour Broken by Physical Damage they take. Mark of Siphoning Supports Marks Skills, causing enemies they Mark to Leech Mana to you when you Hit them with Attacks. |
 Frost Bomb Frost Bomb Frost Bomb Creates a pulsing Orb of Frost. Each pulse inflicts Cold Exposure on nearby Enemies. When the Orb's duration ends, it explodes, dealing Cold damage to surrounding Enemies. | Spell Cascade Supports Spells that affect an area around you or a target location, causing those spells to also target additional areas on either side of the target area, along a randomly chosen axis. Cannot support Channelling skills or Remote skills. |
| Cross Slash Cross Slash Shapeshift into a Werewolf and leap backwards as you gouge the ground with both claws. Hitting a Marked enemy with both gouges will Activate the Mark and cause an additional shockwave. Ice Fragments will be pulled into the location where the gouges cross and explode immediately. This skill can be used while using other skills to interrupt them. | Close Combat II Supports Attacks, causing them to deal more damage to enemies based on how close they are to you. Magnified Area II Supports any skill with an area of effect, making it larger at the cost of damage. Heavy Swing Supports Melee Attacks, boosting their Physical damage at the cost of Attack Speed. Rageforged II Supports any damaging skill that you use or trigger yourself, causing it to consume Rage to deal more damage, with a chance to skip consuming Rage while still benefitting as though it had. If you don't have enough Rage to consume, the damage bonus will not apply. |
| Lunar Blessing Lunar Blessing Shapeshift into a Werewolf and offer your Rage to the moon to receive a blessing, gaining bonus Cold damage, Attack speed and movement speed for yourself and any Wolf Minions you have from Wolf Pack or Predator's Mark. Spends all Rage to extend the Buff's duration. While the Buff is active, your WerewolfAttacks call down Moonbeams on Hit. | Second Wind III Supports skills with cooldowns, giving them extra uses of that cooldown and causing them to restore Life on use. Cannot support instant or triggered skills, or modify the skills of minions. Prolonged Duration II Supports any skill that has a duration, making that duration longer. Rage III Supports Melee Attacks, causing them to grant Rage on Hit. Supported Skills have signficantly higher Attack speed while you are not at maximum Rage. Rapid Attacks II Supports Attacks, causing them to Attack faster. Cold Mastery Supports Cold skills, granting then an additional level. |
| Herald of Ice Herald of Ice While active, Shattering an enemy with an Attack Hit will cause an icy explosion that deals Attack damage to surrounding enemies. (Weapon Set 1) | Magnified Area I Supports any skill with an area of effect, making it larger. Cold Attunement Supports attacks, causing them to gain Cold Damage but deal less Fire and Lightning Damage. Cold Mastery Supports Cold skills, granting then an additional level. |
| Barkskin Barkskin While active, taking Hit damage from enemies to your Energy Shield causes you to gain Armour for a short duration. Armour gained from multiple Hits can stack. The total Armour gained from this Skill cannot exceed the Item Armour on your Equipped Armour Items. (Weapon Set 1) | Prolonged Duration II Supports any skill that has a duration, making that duration longer. |
| Thunderstorm Thunderstorm Conjure a thunderstorm which causes lightning strikes and torrential rain in an area. Enemies in the area are Drenched, causing them to become Shocked or Frozen more easily. Plants in the area become Overgrown. (Weapon Set 2) | Prolonged Duration II Supports any skill that has a duration, making that duration longer. Magnified Area II Supports any skill with an area of effect, making it larger at the cost of damage. Shock Conduction II Supports any skill that Hits enemies, giving it a chance to also Shock nearby enemies when you Shock an enemy. Always Shocks enemies which are Drenched. Lightning Exposure Supports any skill that hits enemies, causing it to deal less damage but inflict Lightning Exposure when it shocks and enemy. |
| Savage Fury Savage Fury While active, your Fury builds from Attacking enemies. Using this Skill releases your Fury to send you into a bestial frenzy, gaining damage and Onslaught but constantly losing life and forcing you into animal form. The frenzy ends immediately if you return to human form. You cannot fain Fury while in a frenzy. (Weapon Set 2) | Prolonged Duration II Supports any skill that has a duration, making that duration longer. |
This build revolves around the use of the Wolf form's core skills to make up for most of its kit, each with their own role:
- Shred - This will be your main damaging skill that makes use of Ice Fragments and Critical Weakness through the Blindside support gem whilst also enabling both Rage for Lunar Blessing and "Empowered Attack" of Explosive Empowerment.
- Lunar Assault - Freezes enemies in a wide arc whilst buffing your damage by adding Cold Damage upon doing so.
- Pounce - Used primarlily a way to mark Elites and Bosses, essentially a primer for single-target damage.
- Lunar Blessing - Used as both a buff for boss fights and making mobbing easier with the additional Moonbeams.
- Cross Slash - This will be your source of burst damage during boss fights and will be used in the middle of Shred combos and cancel the animations of Lunar Blessing.
- Arctic Howl - Used for emergencies where you want to quickly freeze enemies or as an additional means to Break Armour with Brittle Armour.
Apart from the main kit, LazyExile included other support skills that help round out either the build's damage or provide comfort:
- Thunderstorm - Inflicts both the Shocked and Blind debuff on groups of enemies.
- Malice - Inflicts Critical Weakness to enemies in your Presence.
- Herald of Ice - Allows for easy mob clearing through AoE ice explosions on killing frozen enemies.
- Barkskin - Converts all the damage you take to your Energy Shield to Armour. Used alongside Scarred Faith and Energy Shield leeching.
- Savage Fury - Provides additional damage through Fury by constantly attacking enemies. This skill's negative effect is negated by the amount of Life Leech in the build.
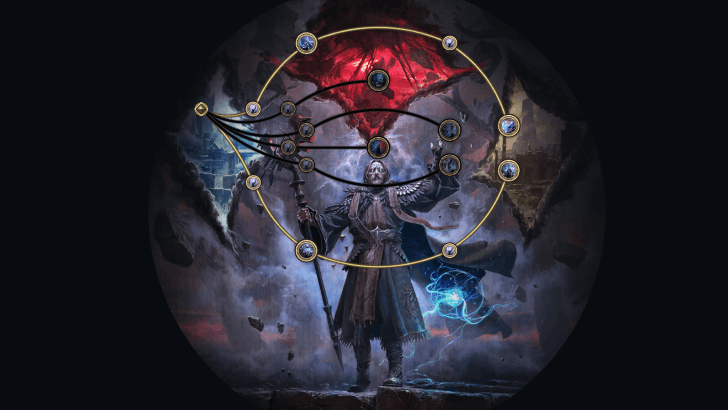
Frost Wolf Oracle Passive Tree
Passive Tree Progression
Note: The nodes that are colored yellow and red are the nodes taken with the Entwined Realities ascendancy passive.
| Ascendency Passive Nodes | |||||
|---|---|---|---|---|---|
 Entwined Realities and Forced Outcome Entwined Realities and Forced Outcome |
|||||
| Passive Nodes | |||||
| 1. |  |
2. |  |
||
| 3. |  |
4. |  |
||
| 5. |  |
6. |  |
||
| 7. |  |
8. |  |
||
| Screenshots taken from Path of Building. | |||||
The passive tree that LazyExile designed is focused on making full use of the Entwined Realities ascendancy passive, allowing you to take Notable Passives you otherwise cannot by getting Keystones and then choosing those within a medium radius. However, despite the multitude of Keystones, all of these are still synergistic and make up for the full build:
- Blood Magic = Converts mana cost to life costs, but is circumvented with the Life Leech of this build.
- Scarred Faith = The 5% of Physical Damage dealt to your ES (Energy Shield) will be recouped as life in exchange for not being able to regenerate ES. However, this caveat is answered with the foulborn version Soul Tether + Atziri's Acuity combo
- Ancestral Bond = Allows you to reach the Endlessly Soaring passive nodes without having any downsides to the build
- Mind Over Matter = Given that this build does not use Mana due to Blood Magic, this is another source of mitigating damage.
- Lord of the Wilds = Allows you to equip the Effigy of Cruelty Antler Focus while using a Talisman to inflict Critical Weakness.
- Zealous Oath = Buffs up the maximum amount of Energy Shield the build has.
The notable passives that this build wants focuses on the following keywords: Shapeshift Buffs, Critical Hit Chance, Critical Hit Damage, Life Leech, Skill Duration, and Elemental Damage, as well as taking Armour and Energy Shield nodes that can help you survive longer in high tier maps. Make sure to configure the Weapon Set 1 and 2 properly as this majorly impacts the flow of the build.
On the other hand, the Ascendancy passive nodes for this build allow The Hidden Path and Forced Outcome to fulfill the needs of the build in other ways. The Hidden Path allows you to get Calculated Hunter, Hidden Forms, and Cower Before the First Ones. Forced Outcome enables all the critical-based setups for the uniques and survivability of the build!
Passive Skill Tree Guide and List of Passives
Jewels
 Emerald Emerald |
・+% Increased Critical Damage Bonus
・+% Increased Damage While Shapeshifted ・+% Increased Skill Speed While Shapeshifted |
|---|
This build will have guaranteed Critical Hits and spend most of its time in Wolf form, so get Emerald Jewels that support that playstyle by adding modifiers for more critical damage, shapeshift damage, and shapeshift skill speed!
Frost Wolf Oracle Playstyle
Mobbing Rotation
The mobbing rotation for this build is centered around comfort and having a nimble playstyle. The rotation is as follows:
- Use Shred to build up some Rage.
- Activate Lunar Blessing for the buff and Moonbeams.
- Pounce on a group of enemies to mark them.
- Use Shred to clear smaller mobs, and then activate a Cross Slash for a screenwide clear.
Optimal Single Target Rotation
If you want to fully minmax the damage this build deals, some sequencing is required to bring out the best of this build. The rotation is as follows:
- Activate Lunar Blessing for the massive buf.
- Use Thunderstorm on the boss to inflict Shocked and Blind.
- Pounce on the boss to apply Freezing Mark.
- Use Lunar Assault until the boss is primed for Freeze.
- Activate Arctic Howl and fill up Savage Fury.
- Use Shred's full attack up to two times to get the Empowered Attack.
- Use Cross Slash while the boss is Frozen to proc the Ice Fragments.
- Finish the boss with Shred when the enemy is no longer frozen.
Simple Single Target Rotation
If you are feeling a little bit "Lazy" or facing a simple and easy boss, you can follow the rotation that LazyExile designed:
- Activate Lunar Blessing for the massive buff.
- Use Thunderstorm on the boss to inflict Shocked and Blind.
- Spam the boss with Shred to fill up Savage Fury, and then reactivate Lunar Blessing when it expires.
Path of Exile 2 (PoE 2) Related Guides

0.4 Best Endgame Builds
| Rank | Build |
|---|---|
 |
|
 |
|
 |
|
 |
0.4 Leveling Builds
All Build Guides
| List of Builds by Class | |||||||||||
|---|---|---|---|---|---|---|---|---|---|---|---|
 Huntress Huntress |
 Mercenary Mercenary |
 Monk Monk |
|||||||||
 Witch Witch |
 Sorceress Sorceress |
 Warrior Warrior |
|||||||||
 Ranger Ranger |
 Druid Druid |
- | |||||||||
| Other Build Guides | 0.3 Leveling Builds | How to Make a Good Build | |||||||||
Druid Leveling Builds
NEW |
Herald of Thunder While active, killing Shocked enemies with Attack damage, will cause subsequent Attack hits to release lightning bolts which deals Attack damage to all surrounding enemies.
Lingering Illusion Creates a short-lived illusory copy of yourself whenever you dodge roll. The copy can be damaged by enemies, and copies that are destroyed by an enemy will grant you a Power Charge.
Elemental Weakness Curse all targets in an area after a short delay, lowering their Elemental Resistances.
Oil Barrage Shapeshift into a Wyvern and spit Oil at enemies, creating Oil Ground where the Projectiles land. Consumes Power Charges if possible to instead Channel a sustained barrage of electrified Oil that does not create Oil Ground. Projectiles are fired in sequence, allowing multiple Projectiles to Hit the same target.
Thunderstorm Conjure a thunderstorm which causes lightning strikes and torrential rain in an area. Enemies in the area are Drenched, causing them to become Shocked or Frozen more easily. Plants in the area become Overgrown.
Barkskin While active, taking Hit damage from enemies to your Energy Shield causes you to gain Armour for a short duration. Armour gained from multiple Hits can stack. The total Armour gained from this Skill cannot exceed the Item Armour on your Equipped Armour Items.
Focus: Dragon, Lightning, Shock |
UP |
Herald of Ash While active, enemies you sufficiently Overkill with attacks will cause an explosion that ignites nearby enemies based on the Overkill damage dealt.
Furious Slam Shapeshift into a Bear and Slam the ground with great force, causing a pair of shockwaves. Can spend Rage to create larger shockwaves that leave behind Jagged Ground.
Volcano Uplift a volcano from the earth, damaging enemies standing on it and releasing a spray of molten Projectiles. While the volcano persists, Slamming it will cause another Projectile spray. Channelling this Skill for longer makes the initial eruption more violent, but does not affect subsequent Projectile sprays.
Fury of the Mountain Shapeshift into a Bear and repeatedly pound the ground, creating Molten Fissures that travel randomly in a wide arc in front of you.
Focus: Bear, Fire, Slam |
NEW |
Frost Bomb Creates a pulsing Orb of Frost. Each pulse inflicts Cold Exposure on nearby Enemies. When the Orb's duration ends, it explodes, dealing Cold damage to surrounding Enemies.
Herald of Ice While active, Shattering an enemy with an Attack Hit will cause an icy explosion that deals Attack damage to surrounding enemies.
Overwhelming Presence While active, enemies in your Presence are easier to Stun and inflict Elemental Ailments upon.
Lunar Assault Shapeshift into a Werewolf and swipe with your claws, projecting an arc of moonlight and ice forward in a crescent.
Lunar Blessing Shapeshift into a Werewolf and offer your Rage to the moon to receive a blessing, gaining bonus Cold damage, Attack speed and movement speed for yourself and any Wolf Minions you have from Wolf Pack or Predator's Mark. Spends all Rage to extend the Buff's duration. While the Buff is active, your WerewolfAttacks call down Moonbeams on Hit.
Cross Slash Shapeshift into a Werewolf and leap backwards as you gouge the ground with both claws. Hitting a Marked enemy with both gouges will Activate the Mark and cause an additional shockwave. Ice Fragments will be pulled into the location where the gouges cross and explode immediately. This skill can be used while using other skills to interrupt them.
Thunderstorm Conjure a thunderstorm which causes lightning strikes and torrential rain in an area. Enemies in the area are Drenched, causing them to become Shocked or Frozen more easily. Plants in the area become Overgrown.
Pounce Shapeshift into a Werewolf and leap to a target location, damaging enemies in an area around where you land. Predator's Mark will be Triggered targetting the highest Rarity enemie Hit, or if a Mark gem is socketed into this Skill, that Mark will be Triggered instead. Using this skill allows any Wolf Minions you have to leap immediately.
Focus: Wolf, Cold, Crowd Control |
Druid Endgame Builds
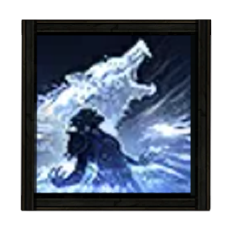
NEW |
Herald of Ice While active, Shattering an enemy with an Attack Hit will cause an icy explosion that deals Attack damage to surrounding enemies.
Lunar Assault Shapeshift into a Werewolf and swipe with your claws, projecting an arc of moonlight and ice forward in a crescent.
Lunar Blessing Shapeshift into a Werewolf and offer your Rage to the moon to receive a blessing, gaining bonus Cold damage, Attack speed and movement speed for yourself and any Wolf Minions you have from Wolf Pack or Predator's Mark. Spends all Rage to extend the Buff's duration. While the Buff is active, your WerewolfAttacks call down Moonbeams on Hit.
Cross Slash Shapeshift into a Werewolf and leap backwards as you gouge the ground with both claws. Hitting a Marked enemy with both gouges will Activate the Mark and cause an additional shockwave. Ice Fragments will be pulled into the location where the gouges cross and explode immediately. This skill can be used while using other skills to interrupt them.
Thunderstorm Conjure a thunderstorm which causes lightning strikes and torrential rain in an area. Enemies in the area are Drenched, causing them to become Shocked or Frozen more easily. Plants in the area become Overgrown.
Pounce Shapeshift into a Werewolf and leap to a target location, damaging enemies in an area around where you land. Predator's Mark will be Triggered targetting the highest Rarity enemie Hit, or if a Mark gem is socketed into this Skill, that Mark will be Triggered instead. Using this skill allows any Wolf Minions you have to leap immediately.
Arctic Howl Shapeshift into a Werewolf and let out an icy howl that damages enemies and Freezes Primed enemies. If an enemy is Frozen or a Frozen enemy is Hit, this Skill Empowers your attacks with added Cold damage, causes Empowered Slams to create Chilled Ground, and grants your Allies added Cold damage. This Skill's cooldown can be bypassed by expending an Endurance Charge.
Barkskin While active, taking Hit damage from enemies to your Energy Shield causes you to gain Armour for a short duration. Armour gained from multiple Hits can stack. The total Armour gained from this Skill cannot exceed the Item Armour on your Equipped Armour Items.
Savage Fury While active, your Fury builds from Attacking enemies. Using this Skill releases your Fury to send you into a bestial frenzy, gaining damage and Onslaught but constantly losing life and forcing you into animal form. The frenzy ends immediately if you return to human form. You cannot fain Fury while in a frenzy.
Focus: Wolf, Cold, Burst, Crowd Control, Tanky |
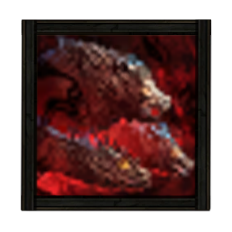
NEW |
Herald of Ash While active, enemies you sufficiently Overkill with attacks will cause an explosion that ignites nearby enemies based on the Overkill damage dealt.
Berserk While active, strengthens your Rage and grants you Life Leech based on your Rage, but causes you to lose Life while Raging.
Charge Regulation While active, you gain powerful Buffs based on your active Charges. However, maintaining the Buff consumes Charges every few seconds.
Furious Slam Shapeshift into a Bear and Slam the ground with great force, causing a pair of shockwaves. Can spend Rage to create larger shockwaves that leave behind Jagged Ground.
Ferocious Roar Shapeshift into a Bear and roar in defiance, immediately gaining Rage if there are enemies nearby and Empowering subsequent Attacks to Break Armour. Alternatively, socketing a human-form Warcry into this Skill triggers that Warcry instead, and augments its damage and area. This Skill's cooldown can be bypassed by expending an Endurance Charge.
Walking Calamity While in Bear form, build Glory by gaining Rage while already at maximum Rage. When you have maximum Glory, roar to the heavens to bring them down upon your enemies. For the duration of the Skill and as long as you remain in Bear form, meteors rain down around you and you Gain Fire damage and Rage regeneration.
Pounce Shapeshift into a Werewolf and leap to a target location, damaging enemies in an area around where you land. Predator's Mark will be Triggered targetting the highest Rarity enemie Hit, or if a Mark gem is socketed into this Skill, that Mark will be Triggered instead. Using this skill allows any Wolf Minions you have to leap immediately.
Rampage Shapeshift into a Bear and charge forward, Slamming the ground as you run. Channelling ends after a short amount of time but can be prolonged by spending Rage.
Savage Fury While active, your Fury builds from Attacking enemies. Using this Skill releases your Fury to send you into a bestial frenzy, gaining damage and Onslaught but constantly losing life and forcing you into animal form. The frenzy ends immediately if you return to human form. You cannot fain Fury while in a frenzy.
Focus: Fire, Tanky, Bear, Burst, Slam |
Druid Class and Ascendancy Guides
| Base Class | |
|---|---|
| Ascendancies | |
Comment
Author

PoE 2 0.4 Druid Build - Frost Wolf Oracle
Please participate in our site
improvement survey
03/2026
improvement survey
03/2026
Would you assist in
improving Game8's site?
improving Game8's site?

×
We are listening to our users' valuable opinions and discussing how to act on them.
The information collected through this survey will be used for the purpose of improving our services. In addition, the information will only be disclosed a part of a statistic in a format that will not allow identification of personal information.
Begin Survey
Not Now
×
Please rate each item regarding Game8.co's Advertisements.
Amount of Ads
Very Dissatisfied
Somewhat Dissatisfied
Fine
Somewhat Satisfied
Highly Satisfied
Placement of Ads
Timing of Ad Display
Ad Loading Speed
Safeness of Ads
Content of Ads
×
Please rate each item regarding Game8.co's Quality of Articles.
Amount of information
Very Dissatisfied
Somewhat Dissatisfied
Fine
Somewhat Satisfied
Highly Satisfied
Frequency of updates
Speed of new information
Accuracy of articles
Understandibility of articles
Readability of sentences
×
Please rate each item regarding Game8.co's Usability of the Site.
Ease of finding information
Very Dissatisfied
Somewhat Dissatisfied
Fine
Somewhat Satisfied
Highly Satisfied
Loading Speed
Use of Color
Font Size
Visibility of Images
Easy to Understand Layout
×
Please rate each item regarding Game8.co's Message Boards, Comments.
Ease of Writing
Very Dissatisfied
Somewhat Dissatisfied
Fine
Somewhat Satisfied
Highly Satisfied
Readability
Ease in Finding Information
Comment Quality
Comment Quantity
Admin Response
×
Please rate each item regarding Game8.co's Site's new design.
Please rate our site's new design
Very Dissatisfied
Somewhat Dissatisfied
Fine
Somewhat Satisfied
Highly Satisfied
Do you think that the website's design change makes the site easier to use?
Has the new design made it easier for you to find information on the site?
Has the new design improved the overall visual appeal of the site?
How would you rate your overall satisfaction with the new design of the site?
×
How likely are you to recommend Game8 to someone you know?
Very Unlikely
0
1
2
3
4
5
6
7
8
9
10
Very Likely
If you have other opinions regarding potential improvement to the website, please share them with us. We would appreciate your honest opinion.
Note: This is a free response section, so you can proceed without entering anything.
Note: Please be sure not to enter any kind of personal information into your response.
Note: Please be sure not to enter any kind of personal information into your response.
×
Thank You
×
Thank you for participating in our survey! Your answers will help us to improve the quality of our website and services.
We hope you continue to make use of Game8.
We hope you continue to make use of Game8.
Close
Rankings
- We could not find the message board you were looking for.
Gaming News


![Marathon Review [First Impressions] | Playing The Long Game](https://img.game8.co/4435736/b9b1ec1e9219416dfc2599f85295d6ef.png/thumb)


Popular Games

Genshin Impact Walkthrough & Guides Wiki
Honkai: Star Rail Walkthrough & Guides Wiki
Umamusume: Pretty Derby Walkthrough & Guides Wiki
Pokemon Pokopia Walkthrough & Guides Wiki
Resident Evil Requiem (RE9) Walkthrough & Guides Wiki
Monster Hunter Wilds Walkthrough & Guides Wiki
Wuthering Waves Walkthrough & Guides Wiki
Arknights: Endfield Walkthrough & Guides Wiki
Pokemon FireRed and LeafGreen (FRLG) Walkthrough & Guides Wiki
Pokemon TCG Pocket (PTCGP) Strategies & Guides Wiki


Recommended Games
Fire Emblem Heroes (FEH) Walkthrough & Guides Wiki
Diablo 4: Vessel of Hatred Walkthrough & Guides Wiki
Yu-Gi-Oh! Master Duel Walkthrough & Guides Wiki
Super Smash Bros. Ultimate Walkthrough & Guides Wiki
Pokemon Brilliant Diamond and Shining Pearl (BDSP) Walkthrough & Guides Wiki
Elden Ring Shadow of the Erdtree Walkthrough & Guides Wiki
Monster Hunter World Walkthrough & Guides Wiki
The Legend of Zelda: Tears of the Kingdom Walkthrough & Guides Wiki
Persona 3 Reload Walkthrough & Guides Wiki
Cyberpunk 2077: Ultimate Edition Walkthrough & Guides Wiki


All rights reserved
© 2010 - 2024 Grinding Gear Games
The copyrights of videos of games used in our content and other intellectual property rights belong to the provider of the game.
The contents we provide on this site were created personally by members of the Game8 editorial department.
We refuse the right to reuse or repost content taken without our permission such as data or images to other sites.