PoE 2 0.4 Sorceress Build - Adonia's Trifusion Stormweaver
Latest: 0.5.0 Release Date
☆ Fate of the Vaal ▶︎ The Last of the Druids
┗ Bonded Mods | 0.4 Mystery Box
★ Druid: Class Overview | Builds
☆ NEW: Disciple of Varashta Ascendancy!
★ Best Class | Best Builds | Leveling Builds
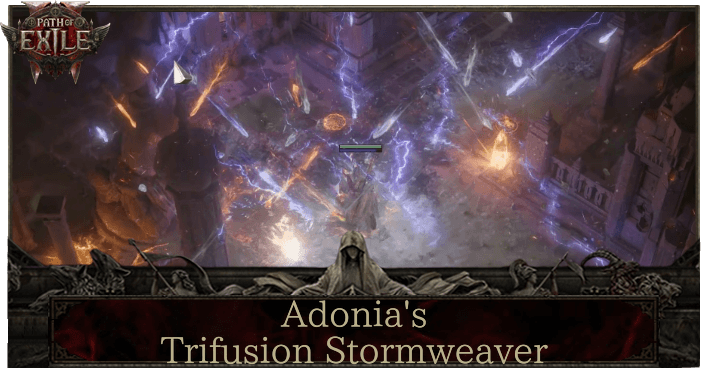
This is an Adonia's Trifusion Stormweaver endgame build for Path of Exile 2 (PoE 2)'s The Last of the Druids Update. Check out the Adonia's Trifusion Stormweaver endgame build, including its gear, socketables, skills, and playstyle!
 Attention! Attention! |
This 0.4.0 endgame build starts from Level 90 and above. If you want to see a build for leveling, check out our Leveling Builds! |
|---|
List of Contents
Adonia's Trifusion Stormweaver Build Summary
Operator Otter's Adonia's Trifusion Stormweaver Build
This build has been crafted by Operator Otter, which is showcased and explained in depth over at his YouTube channel.
You can also check out his Discord channel to interact with Operator Otter and join his community, and you can also catch live streaming on Twitch!
Adonia's Trifusion Stormweaver Build
| Build Setup | |
|---|---|
 Adonia's Trifusion Stormweaver |
 Elemental Storm Cannot deal Critical Hits;Deals Damage every 0.25 seconds;Storm radius is 1.8 metres;Storm duration is 5 seconds;Enemies inside the storm are Hindered
 Frost Bomb Creates a pulsing Orb of Frost. Each pulse inflicts Cold Exposure on nearby Enemies. When the Orb's duration ends, it explodes, dealing Cold damage to surrounding Enemies.
 Spark Launches a spray of sparking projectiles that travel erratically along the ground until they hit an enemy or expire.
 Mana Tempest Creates a storm of arcane energies that Empowers your Mana-costing Spells while you remain inside it. Maintaining the Storm constantly drains your Mana, and each spell you cast causes it to drain faster. The storm will dissipate when you exit it or run out of mana.
 Firestorm Rains flaming bolts over the targeted area. Ignites on enemies in front of you are Consumed to fuel the Firestorm by creating improved bolts.
 Mana Remnants Conjures surging lightning to restore your Mana. While active, Shocked enemies you kill have a chance to spawn a Mana Remnant, and Critically Hitting a Shocked target spawns a Mana Remnant every few seconds. Picking up a Mana Remnant grants you Mana which can Overflow maximum Mana.
 Blink Replaces your dodge roll with a short-cooldown Spell that allows you to tunnel through space, instantly reappearing a medium distance away.
 Cast on Critical While active, gains energy when you Critically Hit enemies and triggers socketed spells on reaching maximum energy.
 Cast on Elemental Ailment While active, gains Energy when you Freeze, Shock, or Ignite enemies, and triggers socketed spells on reaching Maximum Energy.
 Siphon Elements While active, has a chance to create an Infusion Remnant when you Freeze, Shock, or Ignite a target.
|
|
|
|
This Stormweaver build uses all three Elemental Ailments and Elemental Infusions, further boosting their damage output with Power Charges.
This makes it one of the strongest builds to use this season. It can quickly clear maps with great efficiency as it does not rely on a single element, and will have no trouble defeating bosses thanks to its high damage output.
| Date | Changes |
|---|---|
| 1-14-2026 | Created Adonia's Trifusion build for endgame. |
| 1-15-2026 | ・Updated Build FAQs ・Updated Weapons and Armor section ・Updated Playstyle section |
Build FAQs
Bypassing Adonia's Ego Elemental Resistance Penalty
Adonia's Ego Siphoning Wand has an elemental resistance penalty that is applied when Power Charges are consumed. In order to bypass this, we will be using a different weapon set to generate power charges and switch to another to activate Pinnacle of Power.
This allows us to bypass the elemental resistance penalty of Adonia's Ego, and since we will be generating seven power charges, this allows us to gain its benefits while avoiding an otherwise 50-77 + % elemental resistance penalty.
To that end, we will be assigning skills to both weapon sets, to take full advantage of this mechanic.
Absence of Elemental Weakness Skill Gem
The Elemental Weakness Skill Gem has been a staple for the majority of elemental builds since its introduction in Patch 0.3, the patch where Flammability, Conductivity, and Hypothermia were removed and replaced by a new skill, Elemental Weakness.
Since we are using Rakiata's Flow, lowering the enemy's resistances is counterproductive because Rakiata's Flow inverts the target's elemental resistance. This is also why we are not using any exposure nodes on our passive tree.
We are still running Heavy Frost, as it can take some time for Rakiata's Flow to kick in, whereas we are consistently freezing targets. Since Heavy Frost effect does not override Rakiata's Flow, we can take full advantage of it without it hindering our damage output.
Adonia's Trifusion Stormweaver Equipment
※ The affixes shown below are arranged based on descending priority.
| Gear | Modifiers | |
|---|---|---|
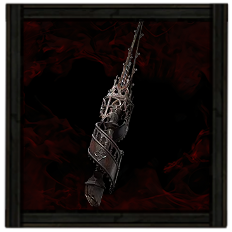 Adonia's Ego Siphoning Wand Adonia's Ego Siphoning Wand Adonia's Ego Siphoning Wand Stats:
Requirements: Level - 65 Intelligence - 35 (Weapon Set I) |
・+ To Maximum Mana
・+ to Level of All Spell Skills ・+% increased Cast Speed ・- % to All Elemental Resistances per Power Charge ・+1 To Maximum Power Charges |
|
 Sacred Flame Shrine Sceptre Sacred Flame Shrine Sceptre Sacred Flame Shrine Sceptre Stats:
Spirit - 100 Requirements: Level - 78 Strength - 78 Intelligence - 106 (Offhand) |
・Gain % of Damage as Extra Fire Damage
・Allies in your Presence Gain % of Damage as Extra Fire Damage ・Allies in your Presence Regenerate % of their Maximum Life per second ・Enemies in your Presence Resist Elemental Damage based on their Lowest Resistance | |
 Chiming Staff Chiming Staff Chiming Staff Stats:
Requirements: Level - 25 Intelligence - 41 (Weapon Set II) |
・+ To Level of All Spell Skills
・% Increased Cast Speed |
|
 Ancestral Tiara Ancestral Tiara Ancestral Tiara Stats:
Energy Shield - 109 Requirements: Level - 80 Intelligence - 115 (Helm) |
・% Increased Cost Efficiency
・Any Elemental Resistance + To Maximum Mana Desecrated: ・% Increased Energy Shield |
|
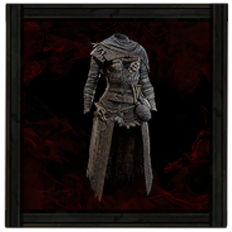 Vile Robe Vile Robe Vile Robe Stats:
Energy Shield - 184 Requirements: Level - 65 Intelligence - 121 (Body Armor) |
・% Increased Armor, Evasion and Energy Shield
・+ To Maximum Energy Shield ・% Increased Energy Shield ・% Increased Spirit Reservation of Skills Desecrated: ・+% Increased Spirt Reservation Efficiency of Skills |
|
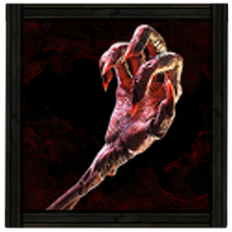
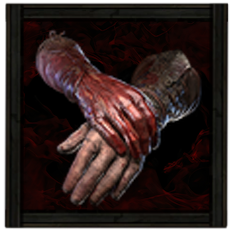 Maligaro's Virtuosity Fine Bracers Maligaro's Virtuosity Fine Bracers Maligaro's Virtuosity Fine Bracers Stats:
Evasion - 81 Requirements: Level - 45 Dexterity - 57 Fixed Modifiers: ・ 60-80% increased Evasion Rating ・ 20-30% increased Critical Hit Chance ・ 5% increased Attack Speed ・ +10-20 to Dexterity ・ Your Critical Damage Bonus is 300% (Gloves) |
・% increased Evasion Rating
・% increased Critical Hit Chance ・5% increased Attack Speed ・+ to Dexterity ・Your Critical Damage Bonus is 300% |
|
 Sekhema Sandals Sekhema Sandals Sekhema Sandals Stats:
Energy Shield - 82 Requirements: Level - 80 Intelligence - 108 (Boots) |
・% Increased Armor, Evasion and Energy Shield ・% Increased Energy Shield ・Reduced Attribute Requirements ・Any Elemental Resistance Desecrated: ・Increased Movement Speed |
|
 Lunar Amulet Lunar Amulet Lunar Amulet Requirements:
Level - 14 Implicit:+20-30 to maximum Energy Shield (Amulet) |
・Allocates Efficient Inscriptions ・+ Level to All Spell Skills ・+ Maximum Energy Shield ・+ Spirit ・Any Elemental Resistance ・+ To Maximum Mana Desecrated: ・+To Any Elemental and Chaos Reistance |
|
 Breach Ring Breach Ring Breach Ring Requirements:
Level - 40 Implicit:Maximum Quality is 40% (Ring 1) |
・ % Increased Spell Damage while on Full Energy Shield
・Increased Cast Speed ・% To Any Elemental Resistance ・% To All Elemental Resistance |
|
 Kalandra's Touch Ring Kalandra's Touch Ring Kalandra's Touch Ring Requirements:
None Implicit:Reflects your other Ring Fixed Modifiers: ・ Mirrored (Ring 2) |
・Reflects Your Other Ring | |
 Ultimate Life Flask Ultimate Life Flask Ultimate Life Flask Stats:
Flask Type - Life Recovered Life - 920 Charge Per Use - 10 Total Charges - 75 Duration - 3 sec. (Life Flask) |
・Gain Charges per Second
・Increased Amount Recovered |
|
 Ultimate Mana Flask Ultimate Mana Flask Ultimate Mana Flask Stats:
Flask Type - Mana Recovered Mana - 310 Charge Per Use - 10 Total Charges - 75 Duration - 3 sec. (Mana Flask) |
・Increase Amount Recovered
・Increased Charges |
Weapons
This build uses Adonia's Ego Siphoning Wand in order to use the active skill, Pinnacle of Power. Pinnacle of Power increases all elemental damage per Power Charged consumed, and this build utilizes it to the fullest, as it uses all three elements to deal damage.
However, the best mechanic that Pinnacle of Power has to offer is that it allows all of our spells to apply any of the elemental ailments, regardless of the damage type that spell uses.
This synergizes extremely well with Cast on Elemental Ailment, as it allows the socketed spell to trigger more often, which, in turn, allows Cast on Critical to proc a lot more often due to the sheer number of damage instances that the Cast on Elemental Ailment can generate.
For our second weapon set, we will be using a Chiming Staff, which will be used specifically for Sigil of Power, as well as Firestorm, to be able to consume all of our elemental infusions instantly in order to generate all of our available power charges.
Armor and Accessories
Since we do not benefit from the Life stat, we will take as much Energy Shield as possible. Since our build uses the Chaos Inoculation keystone passive, we rely solely on Energy Shield for survivability. This is why we must cap our resistances on our gear.
The build utilizes the unique item, Maligaro's Virtuosity Fine Bracers, for increased critical chance and critical damage.
We will be using plenty of persistent skills, so we will use the unique Sacred Flame Shrine Sceptre for additional fire resistance and spirit. Since we need a lot of spirit, make sure to get the highest spirit rolls possible on your chest piece and amulet, as well as anointing your amulet with the Efficient Inscriptions passive.
| List of Armors | List of Accessories |
Runes and Soul Cores
| Equipment | Sockets |
|---|---|
| Weapon Set I | |
| Weapon Set II | |
| Armor |
Depending on your budget, you can purchase an Adonia's Ego Wand that has a socket. Although more expensive, this option allows you to socket a Hedgewitch Assandra's Rune of Wisdom, which adds another level to your spells. This isn't required for the build to function, but it's a nice addition.
For our Chiming Staff, we will socket Xopec's Soul Core of Power to increase our chances of gaining a power charge. This allows us to easily reach our power charge cap.
We will be socketing our sceptre with a Rabbit Idol rune for more spirit, and the Idol of Eeshta on our helmet for increased mana efficiency, to lessen the mana burden of spell casts.
The rest of our slots will use Greater Iron Runes, so it's important to reach the elemental resistance cap through our gear, without using runes.
| List of Runes | List of Soul Cores |
Belts and Charms
| Belt Modifiers | |||||
|---|---|---|---|---|---|
 Headhunter Heavy Belt Headhunter Heavy Belt Headhunter Heavy Belt Requirements:
Level - 50 Implicit:1-2 Charm slots;20-30% increased Stun Threshold Fixed Modifiers: ・ +40-60 to maximum Life ・ +20-40 to Strength ・ +20-40 to Dexterity ・ When you Kill a Rare monster, you gain its Modifiers for 60 seconds |
・+To maximum Life
・+ To Strength ・+To Dexterity ・When you Kill a Rare monster, you gain its Modifiers for 20 seconds |
||||
| Charm Options | |||||
 The Fall of the Axe Silver Charm The Fall of the Axe Silver Charm
|
 Beira's Anguish Dousing Charm Beira's Anguish Dousing Charm
|
 Stone Charm Stone Charm
|
|||
For faster mapping, the build uses the Headhunter Unique Belt to gain the modifiers of any slain rares and elites. Since this build clears maps extremely fast, the bonuses can add up, allowing us to clear maps even faster.
We will be utilizing The Fall of The Axe Silver Charm for the Onslaught buff as well as providing immunity to slows, while Beira's Anguish is used to provide immunity to ignite.
Since we rely heavily on our Energy Shields for survivability, we need to have ignite immunity, as Energy Shields cannot regenerate if we are still taking damage. You may substitute Beira's Anguish for a regular Dousing Charm with modifiers such as increased charges and upgrade it once you have the budget to do so.
| List of Belts | List of Charms |
Adonia's Trifusion Stormweaver Skills
All Active and Persistent Skills
| Skill | Support Gems |
|---|---|
| Elemental Storm Elemental Storm Cannot deal Critical Hits;Deals Damage every 0.25 seconds;Storm radius is 1.8 metres;Storm duration is 5 seconds;Enemies inside the storm are Hindered | Arbiter's Ignition Supports Fire Spell Skills. You have a chance to gain Flame Archon when Igniting with Supported Skills. Cooldown Recovery II Supports skills with Cooldowns, increasing the rate at which those Cooldowns Recover. Cannot modify the skills of minions. Knockback Supports any skill that Hits enemies, causing it to Knock Back enemies. Magnified Area II Supports any skill with an area of effect, making it larger at the cost of damage. Prolonged Duration II Supports any skill that has a duration, making that duration longer. |
 Pinnacle of Power Pinnacle of Power Pinnacle of Power | Lightning Mastery Supports Lightning skills, granting them an additional level. Prolonged Duration II Supports any skill that has a duration, making that duration longer. Heightened Charges Supports any Skill that Consumes Charges, granting a chance for benefits of that Consumption to be doubled. Dialla's Desire Supports any Skill which has levels, increasing the level and Quality, while reducing the cost and Reservation. |
| Purity of Fire Purity of Fire | Warm Blooded Supports Persistent Biff Skills, causing Freeze applied to you to last for a shorter duration while the Supported Skill is active. Mysticism II Supports Persistent Buff Skills, causing you to deal increased Spell Damage while on full Energy Shield while the Supported Skill is active. Coolheaded Supports Persistent Buff Skills, causing Ignite applied to you to last for a shorter duration while the Supported Skill is active. Clarity II Supports Persistent Buff Skills, causing you to gain increased Mana Regeneration while the Skill is active. |
| Mana Remnants Mana Remnants Conjures surging lightning to restore your Mana. While active, Shocked enemies you kill have a chance to spawn a Mana Remnant, and Critically Hitting a Shocked target spawns a Mana Remnant every few seconds. Picking up a Mana Remnant grants you Mana which can Overflow maximum Mana. | Harmonic Remnants II Supports Skills which create Remnants, allowing those Remnants to be collected from further away, with a chance to create an additional Remnant. Remnant Potency III Supports Skills which create Remnants, making those Remnants more powerful, but delaying their effect. |
| Cast on Elemental Ailment Cast on Elemental Ailment While active, gains Energy when you Freeze, Shock, or Ignite enemies, and triggers socketed spells on reaching Maximum Energy. | Arc An arc of Lightning stretches from the caster to a targeted enemy and Chains on to other nearby enemies. Shocked enemies Hit release damaging pulses. Commiserate Supports Skills you use yourself which can cause Damaging Hits. Supported Skills inflict more powerful Ailments if you are afflicted with those Ailments when you inflict them, while also removing from you any Ailment that they inflict. Overcharge Supports any skill that hits enemies, making its Shocks more effective but last for a shorter duration. Pinpoint Critical Supports any skill that Hits Enemies, causing it to Critically Hit more often but deal less damage with Critical Hits Sione's Temper Supports Projectile Spells. Supported Spells have an increasingly higher chance to fire many additional Projectiles in a circle, resetting when they do. |
| Frost Bomb Frost Bomb Creates a pulsing Orb of Frost. Each pulse inflicts Cold Exposure on nearby Enemies. When the Orb's duration ends, it explodes, dealing Cold damage to surrounding Enemies. | Spell Cascade Supports Spells that affect an area around you or a target location, causing those spells to also target additional areas on either side of the target area, along a randomly chosen axis. Cannot support Channelling skills or Remote skills. Short Fuse II Supports Skills which Detonate after some amount of time has elapsed, massively shortening the time before Detonation at the cost of Damage. Cooldown Recovery II Supports skills with Cooldowns, increasing the rate at which those Cooldowns Recover. Cannot modify the skills of minions. Overabundance I Supports skills which can have a Limited number of effects active at once, increasing that Limit at the cost of their duration. Only applies to restrictions that use the word “Limit”. Spell Echo Supports Spells that affect an area around you or a target location. Supported Spells echo, causing their effects to happen again after a short delay. Cannot support Channelling skills or Remote skills. |
| Mana Tempest Mana Tempest Creates a storm of arcane energies that Empowers your Mana-costing Spells while you remain inside it. Maintaining the Storm constantly drains your Mana, and each spell you cast causes it to drain faster. The storm will dissipate when you exit it or run out of mana. | Lightning Mastery Supports Lightning skills, granting them an additional level. Rapid Casting III Supports Spells, causing them to cast faster for each different Spell you've cast Recently. Cooldown Recovery II Supports skills with Cooldowns, increasing the rate at which those Cooldowns Recover. Cannot modify the skills of minions. Efficiency II Supports any skill, making it cost less to use. Cannot support skills which reserve Spirit. |
| Cast on Critical Cast on Critical While active, gains energy when you Critically Hit enemies and triggers socketed spells on reaching maximum energy. | Comet Calls down a mass of ice from the sky, dealing high damage at the targeted location. Targeting close to you will cause you to jump back as you cast. Concentrated Area Supports any skill with an area of effect, causing that area to be smaller but any area damage it deals to be higher. Spell Cascade Supports Spells that affect an area around you or a target location, causing those spells to also target additional areas on either side of the target area, along a randomly chosen axis. Cannot support Channelling skills or Remote skills. Pinpoint Critical Supports any skill that Hits Enemies, causing it to Critically Hit more often but deal less damage with Critical Hits Rakiata's Flow Supports Skills that can cause Damaging Hits, causing those Hits to treat Enemy Elemental Resistances as inverted. |
| Siphon Elements Siphon Elements While active, has a chance to create an Infusion Remnant when you Freeze, Shock, or Ignite a target. | Harmonic Remnants II Supports Skills which create Remnants, allowing those Remnants to be collected from further away, with a chance to create an additional Remnant. Khatal's Rejuvenation Supports Skills that generate Remnants. Picking up Remnants from Supported Skills grants Khatal's Rejuvenation. |
| Blink Blink Replaces your dodge roll with a short-cooldown Spell that allows you to tunnel through space, instantly reappearing a medium distance away. | Atziri's Impatience Supports Skills with Cooldowns, dramatically increasing the rate at which those Cooldowns Recover, but causing you to lose Life, Mana, and Energy Shield when they are used. Cannot Support Meta Skills or modify the Skills of Minions. Rapid Casting III Supports Spells, causing them to cast faster for each different Spell you've cast Recently. |
| Spark Spark Launches a spray of sparking projectiles that travel erratically along the ground until they hit an enemy or expire. | Rapid Casting III Supports Spells, causing them to cast faster for each different Spell you've cast Recently. Pierce III Supports Projectile skills, making their Projectiles Pierce an unlimited number of enemies, losing damage as they do so. Freeze Supports any skill that hits enemies, makit it more effective at Freezing enemies. |
| Skill | Support Gems |
|---|---|
| Elemental Storm Elemental Storm Cannot deal Critical Hits;Deals Damage every 0.25 seconds;Storm radius is 1.8 metres;Storm duration is 5 seconds;Enemies inside the storm are Hindered | Arbiter's Ignition Supports Fire Spell Skills. You have a chance to gain Flame Archon when Igniting with Supported Skills. Cooldown Recovery II Supports skills with Cooldowns, increasing the rate at which those Cooldowns Recover. Cannot modify the skills of minions. Knockback Supports any skill that Hits enemies, causing it to Knock Back enemies. Magnified Area II Supports any skill with an area of effect, making it larger at the cost of damage. Prolonged Duration II Supports any skill that has a duration, making that duration longer. |
| Sigil of Power Sigil of Power | Prolonged Duration II Supports any skill that has a duration, making that duration longer. Magnified Area II Supports any skill with an area of effect, making it larger at the cost of damage. Cooldown Recovery II Supports skills with Cooldowns, increasing the rate at which those Cooldowns Recover. Cannot modify the skills of minions. Rapid Casting III Supports Spells, causing them to cast faster for each different Spell you've cast Recently. |
| Firestorm Firestorm Rains flaming bolts over the targeted area. Ignites on enemies in front of you are Consumed to fuel the Firestorm by creating improved bolts. | Mana Tempest Creates a storm of arcane energies that Empowers your Mana-costing Spells while you remain inside it. Maintaining the Storm constantly drains your Mana, and each spell you cast causes it to drain faster. The storm will dissipate when you exit it or run out of mana. Lightning Mastery Supports Lightning skills, granting them an additional level. Rapid Casting III Supports Spells, causing them to cast faster for each different Spell you've cast Recently. Cooldown Recovery II Supports skills with Cooldowns, increasing the rate at which those Cooldowns Recover. Cannot modify the skills of minions. Efficiency II Supports any skill, making it cost less to use. Cannot support skills which reserve Spirit. |
| Cast on Critical Cast on Critical While active, gains energy when you Critically Hit enemies and triggers socketed spells on reaching maximum energy. | Comet Calls down a mass of ice from the sky, dealing high damage at the targeted location. Targeting close to you will cause you to jump back as you cast. Concentrated Area Supports any skill with an area of effect, causing that area to be smaller but any area damage it deals to be higher. Spell Cascade Supports Spells that affect an area around you or a target location, causing those spells to also target additional areas on either side of the target area, along a randomly chosen axis. Cannot support Channelling skills or Remote skills. Pinpoint Critical Supports any skill that Hits Enemies, causing it to Critically Hit more often but deal less damage with Critical Hits Rakiata's Flow Supports Skills that can cause Damaging Hits, causing those Hits to treat Enemy Elemental Resistances as inverted. |
| Blink Blink Replaces your dodge roll with a short-cooldown Spell that allows you to tunnel through space, instantly reappearing a medium distance away. | Atziri's Impatience Supports Skills with Cooldowns, dramatically increasing the rate at which those Cooldowns Recover, but causing you to lose Life, Mana, and Energy Shield when they are used. Cannot Support Meta Skills or modify the Skills of Minions. Rapid Casting III Supports Spells, causing them to cast faster for each different Spell you've cast Recently. |
| Spark Spark Launches a spray of sparking projectiles that travel erratically along the ground until they hit an enemy or expire. | Rapid Casting III Supports Spells, causing them to cast faster for each different Spell you've cast Recently. Pierce III Supports Projectile skills, making their Projectiles Pierce an unlimited number of enemies, losing damage as they do so. Freeze Supports any skill that hits enemies, makit it more effective at Freezing enemies. |
This build uses a rotation of elemental spells to generate power charges and elemental infusions to strengthen our spellcasts by infusing them with elements. We will use Rapid Casting III on certain skills to hasten the casting time of some spells.
Since this build uses only elemental damage, we will use the Rakiata's Flow support gem to invert the target's elemental resistances. Although it is expensive, this allows the build to deal damage without using the Elemental Weakness skill, and synergizes well with Heavy Frost.
Adonia's Trifusion Stormweaver Passive Tree
Passive Tree Progression
| Ascendency Passive Nodes | |||
|---|---|---|---|
 Refracted Infusion, Storm's Recollection and Tempest Caller Refracted Infusion, Storm's Recollection and Tempest Caller
|
|||
| Passive Nodes | |||
| Screenshots and footage taken from Path of Building |
※ Legend: Red = Weapon Set I | Green = Weapon Set II
This build relies on elemental ailments to trigger Elemental Ailment, so we will take nodes such as Echoing Flames, Echoing Thunder, and Echoing Frost. These nodes will further boost our elemental damage as we consistently freeze, ignite, and shock targets.
To maximize the benefits of the Adonia Ego Wand, we will take nodes that increase our power charge limit and improve generation. These nodes include Infusion of Power, Lust for Power, and The Power Within.
It is important to note that allocating the correct passive points to each weapon set is essential. This allows us to bypass the elemental resistance penalty of Adonia's Ego Wand. Failing to do so will severely lower our elemental resistances.
Passive Skill Tree Guide and List of Passives
Jewels
Note: The modifiers listed are arranged according to priority.
 From Nothing Diamond From Nothing Diamond
|
・ Passives in Radius of Eldritch Battery can be Allocated without being connected to your tree |
|---|---|
 Sapphire Sapphire
|
・Increased Critical Hit Chance
・Increased Critical Hit Chance for Spells ・Increased Energy Shield Recharge Rate ・Faster Start of Energy Shield Recharge |
The build uses the From Nothing Diamond to allocate points to passives such as Drenched and Lightning Quick. These would otherwise be unattainable due to the number of points needed.
The rest of the jewel slots will be used for Sapphires to boost our critical hit chance and damage output even more.
Adonia's Trifusion Stormweaver Playstyle and Skill Rotation
Mobbing Rotation
For the mobbing rotation, note that you only need to use Frost Bomb at the beginning. After the first inital cast, you can alternate between Firestorm and Pinnacle of Power as you progress through the map. The rotation is as follows:
- Cast Frost Bomb to generate Cold Infusions.
- Collect your Elemental Infusions.
- Cast Firestorm on Weapon Set 2 to consume all of the Elemental Infusions and generate Power Charges.
- Cast Pinnacle of Power on Weapon Set 1 to consume the Power Charges.
- Cast Spark and Mana Tempest as needed.
Bossing Rotation
The boss rotation is similar, with some damage-boosting skills woven in. Be careful not to get too close to the boss because the Sacred Flame shrine scepter effect can prevent Rakiata's Flow from inverting the enemy's elemental resistance if their lowest resistance is 0%. The rotation is as follows:
- Cast Frost Bomb to generate Cold Infusions.
- Collect your Elemental Infusions.
- Cast Sigil of Power to increase damage.
- Cast Firestorm on Weapon Set 2 to consume all of the Elemental Infusions and generate Power Charges.
- Cast Pinnacle of Power on Weapon Set 1 to consume the Power Charges.
- Cast Mana Tempest to further boost damage output.
- Cast Spark inside your Mana Tempest.
Path of Exile 2 Related Guides

0.4 Best Endgame Builds
| Rank | Build |
|---|---|
 |
|
 |
|
 |
|
 |
0.4 Leveling Builds
All Build Guides
| List of Builds by Class | |||||||||||
|---|---|---|---|---|---|---|---|---|---|---|---|
 Huntress Huntress |
 Mercenary Mercenary |
 Monk Monk |
|||||||||
 Witch Witch |
 Sorceress Sorceress |
 Warrior Warrior |
|||||||||
 Ranger Ranger |
 Druid Druid |
- | |||||||||
| Other Build Guides | 0.3 Leveling Builds | How to Make a Good Build | |||||||||
Comment
Author

PoE 2 0.4 Sorceress Build - Adonia's Trifusion Stormweaver
Rankings
- We could not find the message board you were looking for.

Gaming News


![Monster Hunter Stories 3 Review [First Impressions] | Simply Rejuvenating](https://img.game8.co/4438641/2a31b7702bd70e78ec8efd24661dacda.jpeg/thumb)
![The Seven Deadly Sins: Origin [First Impressions] | A Promising Start](https://img.game8.co/4440581/584e0bfb87908f12c4eab6e846eb1afd.png/thumb)

Popular Games

Genshin Impact Walkthrough & Guides Wiki
Umamusume: Pretty Derby Walkthrough & Guides Wiki
Pokemon Pokopia Walkthrough & Guides Wiki
Honkai: Star Rail Walkthrough & Guides Wiki
Monster Hunter Stories 3: Twisted Reflection Walkthrough & Guides Wiki
Arknights: Endfield Walkthrough & Guides Wiki
Wuthering Waves Walkthrough & Guides Wiki
Zenless Zone Zero Walkthrough & Guides Wiki
Pokemon TCG Pocket (PTCGP) Strategies & Guides Wiki
Monster Hunter Wilds Walkthrough & Guides Wiki


Recommended Games
Diablo 4: Vessel of Hatred Walkthrough & Guides Wiki
Cyberpunk 2077: Ultimate Edition Walkthrough & Guides Wiki
Fire Emblem Heroes (FEH) Walkthrough & Guides Wiki
Yu-Gi-Oh! Master Duel Walkthrough & Guides Wiki
Super Smash Bros. Ultimate Walkthrough & Guides Wiki
Pokemon Brilliant Diamond and Shining Pearl (BDSP) Walkthrough & Guides Wiki
Elden Ring Shadow of the Erdtree Walkthrough & Guides Wiki
Monster Hunter World Walkthrough & Guides Wiki
The Legend of Zelda: Tears of the Kingdom Walkthrough & Guides Wiki
Persona 3 Reload Walkthrough & Guides Wiki


All rights reserved
© 2010 - 2024 Grinding Gear Games
The copyrights of videos of games used in our content and other intellectual property rights belong to the provider of the game.
The contents we provide on this site were created personally by members of the Game8 editorial department.
We refuse the right to reuse or repost content taken without our permission such as data or images to other sites.