PoE 2 0.2.0 Ice Lightning Invoker Monk Build
Latest: 0.5.0 Release Date
☆ Fate of the Vaal ▶︎ The Last of the Druids
┗ Bonded Mods | 0.4 Mystery Box
★ Druid: Class Overview | Builds
☆ NEW: Disciple of Varashta Ascendancy!
★ Best Class | Best Builds | Leveling Builds
This is an Ice Lightning Invoker Monk build for Path of Exile 2 (PoE 2)'s Dawn of the Hunt Update. Check out the Ice Lightning Invoker Monk build, including its gear, socketables, skills, and playstyle!
 Attention! Attention! |
This build was last updated for patch 0.2.1 and may be outdated for the recent patches. For more up-to-date builds, please refer to our list of latest builds! |
|---|
List of Contents
Ice Lightning Invoker Summary
Ice Lightning Invoker Build
※ Switch tabs to view build progression: Mapping and Cruel.
This Monk mapping build uses Ice Strike with Charged Staff, Herald of Ice, and Herald of Thunder to clear high-tier maps fast. This build focuses on amplifying Physical damage for higher damage output conversions from Ice Strike.
| Date | Changes |
|---|---|
| 04-06-2025 | Updated the build for Patch 0.2.0. |
| 01-17-2025 | Updated the build for higher-tier mapping. |
| 12-17-2024 | Replaced Falling Thunder with Flicker Strike. |
| 12-17-2024 | Updated the Build for Act 2 Cruel until Endgame. |
| 12-11-2024 | Updated the Build for Act 3 until Cruel Act 1. |
| 12-11-2024 | Respecced the build to focus on Electric Damage, replacing Ice Strike and Glacial Cascade with Tempest Flurry and Storm Wave. |
| 12-08-2024 | Updated the Build for Act 2 |
| 12-08-2024 | Swapped Frozen Locus for Wave of Frost |
Build FAQs
| Build Notes |
|---|
Why Swap to Ice Strike?
The Build swaps to Ice Strike to take advantage of Herald of Ice, making deleting mob groups from its explosions easier.
Ice Lightning Invoker Equipment
※ Switch tabs to view build progression: Mapping and Cruel.
Weapons
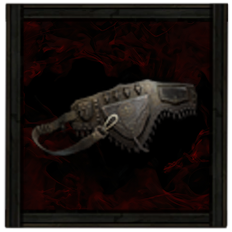
For this build, you don't need a specific Quarterstaff to pull it off, you just need a Quarterstaff with high Physical Damage. Physical Damage is the most important modifier from which Ice Strike pulls damage from.
Armor
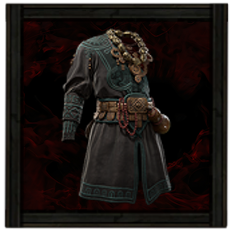
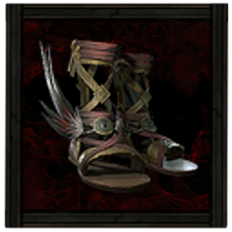
The same goes for the armor, you do not need specific gear, just get armors that have implicit Evasion Rating and Energy Shield. The armor is by far the most complex part of the build as all modifiers listed above are required to pull the build off.
Accessories
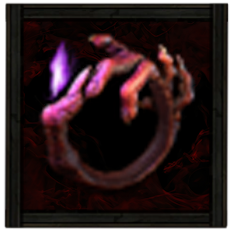
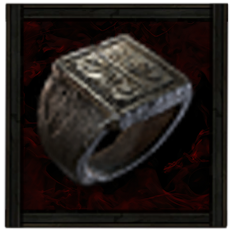
Breach Ring and Unset Ring
Breach Rings are one of the best rings in the game due to their ability to push past the quality limit of 20%. This makes the modifiers in the ring roll higher as you increase its quality. While the Unset Ring is required to an additional Skill Slot.
Gold Amulet
We went for the Gold Amulet on this build as it's intended to mix in finding rare items for selling or trading.
Runes and Soul Cores
| Equipment | Sockets |
|---|---|
| Weapon | |
| Armor |
You'll want Iron Runes in your weapon to increase Physical Damage for Ice Strike. For your Armor, you'll have to adjust depending on your lowest elemental resistance.
Ideally, you should have most elemental resistances covered by your armor modifiers so you can stack on Iron Runes to increase Evasion Rating and Energy Shield.
| All Runes and Soul Cores | |
|---|---|
| List of Runes | List of Soul Cores |
Charms
 Staunching Charm Staunching Charm  Antidote Charm Antidote Charm  Thawing Charm Thawing Charm |
・Increased Duration
・Increased Charges ・Gain Charges Per Second |
|---|
Staunching Charm is the best charm for the build, considering that Bleeding damage can ignore your energy shield. Adding to this, bleeding is extremely dangerous as it can kill you even if the initial hit that causes bleeding does not.
You can also opt for the Antidote and Thawing Charms to become immune to Poison and Freeze respectively. This makes mapping much easier as Poison and Freeze are by far one of the dangerous ailments in high-tier maps.
Ice Lightning Invoker Skills
※ Switch tabs to view build progression: Mapping and Cruel Mode
| Skill | Support Gems |
|---|---|
 Unbound Avatar Unbound Avatar Unbound Avatar Gain Unbound Fury when you inflict an Elemental Ailment;With a Hit on an enemy, no more than once every .2 seconds for each type of Ailment;Maximum 100 Unbound Fury;Cannot gain Unbound Fury while Unbound;40% more Elemental Damage while Unbound;40% more Elemental Ailment Buildup while Unbound;80% more chance to inflict Elemental Ailments while Unbound;Unbound duration is 9 seconds | Fire Mastery Supports Fire skills, granting them an additional level. |
 Elemental Expression Elemental Expression Elemental Expression Creates a fiery explosion, an arcing bolt of lightning, or an icy wave of projectiles. The chance for an explosion is proportional to your Strength, for a bolt proportional to your Dexterity, and for a wave proportional to your Intelligence. | Biting Frost Supports any skill that hits enemies, causing them to deal more damage to frozen enemies but consume their Freeze. Cannot support skills that consume freeze. Freezefork Supported Skills which can fire Projectiles. Projectiles from Supported Skills always Fork when the initial Projectile Hits Frozen Enemies, but Supported Skills cannot build up Freeze themselves. Wildshards II Supports Projectile Spells. Supported Spells have a chance to fire many additional Projectiles in a circle. |
 Ice Strike Ice Strike Ice Strike Perform a fast icy Strike, Using this Attack three times in quick succession causes a final strike that is slower and more powerful. | Rapid Attacks II Supports Attacks, causing them to Attack faster. Elemental Armament II Supports Attacks, causing them to deal more Elemental damage. Ice Bite Supports attacks you use yourself. Freezing an enemy with supported skills infuses all of your attacks with Cold damage for a short time. Efficiency II Supports any skill, making it cost less to use. Cannot support skills which reserve Spirit. |
 Charged Staff Charged Staff Charged Staff Consume all Power Charges to infuse your Quarterstaff with electricity, adding Lightning damage and a Lightning shockwave to your Quarterstaff Attacks. Reusing this skill while the Buff is active adds to the Buff's duration and damage. | Perpetual Charge Supports skills that consume Power, Frenzy, or Endurance Charges on use, giving them a chance not to remove each Charge while still gaining the benefits of Consuming them. Rapid Casting II Supports Spells, causing them to cast faster. |
 Shattering Palm Shattering Palm Shattering Palm Dash to an enemy and strike them with an unarmed attack that manifests a wave of cold, coating nearby enemies in shards of Ice. Dealing enough damage to these enemies will shatter the shards, causing an icy explosion that deals Attack Damage. This skill always strikes with your bare fist, even if you have a quarterstaff equipped. | Cold Penetration Supports any skill that Hits enemies, making those Hits Penetrate enemy Cold resistance. Blind II Supports any skill that Hits enemies, causing them to Blind on Hit with increased effect. |
 Flicker Strike Flicker Strike Flicker Strike Teleport to an enemy and Strike them. Consumes Power Charges to perform additional teleporting strikes on nearby enemies. | Concentrated Area Supports any skill with an area of effect, causing that area to be smaller but any area damage it deals to be higher. Life Leech II Supports Attacks, causing their Physical damage to Leech life. Heft Supports Skills which deal damage, increasing the maximum Physical Damage of their Hits. |
 Tempest Bell Tempest Bell Tempest Bell Build Combo by successfully Striking Enemies with other skills. After reaching maximum Combo, use this skill to cause the Bell on your staff to grow to massive size as you drop it on the ground. The Bell damages enemies on impact and can be Hit by your skills, creating a damaging shockwave. Elemental Ailments applied to the Bell cause its shockwaves to deal extra damage of the corresponding type, and Hits which would have caused Knockback increase the area of effect of the shockwaves. | Close Combat II Supports Attacks, causing them to deal more damage to enemies based on how close they are to you. Font of Rage Supported Skills which create stationary objects. Objects created by supported Skills generate a Font of Rage, creating an Aura which grants Rage over time, as well as preventing Rage loss. Ruthless Supports Attacks, causing repeated uses to be more effective at Stunning enemies. Armour Break II Supports Skills that Hit Enemies, causing those Hits to Break Armour based on a portion of Physical Damage dealt. On Fully Breaking Armour with Supported Skills, you have a chance to gain an Endurance Charge. |
 Herald of Ice Herald of Ice Herald of Ice While active, Shattering an enemy with an Attack Hit will cause an icy explosion that deals Attack damage to surrounding enemies. | Magnified Area II Supports any skill with an area of effect, making it larger at the cost of damage. Cold Mastery Supports Cold skills, granting then an additional level. Cold Attunement Supports attacks, causing them to gain Cold Damage but deal less Fire and Lightning Damage. |
 Herald of Thunder Herald of Thunder Herald of Thunder While active, killing Shocked enemies with Attack damage, will cause subsequent Attack hits to release lightning bolts which deals Attack damage to all surrounding enemies. | Elemental Focus Supports any skill that hits enemies, causing it to deal more Elemental Damage but be unable to inflict Elemental Ailments. Lightning Mastery Supports Lightning skills, granting them an additional level. Shock Siphon Supports any skill that hits enemies, causing you to recover Energy Shield when it kills a Shocked enemy. |
 Wind Dancer Wind Dancer Wind Dancer Grants a buff that gives you more Evasion per stage. Being Hit by a Melee Attack while you have this buff consumes all stages to damage and Knock Back enemies around you. | Clarity II Supports Persistent Buff Skills, causing you to gain increased Mana Regeneration while the Skill is active. Cannibalism II Supports Persistent Buff Skills, causing you to recover Life on kill while the skill is active. |
 Combat Frenzy Combat Frenzy Combat Frenzy While active, grants you a Frenzy Charge when you Freeze, Electrocute, or Pin an enemy. This can only occur once every few seconds. | Charge Profusion II Supports skills that can generate Charges, giving them a chance to generate an additional Charge when they do so, as well as a chance to generate an additional Charge of a random type. |
 Ghost Dance Ghost Dance Ghost Dance Periodically Gain Ghost Shrouds. If you are Hit while you have a Ghost Shroud, it is immediately consumed to recover Energy Shield based on your Evasion. | Compressed Duration II Supports any skill that has a duration, making that duration shorter. |
| Skill | Support Gems |
|---|---|
 Tempest Flurry Tempest Flurry Tempest Flurry Perform a series of aggressive Strikes. When used in quick succession, the third use Strikes three times, and the fourth performs a Final strike that calls down a powerful Shocking bolt. | |
 Storm Wave Storm Wave Storm Wave Sweep your Quarterstaff, projecting a bolt of Lightning through the ground in a long wave ahead of you. | Rising Tempest Supports Skills which deal Damage, raising Elemental Damage dealt for each Skill used Recently of a different Elemental type. Cannot support Minion Skills |
 Charged Staff Charged Staff Charged Staff Consume all Power Charges to infuse your Quarterstaff with electricity, adding Lightning damage and a Lightning shockwave to your Quarterstaff Attacks. Reusing this skill while the Buff is active adds to the Buff's duration and damage. | Perpetual Charge Supports skills that consume Power, Frenzy, or Endurance Charges on use, giving them a chance not to remove each Charge while still gaining the benefits of Consuming them. |
 Tempest Bell Tempest Bell Tempest Bell Build Combo by successfully Striking Enemies with other skills. After reaching maximum Combo, use this skill to cause the Bell on your staff to grow to massive size as you drop it on the ground. The Bell damages enemies on impact and can be Hit by your skills, creating a damaging shockwave. Elemental Ailments applied to the Bell cause its shockwaves to deal extra damage of the corresponding type, and Hits which would have caused Knockback increase the area of effect of the shockwaves. | |
 Wave of Frost Wave of Frost Wave of Frost Flips backwards and sends forth a Freezing wave in front of you. | Deep Freeze Supports any skill that hits enemies, causing Freeze it inflicts to last longer. Ice Bite Supports attacks you use yourself. Freezing an enemy with supported skills infuses all of your attacks with Cold damage for a short time. |
 Falling Thunder Falling Thunder Falling Thunder Infuses your Quarter staff with electrical energies, then slams the ground to deal damage in a large cone in front of you. Consumes your Power Charges to fire Lightning Projectiles forwards from the impact. | |
 Killing Palm Killing Palm Killing Palm Dash to an enemy and Strike them with an unarmed Attack, Culling enemies if their life is low enough. Each enemy killed by this strike grants a Power Charge. Enemies around you that can be Culled will be highlighted. This skill always Strikes with your bare fist, even if you have a Quarterstaff equipped. | Life Drain Supports any skill that Hits enemies, causing you to recover Life when it Culls an enemy |
 Lingering Illusion Lingering Illusion Lingering Illusion Creates a short-lived illusory copy of yourself whenever you dodge roll. The copy can be damaged by enemies, and copies that are destroyed by an enemy will grant you a Power Charge. | |
 Herald of Thunder Herald of Thunder Herald of Thunder While active, killing Shocked enemies with Attack damage, will cause subsequent Attack hits to release lightning bolts which deals Attack damage to all surrounding enemies. | Corrosion Supports any skill that hits enemies, causing Poison it applies to also break any armour. Cannot support skills that consume Fully Broken Armour. |
Your main damaging skills will be Ice Strike buffed by Charged Staff. You can gain Power Charges for Charged Staff and Flicker Strike through the Combat Frenzy as you continually freeze enemies. Use Tempest Bell to further amplify your damage against enemy groups, rares, and bosses.
Herald of Thunder and Herald of Ice are used for improving the mobbing capabilities of the build. Shattering Palm is also used to synergize with Herald of Ice.
Ice Lightning Invoker Passive Tree
Passive Tree Progression
| Ascendancy Passive | |||
|---|---|---|---|
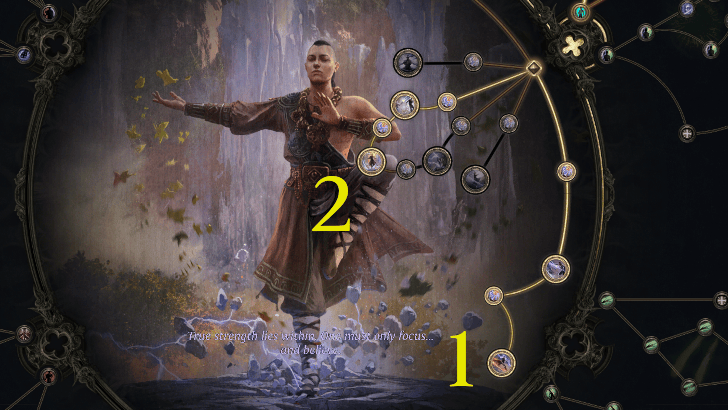 Unbound Avatar and Elemental Expression |
|||
| Passive Nodes | |||
| 1. | 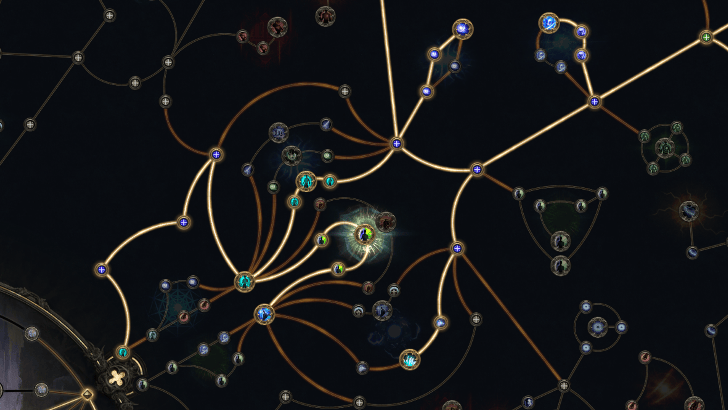 Flow State |
2. | 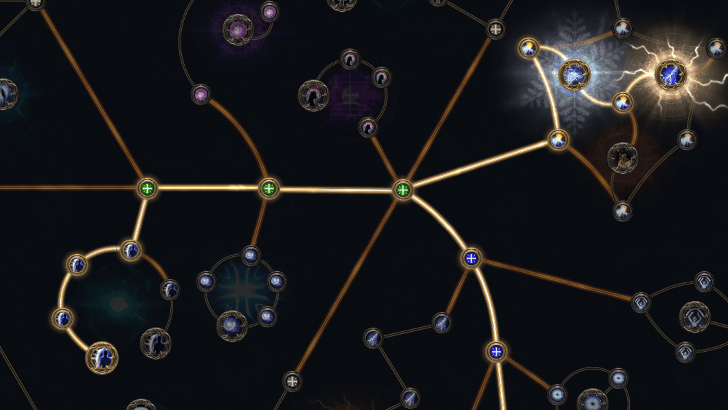 Echoing Thunder and Insightfulness |
| 3. | 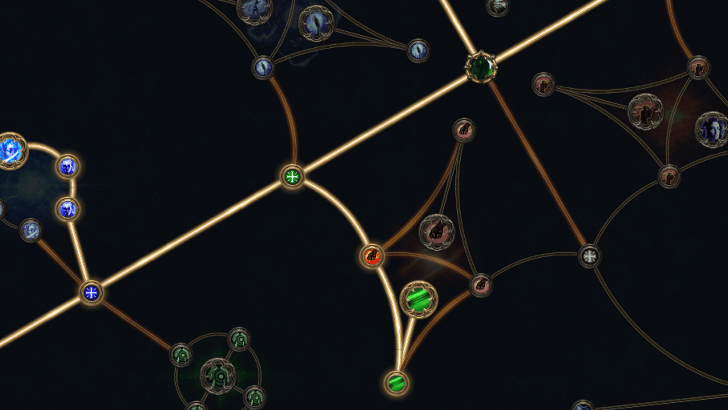 Tenfold Attacks |
4. | 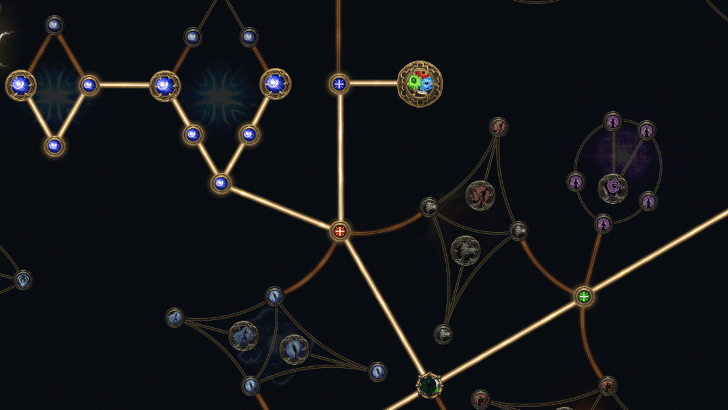 Resonance |
| 5. | 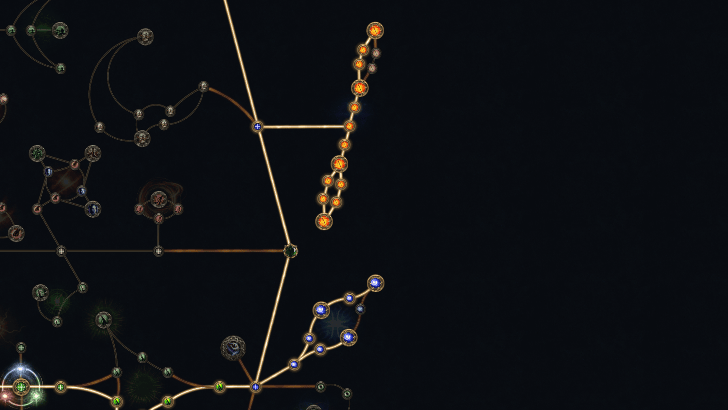 One with the Storm |
6. | 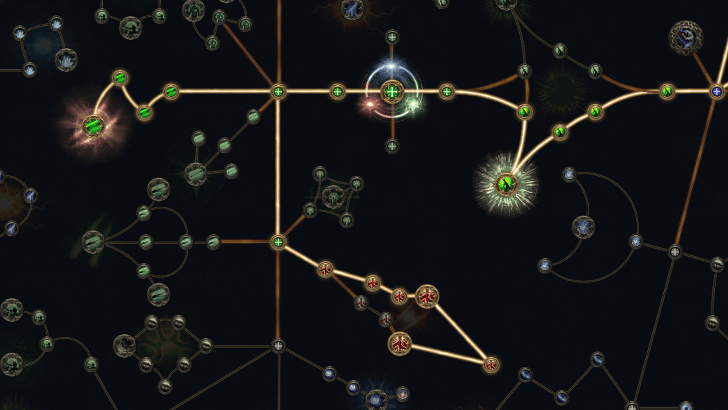 Falcon Technique |
| 7. | 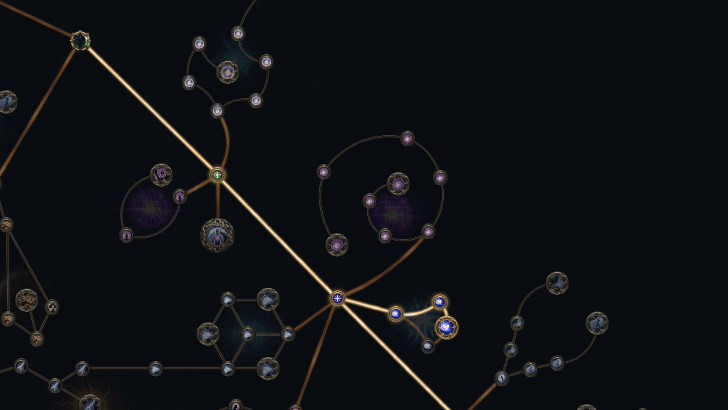 Careful Assassin |
8. | - |
The passive tree priority is to take nodes that grant Attack Speed, Mana Regeneration, Evasion Rating, Energy Shield, Mana nodes, and Elemental Damage. You'll also want to take nodes that grant Critical Strike Chance and Damage to take advantage of Elemental Expression, with more priority on Critical Strike Chance.
A few important nodes would be Resonance for Power Charge generation and One with the Storm to mitigate the Combat Frenzy nerf.
Passive Skill Tree Guide and List of Passives
Ice Lightning Invoker Playstyle
Skill Rotation
The playstyle follows a basic combo of Strike, Freeze, Charge, and repeat, with a few variations on when you'll use Tempest Bell or Flicker Strike. The detailed flow is as follows:
- Use Unbound Avatar before fighting Bosses.
- Use Shattering Palm to blind Enemies and prime them Freeze.
- Use Ice Strike to freeze enemies and gain Power Charges.
- Activate Charged Staff to empower Ice Strike.
- Use Ice Strike again to build combos and gain more Power Charges.
- Slam Tempest Bell on top of mob groups and use spare Power Charges for Flicker Strike.
Rush in with Shattering Palm to blind your targets and prime them for Freezing. This also creates an Ice bomb on nearby enemies, adding more mobbing capabilities. Afterwards, hit the primed enemies with Ice Strike to trigger Ice Explosions and Freeze enemies to gain power charges, then use your Power Charges to activate Charged Staff.
Repeat the combo mentioned above, but add variations on when to use Tempest Bell and Flicker Strike. Tempest Bell is used against tougher mobs or Rare enemies, but you can use it sparingly, considering the build's attack speed. Flicker Strike is used to recover life when mobbing, but also as a lazy button in case you do not want to manually click on enemies.
Path of Exile 2 (PoE 2) Related Guides

0.4 Best Endgame Builds
| Rank | Build |
|---|---|
 |
|
 |
|
 |
|
 |
0.4 Leveling Builds
All Build Guides
| List of Builds by Class | |||||||||||
|---|---|---|---|---|---|---|---|---|---|---|---|
 Huntress Huntress |
 Mercenary Mercenary |
 Monk Monk |
|||||||||
 Witch Witch |
 Sorceress Sorceress |
 Warrior Warrior |
|||||||||
 Ranger Ranger |
 Druid Druid |
- | |||||||||
| Other Build Guides | 0.3 Leveling Builds | How to Make a Good Build | |||||||||
Monk Leveling Builds
UP |
Killing Palm Dash to an enemy and Strike them with an unarmed Attack, Culling enemies if their life is low enough. Each enemy killed by this strike grants a Power Charge. Enemies around you that can be Culled will be highlighted. This skill always Strikes with your bare fist, even if you have a Quarterstaff equipped.
Falling Thunder Infuses your Quarter staff with electrical energies, then slams the ground to deal damage in a large cone in front of you. Consumes your Power Charges to fire Lightning Projectiles forwards from the impact.
Glacial Cascade Sweep your Quarterstaff upwards, releasing an icy fissure which deals damage in a series of bursts culminating in a large spike. Frozen enemies hit by the final spike are dealt heavy damage but the Freeze is Consumed. Ice Crystals hit by the final spike explode.
Ice Strike Perform a fast icy Strike, Using this Attack three times in quick succession causes a final strike that is slower and more powerful.
Tempest Bell Build Combo by successfully Striking Enemies with other skills. After reaching maximum Combo, use this skill to cause the Bell on your staff to grow to massive size as you drop it on the ground. The Bell damages enemies on impact and can be Hit by your skills, creating a damaging shockwave. Elemental Ailments applied to the Bell cause its shockwaves to deal extra damage of the corresponding type, and Hits which would have caused Knockback increase the area of effect of the shockwaves.
Staggering Palm Dash to an enemy and Strike them with an Unarmed Strike, Heavy Stunning an enemy with this Skill grants you a Buff, that causes your Quarterstaff and Unarmed attacks to also fire Projectiles for a short duration. Enemies which are Primed for Stun will instantly be Heavily Stunned. This skill always Strikes with your bare fist, even if you have a Quarterstaff equipped.
Focus: AoE, Burst Damage, Lightning, Cold |
Monk Endgame Builds
Ghost Dance Periodically Gain Ghost Shrouds. If you are Hit while you have a Ghost Shroud, it is immediately consumed to recover Energy Shield based on your Evasion.
Herald of Ice While active, Shattering an enemy with an Attack Hit will cause an icy explosion that deals Attack damage to surrounding enemies.
Herald of Thunder While active, killing Shocked enemies with Attack damage, will cause subsequent Attack hits to release lightning bolts which deals Attack damage to all surrounding enemies.
Ice Strike Perform a fast icy Strike, Using this Attack three times in quick succession causes a final strike that is slower and more powerful.
Tempest Bell Build Combo by successfully Striking Enemies with other skills. After reaching maximum Combo, use this skill to cause the Bell on your staff to grow to massive size as you drop it on the ground. The Bell damages enemies on impact and can be Hit by your skills, creating a damaging shockwave. Elemental Ailments applied to the Bell cause its shockwaves to deal extra damage of the corresponding type, and Hits which would have caused Knockback increase the area of effect of the shockwaves.
Combat Frenzy While active, grants you a Frenzy Charge when you Freeze, Electrocute, or Pin an enemy. This can only occur once every few seconds.
Wind Dancer Grants a buff that gives you more Evasion per stage. Being Hit by a Melee Attack while you have this buff consumes all stages to damage and Knock Back enemies around you.
Charged Staff Consume all Power Charges to infuse your Quarterstaff with electricity, adding Lightning damage and a Lightning shockwave to your Quarterstaff Attacks. Reusing this skill while the Buff is active adds to the Buff's duration and damage.
Shattering Palm Dash to an enemy and strike them with an unarmed attack that manifests a wave of cold, coating nearby enemies in shards of Ice. Dealing enough damage to these enemies will shatter the shards, causing an icy explosion that deals Attack Damage. This skill always strikes with your bare fist, even if you have a quarterstaff equipped.
Focus: AoE, DPS, Crowd Control, Bossing |
|
Ghost Dance Periodically Gain Ghost Shrouds. If you are Hit while you have a Ghost Shroud, it is immediately consumed to recover Energy Shield based on your Evasion.
Herald of Ash While active, enemies you sufficiently Overkill with attacks will cause an explosion that ignites nearby enemies based on the Overkill damage dealt.
Herald of Thunder While active, killing Shocked enemies with Attack damage, will cause subsequent Attack hits to release lightning bolts which deals Attack damage to all surrounding enemies.
Tempest Flurry Perform a series of aggressive Strikes. When used in quick succession, the third use Strikes three times, and the fourth performs a Final strike that calls down a powerful Shocking bolt.
Tempest Bell Build Combo by successfully Striking Enemies with other skills. After reaching maximum Combo, use this skill to cause the Bell on your staff to grow to massive size as you drop it on the ground. The Bell damages enemies on impact and can be Hit by your skills, creating a damaging shockwave. Elemental Ailments applied to the Bell cause its shockwaves to deal extra damage of the corresponding type, and Hits which would have caused Knockback increase the area of effect of the shockwaves.
Cast on Shock While active, gains Energy when you Shock enemies and triggers socketed spells on reaching maximum Energy.
Storm Wave Sweep your Quarterstaff, projecting a bolt of Lightning through the ground in a long wave ahead of you.
Blink Replaces your dodge roll with a short-cooldown Spell that allows you to tunnel through space, instantly reappearing a medium distance away.
Unbound Avatar Gain Unbound Fury when you inflict an Elemental Ailment;With a Hit on an enemy, no more than once every .2 seconds for each type of Ailment;Maximum 100 Unbound Fury;Cannot gain Unbound Fury while Unbound;40% more Elemental Damage while Unbound;40% more Elemental Ailment Buildup while Unbound;80% more chance to inflict Elemental Ailments while Unbound;Unbound duration is 9 seconds
Focus: DPS, Burst Damage, Bossing / Mobbing |
|
Ghost Dance Periodically Gain Ghost Shrouds. If you are Hit while you have a Ghost Shroud, it is immediately consumed to recover Energy Shield based on your Evasion.
Herald of Ice While active, Shattering an enemy with an Attack Hit will cause an icy explosion that deals Attack damage to surrounding enemies.
Tempest Bell Build Combo by successfully Striking Enemies with other skills. After reaching maximum Combo, use this skill to cause the Bell on your staff to grow to massive size as you drop it on the ground. The Bell damages enemies on impact and can be Hit by your skills, creating a damaging shockwave. Elemental Ailments applied to the Bell cause its shockwaves to deal extra damage of the corresponding type, and Hits which would have caused Knockback increase the area of effect of the shockwaves.
Combat Frenzy While active, grants you a Frenzy Charge when you Freeze, Electrocute, or Pin an enemy. This can only occur once every few seconds.
Wind Dancer Grants a buff that gives you more Evasion per stage. Being Hit by a Melee Attack while you have this buff consumes all stages to damage and Knock Back enemies around you.
Storm Wave Sweep your Quarterstaff, projecting a bolt of Lightning through the ground in a long wave ahead of you.
Charged Staff Consume all Power Charges to infuse your Quarterstaff with electricity, adding Lightning damage and a Lightning shockwave to your Quarterstaff Attacks. Reusing this skill while the Buff is active adds to the Buff's duration and damage.
Shattering Palm Dash to an enemy and strike them with an unarmed attack that manifests a wave of cold, coating nearby enemies in shards of Ice. Dealing enough damage to these enemies will shatter the shards, causing an icy explosion that deals Attack Damage. This skill always strikes with your bare fist, even if you have a quarterstaff equipped.
Into the Breach A Flame of Chayula manifests nearby every X seconds;Flames of Chayula fade after 25 seconds if not picked up
Focus: Crowd Control, DPS, Burst Damage |
|
Orb of Storms Creates an Orb of electricity that fires Chaining Lightning bolts at nearby enemies.
Herald of Thunder While active, killing Shocked enemies with Attack damage, will cause subsequent Attack hits to release lightning bolts which deals Attack damage to all surrounding enemies.
Tempest Flurry Perform a series of aggressive Strikes. When used in quick succession, the third use Strikes three times, and the fourth performs a Final strike that calls down a powerful Shocking bolt.
Overwhelming Presence While active, enemies in your Presence are easier to Stun and inflict Elemental Ailments upon.
Combat Frenzy While active, grants you a Frenzy Charge when you Freeze, Electrocute, or Pin an enemy. This can only occur once every few seconds.
Disengage Jump back as you rupture the earth in front of you with spearpoints, damaging enemies. Consumes the Parried Debuff on Hitting enemies to release a shockwave and grant you a Frenzy Charge. This skill can be used while using other skills, and causes Strikes and Projectiles to miss you while jumping. This skill cannot be Ancestrally Boosted.
Lightning Spear Throw a single copy of your spear. When it hits an enemy it bursts, firing secondary lightning bolt Projectiles at multiple other enemies within a large area around it. Consumes a Frenzy Charge if possible to cause the main spear to split into multiple copies on impact, each of which then bursts.
Primal Strikes Perform a Lightning-charged stab that can be chained into a combination of up to three attacks. The first two attacks conjure a charging Wildwood spirit if they Hit a Shocked enemy and refresh Shock duration. The third attack is a large swipe that inflicts Lightning Exposure and can Consume Shock to conjure a stampede of spirits.
Focus: AoE, Lightning, Tank, Mobbing |
|
NEW |
Falling Thunder Infuses your Quarter staff with electrical energies, then slams the ground to deal damage in a large cone in front of you. Consumes your Power Charges to fire Lightning Projectiles forwards from the impact.
Ghost Dance Periodically Gain Ghost Shrouds. If you are Hit while you have a Ghost Shroud, it is immediately consumed to recover Energy Shield based on your Evasion.
Herald of Ash While active, enemies you sufficiently Overkill with attacks will cause an explosion that ignites nearby enemies based on the Overkill damage dealt.
Herald of Ice While active, Shattering an enemy with an Attack Hit will cause an icy explosion that deals Attack damage to surrounding enemies.
Ice Strike Perform a fast icy Strike, Using this Attack three times in quick succession causes a final strike that is slower and more powerful.
Wind Dancer Grants a buff that gives you more Evasion per stage. Being Hit by a Melee Attack while you have this buff consumes all stages to damage and Knock Back enemies around you.
Hand of Chayula Dash to an enemy and Strike them with an Unarmed Attack, applying socketed Curses and Marks with reduced effect. This skill always Strikes with your bare fist, even if you have a Quarterstaff equipped.
Mantra of Destruction Build Combo by successfully striking enemies with other skills. After reaching maximum Combo, use this skill to Empower your next Quarterstaff attack, causing it to deal Chaos damage. Each kill with the Empowered attack grants Purple Flame of Chayula for a duration.
Shattering Palm Dash to an enemy and strike them with an unarmed attack that manifests a wave of cold, coating nearby enemies in shards of Ice. Dealing enough damage to these enemies will shatter the shards, causing an icy explosion that deals Attack Damage. This skill always strikes with your bare fist, even if you have a quarterstaff equipped.
Elemental Conflux Tap into a current of raw and unpredictable Elemental Power, causing you to deal greatly more damage of a randomly chosen Element. The Element affected changes frequently, though the same Element can be affected multiple times in succession.
Focus: Melee, Burst, AoE, Mobbing, Bossing |
NEW |
Ember Fusillade Conjures a blazing Ember that hovers around you. After a short duration, the Ember launches at the enemy, dealing fire damage in an area on impact. Recasting the spess resets the duration for all active Embers. Multiple Embers fired in the same Fusillade will attempt to target different enemies.
Incinerate Conjures a torrent of flames from your hand, Igniting enemies in front of you. The flames grow stronger the longer you Channel for, and at maximum strength also apply stacking Fire Exposure and creating Ignited Ground.
Ball Lightning Fires a slow-moving projectile that repeatedly shoots bolts of lightning at nearby enemies.
Flameblast Channels to build destructive energy around you or a targeted Solar Orb. Releasing the energy causes a devastating explosion that is larger and more intense the longer you channelled for.
Ghost Dance Periodically Gain Ghost Shrouds. If you are Hit while you have a Ghost Shroud, it is immediately consumed to recover Energy Shield based on your Evasion.
Mana Remnants Conjures surging lightning to restore your Mana. While active, Shocked enemies you kill have a chance to spawn a Mana Remnant, and Critically Hitting a Shocked target spawns a Mana Remnant every few seconds. Picking up a Mana Remnant grants you Mana which can Overflow maximum Mana.
Despair Curses all targets in an area after a short delay, lowering their Chaos Resistance.
Cast on Elemental Ailment While active, gains Energy when you Freeze, Shock, or Ignite enemies, and triggers socketed spells on reaching Maximum Energy.
Living Bomb Plant a seed of Fire inside an enemy. Dealing enough damage to the enemy, or killing it outright, causes the seed to explode, dealing damage in an area and leaving behind a Fire Infusion Remnant.
Into the Breach A Flame of Chayula manifests nearby every X seconds;Flames of Chayula fade after 25 seconds if not picked up
Focus: Chaos, Fire, Elemental Ailment, Remnant |
Monk Class and Ascendancy Guides
| Base Class | |
|---|---|
| Ascendancies | |
Author
PoE 2 0.2.0 Ice Lightning Invoker Monk Build
Rankings
- We could not find the message board you were looking for.
Gaming News
Popular Games

Genshin Impact Walkthrough & Guides Wiki

Umamusume: Pretty Derby Walkthrough & Guides Wiki

Pokemon Pokopia Walkthrough & Guides Wiki

Honkai: Star Rail Walkthrough & Guides Wiki

Monster Hunter Stories 3: Twisted Reflection Walkthrough & Guides Wiki

Arknights: Endfield Walkthrough & Guides Wiki

Wuthering Waves Walkthrough & Guides Wiki

Zenless Zone Zero Walkthrough & Guides Wiki

Pokemon TCG Pocket (PTCGP) Strategies & Guides Wiki

Monster Hunter Wilds Walkthrough & Guides Wiki
Recommended Games

Fire Emblem Heroes (FEH) Walkthrough & Guides Wiki

Diablo 4: Vessel of Hatred Walkthrough & Guides Wiki

Cyberpunk 2077: Ultimate Edition Walkthrough & Guides Wiki

Yu-Gi-Oh! Master Duel Walkthrough & Guides Wiki

Super Smash Bros. Ultimate Walkthrough & Guides Wiki

Pokemon Brilliant Diamond and Shining Pearl (BDSP) Walkthrough & Guides Wiki

Elden Ring Shadow of the Erdtree Walkthrough & Guides Wiki

Monster Hunter World Walkthrough & Guides Wiki

The Legend of Zelda: Tears of the Kingdom Walkthrough & Guides Wiki

Persona 3 Reload Walkthrough & Guides Wiki
All rights reserved
© 2010 - 2024 Grinding Gear Games
The copyrights of videos of games used in our content and other intellectual property rights belong to the provider of the game.
The contents we provide on this site were created personally by members of the Game8 editorial department.
We refuse the right to reuse or repost content taken without our permission such as data or images to other sites.
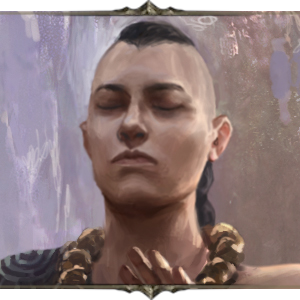 Ice Lightning Invoker






![Death Stranding 2: On The Beach [PC] Review | A Port That Delivers](https://img.game8.co/4447392/15310a0c9aa1b6843bb713b2ea216930.jpeg/thumb)



Can You explain why? i am new to the game, don't want to make a mistake at the beginning,