This survey will take about 1 minute.
Your answers will help us to improve our website.
Path of Exile 2 (PoE 2)
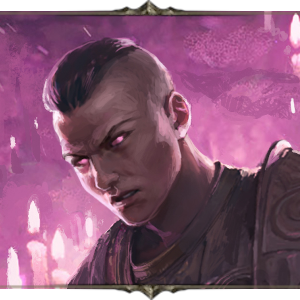
PoE 2 0.2 Monk Build - Mana Stack Acolyte of Chayula
Latest: 0.5.0 Release Date
☆ Fate of the Vaal ▶︎ The Last of the Druids
┗ Bonded Mods | 0.4 Mystery Box
★ Druid: Class Overview | Builds
☆ NEW: Disciple of Varashta Ascendancy!
★ Best Class | Best Builds | Leveling Builds
This is a Mana Stacking Chayula Monk build for Path of Exile 2 (PoE 2)'s Dawn of the Hunt Update. Check out the Mana Stacking Chayula Monk build, including its gear, socketables, skills, and playstyle!
 Attention! Attention! |
This build was last updated for patch 0.2.1 and may be outdated for the recent patches. For more up-to-date builds, please refer to our list of latest builds! |
|---|
List of Contents
Mana Stacking Chayula Build Summary
Emiracle's Mana Stacking Chayula Build
Latest
Previous
This Mana Stacking Chayula endgame build is crafted by emiracle. Check out all of their detailed guides on Path of Exile 2 and other games over at emiracle (Youtube)!
The video breaks down the build step-by-step, covering everything from skills, gear, and passives to fully exploit the Acolyte of Chayula's elemental and mana mastery!
Mana Stacking Chayula Build
| Build Setup | |
|---|---|
 Mana Stacking Chayula Mana Stacking Chayula |
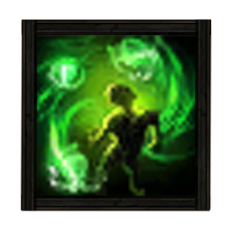
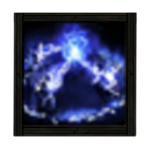 Orb of Storms Creates an Orb of electricity that fires Chaining Lightning bolts at nearby enemies.
 Herald of Thunder While active, killing Shocked enemies with Attack damage, will cause subsequent Attack hits to release lightning bolts which deals Attack damage to all surrounding enemies.
 Tempest Flurry Perform a series of aggressive Strikes. When used in quick succession, the third use Strikes three times, and the fourth performs a Final strike that calls down a powerful Shocking bolt.
 Overwhelming Presence While active, enemies in your Presence are easier to Stun and inflict Elemental Ailments upon.
 Combat Frenzy While active, grants you a Frenzy Charge when you Freeze, Electrocute, or Pin an enemy. This can only occur once every few seconds.
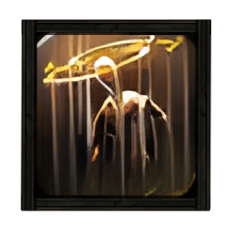
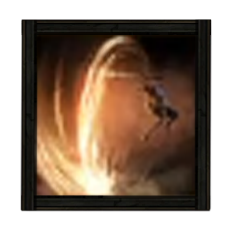 Disengage Jump back as you rupture the earth in front of you with spearpoints, damaging enemies. Consumes the Parried Debuff on Hitting enemies to release a shockwave and grant you a Frenzy Charge. This skill can be used while using other skills, and causes Strikes and Projectiles to miss you while jumping. This skill cannot be Ancestrally Boosted.
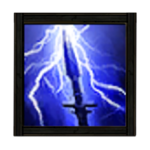
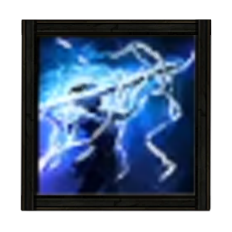 Lightning Spear Throw a single copy of your spear. When it hits an enemy it bursts, firing secondary lightning bolt Projectiles at multiple other enemies within a large area around it. Consumes a Frenzy Charge if possible to cause the main spear to split into multiple copies on impact, each of which then bursts.
 Primal Strikes Perform a Lightning-charged stab that can be chained into a combination of up to three attacks. The first two attacks conjure a charging Wildwood spirit if they Hit a Shocked enemy and refresh Shock duration. The third attack is a large swipe that inflicts Lightning Exposure and can Consume Shock to conjure a stampede of spirits.
|
|
|
|
This Mana Stacking Chayula build makes the Monk an almost immortal lightning machine by leeching and recouping a high mana pool to be used from both offense and defense.
Lightning Spears are used as its main damage tool to clear maps easily with passive nodes such as Branching Bolts and the synergy from Crown of Eyes and spell damage modifiers.
| Date | Changes Made |
|---|---|
| 04/12/25 | ・ Final build update to have Endgame and Leveling versions. |
| 04/12/25 | ・ Mana Stacking Chayula Build Created. |
Build FAQs
| Build Notes |
|---|
Why Chayula Monk?
Take advantage of the Ravenous Doubts Ascendancy node of the Acolyte of Chayula by pairing it with as many Mana Leech modifiers from equipment so that Lightning Spears leech mana by a significant amount per hit.
How Does the Build Work?
Stack up your mana pool by equipping the Mind Over Matter and Eldritch Battery passive nodes. Pair it up with recoup as mana modifiers from Midnight Braid Rawhide Belt and Adverse Growth. This makes damage received tank your mana before your life.
The Embrace the Darkness Ascendancy node is also equipped to gain a Darkness bar which also tanks damage before your life. This would mean that you will always have extra Chaos damage per hit and tank every damage using mana and darkness as your effective HP.
This build's damage is also amplified by synergizing the the Crown of Eyes Coral Circlet's effect with spell damage modifiers from Jewels and passive nodes such as Arcane Intensity and Pure Power, effectively increasing attack damage as well.
What is the Chaos Inoculation Bug?
Since it sets maximum life to 1, equipping Chaos Inoculation also causes stun and elemental threshold to be almost non-existent. Meaning that every hit from enemies will either Stun, Freeze, Ignite, or Shock you.
Although it would be a waste of passive node points, this can be countered by equipping Natural Immunity and Unwavering Stance in the passive skill tree. The Eye of Chayula Gold Amulet can also counter this with its innate effect.
Mana Stacking Chayula Equipment
Endgame
Leveling
| Equipment | |||||||||||||||
|---|---|---|---|---|---|---|---|---|---|---|---|---|---|---|---|
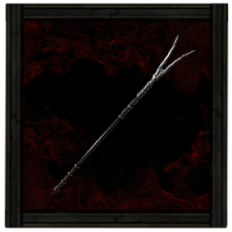 Pronged Spear Pronged SpearStats: Damage - 40-75 Critical Chance - 5.00% Attacks Per Second - 1.60 Requirements: Level - 72 Strength - 46 Dexterity - 115 Modifiers: ・Adds Physical Damage ・+% Increased Physical Damage ・+% Elemental Damage with Attacks ・+% Increased Attack Speed ・Gain Life per Enemy Killed ・Leech Physical Damage as Mana Weapon |  Crown of Eyes Coral Circlet Crown of Eyes Coral CircletStats: Energy Shield - 64 Requirements: Level - 46 Intelligence - 66 Modifiers: ・+% Increased Energy Shield ・Accuracy Rating ・All Attributes ・Fire Resistance ・Increases and Reductions to Spell damage also Apply to Attacks Helmet | 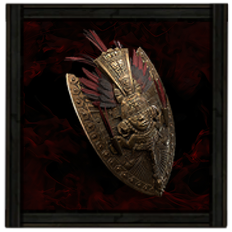 Omen Crest Shield Omen Crest ShieldStats: Armor - 50 Block Chance - 25% Energy Shield - 19 Requirements: Level - 36 Strength - 30 Intelligence - 30 Modifiers: ・+% Increase Block Chance ・Armor ・Maximum Energy Shield ・+% Increased Armor and Energy Shield ・Any Elemental Resistance Offhand | |||||||||||||
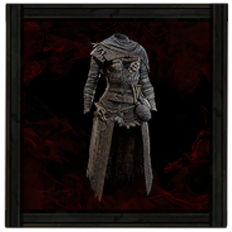 Vile Robe Vile RobeStats: Energy Shield - 184 Requirements: Level - 65 Intelligence - 121 Modifiers: ・Maximum Energy Shield ・+% Increased Energy Shield ・Intelligence ・Any Element Resistance Body Armour | |||||||||||||||
 Hand of Wisdom and Action Spiral Wraps Hand of Wisdom and Action Spiral WrapsStats: Evasion - 33 Energy Shield - 14 Requirements: Level - 33 Dexterity - 24 Intelligence - 24 Modifiers: ・Dexterity ・Intelligence ・+% Increased Attack Speed per 20 Dexterity ・Adds Lightning Damage to Attacks per 20 Intelligence Gloves | 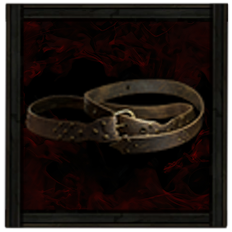 Long Belt Long BeltRequirements: Level - 20 Implicit: ・+% Increased Charm Duration Modifier: ・Armor ・Maximum Life ・Maximum Mana ・Strength ・Any Element Resistance Belt | 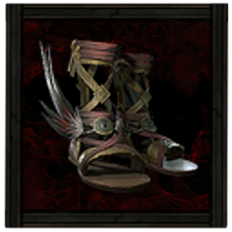 Feathered Sandals Feathered SandalsStats: Energy Shield - 38 Requirements: Level - 33 Intelligence - 45 Modifiers: ・+% Increased Movement Speed ・+% Increased Energy Shield ・Maximum Mana ・Intelligence ・Any Element Resistance Boots | |||||||||||||
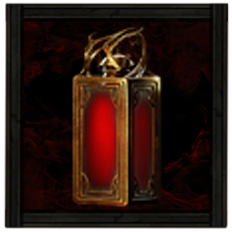 Ultimate Life Flask Ultimate Life FlaskStats: Flask Type - Life Recovered Life - 920 Charge Per Use - 10 Total Charges - 75 Duration - 3 sec. Modifier: ・+% Increased Amount Recovered ・+% Increased Charges Health Flask | 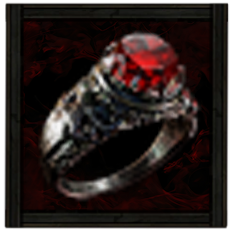 Ruby Ring Ruby RingRequirements: Level - 8 Implicit: ・Fire Resistance Modifier: ・Adds Physical Damage to Attacks ・Accuracy Rating ・Maximum Mana ・Intelligence ・Any Element Resistance Ring 1 |  Lapis Amulet Lapis AmuletRequirements: Level - 8 Implicit: ・Intelligence Modifier: ・Maximum Energy Shield ・Maximum Mana ・+% Increased Maximum Mana ・Intelligence ・+% Increased Mana Regeneration Rate ・Damage taken Recouped as Mana Amulet | 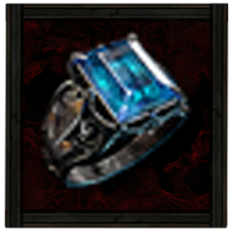 Sapphire Ring Sapphire RingRequirements: Level - 12 Implicit: ・Cold Resistance Modifier: ・Adds Physical Damage to Attacks ・Accuracy Rating ・Maximum Mana ・Strength ・Any Element Resistance ・Leech Physical Attack Damage as Mana Ring 2 | 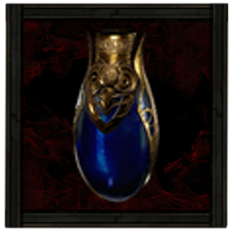 Ultimate Mana Flask Ultimate Mana FlaskStats: Flask Type - Mana Recovered Mana - 310 Charge Per Use - 10 Total Charges - 75 Duration - 3 sec. Modifier: ・+% Increased Amount Recovered ・+% Chance to gain a Charge when you Kill an Enemy Mana Flask | |||||||||||
| Equipment | |||||||||||||||
|---|---|---|---|---|---|---|---|---|---|---|---|---|---|---|---|
| Pronged Spear Stats: Damage - 40-75 Critical Chance - 5.00% Attacks Per Second - 1.60 Requirements: Level - 72 Strength - 46 Dexterity - 115 Modifiers: ・Adds Physical Damage ・+% Increased Physical Damage ・+% Elemental Damage with Attacks ・+% Increased Attack Speed ・Gain Life per Enemy Killed ・Leech Physical Damage as Mana Weapon | Crown of Eyes Coral Circlet Stats: Energy Shield - 64 Requirements: Level - 46 Intelligence - 66 Modifiers: ・+% Increased Energy Shield ・Accuracy Rating ・All Attributes ・Fire Resistance ・Increases and Reductions to Spell damage also Apply to Attacks Helmet |  Tonal Focus Tonal FocusStats: Energy Shield - 25 Requirements: Level - 22 Intelligence - 33 Modifiers: ・Maximum Energy Shield ・+% Increased Energy Shield ・Maximum Mana ・Intelligence ・Any Elemental Resistance Offhand | |||||||||||||
| Vile Robe Stats: Energy Shield - 184 Requirements: Level - 65 Intelligence - 121 Modifiers: ・Maximum Energy Shield ・+% Increased Energy Shield ・Intelligence ・Any Element Resistance Body Armour | |||||||||||||||
 Layered Gauntlets Layered GauntletsStats: Armor - 22 Evasion - 18 Requirements: Level - 16 Strength - 13 Dexterity - 13 Modifiers: ・Adds Fire Damage to Attacks ・Accuracy Rating ・Maximum Mana ・Leech Physical Damage as Mana ・Any Element Resistance Gloves | 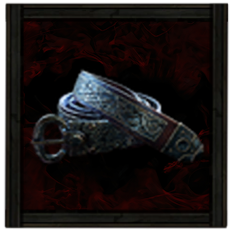 Midnight Braid Rawhide Belt Midnight Braid Rawhide BeltRequirements: None Implicit: ・+% Increased Life Recovery from Flasks Modifier: ・Maximum Mana ・All Elemental Resistances ・Damage Recouped as Mana Belt | 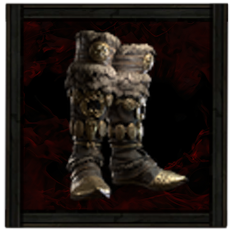 Secured Leggings Secured LeggingsStats: Armor - 33 Energy Shield - 14 Requirements: Level - 16 Strength - 14 Intelligence - 14 Modifiers: ・+% Increased Movement Speed ・Maximum Mana ・Life Regeneration per Second ・Any Element Resistance Boots | |||||||||||||
| Ultimate Life Flask Stats: Flask Type - Life Recovered Life - 920 Charge Per Use - 10 Total Charges - 75 Duration - 3 sec. Modifier: ・+% Increased Amount Recovered ・+% Increased Charges Health Flask | Ruby Ring Requirements: Level - 8 Implicit: ・Fire Resistance Modifier: ・+% Increased Lightning Damage ・Maximum Mana ・Leech Physical Damage as Mana ・Any Element Resistance Ring 1 | 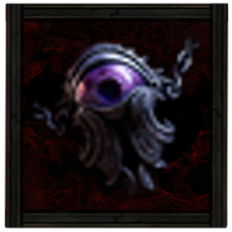 Eye of Chayula Gold Amulet Eye of Chayula Gold AmuletRequirements: Level - 35 Implicit: ・+% Increased Rarity of Items Found Modifier: ・Reduced Maximum Life ・All Attributes ・Stun Threshold Amulet | Sapphire Ring Requirements: Level - 12 Implicit: ・Cold Resistance Modifier: ・Adds Physical Damage to Attacks ・Accuracy Rating ・Maximum Mana ・Strength ・Any Element Resistance ・Leech Physical Attack Damage as Mana Ring 2 | Ultimate Mana Flask Stats: Flask Type - Mana Recovered Mana - 310 Charge Per Use - 10 Total Charges - 75 Duration - 3 sec. Modifier: ・+% Increased Amount Recovered ・+% Chance to gain a Charge when you Kill an Enemy Mana Flask | |||||||||||
Weapons
Spear
Equip any high level Spear that provides physical damage as mana convertion and increase in elemental or physical damage. Combining this with increased attack speed and gaining mana per kill gives a higher output of Lightning Spears, reclaiming mana lost per enemies hit.
For the off-hand, equip any high level Shield that increases Energy Shield, Armor, and Block Chance.
Armor
Crown of Eyes Coral Circlet
Crown of Eyes Coral Circlet is a must-have as it significantly boosts every cornerstone of this build: mana and damage. Mana is boosted once Eldritch Battery is equipped and every increase in spell damage increases attack damage as well, effectively doubling every damage increase.
Hand of Wisdom and Action Spiral Wraps
Hand of Wisdom and Action Spiral Wraps is recommended for the gloves since it gives a good amount of stats as well as increased Attack Speed and Lightning Damage – two things that are important for Lightning Spears.
For an alternative and other armor parts, focus on equipment that innately gives energy shield and gives an increase in intelligence and mana for the modifiers. All three of these modifiers directly add to your mana pool, making this build more tanky and throw a lot more spears.
Accessories
Rings
Any elemental Ring is recommended as it innately increase resistance to any respective element. Just be sure to focus on modifiers such as leech damage as mana, intelligence, mana, and physical damage.
Eye of Chayula Gold Amulet
The Eye of Chayula Gold Amulet is equipped to counter the Chaos Inoculation bug by making sure you do not get stunned. An alternative would be equipping the Unwavering Stance as it gives the same effect.
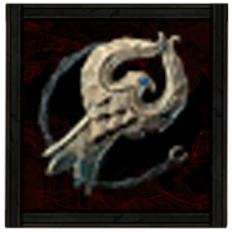
If you opt not to equip Chaos Inoculation, a good alternative is Lapis Amulet since it innately increases mana. Be sure to focus on the usual mana modifers as well.
Belts
Midnight Braid Rawhide Belt
Midnight Braid Rawhide Belt is a must-have as it allows a large amount of damage received to be recouped as mana, synergizing well with the high mana pool and making this build even more tanky.
Runes and Soul Cores
| Equipment | Sockets |
|---|---|
| Weapon | |
| Armor |
It is recommended to equip a Greater Iron Rune for your Spear and Greater Mind Rune for your Offhand rune slots to gain more damage and mana leech when attacking enemies.
Soul Core of Zalatl or even more Greater Mind Runes are used on armor to enhance this build's mana pool even further by maximizing its total amount of mana.
| All Runes and Soul Cores | |
|---|---|
| List of Runes | List of Soul Cores |
Jewels
Note: The modifiers listed are arranged according to priority.
| |
・+% Increased amount of Mana Leeched
・+% Increased Attack Speed with Spears ・+% Increased Attack Damage ・+% Increased Lightning Damage ・+% Increased Magnitude of Shock you inflict |
|---|---|
| |
・Passives in Radius of a random Keystone Passive can be Allocated without being connected to your tree |
It is recommended to focus on getting Emeralds to gain more damage modifiers and consistency for the build, and the From Nothing Diamond so you can use it on Eldritch Battery to freely get the nearby notables. The best modifier you can get here would be the increased amount of Mana Leeched since it helps build up more mana per hit from Spears.
Charms
 Thawing Charm Thawing Charm |
・Increased Duration
・Increased Charges ・Gain Charges Per Second |
|---|---|
 Sapphire Charm Sapphire Charm |
・Increased Duration
・Increased Charges ・Gain Charges Per Second |
 Grounding Charm Grounding Charm |
・Increased Duration
・Gains Charges per Second ・Increased Charges |
Equip a Thawing Charm or Sapphire Charm when facing Count Geonor since it negates Freezing and offers Cold Resistance from his Chill attacks.
Replace Thawing Charm with a Grounding Charm as it helps negate both Jamanra, the Abomination and Doryani's Shock ailments from their attacks.
Mana Stacking Chayula Skills
※ The Support Gems' priority are arranged in a descending order. The first one being the most important and the last being the least crucial.
| Skill | Support Gems |
|---|---|
|
Lightning Spear Lightning Spear Throw a single copy of your spear. When it hits an enemy it bursts, firing secondary lightning bolt Projectiles at multiple other enemies within a large area around it. Consumes a Frenzy Charge if possible to cause the main spear to split into multiple copies on impact, each of which then bursts.
|
Elemental Armament III Supports Attacks, causing them to deal more Damage for each Elemental Ailment on Enemies they Hit. Supported Skills cannot themselves inflict Elemental Ailments.
Deliberation Supports skills that can be used while moving, causing you to move slower while using them, but granting more damage in exchange.
Perpetual Charge Supports skills that consume Power, Frenzy, or Endurance Charges on use, giving them a chance not to remove each Charge while still gaining the benefits of Consuming them.
Volt Supports Projectile Attack Skills you use yourself. Supported Skills gain Voltaic Charge as you move, up to a maximum. When used, Supported Skills expend that Charge to gain extra Lightning Damage and Chain.
Lightning Attunement Supports attacks, causing them to gain Lightning Damage but deal less Cold and Fire Damage.
|
|
Primal Strikes Primal Strikes Perform a Lightning-charged stab that can be chained into a combination of up to three attacks. The first two attacks conjure a charging Wildwood spirit if they Hit a Shocked enemy and refresh Shock duration. The third attack is a large swipe that inflicts Lightning Exposure and can Consume Shock to conjure a stampede of spirits.
|
Elemental Focus Supports any skill that hits enemies, causing it to deal more Elemental Damage but be unable to inflict Elemental Ailments.
Pursuit III Supports Melee Attacks. Supported Skills deal more Melee damage if you have struck with a Projectile Attack Hit in the last two seconds, but cannot themselves deal Projectile Damage.
Concentrated Area Supports any skill with an area of effect, causing that area to be smaller but any area damage it deals to be higher.
Rapid Attacks III Supports Attacks, causing them to Attack faster at the cost of Damage.
Rising Tempest Supports Skills which deal Damage, raising Elemental Damage dealt for each Skill used Recently of a different Elemental type. Cannot support Minion Skills
|
|
Disengage Disengage Jump back as you rupture the earth in front of you with spearpoints, damaging enemies. Consumes the Parried Debuff on Hitting enemies to release a shockwave and grant you a Frenzy Charge. This skill can be used while using other skills, and causes Strikes and Projectiles to miss you while jumping. This skill cannot be Ancestrally Boosted.
|
Cadence Supports Attacks you use yourself. Supported Skills gain more Attack speed each time you use them, but will become unusable if used too frequently in a short time frame.
|
|
Orb of Storms Orb of Storms Creates an Orb of electricity that fires Chaining Lightning bolts at nearby enemies.
|
Font of Mana Supports skills which create stationary objects. Objects created by supported skills generate a Font of Mana, creating an Aura which grants Mana regeneration.
Font of Rage Supported Skills which create stationary objects. Objects created by supported Skills generate a Font of Rage, creating an Aura which grants Rage over time, as well as preventing Rage loss.
Unbending Supports Spell Skills you use yourself. While using Supported Skills, a percentage of Damage taken is Recouped as Mana, with the percentage scaling higher the longer the Cast time of the Supported Skill. Cannot Support Channeling Skills.
|
|
Tempest Flurry Tempest Flurry Perform a series of aggressive Strikes. When used in quick succession, the third use Strikes three times, and the fourth performs a Final strike that calls down a powerful Shocking bolt.
|
- |
|
Herald of Thunder Herald of Thunder While active, killing Shocked enemies with Attack damage, will cause subsequent Attack hits to release lightning bolts which deals Attack damage to all surrounding enemies.
|
Innervate Supports attacks you use yourself. Killing a Shocked enemy with supported skills infuses all of your attacks with Lightning damage for a short time.
Electrocute Supports any skill which can deal Damage. Lightning Damage from Supported skills can inflict Electrocute, but supported skills deal less Damage.
Neural Overload Supports any skill that hits enemies. Nearby enemies are marked when they are Primed for Electrocution, and hitting a marked enemy with a supported skill will Electrocute them.
|
|
Combat Frenzy Combat Frenzy While active, grants you a Frenzy Charge when you Freeze, Electrocute, or Pin an enemy. This can only occur once every few seconds.
|
Charge Profusion II Supports skills that can generate Charges, giving them a chance to generate an additional Charge when they do so, as well as a chance to generate an additional Charge of a random type.
Precision II Supports Persistent Buff Skills, causing you to gain increased Accuracy while the skill is active.
|
|
Overwhelming Presence Overwhelming Presence While active, enemies in your Presence are easier to Stun and inflict Elemental Ailments upon.
|
- |
The Mana Stacking Chayula build's main offensive skill is the Lightning Spear. Its damage is boosted with buff skills such as Herald of Thunder, Combat Frenzy, and Overwhelming Presence. The reasons for including the support gems here are indicated below:
- Lightning Spear - All support gems focus on increasing this skill's damage output by a significant amount. Voltaic Charges are good Lightning damage enhancers and Perpetual Charge maximizes the potential of charges.
- Primal Strikes - Mainly used to whittle down bosses. Pursuit is effective due to alternating Primal Strikes and Lightning Spears.
- Disengage - Mostly used to dodge attacks if needed. Also provides Frenzy Chage.
- Herald of Thunder - Further enhances lightning damage with Electrocute and AoE clear.
- Orb of Storms - Mainly treated as a totem that buffs this build while it throws spears by giving mana regeneration, rage, and more mana recoup.
- Combat Frenzy - Provides you with Frenzy Charge economy due to this build's easy access to Electrocute. The support gems increase Accuracy and Frenzy Charges gained.
Mana Stacking Chayula Passive Tree
Passive Tree Progression
| Ascendancy Tree | |||
|---|---|---|---|
 Acolyte of Chayula Ascendancy Group Nodes Acolyte of Chayula Ascendancy Group Nodes |
|||
| Passive Nodes | |||
| 1. |  |
2. |  |
| 3. |  |
4. |  |
| 5. |  |
6. | - |
Once Ascendancy has been achieved, focus on unlocking the Ravenous Doubts to instantly gain mana leech from attacks. Reality Rending is an offensive boost to this build to enable more Chaos damage, while Chayula's Gift will double your Chaos Resistance to help survive taking on endgame content.
Mana stacking starts ramping up once you slot in Mind Over Matter, Eldritch Battery, and Adverse Growth as it allows the high mana pool to become your effective HP. Pure Power is highly important as it scales very well during the uber endgame and synergizes its scaling potential with Crown of Eyes Coral Circlet and high mana pool.
After getting Ingenuity, start reallocating early nodes and focus on building Intelligence since it scales well to the endgame due to the innate increase in mana. Refer to the video above the table to see which branches to focus on.
Since darkness and the high mana pool will be this build's effective HP, Chaos Inoculation is an optional node that is good to equip since it makes this build immune to Chaos damage. Just be sure to equip Natural Immunity or Unwavering Stance if you don't have the Eye of Chayula Gold Amulet to counter the bug.
Passive Skill Tree Guide and List of Passives
Mana Stacking Chayula Playstyle
Skill Rotations
※ Press on what type you are fighting for a more detailed explanation on the playstyle and skill rotation.
| Type | Skill Rotation |
|---|---|
| Mobbing |
Orb of Storms Creates an Orb of electricity that fires Chaining Lightning bolts at nearby enemies.
▶
Lightning Spear Throw a single copy of your spear. When it hits an enemy it bursts, firing secondary lightning bolt Projectiles at multiple other enemies within a large area around it. Consumes a Frenzy Charge if possible to cause the main spear to split into multiple copies on impact, each of which then bursts.
|
| Bossing |
Orb of Storms Creates an Orb of electricity that fires Chaining Lightning bolts at nearby enemies.
▶
Primal Strikes Perform a Lightning-charged stab that can be chained into a combination of up to three attacks. The first two attacks conjure a charging Wildwood spirit if they Hit a Shocked enemy and refresh Shock duration. The third attack is a large swipe that inflicts Lightning Exposure and can Consume Shock to conjure a stampede of spirits.
▶
Lightning Spear Throw a single copy of your spear. When it hits an enemy it bursts, firing secondary lightning bolt Projectiles at multiple other enemies within a large area around it. Consumes a Frenzy Charge if possible to cause the main spear to split into multiple copies on impact, each of which then bursts.
|
The Mana Stacking Chayula's playstyle is relatively simple since it mainly relies on the Lightning Spear to deal damage and regain mana.
Mobbing
Mobbing with the Mana Stacking Chayula is as follows:
- Deploy an Orb of Storms to gain the effects from its support gems.
- Spam Lightning Spears.
- Herald of Thunder will release additional lightning bolts as enemies are killed by the spears.
Bossing
Bossing withe the Mana Stacking Chayula build will both be relying on Primal Strikes and Lightning Spears as they take advantage of the Shock ailment. The playstyle is as follows:
- Deploy an Orb of Storms to gain the effects from its support gems.
- Perform two Primal Strikes
- Throw a Lightning Spear
Be sure to always perform two Primal Strikes before throwing a Lightning Spear before repeating the process. Avoid throwing a third Primal strike everytime as it consumes the enemy's Shock ailment.
Path of Exile 2 (PoE 2) Related Guides

0.4 Best Endgame Builds
| Rank | Build |
|---|---|
 |
|
 |
|
 |
|
 |
0.4 Leveling Builds
All Build Guides
| List of Builds by Class | |||||||||||
|---|---|---|---|---|---|---|---|---|---|---|---|
 Huntress Huntress |
 Mercenary Mercenary |
 Monk Monk |
|||||||||
 Witch Witch |
 Sorceress Sorceress |
 Warrior Warrior |
|||||||||
 Ranger Ranger |
 Druid Druid |
- | |||||||||
| Other Build Guides | 0.3 Leveling Builds | How to Make a Good Build | |||||||||
Monk Leveling Builds
UP |
Killing Palm Dash to an enemy and Strike them with an unarmed Attack, Culling enemies if their life is low enough. Each enemy killed by this strike grants a Power Charge. Enemies around you that can be Culled will be highlighted. This skill always Strikes with your bare fist, even if you have a Quarterstaff equipped.
Falling Thunder Infuses your Quarter staff with electrical energies, then slams the ground to deal damage in a large cone in front of you. Consumes your Power Charges to fire Lightning Projectiles forwards from the impact.
Glacial Cascade Sweep your Quarterstaff upwards, releasing an icy fissure which deals damage in a series of bursts culminating in a large spike. Frozen enemies hit by the final spike are dealt heavy damage but the Freeze is Consumed. Ice Crystals hit by the final spike explode.
Ice Strike Perform a fast icy Strike, Using this Attack three times in quick succession causes a final strike that is slower and more powerful.
Tempest Bell Build Combo by successfully Striking Enemies with other skills. After reaching maximum Combo, use this skill to cause the Bell on your staff to grow to massive size as you drop it on the ground. The Bell damages enemies on impact and can be Hit by your skills, creating a damaging shockwave. Elemental Ailments applied to the Bell cause its shockwaves to deal extra damage of the corresponding type, and Hits which would have caused Knockback increase the area of effect of the shockwaves.
Staggering Palm Dash to an enemy and Strike them with an Unarmed Strike, Heavy Stunning an enemy with this Skill grants you a Buff, that causes your Quarterstaff and Unarmed attacks to also fire Projectiles for a short duration. Enemies which are Primed for Stun will instantly be Heavily Stunned. This skill always Strikes with your bare fist, even if you have a Quarterstaff equipped.
Focus: AoE, Burst Damage, Lightning, Cold |
Monk Endgame Builds
Ghost Dance Periodically Gain Ghost Shrouds. If you are Hit while you have a Ghost Shroud, it is immediately consumed to recover Energy Shield based on your Evasion.
Herald of Ice While active, Shattering an enemy with an Attack Hit will cause an icy explosion that deals Attack damage to surrounding enemies.
Herald of Thunder While active, killing Shocked enemies with Attack damage, will cause subsequent Attack hits to release lightning bolts which deals Attack damage to all surrounding enemies.
Ice Strike Perform a fast icy Strike, Using this Attack three times in quick succession causes a final strike that is slower and more powerful.
Tempest Bell Build Combo by successfully Striking Enemies with other skills. After reaching maximum Combo, use this skill to cause the Bell on your staff to grow to massive size as you drop it on the ground. The Bell damages enemies on impact and can be Hit by your skills, creating a damaging shockwave. Elemental Ailments applied to the Bell cause its shockwaves to deal extra damage of the corresponding type, and Hits which would have caused Knockback increase the area of effect of the shockwaves.
Combat Frenzy While active, grants you a Frenzy Charge when you Freeze, Electrocute, or Pin an enemy. This can only occur once every few seconds.
Wind Dancer Grants a buff that gives you more Evasion per stage. Being Hit by a Melee Attack while you have this buff consumes all stages to damage and Knock Back enemies around you.
Charged Staff Consume all Power Charges to infuse your Quarterstaff with electricity, adding Lightning damage and a Lightning shockwave to your Quarterstaff Attacks. Reusing this skill while the Buff is active adds to the Buff's duration and damage.
Shattering Palm Dash to an enemy and strike them with an unarmed attack that manifests a wave of cold, coating nearby enemies in shards of Ice. Dealing enough damage to these enemies will shatter the shards, causing an icy explosion that deals Attack Damage. This skill always strikes with your bare fist, even if you have a quarterstaff equipped.
Focus: AoE, DPS, Crowd Control, Bossing |
|
Ghost Dance Periodically Gain Ghost Shrouds. If you are Hit while you have a Ghost Shroud, it is immediately consumed to recover Energy Shield based on your Evasion.
Herald of Ash While active, enemies you sufficiently Overkill with attacks will cause an explosion that ignites nearby enemies based on the Overkill damage dealt.
Herald of Thunder While active, killing Shocked enemies with Attack damage, will cause subsequent Attack hits to release lightning bolts which deals Attack damage to all surrounding enemies.
Tempest Flurry Perform a series of aggressive Strikes. When used in quick succession, the third use Strikes three times, and the fourth performs a Final strike that calls down a powerful Shocking bolt.
Tempest Bell Build Combo by successfully Striking Enemies with other skills. After reaching maximum Combo, use this skill to cause the Bell on your staff to grow to massive size as you drop it on the ground. The Bell damages enemies on impact and can be Hit by your skills, creating a damaging shockwave. Elemental Ailments applied to the Bell cause its shockwaves to deal extra damage of the corresponding type, and Hits which would have caused Knockback increase the area of effect of the shockwaves.
Cast on Shock While active, gains Energy when you Shock enemies and triggers socketed spells on reaching maximum Energy.
Storm Wave Sweep your Quarterstaff, projecting a bolt of Lightning through the ground in a long wave ahead of you.
Blink Replaces your dodge roll with a short-cooldown Spell that allows you to tunnel through space, instantly reappearing a medium distance away.
Unbound Avatar Gain Unbound Fury when you inflict an Elemental Ailment;With a Hit on an enemy, no more than once every .2 seconds for each type of Ailment;Maximum 100 Unbound Fury;Cannot gain Unbound Fury while Unbound;40% more Elemental Damage while Unbound;40% more Elemental Ailment Buildup while Unbound;80% more chance to inflict Elemental Ailments while Unbound;Unbound duration is 9 seconds
Focus: DPS, Burst Damage, Bossing / Mobbing |
|
Ghost Dance Periodically Gain Ghost Shrouds. If you are Hit while you have a Ghost Shroud, it is immediately consumed to recover Energy Shield based on your Evasion.
Herald of Ice While active, Shattering an enemy with an Attack Hit will cause an icy explosion that deals Attack damage to surrounding enemies.
Tempest Bell Build Combo by successfully Striking Enemies with other skills. After reaching maximum Combo, use this skill to cause the Bell on your staff to grow to massive size as you drop it on the ground. The Bell damages enemies on impact and can be Hit by your skills, creating a damaging shockwave. Elemental Ailments applied to the Bell cause its shockwaves to deal extra damage of the corresponding type, and Hits which would have caused Knockback increase the area of effect of the shockwaves.
Combat Frenzy While active, grants you a Frenzy Charge when you Freeze, Electrocute, or Pin an enemy. This can only occur once every few seconds.
Wind Dancer Grants a buff that gives you more Evasion per stage. Being Hit by a Melee Attack while you have this buff consumes all stages to damage and Knock Back enemies around you.
Storm Wave Sweep your Quarterstaff, projecting a bolt of Lightning through the ground in a long wave ahead of you.
Charged Staff Consume all Power Charges to infuse your Quarterstaff with electricity, adding Lightning damage and a Lightning shockwave to your Quarterstaff Attacks. Reusing this skill while the Buff is active adds to the Buff's duration and damage.
Shattering Palm Dash to an enemy and strike them with an unarmed attack that manifests a wave of cold, coating nearby enemies in shards of Ice. Dealing enough damage to these enemies will shatter the shards, causing an icy explosion that deals Attack Damage. This skill always strikes with your bare fist, even if you have a quarterstaff equipped.
Into the Breach A Flame of Chayula manifests nearby every X seconds;Flames of Chayula fade after 25 seconds if not picked up
Focus: Crowd Control, DPS, Burst Damage |
|
Orb of Storms Creates an Orb of electricity that fires Chaining Lightning bolts at nearby enemies.
Herald of Thunder While active, killing Shocked enemies with Attack damage, will cause subsequent Attack hits to release lightning bolts which deals Attack damage to all surrounding enemies.
Tempest Flurry Perform a series of aggressive Strikes. When used in quick succession, the third use Strikes three times, and the fourth performs a Final strike that calls down a powerful Shocking bolt.
Overwhelming Presence While active, enemies in your Presence are easier to Stun and inflict Elemental Ailments upon.
Combat Frenzy While active, grants you a Frenzy Charge when you Freeze, Electrocute, or Pin an enemy. This can only occur once every few seconds.
Disengage Jump back as you rupture the earth in front of you with spearpoints, damaging enemies. Consumes the Parried Debuff on Hitting enemies to release a shockwave and grant you a Frenzy Charge. This skill can be used while using other skills, and causes Strikes and Projectiles to miss you while jumping. This skill cannot be Ancestrally Boosted.
Lightning Spear Throw a single copy of your spear. When it hits an enemy it bursts, firing secondary lightning bolt Projectiles at multiple other enemies within a large area around it. Consumes a Frenzy Charge if possible to cause the main spear to split into multiple copies on impact, each of which then bursts.
Primal Strikes Perform a Lightning-charged stab that can be chained into a combination of up to three attacks. The first two attacks conjure a charging Wildwood spirit if they Hit a Shocked enemy and refresh Shock duration. The third attack is a large swipe that inflicts Lightning Exposure and can Consume Shock to conjure a stampede of spirits.
Focus: AoE, Lightning, Tank, Mobbing |
|
NEW |
Falling Thunder Infuses your Quarter staff with electrical energies, then slams the ground to deal damage in a large cone in front of you. Consumes your Power Charges to fire Lightning Projectiles forwards from the impact.
Ghost Dance Periodically Gain Ghost Shrouds. If you are Hit while you have a Ghost Shroud, it is immediately consumed to recover Energy Shield based on your Evasion.
Herald of Ash While active, enemies you sufficiently Overkill with attacks will cause an explosion that ignites nearby enemies based on the Overkill damage dealt.
Herald of Ice While active, Shattering an enemy with an Attack Hit will cause an icy explosion that deals Attack damage to surrounding enemies.
Ice Strike Perform a fast icy Strike, Using this Attack three times in quick succession causes a final strike that is slower and more powerful.
Wind Dancer Grants a buff that gives you more Evasion per stage. Being Hit by a Melee Attack while you have this buff consumes all stages to damage and Knock Back enemies around you.
Hand of Chayula Dash to an enemy and Strike them with an Unarmed Attack, applying socketed Curses and Marks with reduced effect. This skill always Strikes with your bare fist, even if you have a Quarterstaff equipped.
Mantra of Destruction Build Combo by successfully striking enemies with other skills. After reaching maximum Combo, use this skill to Empower your next Quarterstaff attack, causing it to deal Chaos damage. Each kill with the Empowered attack grants Purple Flame of Chayula for a duration.
Shattering Palm Dash to an enemy and strike them with an unarmed attack that manifests a wave of cold, coating nearby enemies in shards of Ice. Dealing enough damage to these enemies will shatter the shards, causing an icy explosion that deals Attack Damage. This skill always strikes with your bare fist, even if you have a quarterstaff equipped.
Elemental Conflux Tap into a current of raw and unpredictable Elemental Power, causing you to deal greatly more damage of a randomly chosen Element. The Element affected changes frequently, though the same Element can be affected multiple times in succession.
Focus: Melee, Burst, AoE, Mobbing, Bossing |
NEW |
Ember Fusillade Conjures a blazing Ember that hovers around you. After a short duration, the Ember launches at the enemy, dealing fire damage in an area on impact. Recasting the spess resets the duration for all active Embers. Multiple Embers fired in the same Fusillade will attempt to target different enemies.
Incinerate Conjures a torrent of flames from your hand, Igniting enemies in front of you. The flames grow stronger the longer you Channel for, and at maximum strength also apply stacking Fire Exposure and creating Ignited Ground.
Ball Lightning Fires a slow-moving projectile that repeatedly shoots bolts of lightning at nearby enemies.
Flameblast Channels to build destructive energy around you or a targeted Solar Orb. Releasing the energy causes a devastating explosion that is larger and more intense the longer you channelled for.
Ghost Dance Periodically Gain Ghost Shrouds. If you are Hit while you have a Ghost Shroud, it is immediately consumed to recover Energy Shield based on your Evasion.
Mana Remnants Conjures surging lightning to restore your Mana. While active, Shocked enemies you kill have a chance to spawn a Mana Remnant, and Critically Hitting a Shocked target spawns a Mana Remnant every few seconds. Picking up a Mana Remnant grants you Mana which can Overflow maximum Mana.
Despair Curses all targets in an area after a short delay, lowering their Chaos Resistance.
Cast on Elemental Ailment While active, gains Energy when you Freeze, Shock, or Ignite enemies, and triggers socketed spells on reaching Maximum Energy.
Living Bomb Plant a seed of Fire inside an enemy. Dealing enough damage to the enemy, or killing it outright, causes the seed to explode, dealing damage in an area and leaving behind a Fire Infusion Remnant.
Into the Breach A Flame of Chayula manifests nearby every X seconds;Flames of Chayula fade after 25 seconds if not picked up
Focus: Chaos, Fire, Elemental Ailment, Remnant |
Monk Class and Ascendancy Guides
| Base Class | |
|---|---|
| Ascendancies | |
Comment
Author

PoE 2 0.2 Monk Build - Mana Stack Acolyte of Chayula
Please participate in our site
improvement survey
04/2026
improvement survey
04/2026
Would you assist in
improving Game8's site?
improving Game8's site?

×
We are listening to our users' valuable opinions and discussing how to act on them.
The information collected through this survey will be used for the purpose of improving our services. In addition, the information will only be disclosed a part of a statistic in a format that will not allow identification of personal information.
Begin Survey
Not Now
×
Please rate each item regarding Game8.co's Advertisements.
Amount of Ads
Very Dissatisfied
Somewhat Dissatisfied
Fine
Somewhat Satisfied
Highly Satisfied
Placement of Ads
Timing of Ad Display
Ad Loading Speed
Safeness of Ads
Content of Ads
×
Please rate each item regarding Game8.co's Quality of Articles.
Amount of information
Very Dissatisfied
Somewhat Dissatisfied
Fine
Somewhat Satisfied
Highly Satisfied
Frequency of updates
Speed of new information
Accuracy of articles
Understandibility of articles
Readability of sentences
×
Please rate each item regarding Game8.co's Usability of the Site.
Ease of finding information
Very Dissatisfied
Somewhat Dissatisfied
Fine
Somewhat Satisfied
Highly Satisfied
Loading Speed
Use of Color
Font Size
Visibility of Images
Easy to Understand Layout
×
Please rate each item regarding Game8.co's Message Boards, Comments.
Ease of Writing
Very Dissatisfied
Somewhat Dissatisfied
Fine
Somewhat Satisfied
Highly Satisfied
Readability
Ease in Finding Information
Comment Quality
Comment Quantity
Admin Response
×
Please rate each item regarding Game8.co's Site's new design.
Please rate our site's new design
Very Dissatisfied
Somewhat Dissatisfied
Fine
Somewhat Satisfied
Highly Satisfied
Do you think that the website's design change makes the site easier to use?
Has the new design made it easier for you to find information on the site?
Has the new design improved the overall visual appeal of the site?
How would you rate your overall satisfaction with the new design of the site?
×
How likely are you to recommend Game8 to someone you know?
Very Unlikely
0
1
2
3
4
5
6
7
8
9
10
Very Likely
If you have other opinions regarding potential improvement to the website, please share them with us. We would appreciate your honest opinion.
Note: This is a free response section, so you can proceed without entering anything.
Note: Please be sure not to enter any kind of personal information into your response.
Note: Please be sure not to enter any kind of personal information into your response.
×
Thank You
×
Thank you for participating in our survey! Your answers will help us to improve the quality of our website and services.
We hope you continue to make use of Game8.
We hope you continue to make use of Game8.
Close
Rankings
- We could not find the message board you were looking for.

Gaming News

![Forza Horizon 6 Review [Preview] | Beautiful Roads With a Whole Lot of Oversteer](https://img.game8.co/4460981/a7254c24945c43fbdf6ad9bea52b5ce9.png/show)


![Forza Horizon 6 Review [Preview] | Beautiful Roads With a Whole Lot of Oversteer](https://img.game8.co/4460981/a7254c24945c43fbdf6ad9bea52b5ce9.png/thumb)
Popular Games

Genshin Impact Walkthrough & Guides Wiki
Crimson Desert Walkthrough & Guides Wiki
Umamusume: Pretty Derby Walkthrough & Guides Wiki
Honkai: Star Rail Walkthrough & Guides Wiki
Monster Hunter Stories 3: Twisted Reflection Walkthrough & Guides Wiki
Wuthering Waves Walkthrough & Guides Wiki
The Seven Deadly Sins: Origin Walkthrough & Guides Wiki
Pokemon TCG Pocket (PTCGP) Strategies & Guides Wiki
Pokemon Pokopia Walkthrough & Guides Wiki
Zenless Zone Zero Walkthrough & Guides Wiki


Recommended Games
Monster Hunter World Walkthrough & Guides Wiki
Fire Emblem Heroes (FEH) Walkthrough & Guides Wiki
Pokemon Brilliant Diamond and Shining Pearl (BDSP) Walkthrough & Guides Wiki
Super Smash Bros. Ultimate Walkthrough & Guides Wiki
Diablo 4: Vessel of Hatred Walkthrough & Guides Wiki
Cyberpunk 2077: Ultimate Edition Walkthrough & Guides Wiki
Yu-Gi-Oh! Master Duel Walkthrough & Guides Wiki
Elden Ring Shadow of the Erdtree Walkthrough & Guides Wiki
The Legend of Zelda: Tears of the Kingdom Walkthrough & Guides Wiki
Persona 3 Reload Walkthrough & Guides Wiki


All rights reserved
© 2010 - 2024 Grinding Gear Games
The copyrights of videos of games used in our content and other intellectual property rights belong to the provider of the game.
The contents we provide on this site were created personally by members of the Game8 editorial department.
We refuse the right to reuse or repost content taken without our permission such as data or images to other sites.