PoE 2 0.3 Monk Leveling Build - Cold Lightning
Latest: 0.5.0 Release Date
☆ Fate of the Vaal ▶︎ The Last of the Druids
┗ Bonded Mods | 0.4 Mystery Box
★ Druid: Class Overview | Builds
☆ NEW: Disciple of Varashta Ascendancy!
★ Best Class | Best Builds | Leveling Builds
This is a leveling build for the Monk in Path of Exile 2 (PoE 2)'s The Third Edict Update that focuses on Ice and Lightning damage to finish Act 1 to 3. Check out this Monk levelling build, including its progression, equipment, socketables, skills, playstyle, and recommended builds!
Cold Lightning Monk Build Summary
Cold Lightning Monk Leveling Build
| Build Setup | |
|---|---|
 Monk Leveling Build Monk Leveling Build |
 Killing Palm Dash to an enemy and Strike them with an unarmed Attack, Culling enemies if their life is low enough. Each enemy killed by this strike grants a Power Charge. Enemies around you that can be Culled will be highlighted. This skill always Strikes with your bare fist, even if you have a Quarterstaff equipped.
 Falling Thunder Infuses your Quarter staff with electrical energies, then slams the ground to deal damage in a large cone in front of you. Consumes your Power Charges to fire Lightning Projectiles forwards from the impact.
 Glacial Cascade Sweep your Quarterstaff upwards, releasing an icy fissure which deals damage in a series of bursts culminating in a large spike. Frozen enemies hit by the final spike are dealt heavy damage but the Freeze is Consumed. Ice Crystals hit by the final spike explode.
 Ice Strike Perform a fast icy Strike, Using this Attack three times in quick succession causes a final strike that is slower and more powerful.
 Tempest Bell Build Combo by successfully Striking Enemies with other skills. After reaching maximum Combo, use this skill to cause the Bell on your staff to grow to massive size as you drop it on the ground. The Bell damages enemies on impact and can be Hit by your skills, creating a damaging shockwave. Elemental Ailments applied to the Bell cause its shockwaves to deal extra damage of the corresponding type, and Hits which would have caused Knockback increase the area of effect of the shockwaves.
 Freezing Mark Marks a target, making them more susceptible to being Frozen. When a Marked target dies, a Cold nova erupts from their corpse. this nova does not use your Weapon Damage, and instead uses its own Base Attack damage.
|
|
|
|
This unarmed build uses Freezing Mark with Ice Strike and Glacial Cascade to deal damage to enemies and freeze them in place. It also utilizes Killing Palm and Falling Thunder for burst damage.
| Date | Changes Made |
|---|---|
| 09/02/25 | ・ Added an Act 3 Update for Patch 0.3.0 |
| 08/30/25 | ・ Updated for Patch 0.3.0 |
Cold Lightning Monk Equipment
※ The affixes shown below are arranged based on descending priority.
| Gear | Affixes |
|---|---|
 Long Quarterstaff Long Quarterstaff Long Quarterstaff Stats:
Damage - 9-18 Critical Chance - 10.00% Attacks Per Second - 1.40 Requirements: Dexterity - 9 Implicit Skill: Increased Range |
・Adds Physical Damage
・Level of All Melee Skills |
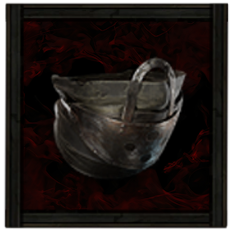 Face Mask Face Mask Face Mask Stats:
Evasion - 26 Energy Shield - 15 Requirements: Level - 10 Dexterity - 10 Intelligence - 10 |
・Increased Evasion and Energy Shield
・Maximum Life ・Maximum Mana ・Lightning Resistance |
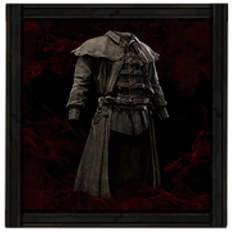 Waxed Jacket Waxed Jacket Waxed Jacket Stats:
Evasion - 43 Energy Shield - 24 Requirements: Level - 11 Dexterity - 13 Intelligence - 13 |
・Evasion Rating
・Energy Shield ・Increased Evasion Rating and Energy Shield ・Maximum Life |
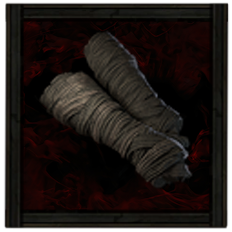 Gauze Wraps Gauze Wraps Gauze Wraps Stats:
Evasion - 8 Energy Shield - 6 Requirements: None |
・Evasion Rating
・Maximum Energy Shield ・Dexterity |
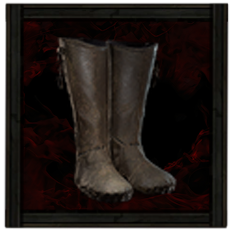 Rawhide Boots Rawhide Boots Rawhide Boots Stats:
Evasion - 15 Requirements: None |
・Maximum Life
・Maximum Mana ・Dexterity ・Lightning Resistance |
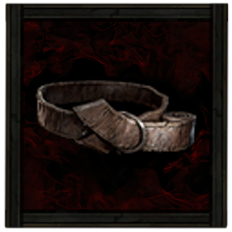 Rawhide Belt Rawhide Belt Rawhide Belt Requirements:
None Implicit:20-30% increased Life Recovery from Flasks |
・Dexterity |
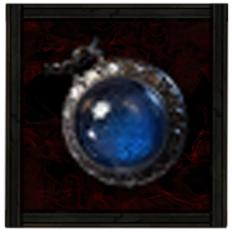 Azure Amulet Azure Amulet Azure Amulet Requirements:
None Implicit:20-30% increased Mana Regeneration Rate |
・Increased Evasion Rating
・Dexterity |
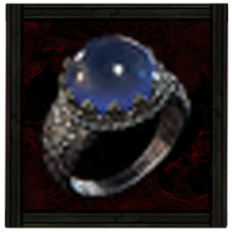 Lazuli Ring Lazuli Ring Lazuli Ring Requirements:
None Implicit:+20-30 to Maximum Mana |
・Maximum Mana
・Dexterity |
|
Lazuli Ring Lazuli Ring Requirements:
None Implicit:+20-30 to Maximum Mana |
・Maximum Life
・Dexterity |
 Greater Life Flask Greater Life Flask Greater Life Flask Stats:
Flask Type - Life Recovered Life - 150 Charge Per Use - 10 Total Charges - 70 Duration - 4 sec. |
・Increased Life Recovered
・Increased Charges |
 Greater Mana Flask Greater Mana Flask Greater Mana Flask Stats:
Flask Type - Mana Recovered Mana - 90 Charge Per Use - 10 Total Charges - 70 Duration - 2.5 sec. |
・Increased Recovery Rate
・Increased Charges |
Weapons
During Act 1 until Act 2, try to get any Quarterstaff with additional modifiers that increase Physical Damage and grant levels to all Melee Skills. This should be able to carry you through the rest of the act.
Armor and Accessories
You'll want to stack Evasion and Energy Shields to take advantage of the bonuses of the Hollow Palm Technique passive key. This allows you to increase your Attack Speed and Critical Strike Chance based on your Evasion Rating and Energy Shield, respectively.
You'll also want the Azure Amulet paired with two Lazuli Rings to support the mana consumption of Ice Strike, allowing you to continuously cast the skill without having to use a Mana Flask.
| List of Rings | List of Amulets |
| List of Armors | |
Belts and Charms
 Staunching Charm Staunching Charm |
・Increased Duration
・Increased Charges ・Gain Charges Per Second |
|---|---|
 Antidote Charm Antidote Charm |
・Increased Duration
・Increased Charges ・Gain Charges Per Second |
We recommend using the Staunching and Antidote charms to mitigate the effects of Bleed and Poison. This is by far the hardest status to mitigate as you cannot build resistances against them.
| Belts and Charms | |
|---|---|
| List of Belts | List of Charms |
Runes and Soul Cores
| Equipment | Sockets |
|---|---|
| Weapon | |
| Armor |
Use Iron Runes on your Quarterstaff to allow the build to scale the core skills with Physical Damage. You can use the elemental runes on your armor to attempt to cap out your elemental resistances!
| All Runes and Soul Cores | |
|---|---|
| List of Runes | List of Soul Cores |
Cold Lightning Monk Skills
※ The Support Gems' priorities are arranged in descending order. The first one being the most important and the last being the least crucial.
| Skill | Support Gems |
|---|---|
|
Ice Strike Ice Strike Perform a fast icy Strike, Using this Attack three times in quick succession causes a final strike that is slower and more powerful.
|
Rapid Attacks I Supports Attacks, causing them to Attack faster.
Close Combat I Supports Attacks, causing them to deal more damage to enemies based on how close they are to you.
Elemental Armament II Supports Attacks, causing them to deal more Elemental damage.
|
 Shattering Palm Shattering Palm Shattering Palm Dash to an enemy and strike them with an unarmed attack that manifests a wave of cold, coating nearby enemies in shards of Ice. Dealing enough damage to these enemies will shatter the shards, causing an icy explosion that deals Attack Damage. This skill always strikes with your bare fist, even if you have a quarterstaff equipped.
|
Rapid Attacks I Supports Attacks, causing them to Attack faster.
Blind I Support any skill that Hits enemies, causing them to Blind on hit.
|
 Charged Staff Charged Staff Charged Staff Consume all Power Charges to infuse your Quarterstaff with electricity, adding Lightning damage and a Lightning shockwave to your Quarterstaff Attacks. Reusing this skill while the Buff is active adds to the Buff's duration and damage.
|
Prolonged Duration I Supports any skill that has a duration, making that duration longer.
Elemental Armament II Supports Attacks, causing them to deal more Elemental damage.
|
|
Falling Thunder Falling Thunder Infuses your Quarter staff with electrical energies, then slams the ground to deal damage in a large cone in front of you. Consumes your Power Charges to fire Lightning Projectiles forwards from the impact.
|
Perpetual Charge Supports skills that consume Power, Frenzy, or Endurance Charges on use, giving them a chance not to remove each Charge while still gaining the benefits of Consuming them.
Lightning Attunement Supports attacks, causing them to gain Lightning Damage but deal less Cold and Fire Damage.
|
|
Glacial Cascade Glacial Cascade Sweep your Quarterstaff upwards, releasing an icy fissure which deals damage in a series of bursts culminating in a large spike. Frozen enemies hit by the final spike are dealt heavy damage but the Freeze is Consumed. Ice Crystals hit by the final spike explode.
|
Rapid Attacks I Supports Attacks, causing them to Attack faster.
Cold Attunement Supports attacks, causing them to gain Cold Damage but deal less Fire and Lightning Damage.
|
|
Tempest Bell Tempest Bell Build Combo by successfully Striking Enemies with other skills. After reaching maximum Combo, use this skill to cause the Bell on your staff to grow to massive size as you drop it on the ground. The Bell damages enemies on impact and can be Hit by your skills, creating a damaging shockwave. Elemental Ailments applied to the Bell cause its shockwaves to deal extra damage of the corresponding type, and Hits which would have caused Knockback increase the area of effect of the shockwaves.
|
Magnified Area I Supports any skill with an area of effect, making it larger.
|
 Herald of Ice Herald of Ice Herald of Ice While active, Shattering an enemy with an Attack Hit will cause an icy explosion that deals Attack damage to surrounding enemies.
|
Cold Attunement Supports attacks, causing them to gain Cold Damage but deal less Fire and Lightning Damage.
|
 Combat Frenzy Combat Frenzy Combat Frenzy While active, grants you a Frenzy Charge when you Freeze, Electrocute, or Pin an enemy. This can only occur once every few seconds.
|
Charge Profusion I Supports skills that can generate Charges, giving them a chance to generate and additional Charge when they do so.
|
Ice Strike is the main star of the show as it deals the highest damage among your skills. However, it is still important to use Glacial Cascade and Falling Thunder for high bursts of damage when the opportunity shows, while Tempest Bell is used for amplifying damage.
Cold Lightning Monk Passive Tree
Passive Tree Progression
From the start, make a beeline towards Flow State, then use the attribute highway to reach Hollow Palm Technique. Afterwards, head back to gain Essence of the Mountain for more freeze buildup. Afterwards take more Attack Speed nodes by taking Falcon Technique as well as Reaching Strike and Rapid Strike.
It's also important to get Resonance, to convert the Frenzy Charges to Power Charges to use Charged Staff or Falling Thunder. From here onwards, you can decide to increase your Critical Chance and Damage, then followed by more Evasion Rating.
Passive Skill Tree Guide and List of Passives
Ascendancy Options
 Invoker Invoker
|
• Choose I am the Blizzard to support your Cold Damage. |
Since the build mainly focuses on using Ice Strike and freezing enemies, the best Ascendancy to choose is Invoker as its skills purely support elemental builds. You can still choose the Acolyte of Chayula, but your progression past the leveling build would require you to respec more.
You have the option to transition to a different Ascendancy at a later stage of the game if you wish to switch to a different build once you reach the endgame.
Build Progression
| Jump to an Act! | ||
|---|---|---|
| Act 1 | Act 2 | Act 3 |
Act 1 Progression
To progress through Act 1 and beat Count Geonor using the Lightning Monk leveling build, follow these steps:
| # | Steps |
|---|---|
| 1 | Beat the
|
| 2 | Head for the Mysterious Campsite at Clearfell to get an extra Level 1
|
| 3 | Complete
Treacherous Ground
and get the
|
| 4 | Defeat
|
| 5 | Find and defeat
to get another skill gem for
Note: Loot the Witch Hut to get Medium Flasks. |
| 6 | Defeat
|
| 7 | Progress to The Grim Tangle and defeat
|
| 8 | Look for the Haunted Treasure Inside the Tomb of the Consort and defeat the rare enemy to acquire a Level 1 Uncut Support Gem and slot in
|
| 9 | Defeat
|
| 10 | Search and complete your first Ritual in the same area to get a Level 4 Uncut Support Gem and use this to upgrade your Falling Thunder.
|
| 11 | Start looking for the Dryadic Ritual in the same area to get an extra Level 1 Uncut Support Gem to get
|
| 12 | Defeat the
|
| 13 | Complete The Lost Lute at the Ogham Farmlands to obtain a Book of Specialisation for more passive points.
|
| 14 | Search for the Crop Circle in the same area to defeat
and obtain a Level 4 Uncut Skill Gem and use it to upgrade
|
| 15 | Proceed to Ogham Village and defeat
|
| 16 | Slot in
|
| 17 | Search and defeat the
|
| 18 | Continue and defeat
|
Act 2 Progression
To progress through Act 2 and beat Jamanra, the Abomination using the Cold Lightning leveling build, follow these steps:
| # | Steps |
|---|---|
| 1 | Complete the Earning Passage quest for an
|
| 2 | Defeat
Ascendancy: Finish the Sekhema's Trial to get your first two Ascendancy Skills: ┣
┣
|
| 3 | Clear Mobs in Keth until you get the
|
| 4 | Defeat
|
| 5 | Defeat
in the Galleria for a random Jewel.
|
| 6 | Open the Guarded Sarcophagus for an
|
| 7 | Three Elemental Offering Ring choices: Ruby Ring, Sapphire Ring, and Topaz Ring for flame, cold, and lightning resistance respectively. It is recommended to choose the Topaz Ring to prepare for
|
| 8 | Clear The City of Seven Waters for an Uncut Support Gem II.
|
| 9 | Destroy the Effigy located in the Shrine of Bones for an Uncut Support Gem Level 2.
|
| 10 | Clear Mobs in The Bone Pits until you get the
|
| 11 | Complete A Theft of Ivory quest for an Uncut Support Gem Level 2.
|
| 12 | Place both the Kabala Clan and Sun Clan Relics in the Valley of Titans to complete the Ancient Vows quest. Choose the Sun Clan Relic for more Charm Charges.
|
| 13 | Complete A Crown of Stone quest for an Uncut Support Gem Level 2. |
| 14 | Complete the Tradition's Toll quest to get a
|
| 15 | Defeat the
for an additional
|
Act 3 Progression
Progress Act 3 and beat Doryani by:
| # | Step by Step Guide to Act 3 Leveling |
|---|---|
| 1 | |
| 2 |
Loot the basket found in the Orok Campfire at Sandswept Marsh to get a
|
| 3 | |
| 4 |
Complete The Slithering Dead to get the Venom Draught that provides +30% Increased Elemental Ailment Threshold. |
| 5 |
Look for the Jungle Grave and interact with the Ravaged Corpse to summon Servi and get a rare Belt. We recommend taking Linen Belt for better mana management. |
| 6 |
Defeat
|
| 7 |
Submit the Tribal Vengeance to get a charm. Choose the Antidote Charm for increased defenses against Poison. |
| 8 |
Defeat
|
| 9 |
Obtain an
|
| 10 | |
| 11 |
Ascendancy: By this time, you can complete the Trial of Chaos to get your third and fourth Ascendancy Point.
┗
┗
|
| 12 |
Use the
|
Lightning Monk Playstyle
Mobbing Rotation
※ Press on what type you are fighting for a more detailed explanation on the playstyle and skill rotation.
For general mobbing, you can just keep attacking with Ice Strike to deal with most mobs. The rotation is as follows:
- Cast Shattering Palm and Spam Ice Strike to clear fodder enemies.
- Use Falling Thunder whenever you like to burst mobs.
- Use Glacial Cascade to chill enemies or prime them for Freeze.
- Use Charged Staff to apply shock when using Ice Strike.
Bossing Rotation
The Rotation is nearly the same bosses, but requires a bit more ranged combat. The rotation is as follows:
- Spam Glacial Cascade from afar.
- Use Ice Strike to build combo for Tempest Bell.
- Alternate between Ice Strike and Glacial Cascade depending on your needs.
Path of Exile 2 (PoE 2) Related Guides

0.4 Best Endgame Builds
| Rank | Build |
|---|---|
 |
|
 |
|
 |
|
 |
0.4 Leveling Builds
All Build Guides
| List of Builds by Class | |||||||||||
|---|---|---|---|---|---|---|---|---|---|---|---|
 Huntress Huntress |
 Mercenary Mercenary |
 Monk Monk |
|||||||||
 Witch Witch |
 Sorceress Sorceress |
 Warrior Warrior |
|||||||||
 Ranger Ranger |
 Druid Druid |
- | |||||||||
| Other Build Guides | 0.3 Leveling Builds | How to Make a Good Build | |||||||||
Monk Leveling Builds
Monk Endgame Builds
Ghost Dance Periodically Gain Ghost Shrouds. If you are Hit while you have a Ghost Shroud, it is immediately consumed to recover Energy Shield based on your Evasion.
Herald of Ice While active, Shattering an enemy with an Attack Hit will cause an icy explosion that deals Attack damage to surrounding enemies.
Herald of Thunder While active, killing Shocked enemies with Attack damage, will cause subsequent Attack hits to release lightning bolts which deals Attack damage to all surrounding enemies.
Ice Strike Perform a fast icy Strike, Using this Attack three times in quick succession causes a final strike that is slower and more powerful.
Tempest Bell Build Combo by successfully Striking Enemies with other skills. After reaching maximum Combo, use this skill to cause the Bell on your staff to grow to massive size as you drop it on the ground. The Bell damages enemies on impact and can be Hit by your skills, creating a damaging shockwave. Elemental Ailments applied to the Bell cause its shockwaves to deal extra damage of the corresponding type, and Hits which would have caused Knockback increase the area of effect of the shockwaves.
Combat Frenzy While active, grants you a Frenzy Charge when you Freeze, Electrocute, or Pin an enemy. This can only occur once every few seconds.
Wind Dancer Grants a buff that gives you more Evasion per stage. Being Hit by a Melee Attack while you have this buff consumes all stages to damage and Knock Back enemies around you.
Charged Staff Consume all Power Charges to infuse your Quarterstaff with electricity, adding Lightning damage and a Lightning shockwave to your Quarterstaff Attacks. Reusing this skill while the Buff is active adds to the Buff's duration and damage.
Shattering Palm Dash to an enemy and strike them with an unarmed attack that manifests a wave of cold, coating nearby enemies in shards of Ice. Dealing enough damage to these enemies will shatter the shards, causing an icy explosion that deals Attack Damage. This skill always strikes with your bare fist, even if you have a quarterstaff equipped.
Focus: AoE, DPS, Crowd Control, Bossing |
|
Ghost Dance Periodically Gain Ghost Shrouds. If you are Hit while you have a Ghost Shroud, it is immediately consumed to recover Energy Shield based on your Evasion.
Herald of Ash While active, enemies you sufficiently Overkill with attacks will cause an explosion that ignites nearby enemies based on the Overkill damage dealt.
Herald of Thunder While active, killing Shocked enemies with Attack damage, will cause subsequent Attack hits to release lightning bolts which deals Attack damage to all surrounding enemies.
Tempest Flurry Perform a series of aggressive Strikes. When used in quick succession, the third use Strikes three times, and the fourth performs a Final strike that calls down a powerful Shocking bolt.
Tempest Bell Build Combo by successfully Striking Enemies with other skills. After reaching maximum Combo, use this skill to cause the Bell on your staff to grow to massive size as you drop it on the ground. The Bell damages enemies on impact and can be Hit by your skills, creating a damaging shockwave. Elemental Ailments applied to the Bell cause its shockwaves to deal extra damage of the corresponding type, and Hits which would have caused Knockback increase the area of effect of the shockwaves.
Cast on Shock While active, gains Energy when you Shock enemies and triggers socketed spells on reaching maximum Energy.
Storm Wave Sweep your Quarterstaff, projecting a bolt of Lightning through the ground in a long wave ahead of you.
Blink Replaces your dodge roll with a short-cooldown Spell that allows you to tunnel through space, instantly reappearing a medium distance away.
Unbound Avatar Gain Unbound Fury when you inflict an Elemental Ailment;With a Hit on an enemy, no more than once every .2 seconds for each type of Ailment;Maximum 100 Unbound Fury;Cannot gain Unbound Fury while Unbound;40% more Elemental Damage while Unbound;40% more Elemental Ailment Buildup while Unbound;80% more chance to inflict Elemental Ailments while Unbound;Unbound duration is 9 seconds
Focus: DPS, Burst Damage, Bossing / Mobbing |
|
Ghost Dance Periodically Gain Ghost Shrouds. If you are Hit while you have a Ghost Shroud, it is immediately consumed to recover Energy Shield based on your Evasion.
Herald of Ice While active, Shattering an enemy with an Attack Hit will cause an icy explosion that deals Attack damage to surrounding enemies.
Tempest Bell Build Combo by successfully Striking Enemies with other skills. After reaching maximum Combo, use this skill to cause the Bell on your staff to grow to massive size as you drop it on the ground. The Bell damages enemies on impact and can be Hit by your skills, creating a damaging shockwave. Elemental Ailments applied to the Bell cause its shockwaves to deal extra damage of the corresponding type, and Hits which would have caused Knockback increase the area of effect of the shockwaves.
Combat Frenzy While active, grants you a Frenzy Charge when you Freeze, Electrocute, or Pin an enemy. This can only occur once every few seconds.
Wind Dancer Grants a buff that gives you more Evasion per stage. Being Hit by a Melee Attack while you have this buff consumes all stages to damage and Knock Back enemies around you.
Storm Wave Sweep your Quarterstaff, projecting a bolt of Lightning through the ground in a long wave ahead of you.
Charged Staff Consume all Power Charges to infuse your Quarterstaff with electricity, adding Lightning damage and a Lightning shockwave to your Quarterstaff Attacks. Reusing this skill while the Buff is active adds to the Buff's duration and damage.
Shattering Palm Dash to an enemy and strike them with an unarmed attack that manifests a wave of cold, coating nearby enemies in shards of Ice. Dealing enough damage to these enemies will shatter the shards, causing an icy explosion that deals Attack Damage. This skill always strikes with your bare fist, even if you have a quarterstaff equipped.
Into the Breach A Flame of Chayula manifests nearby every X seconds;Flames of Chayula fade after 25 seconds if not picked up
Focus: Crowd Control, DPS, Burst Damage |
|
Orb of Storms Creates an Orb of electricity that fires Chaining Lightning bolts at nearby enemies.
Herald of Thunder While active, killing Shocked enemies with Attack damage, will cause subsequent Attack hits to release lightning bolts which deals Attack damage to all surrounding enemies.
Tempest Flurry Perform a series of aggressive Strikes. When used in quick succession, the third use Strikes three times, and the fourth performs a Final strike that calls down a powerful Shocking bolt.
Overwhelming Presence While active, enemies in your Presence are easier to Stun and inflict Elemental Ailments upon.
Combat Frenzy While active, grants you a Frenzy Charge when you Freeze, Electrocute, or Pin an enemy. This can only occur once every few seconds.
Disengage Jump back as you rupture the earth in front of you with spearpoints, damaging enemies. Consumes the Parried Debuff on Hitting enemies to release a shockwave and grant you a Frenzy Charge. This skill can be used while using other skills, and causes Strikes and Projectiles to miss you while jumping. This skill cannot be Ancestrally Boosted.
Lightning Spear Throw a single copy of your spear. When it hits an enemy it bursts, firing secondary lightning bolt Projectiles at multiple other enemies within a large area around it. Consumes a Frenzy Charge if possible to cause the main spear to split into multiple copies on impact, each of which then bursts.
Primal Strikes Perform a Lightning-charged stab that can be chained into a combination of up to three attacks. The first two attacks conjure a charging Wildwood spirit if they Hit a Shocked enemy and refresh Shock duration. The third attack is a large swipe that inflicts Lightning Exposure and can Consume Shock to conjure a stampede of spirits.
Focus: AoE, Lightning, Tank, Mobbing |
|
Falling Thunder Infuses your Quarter staff with electrical energies, then slams the ground to deal damage in a large cone in front of you. Consumes your Power Charges to fire Lightning Projectiles forwards from the impact.
Ghost Dance Periodically Gain Ghost Shrouds. If you are Hit while you have a Ghost Shroud, it is immediately consumed to recover Energy Shield based on your Evasion.
Herald of Ash While active, enemies you sufficiently Overkill with attacks will cause an explosion that ignites nearby enemies based on the Overkill damage dealt.
Herald of Ice While active, Shattering an enemy with an Attack Hit will cause an icy explosion that deals Attack damage to surrounding enemies.
Ice Strike Perform a fast icy Strike, Using this Attack three times in quick succession causes a final strike that is slower and more powerful.
Wind Dancer Grants a buff that gives you more Evasion per stage. Being Hit by a Melee Attack while you have this buff consumes all stages to damage and Knock Back enemies around you.
Hand of Chayula Dash to an enemy and Strike them with an Unarmed Attack, applying socketed Curses and Marks with reduced effect. This skill always Strikes with your bare fist, even if you have a Quarterstaff equipped.
Mantra of Destruction Build Combo by successfully striking enemies with other skills. After reaching maximum Combo, use this skill to Empower your next Quarterstaff attack, causing it to deal Chaos damage. Each kill with the Empowered attack grants Purple Flame of Chayula for a duration.
Shattering Palm Dash to an enemy and strike them with an unarmed attack that manifests a wave of cold, coating nearby enemies in shards of Ice. Dealing enough damage to these enemies will shatter the shards, causing an icy explosion that deals Attack Damage. This skill always strikes with your bare fist, even if you have a quarterstaff equipped.
Elemental Conflux Tap into a current of raw and unpredictable Elemental Power, causing you to deal greatly more damage of a randomly chosen Element. The Element affected changes frequently, though the same Element can be affected multiple times in succession.
Focus: Melee, Burst, AoE, Mobbing, Bossing |
|
Ember Fusillade Conjures a blazing Ember that hovers around you. After a short duration, the Ember launches at the enemy, dealing fire damage in an area on impact. Recasting the spess resets the duration for all active Embers. Multiple Embers fired in the same Fusillade will attempt to target different enemies.
Incinerate Conjures a torrent of flames from your hand, Igniting enemies in front of you. The flames grow stronger the longer you Channel for, and at maximum strength also apply stacking Fire Exposure and creating Ignited Ground.
Ball Lightning Fires a slow-moving projectile that repeatedly shoots bolts of lightning at nearby enemies.
Flameblast Channels to build destructive energy around you or a targeted Solar Orb. Releasing the energy causes a devastating explosion that is larger and more intense the longer you channelled for.
Ghost Dance Periodically Gain Ghost Shrouds. If you are Hit while you have a Ghost Shroud, it is immediately consumed to recover Energy Shield based on your Evasion.
Mana Remnants Conjures surging lightning to restore your Mana. While active, Shocked enemies you kill have a chance to spawn a Mana Remnant, and Critically Hitting a Shocked target spawns a Mana Remnant every few seconds. Picking up a Mana Remnant grants you Mana which can Overflow maximum Mana.
Despair Curses all targets in an area after a short delay, lowering their Chaos Resistance.
Cast on Elemental Ailment While active, gains Energy when you Freeze, Shock, or Ignite enemies, and triggers socketed spells on reaching Maximum Energy.
Living Bomb Plant a seed of Fire inside an enemy. Dealing enough damage to the enemy, or killing it outright, causes the seed to explode, dealing damage in an area and leaving behind a Fire Infusion Remnant.
Into the Breach A Flame of Chayula manifests nearby every X seconds;Flames of Chayula fade after 25 seconds if not picked up
Focus: Chaos, Fire, Elemental Ailment, Remnant |
Monk Class and Ascendancy Guides
| Base Class | |
|---|---|
| Ascendancies | |
Author

PoE 2 0.3 Monk Leveling Build - Cold Lightning
Rankings
- We could not find the message board you were looking for.

Gaming News


![Death Stranding 2: On The Beach Review [PC] | A Port That Delivers](https://img.game8.co/4447392/15310a0c9aa1b6843bb713b2ea216930.jpeg/thumb)

Popular Games

Genshin Impact Walkthrough & Guides Wiki
Umamusume: Pretty Derby Walkthrough & Guides Wiki
Crimson Desert Walkthrough & Guides Wiki
Monster Hunter Stories 3: Twisted Reflection Walkthrough & Guides Wiki
Honkai: Star Rail Walkthrough & Guides Wiki
Pokemon Pokopia Walkthrough & Guides Wiki
The Seven Deadly Sins: Origin Walkthrough & Guides Wiki
Wuthering Waves Walkthrough & Guides Wiki
Zenless Zone Zero Walkthrough & Guides Wiki
Arknights: Endfield Walkthrough & Guides Wiki


Recommended Games
Fire Emblem Heroes (FEH) Walkthrough & Guides Wiki
Diablo 4: Vessel of Hatred Walkthrough & Guides Wiki
Cyberpunk 2077: Ultimate Edition Walkthrough & Guides Wiki
Yu-Gi-Oh! Master Duel Walkthrough & Guides Wiki
Super Smash Bros. Ultimate Walkthrough & Guides Wiki
Pokemon Brilliant Diamond and Shining Pearl (BDSP) Walkthrough & Guides Wiki
Elden Ring Shadow of the Erdtree Walkthrough & Guides Wiki
Monster Hunter World Walkthrough & Guides Wiki
The Legend of Zelda: Tears of the Kingdom Walkthrough & Guides Wiki
Persona 3 Reload Walkthrough & Guides Wiki


All rights reserved
© 2010 - 2024 Grinding Gear Games
The copyrights of videos of games used in our content and other intellectual property rights belong to the provider of the game.
The contents we provide on this site were created personally by members of the Game8 editorial department.
We refuse the right to reuse or repost content taken without our permission such as data or images to other sites.
week lvling build