PoE 2 0.3 Ranger Leveling Build - Lightning Arrow
Latest: 0.5.0 Release Date
☆ Fate of the Vaal ▶︎ The Last of the Druids
┗ Bonded Mods | 0.4 Mystery Box
★ Druid: Class Overview | Builds
☆ NEW: Disciple of Varashta Ascendancy!
★ Best Class | Best Builds | Leveling Builds
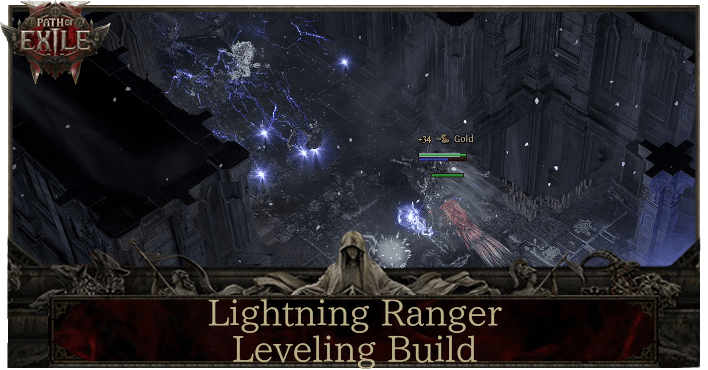
This is a leveling build for the Ranger in Path of Exile 2 (PoE 2)'s The Third Edict Update that focuses on Lightning damage. Check out this Ranger leveling build, including its progression, equipment, socketables, skills, playstyle, and recommended builds!
 Attention! Attention! |
The build is updated for Act 3 of Patch 0.3.0: The Third Edict. Sign in or Log in, then select  under the page title to be notified of any updates![/align] under the page title to be notified of any updates![/align] |
|---|
Lightning Ranger Build Summary
Ranger Leveling Build Overview
| Build Setup | |
|---|---|
 Lightning Ranger Lightning Ranger |
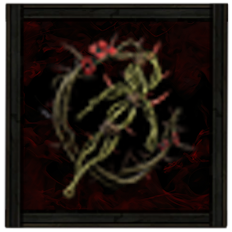
 Herald of Thunder While active, killing Shocked enemies with Attack damage, will cause subsequent Attack hits to release lightning bolts which deals Attack damage to all surrounding enemies.
 Barrage Ready a volley of arrows or spears, Empowering your next Bow or Projectile Spear Attack to repeat multiple times. Consumes your Frenzy Charges on use to add additional repeats.
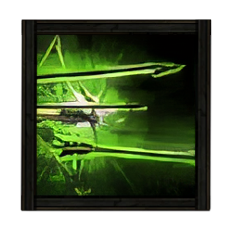
 Lightning Arrow Fires a charged arrow at the target. On hitting an enemy or wall, the arrow will fire Chaining Lightning beams at nearby enemies.
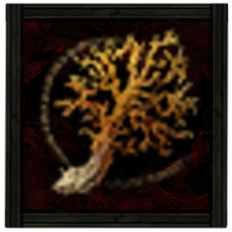
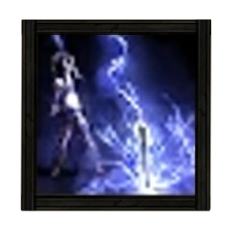 Lightning Rod Fire an arrow that drops from above, creating a Lightning burst. The arrow remains in the ground, and any Chaining Lightning beams can Chain to it. When Chained to, the arrows release another Lightning burst.
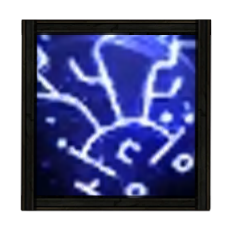 Voltaic Mark Marks a target, making them more susceptible to being Shocked. When the Marked target dies, a Lightning nova erupts from their corpse. This nova does not use your Weapon Damage, and instead uses its own base Attack Damage.
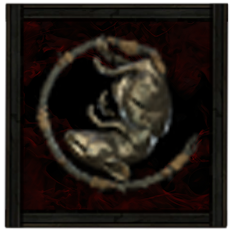
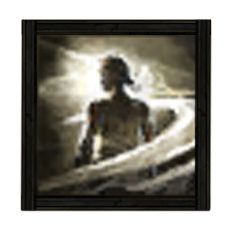 Wind Dancer Grants a buff that gives you more Evasion per stage. Being Hit by a Melee Attack while you have this buff consumes all stages to damage and Knock Back enemies around you.
|
|
|
|
This Ranger leveling build is designed around Lightning Arrow's and Lightning Rod's ability to burst down bosses and fast clear mobs. Make sure to spam Lightning Rod first before you shoot Lightning Arrows to completely benefit from the lightning burst procs.
| Date | Changes Made |
|---|---|
| 09/1/2025 | ・ Lightning Ranger Build updated for Act 3. |
| 08/31/2025 | ・ Lightning Ranger Build updated for Act 2. |
| 08/30/2025 | ・ Lightning Ranger Build updated for Patch 0.3.0. |
| 03/28/2025 | ・ Lightning Ranger Build Created. |
Lightning Ranger Equipment
※ The affixes shown below are arranged based on descending priority.
| Gear | Affixes |
|---|---|
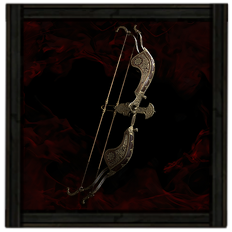 Dualstring Bow Dualstring Bow Dualstring Bow Stats:
Damage - 19-35 Critical Chance - 5.00% Attacks Per Second - 1.15 Requirements: Level - 28 Dexterity - 52 Implicit Skill: +50% Surpassing Chance to Fire an Additional Arrow |
・Increased Elemental Damage
・Add Physical Damage ・Add Lightning Damage ・Increased Attack Speed ・Level to All Projectile Skills |
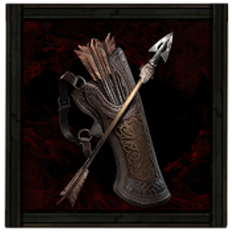 Broadhead Quiver Broadhead Quiver Broadhead Quiver Requirements:
None Implicit Skill: Adds 1 to 3 Physical Damage to Attacks |
・Increased Critical Hit Chance
・Add Physical Damage ・Add Lightning Damage ・Increased Damage With Bow Skills |
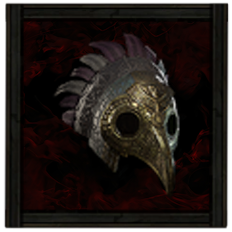 Tribal Mask Tribal Mask Tribal Mask Stats:
Evasion - 66 Energy Shield - 28 Requirements: Level - 33 Dexterity - 27 Intelligence - 27 |
・Evasion Rating
・Increased Energy Shield ・Any Elemental Resistance |
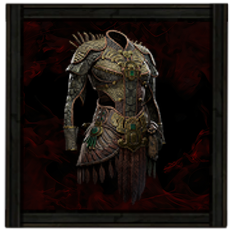 Serpentscale Coat Serpentscale Coat Serpentscale Coat Stats:
Evasion - 198 Requirements: Level - 36 Dexterity - 59 |
・Evasion Rating
・Maximum Life ・Dexterity ・Any Elemental Resistance |
 Spined Bracers Spined Bracers Spined Bracers Stats:
Evasion - 60 Requirements: Level - 33 Dexterity - 42 |
・Add Physical Damage
・Add Lightning Damage ・Increased Attack Speed ・Any Elemental Resistance |
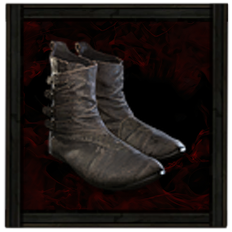 Frayed Shoes Frayed Shoes Frayed Shoes Stats:
Evasion - 13 Energy Shield - 9 Requirements: Level - 5 |
・Increased Movement Speed
・Increased Evasion and Energy Shield ・Dexterity ・Any Elemental Resistance |
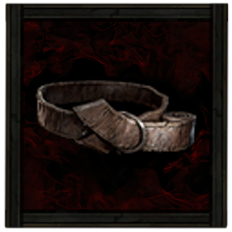 Rawhide Belt Rawhide Belt Rawhide Belt Requirements:
None Implicit:20-30% increased Life Recovery from Flasks |
・Flask Health Recovery Rate
・Flask Mana Recovery Rate ・Reduced Flask Charges Used ・Any Elemental Resistance |
 Jade Amulet Jade Amulet Jade Amulet Requirements:
Level - 8 Implicit:+10-15 to Dexterity |
・Dexterity
・All Attributes ・Maximum Life ・Maximum Mana ・Any Elemental Resistance |
 Iron Ring Iron Ring Iron Ring Requirements:
None Implicit:Adds 1 to 4 Physical Damage to Attacks |
・Add Lightning Damage
・Dexterity ・Increased Rarity of Items Found ・Any Elemental Resistance |
|
Iron Ring Iron Ring Requirements:
None Implicit:Adds 1 to 4 Physical Damage to Attacks |
・Add Lightning Damage
・Dexterity ・Increased Rarity of Items Found ・Any Elemental Resistance |
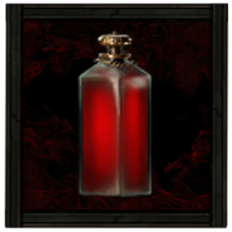 Colossal Life Flask Colossal Life Flask Colossal Life Flask Stats:
Flask Type - Life Recovered Life - 450 Charge Per Use - 10 Total Charges - 75 Duration - 4 sec. |
・Gain Charges per Second
・Increased Amount Recovered |
 Colossal Mana Flask Colossal Mana Flask Colossal Mana Flask Stats:
Flask Type - Mana Recovered Mana - 165 Charge Per Use - 10 Total Charges - 75 Duration - 2.5 sec. |
・Gain Charges per Second
・Increased Amount Recovered |
Weapons
During the Act 1, try to get a solid Recurve Bow with additional modifiers that increase Physical and Lightning Damage. Prioritize having Physical Damage modifiers as Lightning Arrow and Lightning Rod heavily scale off of them.
As you progress through Acts 2 and 3, you will mainly be using the Dualstring Bow with the same modifiers so that all of your Bow attacks will receive an additional projectile.
Armor and Accessories
The Ranger's main survivability revolves around heavy use of Evasion, so prioritize armor pieces that increase Evasion Rating. Additionally, use Energy Shield as a means to increase survivability in the chance you do get hit. For the modifiers, take Maximum Life and try to cap 75% on Elemental Resistances if possible.
However, always prioritize boots with higher Movement Speed modifiers. Not only will this help you traverse the early acts better, but also increase your chances of evading enemy attacks!
Generally, the build will use Iron Rings for its increase to Physical Damage, further stacking the build's damage capabilities with Lightning Arrow and Lightning Rod. However, if you are still lacking the necessary Elemental Resistances, opt to equip either the Ruby, Sapphire, or Topaz Rings!
As you are using Evasion as a means of survival, having a Jade Amulet to further increase Dexterity for higher evasion rating to achieve better survivability!
| List of Rings | List of Amulets |
| List of Armors | |
Belts and Charms
 Sapphire Charm Sapphire Charm |
・Increased Duration
・Increased Charges ・Gain Charges Per Second |
|---|---|
 Topaz Charm Topaz Charm |
・Increased Duration
・Increased Charges ・Gain Charges Per Second |
 Antidote Charm Antidote Charm |
・Increased Duration
・Increased Charges ・Gain Charges Per Second |
The belt you will be using up until Act 3 can be acquired very early on in Act 1, and that is the Linen Belt. As this build consumes a significant amount of Mana, having increased mana regeneration from your flasks will go a long way!
We recommend equipping the Sapphire Charm to help you combat the cold attacks of Count Geonor at the end of the Act 1. Just make sure to keep dodging his attacks since they can still take a chunk of your health even with the resistance Charm equipped.
For Act 2, your main problem would be Jamanra, the Risen King so make sure to equip the Topaz Charm to help mitigate his attacks. Lastly, equip an Antidote Charm when you reach Act 3 since a lot of the bosses in this Act can deal large amounts of poison damage.
| List of Belts | List of Charms |
Runes and Soul Cores
| Equipment | Sockets |
|---|---|
| Weapon | |
| Armor |
Naturally, the best rune for slotting into your weapon would be the Storm Rune, allowing the build to further scale the core skills with Lightning Damage. As for armor runes, use the elemental runes to attempt capping out your elemental resistances!
| List of Runes | List of Soul Cores |
Lightning Ranger Skills
※ The Support Gems' priority are arranged in a descending order. The first one being the most important and the last being the least crucial.
| Skill | Support Gems |
|---|---|
|
Lightning Arrow Lightning Arrow Fires a charged arrow at the target. On hitting an enemy or wall, the arrow will fire Chaining Lightning beams at nearby enemies.
|
Lightning Attunement Supports attacks, causing them to gain Lightning Damage but deal less Cold and Fire Damage.
Rapid Attacks II Supports Attacks, causing them to Attack faster.
Chain II Supports Projectile skills and any other skills that Chain, causing them to Chain additional times.
|
|
Lightning Rod Lightning Rod Fire an arrow that drops from above, creating a Lightning burst. The arrow remains in the ground, and any Chaining Lightning beams can Chain to it. When Chained to, the arrows release another Lightning burst.
|
Concentrated Area Supports any skill with an area of effect, causing that area to be smaller but any area damage it deals to be higher.
Lightning Attunement Supports attacks, causing them to gain Lightning Damage but deal less Cold and Fire Damage.
Elemental Armament II Supports Attacks, causing them to deal more Elemental damage.
|
|
Voltaic Mark Voltaic Mark Marks a target, making them more susceptible to being Shocked. When the Marked target dies, a Lightning nova erupts from their corpse. This nova does not use your Weapon Damage, and instead uses its own base Attack Damage.
|
Magnified Area I Supports any skill with an area of effect, making it larger.
Neural Overload Supports any skill that hits enemies. Nearby enemies are marked when they are Primed for Electrocution, and hitting a marked enemy with a supported skill will Electrocute them.
|
|
Barrage Barrage Ready a volley of arrows or spears, Empowering your next Bow or Projectile Spear Attack to repeat multiple times. Consumes your Frenzy Charges on use to add additional repeats.
|
Second Wind I Supports skills with cooldowns, giving them extra uses of that cooldown. Cannot support instant or triggered skills, or modify the skills of minions.
Cooldown Recovery I Supports skills with Cooldowns, increasing the rate at which those Cooldowns Recover. Cannot modify the skills of minions.
|
|
Herald of Thunder Herald of Thunder While active, killing Shocked enemies with Attack damage, will cause subsequent Attack hits to release lightning bolts which deals Attack damage to all surrounding enemies.
|
Concentrated Area Supports any skill with an area of effect, causing that area to be smaller but any area damage it deals to be higher.
Lightning Attunement Supports attacks, causing them to gain Lightning Damage but deal less Cold and Fire Damage.
Elemental Focus Supports any skill that hits enemies, causing it to deal more Elemental Damage but be unable to inflict Elemental Ailments.
|
This Ranger leveling build's foundation skills are Lightning Arrow alongside Lightning Rod for mobbing and Stormcaller Arrow for melting bosses. Make sure to activate Barrage before you use any of your skills to instantly double-cast them.
Furthermore, use Voltaic Mark against tough enemies such as elites and Bosses to help you easily proc Electrocution for a huge opening to burst down all your skills.
Lastly, equip Herald of Thunder for an additional damage boost and help you deal more Lightning AoE damage with your skills.
Lightning Ranger Passive Tree
Passive Tree Progression

The leveling passive tree for the Ranger focuses on providing Projectile Damage, Lightning Damage, and Movement Speed to help you progress through the campaign as fast as possible. For your first few passives, make your way to Clean Shot for additional damage then quickly rush to get Eagle Eye and Blur to help with your survivability.
As you stack up on Dexterity and the occasional Intelligence investment, head straight for Primal Sundering, Surging Currents, Catalysis, and Coming Calamity respectively to to further boost your damage output. After settling your damage, grab Escape Velocity for both mobility and survivability.
Lastly, get Frazzled for better mana regeneration and Acceleration for the movement speed and to help you cast your skills faster.
Passive Skill Tree Guide and List of Passives
Ascendancy Options
 Deadeye Deadeye
|
• Provides a good balance of speed, survivability, and damage. Perfect for new and returning players. |
As of Patch 0.3, we recommend choosing the Deadeye Ascendancy and obtaining the Tailwind Ascendancy node to increase your clear speed and reach endgame faster.
You have the option to transition to a different Ascendancy at a later stage of the game if you wish to switch to a different build once you reach the endgame.
Build Progression
| Jump to an Act! | ||
|---|---|---|
| Act 1 | Act 2 | Act 3 |
Act 1 Progression
To progress through Act 1 and beat Count Geonor using the Lightning Ranger leveling build, follow these steps:
| # | Steps |
|---|---|
| 1 | After beating the
|
| 2 | Head for the Mysterious Campsite at Clearfell to get an extra Level 1
|
| 3 | |
| 4 | Defeat
|
| 5 | Find and defeat
Note: Make sure to loot the Witch Hut to get Medium Flasks. |
| 6 | Defeat
|
| 7 | Progress to The Grim Tangle and defeat
|
| 8 | Look for the Haunted Treasure Inside the Tomb of the Consort and defeat the rare enemy to acquire a Level 1 Uncut Support Gem and slot in
Note: Once you find a Level 3 Uncut Skill Gem, use it to equip |
| 9 | Defeat
|
| 10 | Search and complete your first Ritual in the same area to get a Level 4 Uncut Support Gem and use this to upgrade your
|
| 11 | Start looking for the Dryadic Ritual in the same area to get an extra Level 1 Uncut Support Gem (to be used later).
|
| 12 | Defeat the
|
| 13 | Complete The Lost Lute at the Ogham Farmlands to obtain a Book of Specialisation for more passive points.
|
| 14 | Search for the Crop Circle in the same area to defeat
|
| 15 | Proceed to Ogham Village and defeat
Note: Use the Uncut Skill Gem to get |
| 16 | Search and defeat the
|
| 17 | Continue and defeat
Note: Make sure you have Medium Flasks since this boss fight has 2 Phases so you will be spending a good amount of time learning and surviving the mechanics. |
Act 2 Progression
To progress through Act 2 and beat Jamanra, the Abomination using the Warrior leveling build, follow these steps:
| # | Steps |
|---|---|
| 1 | Complete the Earning Passage quest for an
|
| 2 | Defeat
Note: Although this leveling build does not require any Ascendancy, you can still attempt to finish the Sekhema's Trial to get the Ascenndancy of your choosing. |
| 3 | Clear Mobs in Keth until you get the
|
| 4 | Defeat
|
| 5 | Defeat
|
| 6 | Open the Guarded Sarcophagus for an
|
| 7 | Three Elemental Offering Ring choices: Ruby Ring, Sapphire Ring, and Topaz Ring for flame, cold, and lightning resistance respectively. It is recommended to choose the Topaz Ring to prepare for
|
| 8 | Clear The City of Seven Waters for an Uncut Support Gem 2. You can use this to get
|
| 9 | Destroy the Effigy located in the Shrine of Bones for an
|
| 10 | Clear Mobs in The Bone Pits until you get the
|
| 11 | Complete A Theft of Ivory quest for an
|
| 12 | Place both Relics in the Valley of Titans to complete the Ancient Vows quest. Choose the Sun Clan Relic for more Charm charges gained.
|
| 13 | Complete A Crown of Stone quest for an
|
| 14 | Complete the Tradition's Toll quest to get a
|
| 15 | Defeat the
|
| 16 | Activate the
|
Act 3 Progression
To progress through Act 3 and beat Doryani using the Lightning Mercenary leveling build, follow these steps:
| # | Step by Step Guide to Act 3 Leveling |
|---|---|
| 1 | |
| 2 |
Loot the basket found in the Orok Campfire at Sandswept Marsh to get a
Note: Use this on your Lightning Arrow and use your extra Uncut Support Gem to slot in |
| 3 | |
| 4 |
Complete The Slithering Dead to get the Venom Draught of Clarity for provide you with increased Mana Regeneration. |
| 5 |
Look for the Jungle Grave and interact with the Ravaged Corpse to summon Servi and get a rare Belt. We recommend taking Rawhide Belt for better survivability. |
| 6 |
Defeat
|
| 7 |
Submit the Tribal Vengeance to get a charm. Choose the Antidote Charm for increased defenses against Poison. |
| 8 |
Defeat
|
| 9 |
Use the Paquate's Mechanism to Corrupt gear. We suggest corrupting the
|
| 10 |
Obtain an
|
| 11 |
Offer the Mushrooms in Apex of Filth to obtain
Note: If you find an Uncut Skill Gem Level 11, use this to equip |
| 12 |
Ascendancy: By this time, you can complete the Trial of Chaos to get your third and fourth Ascendancy Point.
┣
┗
|
| 13 |
Use the
|
Lightning Ranger Playstyle
Skill Rotation
For general use, you will adopt a kiting playstyle that mainly uses all your skills to clear hordes of enemies and Bosses. The rotation is as follows:
- Activate Barrage to enhance your next projectile skill.
- Cast Voltaic Mark to buildup Electrocute and stun your enemies.
- Spam Lightning Rod a few times then cast Lightning Arrow to trigger the lightning bursts.
- Rinse and repeat.
Path of Exile 2 (PoE 2) Related Guides

0.4 Best Endgame Builds
| Rank | Build |
|---|---|
 |
|
 |
|
 |
|
 |
0.4 Leveling Builds
All Build Guides
| List of Builds by Class | |||||||||||
|---|---|---|---|---|---|---|---|---|---|---|---|
 Huntress Huntress |
 Mercenary Mercenary |
 Monk Monk |
|||||||||
 Witch Witch |
 Sorceress Sorceress |
 Warrior Warrior |
|||||||||
 Ranger Ranger |
 Druid Druid |
- | |||||||||
| Other Build Guides | 0.3 Leveling Builds | How to Make a Good Build | |||||||||
Ranger Leveling Builds
Herald of Thunder While active, killing Shocked enemies with Attack damage, will cause subsequent Attack hits to release lightning bolts which deals Attack damage to all surrounding enemies.
Barrage Ready a volley of arrows or spears, Empowering your next Bow or Projectile Spear Attack to repeat multiple times. Consumes your Frenzy Charges on use to add additional repeats.
Lightning Arrow Fires a charged arrow at the target. On hitting an enemy or wall, the arrow will fire Chaining Lightning beams at nearby enemies.
Lightning Rod Fire an arrow that drops from above, creating a Lightning burst. The arrow remains in the ground, and any Chaining Lightning beams can Chain to it. When Chained to, the arrows release another Lightning burst.
Stormcaller Arrow Fires an arrow that embeds where it lands for a short duration. At the end of the duration, a Lightning bolt strikes the arrow, disintegrating it and damaging enemies with a high chance to Shock.
Focus: Burst Damage, Lightning, Fast Clear |
|
NEW |
Poisonburst Arrow Fires a virulent arrow that creates a burst of Poison on hit, affecting all enemies in an area.
Vine Arrow Fire an arrow into the air that lands after a short delay, causing a plant to spring up at the impact location. The plants sprouts vines that latch onto nearby enemies, Slowing their movement speed and dealing Chaos Damage over time. The plant can be Poisoned, causing it to deal more damage.
Contagion Afflicts a single enemy with a Debuff that deals Chaos Damage over time. If the enemy dies while affected by contagion, it and all other Chaos Damage over time Debuffs spread to other enemies and refresh their durations. Reanimating or detonating a corpse affected by contagion will cause the Minion or explosion to spread Contagion on hit.
Ghost Dance Periodically Gain Ghost Shrouds. If you are Hit while you have a Ghost Shroud, it is immediately consumed to recover Energy Shield based on your Evasion.
Plague Bearer Stores all Poison Damage you deal. Using the Plague Nova skill unleashes the stored Poison.
Explosive Grenade Fires a bouncing Grenade that unleashes a devastating fiery blast when its fuse expires.
Toxic Growth Leap into the air and fire a volley of arrows which cause toxic pustules to sprout from the ground on impact. The pustules explode after a delay and can be Poisoned, causing them to explode faster and more violently.
Wind Dancer Grants a buff that gives you more Evasion per stage. Being Hit by a Melee Attack while you have this buff consumes all stages to damage and Knock Back enemies around you.
Despair Curses all targets in an area after a short delay, lowering their Chaos Resistance.
Herald of Plague While active, killing a Poisoned enemy spreads its Poison to other nearby enemies, and has a chance to also Hinder them.
Focus: Poison, AoE, Burst, DoT, Fast Clear |
Ranger Endgame Builds
UP |
Poisonburst Arrow Fires a virulent arrow that creates a burst of Poison on hit, affecting all enemies in an area.
Vine Arrow Fire an arrow into the air that lands after a short delay, causing a plant to spring up at the impact location. The plants sprouts vines that latch onto nearby enemies, Slowing their movement speed and dealing Chaos Damage over time. The plant can be Poisoned, causing it to deal more damage.
Ghost Dance Periodically Gain Ghost Shrouds. If you are Hit while you have a Ghost Shroud, it is immediately consumed to recover Energy Shield based on your Evasion.
Toxic Growth Leap into the air and fire a volley of arrows which cause toxic pustules to sprout from the ground on impact. The pustules explode after a delay and can be Poisoned, causing them to explode faster and more violently.
Wind Dancer Grants a buff that gives you more Evasion per stage. Being Hit by a Melee Attack while you have this buff consumes all stages to damage and Knock Back enemies around you.
Herald of Plague While active, killing a Poisoned enemy spreads its Poison to other nearby enemies, and has a chance to also Hinder them.
Eternal Rage While active, you constantly regenerate Rage.
Focus: Mapping, Bossing, DoT, Poison, Chaos Damage |
Explosive Grenade Fires a bouncing Grenade that unleashes a devastating fiery blast when its fuse expires.
Flash Grenade Fires a bouncing Grenade that unleashes a Blinding, Stunning explosion when its fuse expires. This explosion can Blind both Allies and Enemies.
Gas Grenade Fires a bouncing Grenade that causes a burst of Poison gas when its fuse expires, damaging enemies and leaving behind a growing Poison cloud. Burning effects or Detonator skills will cause the cloud to explode in a fiery blast.
Wind Dancer Grants a buff that gives you more Evasion per stage. Being Hit by a Melee Attack while you have this buff consumes all stages to damage and Knock Back enemies around you.
Oil Grenade Fires a bouncing Grenade that bursts in a spray of Oil when the fuse expires or when it impacts an Enemy, dealing minimal damage but covering the ground and nearby enemies in Oil. Oil created this way can be Ignited by Detonator Skills or Ignited Ground.
Voltaic Grenade Fires a bouncing Grenade that discharges an Electrocuting Lightning blasts when its fuse expires
Focus: AoE, Grenades, Burst |
|
Conductivity Curses all targets in an area after a short delay, lowering their Lightning Resistance.
Grim Feast Feeds on corpses to bolster your Energy Shield. While active, enemies and Reviving Minions that die in your Presence have a chance to drop Grim Remnants. Picking up a Grim Remnant grants you Energy Shield which can Overflow maximum Energy Shield.
Herald of Ice While active, Shattering an enemy with an Attack Hit will cause an icy explosion that deals Attack damage to surrounding enemies.
Herald of Thunder While active, killing Shocked enemies with Attack damage, will cause subsequent Attack hits to release lightning bolts which deals Attack damage to all surrounding enemies.
Bonestorm Channel to conjure a swarm of bone spikes in the air, then release to fire at the enemies and explode. Shrapnel Impales enemies Hit, causing subsequent Attack Hits against those targets to deal Extra Damage. Consumes your Power Charge to cause much larger explosions.
Cast on Shock While active, gains Energy when you Shock enemies and triggers socketed spells on reaching maximum Energy.
Lightning Arrow Fires a charged arrow at the target. On hitting an enemy or wall, the arrow will fire Chaining Lightning beams at nearby enemies.
Lightning Rod Fire an arrow that drops from above, creating a Lightning burst. The arrow remains in the ground, and any Chaining Lightning beams can Chain to it. When Chained to, the arrows release another Lightning burst.
Magnetic Salvo Aims skyward and fires energy missiles at lingering arrows or bolts created by other Lightning Attacks in front of you. The missiles explode if they land close to a lingering bolt or arrow, dealing more damage in a larger area but destroying that bolt or arrow in the process.
Wind Dancer Grants a buff that gives you more Evasion per stage. Being Hit by a Melee Attack while you have this buff consumes all stages to damage and Knock Back enemies around you.
Focus: Burst Damage, Lightning, Energy Shield |
|
Hypothermia Curses all targets in an area after a short delay, lowering their Cold Resistance.
Lightning Warp Teleports you inside the target's body, causing it to violently explode. Highlights enemies that can be culled, and can only be used on these enemies or Ball Lightning projectiles. The target is destroyed, and the explosion deals Lightning Damage to surrounding enemies and creates Shocked Ground.
Ball Lightning Fires a slow-moving projectile that repeatedly shoots bolts of lightning at nearby enemies.
Eye of Winter Fires a single Eye Projectile which does not hit enemies. The Eye constantly releases damaging shard Projectiles in a spiral as it flies, plus an extra burst of Shards at the end of its flight. If the Eye passes over an Elemental ground surface, it will take on that surface effect, applying it to nearby enemies and causing shards to deal more damage of the corresponding type.
Ghost Dance Periodically Gain Ghost Shrouds. If you are Hit while you have a Ghost Shroud, it is immediately consumed to recover Energy Shield based on your Evasion.
Grim Feast Feeds on corpses to bolster your Energy Shield. While active, enemies and Reviving Minions that die in your Presence have a chance to drop Grim Remnants. Picking up a Grim Remnant grants you Energy Shield which can Overflow maximum Energy Shield.
Herald of Ice While active, Shattering an enemy with an Attack Hit will cause an icy explosion that deals Attack damage to surrounding enemies.
Herald of Thunder While active, killing Shocked enemies with Attack damage, will cause subsequent Attack hits to release lightning bolts which deals Attack damage to all surrounding enemies.
Wind Dancer Grants a buff that gives you more Evasion per stage. Being Hit by a Melee Attack while you have this buff consumes all stages to damage and Knock Back enemies around you.
Cast on Freeze While active, gains Energy when you Freeze enemies and triggers socketed spells on reaching maximum Energy.
Blink Replaces your dodge roll with a short-cooldown Spell that allows you to tunnel through space, instantly reappearing a medium distance away.
Alchemist's Boon While active, grants you Flask Charges passively and causes Life and Mana recovery from your Flasks to also apply to Allies in your presence.
Shattering Concoction X Added Cold Damage;+7% to Critical Hit Chance;Consumes 5 Charges from your Mana Flask;Inflicts Cold Exposure on Hit;Explosion radius is 1.5 metres
Focus: Burst Damage, Cold, Concoction |
|
Herald of Ice While active, Shattering an enemy with an Attack Hit will cause an icy explosion that deals Attack damage to surrounding enemies.
Combat Frenzy While active, grants you a Frenzy Charge when you Freeze, Electrocute, or Pin an enemy. This can only occur once every few seconds.
Wind Dancer Grants a buff that gives you more Evasion per stage. Being Hit by a Melee Attack while you have this buff consumes all stages to damage and Knock Back enemies around you.
Cast on Critical While active, gains energy when you Critically Hit enemies and triggers socketed spells on reaching maximum energy.
Disengage Jump back as you rupture the earth in front of you with spearpoints, damaging enemies. Consumes the Parried Debuff on Hitting enemies to release a shockwave and grant you a Frenzy Charge. This skill can be used while using other skills, and causes Strikes and Projectiles to miss you while jumping. This skill cannot be Ancestrally Boosted.
Glacial Lance Throw a single lance that leaves icy fragments in its wake. The fragments Chill nearby enemies. Consumes a Frenzy Charge if possible to cause the ice fragments created by the first Projectile to explode outwards after a short duration, peppering enemies with shrapnel.
Focus: Mobbing, Single Target, DPS, AoE, Bossing |
|
Ghost Dance Periodically Gain Ghost Shrouds. If you are Hit while you have a Ghost Shroud, it is immediately consumed to recover Energy Shield based on your Evasion.
Barrage Ready a volley of arrows or spears, Empowering your next Bow or Projectile Spear Attack to repeat multiple times. Consumes your Frenzy Charges on use to add additional repeats.
Snipe Channel to charge up your bow before releasing a powerful shot. Releasing the moment you fully charge causes the arrow to explode on impact for a guaranteed Critical Hit.
Sniper's Mark Marks a target. The next Critical Hit the target receives consumes the Mark to deal extra damage and grant you a Frenzy Charge.
Spiral Volley Loads your Bow with a volley of enchanted arrows and fires them in a circle as you spin forward, firing directly at targets if possible. Consumes Frenzy Charges to cause the arrows to deal more damage and Chain to other targets. Each target can only be Hit once.
Wind Dancer Grants a buff that gives you more Evasion per stage. Being Hit by a Melee Attack while you have this buff consumes all stages to damage and Knock Back enemies around you.
Bloodhound's Mark Mark a target, making them suffer Heavy Stun build up from Blood Loss. If they suffer enough Blood Loss while Marked, the Mark is consumed and they will release an explosion of blood when killed or Heavy Stunned.The duration doesn't tick while the target is suffering Blood Loss.
Herald of Blood While active, killing an enemy with Blood Loss will cause a bloody explosion that deals Physical Attack damage to surrounding enemies based off the life of the exploded enemy, destroying their Corpse in the process. The explosion also has a chance to aggravate Bleeding.
Focus: Bleed, Burst, Charges |
|
Herald of Thunder While active, killing Shocked enemies with Attack damage, will cause subsequent Attack hits to release lightning bolts which deals Attack damage to all surrounding enemies.
Lightning Arrow Fires a charged arrow at the target. On hitting an enemy or wall, the arrow will fire Chaining Lightning beams at nearby enemies.
Lightning Rod Fire an arrow that drops from above, creating a Lightning burst. The arrow remains in the ground, and any Chaining Lightning beams can Chain to it. When Chained to, the arrows release another Lightning burst.
Electrocuting Arrow Leap forward into the air and fire downward. Hitting an enemy will attach an Electrocuting Rod to them, causing all incoming Lightning damage to build up Electrocution. This rod is removed when the enemy is next Electrocuted.
Voltaic Mark Marks a target, making them more susceptible to being Shocked. When the Marked target dies, a Lightning nova erupts from their corpse. This nova does not use your Weapon Damage, and instead uses its own base Attack Damage.
Wind Dancer Grants a buff that gives you more Evasion per stage. Being Hit by a Melee Attack while you have this buff consumes all stages to damage and Knock Back enemies around you.
Mirage Archer While active, dodge rolling will create a Mirage that uses socketed ranged Attacks for a short duration, then vanish. You cannot create another Mirage while one exists, or for a short time after one vanishes. Dodge rolling while you are unable to create a new Mirage will restart this timer.
Mirage Deadeye
Focus: Lightning, Burst, Mobile, Mobbing, Bossing |
Ranger Class and Ascendancy Guides
| Base Class | |
|---|---|
| Ascendancies | |
Comment
Author

PoE 2 0.3 Ranger Leveling Build - Lightning Arrow
Rankings
- We could not find the message board you were looking for.

Gaming News

![The Seven Deadly Sins: Origin [First Impressions] | A Promising Start](https://img.game8.co/4440581/584e0bfb87908f12c4eab6e846eb1afd.png/show)

![Monster Hunter Stories 3 Review [First Impressions] | Simply Rejuvenating](https://img.game8.co/4438641/2a31b7702bd70e78ec8efd24661dacda.jpeg/thumb)
![The Seven Deadly Sins: Origin [First Impressions] | A Promising Start](https://img.game8.co/4440581/584e0bfb87908f12c4eab6e846eb1afd.png/thumb)
Popular Games

Genshin Impact Walkthrough & Guides Wiki
Umamusume: Pretty Derby Walkthrough & Guides Wiki
Pokemon Pokopia Walkthrough & Guides Wiki
Honkai: Star Rail Walkthrough & Guides Wiki
Monster Hunter Stories 3: Twisted Reflection Walkthrough & Guides Wiki
Arknights: Endfield Walkthrough & Guides Wiki
Wuthering Waves Walkthrough & Guides Wiki
Zenless Zone Zero Walkthrough & Guides Wiki
Pokemon TCG Pocket (PTCGP) Strategies & Guides Wiki
Monster Hunter Wilds Walkthrough & Guides Wiki


Recommended Games
Fire Emblem Heroes (FEH) Walkthrough & Guides Wiki
Diablo 4: Vessel of Hatred Walkthrough & Guides Wiki
Cyberpunk 2077: Ultimate Edition Walkthrough & Guides Wiki
Yu-Gi-Oh! Master Duel Walkthrough & Guides Wiki
Super Smash Bros. Ultimate Walkthrough & Guides Wiki
Pokemon Brilliant Diamond and Shining Pearl (BDSP) Walkthrough & Guides Wiki
Elden Ring Shadow of the Erdtree Walkthrough & Guides Wiki
Monster Hunter World Walkthrough & Guides Wiki
The Legend of Zelda: Tears of the Kingdom Walkthrough & Guides Wiki
Persona 3 Reload Walkthrough & Guides Wiki


All rights reserved
© 2010 - 2024 Grinding Gear Games
The copyrights of videos of games used in our content and other intellectual property rights belong to the provider of the game.
The contents we provide on this site were created personally by members of the Game8 editorial department.
We refuse the right to reuse or repost content taken without our permission such as data or images to other sites.