PoE 2 0.3 Witch Build - Reaper Blood Mage
Latest: 0.5.0 Release Date
☆ Fate of the Vaal ▶︎ The Last of the Druids
┗ Bonded Mods | 0.4 Mystery Box
★ Druid: Class Overview | Builds
☆ NEW: Disciple of Varashta Ascendancy!
★ Best Class | Best Builds | Leveling Builds
This is a Reaper Blood Mage Witch endgame build that utilizes Reap, a new weapon skill introduced in Path of Exile 2 (PoE 2)'s The Third Edict Update. Check out the Reap build, including its gear, socketables, skills, and playstyle!
List of Contents
Reaper Blood Mage Build Summary
Mist's Reaper Blood Mage Build
This build showcase is brought to by Mist, crafted for the 0.3 Patch. Check out all of their detailed guides on Path of Exile 2 over at Mist's Youtube and Discord. You can also catch Mist and his community live on Twitch!
The video provides a comprehensive overview of the build, including an explanation of the skills, gear, and new additions made available in patch 0.3 that made this build possible.
Reaper Blood Mage Witch Build
| Build Setup | |
|---|---|
 Reaper Blood Mage |
 Life Remnants 25% chance to spawn a Remnant on killing an enemy;Spawn a Remnant on Critically Hitting a target, no more than once every 2 seconds;Each Remnant grants X Life
 Frost Bomb Creates a pulsing Orb of Frost. Each pulse inflicts Cold Exposure on nearby Enemies. When the Orb's duration ends, it explodes, dealing Cold damage to surrounding Enemies.
 Orb of Storms Creates an Orb of electricity that fires Chaining Lightning bolts at nearby enemies.
 Bonestorm Channel to conjure a swarm of bone spikes in the air, then release to fire at the enemies and explode. Shrapnel Impales enemies Hit, causing subsequent Attack Hits against those targets to deal Extra Damage. Consumes your Power Charge to cause much larger explosions.
 Vulnerability Curses all targets in an area after a short delay, making Hits against them ignore a portion of their Armour.
 Bone Cage Raises a ring of bone spikes around you. The spikes are destroyed when enemies touch them, damaging and Pinning those enemies.
 Cast on Critical While active, gains energy when you Critically Hit enemies and triggers socketed spells on reaching maximum energy.
|
|
|
|
This Reap Blood Mage build is centered around the use of Reaping Staff, which is a new weapon introduced in Patch 0.3. This provides strong mapping capabilities, with the critical weakness debuff being a great bonus that can be utilized against tanky elites and bosses.
| Date | Changes |
|---|---|
| 09-16-2025 | Created Reaper Blood Mage build. |
Reaper Blood Mage Equipment
| Gear | Modifiers |
|---|---|
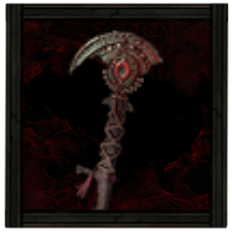 Reaping Staff Reaping Staff Reaping Staff Stats:
Requirements: Level - 38 Intelligence - 57 (Weapon Set 1) |
・% Increased Spell Physical Damage
・+ Level of All Physical Skills ・% Increased Cast Speed ・% Increased Spell Damage per 100 Maximum LIfe ・% Increased Spell Damage |
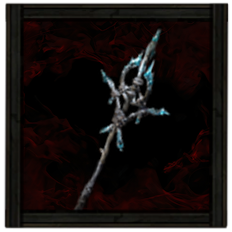 Gelid Staff Gelid Staff Gelid Staff Stats:
Requirements: None (Weapon Set 2) |
・% + Level of All Spell Skills
・Gain % of Damage as Extra Cold Damage ・Gain % of Damage as Extra Lightning Damage ・% Increased Spell Damage ・% Increased Cast Damage |
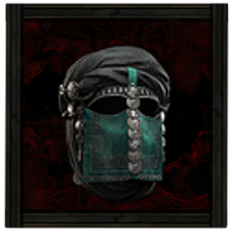 Pariah Mask Pariah Mask Pariah Mask Stats:
Evasion - 103 Energy Shield - 40 Requirements: Level - 54 Dexterity - 42 Intelligence - 42 (Helm) |
・Any Elemental Resistance
・% Increased Evasion and Energy Shield ・+ Maximum Life |
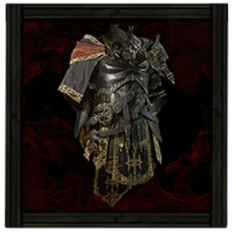 Morior Invictus Grand Regalia Morior Invictus Grand Regalia Morior Invictus Grand Regalia Stats:
Armor - 135 Evasion - 123 Energy Shield - 46 Requirements: Level - 65 Strength - 41 Dexterity - 41 Intelligence - 41 Fixed Modifiers: ・ 200-300% increased Armour, Evasion and Energy Shield ・ 5% Increase to 2 random stat per Socketed Rune or Soul Core (Body Armor) |
・% Increased Armour, Evasion and Energy Shield
・% Increase to 3 random stat per Socketed Rune or Soul Core ・+ Maximum Life per Socket Filled ・Hits Against You Have % Reduced Critical Damage Bonus per Socket Filled ・+ To All Elemental Resistances per Socket Filled |
 Atziri's Acuity Moulded Mitts Atziri's Acuity Moulded Mitts Atziri's Acuity Moulded Mitts Stats:
Armor - 68 Requirements: Level - 33 Strength - 42 Fixed Modifiers: ・ 80-100% increased Armour ・ 30-50% increased Critical Hit Chance ・ +20-30 to Intelligence ・ Leech from Critical Hits is instant (Gloves) |
・% Increased Armour
・% Increased Critical Hit Chance ・+ to Intelligence ・Leech from Critical Hits is Instant |
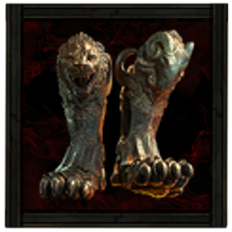 Trampletoe Trimmed Greaves Trampletoe Trimmed Greaves Trampletoe Trimmed Greaves Stats:
Armor - 87 Requirements: Level - 27 Strength - 38 Fixed Modifiers: ・ 15% increased Movement Speed ・ 50-100% increased Armour ・ 50% increased Attribute Requirements ・ Deal 30% of Overkill damage to enemies within 2 metres of the enemy killed (Boots) |
・+Maximum Life
・Any Elemental Resistance ・15% increased Movement Speed ・% increased Armour ・% increased Attribute Requirements ・Deal % of Overkill damage to enemies within 2 metres of the enemy killed |
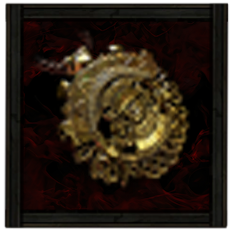 Gold Amulet Gold Amulet Gold Amulet Requirements:
Level - 35 Implicit:12-20% increased Rarity of Items found (Amulet) |
・% Increased Spell Damage
・+ Level of All Spell Skills ・% Increased Critical Damage Bonus ・% Increased Global Defences ・Remnants Have % Increased Effect Annointment: Cooked ・60% Increased Critical Damage Bonus ・25% Reduced Global Defences |
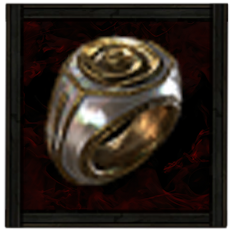 Pearl Ring Pearl Ring Pearl Ring Requirements:
Level - 32 Implicit:7-10% increased Cast Speed (Ring 1) |
・% Increased Cast Speed
・Remnants Have % Increased Effect ・+ Maximum Life ・Any Elemental Resistance ・Leech % of Physical Damage as Mana |
|
Pearl Ring Pearl Ring Requirements:
Level - 32 Implicit:7-10% increased Cast Speed (Ring 2) |
・% Increased Cast Speed
・Evasion Rating ・Maximum Life ・Any Elemental Resistance ・Remnants Have % Increased Effect |
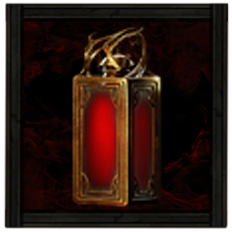 Ultimate Life Flask Ultimate Life Flask Ultimate Life Flask Stats:
Flask Type - Life Recovered Life - 920 Charge Per Use - 10 Total Charges - 75 Duration - 3 sec. (Life Flask) |
・% Increased Amount Recovered
・% Chance To Gain a Charge When You Kill an Enemy |
 Transcendent Mana Flask Transcendent Mana Flask Transcendent Mana Flask Stats:
Flask Type - Mana Recovered Mana - 285 Charge Per Use - 10 Total Charges - 75 Duration - 3.5 sec. (Mana Flask) |
・Gain Charges per Second
・% Increase Amount Recovered |
Weapons
Your main weapon will be the Two-Handed Reaping Staff, which grants the Reap skill. Prioritize leveling up all physical skills by seven levels, as this will determine whether you can one-shot mobs during mapping. Although the Reaping Staff is a physical-based weapon, Reap is still tagged as a spell, so try to increase your cast speed as well.
Lastly, the Reaping Staff boasts an excellent modifier that increases spell damage by a percentage for spells that cost life. This synergizes well with the Blood Mage mechanic of using life as a resource. However, keep in mind that acquiring one with this modifier can be expensive.
Our second staff will mainly be used for bossing and casting our two elemental spells: Frost Bomb and Orb of Storms. Make sure these skills are set to Weapon Set II so they can take full advantage of the staff.
Armor and Accessories
For your armor and accessories, aim for a good balance of elemental resistances and maximum life for offense and defense.
The Morior Invictus Grand Regalia is unique body armor that grants more bonuses the more runes you socket into it. You can also use a Vaal Orb to corrupt the armor and add an additional socket. Try to get Break % Increased armor on your gloves as well, via corruption.
Lastly, try equipping accessories with the Remnants have % increased effect modifier, as this build relies on the Life Remnants Ascendancy skill to increase your maximum life.
| List of Armors | List of Accessories |
Runes and Soul Cores
| Equipment | Sockets |
|---|---|
| Weapon | |
| Armor |
With Reap being purely physical, socket two Greater Iron Runes to your Reaping Staff for more damage.
Socket Fenumus' Rune of Spinning on your gloves for faster cast speed, and socket your body armor with Soul Core of Citaqualotl to boost all three elemental resistances. Fill any additional sockets on the rest of your gear with Greater Body Runes to increase your maximum life.
As an alternative option, you may use any of the three elemental runes on your helmet or boots if you encounter issues reaching the elemental resistance cap.
| List of Runes | List of Soul Cores |
Belts and Charms
| Belt Modifiers | |||||
|---|---|---|---|---|---|
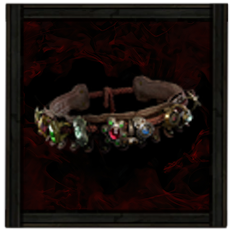 Ingenuity Utility Belt Ingenuity Utility Belt Ingenuity Utility Belt Requirements:
Level - 55 Implicit:1-2 Charm slots;20% of Flask Recovery applied Instantly Fixed Modifiers: ・ 40-80% increased bonuses gained from Equipped Rings |
・2 Charm slots
・20% of Flask Recovery applied Instantly ・% Increased Charm Charges Gained ・% increased bonuses gained from Equipped Left Ring ・% increased bonuses gained from Equipped Right Ring |
||||
| Charm Options | |||||
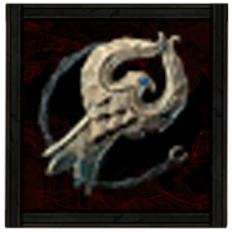 Thawing Charm Thawing Charm |
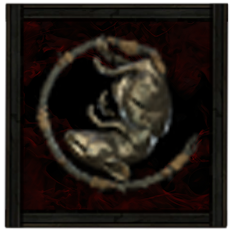
 Silver Charm Silver Charm |
 Antidote Charm Antidote Charm |
|||
The Ingenuity utility belt is used to enhance the effects of your rings and increase your charm slots. It is important to ensure that the correct modifiers are on your rings to maximize the benefits of this belt.
Your charms will primarily be used to avoid being stunned or frozen, allowing you to maintain mobility during combat.
| List of Belts | List of Charms |
Reaper Blood Mage Skills
All Active and Persistent Skills
| Skill | Support Gems |
|---|---|
|
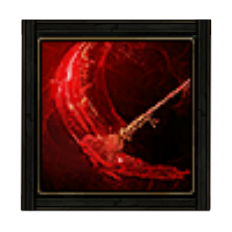
Reap Reap |
Extraction Supports Spell skills . Using supported Spells will cause you to Sacrifice a portion of your Life on use, gaining extra Chaos Damage in exchange. Does not support persistent Persistent skills, Minion skills, or Triggered skills.
Concentrated Area Supports any skill with an area of effect, causing that area to be smaller but any area damage it deals to be higher.
Rapid Casting II Supports Spells, causing them to cast faster.
Deliberation Supports skills that can be used while moving, causing you to move slower while using them, but granting more damage in exchange.
Heft Supports Skills which deal damage, increasing the maximum Physical Damage of their Hits.
|
|
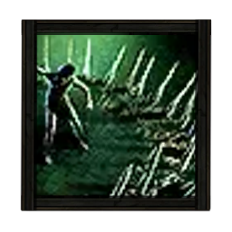
Bonestorm Bonestorm Channel to conjure a swarm of bone spikes in the air, then release to fire at the enemies and explode. Shrapnel Impales enemies Hit, causing subsequent Attack Hits against those targets to deal Extra Damage. Consumes your Power Charge to cause much larger explosions.
|
Uruk's Smelting Supports any skill, causing Armour Break it inflicts to be stronger. Fully Breaking Armour with Supported Skills permanently increases the Physical Damage taken by those affected, up to a cap.
Considered Casting Supports Spell skills that Hit Enemies, boosting Damage at the cost of Cast Speed.
Zenith I Supports Spell Skills. Supported Skills deal more damage while you are above 90% of your Maximum Mana. Does not support Skills used by Minions.
Deliberation Supports skills that can be used while moving, causing you to move slower while using them, but granting more damage in exchange.
Extraction Supports Spell skills . Using supported Spells will cause you to Sacrifice a portion of your Life on use, gaining extra Chaos Damage in exchange. Does not support persistent Persistent skills, Minion skills, or Triggered skills.
|
|
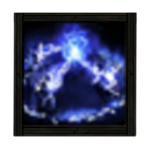
Bone Cage Bone Cage Raises a ring of bone spikes around you. The spikes are destroyed when enemies touch them, damaging and Pinning those enemies.
|
Astral Projection Supports Nova skills, causing those skills to take place at a targeted location when used instead of around you.
Spell Echo Supports Spells that affect an area around you or a target location. Supported Spells echo, causing their effects to happen again after a short delay. Cannot support Channelling skills or Remote skills.
Rapid Casting II Supports Spells, causing them to cast faster.
Lifetap Supports any skill, turning a portion of its Mana cost into a Life cost. Does not support skills which reserve spirit.
Efficiency II Supports any skill, making it cost less to use. Cannot support skills which reserve Spirit.
|
|
Cast on Critical Cast on Critical While active, gains energy when you Critically Hit enemies and triggers socketed spells on reaching maximum energy.
|
Detonate Dead Causes a Corpse to violently explode, damaging surrounding enemies.
Xoph's Pyre Supports Skills that can cause Damaging Hits, granting extra Chaos damage and causing Chaos damage to Contribute to Ignites.
Efficiency II Supports any skill, making it cost less to use. Cannot support skills which reserve Spirit.
Lifetap Supports any skill, turning a portion of its Mana cost into a Life cost. Does not support skills which reserve spirit.
Boundless Energy II Supports Meta Skills. Supported Skills generate Energy significantly faster.
|
|
Orb of Storms Orb of Storms Creates an Orb of electricity that fires Chaining Lightning bolts at nearby enemies.
|
Esh's Radiance Supports Skills that can cause Damaging Hits, granting extra Chaos damage and causing Chaos damage to Contribute to Shock.
Magnified Area II Supports any skill with an area of effect, making it larger at the cost of damage.
Efficiency II Supports any skill, making it cost less to use. Cannot support skills which reserve Spirit.
Neural Overload Supports any skill that hits enemies. Nearby enemies are marked when they are Primed for Electrocution, and hitting a marked enemy with a supported skill will Electrocute them.
|
|
Frost Bomb Frost Bomb Creates a pulsing Orb of Frost. Each pulse inflicts Cold Exposure on nearby Enemies. When the Orb's duration ends, it explodes, dealing Cold damage to surrounding Enemies.
|
Tul's Stillness Supports Skills that can cause Damaging Hits, granting extra Chaos damage and causing Chaos damage to Contribute to Freeze Buildup.
Considered Casting Supports Spell skills that Hit Enemies, boosting Damage at the cost of Cast Speed.
Zenith I Supports Spell Skills. Supported Skills deal more damage while you are above 90% of your Maximum Mana. Does not support Skills used by Minions.
Harmonic Remnants II Supports Skills which create Remnants, allowing those Remnants to be collected from further away, with a chance to create an additional Remnant.
Freeze Supports any skill that hits enemies, makit it more effective at Freezing enemies.
|
|
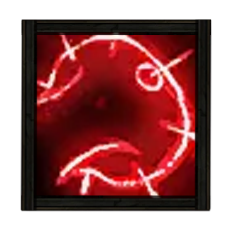
Vulnerability Vulnerability Curses all targets in an area after a short delay, making Hits against them ignore a portion of their Armour.
|
Heightened Curse Supports curse skills, magnifying their power.
Focused Curse Supports Curse skills, causing them to Curse enemies more quickly after being cast.
Cursed Ground Supports Curse skills. supported skills no longer have an activation delay, instead creating areas which Curse enemies so long as they are within them.
Efficiency II Supports any skill, making it cost less to use. Cannot support skills which reserve Spirit.
|
|
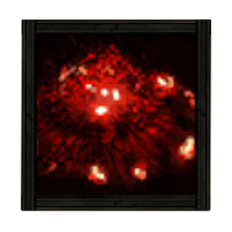
Life Remnants Life Remnants 25% chance to spawn a Remnant on killing an enemy;Spawn a Remnant on Critically Hitting a target, no more than once every 2 seconds;Each Remnant grants X Life
|
Harmonic Remnants II Supports Skills which create Remnants, allowing those Remnants to be collected from further away, with a chance to create an additional Remnant.
Remnant Potency III Supports Skills which create Remnants, making those Remnants more powerful, but delaying their effect.
|
In most mapping situations, Reap is our main damaging skill, capable of clearing hordes of enemies with a single cast. With Trampletoes equipped and Detonate Dead active, we can take out enemies outside of Reap's range.
The rest of our skills are primarily used for bossing and dealing with ranged enemies that are too risky to approach. Bone Cage is great for dealing with ranged targets, as it can deal decent damage from a distance, while Bonestorm can be used to quickly take down key targets provided that there is an opening to channel it to full.
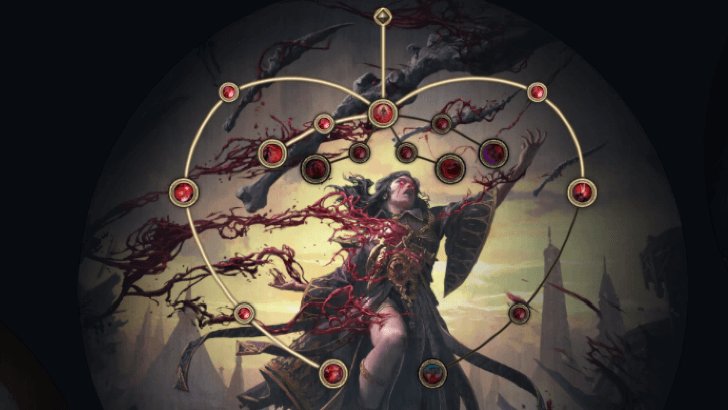
Reaper Blood Mage Passive Tree
Passive Tree Progression
| Ascendency Passive Nodes | |||
|---|---|---|---|
 |
|||
| Passive Nodes | |||
| 1. |  |
2. |  |
| 3. |  |
4. |  Flow like Water and Moment of Truth Flow like Water and Moment of Truth |
| 5. |  Deadly Force and Stylebender Deadly Force and Stylebender |
6. |  |
| 7. |  Careful Assasin and Controlling Magic Careful Assasin and Controlling Magic |
4. | - |
| Screenshots taken from Path of Building | |||
Our passive tree focuses purely on offense, stacking critical stats, which is something Blood Mages excel in. Abilities such as Critical Exploit and Throatseeker contribute to our critical chance and damage, setting the basis for explosive critical damage.
We will spend the rest of our points on passive abilities that increase spell damage and cast speed. These include Raw Destruction, Potent Incantation, and Flow Like Water.
Passive Skill Tree Guide and List of Passives
Jewels
Note: The modifiers listed are arranged according to priority.
 Against the Darkness Against the Darkness |
・Small Passives in the Radius Also Grants X to Maximum Life
・ Notable Passives in the Radius Also Grants % of Damage as Extra Chaos Damage |
|---|---|
 From Nothing From Nothing |
・Pasives in Radius of Chaos Inoculation can be Allocated
・Pain Attunement |
 Heart of the Well Heart of the Well |
・% Increased Critical Spell Damage Bonus
・% of Damage Taken Recouped as Life ・Gain % of Damage as Extra Chaos Damage ・% Increased Cooldown Recovery Rate |
Our build requires three unique diamond jewels: Against the Darkness, From Nothing, and Heart of the Well. These jewels increase our damage output via spell damage, life, increased criticals, as well as some extra chaos damage.
The most notable item is the From Nothing Diamond Jewel, which grants the passive ability Pain Attunement. Keeping our health pool low increases our critical damage by 30% with Pain Attunement, further increasing our DPS.
Reaper Blood Mage Playstyle and Skill Rotation
Mobbing Rotation
Thanks to Trampletoes and Detonate Dead triggers when we use Reap, the setup makes mobbing an absolute breeze. The rotation is as follows:
- Cast Reap on the enemy mobs.
- Pick up the Llfe Remnants that spawn from the slain opponents.
- Proceed to the next pack and cast Reap as needed.
Bossing Rotation
Our full range of skills must be utilized when engaging in boss battles to ensure the most optimal damage output. The rotation is as follows:
- Cast Vulnerability to lower target's armor.
- Cast Orb of Storms for some damage.
- Cast Frost Bomb for damage, and to apply elemental exposure.
- Cast Bone Cage until you see an opening.
- Channel Bonestorm and cast when at maxmium charge.
Path of Exile 2 Related Guides

0.4 Best Endgame Builds
| Rank | Build |
|---|---|
 |
|
 |
|
 |
|
 |
0.4 Leveling Builds
All Build Guides
| List of Builds by Class | |||||||||||
|---|---|---|---|---|---|---|---|---|---|---|---|
 Huntress Huntress |
 Mercenary Mercenary |
 Monk Monk |
|||||||||
 Witch Witch |
 Sorceress Sorceress |
 Warrior Warrior |
|||||||||
 Ranger Ranger |
 Druid Druid |
- | |||||||||
| Other Build Guides | 0.3 Leveling Builds | How to Make a Good Build | |||||||||
Author

PoE 2 0.3 Witch Build - Reaper Blood Mage
Rankings
- We could not find the message board you were looking for.

Gaming News

![The Liar Princess and the Blind Prince Review [PC] | Lovely to Look at but Tedious to Play](https://img.game8.co/4442586/8d95f5faf05780f1765ce7e0938bd825.jpeg/show)

![Monster Hunter Stories 3 Review [First Impressions] | Simply Rejuvenating](https://img.game8.co/4438641/2a31b7702bd70e78ec8efd24661dacda.jpeg/thumb)
![The Seven Deadly Sins: Origin Review [First Impressions] | A Promising Start](https://img.game8.co/4440581/584e0bfb87908f12c4eab6e846eb1afd.png/thumb)
Popular Games

Genshin Impact Walkthrough & Guides Wiki
Umamusume: Pretty Derby Walkthrough & Guides Wiki
Pokemon Pokopia Walkthrough & Guides Wiki
Honkai: Star Rail Walkthrough & Guides Wiki
Monster Hunter Stories 3: Twisted Reflection Walkthrough & Guides Wiki
Arknights: Endfield Walkthrough & Guides Wiki
Wuthering Waves Walkthrough & Guides Wiki
Zenless Zone Zero Walkthrough & Guides Wiki
Pokemon TCG Pocket (PTCGP) Strategies & Guides Wiki
Monster Hunter Wilds Walkthrough & Guides Wiki


Recommended Games
Fire Emblem Heroes (FEH) Walkthrough & Guides Wiki
Diablo 4: Vessel of Hatred Walkthrough & Guides Wiki
Cyberpunk 2077: Ultimate Edition Walkthrough & Guides Wiki
Yu-Gi-Oh! Master Duel Walkthrough & Guides Wiki
Super Smash Bros. Ultimate Walkthrough & Guides Wiki
Pokemon Brilliant Diamond and Shining Pearl (BDSP) Walkthrough & Guides Wiki
Elden Ring Shadow of the Erdtree Walkthrough & Guides Wiki
Monster Hunter World Walkthrough & Guides Wiki
The Legend of Zelda: Tears of the Kingdom Walkthrough & Guides Wiki
Persona 3 Reload Walkthrough & Guides Wiki


All rights reserved
© 2010 - 2024 Grinding Gear Games
The copyrights of videos of games used in our content and other intellectual property rights belong to the provider of the game.
The contents we provide on this site were created personally by members of the Game8 editorial department.
We refuse the right to reuse or repost content taken without our permission such as data or images to other sites.
откуда 100 духа?