PoE 2 0.4 Warrior Build - Glacial Warrior Warbringer
Latest: 0.5.0 Release Date
☆ Fate of the Vaal ▶︎ The Last of the Druids
┗ Bonded Mods | 0.4 Mystery Box
★ Druid: Class Overview | Builds
☆ NEW: Disciple of Varashta Ascendancy!
★ Best Class | Best Builds | Leveling Builds
This is a Glacial Warrior Warbringer endgame build for mapping in Path of Exile 2 (PoE 2)'s The Last of the Druids Update. Check out the Glacial Warrior Warbringer endgame build, including its gear, socketables, skills, and playstyle!
 Attention! Attention! |
This 0.4.0 endgame build starts from Level 65 and above. If you want to see a build for leveling, check out our Leveling Builds! |
|---|
List of Contents
Glacial Warrior Warbringer Build Summary
Carnarius's Glacial Warrior Warbringer Build
This is a Glacial Warrior Warbringer build for 0.4.0 created by Carnarius. Make sure to check out Carnarius' Youtube Channel for more builds and content!
You can watch Carnarius stream his gameplay live on Twitch, or join his official Discord for announcements and updates.
Glacial Warrior Warbringer Warrior Build
 Glacial Warrior Warbringer |
 Herald of Ice While active, Shattering an enemy with an Attack Hit will cause an icy explosion that deals Attack damage to surrounding enemies.
 Scavenged Plating Uses fragments of armour scavenged from enemies to bolster your own. Fully Breaking an enemy's Armour grants you a stack of Scavenged Plating for a duration, and you gain Armour and Thorns per stack.
 Leap Slam Jump into the air, damaging and Knocking Back enemies with your mace where you land. Enemies you would land on are pushed out of the way.
 Armour Breaker Strike with a forceful blow, knocking enemies back and weakening their Armour.
 Shield Wall Ram you Shield into the ground, throwing up a semi-circular wall of earth. Enemies can attack the walls and your Slams will instantly destroy them. Each wall segment explodes when destroyed, damaging enemies around it.
 Time of Need Invokes divine blessings, periodically healing you and removing Curses and Elemental Ailments from you.
 Fortifying Cry Perform a Warcry that grants Guard and Triggers Shield Wave when subsequent Shield Attacks deal damage. The Skill's cooldown can be bypassed by expending an Endurance Charge.
|
|
|
|
The Glacial Warrior Warbringer focuses on large area damage made possible by Shield Wall and Herald of Ice, by using the Warbringer's natural ability to break armour to deal more damage and easily clear enemy packs. The build only requires 145 Spirit to keep all your persistent skills active.
Keep in mind that Shield Wall uses three Lineage Gems, making the build a bit expensive but extremely powerful for clearing.
| Date | Changes |
|---|---|
| 01-15-2026 | Created Glacial Warrior Warbringer build for endgame. |
Glacial Warrior Warbringer Equipment
| Gear | Modifiers |
|---|---|
 Tawhoan Greatclub Tawhoan Greatclub Tawhoan Greatclub Stats:
Damage - 113-153 Critical Chance - 5% Attacks Per Second - 1.10 Requirements: Level - 78 Strength - 163 Implicit Skill: Warcries Empower an Additional Attack (Weapon Set 1) |
・Added Physical Damage Damage
・Increased Physical Damage ・+ to Level of All Attack Skills ・Life per Enemy Killed ・Gain % of damage as extra Physical Damage |
 Tawhoan Tower Shield Tawhoan Tower Shield Tawhoan Tower Shield Stats:
Armor - 192 Requirements: Level - 80 Strength - 115 (Weapon Set 1) |
・Added Armour
・Increased Armour ・Strength ・Fire Resistance ・Stun Threshold ・Armour also applies to Chaos Damage Desecrated: ・Armor also Applies to Chaos Damage |
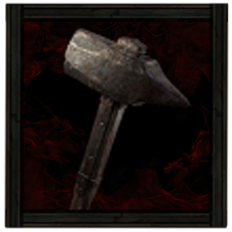 Anvil Maul Anvil Maul Anvil Maul Stats:
Damage - 101-136 Critical Chance - 5% Attacks Per Second - 1.05 Requirements: Level - 67 Strength - 134 Implicit Skill: Crushes Enemies on Hit (Weapon Set 2) |
・Added Physical Damage Damage
・+ to Level of All Melee Skills ・Strength ・Leech Physical Damage as Life ・Gain % of damage as extra Physical Damage ・Increased Damage against Enemies with Fully Broken Armor Desecrated: ・Increased Damage against enemies with Fully Broken Armor |
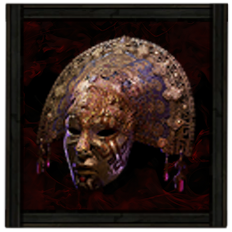 The Vertex Tribal Mask The Vertex Tribal Mask The Vertex Tribal Mask Stats:
Evasion - 66 Energy Shield - 28 Requirements: Level - 33 Dexterity - 27 Intelligence - 27 Fixed Modifiers: ・ 100-150% increased Evasion and Energy Shield ・ 20-30% increased Critical Hit Chance ・ +13-17% to Chaos Resistance ・ Equipment and Skill Gems have 50% reduced Attribute Requirements (Helm) |
・No Attribute Requirements
・Chaos Resistance ・Increased Attributes ・+ to Level of All Skills |
 The Brass Dome Champion Cuirass The Brass Dome Champion Cuirass The Brass Dome Champion Cuirass Stats:
Armor - 335 Requirements: Level - 58 Strength - 92 Fixed Modifiers: ・ 400-500% increased Armour ・ -1-5% to all Maximum Elemental Resistances ・ +200-300 to Stun Threshold ・ Take no Extra Damage from Critical Hits (Body Armour) |
・Increased Armour
・-% to All Elemental Resistances ・Stun Threshold ・Take no extra damage from Critical Hits |
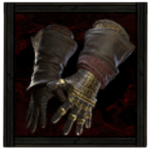 Cultist Gauntlets Cultist Gauntlets Cultist Gauntlets Stats:
Armor - 80 Evasion - 73 Requirements: Level - 75 Strength - 52 Dexterity - 52 (Gloves) |
・Added Armour
・Added Evasion Rating ・Increased Armour and Evasion Rating ・Maximum Life ・+ Level to All Melee Skills ・Lightning Resistance ・% of Armour also applies to Elemental Damage |
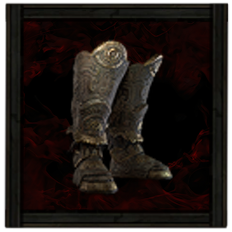 Vaal Greaves Vaal Greaves Vaal Greaves Stats:
Armor - 219 Requirements: Level - 75 Strength - 101 (Boots) |
・Armour
・Maximum Life ・Fire Resistance ・Lightning Resistance ・% of Armour also applies to Elemental Damage Desecrated: ・Movement Speed |
 Stellar Amulet Stellar Amulet Stellar Amulet Requirements:
Level - 24 Implicit:+5-7 to all Attributes (Amulet) |
・Allocates Stimulants
・Added Maximum Life ・Increased Maximum Life ・+ Spirit ・+ Level to All Melee Skills ・+ to all Attributes Desecrated: ・% of Damage recouped as Life |
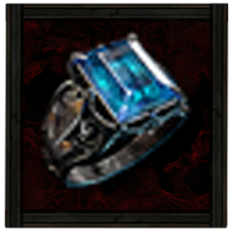 Sapphire Ring Sapphire Ring Sapphire Ring Requirements:
Level - 12 Implicit:+20-30% to Cold Resistance (Ring 1) |
・Added Physical Damage to Attacks
・Evasion Rating ・Maximum Life ・Strength ・+% to All Elemental Resistances ・Cold Resistance |
 Prismatic Ring Prismatic Ring Prismatic Ring Requirements:
Level - 35 Implicit:7-10% to all Elemental Resistances (Ring 2) |
・Increased Fire Damage
・Accuracy Rating ・Maximum Life ・Fire Resistance ・Cold Resistance Desecrated: ・Lightning and Chaos Resistances |
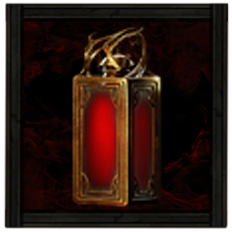 Ultimate Life Flask Ultimate Life Flask Ultimate Life Flask Stats:
Flask Type - Life Recovered Life - 920 Charge Per Use - 10 Total Charges - 75 Duration - 3 sec. (Life Flask) |
・More Recovery if used on Low Life
・Reduced Charges per use |
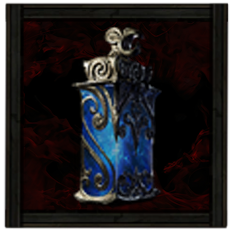 Lavianga's Spirits Gargantuan Mana Flask Lavianga's Spirits Gargantuan Mana Flask Lavianga's Spirits Gargantuan Mana Flask Stats:
Flask Type - Mana Recovered Mana - 185 Charge Per Use - 10 Total Charges - 75 Duration - 2 sec. (Mana Flask) |
・This Flask cannot be used, but applies its Effect Constantly
・% Reduced Amount Recovered |
Weapons
This build specifically uses a Shield to spam Shield Wall, along with a Mace to use Leap Slam and Fortifying Cry to trigger the explosions from Shield Wall. Focus on getting as much Physical Damage as possible to maximize your DPS, then Armour on your shield to maximize survivability.
Armour and Accessories
The build uses the The Vertex unique helmet to ease up attribute requirements from gear, allowing you to focus more on your main stat, while the The Brass Dome unique body armour increases your defense against Critical hits.
Armour is a vital part of this build's survivability. The Warrior class has access to numerous passive nodes related to Armour, making it easier to focus more on Elemental Resistances for optimal survivability in high-tier maps.
| List of Armours | List of Accessories |
Runes and Soul Cores
| Equipment | Sockets |
|---|---|
| Weapon | |
| Armour |
Slot in Saqawal's Rune of the Sky and Greater Rune of Alacrity on your Club to increase your Elemental Damage and Skill Speed.
Use Hayoxi's Soul Core of Heatproofing on your helmet and Zalatl's Soul Core of Insulation on your boots for more resistance to Cold and Lightning Damage based on your Armour, then use Soul Cores of Jiquani on your Body Armor for more maximum life.
You can slot in more Greater Iron Runes on your Shield and Gloves for more Armour, which should generally help all your resistances.
| List of Runes | List of Soul Cores |
Belts and Charms
| Belt Modifiers | |||||
|---|---|---|---|---|---|
 Utility Belt Utility Belt Utility Belt Requirements:
Level - 55 Implicit:1-2 Charm slots;20% of Flask Recovery applied Instantly |
・Added Armour
・Maximum Life ・Fire Resistance ・Chaos Resistance ・Added Thorns Damage Desecrated: ・Lightning and Chaos Resistances |
||||
| Charm Options | |||||
 Arakaali's Gift Antidote Charm Arakaali's Gift Antidote Charm
|
 Thawing Charm Thawing Charm
|
||||
You only need a simple belt with as much Armour, Maximum Life, and Elemental Resistances as you can get.
The charms help mitigate Poison and Freeze, which can leave you vulnerable to fatal damage and greatly hinder your movement. Aim to get modifiers such as increased charges gained for more consistent and reliable use of charms.
| List of Belts | List of Charms |
Glacial Warrior Warbringer Skills
All Active and Persistent Skills
| Skill | Support Gems |
|---|---|
 Raise Shield Raise Shield Raise Shield |
Rageforged II Supports any damaging skill that you use or trigger yourself, causing it to consume Rage to deal more damage, with a chance to skip consuming Rage while still benefitting as though it had. If you don't have enough Rage to consume, the damage bonus will not apply.
Close Combat II Supports Attacks, causing them to deal more damage to enemies based on how close they are to you.
Heavy Swing Supports Melee Attacks, boosting their Physical damage at the cost of Attack Speed.
|
|
Shield Wall Shield Wall Ram you Shield into the ground, throwing up a semi-circular wall of earth. Enemies can attack the walls and your Slams will instantly destroy them. Each wall segment explodes when destroyed, damaging enemies around it.
|
Atalui's Bloodletting Supports any Skill, turning a portion of its Mana cost into a Life cost. Does not support Skills which reserve Spirit. Supported Skills Gain a portion of their Life cost as extra Physical Damage.
Ahn's Citadel Supports skills that create walls in a line, causing them to instead be created along a Fissure, at the cost of damage and Area of Effect.
Kaom's Madness Supports Melee Attacks which create fissures in the ground, causing them to create many additional fissures at the cost of damage, attack speed, and area of effect.
Embitter Supports Skills which can Damage Enemies with Hits, causing all sources of Damage Gained to instead be treated as Damage Gained as extra Cold for Supported Skills
Rapid Attacks II Supports Attacks, causing them to Attack faster.
|
|
Armour Breaker Armour Breaker Strike with a forceful blow, knocking enemies back and weakening their Armour.
|
Uruk's Smelting Supports any skill, causing Armour Break it inflicts to be stronger. Fully Breaking Armour with Supported Skills permanently increases the Physical Damage taken by those affected, up to a cap.
Rapid Attacks II Supports Attacks, causing them to Attack faster.
Brutality III Supports any skill that deals damage, boosting its physical damage at the expense of all other damage types, as well as giving Hits from that skill a chance to ignore Physical Damage reduction.
Close Combat II Supports Attacks, causing them to deal more damage to enemies based on how close they are to you.
Heft Supports Skills which deal damage, increasing the maximum Physical Damage of their Hits.
|
|
Fortifying Cry Fortifying Cry Perform a Warcry that grants Guard and Triggers Shield Wave when subsequent Shield Attacks deal damage. The Skill's cooldown can be bypassed by expending an Endurance Charge.
|
Heft Supports Skills which deal damage, increasing the maximum Physical Damage of their Hits.
Close Combat II Supports Attacks, causing them to deal more damage to enemies based on how close they are to you.
Brutality III Supports any skill that deals damage, boosting its physical damage at the expense of all other damage types, as well as giving Hits from that skill a chance to ignore Physical Damage reduction.
Heavy Swing Supports Melee Attacks, boosting their Physical damage at the cost of Attack Speed.
Raging Cry Supports Warcry skills, causing them to grant you Rage on use depending on counted monster Power.
|
|
Leap Slam Leap Slam Jump into the air, damaging and Knocking Back enemies with your mace where you land. Enemies you would land on are pushed out of the way.
|
Cadence Supports Attacks you use yourself. Supported Skills gain more Attack speed each time you use them, but will become unusable if used too frequently in a short time frame.
Holy Descent Supports skills that leap into the air, causing them to create Consecrated ground when you land.
Rapid Attacks III Supports Attacks, causing them to Attack faster at the cost of Damage.
Efficiency II Supports any skill, making it cost less to use. Cannot support skills which reserve Spirit.
Rage III Supports Melee Attacks, causing them to grant Rage on Hit. Supported Skills have signficantly higher Attack speed while you are not at maximum Rage.
|
|
Scavenged Plating Scavenged Plating Uses fragments of armour scavenged from enemies to bolster your own. Fully Breaking an enemy's Armour grants you a stack of Scavenged Plating for a duration, and you gain Armour and Thorns per stack.
|
Prolonged Duration II Supports any skill that has a duration, making that duration longer.
Vitality II Supports Persistent Buff Skills, causing you to gain Life Regeneration while the Skill is active.
|
|
Herald of Ice Herald of Ice While active, Shattering an enemy with an Attack Hit will cause an icy explosion that deals Attack damage to surrounding enemies.
|
Armour Explosion Supports attacks, causing them to trigger a Fiery explosion when they Fully Break an enemy's Armour.
Cold Attunement Supports attacks, causing them to gain Cold Damage but deal less Fire and Lightning Damage.
Armour Demolisher II Supports any skill, causing Armour Break it inflicts to be stronger.
Magnified Area II Supports any skill with an area of effect, making it larger at the cost of damage.
Elemental Armament II Supports Attacks, causing them to deal more Elemental damage.
|
|
Time of Need Time of Need Invokes divine blessings, periodically healing you and removing Curses and Elemental Ailments from you.
|
Compressed Duration II Supports any skill that has a duration, making that duration shorter.
Cannibalism I Supports Persistent Buff Skills, causing you to recover Life on kill while the skill is active.
|
This build focuses on boosting your damage with Shield Wall through its slotted support gems. Embitter allows Shield Wall to deal Cold Damage, giving the explosive effects of Herald of Ice. Ahn's Citadel and Kaom's Madness create multiple fissures that allow the build to clear entire screens, while Atalui's Bloodletting grants more damage.
Fortifying Cry provides rage generation with Raging Cry, while the rest of its support gems amplify its damage. Leap Slam also provides rage generation through Rage III, then the rest of its support gems focus more on attack speed for mobility.
Finally, Herald of Ice is the primary clearing skill of the build, with Armor Explosion increasing the build's clear speed along with Armor Demolisher II and Magnified Area II. Cold Attunement and Elemental Armament II increase the elemental damage from Herald of Ice.
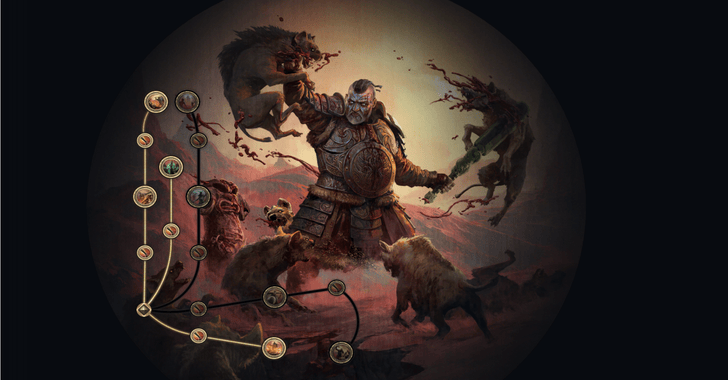
Glacial Warrior Warbringer Passive Tree
Passive Tree Progression
| Ascendency Passive Nodes | |||
|---|---|---|---|
 |
|||
| Passive Nodes | |||
| Screenshot and video taken from Path of Building | |||
※ Legend: Red = Weapon Set I | Green = Weapon Set II
For damage, focus on allotting nodes that provide Strength, Stun Buildup, Attack Damage, Armour Break, and Attack Speed. This ensures that your Shield Wall can reliably defeat or stun all enemies within your wide range.
For defense, invest in Armour and Armour applies to Elemental Resistances to boost survivability on all fronts. You can easily become extremely tanky by stacking these with armour modifiers. Blade Catcher is also a must-have to increase your defenses against Critical Hits.
Make sure to invest in Blood Magic since it is much easier to sustain your HP rather than mana to keep using your skills.
Passive Skill Tree Guide and List of Passives
Jewels
Note: The modifiers listed are arranged according to priority.
 Heart of the Well Diamond Heart of the Well Diamond
|
Desecrated: ・% of Damage recouped as Life ・Maximum Elemental Resistances ・Gain 13% of Damage as extra Cold Damage ・% of Mana Costs Converted to Life Costs |
|---|---|
 Megalomaniac Diamond Megalomaniac Diamond
|
・Allocate Spiked Shield
・Allocate Lockdown |
 Time-Lost Ruby Time-Lost Ruby
|
・Increased Effect on Notable Passive Skills in Radius
・Small Passive Skills in Radius also grant Banner Skills; have 4% increased duration ・Small Passive Skills in Radius also grant increased damage against enemies with Fully Broken Armour |
The Heart of the Well Diamond is extremely great for survivability and damage boost. Keep in mind that you can have any element in the jewel, as Embitter will just convert it to Cold. Then you will want the Megalomaniac Diamond to get Spiked Shield and Lockdown for more defense, damage, and attack speed.
Finally, the Time-Lost Ruby is used to increase the effects of Tempered Defences and The Molten One's Gift, granting more defenses and damage.
Glacial Warrior Warbringer Playstyle and Skill Rotation
Mobbing and Bossing Rotation
Your skill rotation revolves around using Shield Wall as your main source of damage. The rotation is as follows:
- Cast Shield Wall to create fissures around the area.
- Use Fortifying Cry or Leap Slam to trigger explosions from the fissures.
Path of Exile 2 Related Guides

0.4 Best Endgame Builds
| Rank | Build |
|---|---|
 |
|
 |
|
 |
|
 |
0.4 Leveling Builds
All Build Guides
| List of Builds by Class | |||||||||||
|---|---|---|---|---|---|---|---|---|---|---|---|
 Huntress Huntress |
 Mercenary Mercenary |
 Monk Monk |
|||||||||
 Witch Witch |
 Sorceress Sorceress |
 Warrior Warrior |
|||||||||
 Ranger Ranger |
 Druid Druid |
- | |||||||||
| Other Build Guides | 0.3 Leveling Builds | How to Make a Good Build | |||||||||
Comment
Author

PoE 2 0.4 Warrior Build - Glacial Warrior Warbringer
Rankings
- We could not find the message board you were looking for.

Gaming News

![Monster Hunter Stories 3 Review [First Impressions] | Simply Rejuvenating](https://img.game8.co/4438641/2a31b7702bd70e78ec8efd24661dacda.jpeg/show)
![Monster Hunter Stories 3 Review [First Impressions] | Simply Rejuvenating](https://img.game8.co/4438641/2a31b7702bd70e78ec8efd24661dacda.jpeg/thumb)
![The Seven Deadly Sins: Origin [First Impressions] | A Promising Start](https://img.game8.co/4440581/584e0bfb87908f12c4eab6e846eb1afd.png/thumb)

Popular Games

Genshin Impact Walkthrough & Guides Wiki
Umamusume: Pretty Derby Walkthrough & Guides Wiki
Pokemon Pokopia Walkthrough & Guides Wiki
Honkai: Star Rail Walkthrough & Guides Wiki
Monster Hunter Stories 3: Twisted Reflection Walkthrough & Guides Wiki
Arknights: Endfield Walkthrough & Guides Wiki
Wuthering Waves Walkthrough & Guides Wiki
Zenless Zone Zero Walkthrough & Guides Wiki
Pokemon TCG Pocket (PTCGP) Strategies & Guides Wiki
Monster Hunter Wilds Walkthrough & Guides Wiki


Recommended Games
Diablo 4: Vessel of Hatred Walkthrough & Guides Wiki
Cyberpunk 2077: Ultimate Edition Walkthrough & Guides Wiki
Fire Emblem Heroes (FEH) Walkthrough & Guides Wiki
Yu-Gi-Oh! Master Duel Walkthrough & Guides Wiki
Super Smash Bros. Ultimate Walkthrough & Guides Wiki
Pokemon Brilliant Diamond and Shining Pearl (BDSP) Walkthrough & Guides Wiki
Elden Ring Shadow of the Erdtree Walkthrough & Guides Wiki
Monster Hunter World Walkthrough & Guides Wiki
The Legend of Zelda: Tears of the Kingdom Walkthrough & Guides Wiki
Persona 3 Reload Walkthrough & Guides Wiki


All rights reserved
© 2010 - 2024 Grinding Gear Games
The copyrights of videos of games used in our content and other intellectual property rights belong to the provider of the game.
The contents we provide on this site were created personally by members of the Game8 editorial department.
We refuse the right to reuse or repost content taken without our permission such as data or images to other sites.